-

Qualtrics Platform -

Customer Journey Optimizer -

XM Discover -

Qualtrics Social Connect
Getting Started with Surveys
About Survey Projects
Surveys are a key foundation of research. Using a simple survey, we can reach out to others for feedback and gain insights we’d never otherwise come up with ourselves. While Qualtrics has many types of projects expertly tailored to different research disciplines, if you’re ever in doubt of which project to try, you can always start with a survey.
Using a survey project, you can pick from a wide array of question types, customize what the respondents see as they answer questions, and screen respondents who may not fit your research needs. You can distribute your survey, automate it, analyze the data you’ve collected, and create reports, all from right inside one project.
Creating a Survey
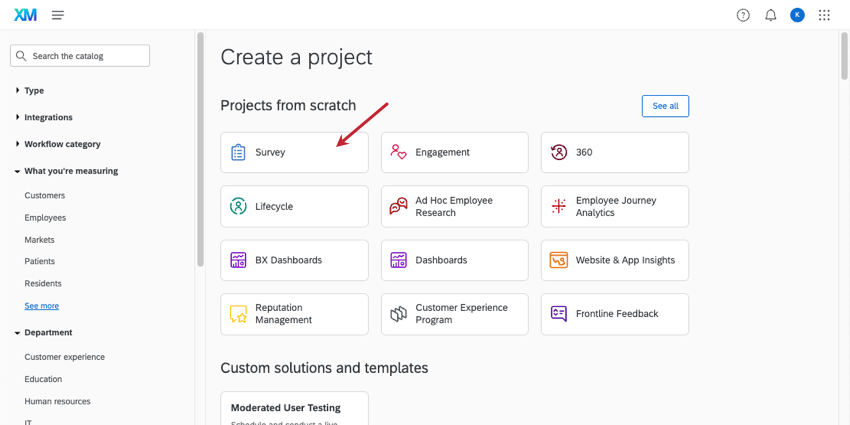
Like any Qualtrics project, surveys can be created in the catalog. You can create a brand new survey, or you can copy your survey from other surveys, a file, or the library.
However, making the project is only the first step. Below, we’ll link support pages that take you through the process of creating, distributing, and reporting on your survey.
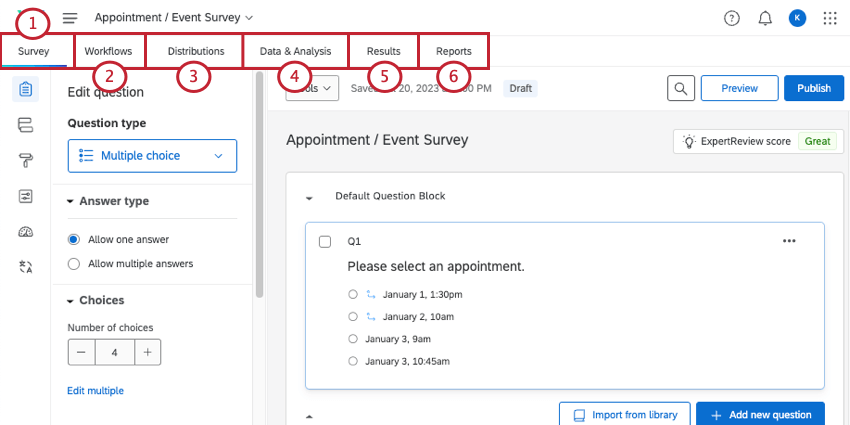
- Customize the survey itself. In the Survey tab, you can create questions, customize what questions appear to respondents when, configure respondent quotas, determine who can access the survey, and much, much more.
- Automate workflows based on what happens in the survey. Create automations in the Workflows tab. For example, you can send another survey a certain number of days after the respondent completes the first survey, or you can create a ticket for your support team if a customer expresses dissatisfaction. (This is an optional step.)
- Send the survey. In the Distributions tab, you can send your survey to your respondents in many ways, such as email, SMS, or even a single, anonymous link.
Qtip: Depending on the distribution method, you may want to create a contact list first.
- Analyze, edit, and export responses. In the Data & Analysis tab, you can take a look at the individual responses you collected and make edits to them. You can look at data right inside Qualtrics, or export it for analysis in another software.
- View a dashboard compiling your results. In the Results tab, you’ll see the general results of your data collection organized into a dashboard. You can also build your own dashboard pages, complete with unique charts and filters.
- Build PDF-friendly reports. If you want to create a PDF-friendly report from scratch, check out the Reports tab.