-

Qualtrics Platform -

Customer Journey Optimizer -

XM Discover -

Qualtrics Social Connect
Email Messages (360)
About Email Messages
After you have uploaded all of your subjects and evaluators, it is time to send your 360 survey to them.
360 has several types of messages you can send. For example, anyone who is a subject receives a different invite than external evaluators do. There are also reminders, which make sure to only go out to those who haven’t completed their surveys.
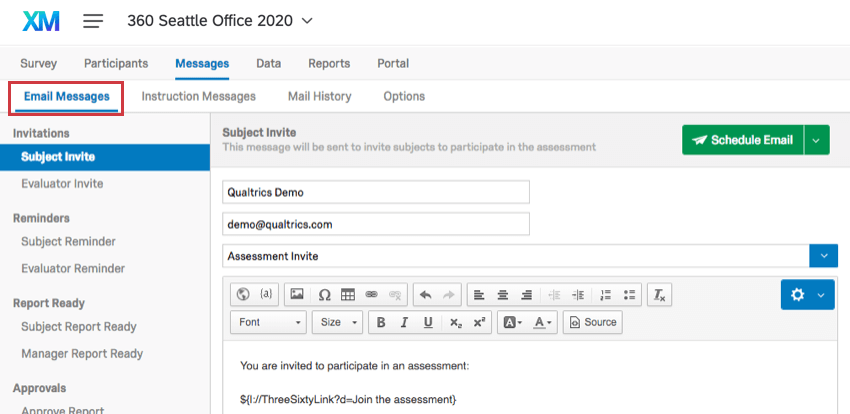
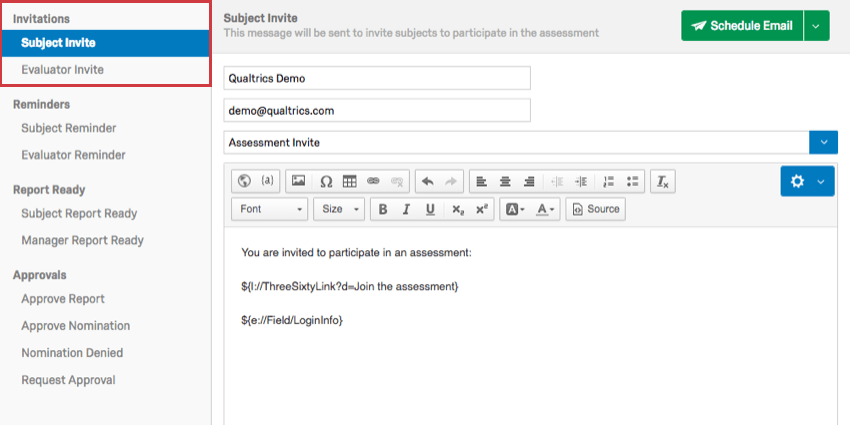
To get started writing your messages, navigate to the Messages tab, and then to the Email Messages section. The types of messages you can edit and send are listed along the left in the message type pane.
Subject and Evaluator Invites
Invites are meant to invite your participants to the survey. They can contain a welcome message, an explanation of the purpose of the survey, or anything else you think is helpful for your participants to get started.
Subject Invite
Subject Invites go to all your subjects. This includes people who may be evaluators, too. As long as someone is in the Subjects subsection of your Participants section, they will receive the Subject Invite.
By default, Subject Invites send to everyone in your subject list. It does not matter if a subject has already received an invite; they will continue to receive any future invites you send.
Evaluator Invite
By default, Evaluator Invites send to evaluators added/uploaded in the Evaluator subsection, who do not have 0/0 evaluations to do. It does not matter if an evaluator has already received an invite; they will continue to receive any future invites you send.
Survey Link and Login Info
By default, the your 360 invites include Piped Text for the survey link and login info, which transforms into a link and customized information when it is sent to the participant.

Both subject and evaluator invites must include both an assessment link and login info. External evaluators will only see a direct link with no login info, unless you enable the last Message Option.
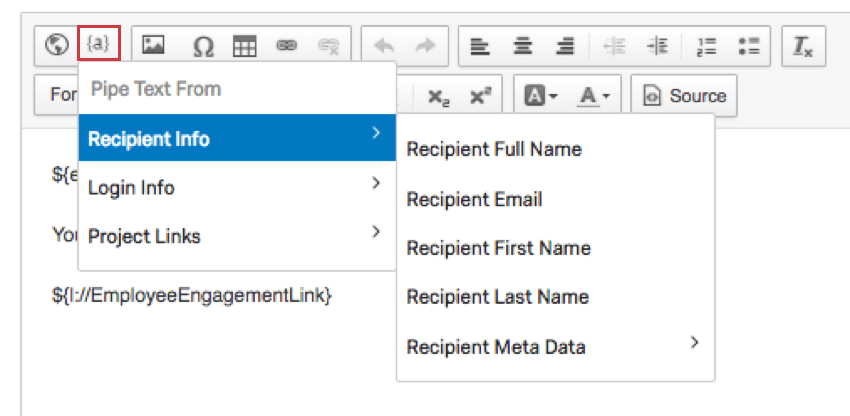
In the event you accidentally remove this information, click the {a} button and select the content you want to insert.
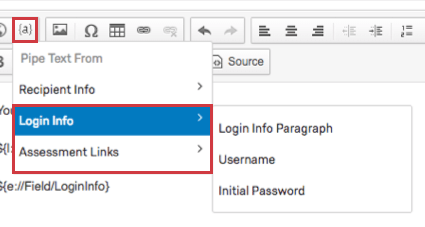
- Login Info: Choose either to separately insert the username and password, or just select Login Info Paragraph to ensure both are included automatically.
- Assessment Links: The option Assessment Link will give you clickable text that leads to the survey. It says “Join the assessment.” The option Assessment URL gives the full URL of the assessment.
Qtip: You can also click the globe icon to generate a link to the survey.

Dashboard
The Dashboard invite lets dashboard users know that their dashboards are available to view. Because participants have to log into a dashboard to access it, login information must be included in this message. It is also important to specify which dashboard this message should link to.
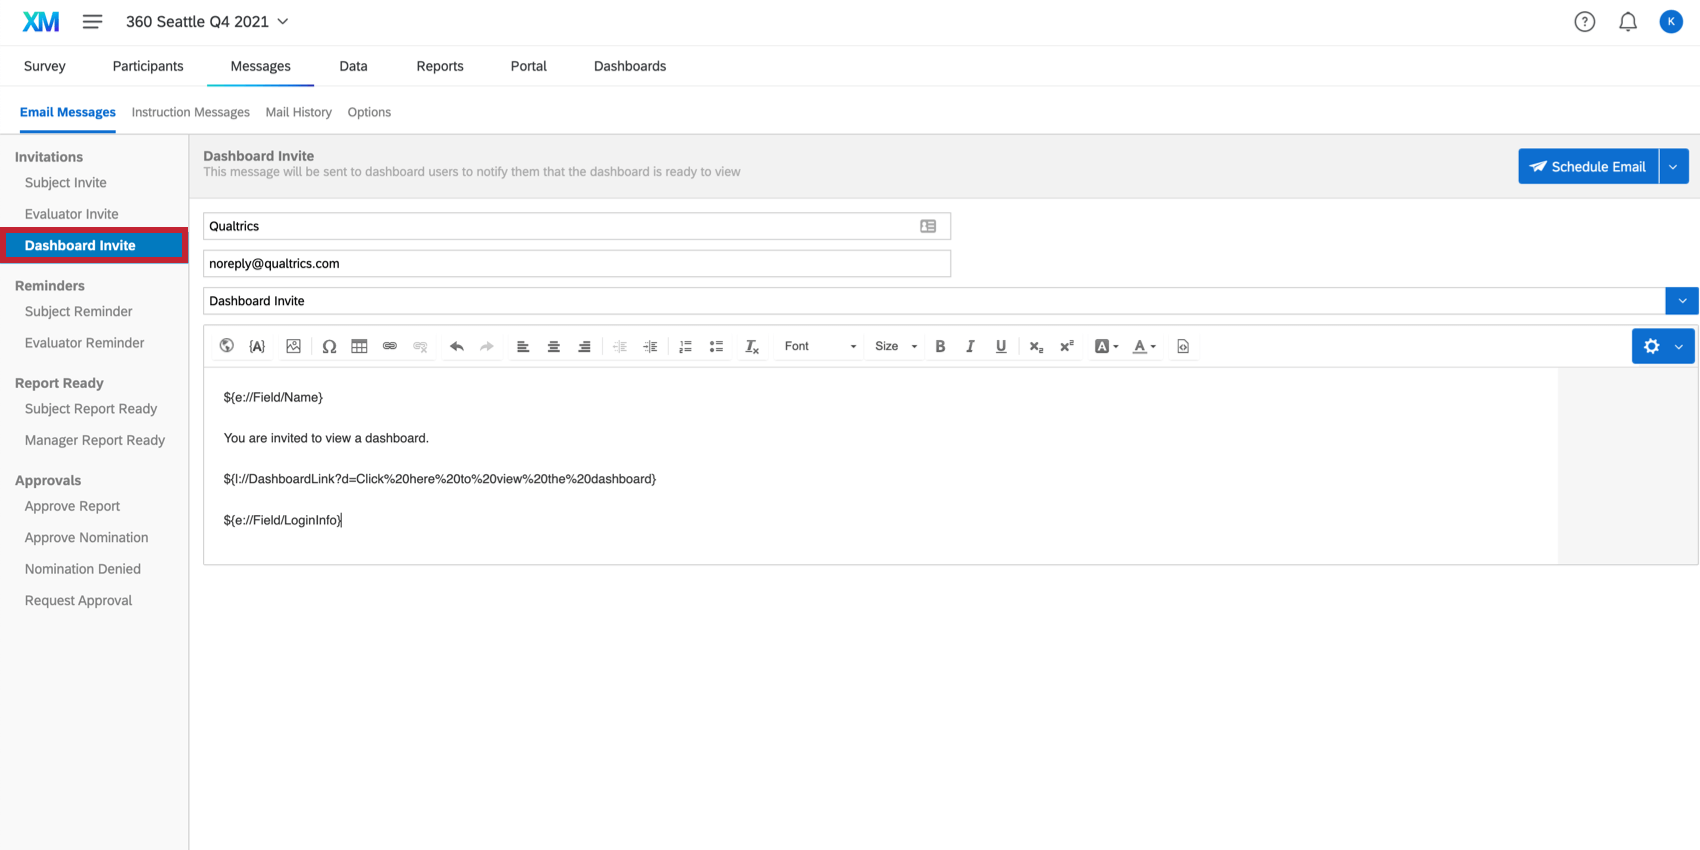
Adding Login Info and a Dashboard Link
Login information and a link to the dashboard are both included by default.
- Navigate to the Messages tab and select the Dashboard message.
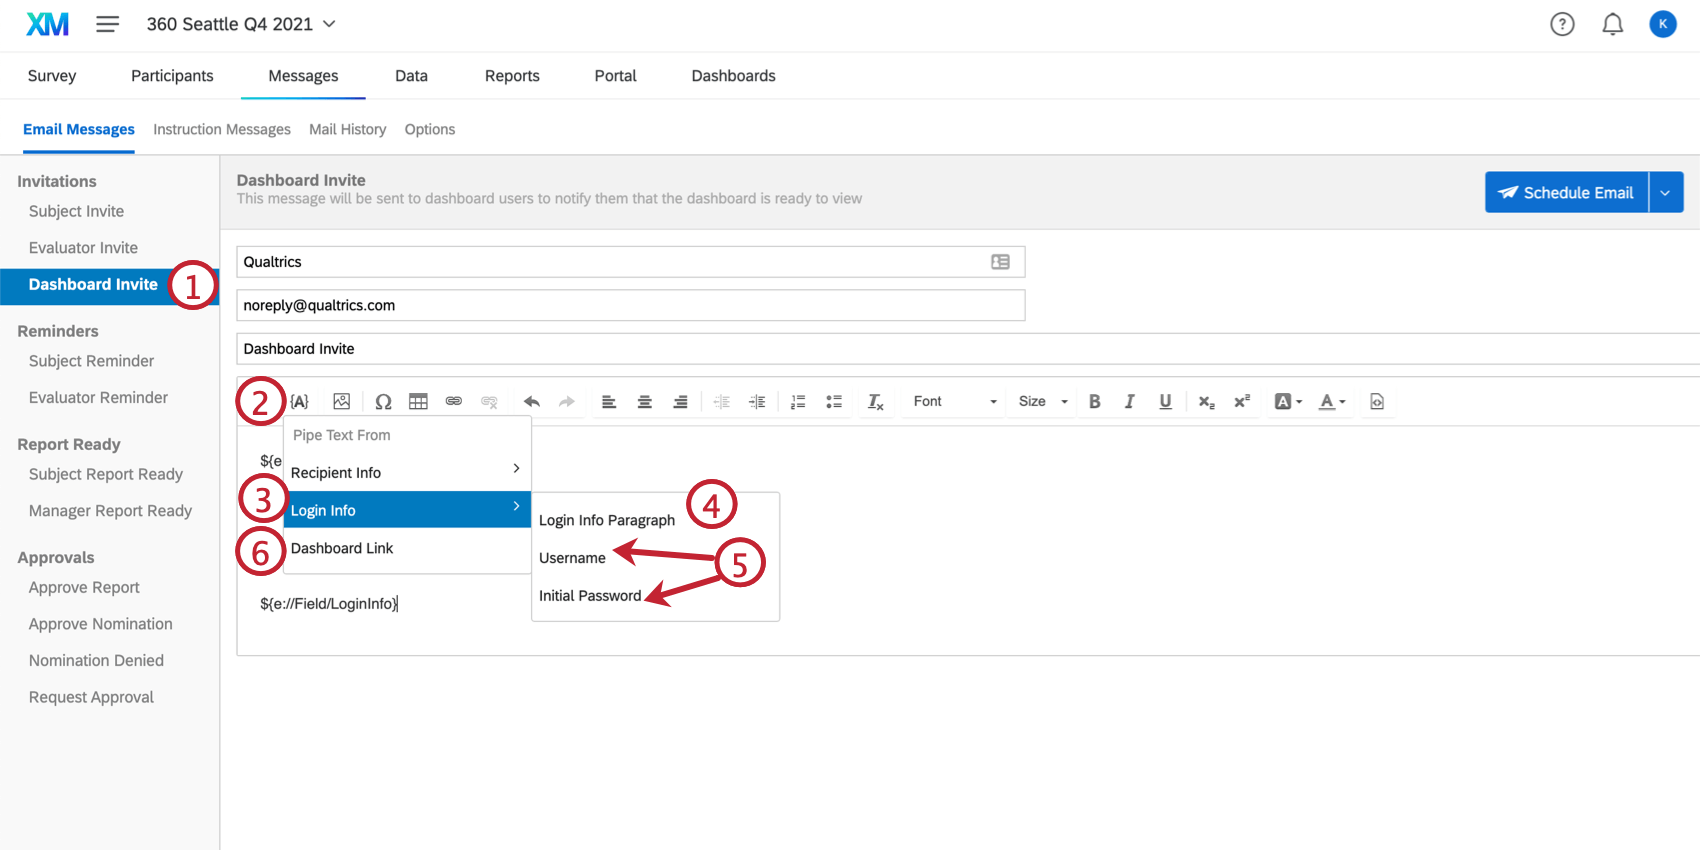
- Click {a}.
- Select Login Info.
- If you want all the login information displayed to the participant without having to format it, select Login Info Paragraph.
- If you want to pipe in username and password separately, select Username and Initial Password.
- If you want to pipe in the link to log into the dashboard, select Dashboard Link.
Scheduling a Dashboard Invite
Scheduling a Dashboard invite varies from scheduling other messages because it has an extra Dashboard setting.
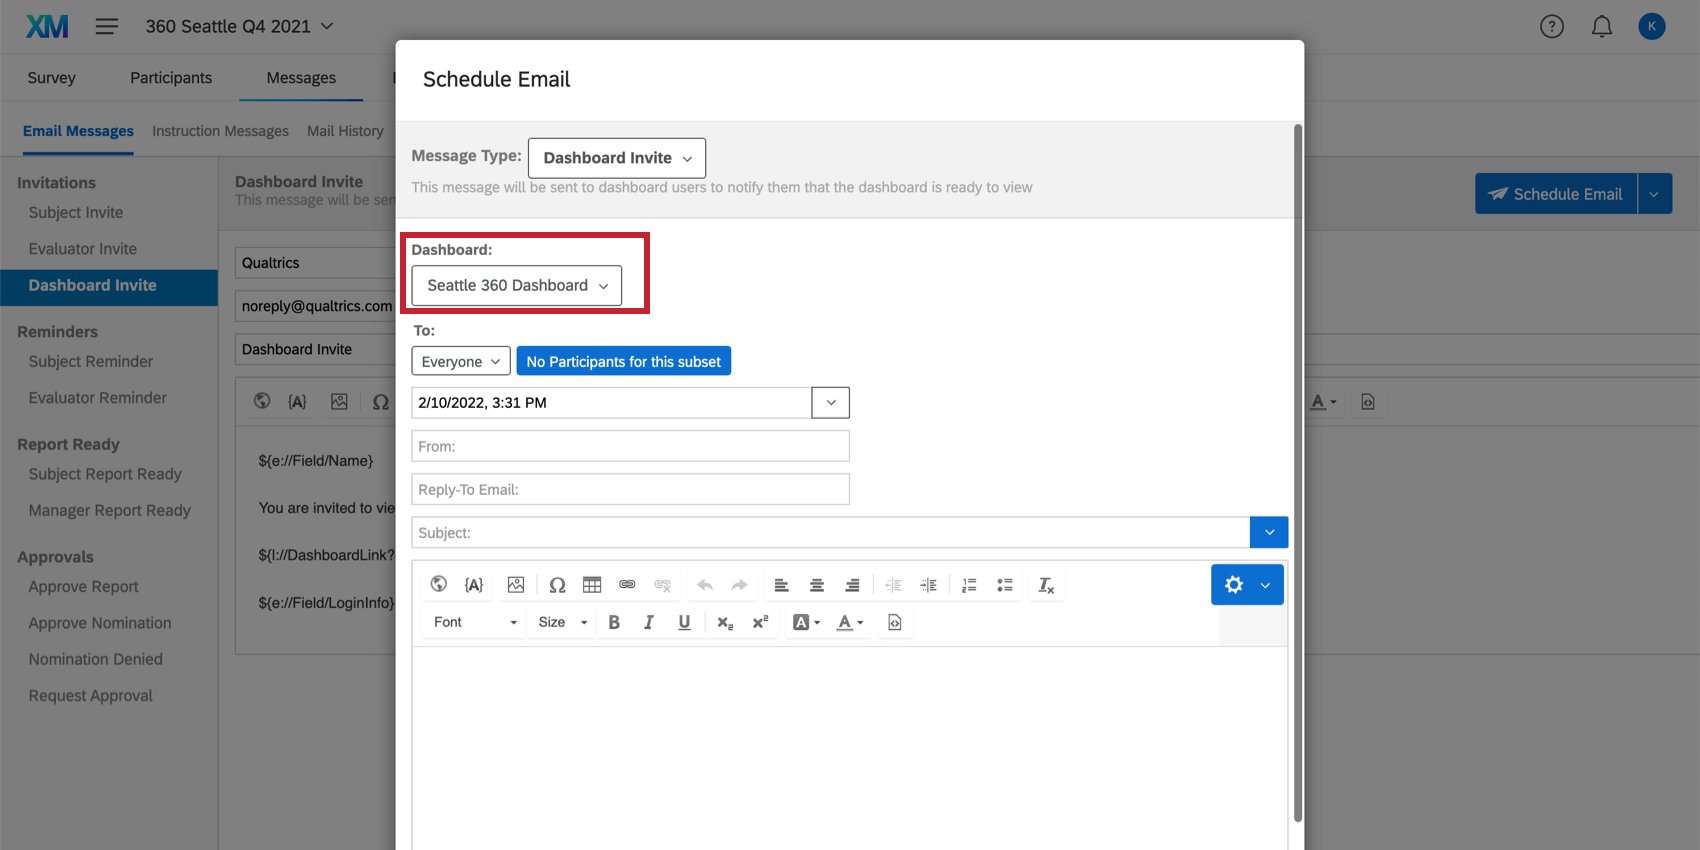
This setting allows you to select which dashboard this invite is for. You can only attach one at a time, but if users have access to multiple dashboards, they can toggle between them after logging in. This setting determines which dashboard is accessed automatically when logging in from the invitation.
Subject and Evaluator Reminders
To help increase response rates, you can follow up with participants who haven’t completed their survey by sending a Subject or Evaluator Reminder. Reminders only send to participants who have not yet completed their survey, and they include the same individualized link the participant was initially sent to take the survey. If the participants have already started the survey, they will continue where they left off when they click the link.
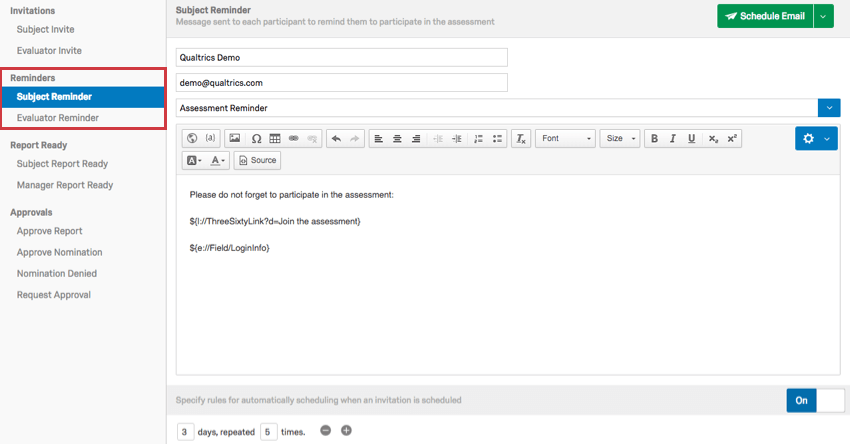
Subject Reminders
Subject reminders go to all subjects that are not marked complete or Done. Any outstanding task will cause reminders to send when the subject is not marked as Done. Tasks include self evaluations, other evaluations, evaluator nominations, and viewing reports.
Subjects can be marked as Done individually in the Participant Information Window, or en masse in the Participants section.
Evaluator Reminders
Evaluator reminders go to all evaluators until they have completed all evaluations.
Specifying Rules
Tired of manually scheduling lots of emails? You can set up reminders to go out automatically on a chosen schedule.
- Navigate to your Subject or Evaluator Reminder.
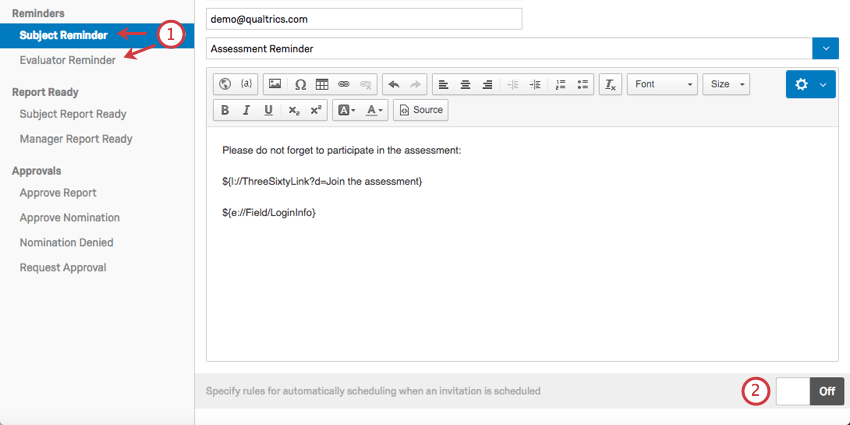
- Navigate to the bottom of the page and flip the switch to On.
- Specify the number of days between reminders.

- Specify how many times you want this rule to be repeated.
Example: If the rule says 3 days, repeated 5 times, then the reminder will send every 3 days, and will do this 5 times.
These settings save automatically. Flip the switch back to Off to turn off your reminders.
Interactions Between Multiple Reminder Rules
The behavior described here applies for 360 reminder emails when there are multiple reminder rules set up. When you have multiple rules in this scenario, the rules are evaluated independently of each other.
This behavior is best described with a specific example. Let’s say you set up 2 reminder rules:
- Rule 1: 2 days, repeated 1 time
- Rule 2: 5 days, repeated 1 time
Your unfinished participants will receive two reminders. The first reminder will send 2 days after the initial invitation. The second reminder will send 5 days after the initial invitation. This means the second reminder will send 3 days after the first reminder. If you are unsure about when your reminders are scheduled to send, look at your Mail History and your reminders will be listed there.
Subject Report Ready
The Subject Report Ready email goes out to subjects to let them know their reports are ready to be accessed. This email will only send to each subject once.
This email cannot be scheduled. It is automatically sent out to subjects when you have the following Report Options turned on:
- Subject can access report: This option makes sure the subject can eventually see their report.
- Email subject when report becomes available: When the criteria above are met, the Subject Report Ready email goes out.
And one of the following enabled:
- Make report available to subject when: This option only allows subjects to see their report only after certain criteria has been met.
- Manager approves reports: Subjects cannot view their reports until a manager approves them.
- Administrator approves reports: Subjects cannot view their reports until an administrator approve it.
if you forgot to turn on these settings ahead of time
If you forgot to enable these settings and missed a wave of participants, or if you’d rather these mailings not go out automatically, but in distinct phases, consider using the Custom Messages feature.
You can copy the content of your Subject Ready Report email and insert it into a Custom Message instead. Using Participant Criteria, you can also make sure the mailing only goes out to those who meet the specified conditions.
Manager Report Ready
The Manager Report Ready email goes out to subjects’ managers to let them know their direct reports’ reports are ready to be accessed. This email will only send to each manager once.
This email cannot be scheduled. It is automatically sent out to managers when you have the following Report Options turned on:
- Manager can access subject reports: This option makes sure the subject’s manager can eventually see their report.
- Email subject’s manager when report becomes available: When the criteria above are met, the Manager Report Ready email goes out.
And one of the following enabled:
- Make report available to subject when: This option only allows subjects to see their report only after certain criteria has been met.
- Administrator approves reports: Subjects cannot view their reports until an administrator approve it.
Approve Report
The Approve Report message is sent to a subject’s manager to let them know the subject’s reports is ready for approval.
This email cannot be scheduled. It is automatically sent out to managers when you enable the following Report Options:
- Manager approves reports. When enabled, managers must approve reports for their direct reports before a subject can view them.
- Email manager when report is ready for approval: When selected, the manager will be sent an email as soon as they’re allowed to review a report for approval.
Approve Nomination
This message is sent to a manager when one of their direct report’s nominates someone to evaluate them. The manager can approve or reject this nomination.
This email cannot be scheduled. It is automatically sent out to managers when you enable the following Participant Options:
- Subject Nominates Evaluators: Allows subjects to choose who their evaluators will be.
- Managers Approve Nominations: Don’t allow nominated evaluators to assess subjects until the subject’s manager has approved their nomination.
- Email managers when a subject’s nominations are ready for approval: If there are no requirements on each type of nomination a subject needs to add, managers will be emailed every time someone is nominated. If there are requirements, the system waits until the subject has made all their nominations to alert the manger.
Nomination Denied
This message is sent to a subject when they nominate someone to evaluate them, but their manager rejects this nomination.
This email cannot be scheduled. It is automatically sent out to subjects when you enable the following Participant Options:
- Subject Nominates Evaluators: Allows subjects to choose who their evaluators will be.
- Managers Approve Nominations: Don’t allow nominated evaluators to assess subjects until the subject’s manager has approved their nomination.
- Email subject when a nomination is denied: When this option is selected, subjects will be emailed when their manager has rejected their nomination.
Request Approval
If managers are set to approve evaluators their direct reports have nominated, the subject can sometimes send a message looking for approval.
This email cannot be scheduled. It is sent by subjects from their Participant Portal. This option is only available if the following Participant Options are enabled:
- Subject Nominates Evaluators: Allows subjects to choose who their evaluators will be.
- Managers Approve Nominations: Don’t allow nominated evaluators to assess subjects until the subject’s manager has approved their nomination.
- Allow subjects to email managers when their nominations are ready for approval: This allows the subject to email the manager whenever asking them for approval on their nominations.
Editing Messages
In every message, you will have access to a Rich Content Editor that allows you to change font colors, format the text of the message, insert images, and more.
The message editor options icon on the top-right of the Rich Content Editor allows you to load an existing message or translate your messages.

From this Rich Content Editor you can also access the Piped Text button, {a}. From here, you can add additional information such as the participant’s full name or metadata by selecting the Recipient Info menu.
All changes made to these messages are saved automatically to the Email Messages section. They will retain all changes you make every time you log in. However, you can also save messages for re-use in later 360 projects.
Saving Messages in Your Library
While working in the Email Messages section, you can save the messages you’re working on in your library for use in future 360 projects.
- Navigate to the Email Messages section in the Messages tab.

- Choose a message type.
- Click the message editor options icon on the far-right.
- Click Save As.
- Select a Library to save your message in.
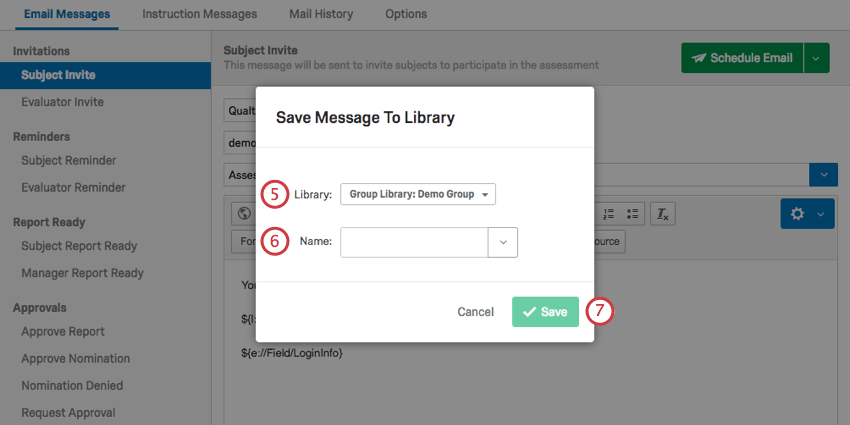
- Assign your message a Name.
- Click Save.
Loading Messages from Your Library
If you saved a message in your library, you can bring it into any 360 project you want.
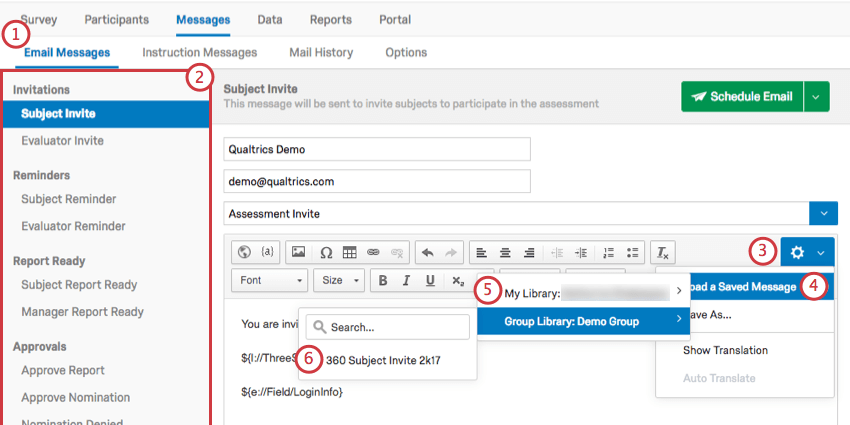
- Navigate to the Email Messages section in the Messages tab.
- Choose a message type.
- Click the message editor options icon on the far-right.
- Select Load a Saved Message.
- Select the library you saved the message to.
- Select your message.
Scheduling Emails
When your invite or reminder messages are ready, you can schedule them out by clicking on the Schedule Email button. If you click the dropdown to the right, you will have two options.
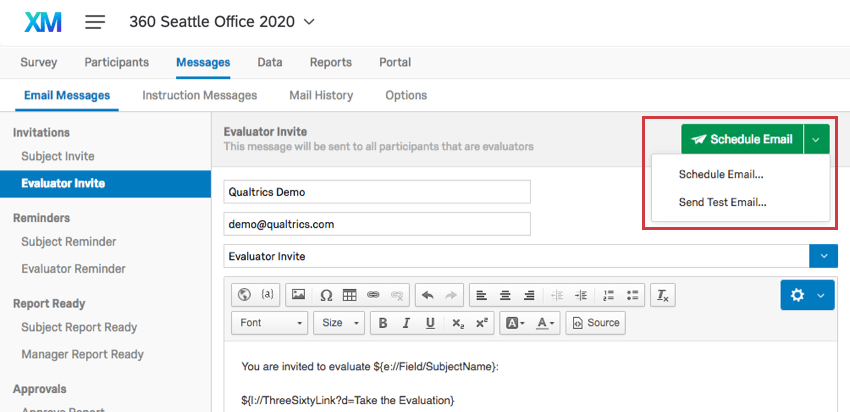
- Schedule Email: Schedule a message to send out to your participants.
- Send Test Email: Choose an email address to receive a test email. This is a good way to preview your message’s formatting before you send your official invite. Note that Piped Text does not work in test emails – it will turn up a blank for personal information because there’s no participant to pull information from, and the link will not work for similar reasons.
Qtip: Send Test Email is mostly to check the formatting of the email. To do a deeper testing of the link, try adding yourself as a participant.
Once you have clicked Schedule Email, a new window will open up.
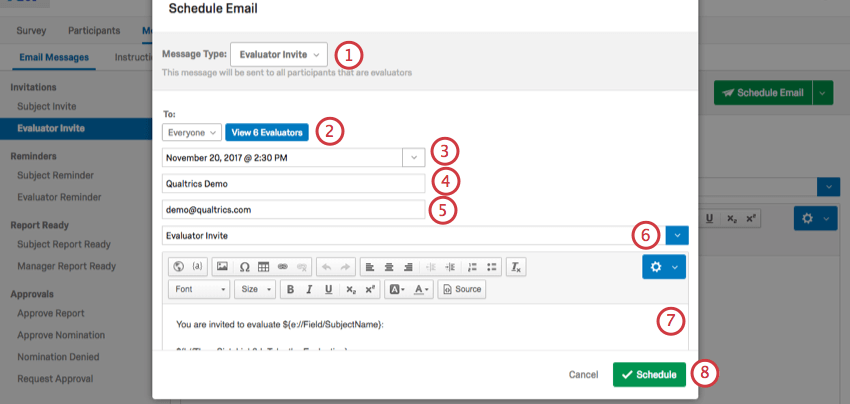
- Message Type: Choose which message type you’re sending. This loads any message you already have written out.
- To: Choose to send to all qualified participants, or narrow down your recipients by certain criteria. We highly encourage you to set participant criteria.
- Send Date: Choose a time for the message to go out. Clicking the dropdown arrow allows you to choose from a list of times to send. Clicking directly on the date and time brings up a calendar that allows you to get more specific.
- From: Choose a name to display so your participants know who’s sending the message.
- Reply-To Email: If your participants have questions, they might respond directly to the message. The reply-to email receives these responses.
Qtip: Interested in changing the From Address, too? This can only be changed on an organization-wide level. Check out the Using a Custom From Address support page for more details. Some setup by your internal IT team may be required.
- Subject: Create a subject line for your message. The blue dropdown arrow on the far right allows you to load a pre-saved subject line from your library.
Qtip: Saving a subject line in your library lets you translate it more easily. See our support page on translating library messages.
- Message Body: Feel free to perform any last-minute edits you would like to include.
- Schedule: When you’re ready to send the email out, click this button. You cannot get the email back once it’s sent.
Participants by Criteria
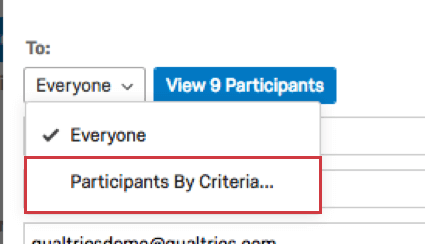
Every email you send will go out to everyone by default – if you don’t want your mailings to be distributed to everyone, you will need to specify the criteria participants must meet to receive your email. You can narrow down this criteria by clicking the dropdown next to To, and selecting Participants by Criteria.
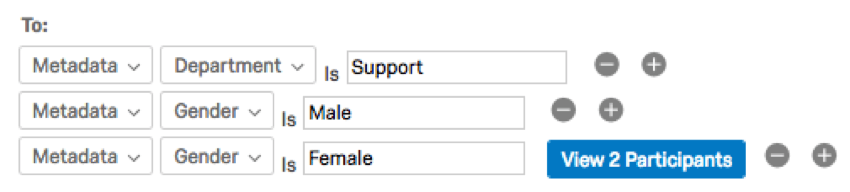
From here, you can click the dropdown again and choose to narrow recipients by contact info, metadata, relationship, or whether they’ve nominated enough evaluators. If you click on the View Participant(s) button, you can double-check that you’ve isolated the correct participants.

Click the plus (+) sign to add more conditions. However, you cannot specify if these conditions are linked by “and” or “or.” Different criteria, such as Age and Email, are considered to be joined by “and,” so that both conditions must be true for a participant to receive an email. Specifying two different Age groups will result in an “or” statement, so that recipients can be either the one age specified or the other. Likewise, specifying multiple email addresses will result in the message sending out to each one of those emails.
Example: In the screenshot below, only participants whose department is Support will be emailed, but both men and women in Support will be emailed.
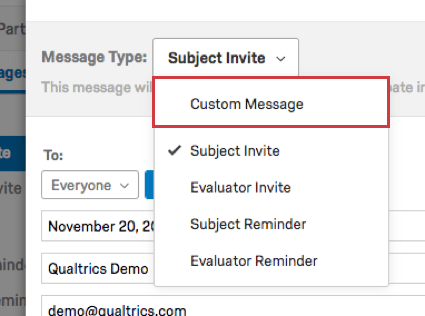
Custom Messages
Do none of the message types fit the sort of email you want to send out? Maybe you’d like to write a thank you, or send a personalized invite to a participant who got added late. In these cases, you might want to send a custom message.
You can send a custom message by navigating to the Schedule Email window, and selecting Custom Message from Message Type.