-

Qualtrics Platform -

Customer Journey Optimizer -

XM Discover -

Qualtrics Social Connect
Panel Company Integration
About Panel Company Integrations
If you are using a panel company to distribute your survey to specific respondents, you’ll need to set up your survey to track respondents properly. This page outlines a step-by-step process for your panel company integration.
Understanding Panel Company Integration with Qualtrics
Panel company integration can be complex to set up, so let’s break it down a little before we walk through the setup.
The panel company you are working with is providing you with specific respondents without actually revealing the confidential personal information of each participant.
In order to accomplish this, the panel company has assigned identifying fields or IDs to each participant by using standardized fields such as id, pid, uid, ticket, or others to store the identifying information. The purpose of the integration process is to record each participant’s identifying information inside of Qualtrics and pass back that information to the panel company upon survey completion.
Once the participant completes the survey, the recorded identifying information will be sent back to the panel company through a redirect link. Participants are redirected to the panel company’s website in order to receive compensation, and their identifying information included in redirect link will be used to confirm that compensation.
As part of the panel company integration process, you will send the anonymous link of your survey to the panel company you are working with. Once the panel company is ready to invite respondents to take the survey, they will create a unique link for each potential respondent by taking the link you sent them and adding the participant’s identifying information to the end of the link. Later on, when a participant clicks the link to the survey, they will carry with them their own unique information into the survey.
In addition, the panel company will send you three or four “redirect” website addresses (or redirect links). Every respondent that comes from your panel company (and does not drop out of the survey early) should be redirected back to one of those addresses. Depending on whether the respondent finished the survey completely (Complete), got screened out because they did not qualify to take the survey (Screen Out), attempted to take the survey after you have collected the responses you need (Over Quota), or gave low quality responses (Quality Check), they should be redirected to a different link.
All survey participants should be redirected to the panel company’s website, but depending on their status, they may or may not receive compensation. The redirect links must be modified to insert each participant’s identifying information. All of these steps mentioned will be explained in the following sections below.
Providing the Panel Company Your Survey Link
You will need to give the panel company your anonymous link. The panel company will attach identifying information to the end of this link when distributing the survey so that they can track respondents.
To provide the Anonymous Link
- Navigate to the the Distributions tab for the project you’re working on.
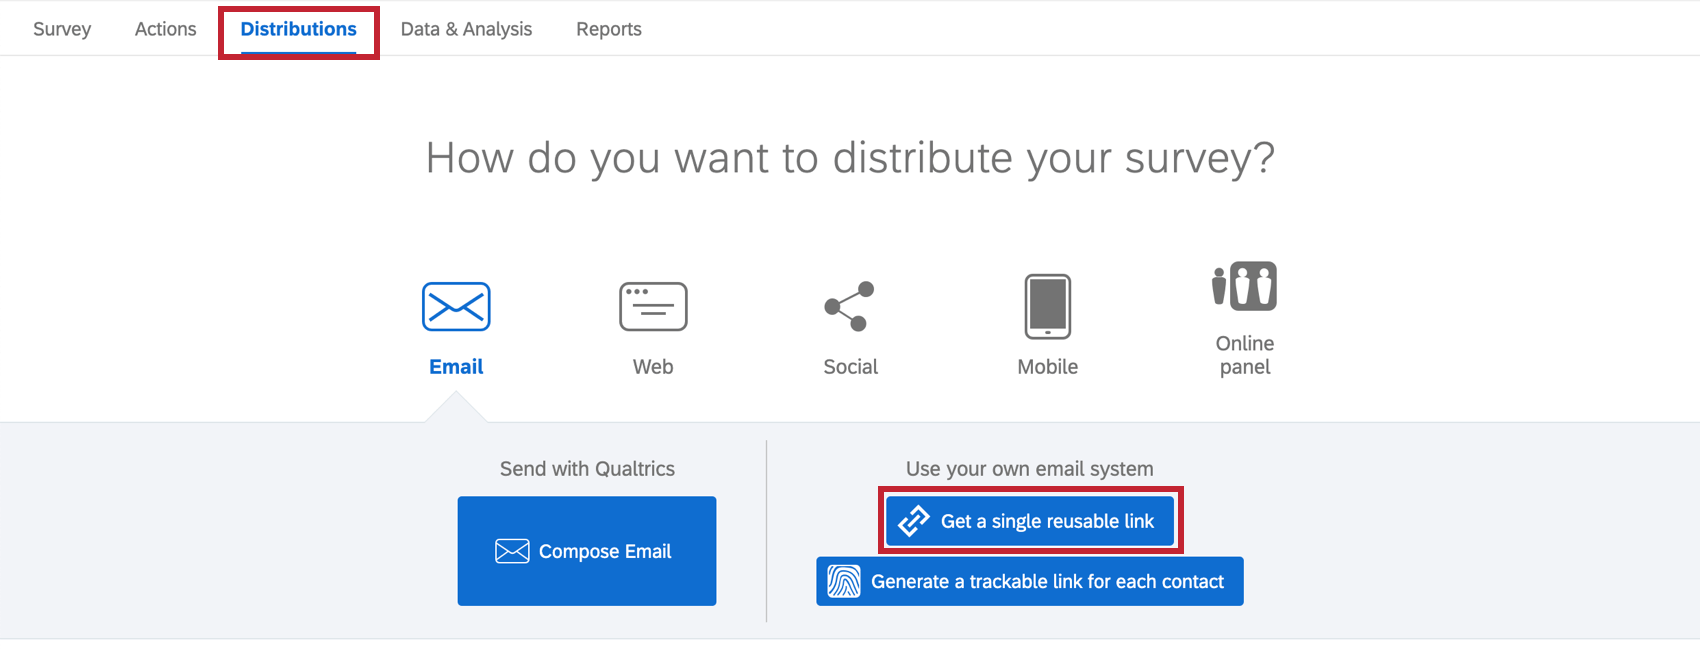
- If you haven’t yet activated your survey, click Get a single reusable link.
- Click the Anonymous Link tab and copy your Anonymous Survey Link.
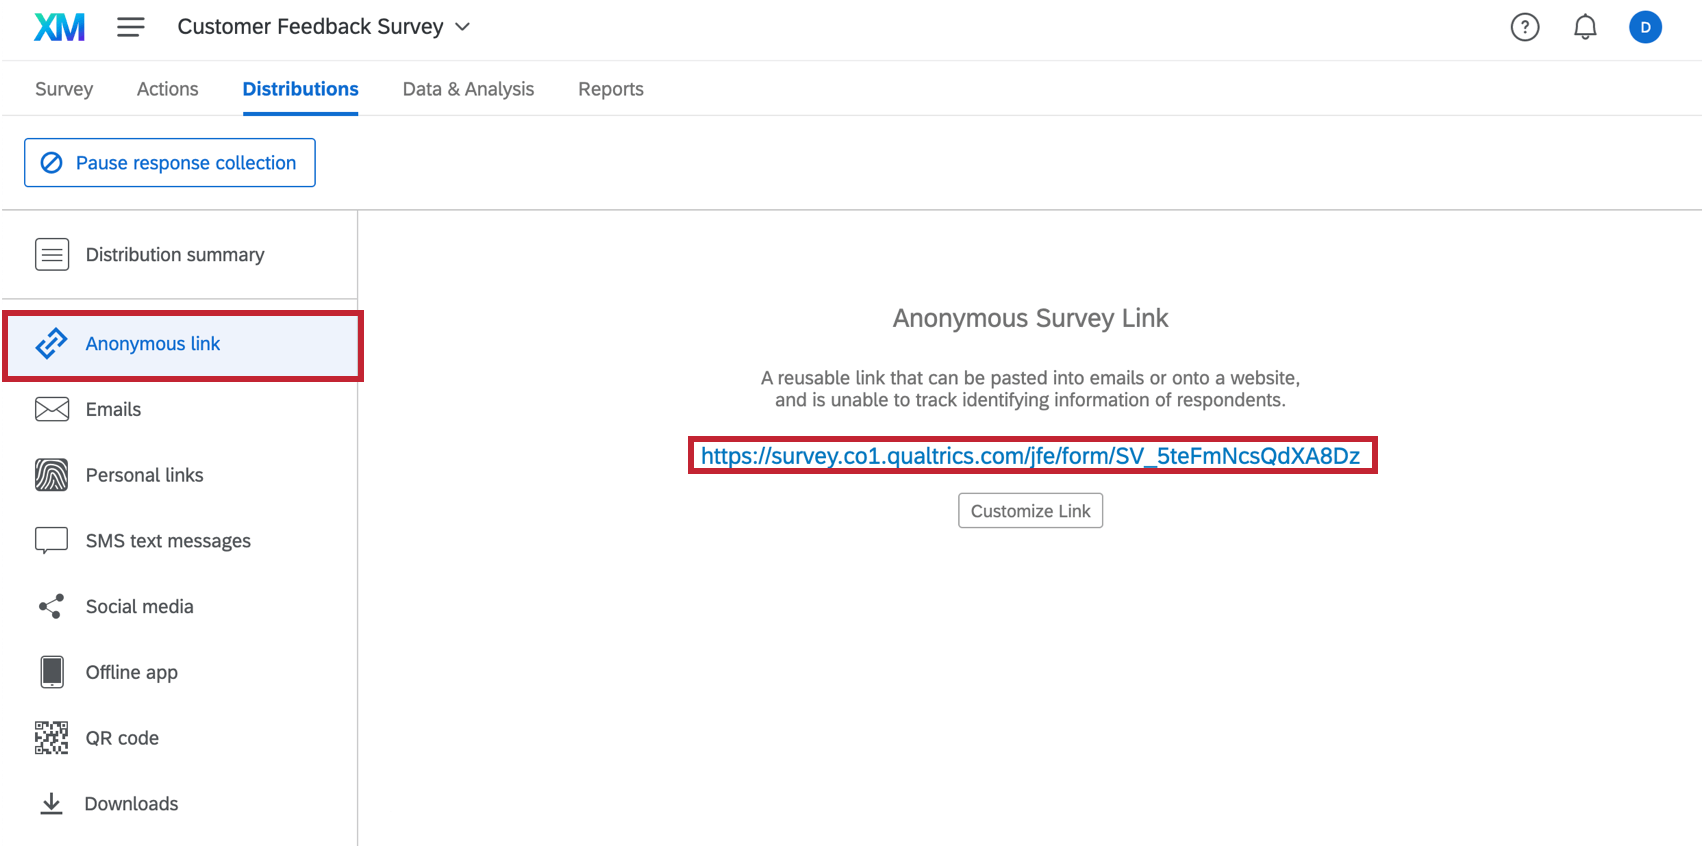
- Email the link to the panel company.
Modifying the Redirect Links Provided by the Panel Company
Your panel company may send you up to four redirect links to insert in your survey that correspond to different completion statuses: Screen-out, Over Quota, Quality Check, and Complete Response.
If you don’t have the redirect links, contact the panel company. These links will be used to send the respondents back to the panel company’s website for compensation upon completing the survey.
To modify the redirect links
- Copy your links to Word or another text editor.
- Look at the end of the links. You will see one or more of the following, followed by dummy text:
&id=
&pid=
&uid=
&ticket=
 Qtip: These are identifying fields added to the end of the links and will be recorded in Qualtrics as embedded data (see Recording Identifying Fields below). Note that you might see other fields not included in the list above.
 - Go into the Survey tab for the project you’re working on.
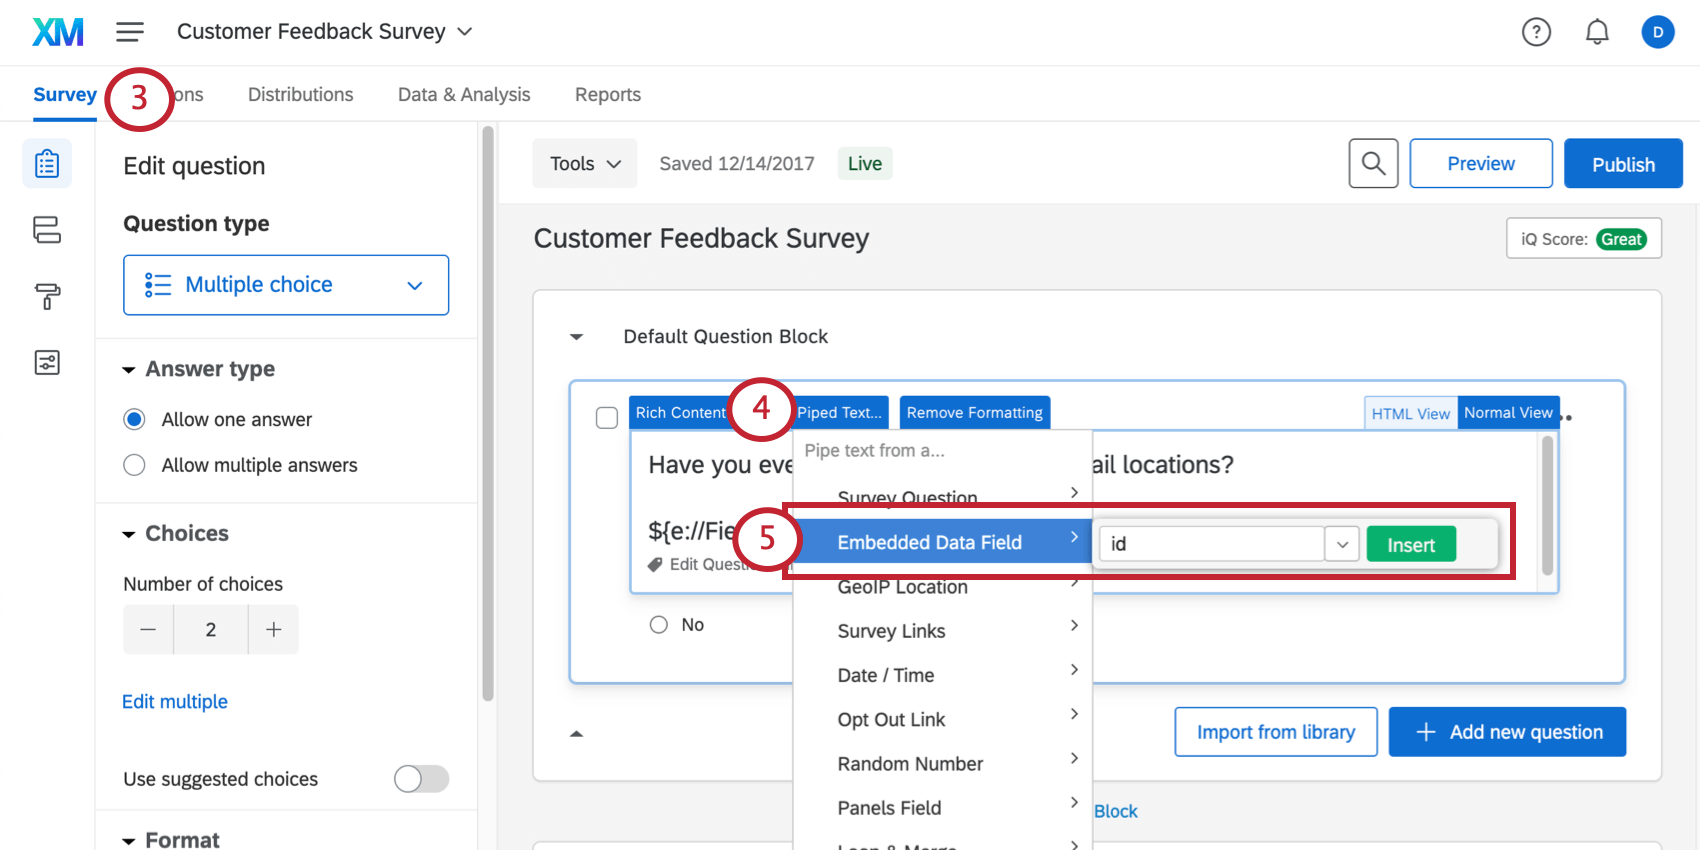
- Click in the question text for any question and click the Piped Text tab.
- Select Embedded Data and enter the field name from the end of your links (so if you saw &id=, type in id; if you saw &ticket=, type in ticket) and select Insert.
- A piece of code will be inserted in the question text box.
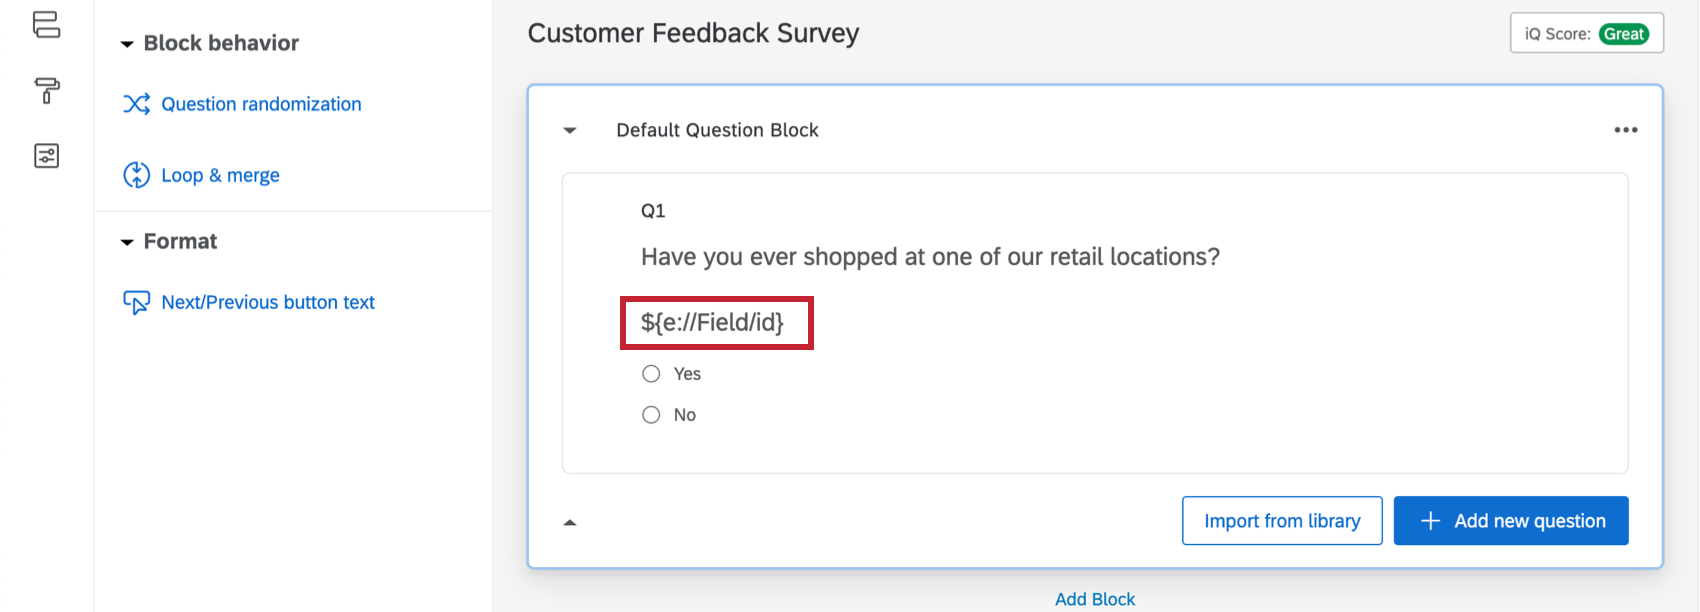
- Cut the code from the question text box and go back to your links in the text editor.
- Paste the code that you generated (e.g., ${e://Field/id}) in place of the dummy text, after the field name.
- Before
https://survey.panelcompany.com/wix3/p8501.aspx?stat=1&id=xxxxx
- After
https://survey.panelcompany.com/wix3/p8501.aspx?stat=1&id=${e://Field/id}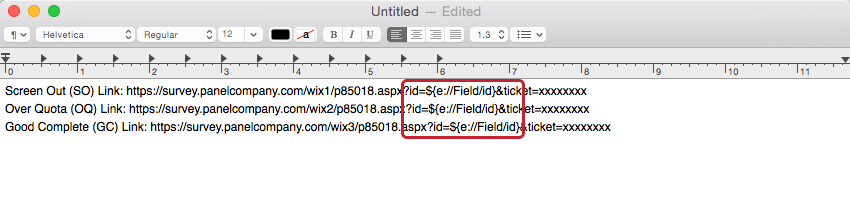
- Before
- Repeat steps 3–8 for each field that you need to append to your link.
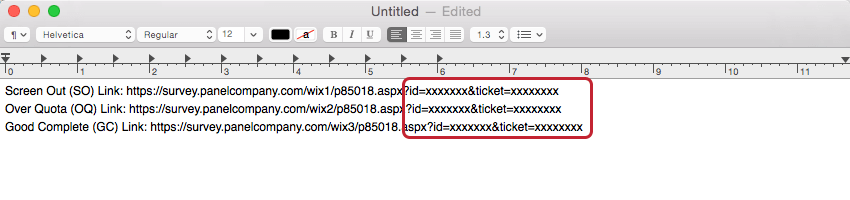
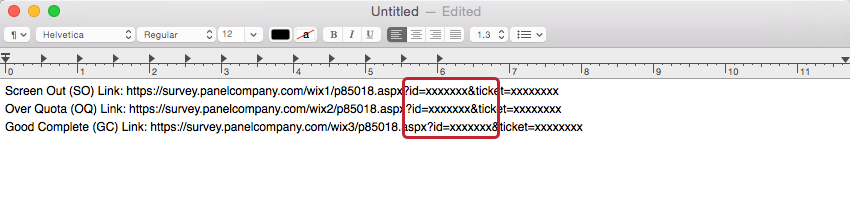
Example: a link with two fields at the end might look something like
https://survey.panelcompany.com/wix1/p8501.aspx?stat=1&id=${e://Field/id}&ticket=${e://Field/ticket}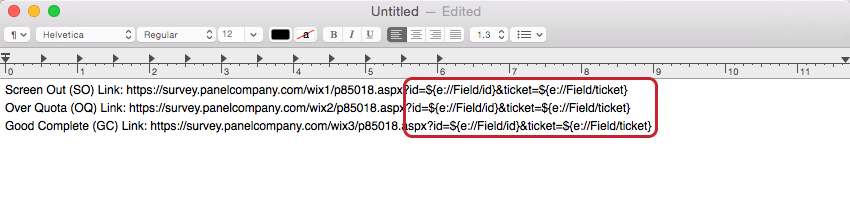
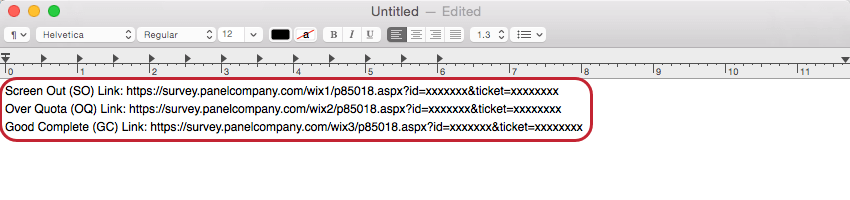
- Modify the other two links so that they end with the same information as the first link. Your final links might look something like this:
- Screen-out Link:
https://survey.panelcompany.com/wix1/p8501.aspx?stat=1&id=${e://Field/id}&ticket=${e://Field/ticket} - Over Quota Link:
https://survey.panelcompany.com/wix2/p8501.aspx?stat=1&id=${e://Field/id}&ticket=${e://Field/ticket} - Quality Check Link:
https://survey.panelcompany.com/wix3/p8501.aspx?stat=1&id=${e://Field/id}&ticket=${e://Field/ticket} - Complete Response Link:
https://survey.panelcompany.com/wix4/p8501.aspx?stat=1&id=${e://Field/id}&ticket=${e://Field/ticket}
- Screen-out Link:
Adding the Links into Your Survey
The panel company will have specified which redirect link is for Screen-outs, Over Quotas, Quality Checks, and for Complete Responses. If you don’t have any screening criteria in your survey, you won’t need the Screen-out link. Similarly, if you don’t have any quotas in your survey, you won’t need the Over Quota link, and if you don’t have any quality checks in your survey, you won’t need the Quality Check link.
To insert a Complete Response link
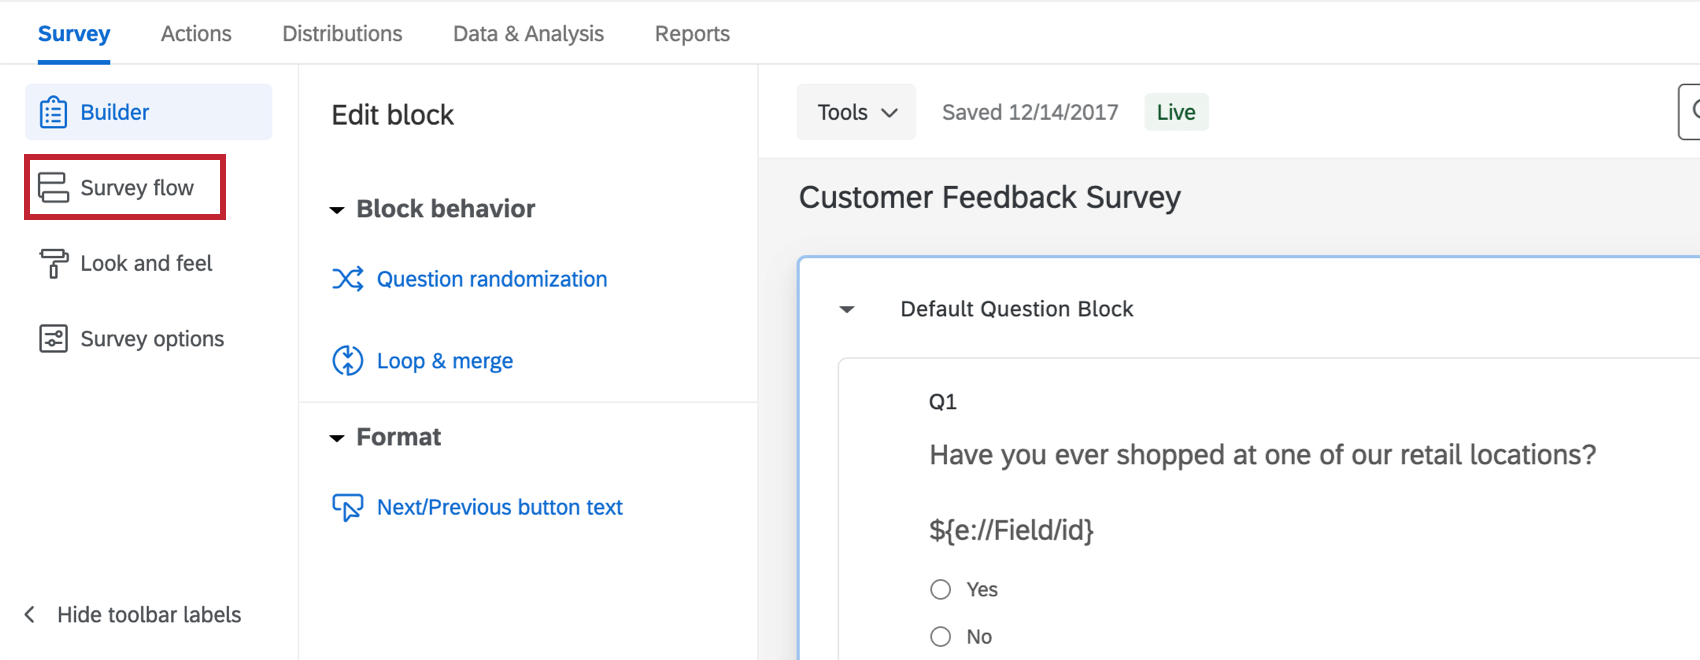
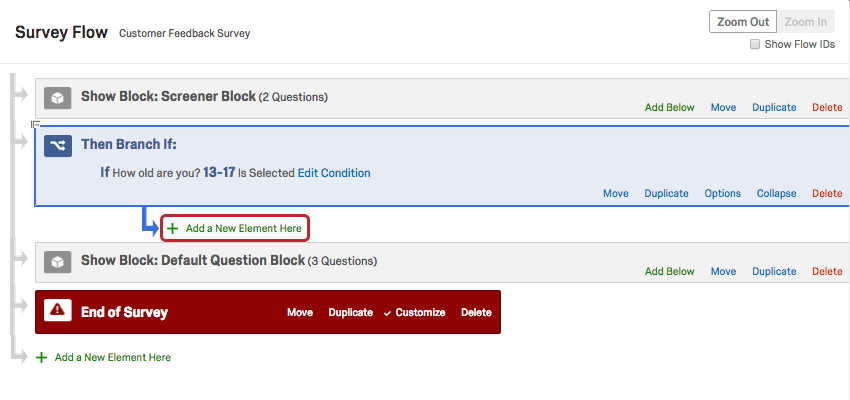
- In your Survey tab, go to your Survey flow.
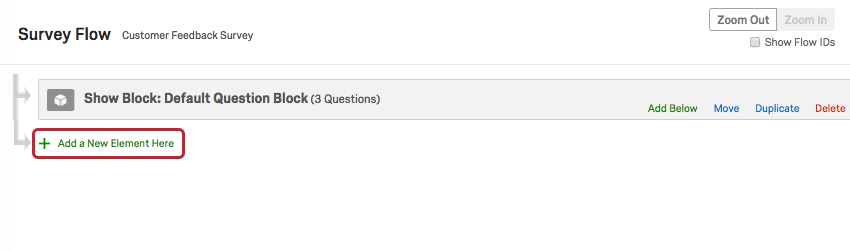
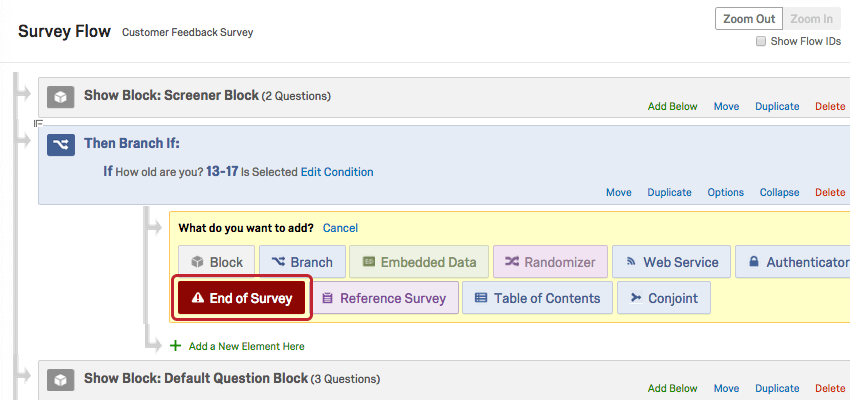
- At the bottom of the flow (or beneath any relevant block), click Add a New Element Here.
- Choose End of Survey.
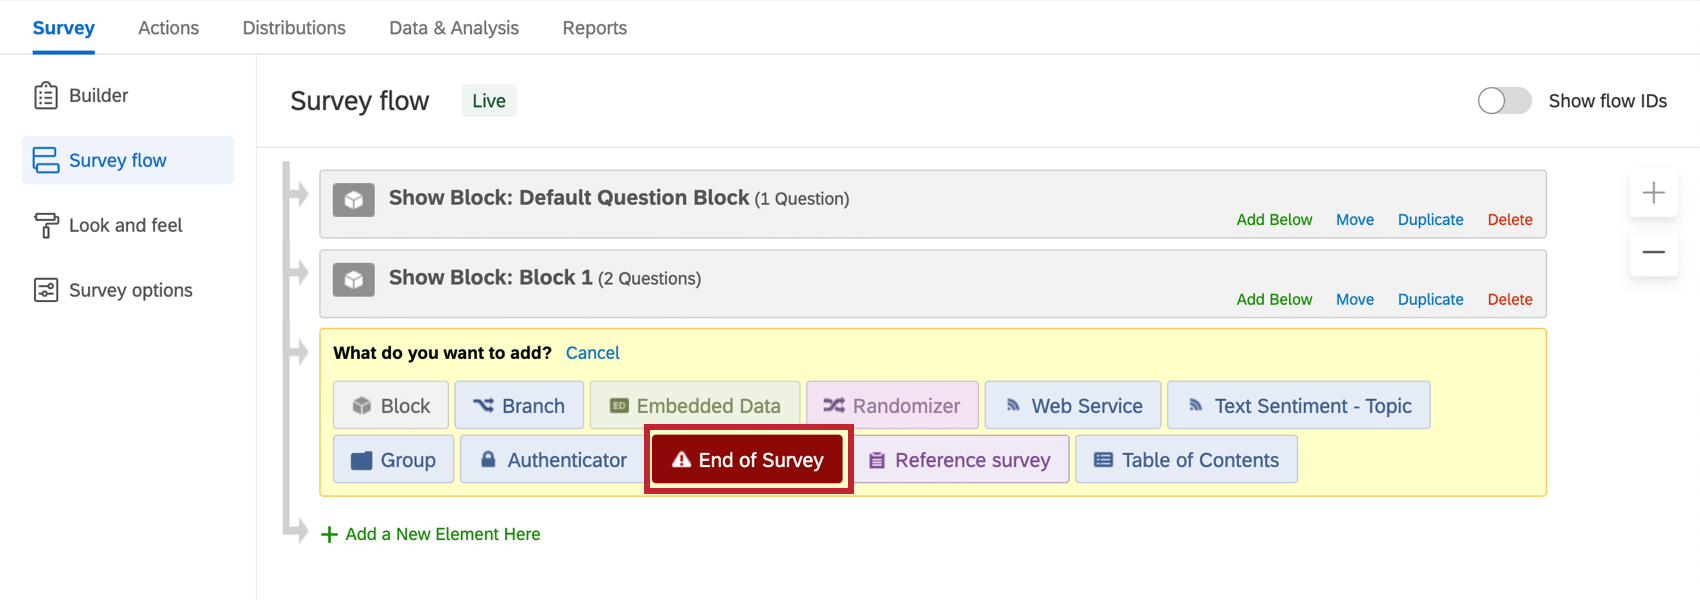
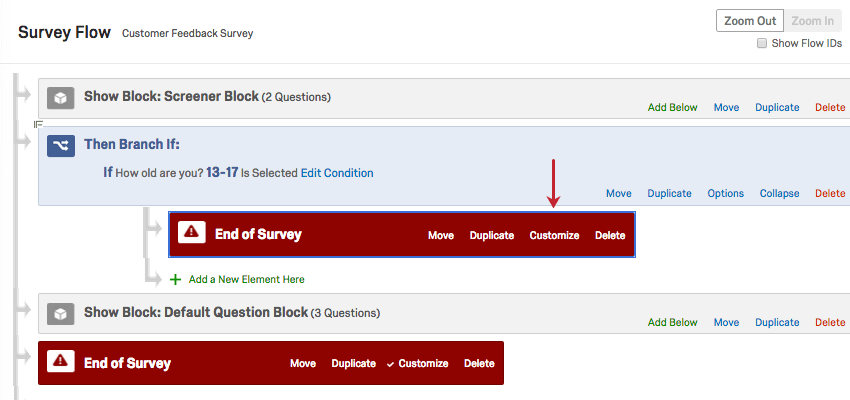
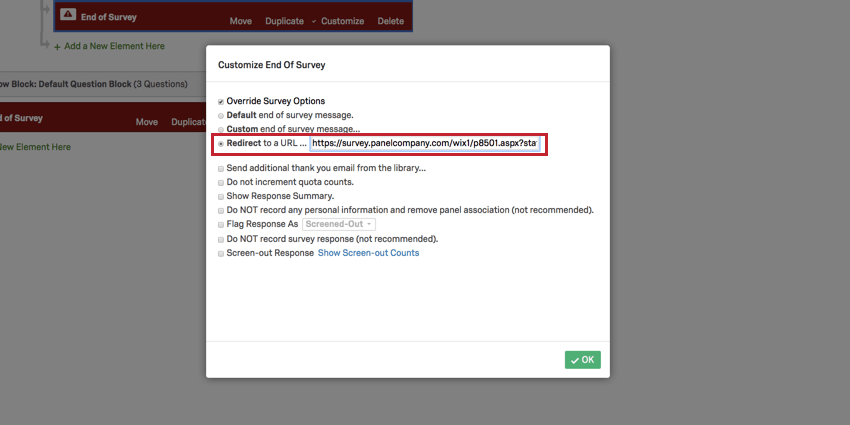
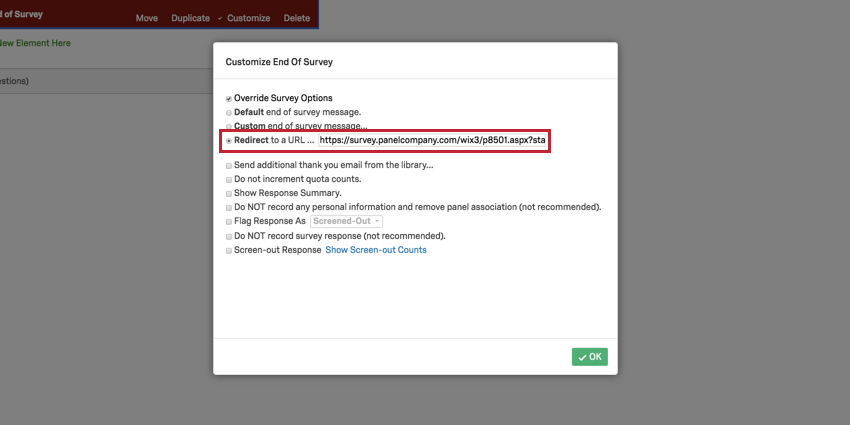
- Click Customize.
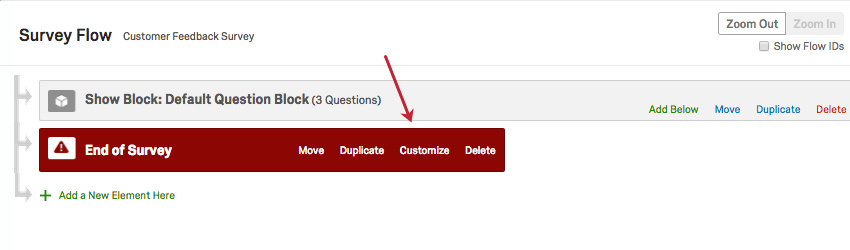
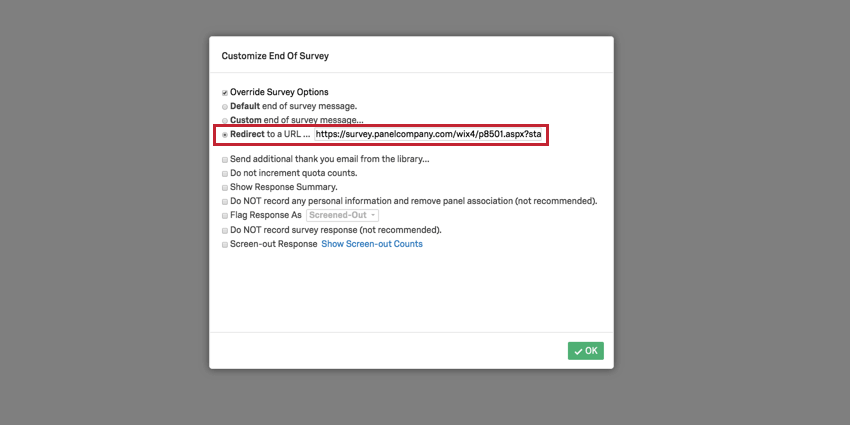
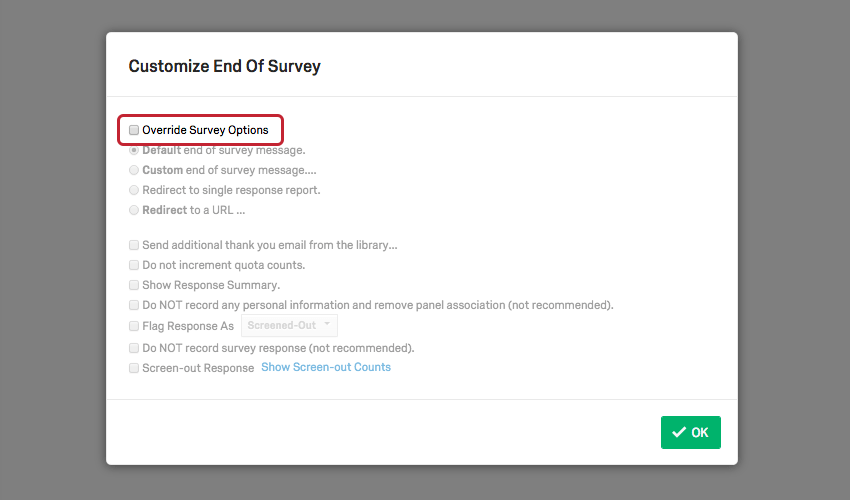
- Click the checkbox for Override Survey Options.

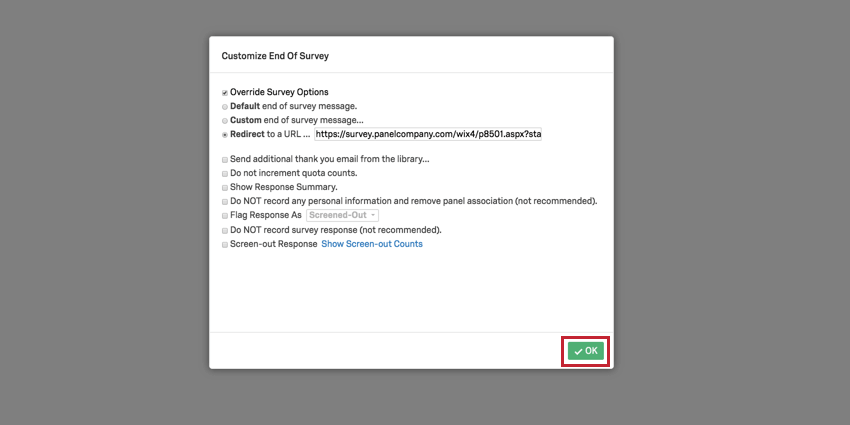
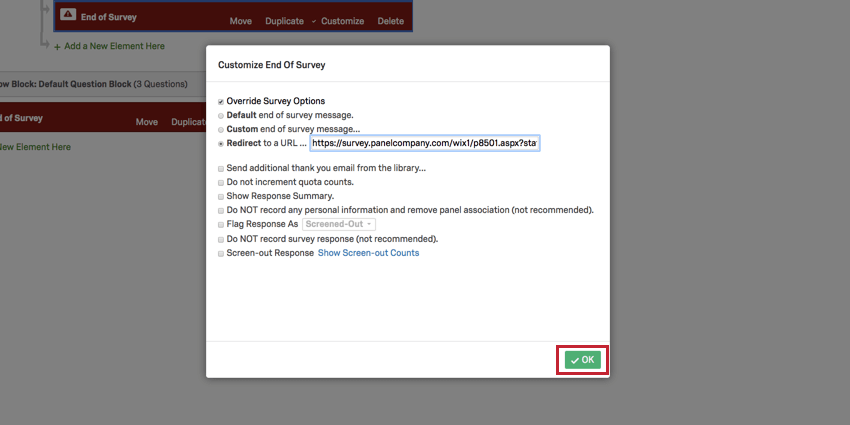
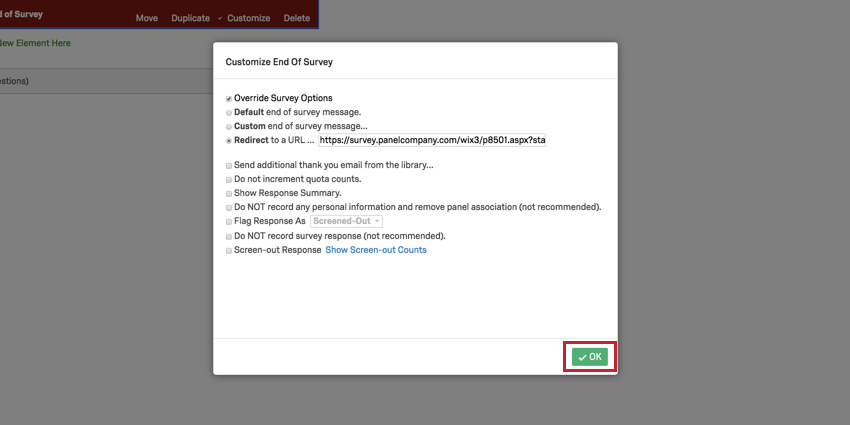
- Choose Redirect to a URL and paste in the Completes link.
- Click OK.
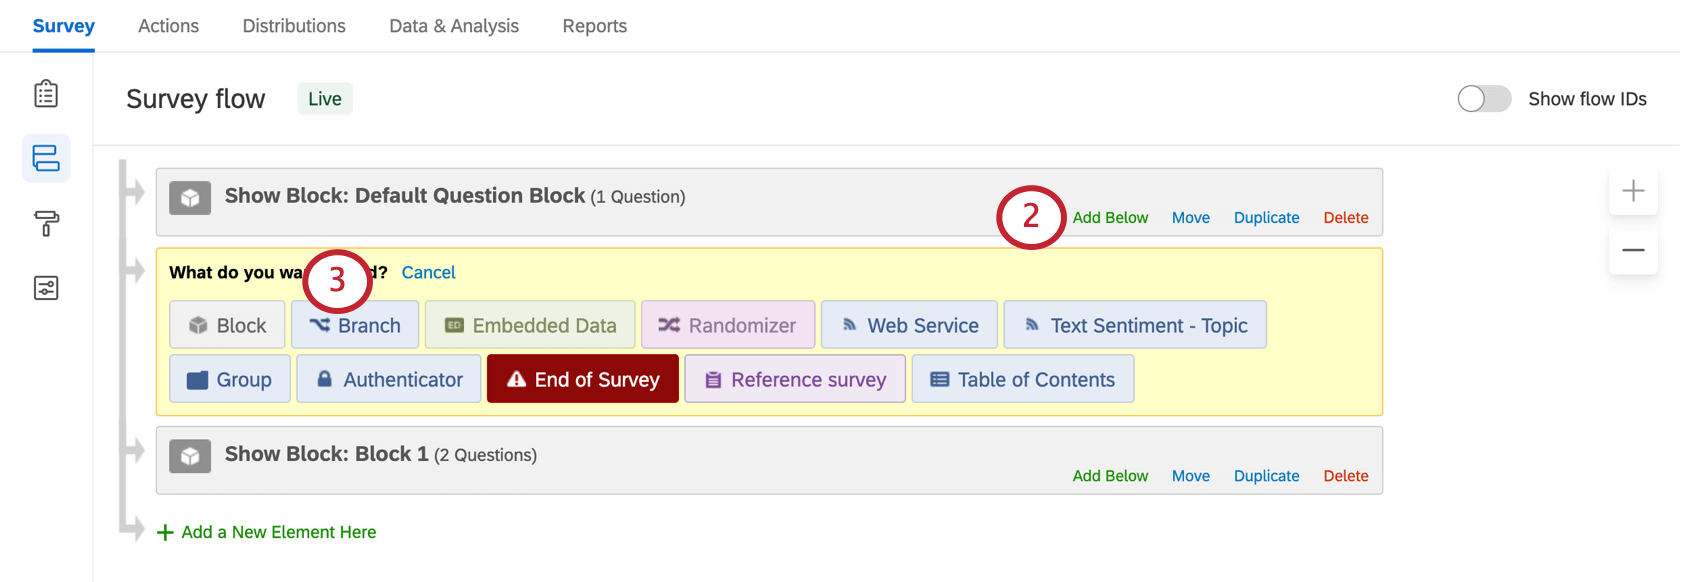
To insert a Screen-out link
- In your Survey tab, go to your Survey Flow.
- Click Add Below on the question block where you added your screening questions.
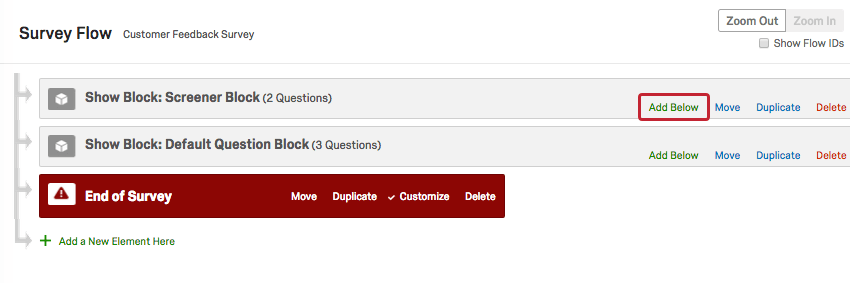
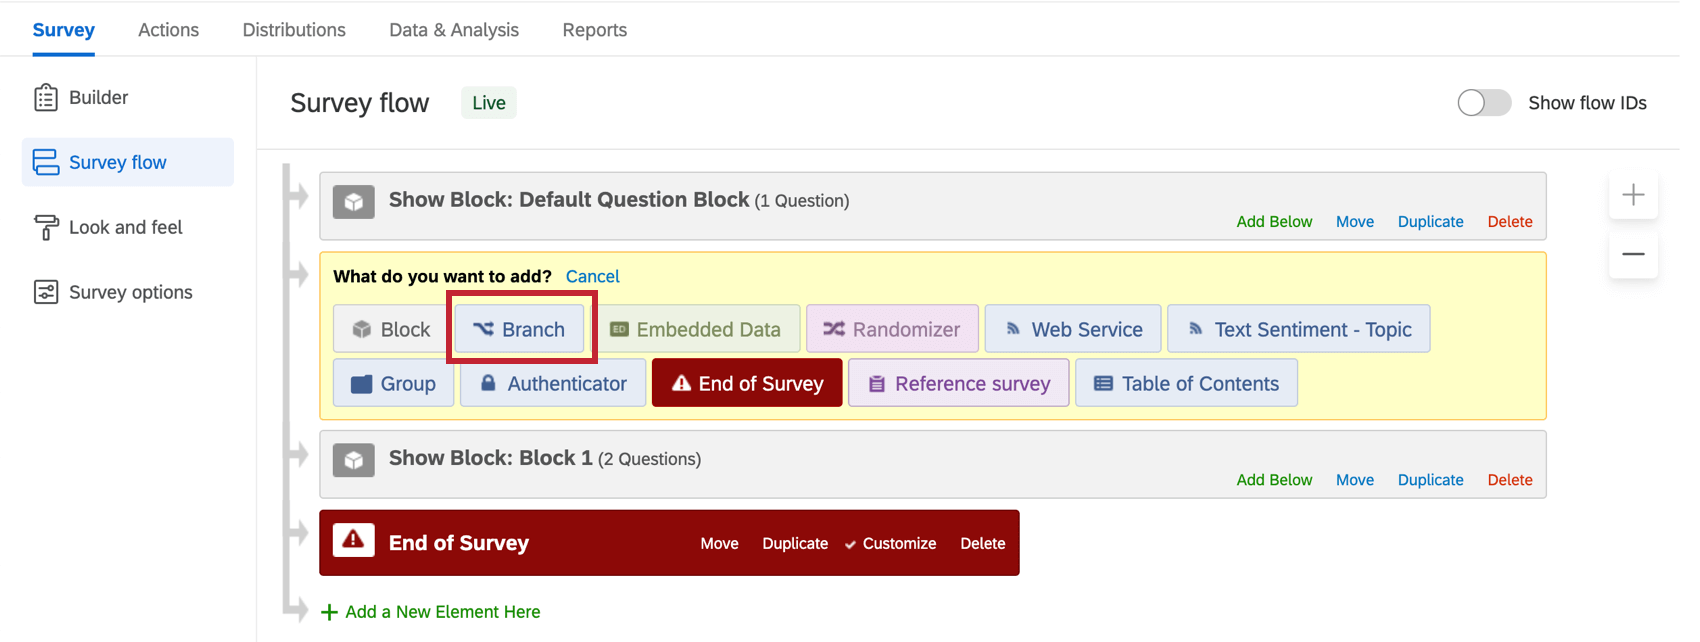
- Choose Branch.
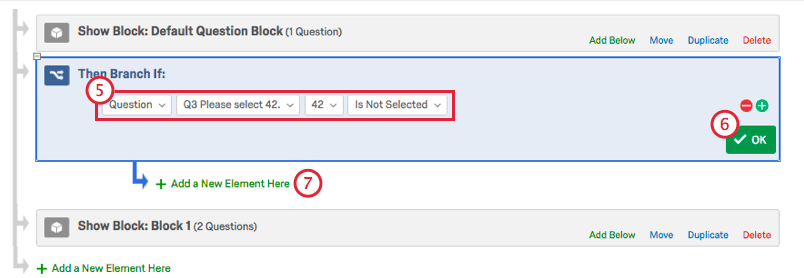
- Click Add a Condition.
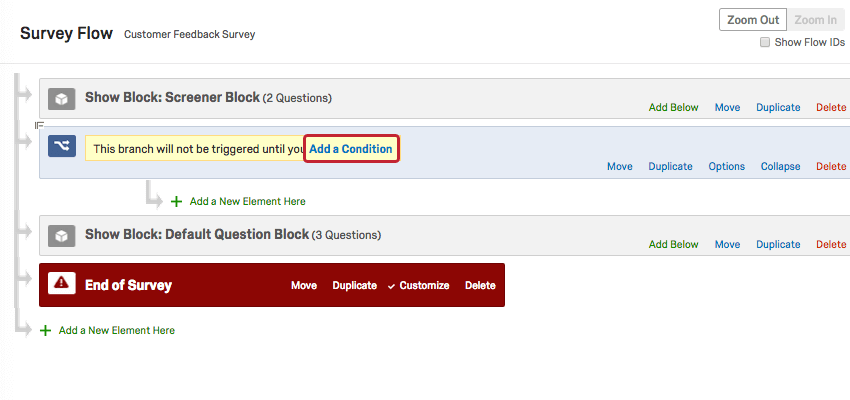
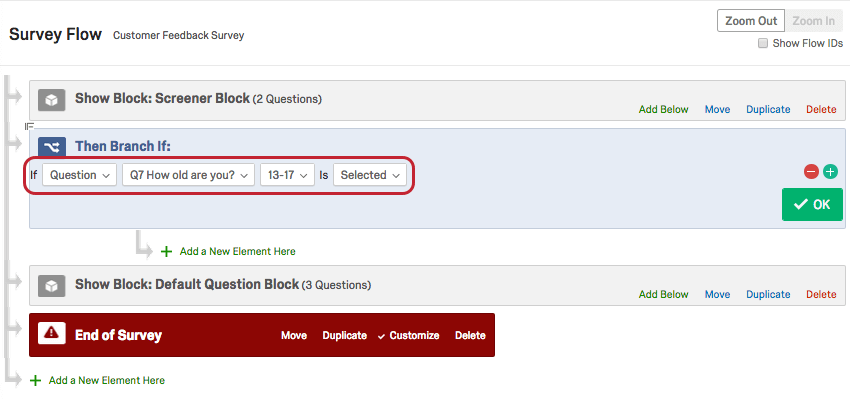
- Add your screening logic to the branch.
 Qtip: For more information on working with branch logic, refer to our Branch Logic page.
 - Click OK.

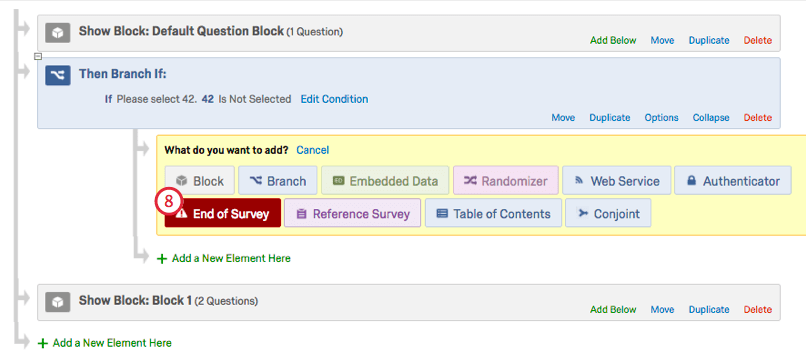
- Beneath the screen-out branch, click Add a New Element Here.
- Choose End of Survey.
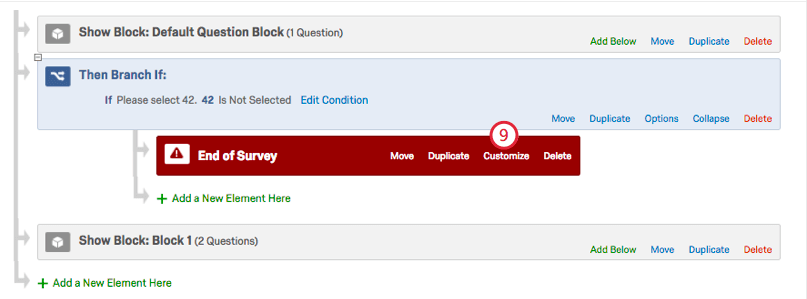
- Click Customize.
- Click the checkbox for Override Survey Options.
- Choose Redirect to a URL and paste in the Screen-out link.
- Click OK.
To insert an Over Quota link
- In the Survey tab, go to the Survey options menu.
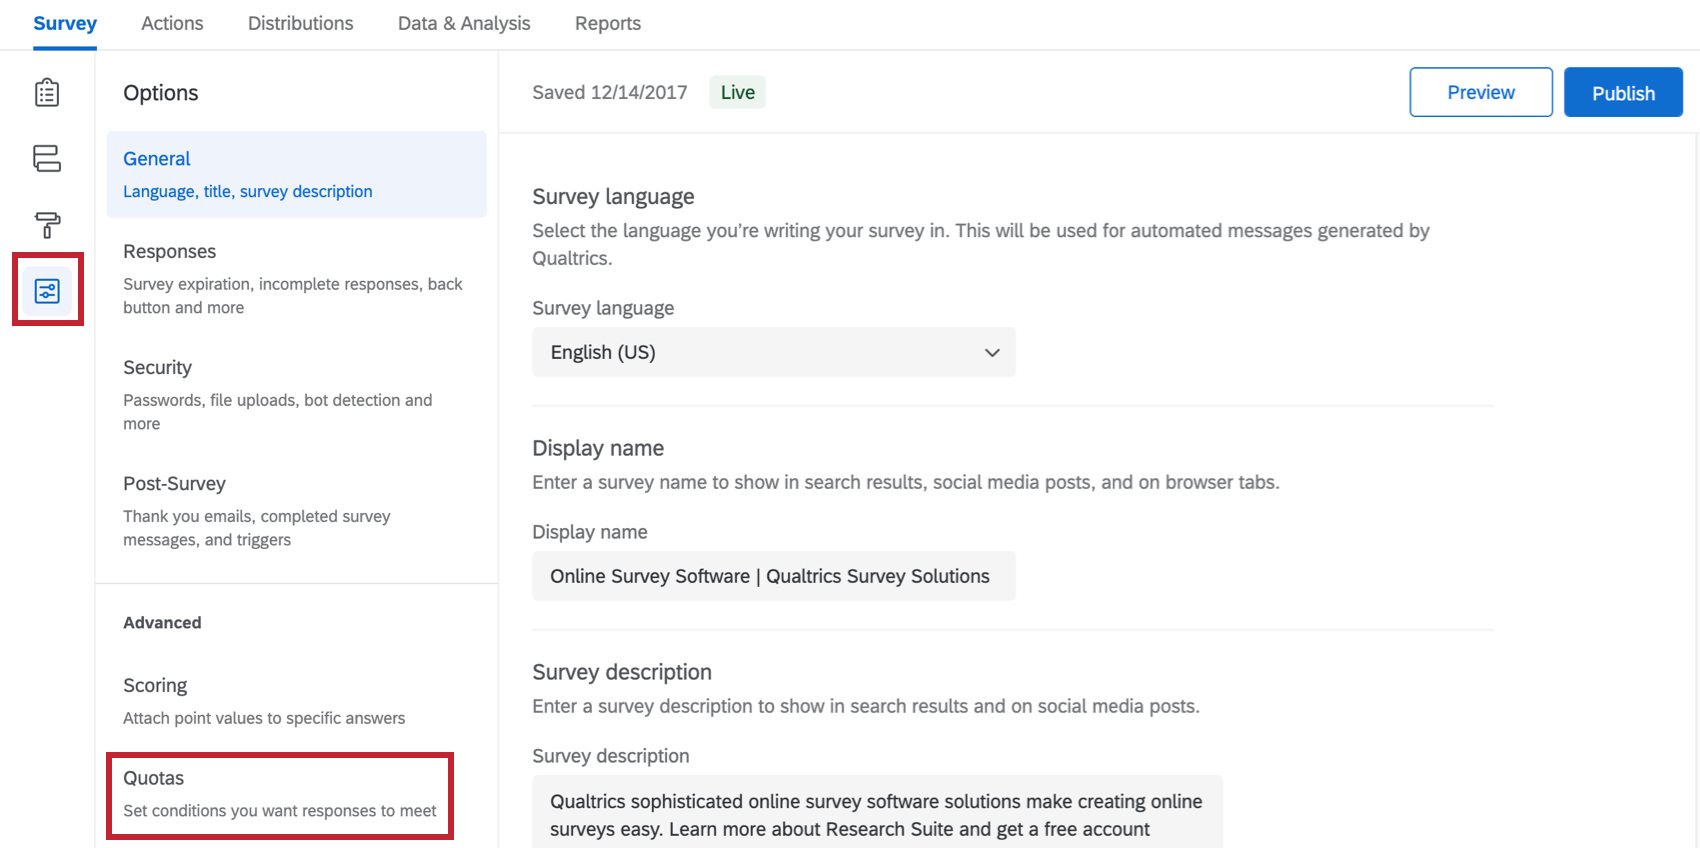
- Choose Quotas.
- Click Add a Quota.
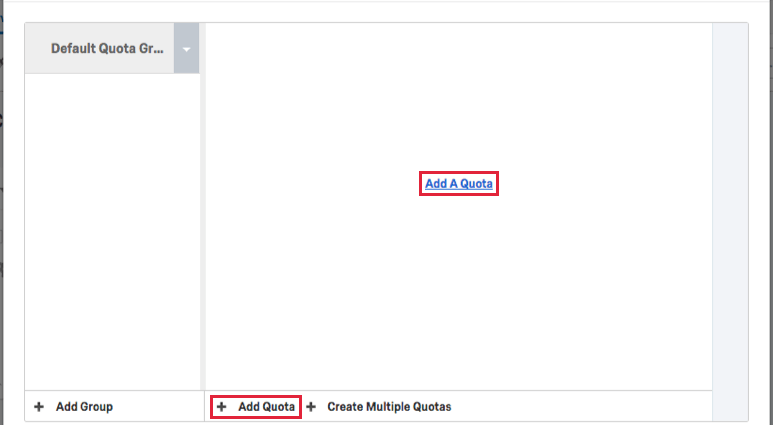
- Set up any quotas you want to include in your survey.
Qtip: For more information on setting up quotas, refer to our Quotas page.
- Leave the quota action as End Current Survey.
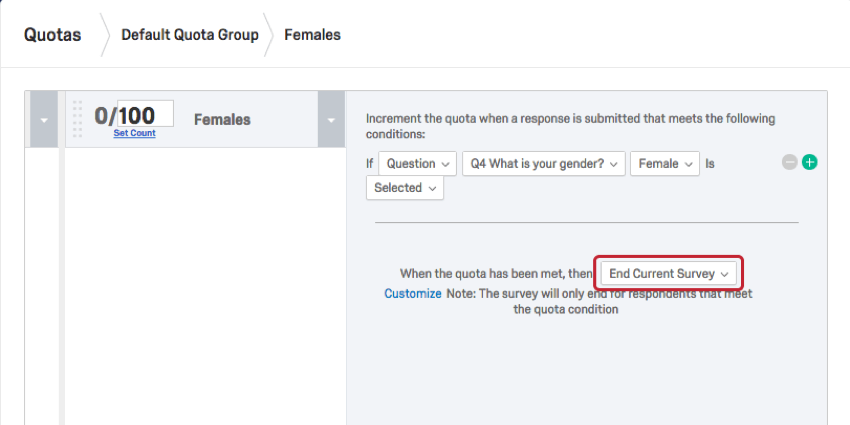
- Click Customize.
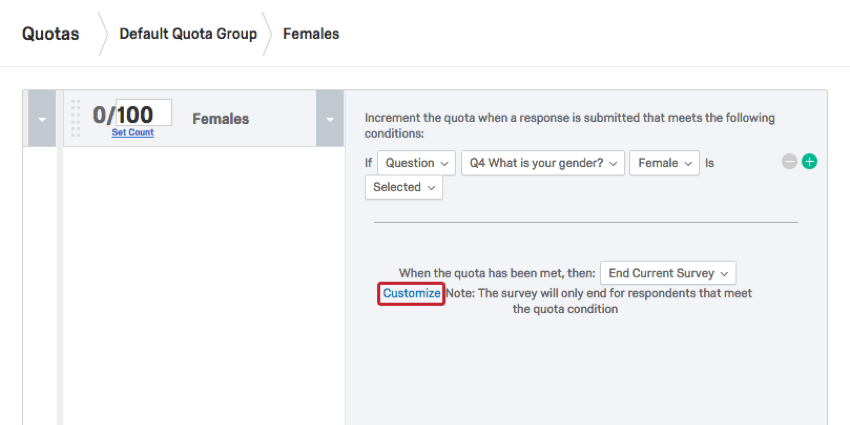
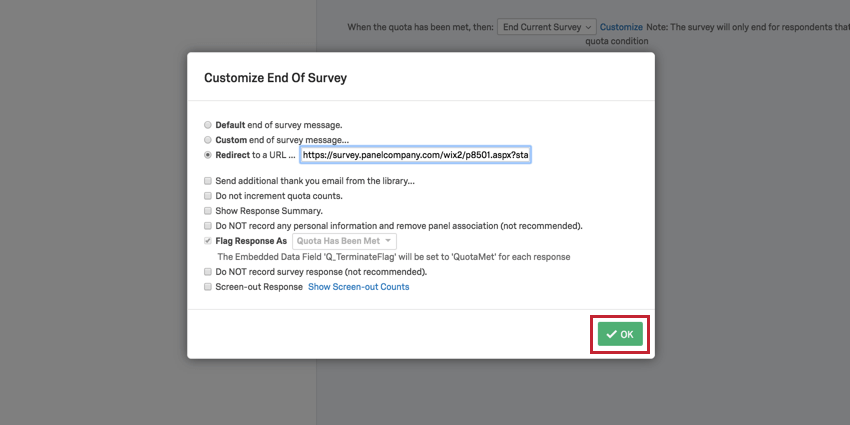
- Choose Redirect to a URL and paste in the Over Quota link.
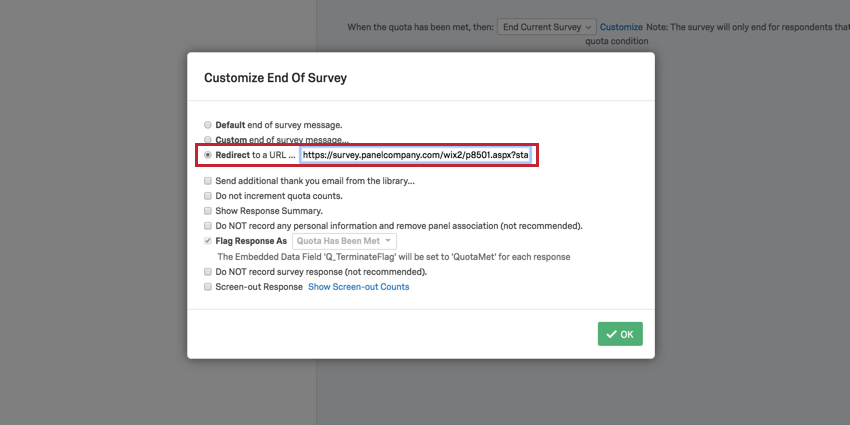
- Click OK.
To insert a Quality Check link
- In your Survey tab, go to your Survey flow.
- Click Add Below on the question block where you added your quality check questions.
- Choose Branch.
- Click Add a Condition.

- Add your quality check logic to the branch.
 Qtip: For more information on working with branch logic, refer to our Branch Logic page.
 - Click OK.
- Beneath the quality check branch, click Add a New Element Here.
- Choose End of Survey.
- Click Customize.
- Click the checkbox for Override Survey Options.

- Choose Redirect to a URL and paste in the Quality check link.
- Click OK.
Recording Identifying Fields
Once you have inserted your modified redirect links into the correct areas of your survey, you will need to make sure you are recording the correct identifying fields for the integration to work.
You can check this by adding embedded data to the survey flow so that all of the identifying fields are properly recorded and can be sent back to the panel company’s website when they are redirected by the modified links.
To record identifying fields
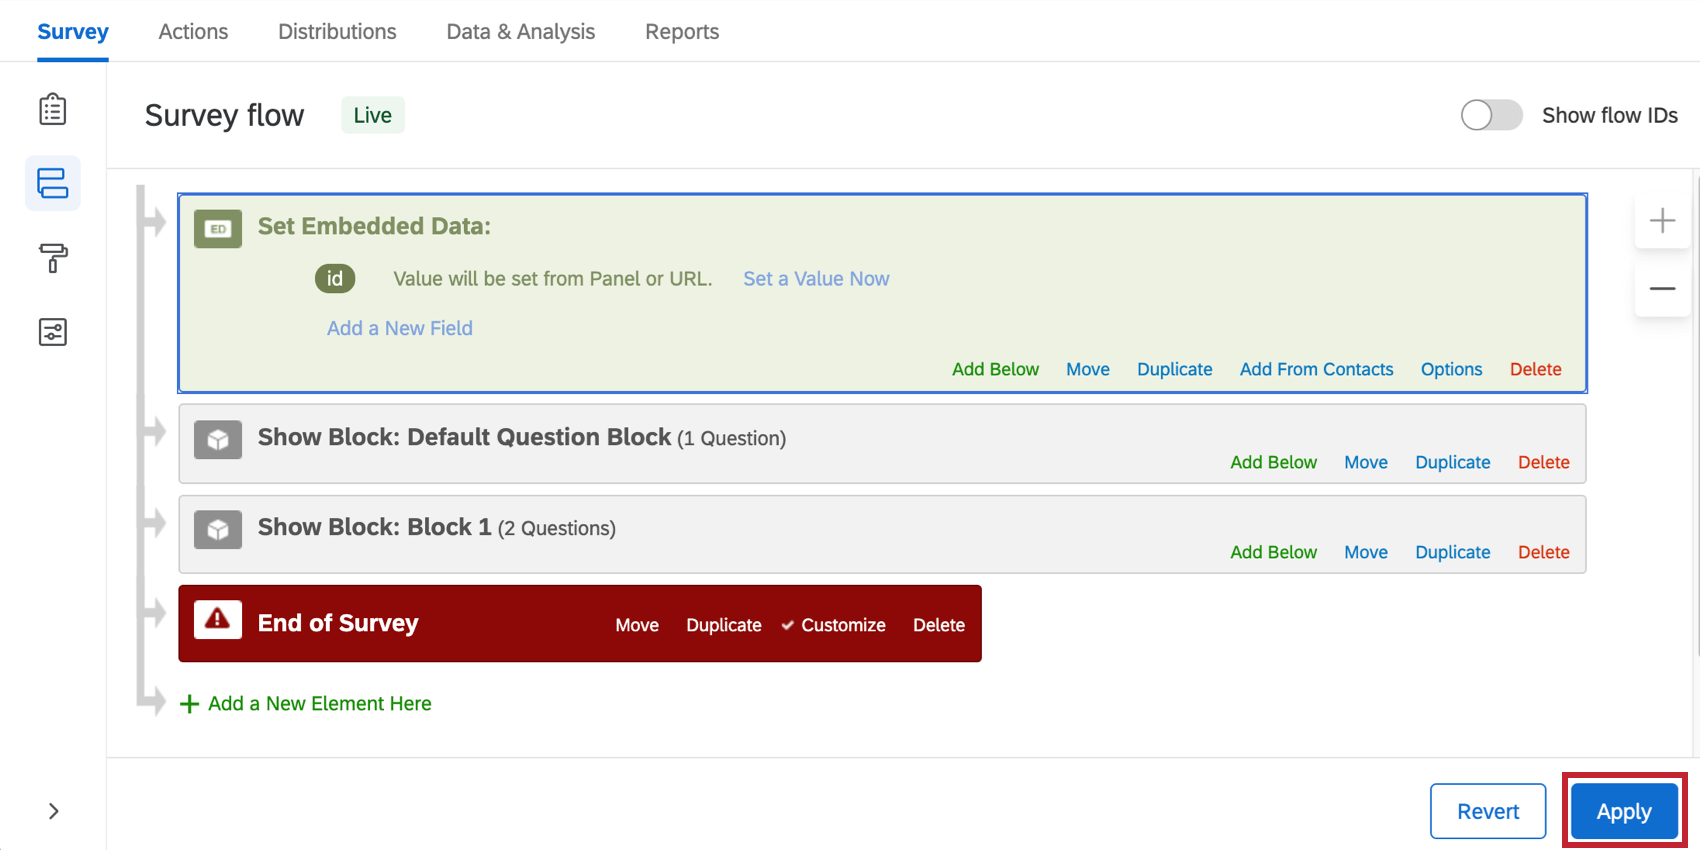
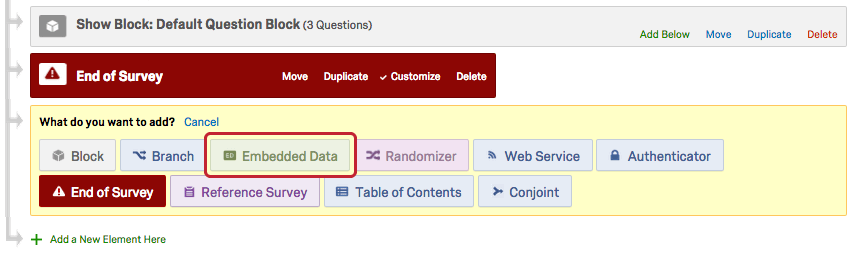
- Navigate to the Survey flow in the Survey tab.
- Click Add a New Element Here.

- Choose Embedded Data.
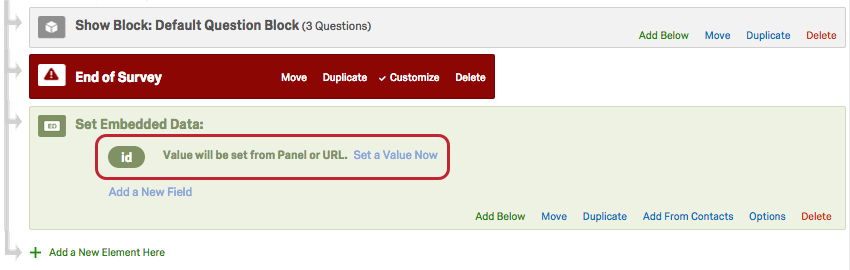
- Enter the name of the identifying field (id, uid, gid, ticket, etc.) in the text box that reads Enter Embedded Data Field Name Here (do not click Set a Value Now since the value is being recorded from the survey link URL).
- If you have more than one identifying field you are attaching to the end of the redirect links, click Add a New Field below and repeat step 3.

- Click and hold Move to drag and drop the embedded data element to the top of the survey flow.
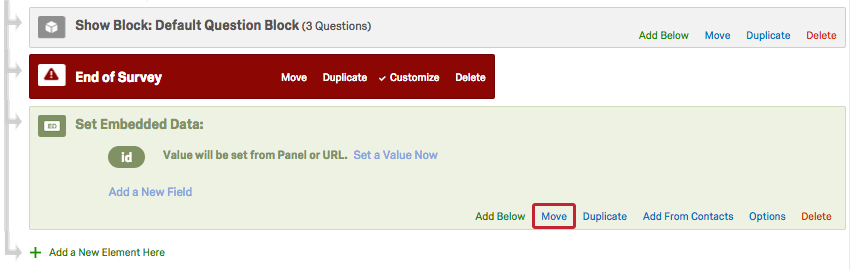
- Click Apply.