-

Qualtrics Platform -

Customer Journey Optimizer -

XM Discover -

Qualtrics Social Connect
Participants Options (360)
About Participants Options
The Options section of the Participants tab is where you set up nominations and their requirements, nomination approval, unsolicited evaluations, self-evaluations, and more for your 360 project.

Give Feedback Settings
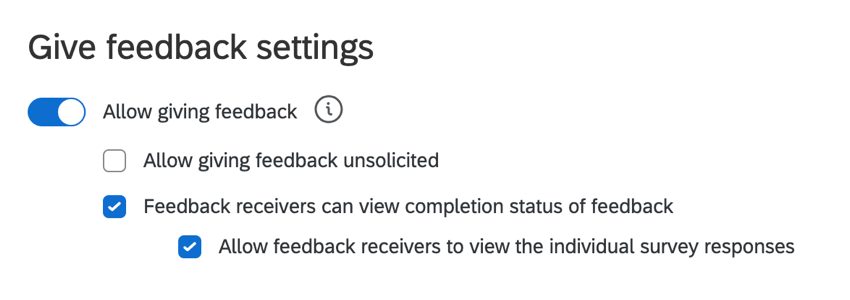
- Allow giving feedback: When this option is disabled, the “Give feedback” section of the Participant Portal will be hidden. Subjects will not be able to submit feedback for each other. When enabled, this option allows subjects to submit feedback. This also allows you to enable the following options:
- Allow giving feedback unsolicited: Allows subjects to give feedback to other subjects in the current project without being explicitly asked to provide feedback. The subject must already be added to the project in order to be evaluated.
Qtip: When this option is enabled, the Subject nomination groups options control who can give unsolicited evaluations. (Not who can be the subject of an unsolicited evaluation.) Anyone in the assessment should also be enabled so that evaluators can add themselves to the subjects’ assessments. Anyone in the directory should only be enabled to limit the possible unsolicited evaluators by using a specific group filter.Qtip: Unsolicited evaluations will not increment the number in the Evaluations Received or Evaluations Completed columns.

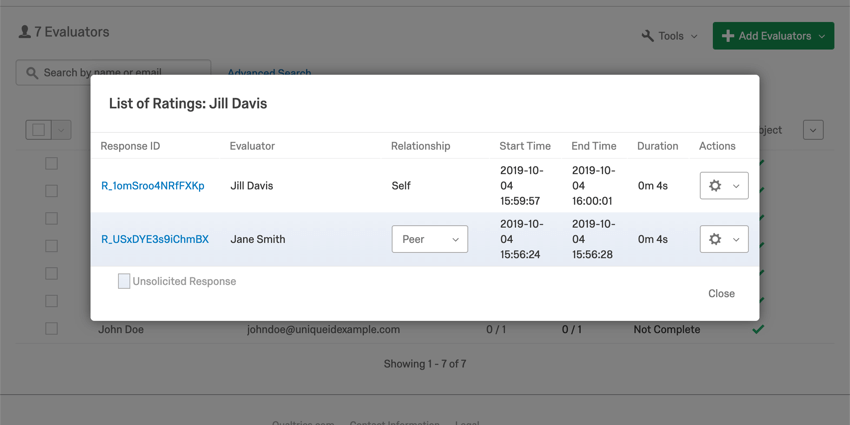
To find an unsolicited evaluation or allow someone to retake their unsolicited evaluation, go to View Responses Received and check the responses highlighted in blue at the bottom of the list.
- Feedback receivers can view completion status of feedback: Allows each subject to view whether or not specific feedback requests have been completed.
Qtip: The “Subject nominates evaluators” option must also be enabled for this to work.
- Allow feedback receivers to view the individual survey responses: Allows subjects to view each feedback response they’ve received. This option only appears when “Feedback receivers can view completion status of feedback” is enabled.
- Allow giving feedback unsolicited: Allows subjects to give feedback to other subjects in the current project without being explicitly asked to provide feedback. The subject must already be added to the project in order to be evaluated.
Round Robin Evaluation
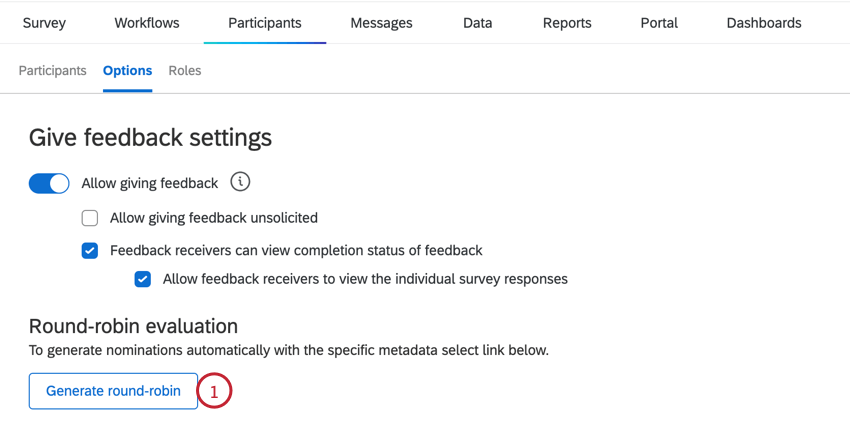
You can create a round-robin evaluation where subjects in a group evaluate all other subjects in that group. You may create multiple round-robin evaluations in one 360 project.
- In the Participants Options section, click the Generate round-robin button.
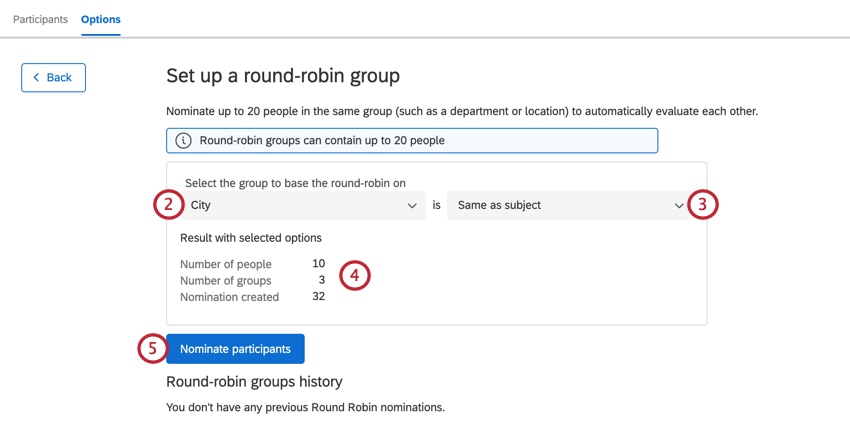
- Choose the group to base the round-robin on. You may choose All (meaning all participants in the project) or you may base your group on any available metadata fields.
 Qtip: You can only choose All if your project has twenty or fewer participants.
 - If you selected a metadata field to base the group on, choose the desired metadata value for the group. You can pick a specific value, or select Same as subject to have participants with the same metadata value evaluate each other.
Qtip: You will only be able to select values for which the number of participants is less than or equal to twenty.Example: In this example, we are creating a round-robin group for participants whose Department is equal to Sales. In other words, we want all participants in the Sales department to evaluate each other.
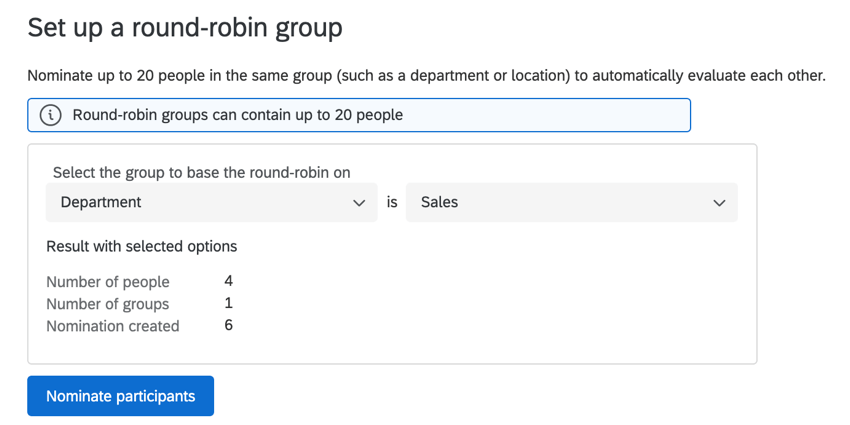
- Review the results of your selected criteria. This will show the number of participants, the number of groups, and the number of nominations created.
- When finished, click Nominate participants.
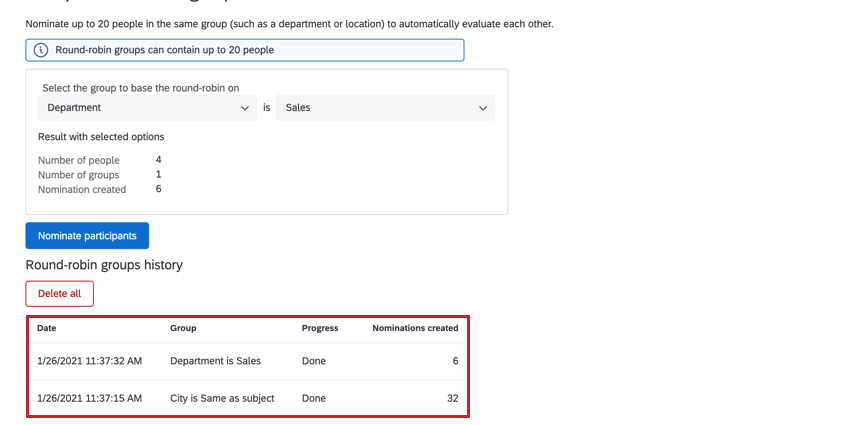
After creating your round-robin evaluation, Qualtrics will process this task and create your nominations. You can view the progress of this in the table below the round-robin setup window. Every round-robin group you’ve created in your project will be listed here.
Deleting Round-Robin Evaluations
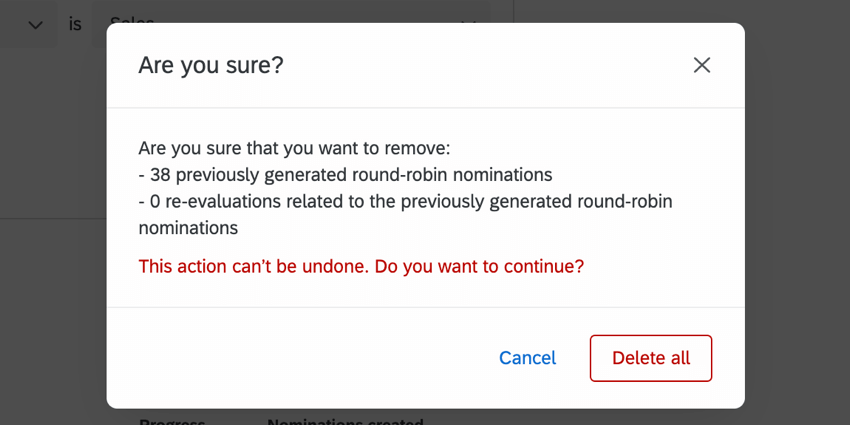
You can delete your round-robin evaluations by clicking the Delete all button in the round-robin setup window.
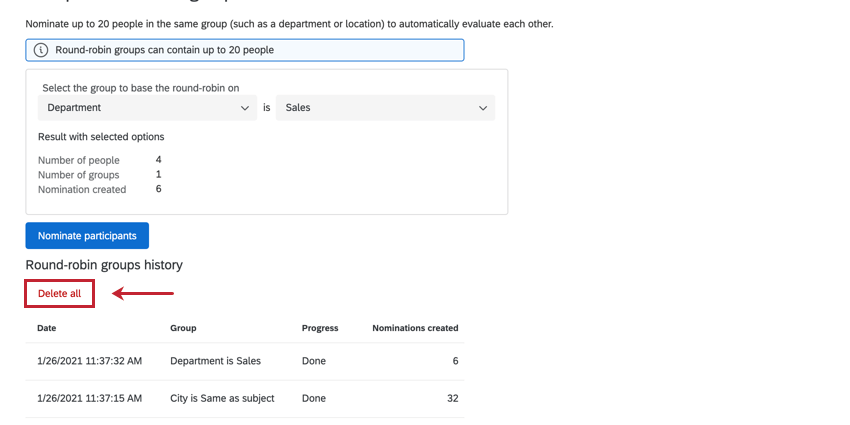
A confirmation window will appear to make sure you want to delete your round-robin evaluations. Note that they are irretrievable once deleted. Click Delete all to confirm.
Self-Evaluation
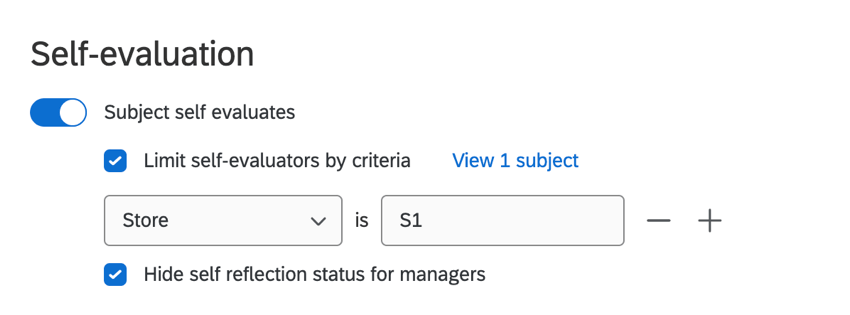
Subject self evaluates: The subject must evaluate themselves.
- Limit self-evaluators by criteria: This option is useful if you need to narrow down who does a self-evaluation. You can narrow this down by metadata.
- Hide self reflection status for managers: When enabled, managers cannot see which subjects have completed their self reflection. The self reflection status label will be missing from the participant portal.
Opt-In Link
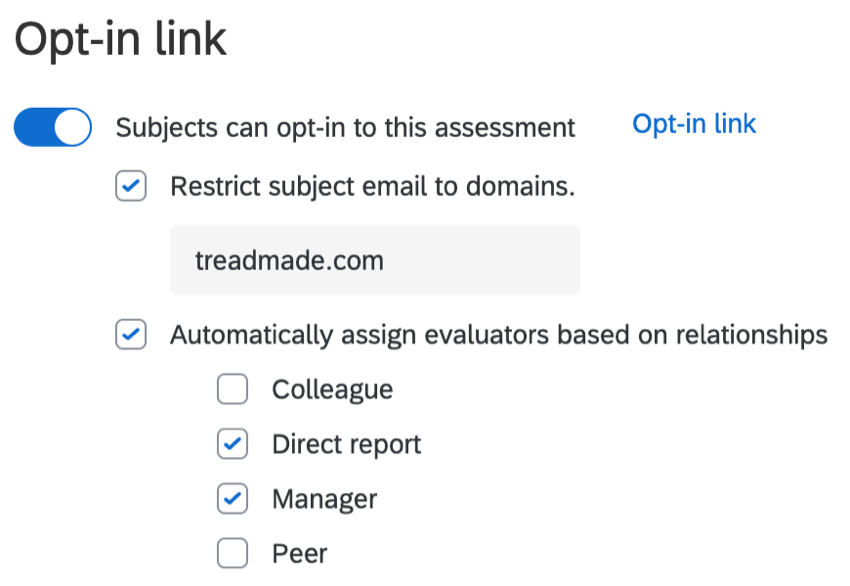
Subjects can opt-in to this assessment: This option creates a link where someone can opt-in. So long as they exist in the directory and thus have a portal to log into, this option adds them to the participant list. From there, they can perform any tasks set on the 360 survey by default (self-assessment, nominating evaluators, etc.). Click Opt-in link to get this link.
- Restrict subject email to domains: To avoid participants from opting in from the wrong account, or to keep users uploaded into your directory on separate 360 projects, you can specify the email domain someone is logged into before they can opt in.
- Automatically assign evaluators based on relationships: If your participants are already uploaded to the employee directory with relationships assigned, you can use this information to assign evaluators to subjects as they opt into the assessment. For example, you can choose to add all of the subject’s direct reports and manager as evaluators. Evaluators will be added so long as they are listed amongst the chosen relationships for that subject in the directory; an evaluator does not have to already be in the project’s participant list to be added.
Evaluator Nomination Settings
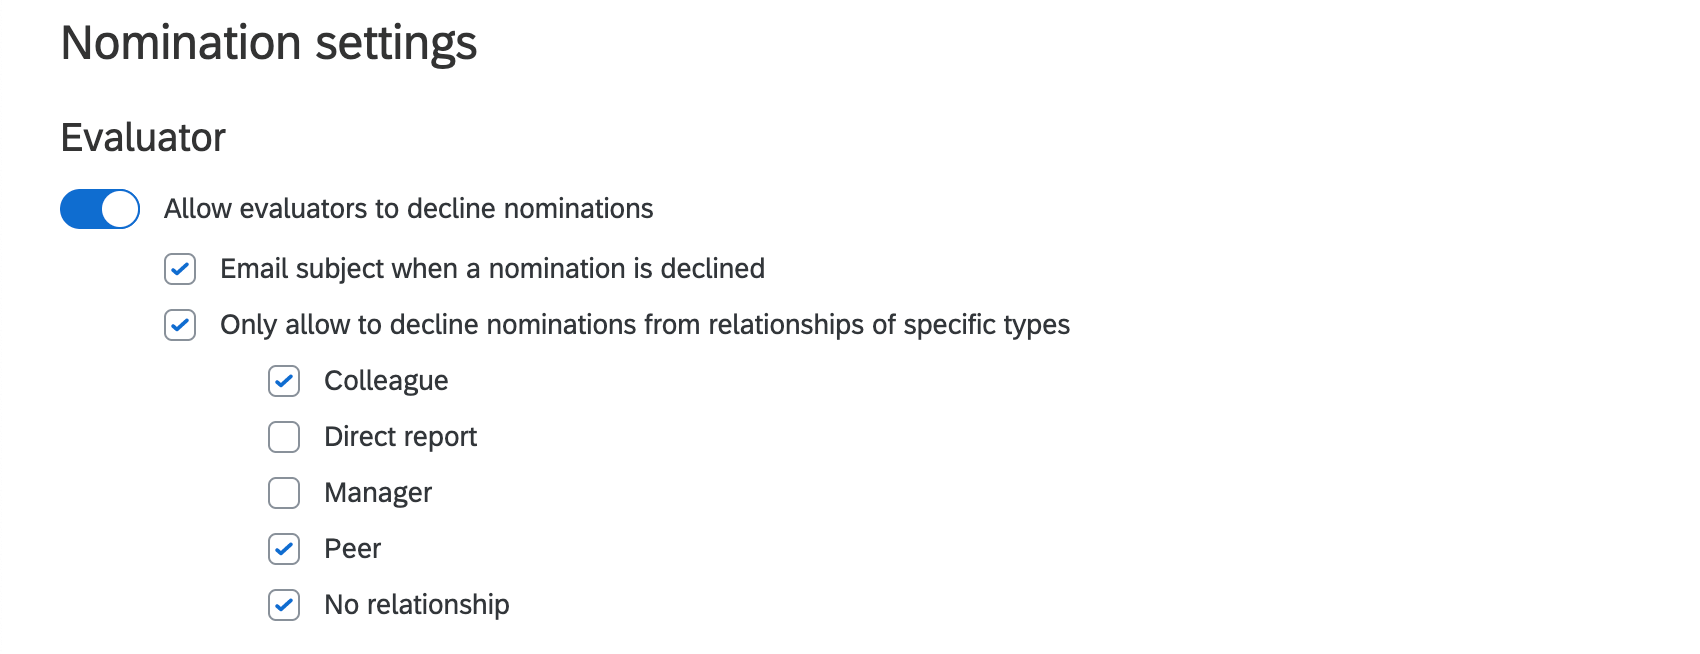
Allow evaluators to decline nominations: If a subject nominates someone to be the evaluator, enabling this option allows the evaluator to decline.
- Email subject when a nomination is declined: This option must be selected before any nominations are declined. Otherwise, the email will not send retroactively. Subjects will be emailed when someone has turned down their nomination.
- Only allow to decline nominations from relationships of specific types: As described, allow evaluators to decline nominations if they have a certain relationship to the subject.
Example: You may be fine with employees rejecting nominations from peers or colleagues. At the same time, you do not want employees to deny direct reports or managers, since these are the employees who work with the subject most closely.
Manager Nomination Settings
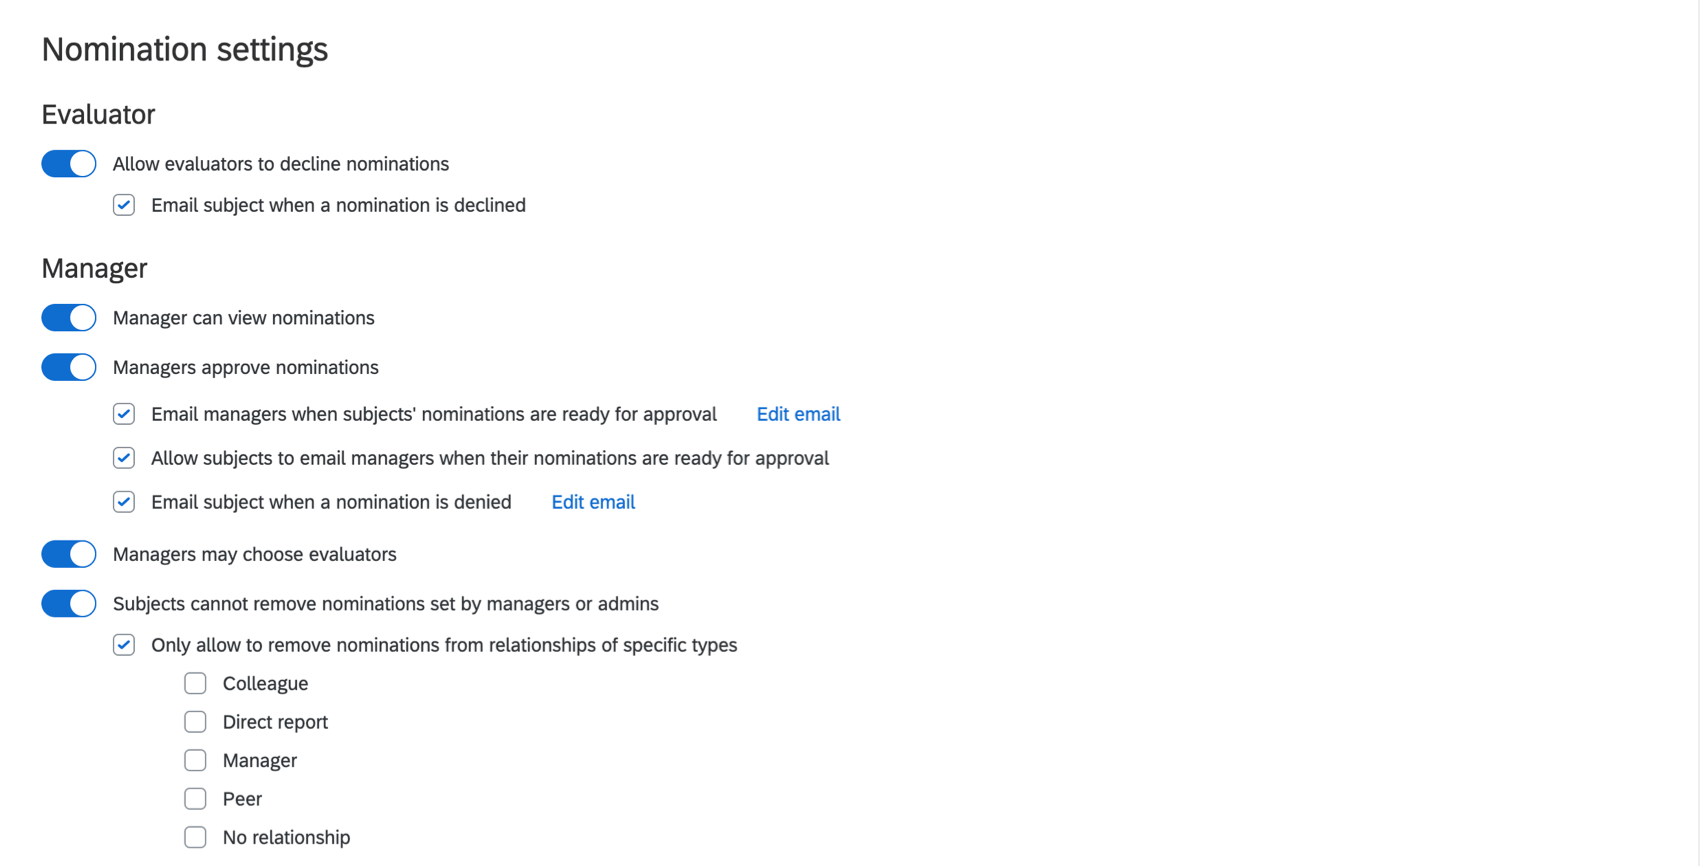
- Manager can view nominations: Select this option and managers will be able to view the evaluators nominated by their direct reports.
- Managers approve nominations: Don’t allow nominated evaluators to assess subjects until the subject’s manager has approved their nomination.
- Email managers when subjects’ nominations are ready for approval: If there are nomination requirements, an email will be sent only when the subject moves from not meeting requirements to meeting requirements. If there are no nomination requirements, an email will be sent only when the first nomination is added.
- Allow subjects to email managers when their nominations are ready for approval: This allows the subject to email the manager whenever asking them for approval on their nominations.
- Email subject when a nomination is denied: When this option is selected, subjects will be emailed when their manager has rejected their nomination.
- Managers may choose evaluators: Select this option and managers will be able to add evaluators to their direct reports.
- Subject cannot remove nominations set by managers or admins: This setting prevents subjects from removing evaluators uploaded for them by an admin, or selected by a manager. Subjects can still delete nominations they made themselves.
- Only allow to remove nominations from relationships of specific types: When this option is enabled, subjects will only be allowed to remove nominations of selected relationship types.
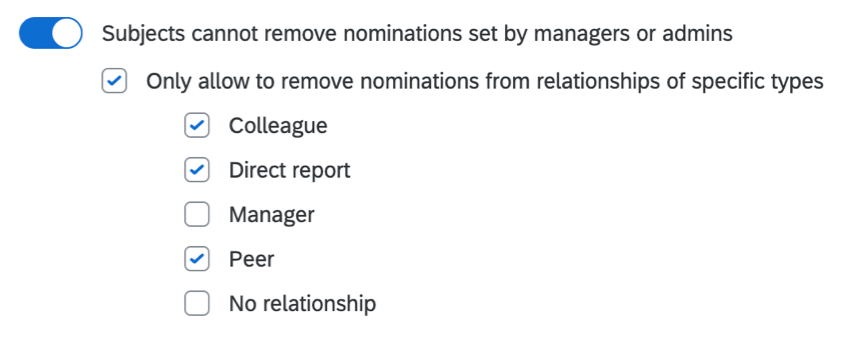 Example: You are fine with subjects removing any nominations so long as those nominees are colleagues, peers, or have no relationship assigned. However, you never want the subject to be able to remove a manager or a direct report. Therefore, you enable this option, and select all relationship types except Direct Report and Manager.
- Only allow to remove nominations from relationships of specific types: When this option is enabled, subjects will only be allowed to remove nominations of selected relationship types.
Subject Nomination Settings
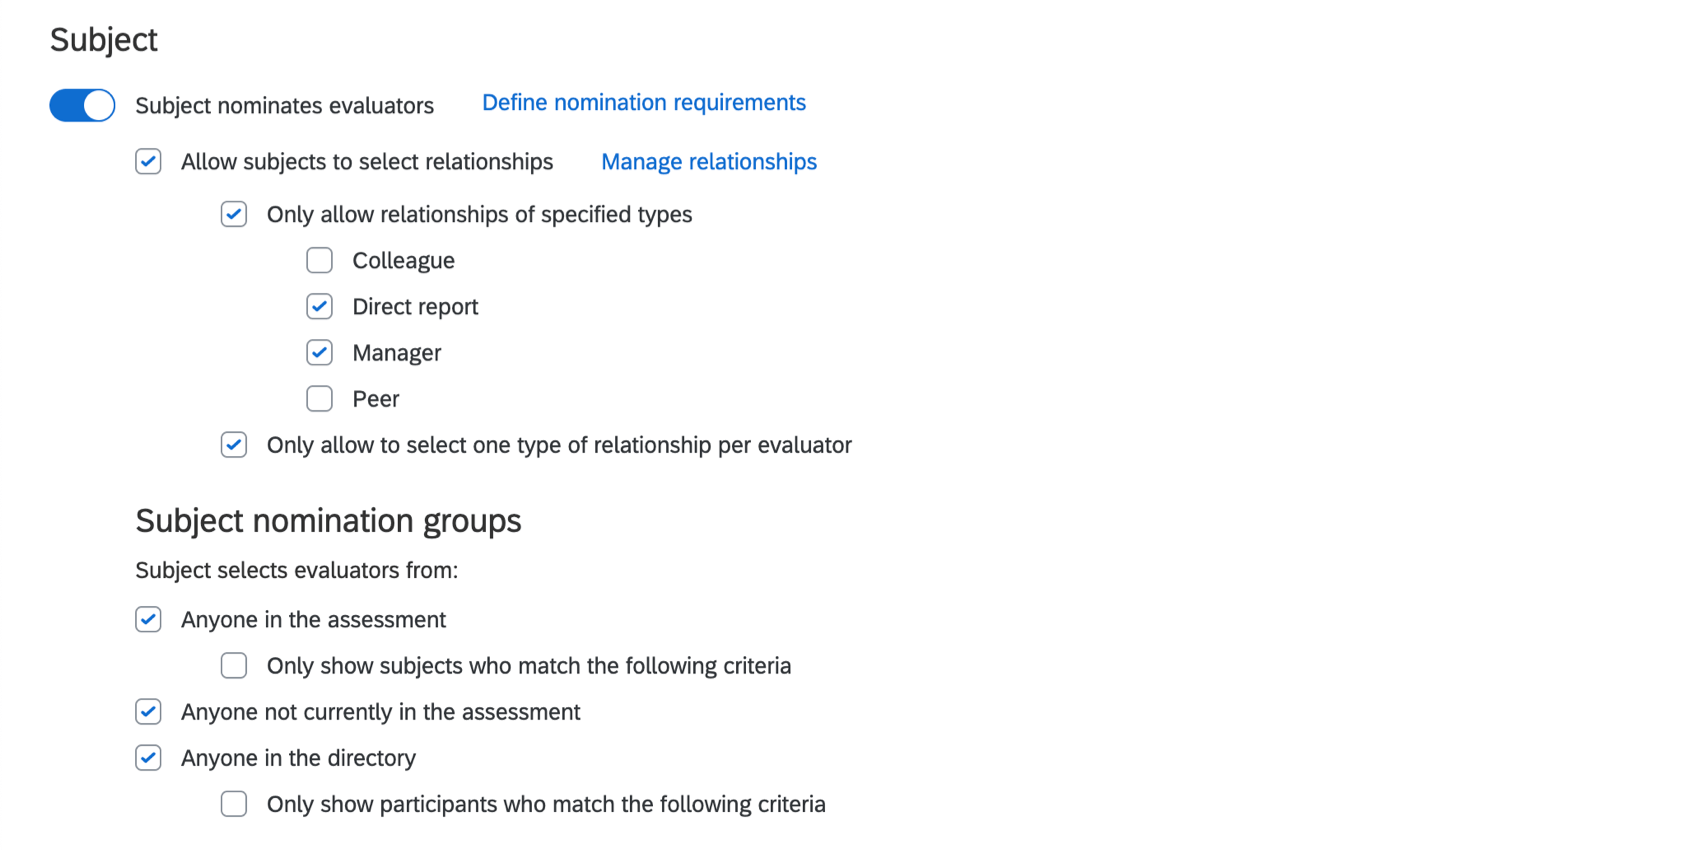
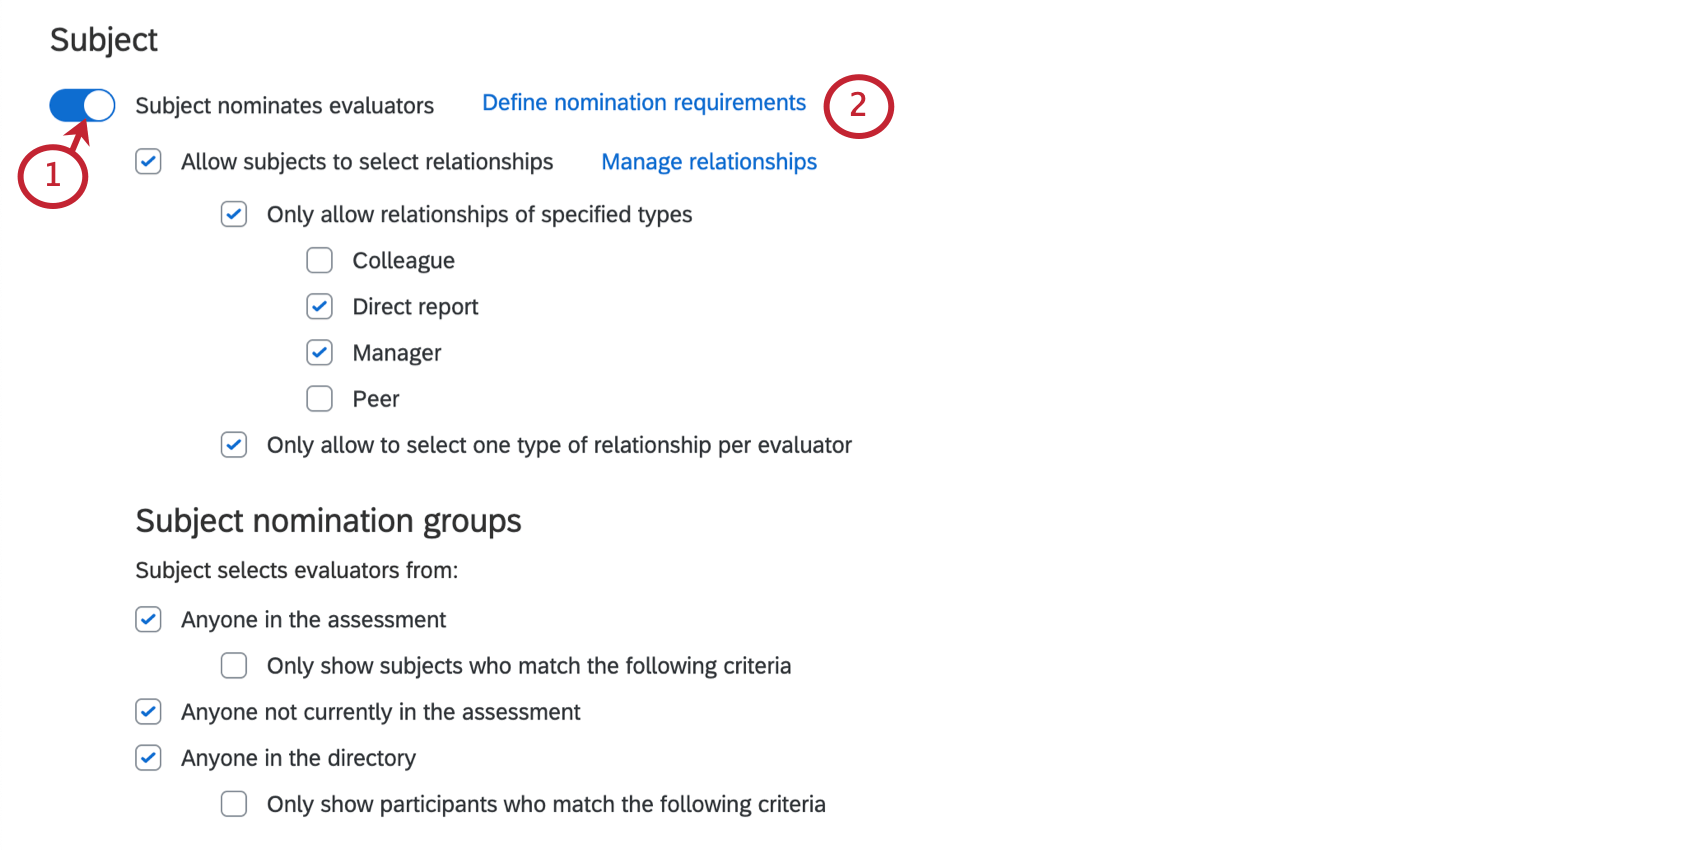
Subject nominates evaluators: Allows subjects to choose who their evaluators will be. If this setting is enabled, a number of options will appear so you can specify how subjects are allowed to nominate evaluators:
- Allow subjects to select relationships: This option allows subjects to set the relationships they share with their nominations. If this option is not selected, when the subject nominates an evaluator, the 360 project reads the relationship set between the two in the directory, leaving it blank if there is none. Click Manage Relationships to see the Manage Relationships window and edit your custom relationships.
- Only allow relationships of specified types: When you select this option, you can restrict what relationships a subject can choose from.
- Only allow to select one type of relationship per evaluator: When this option is not enabled, subjects can nominate the same person multiple times under different relationships. When enabled, this option will prevent subjects from nominating the same person to evaluate them again under a different relationship.
Subject nomination groups
Once “subject nominates evaluators” is enabled, you can specify that the subject selects evaluators from:
- Anyone in the assessment: Subjects may nominate anyone uploaded as a participant in the 360 project.
- Only show subjects who match the following criteria: Subjects may nominate anyone uploaded as a participant in the 360 project, provided they match certain metadata values.
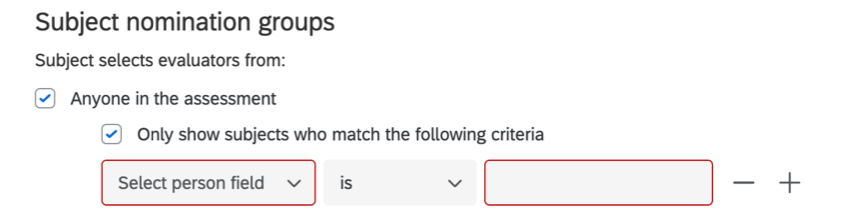
- Only show subjects who match the following criteria: Subjects may nominate anyone uploaded as a participant in the 360 project, provided they match certain metadata values.
- Anyone not currently in the assessment: Can only choose people not in the assessment. Note that this means subjects can type in any email address to invite them to the assessment, and that these evaluators will then be added to your directory. There is also the likelihood that duplicates will be added, since subjects cannot specify a unique identifier with the evaluator they upload. We generally recommend not using this option if you can instead upload all eligible employees to the directory and thus enable the Anyone in the directory option.
Attention: Brands with SSO should not use this option. Any evaluators subjects add from outside the directory will not have the SSO login enabled.
- Anyone in the directory: Subjects may nominate anyone saved in the directory.
Attention: The Anyone in the directory option will only appear in the Subject Options if the Admin User has the Access Directories permission enabled.
- Only show participants who match the following criteria: Subjects may nominate anyone uploaded to the directory, provided they match certain metadata or email address values.
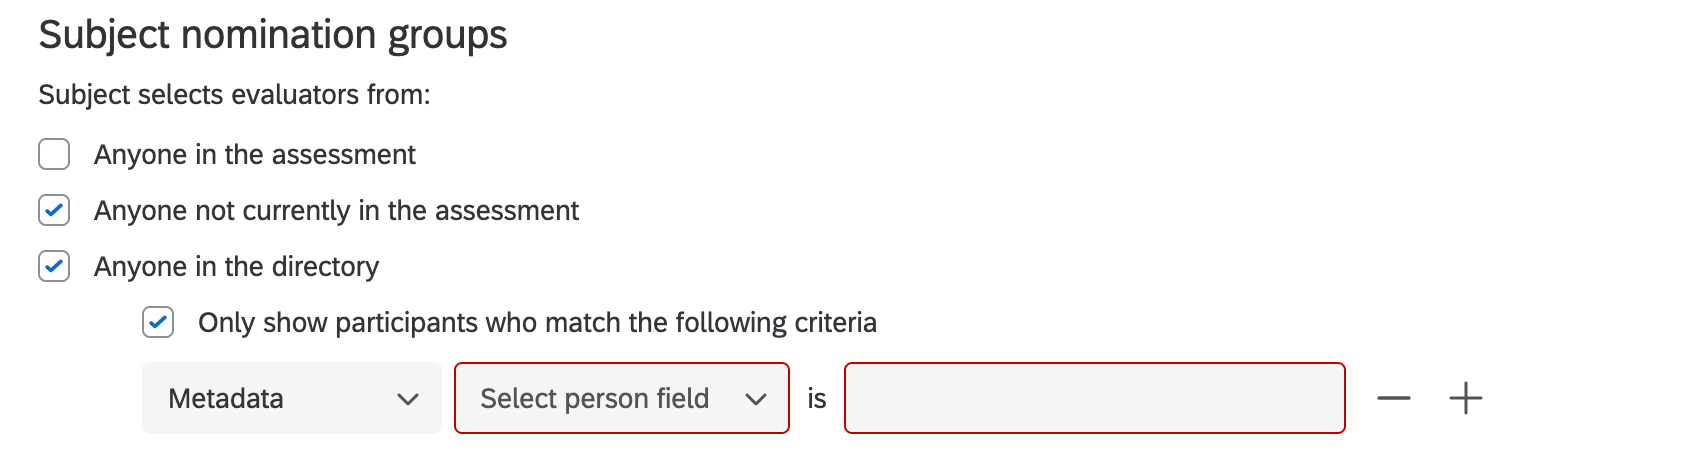
- Only show participants who match the following criteria: Subjects may nominate anyone uploaded to the directory, provided they match certain metadata or email address values.
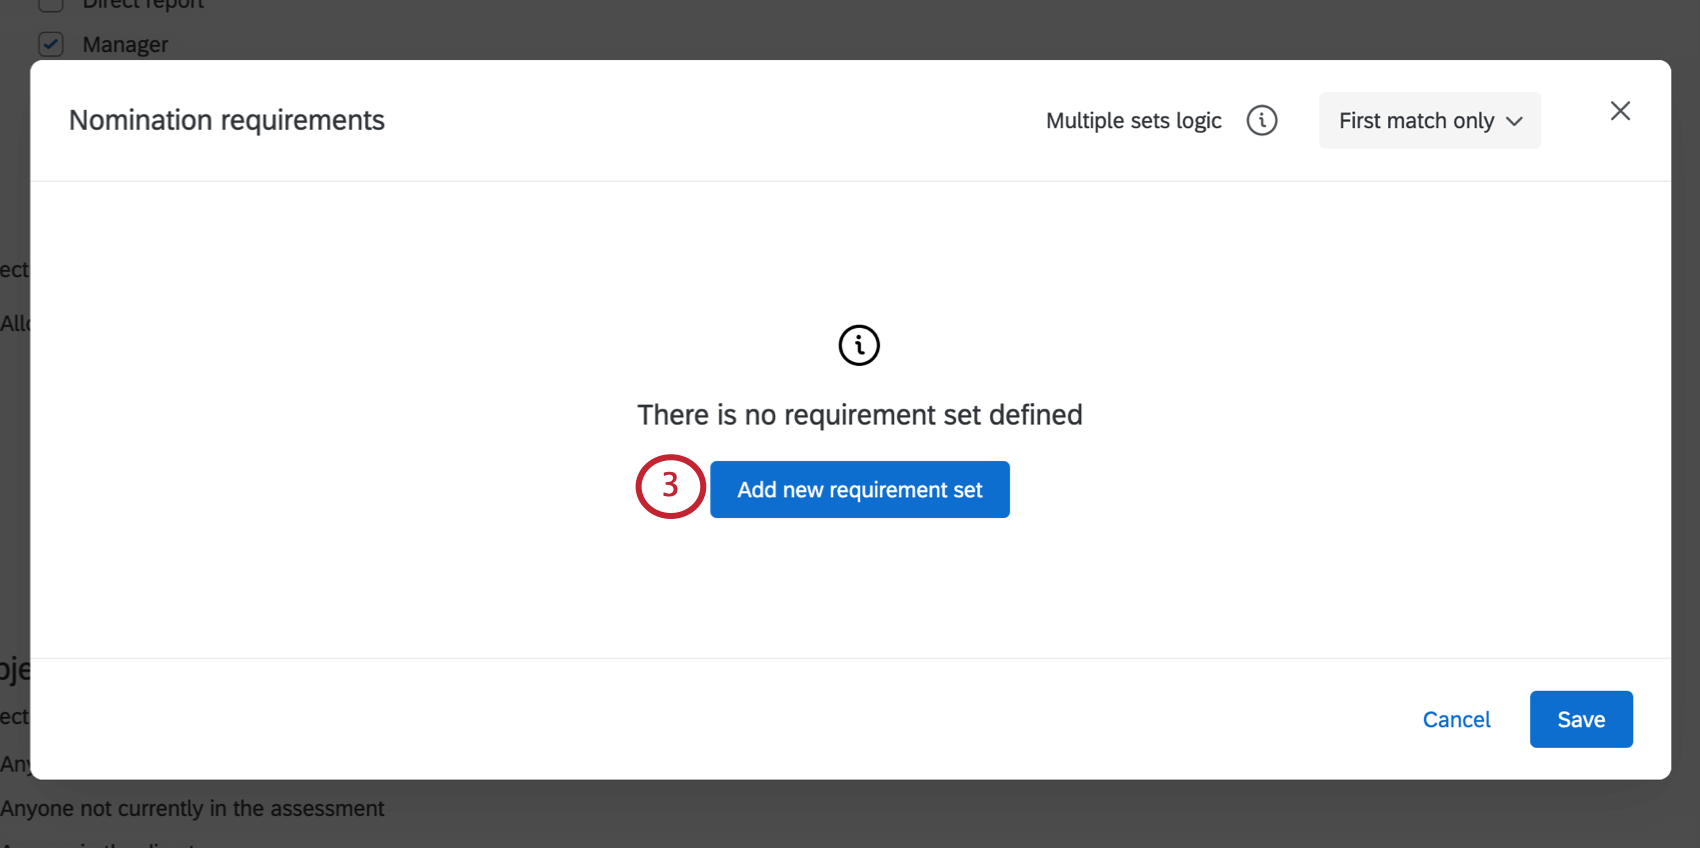
Define Nomination Requirements
You can specify how many evaluators of each relationship a subject can nominate.
- Enable Subject nominates evaluators.
- Click Define nomination requirements.
- Click Add new requirement set.
- If desired, name these nomination requirements. Only those who can edit the 360 project will see this name.
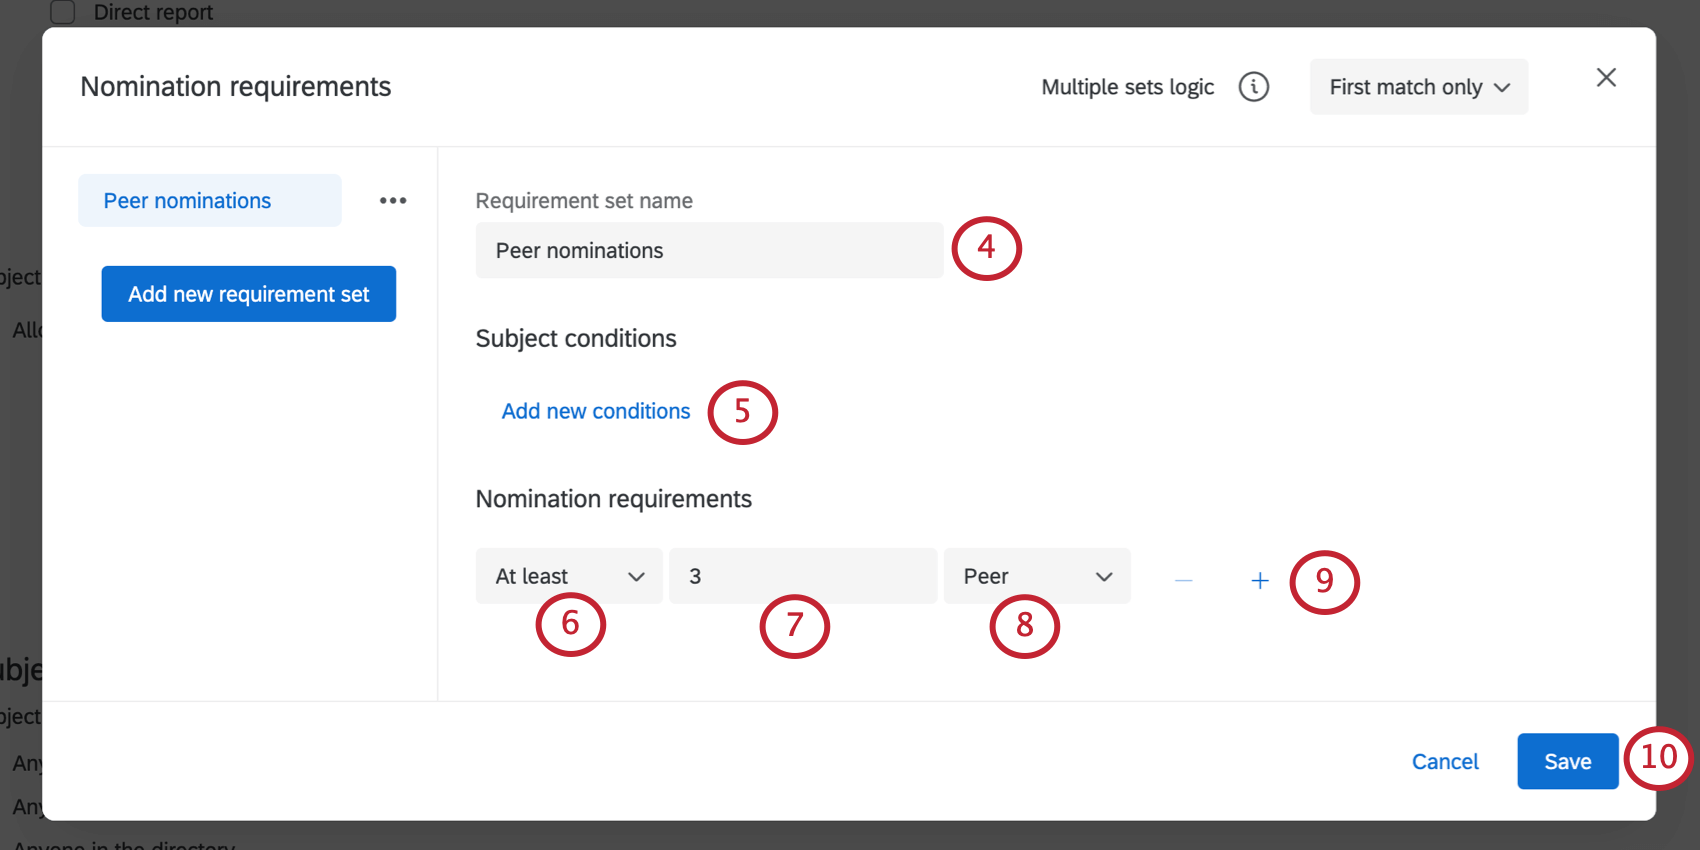
- If these conditions should apply to all subjects, skip this step. Otherwise, you can click Add new conditions and restrict which subjects are affected using metadata.
- Choose a qualifier for the number of evaluators.
- Choose a number of evaluators.
- Choose a relationship.
- If desired, add or remove conditions by using the plus ( + ) and minus ( – ) signs, respectively.
- Click Save.
More Options for Nomination Requirements
There are a few more options you have for defining nomination requirements.
For example, if you create multiple sets of requirements, you can then determine that subjects don’t have to complete all of them, just the first one they meet the requirements for.
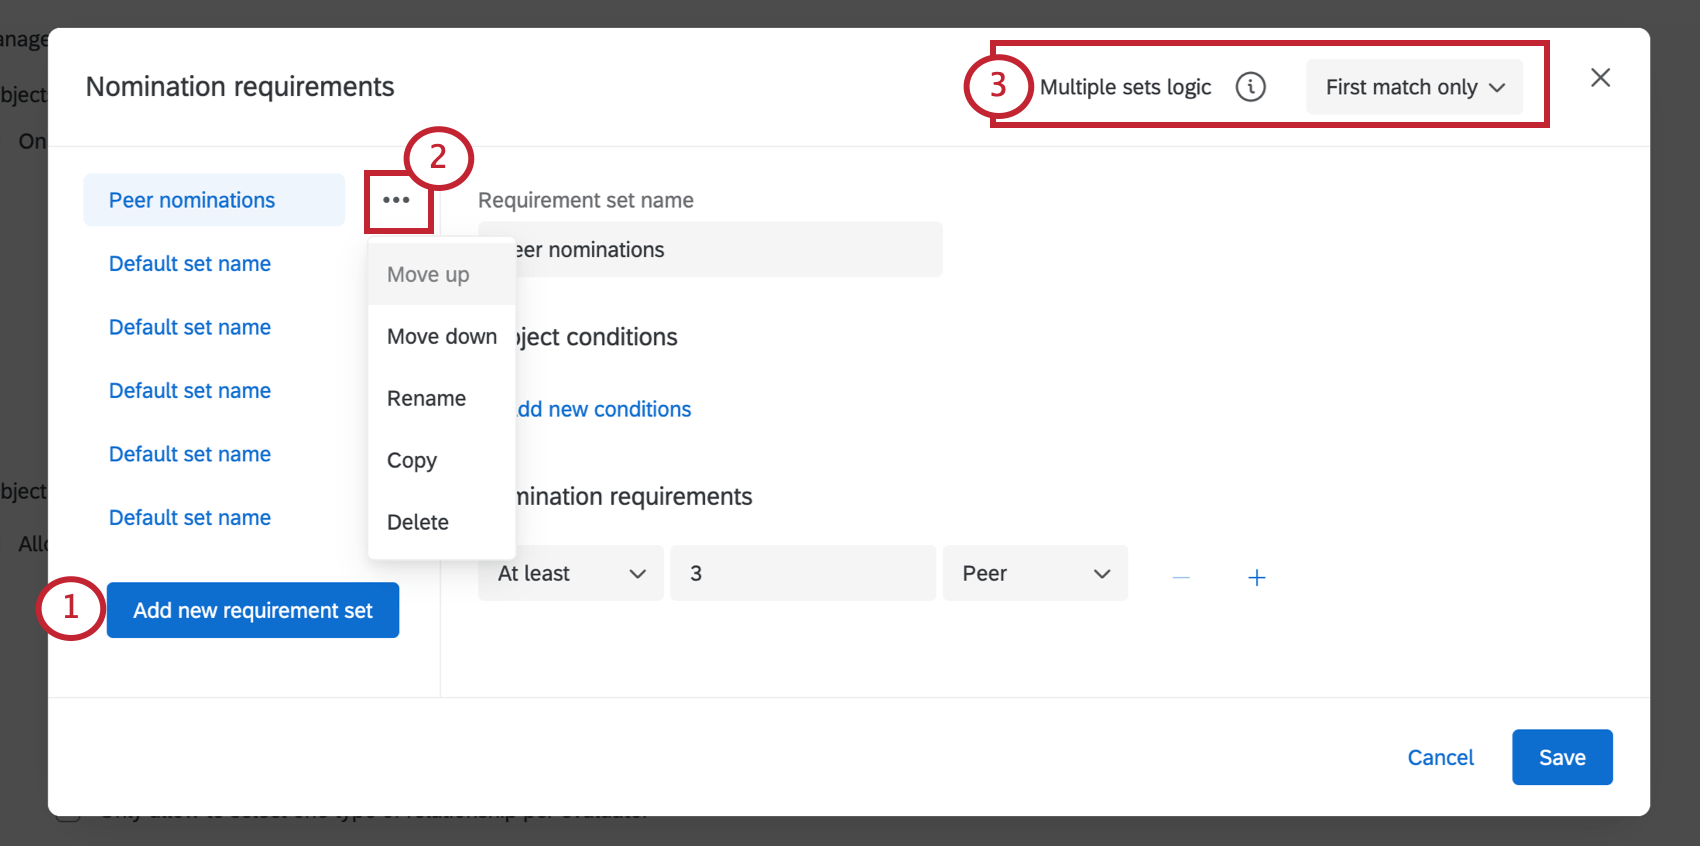
- Click Add new Requirement Set to add any additional requirement sets you want.
- Click the dropdown next to a requirement set to move it up, move it down, rename, copy, or delete it as needed.
- Use the Multiple sets logic dropdown to determine which requirements subjects have to meet. First Match Only means that the subject will be considered done nominating when they meet the requirements of at least one set. All Matching Sets means the subject will have to meet the requirements of all sets before they are considered done nominating.