-

Qualtrics Platform -

Customer Journey Optimizer -

XM Discover -

Qualtrics Social Connect
Creating & Managing Users
About Creating & Managing Users
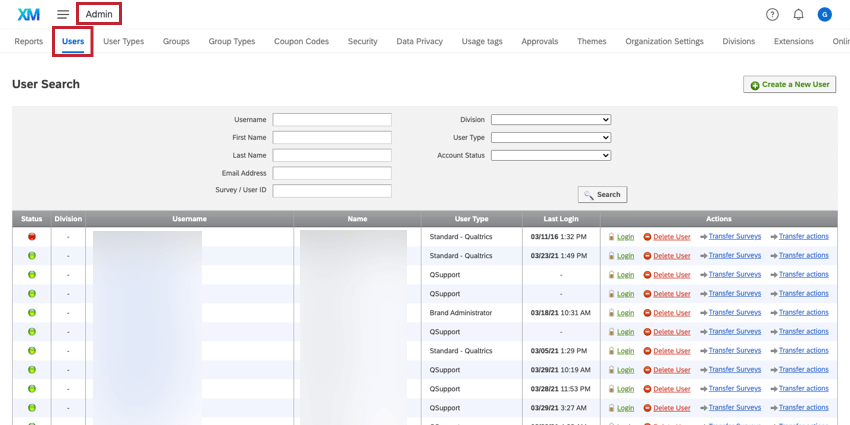
As a Brand Administrator, you are able to create new user accounts for your license in the Users tab of the Admin page. You can also edit account permissions, log into accounts, send password reset emails, delete users, transfer survey ownership, and more. This page will discuss the options available for creating and managing user accounts within your license.
Creating New Users
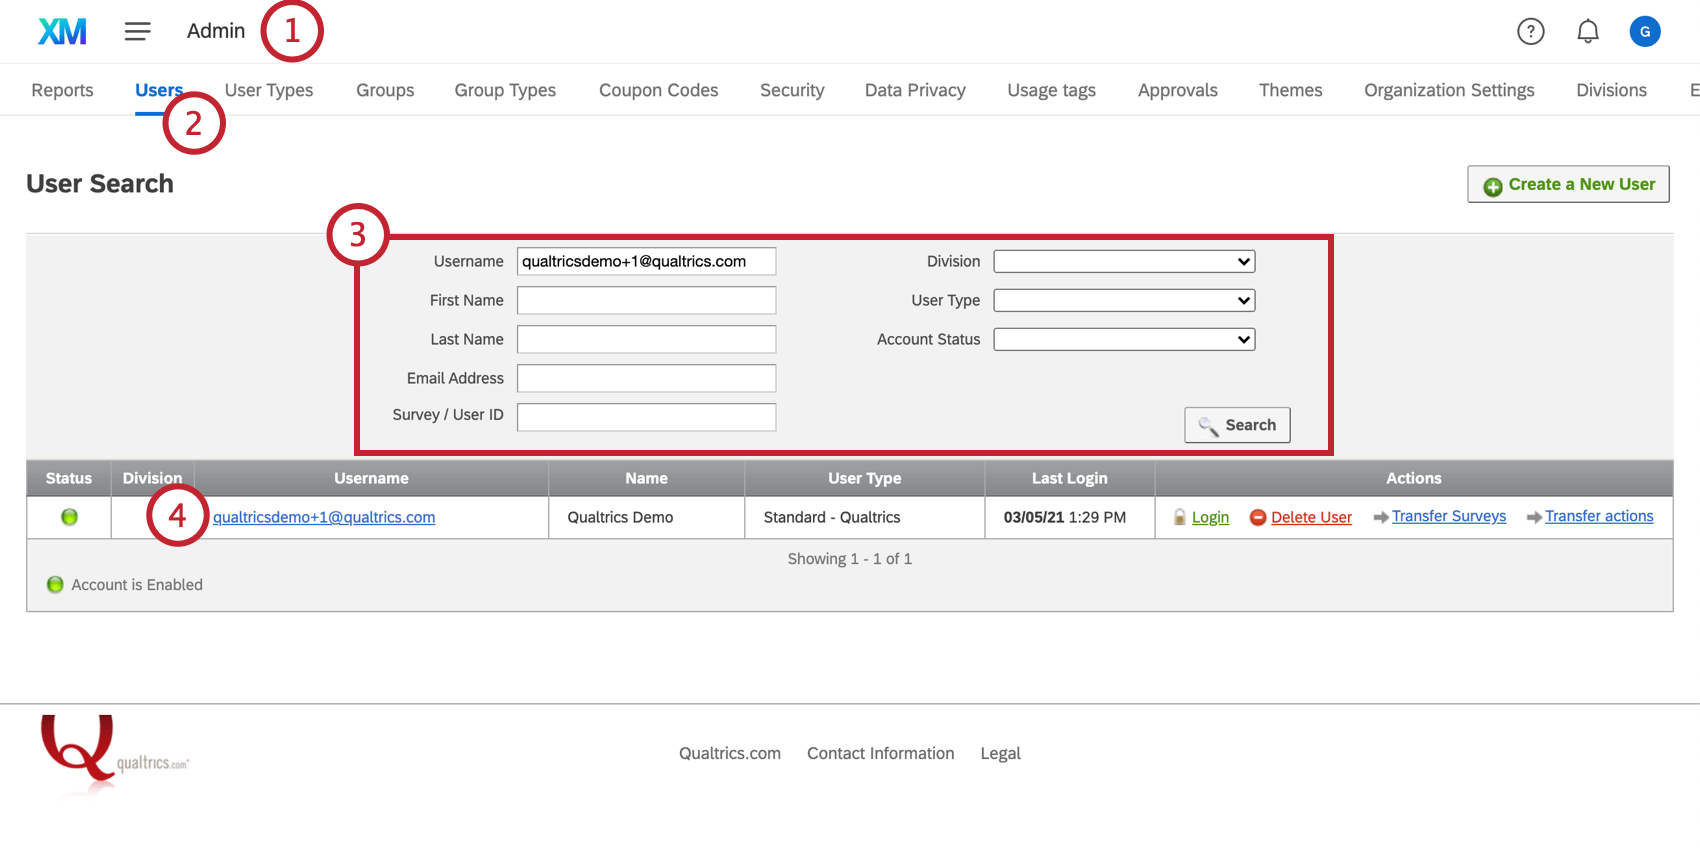
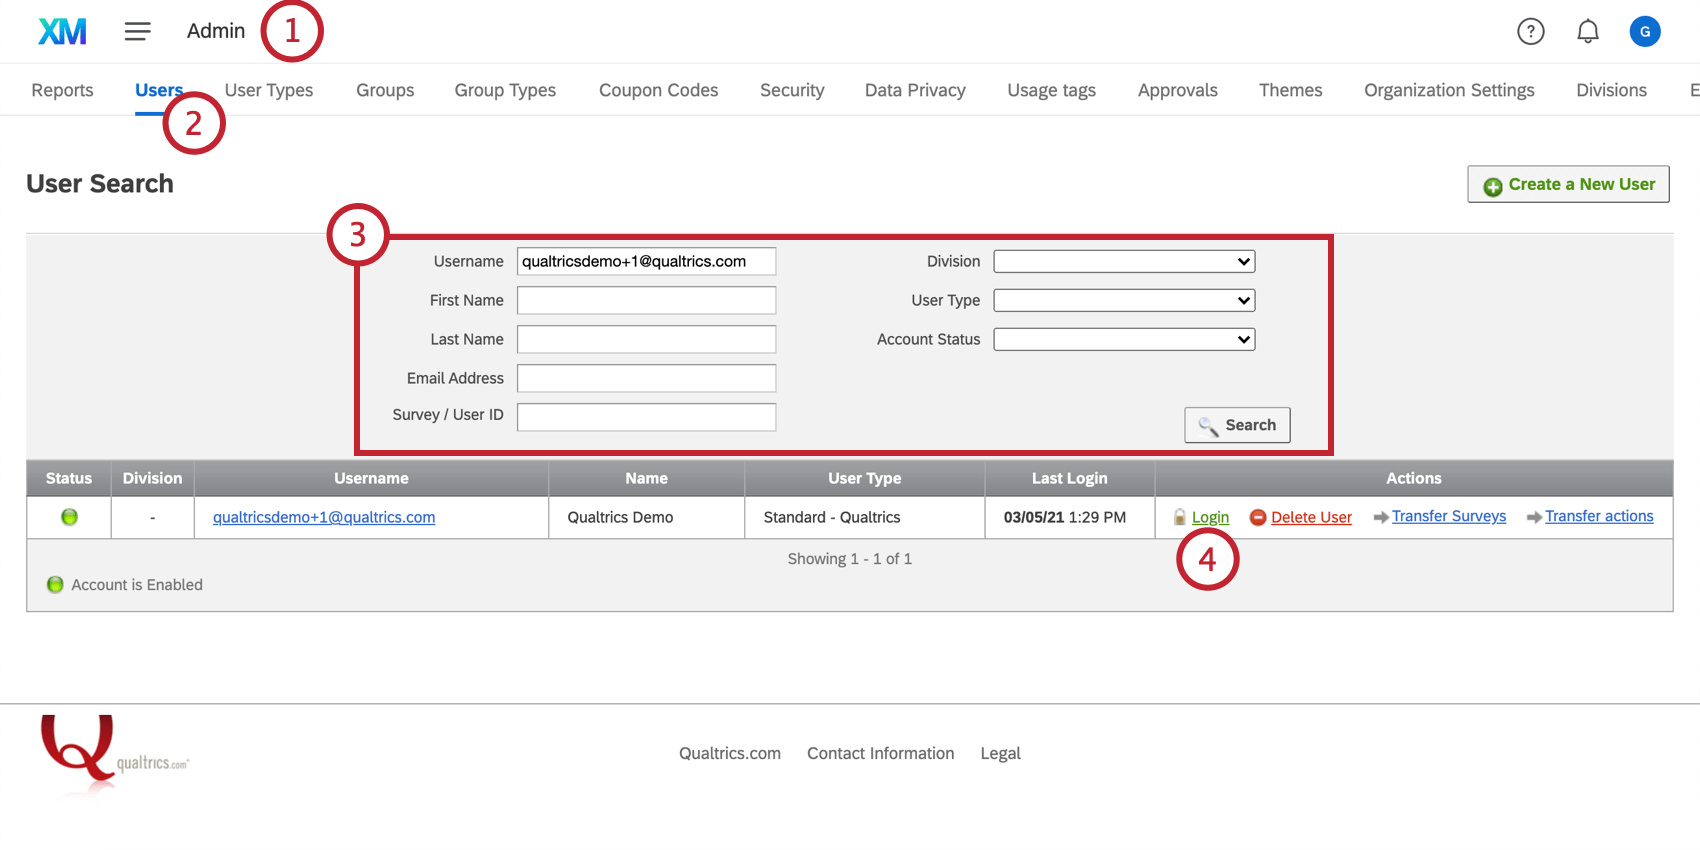
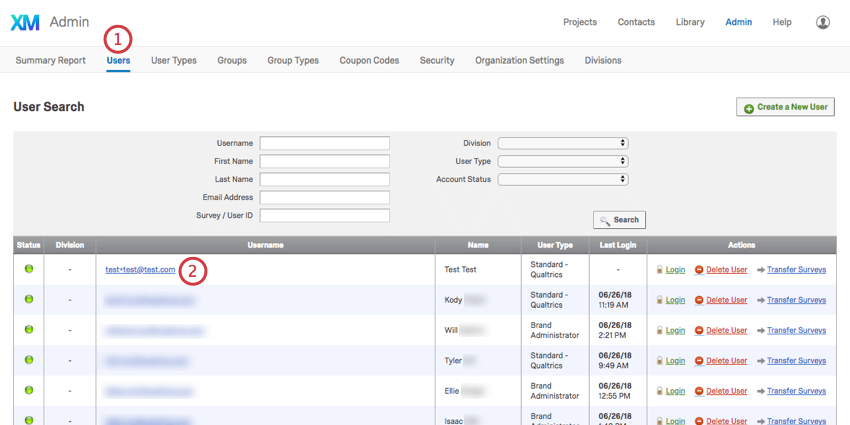
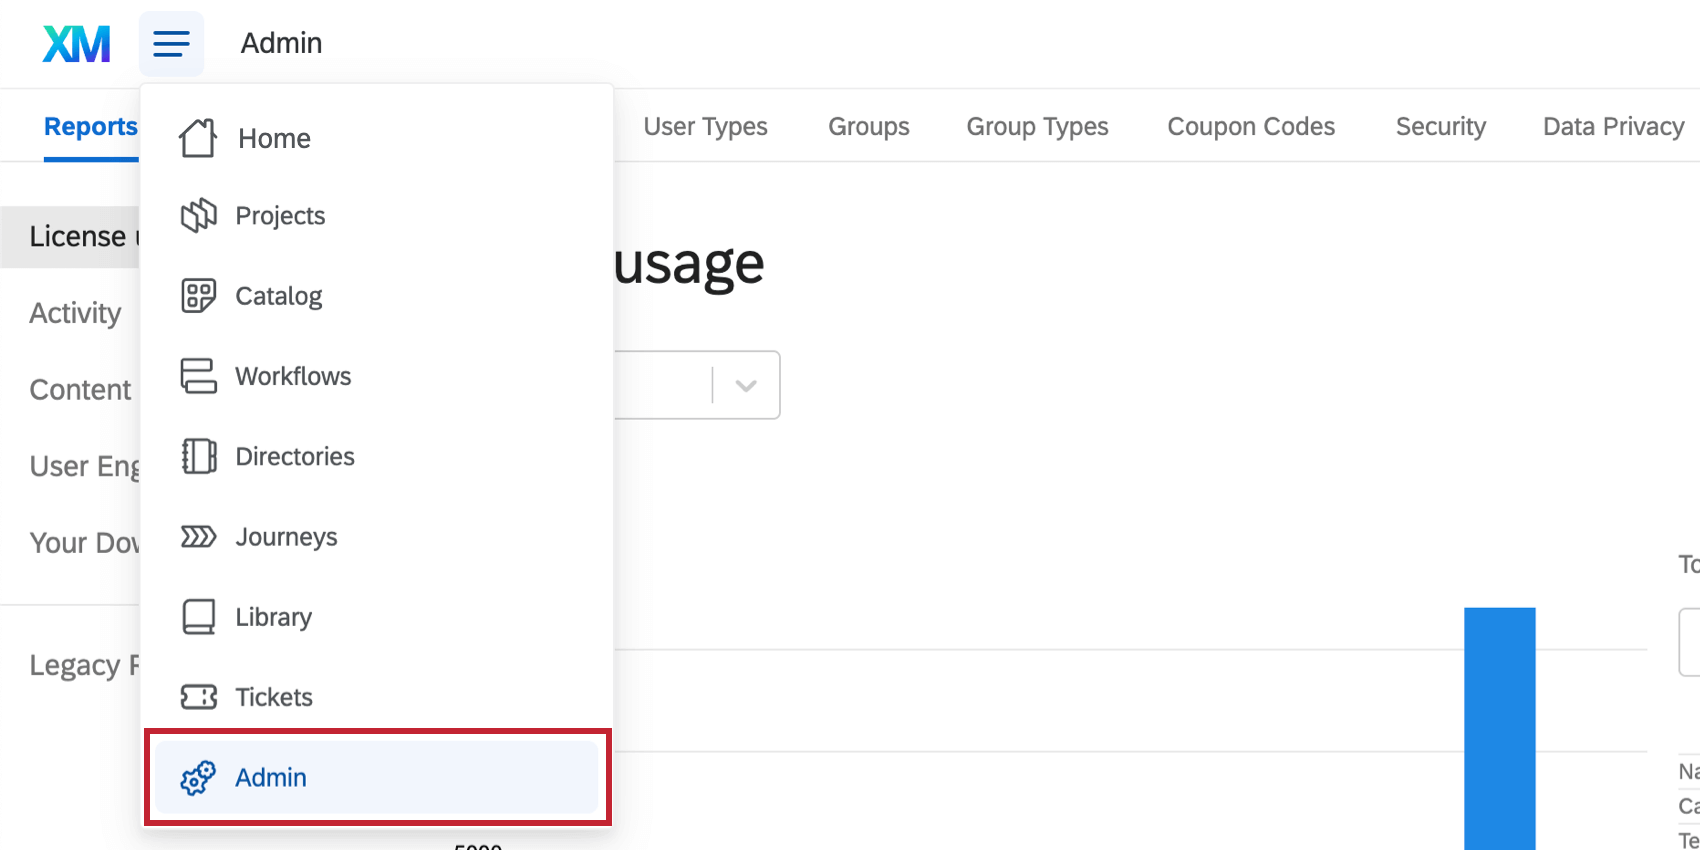
- Navigate to the Admin page.
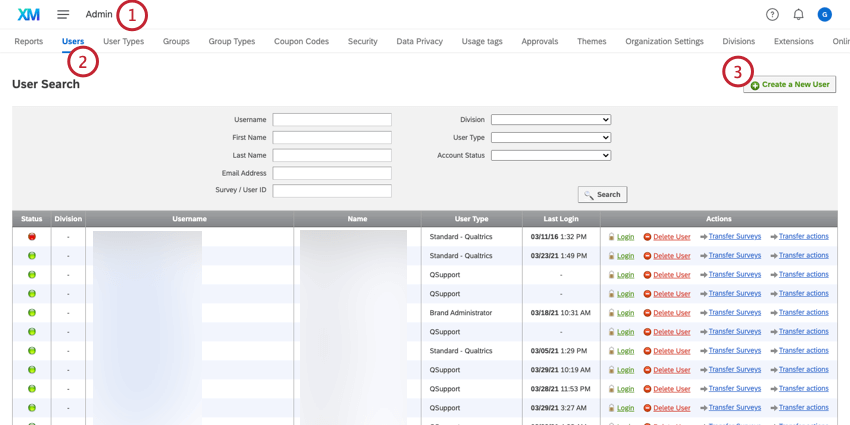
- Select Users.
- Click Create a New User.
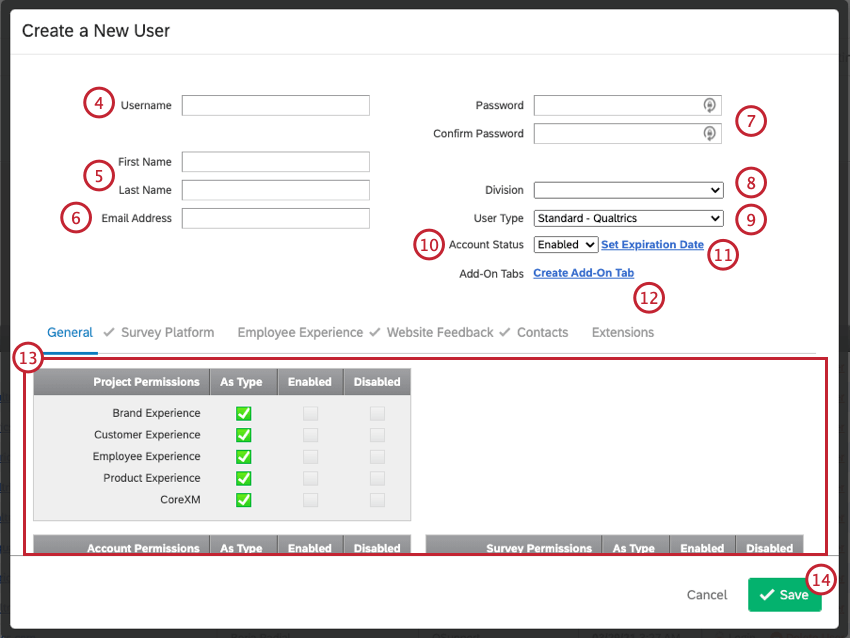
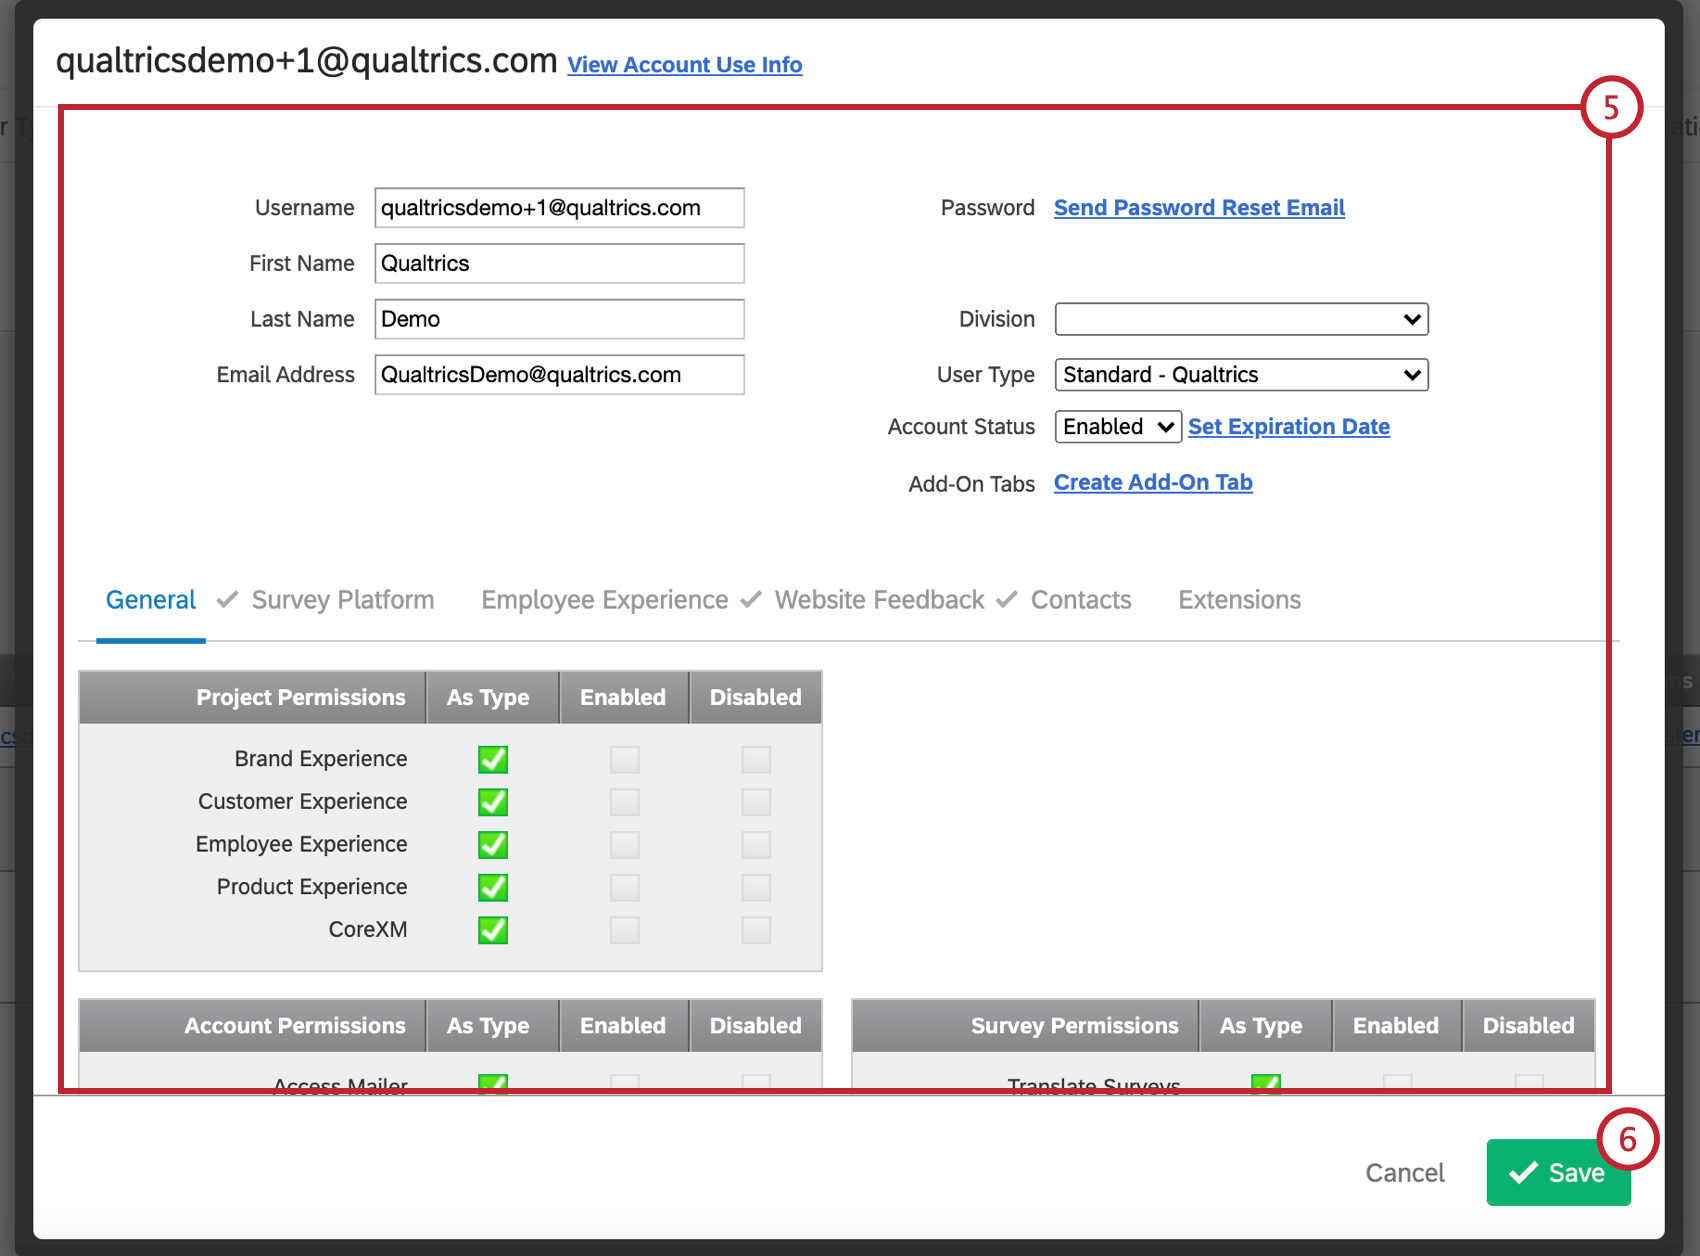
- Enter the Username. This must be in the form of an email address, but it doesn’t have to be a functioning email address. You should not use the same username as an existing account in any Qualtrics brand.
 Example: Joel already had a Qualtrics account at his old company, so he can’t use his email address, joel@demo.com, for his new account’s username. However, even though neither is his real email address, he can have joel+1@demo.com or joel+newcompany@demo.com as his username.Qtip: You will not be able to create a new user with an existing username, with one exception: if the username was uploaded as a 360 or Engagement participant in the past, you can create a standard Qualtrics account with the same name. In this event, the newly created account will require the user to select their brand (Qualtrics license) from a dropdown whenever they log in, to determine which account they want to access. This is the only difference, and the accounts will otherwise function as normal once logged in; however, if you want to eliminate this behavior, the user can reach out to Qualtrics Support to have their 360 / Engagement participant username changed.
Qtip: Here is a list of common symbols that are incompatible with usernames and user fields:
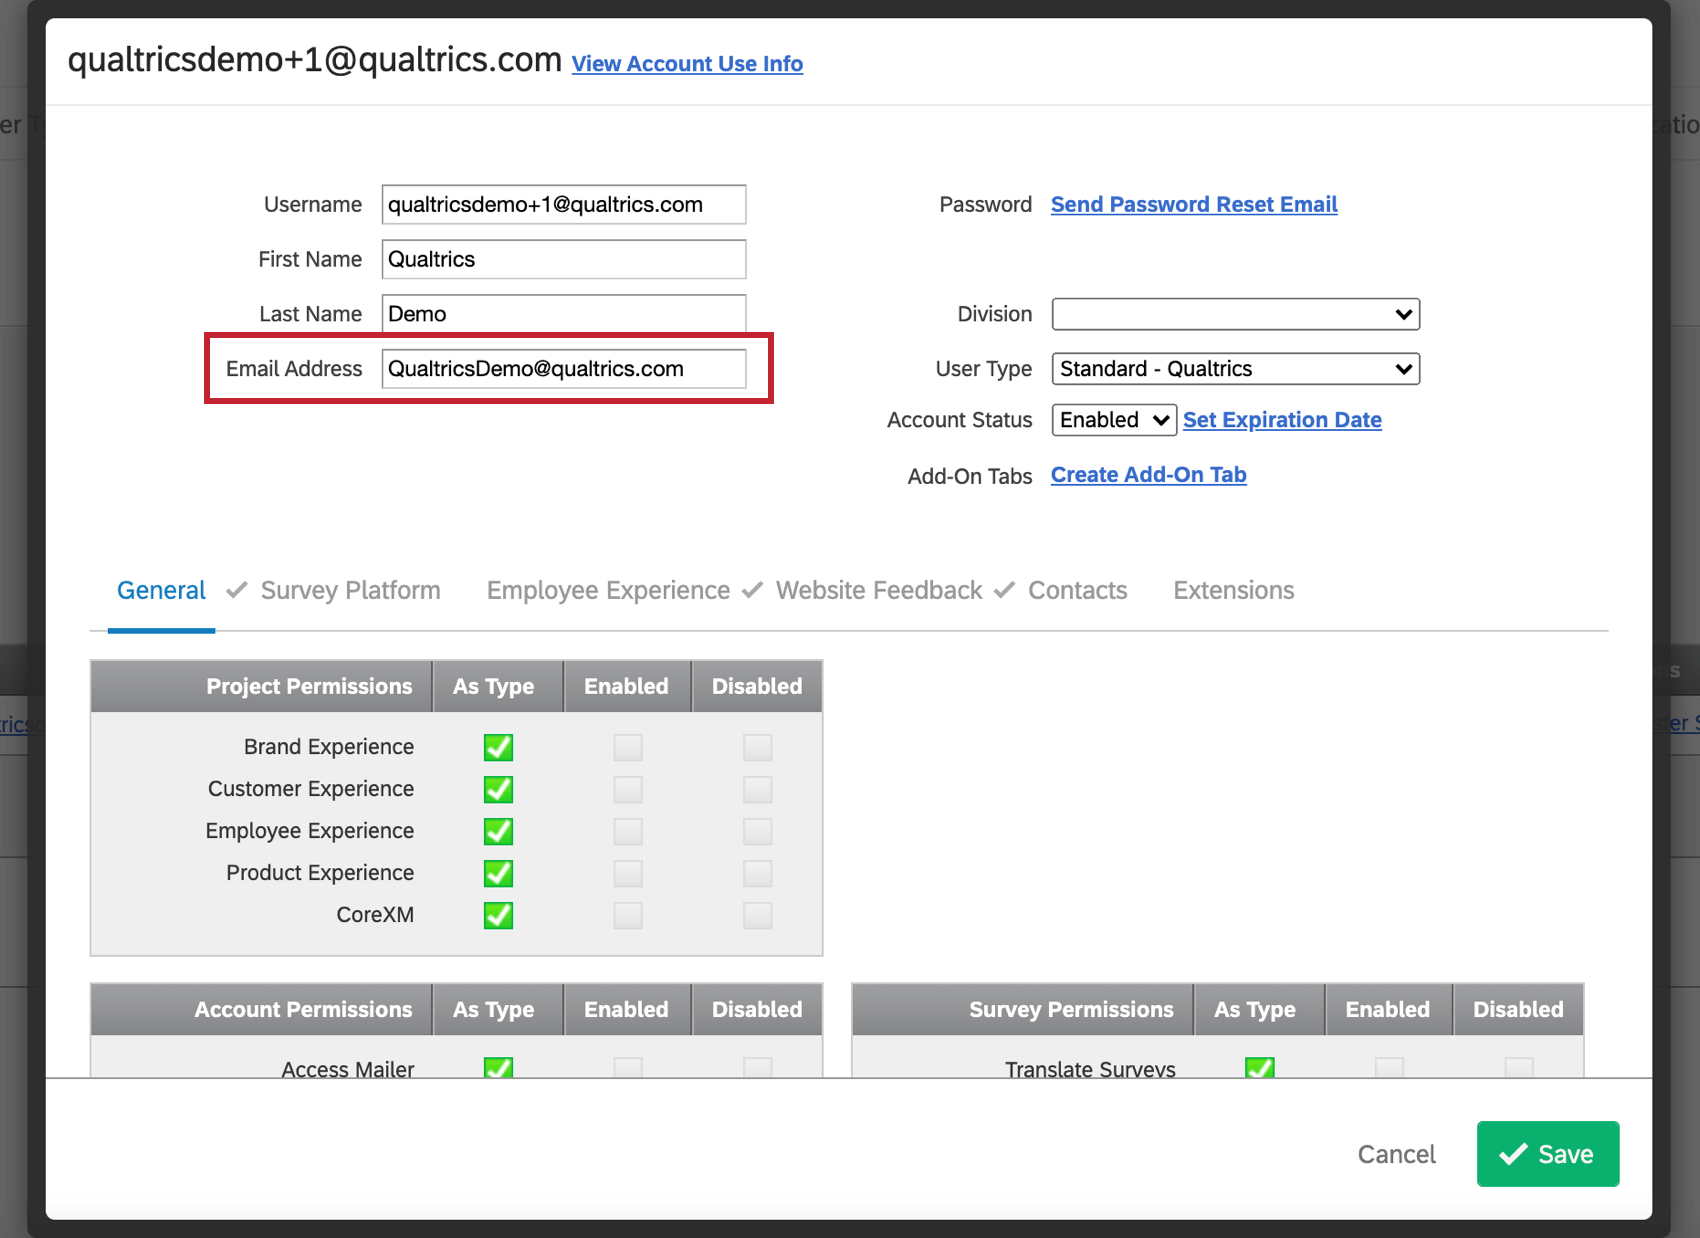
=;~!&*%{}<>[]|\"\\^ - Enter the First Name and Last Name.
- Enter the Email Address.
Qtip: The email address can be any functioning email address, even if it’s been used on a previous Qualtrics account. Please make sure this email address is accurate, because this is how users send themselves password resets and receive collaboration invites from colleagues.
- Enter a Password for your new user. Enter the same one in the Confirm Password field.
Qtip: Brand Administrators may want to set brand-wide requirements for user passwords. For standard licenses, see the Organization Settings Tab. For licenses with upgraded security standards, see the Security Tab.
- If desired, set a Division. Divisions are useful for determining administrative subdivisions of a license.
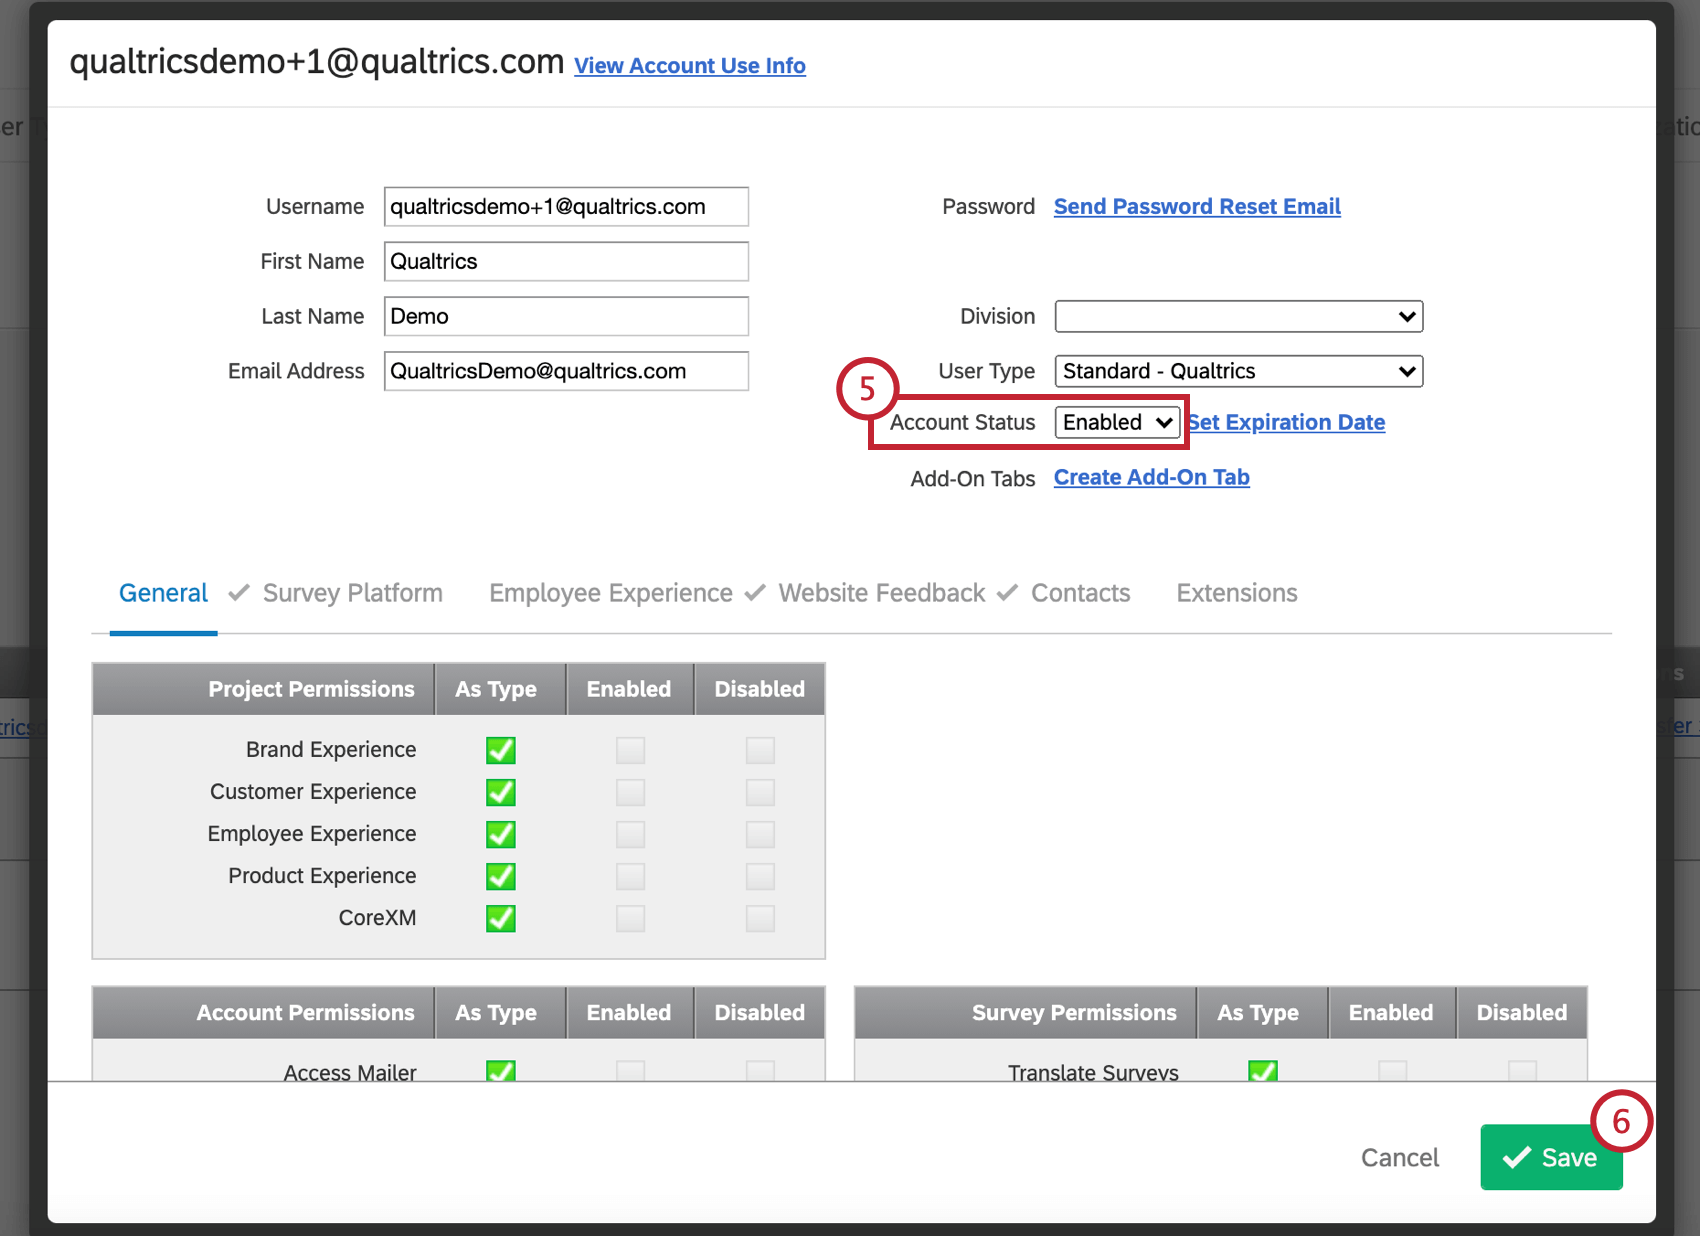
- If desired, set a User Type. This determines what permissions the user starts out with.
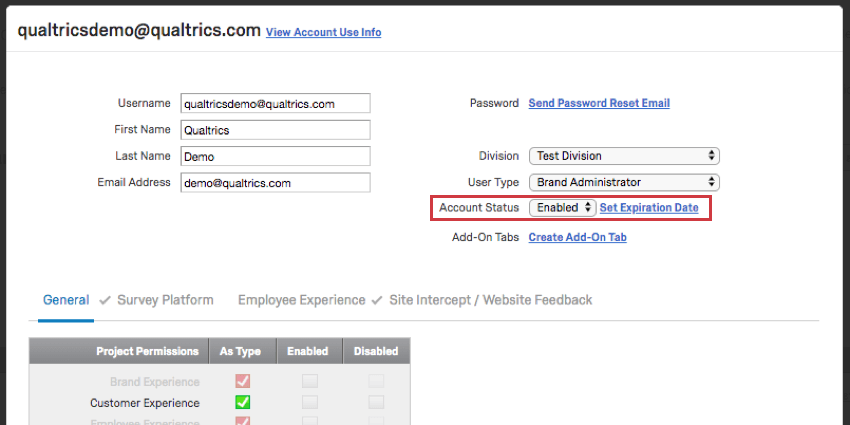
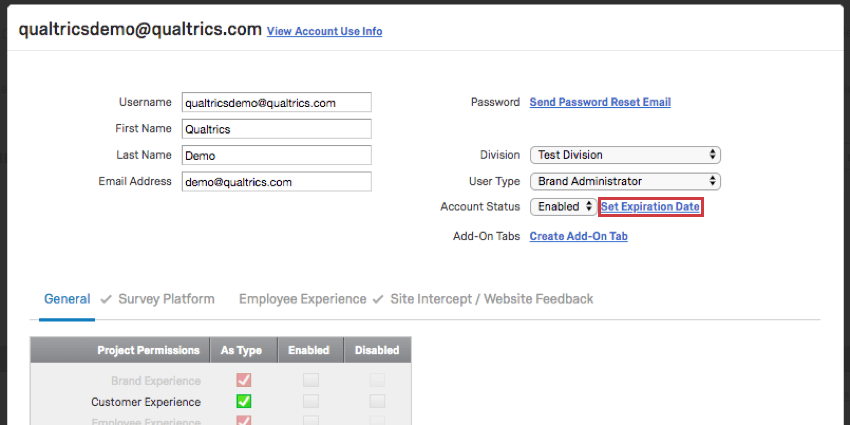
- Set an account status. Generally, this should be Enabled.
Qtip: Learn more in the Account Status and Expiration section.
- If you would like, you may also choose Set Expiration Date to specify a date when the user’s account should expire.
Qtip: Learn more in the Account Status and Expiration section.
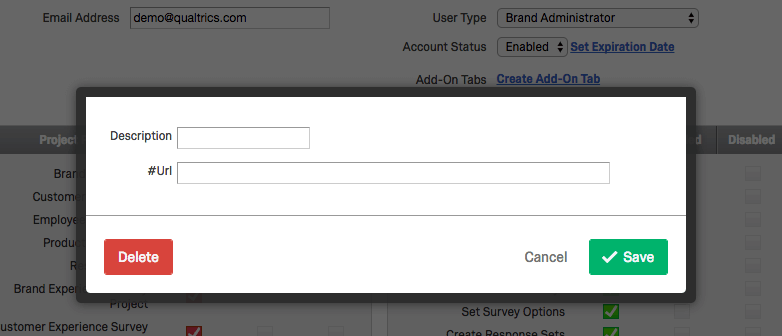
- If desired, select Create Add-On Tab if you would like an Add-On page to appear to the left of the Help page in the upper-right corner of the user’s account.
Qtip: An Add-On page allows you to create an additional page in the user’s account that will contain pages that present information from whatever URL you would like. Simply specify a Description and a URL for a page to be added. To delete a page, click on the name and select Delete. You will be able to add multiple pages by selecting Create Add-On Tab as many times as you would like. This could be used to present a guidelines page to your users, for example.
- Click the checkboxes to customize the account’s permissions.
Qtip: Clicking the checkbox under Enabled will enable the permission for the user, whereas clicking the checkbox under Disabled will disable the permission. We recommend creating a new User Type if you find yourself editing many accounts to have the same customized permissions.
- Click Save.
Self-Enrollment
Creating new user accounts manually may not be practical in larger licenses. If your organization has a custom branded login page, the self-enrollment feature can be enabled. If enabled, members of your organization will be able to go to your branded login page and create their own accounts.
A branded login page is when your organization has its own special link where they sign into or up with Qualtrics. For example, State University could be at https://stateu.az1.qualtrics.com/, and put its logo at the top so students know they’re at the right place.
Managing Existing Users
As a Brand Administrator, you can manage an existing user’s account. Managing user accounts can include activating surveys, changing ownership of projects, updating a user’s contact information, and modifying a user’s permissions.
- Navigate to the Admin page.
- Select Users.
- Search for the existing user by using any of the search criteria and filters.
- Click the username of the desired user account.
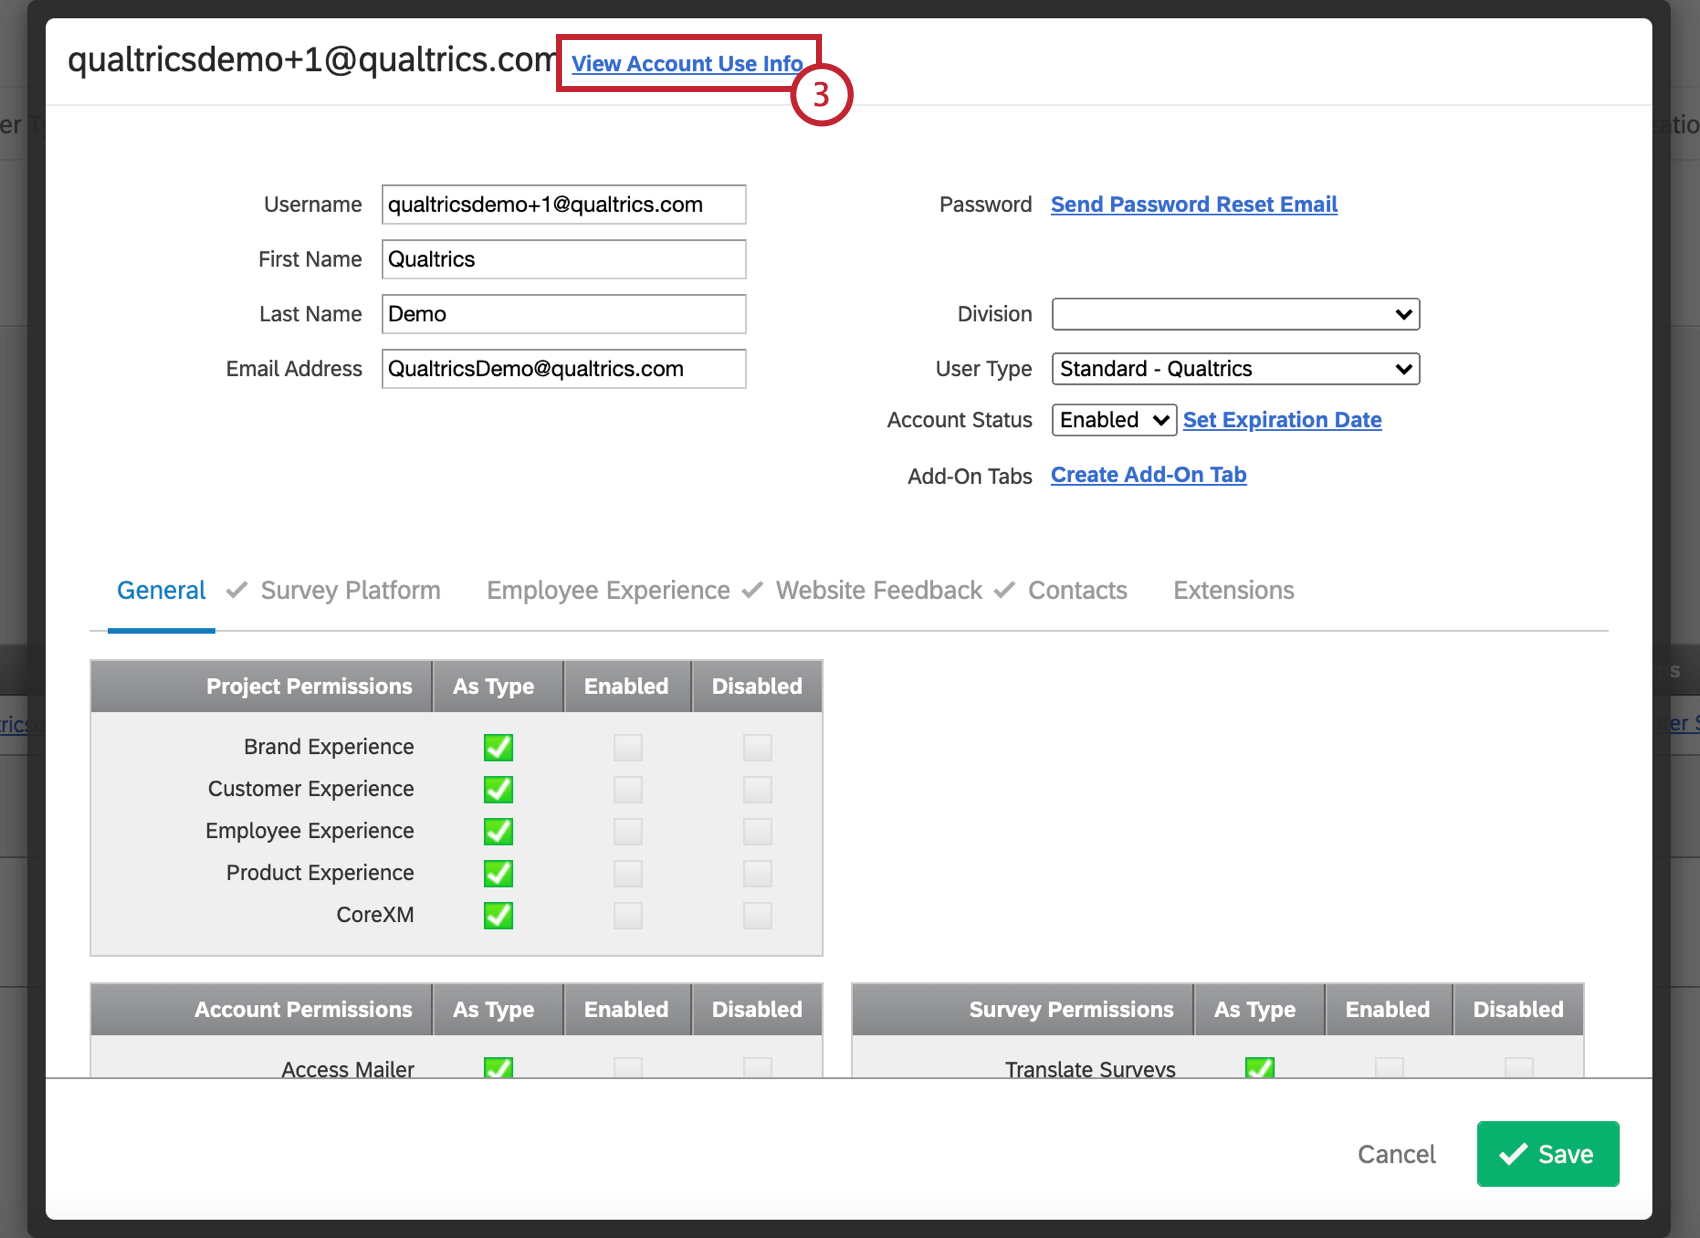
- Edit the user’s account. Learn more about these fields in the Creating New Users section.
- Click Save.
Searching for Existing Users
If you need to edit a specific user and have lots of people in your brand, don’t manually navigate through the list of users; make a search instead!
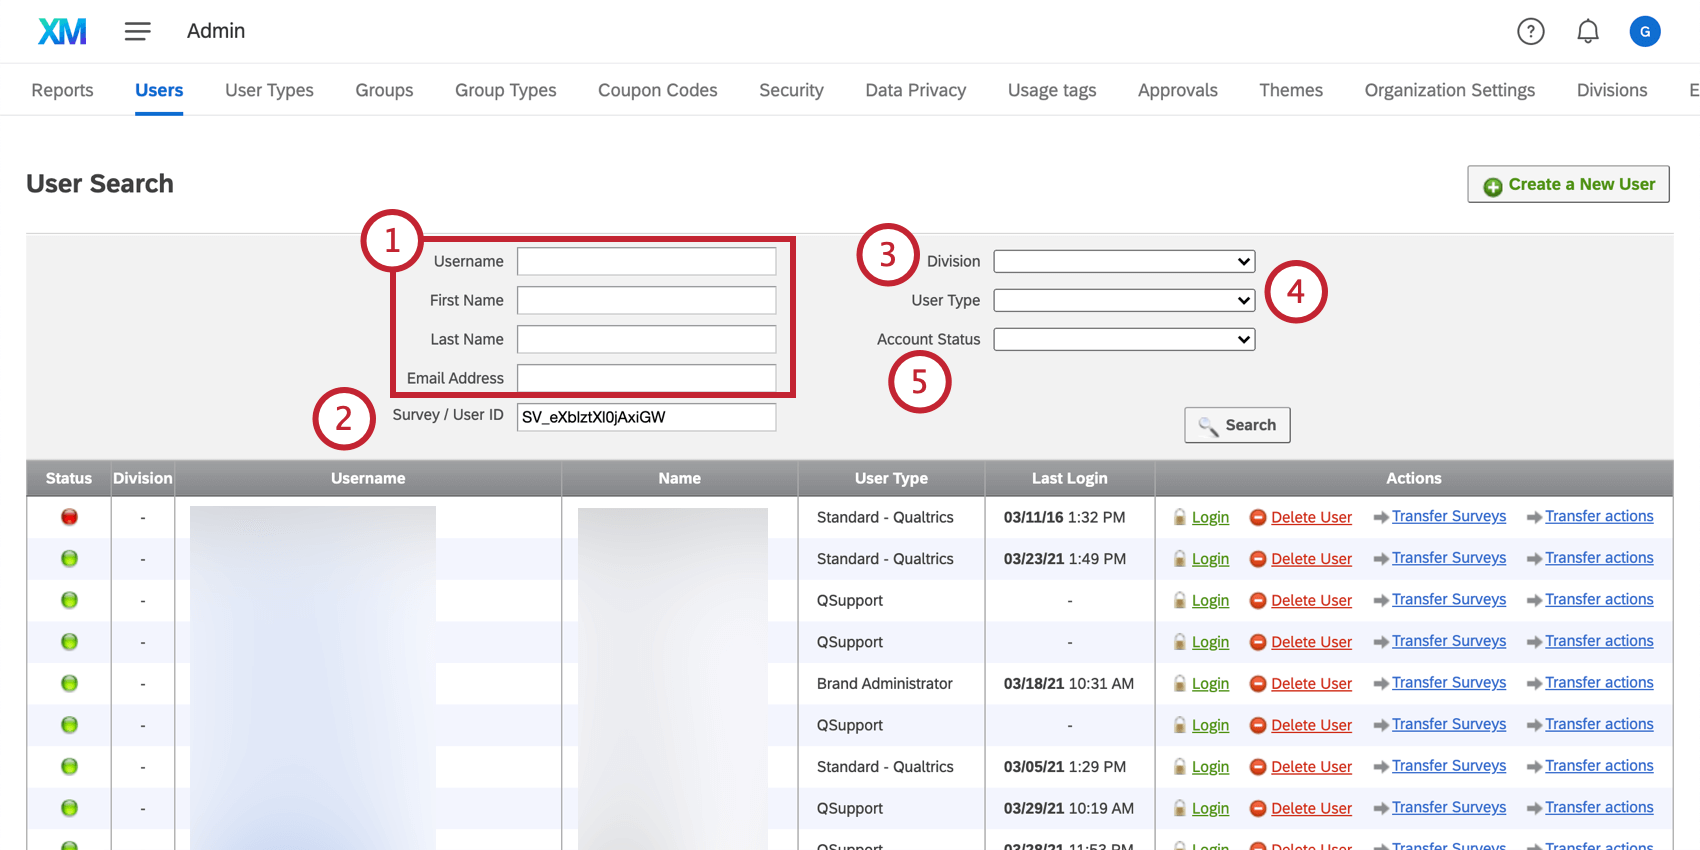
- Search by the username, first name, last name, or email address of the user. You don’t have to type the full value; for example, you can find anyone with “demo” in their username by searching “demo” in the username field.
Qtip: If you fill out multiple search fields, these values are joined by “and,” meaning results will match all criteria filled out. For example, you may have someone named “Brian” in your brand. You also have users with the last name “Smith.” If you search “Brian” under first name and “Smith” under last name, you will not find neither “Brian Washington” nor “John Smith” in your results.
- Search by a Qualtrics Survey ID or a User ID.
Qtip: When searching by survey ID or user ID, you cannot include other searched criteria. Any other fields you fill out will be ignored.
- Search by the Division the user belongs to.
- Search by the User Type the account has.
- Search by the Account Status.
Sending Password Reset Emails
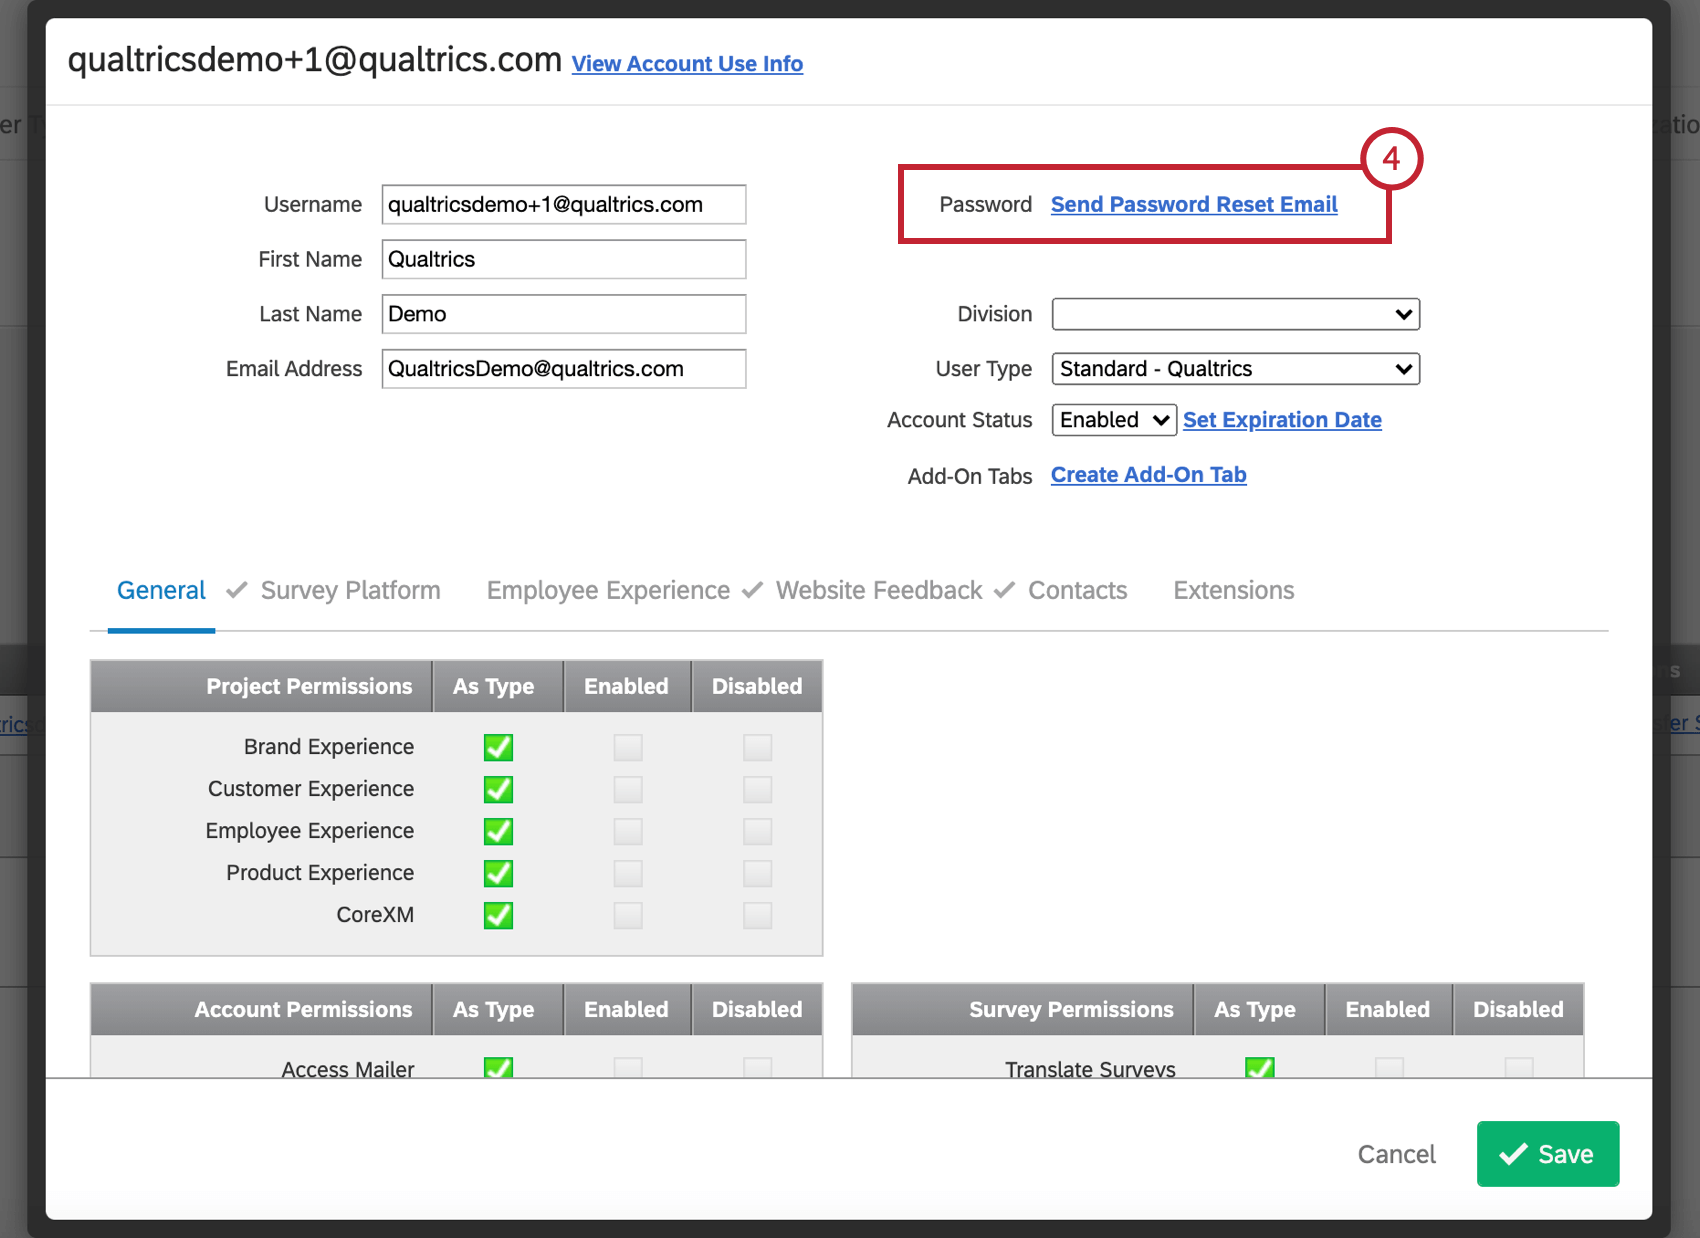
Sometimes users have trouble logging into Qualtrics. They can tell Qualtrics they forgot their password, which will send a secure email to the email address listed for their account. However, there may be times that the user can’t find this email in their inbox or junk folder. In that case, you can try sending a password reset to the user yourself.
- Go to the Users tab.
- Search for the user having trouble logging in.
- Click on the username.
- Click Send Password Reset Email.
Where Password Reset Emails are Sent
Password reset emails are sent to whatever is entered in the email field of a user’s account, not the username. It is important to double-check that what is in the email field for a user is a real, functioning email address. You cannot add multiple email addresses to this field.
Setting a Specific Password
When you first create an account, you can set a specific password for the user.
Once an account is created, you cannot set a specific password for that account anymore. This is to protect the user’s privacy and personal password preferences. If you have a user asking for a new password, send them a password reset email instead.
Transferring Survey Ownership
Sometimes collaboration isn’t enough – in the case where a user leaves an organization or a team, they may want to transfer the ownership of their survey to someone else. As an administrator, you can transfer ownership of one survey at a time, or all of a user’s surveys at once.
Transferring One Survey
- Navigate to the Admin page.
- Select Users.
- Search for the existing user by using any of the search criteria and filters (Username, First Name, Last Name, etc., as well as Division, User Type, and Account Status). You can use multiple criteria at once.
- Click the username of the desired user account.
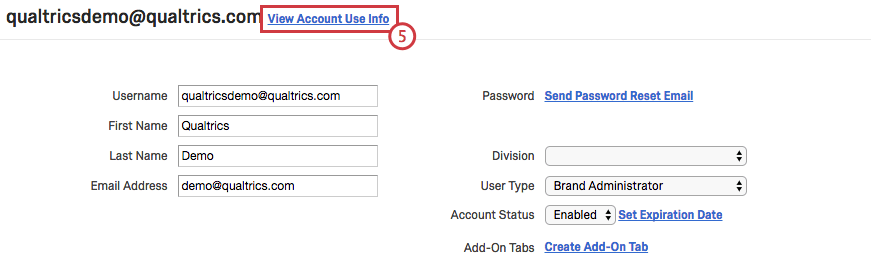
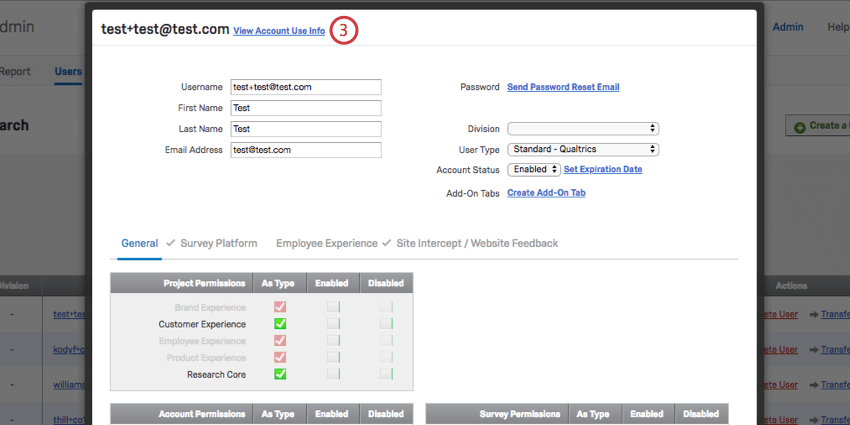
- Click View Account Use Info.
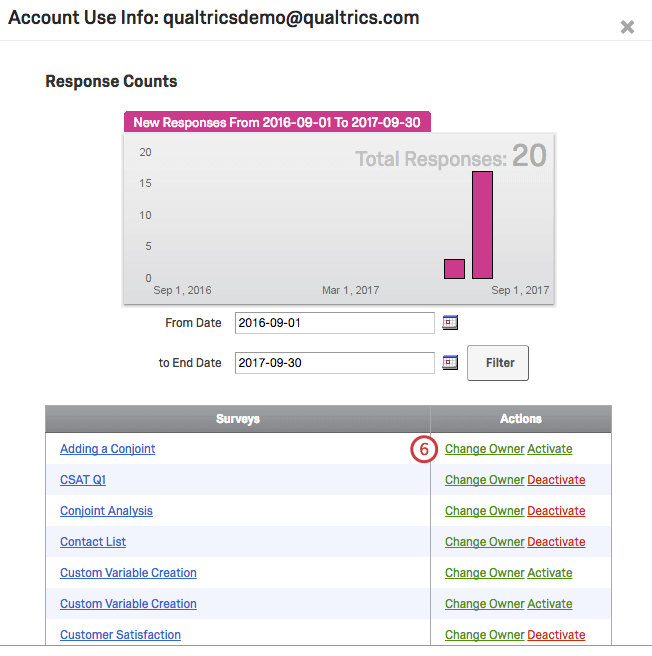
- Click Change Owner next to the desired project.
- Search for the User you would like to transfer the project ownership to.
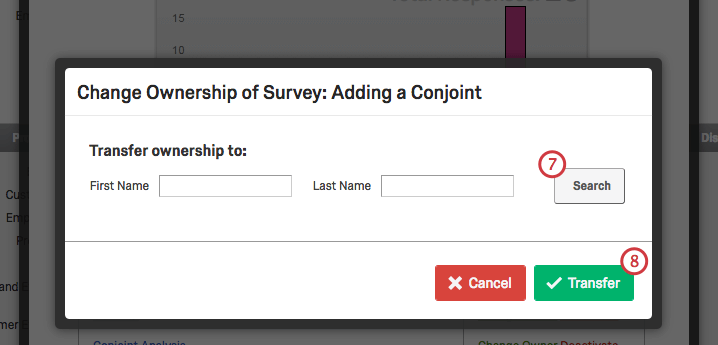
- Click Transfer.
Transferring Multiple Surveys
- Navigate to the Admin page.
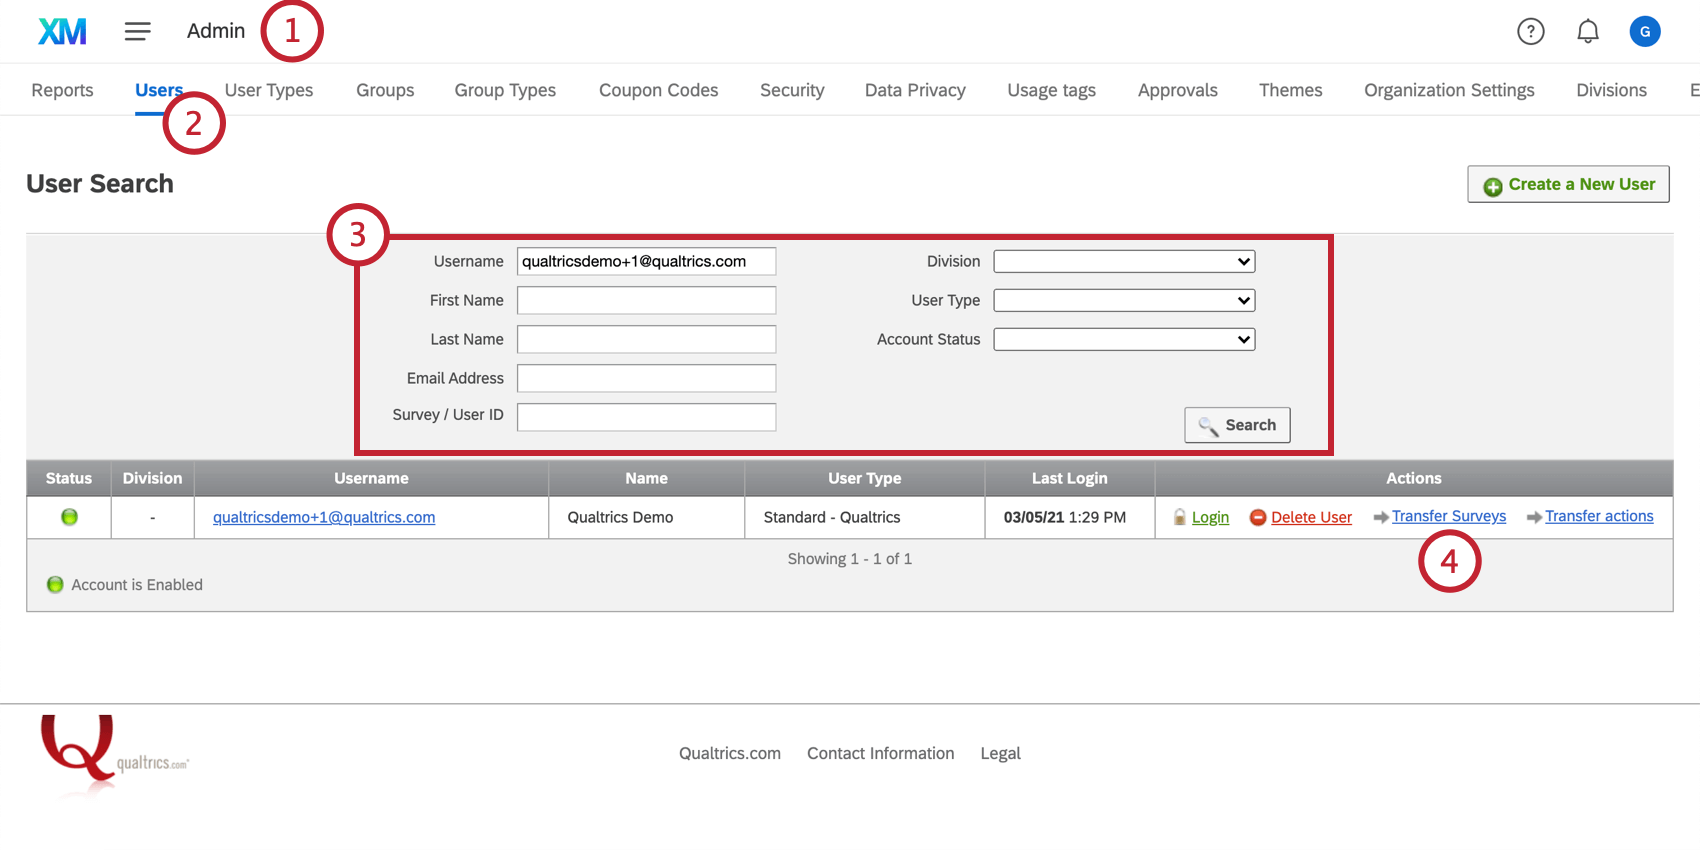
- Select Users.
- Search for the existing user by using any of the search criteria and filters (Username, First Name, Last Name, etc., as well as Division, User Type, and Account Status). You can use multiple criteria at once.
- To the far-right of the desired user, click Transfer Surveys.
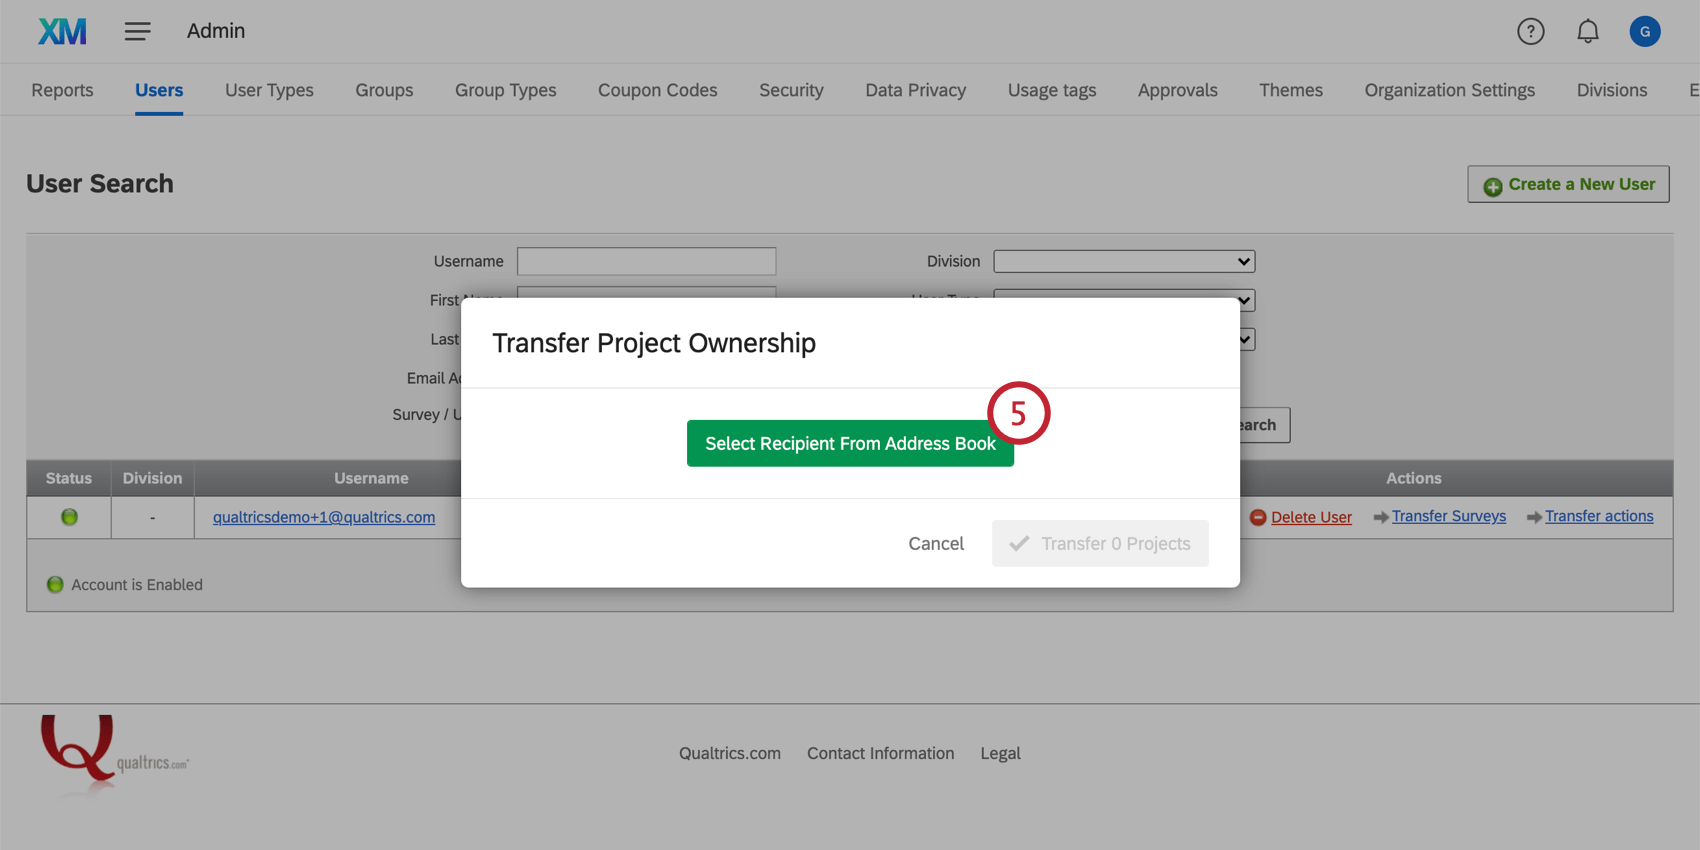
- Click Select Recipient From Address Book.
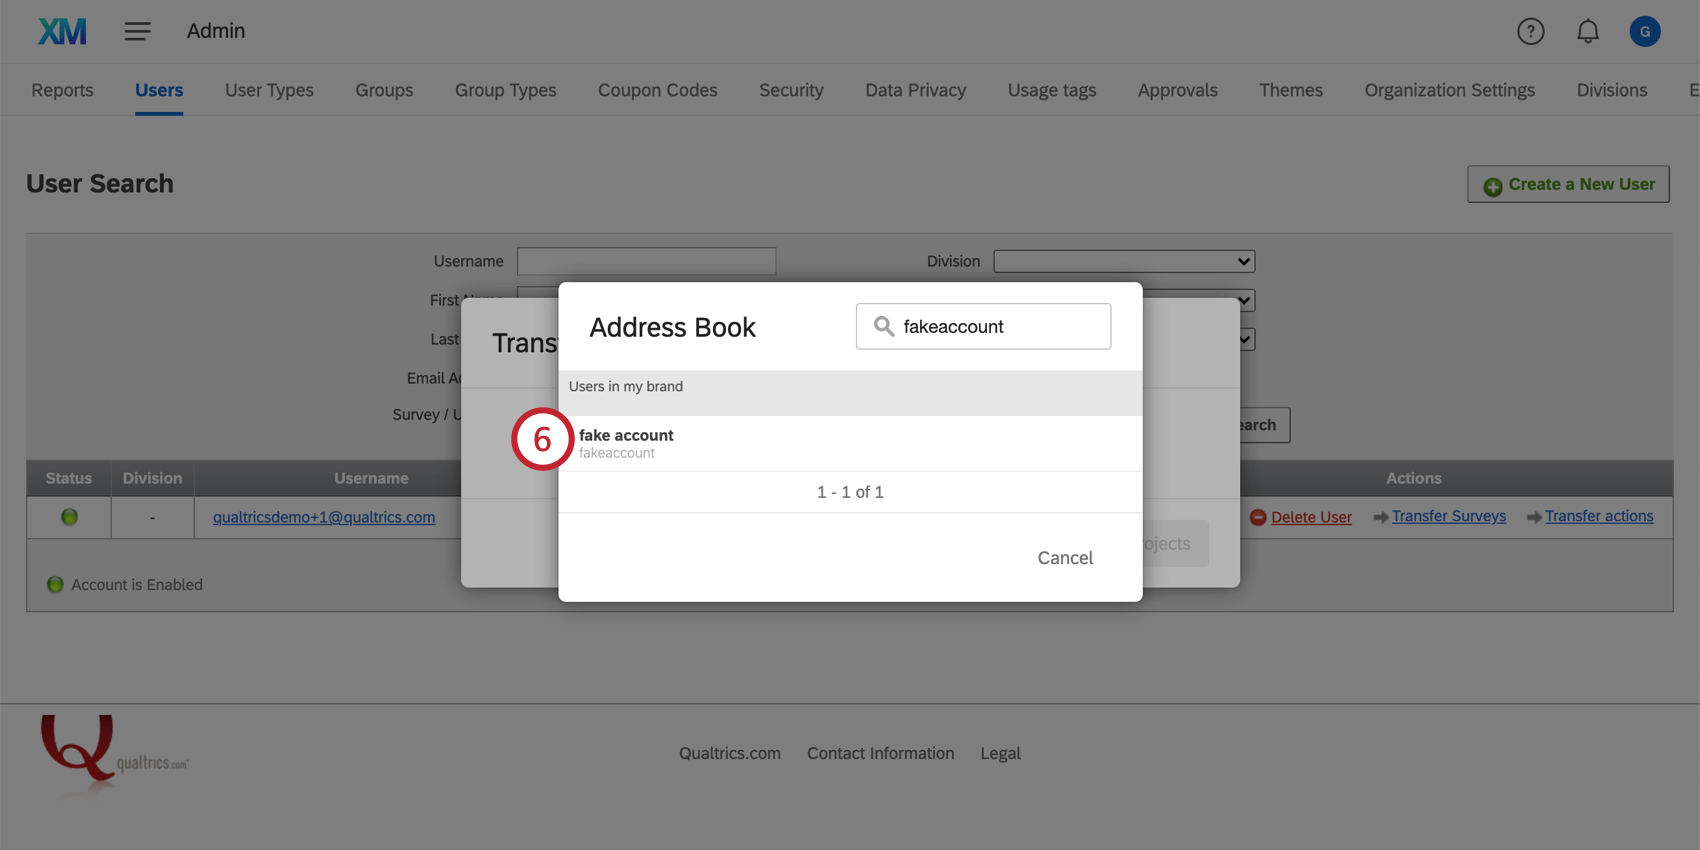
- Find a user in your brand and click their name.
- Select the projects you want to transfer.
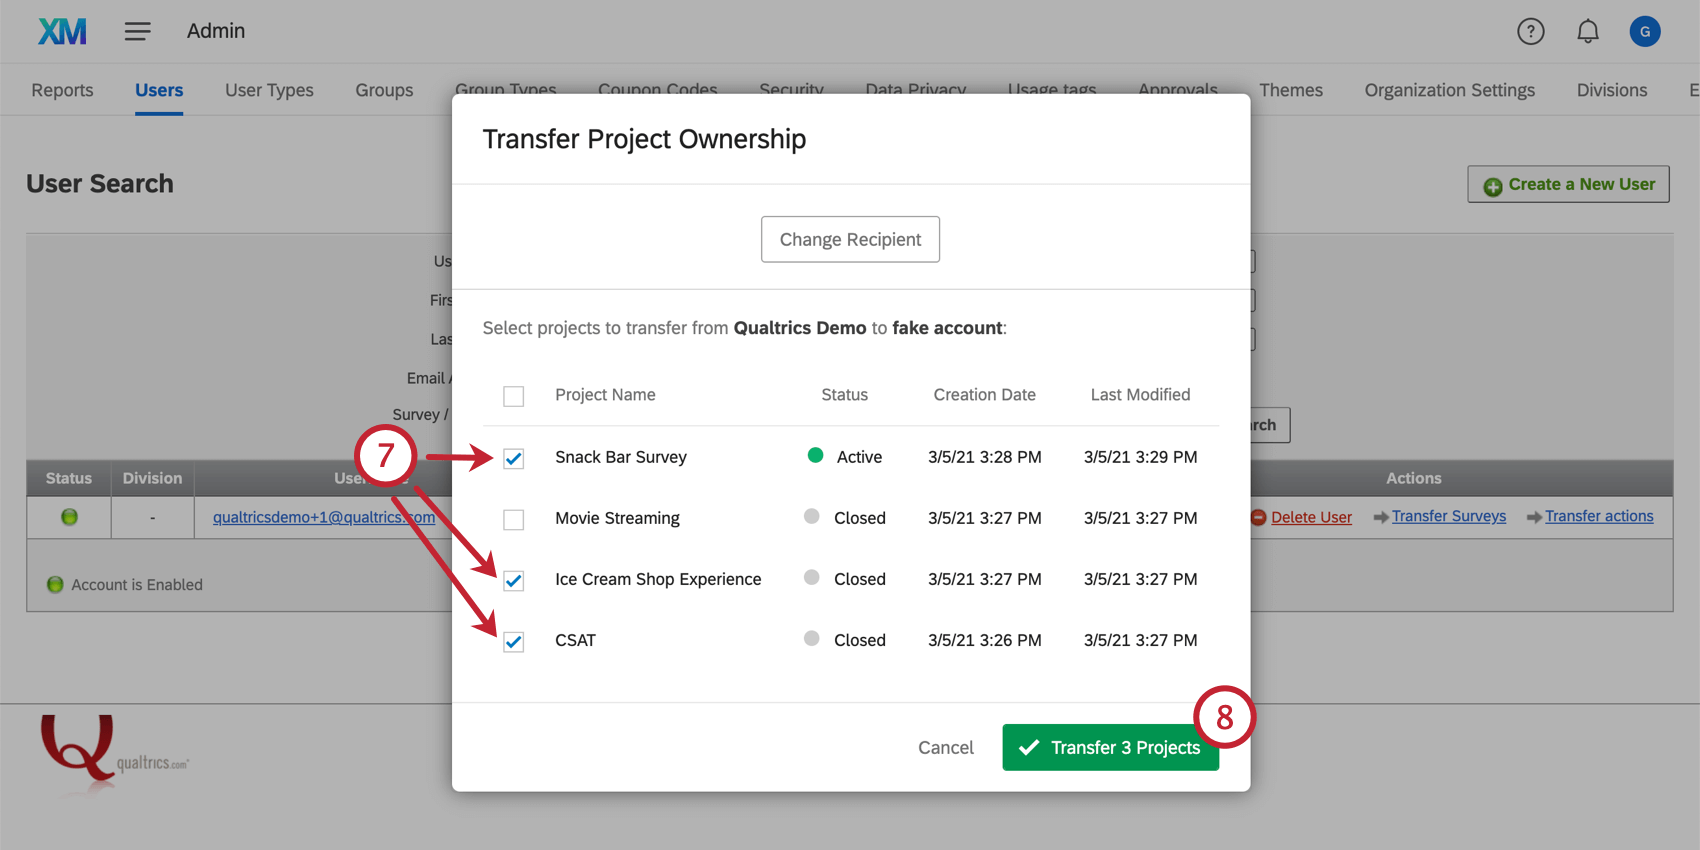
- Click Transfer Project(s).
Transferring Workflow Ownership
Sometimes you may want to change who owns a workflow–for example, when an employee leaves your company. As a Brand Administrator, you can transfer ownership of one or more of a user’s workflows at a time.
- Navigate to Admin.
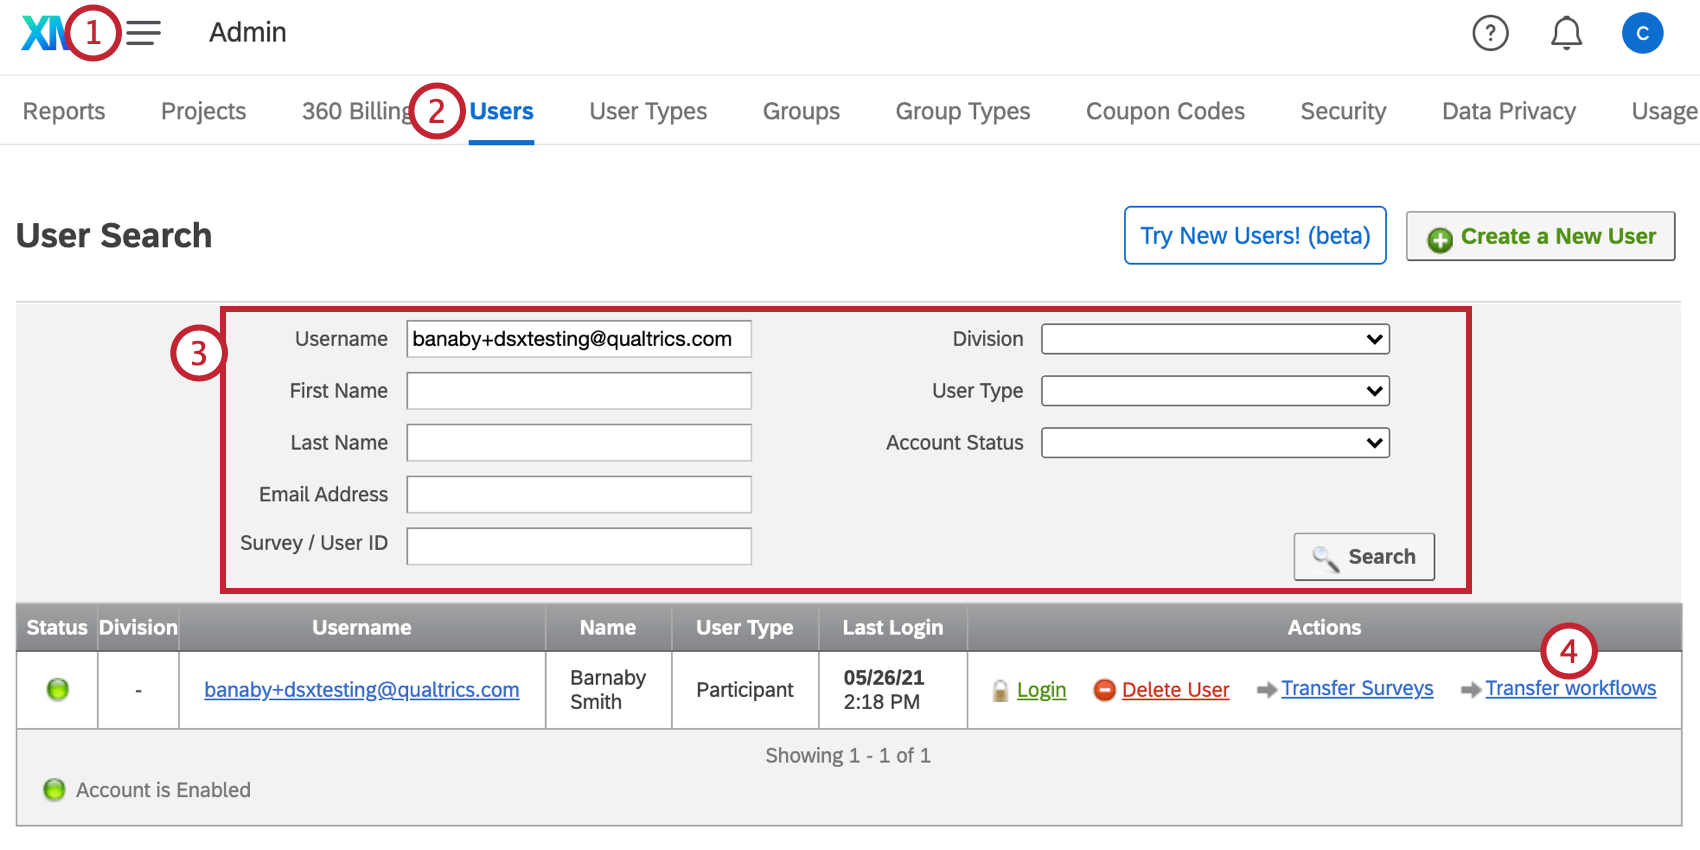
- Go to the Users tab.
- Search for the user who currently owns the workflow.
- Click Transfer workflows.
- Enter the name of the user who you want to be the new owner.
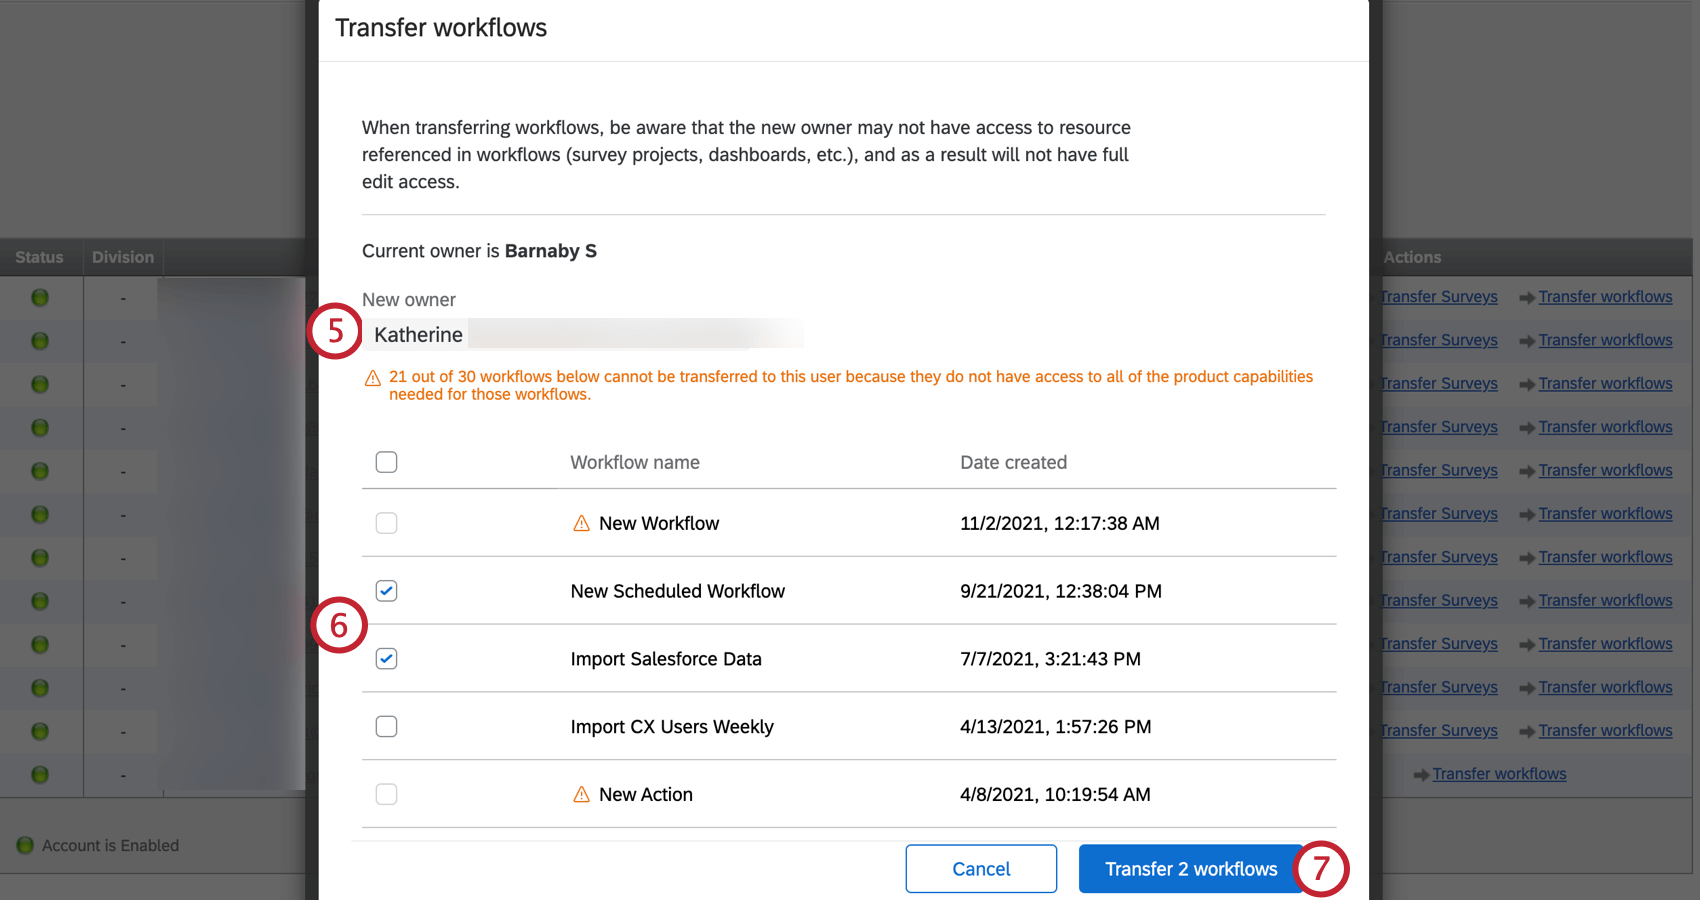
- Click the checkbox next to the workflows you want to transfer.
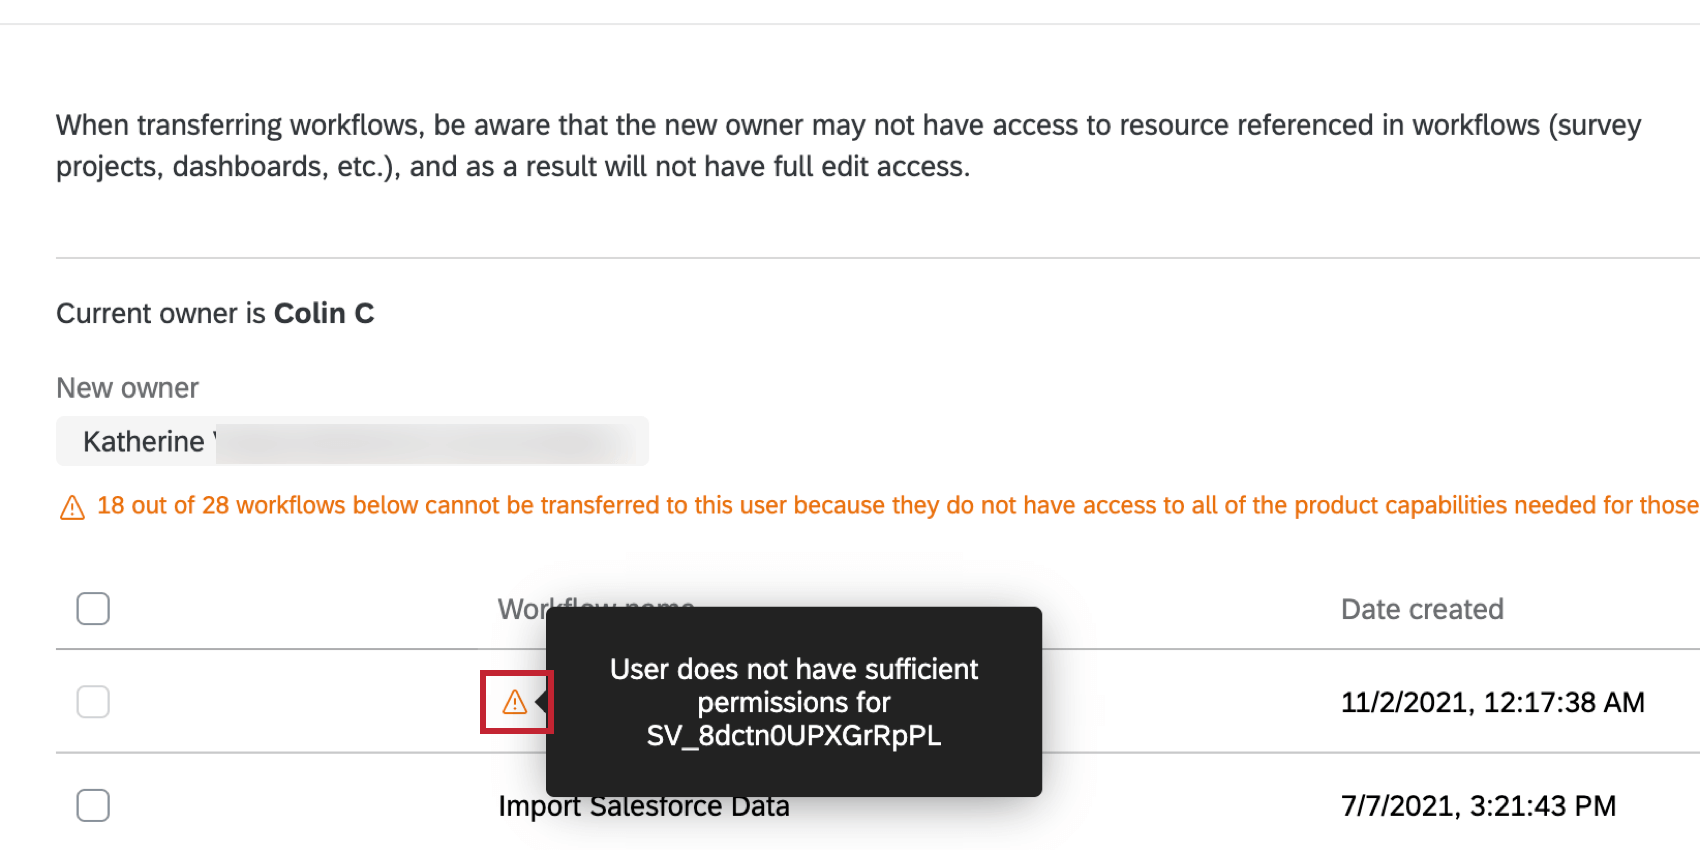
Qtip: You can only transfer workflows where the new owner will have access to the resources referenced in the workflow (e.g., survey, dashboard, third party extension account). If the new owner does not have permission, a yellow triangle will appear next to the workflow name. Hover over the triangle to see more information about what resource the new owner will need access to before the workflow can be transferred.
- Click Transfer workflow.
- Review the workflows that were transferred. If any workflows fail to transfer, an error will appear telling you which workflow failed.
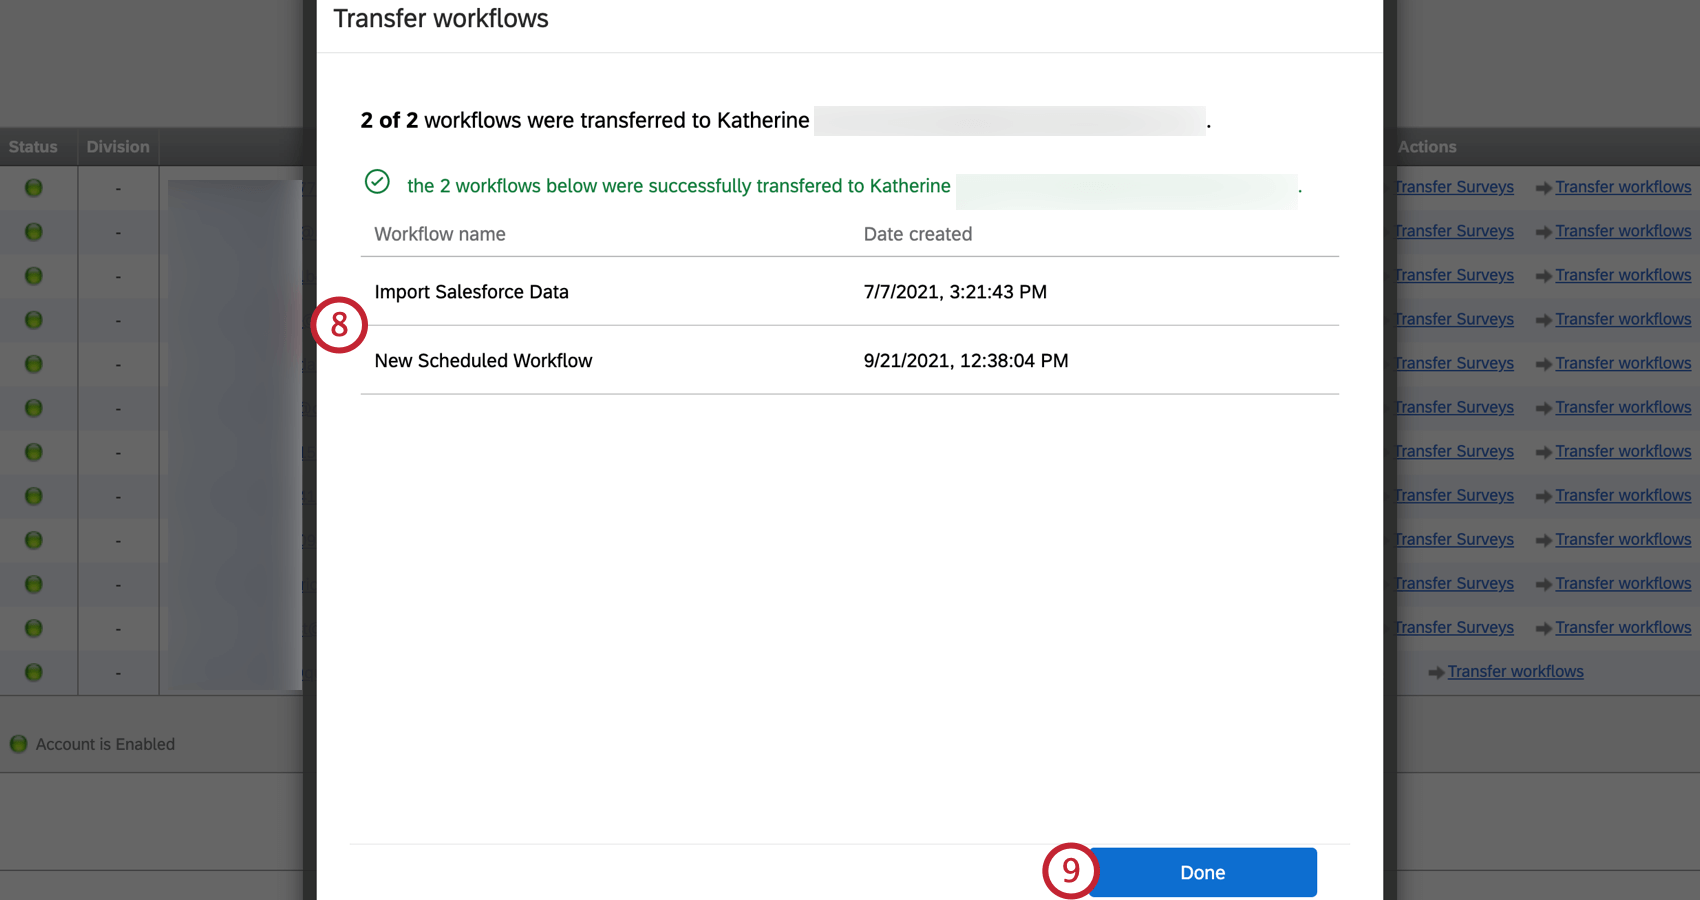 Qtip: If a workflow fails to transfer, try transferring it again. If the problem persists, contact Qualtrics Support.
 - When finished, click Done.
Logging into User Accounts
You can proxy log into the accounts of users on your brand. This can be useful when investigating account abuse, when a colleague who needs to collaborate on a project is out of office, or to test out different account permissions.
- Navigate to the Admin page.
- Select Users.
- Search for the existing user by using any of the search criteria and filters (Username, First Name, Last Name, etc., as well as Division, User Type, and Account Status). You can use multiple criteria at once.
- For the user account you would like to access, click Login, located to the right under the Actions column.
Deleting Users
Only delete a user if you are absolutely sure that’s what you want to do. There is no guarantee that Qualtrics Support can restore a user or their account content.
When a user is deleted, many account contents, such as their XM Directory automations, workflows within projects, and dashboards, will be permanently deleted and will not be recoverable. Note that even if the user is successfully restored later, their dashboards will not be restored. Before deleting a user, a Brand Administrator must log in as the user and grant edit access to any dashboard, as well as transfer ownership of any project, that they want to retain access to.
- Navigate to the Admin page.
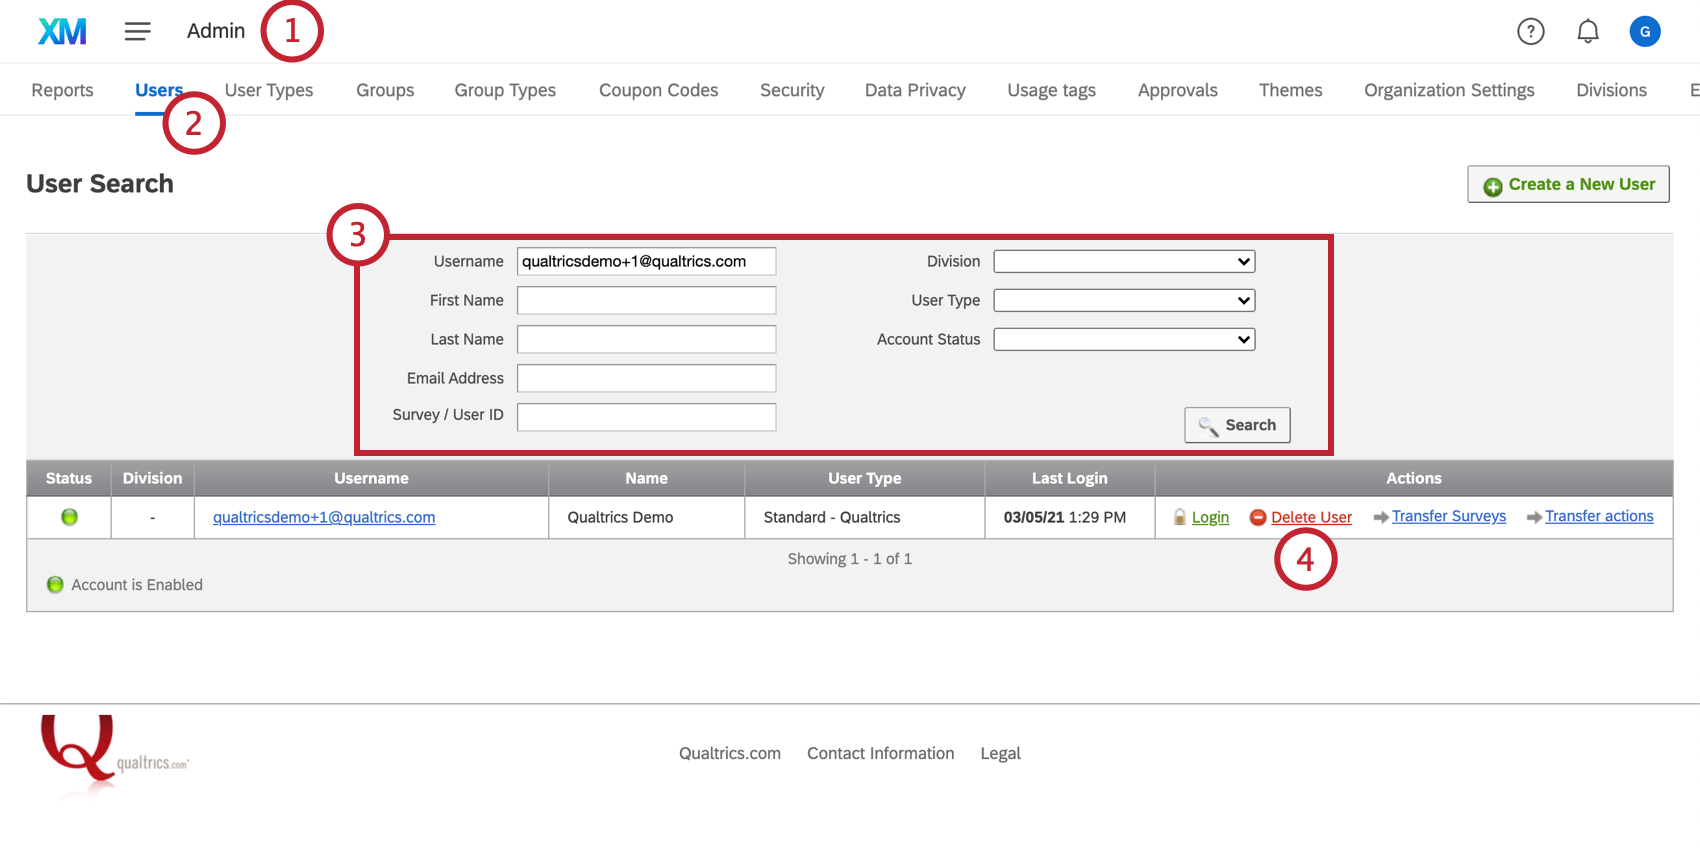
- Select Users.
- Search for the existing user by using any of the search criteria and filters (Username, First Name, Last Name, etc., as well as Division, User Type, and Account Status). You can use multiple criteria at once.
- For the user account you would like to remove click Delete User, located to the right under Actions.
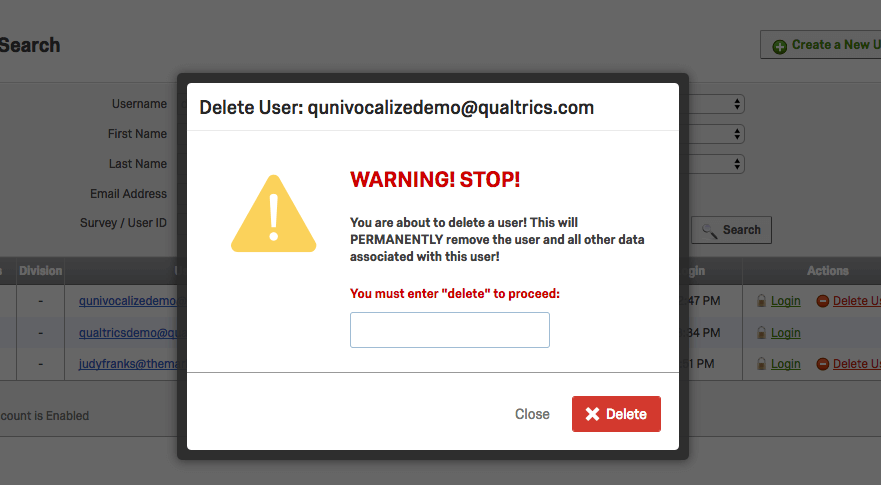
- Follow the prompts for confirming your action, then click Delete again.
User Account Status and Expiration
User Accounts have two statuses: Enabled and Disabled. An enabled account is an active account – it can perform all the functions it has permissions for.
Disabling Accounts
Giving an account the status Disabled is a great way to remove someone’s access to Qualtrics without deleting their account or their projects. When an account’s disabled, the user cannot log into it anymore, and the surveys on that account will stop sending out mailings. Active surveys on the account will continue to collect responses.
Expiration Dates
When you set an expiration date on a user account, you are setting the date that the account will become inaccessible. Some universities use expiration dates to remove students’ access to their Qualtrics accounts after they graduate, without forcing an administrator to remember to go into Qualtrics and update the accounts at the end of the year.
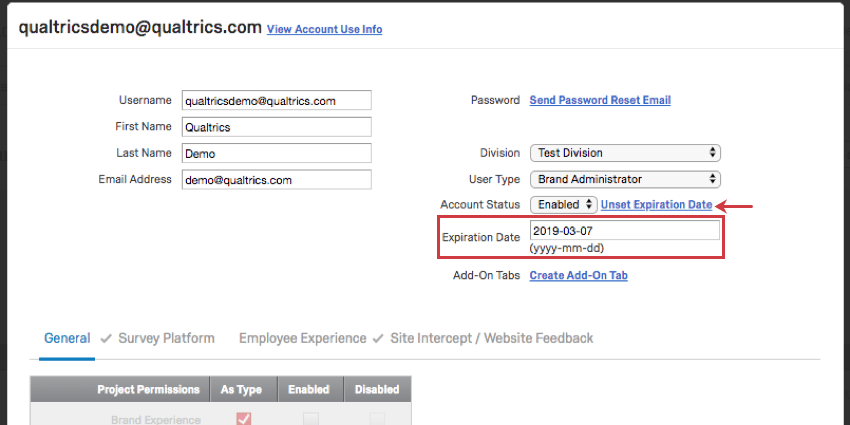
To set an expiration date for a user, click Set Expiration Date.
Expiration dates are set as specific dates in the yyyy-mm-dd format. To remove the date, click Unset Expiration Date.
Verifying Users
At times, users may reach out to you because they never received an account verification email. Brand Administrators can manually verify the users doing the following:
- Go to the Admin page.
- Select the Users tab.
- Search for the desired user.
- Click on the username.
- Under Account Status, select Enabled.
- Click Save.
Restoring and Permanently Deleting Surveys
Restoring Deleted Surveys
- In the Admin page, go to the Users tab.
- Click the username of the user.
- Click View Account Use Info.
- Surveys with names in red were removed by the user. Click Undelete.
Permanently Deleting Surveys
To delete a project permanently from a user’s account, the user must first delete it themselves. Then the Brand Administrator must do the following:
- In the Admin page, go to the Users tab.
- Click the username of the user.
- Click View Account Use Info.
- Surveys with names in red were removed by the user. Click Permanently Delete.

- Type delete in the field.
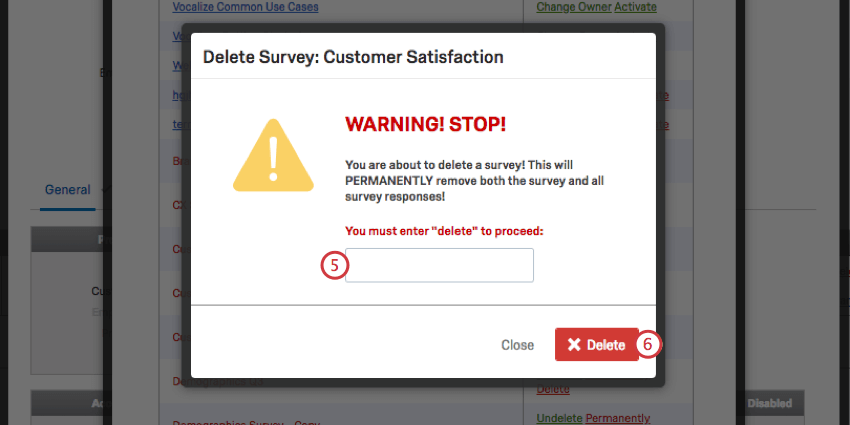
- Click Delete.
View Account Use Info
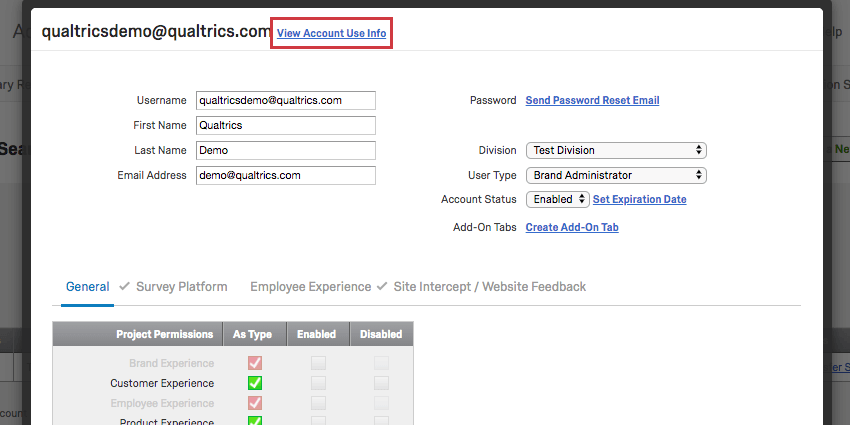
When editing an account, you’ll see the View Account Use Info link at the top. In this section, you can see how many responses the account has collected and which projects the account owns. You can also transfer the ownership of any of the projects to another user account within your organization, as well as activate/deactivate, undelete, and permanently delete any of the projects.
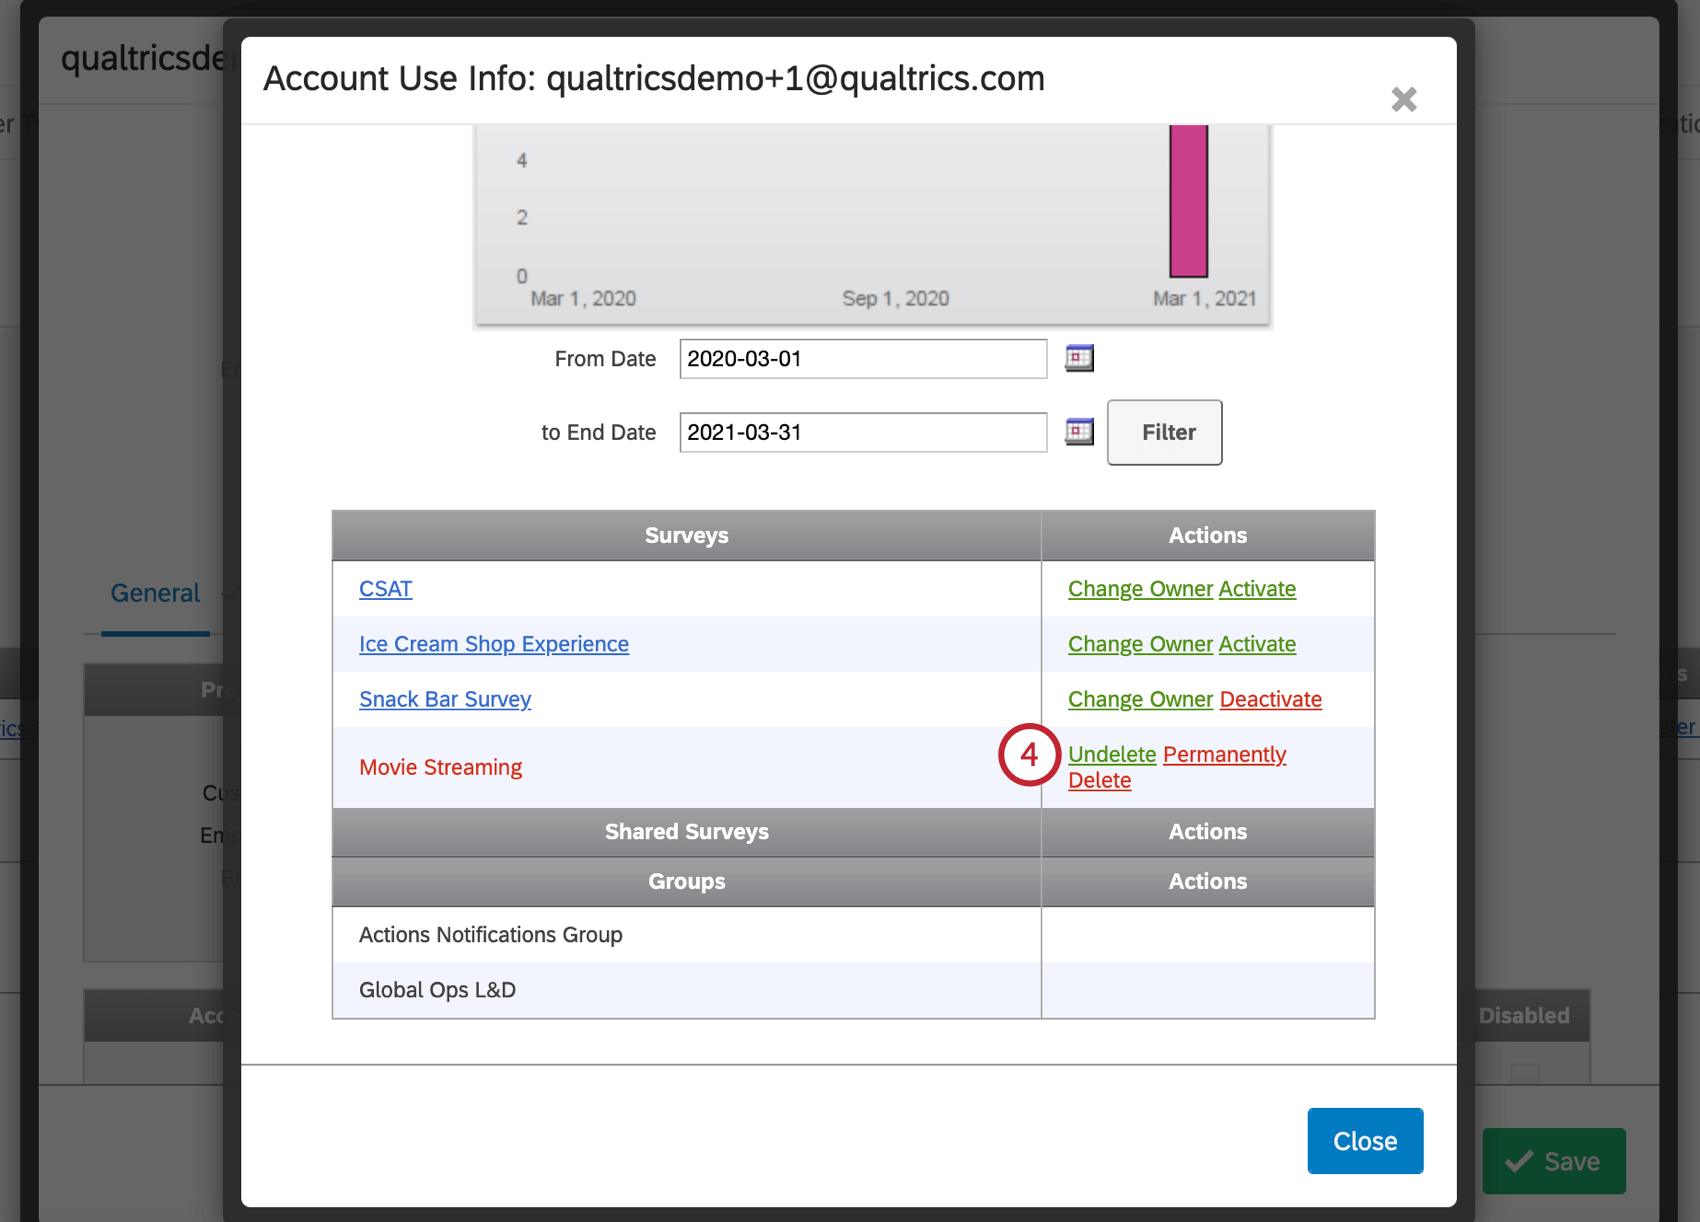
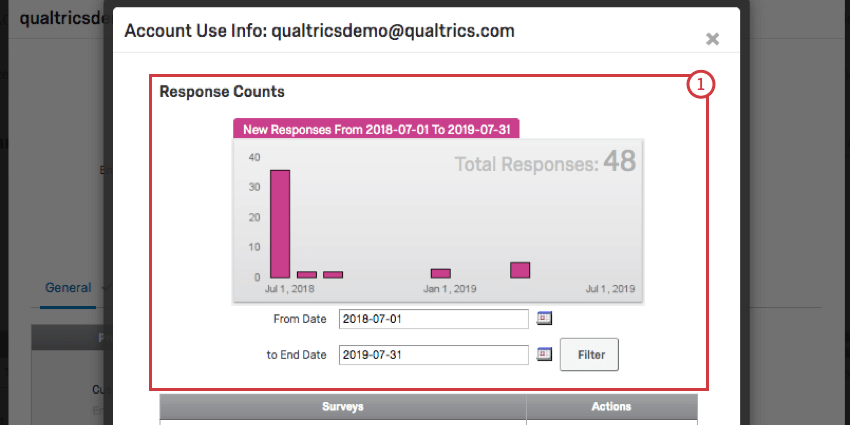
- The Responses Counts graph displays the responses collected by the account. Use the date fields to filter the dates of the responses collected.
- Click a survey’s name to open its preview link.
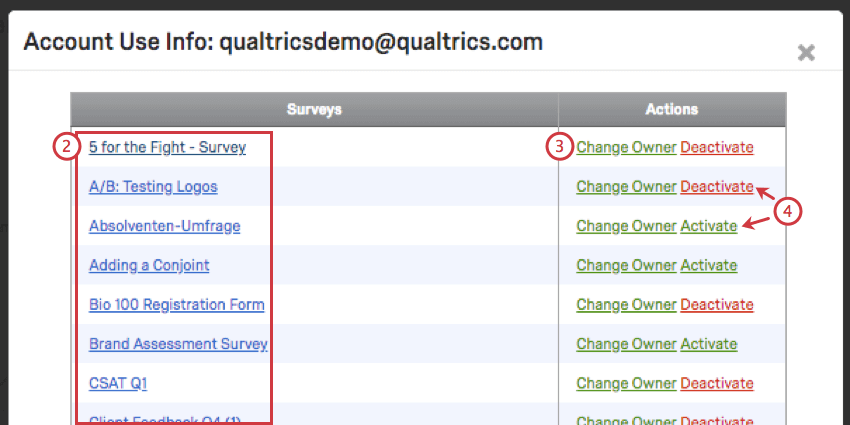
- Click Change Owner to transfer a survey to someone else. See the linked section for more details.
- Click Deactivate to deactivate the survey. This stops it from collecting anymore responses. If the survey is closed or new, it will have an option to Activate it instead.
- See Restoring and Permanently Deleting Surveys.
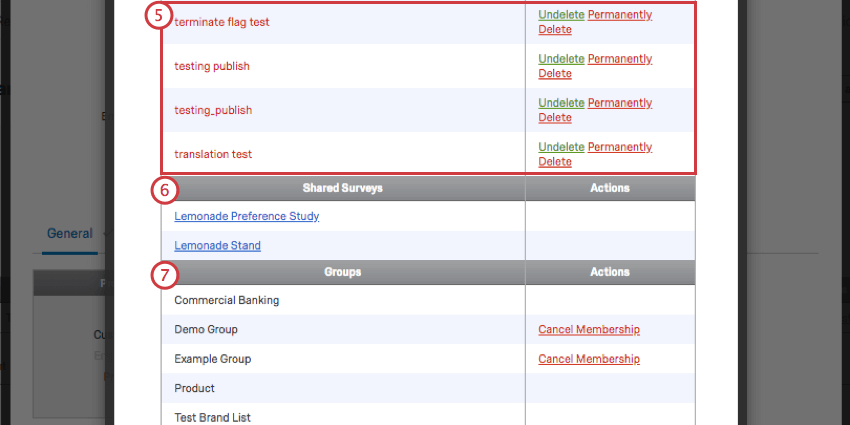
- View a list of surveys that the user was invited to collaborate on.
- View a list of groups the user belongs to. If the group is not brand-wide, then you will have the option to remove the user from the group by clicking Cancel Membership.
New Users Tab
The Users tab has been redesigned with a more modern look. In addition to supporting all the same behavior you’re used to, the new Users tab also features bulk user upload and bulk user updates.
Switching Between the New and Existing Users Tab
- Go to the Admin page.
- Select Users.
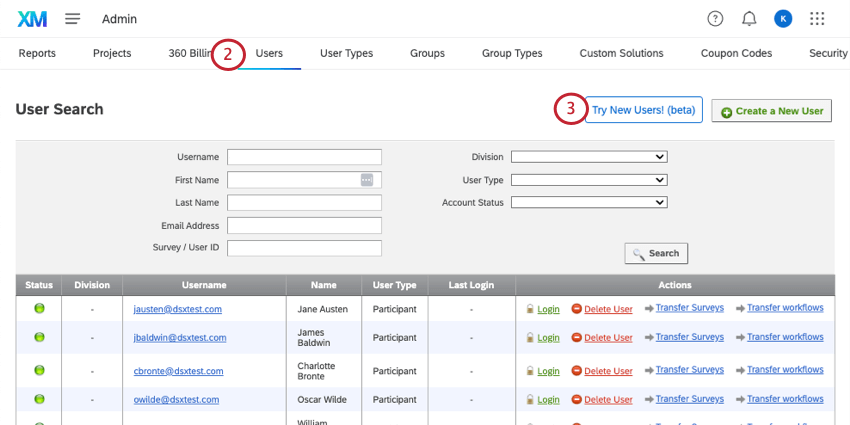
- Click Try New Users! at the top.
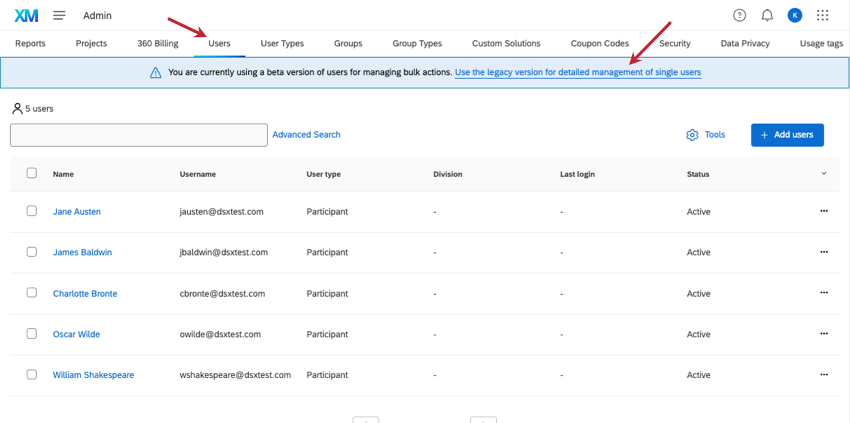
To return to the old user interface, you can click on the banner along the top of the page. The link says, Use the legacy version for detailed management of single users. You can also click the Users tab again.
Uploading Users in Bulk
You can upload many users at once using a CSV or TSV file.
- Click Add users.
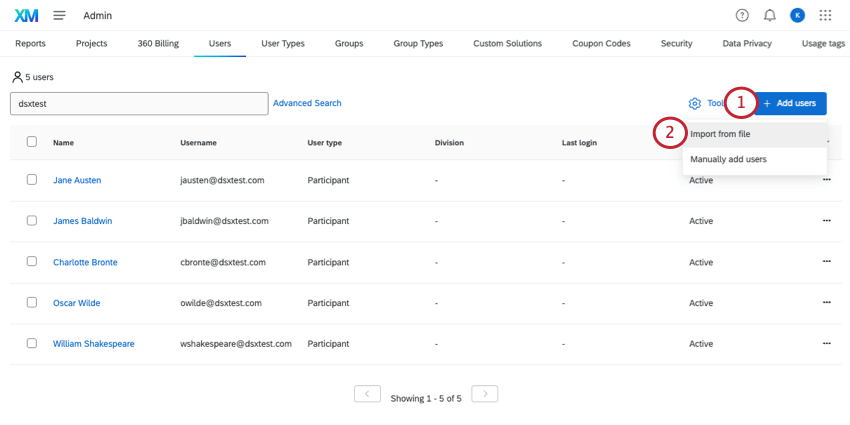
- Click Import from file
- Download the CSV Template.

- Edit your file. Include the following fields:
- userID: Leave this blank for all new users.
- userName: What username the user should log into Qualtrics with. Follow the same guidelines you do for manual user creation.
- firstName: First name.
- lastName: Last name.
- email: Email.
- divisionId: The ID of the divisions the user should belong to. If you’re unsure what divisions exist in your organization and what their IDs are, download the Divisions This field is optional.
- accountType: The ID of the user type the user should belong to. If you’re unsure what user types exist in your organization and what their IDs are, download the UserType
- accountStatus: This should be set to “Active” to indicate the user can access their Qualtrics account. See Account Status and Expiration.
- expirationDate: Expiration dates can be set in the MM/DD/YYYY format. You can leave this field blank if you don’t want the account to expire at a certain date.
Warning: Do not remove or change the order of any columns.
- Once you’re finished, save the file as a UTF-8 encoded CSV, or as a TSV.
Qtip: For more troubleshooting advice, see CSV & TSV Upload Issues.
- Select the file you want to import.
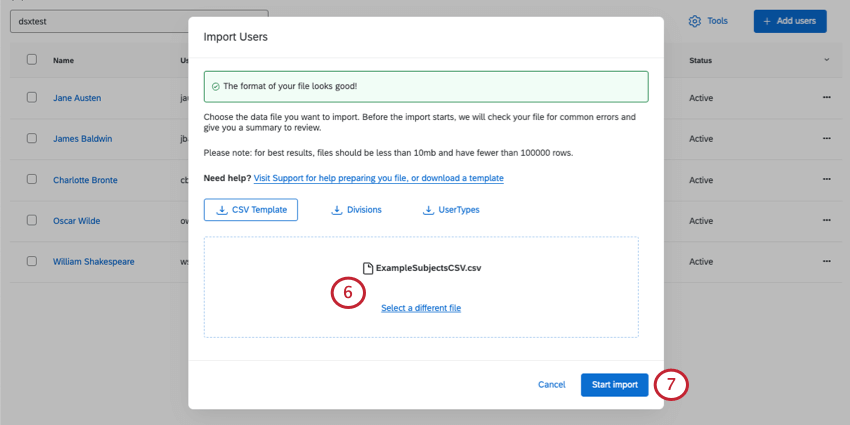 Qtip: The system will do a quick check of the file format and errors, much like the participant upload system.
 - Click Start import.
Qtip: The system will do a quick check of the file format and errors, much like the participant upload system.
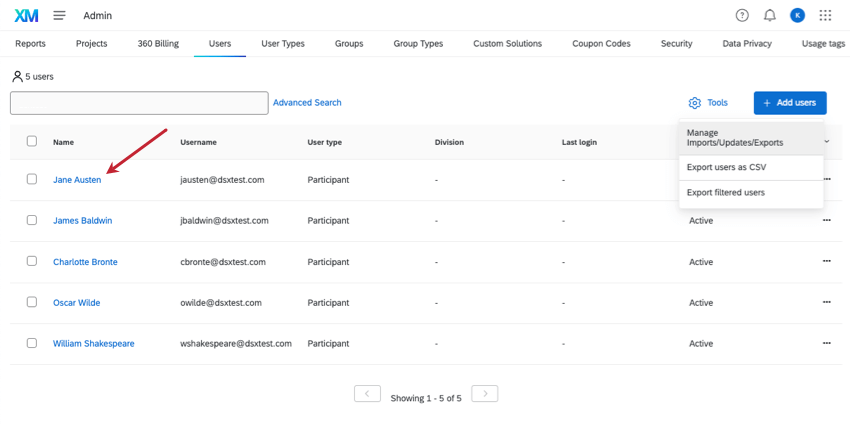
You can check the status of your import by clicking Manage Imports\Updates\Exports under Tools. Once an import has completed you can also view detailed messaging about the status of the import job.

Export All Users in Brand

Go to Tools and select Export users as CSV. There is no TSV option.
Updating Users in Bulk
- Export your users to CSV.
- Open this CSV and make edits as needed. Only the following fields can be edited:
firstName
lastName
divisionId
accountType
accountStatusWarning: Do not modify userID for any user. This ID is how the file knows to edit the correct user. New users should have blank userIDs.Warning: Remove the division name and user type name columns (but keep their IDs). Do not remove or change the order of any other columns.Qtip: It is okay to remove rows if there are users you don’t want to make changes to. - Once you’re finished, save the file as a UTF-8 encoded CSV, or as a TSV.
Qtip: For more troubleshooting advice, see CSV & TSV Upload Issues.
- Import the file as you would with new users.
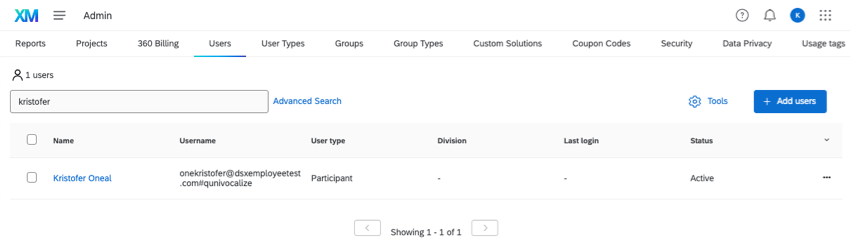
Searching Users
Type text to search for any field that matches your criteria.
To search specifically by username, first and last name, email, status, user type, or division, click Advanced Search.
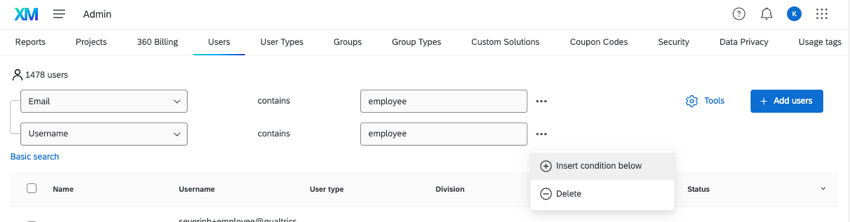
You can insert and delete conditions as needed. If there are multiple conditions, a user must match all of them to be included in results.
Click Basic search to return to the search bar.
Information on Individual Users
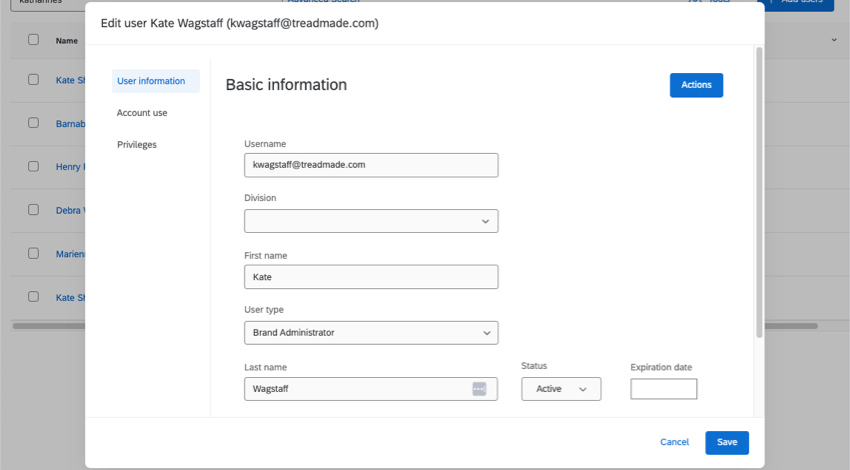
Click on a user’s name to see more information about them and make edits to them.
User information contains the user’s username, division, first and last name, user type, status, expiration date, and email. You can edit any of these fields. Under Actions, you can also delete the user, send them a password reset, remove them from multi-factor authentication, or proxy log into their account.
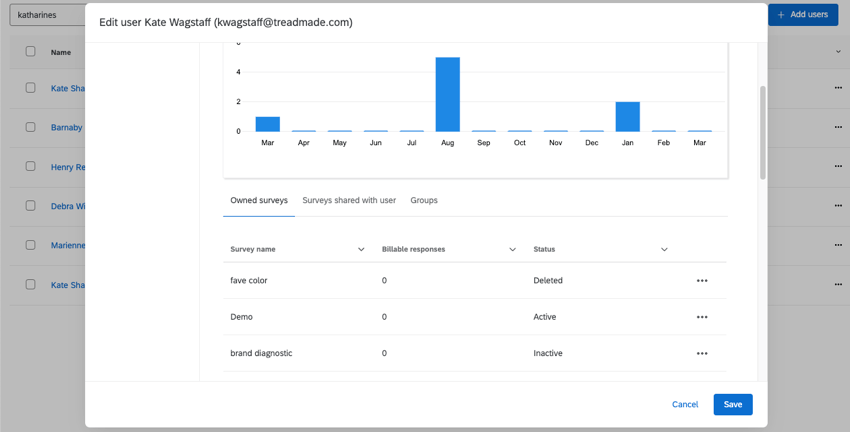
Account use shows the same information you’d find in Account Use Info. In Owned surveys, you can click the dropdown next to a survey to transfer ownership, activate it, delete it, or more. (Options will vary based on whether the user actually owns that survey.) You can use the other tabs to see surveys that have been shared with the user and groups they belong to.
The Privileges tab is where you adjust user permissions. Use the dropdown to switch between types of permissions (e.g., General, Contacts, Employee Experience).
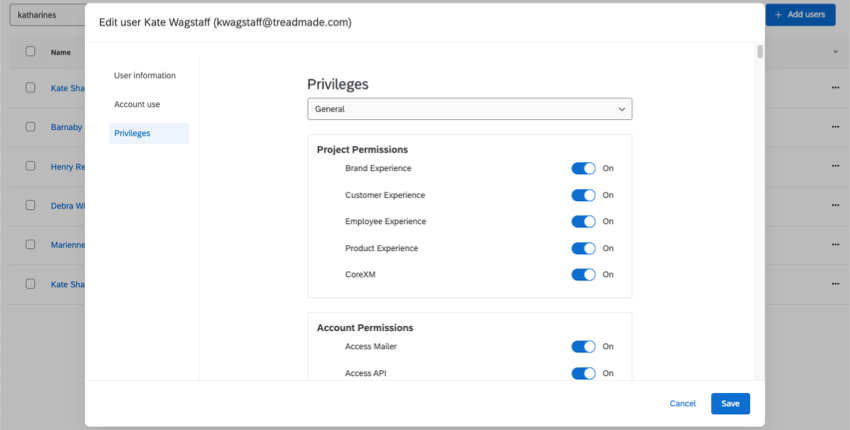
Remember to Save all changes.