-

Qualtrics Platform -

Customer Journey Optimizer -

XM Discover -

Qualtrics Social Connect
ServiceNow Task
Qtip: If you’re interested in purchasing this extension, check it out on the XM Marketplace!
About the ServiceNow Task
Workflows in Qualtrics can create incidents in ServiceNow, or update existing ones. For example, you may want to create a ServiceNow incident whenever a negative NPS score comes through a Qualtrics survey. You can also update a client’s information in a ServiceNow incident if they respond to a survey in Qualtrics where they provide new contact information.
Qtip: Are you having trouble accessing your instance? If your instance has “gone to sleep,” please contact ServiceNow’s support team.
Qtip: Are you curious how events in ServiceNow can trigger tasks in Qualtrics, such as a CSAT survey that goes out when ServiceNow tickets are resolved? Check out our JSON Event page for an example on integrating with ServiceNow.
Setting Up a ServiceNow Task
- In your survey, go to the Workflows tab.
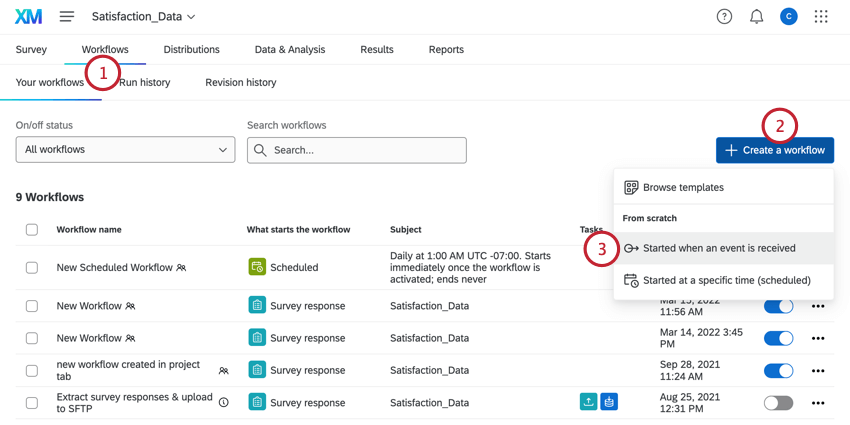
- Click Create a workflow.
- Choose Started when an event is received.
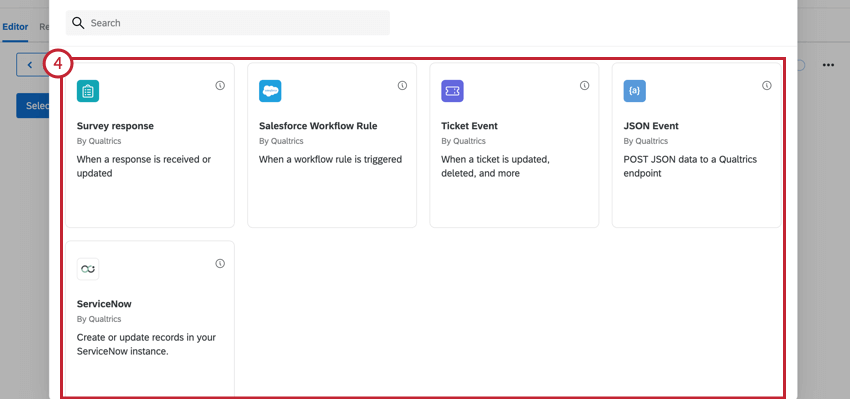
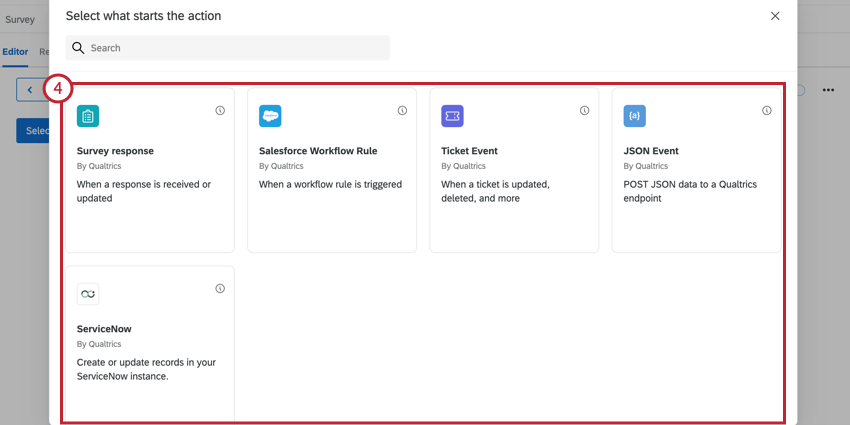
- Select the Event that will trigger the ticket creation or change in ServiceNow. Most of the time, this will be a Survey response from Qualtrics. See event-based workflows for all available options.
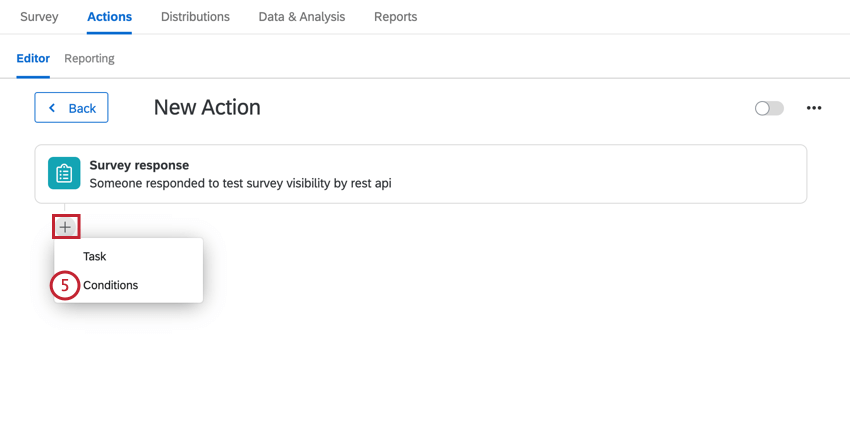
- If desired, add conditions to your workflow, which determine when the workflow runs. To add conditions, click the plus sign ( + ) and then Conditions.
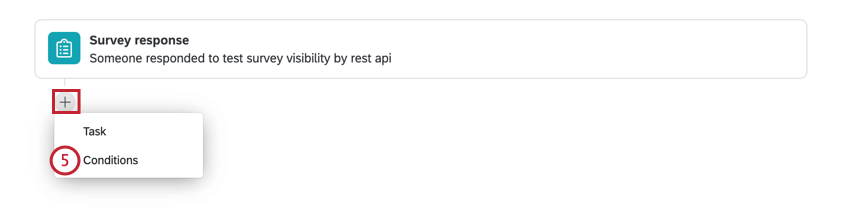 Qtip: This is most helpful if you don’t want a ServiceNow ticket created or updated for every single response that is submitted to the survey.
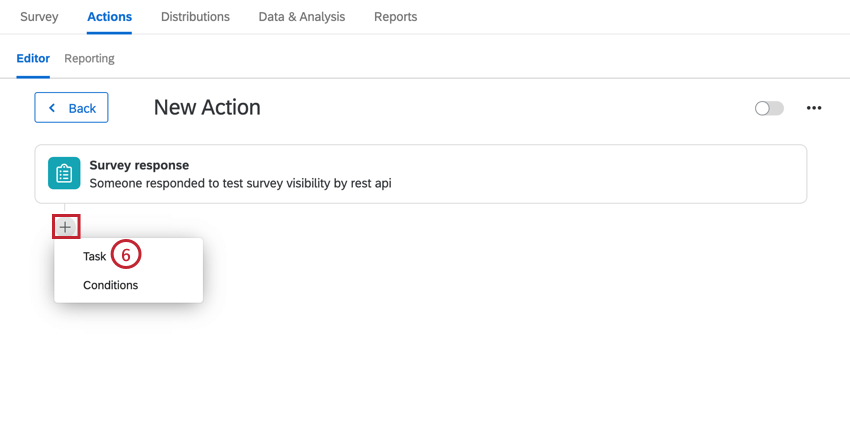
 - Click the plus sign ( + ) and then Task.

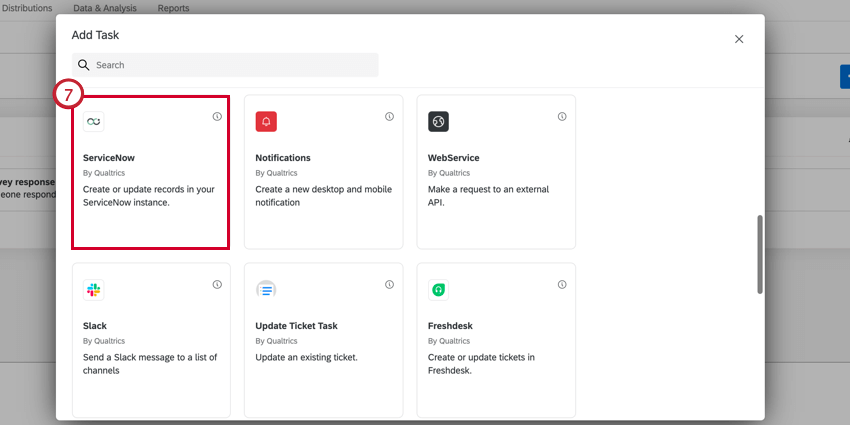
- Select ServiceNow.
- Choose the task you’d like to accomplish in ServiceNow. You can choose to create a new record or update an existing record.
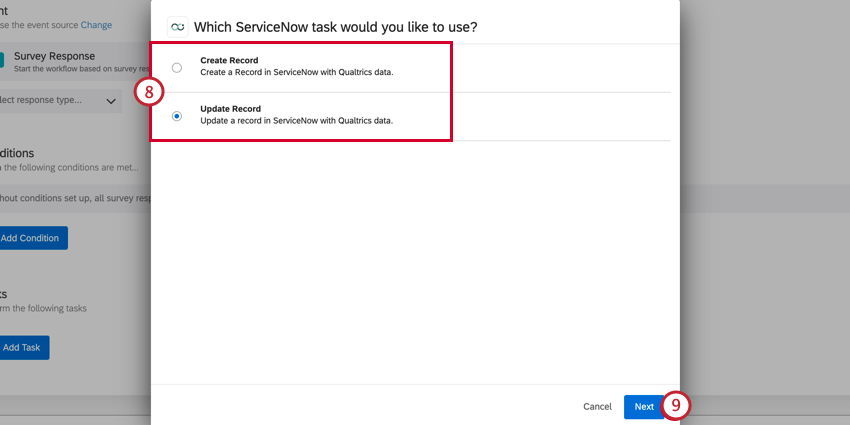
- Click Next.
- Select the ServiceNow account the task should be completed in.
 Qtip: You’ll be able to select any ServiceNow accounts you’ve previously connected to Qualtrics, along with any accounts configured by Brand Administrators in Extensions.
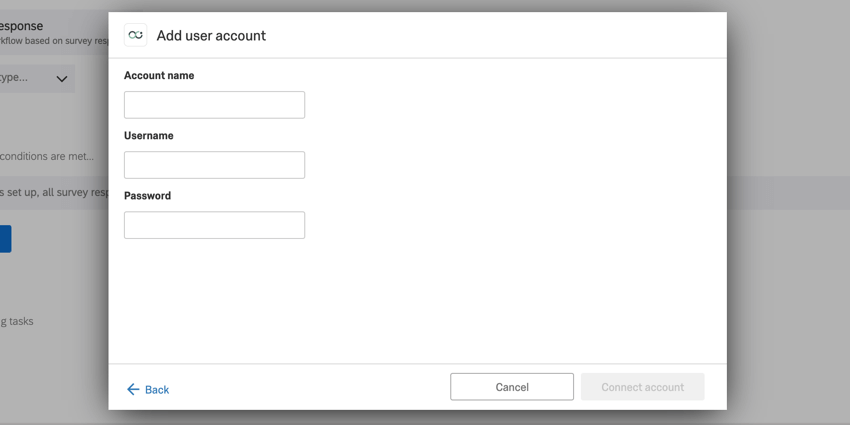
 - If you’d like to connect a new ServiceNow account, click Add user account.
Qtip: After clicking Add user account, you’ll be asked to give your account a name and to enter the username and password.
 Qtip: You can edit your connected account’s name by clicking the pencil icon in the account selection window. To disconnect your account, click the trash can icon. Be careful when deleting accounts, as any plugins using this account will no longer work.
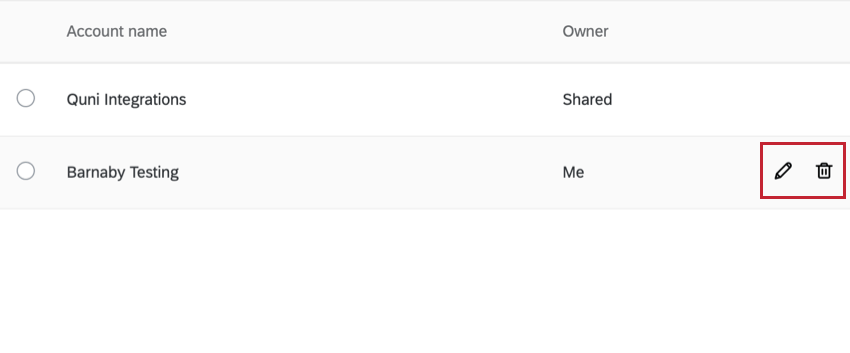
- Click Next and finish setting up the task. Depending on the selected task, the setup will be different. See the below sections on setting up each task.
Create Record
If you selected Create Record as your task, you will be creating a new record in ServiceNow.
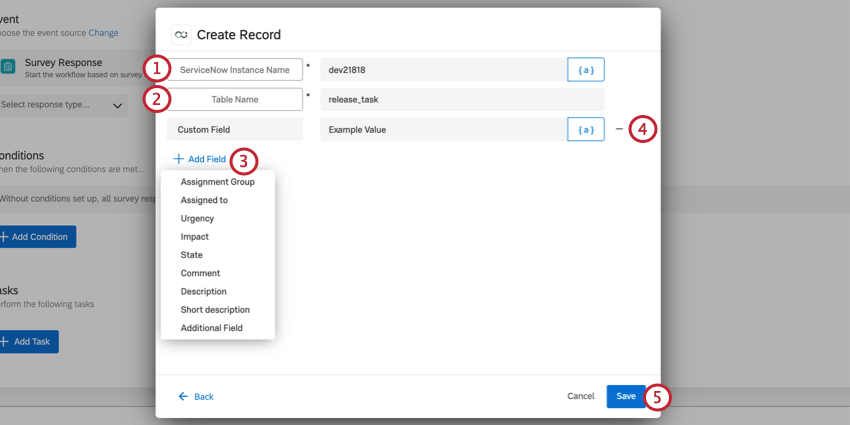
- Enter your ServiceNow Instance Name.
Qtip: When you access your ServiceNow instance, this is a short sequence that appears in the beginning of the URL. For example, if your URL is dev12345.service-now.com, your instance is dev12345.
- Add a Table Name. Your options include:
- Your own, custom value.
- change_request
- change_task
- incident
- problem
- release_task
- ticket
- Click Add Field to determine the ticket fields you want to be prepopulated by this task. You have several options:
- Assignment Group: The ID of the assignment group.
- Assigned to: The ID of the person assigned to the record.
- Urgency: The extent to which the incident can be delayed, or must be addressed with utmost urgency. Possible values include Low, Medium, and High.
- Impact: The effect a record has on business. Possible values include Low, Medium, and High.
- State: The state, or status, of a record. Values include In Progress, On Hold, Resolved, Closed, and Cancelled.
- Comment: Any additional comment you want to add to the record.
- Description: Description of the record.
- Short description: Short text description of the record.
- Additional Field: Add a custom field. You can add multiple.
Qtip: Click the {a} icon to insert piped text as your field value. Piped text is great for when the value may be dynamic and changing based on survey responses provided.
- To delete any unwanted fields, click the – symbol next to the field.
- When done, click Save.
Update Record
If you selected Update Record as your task, you will be updating an existing record in ServiceNow.
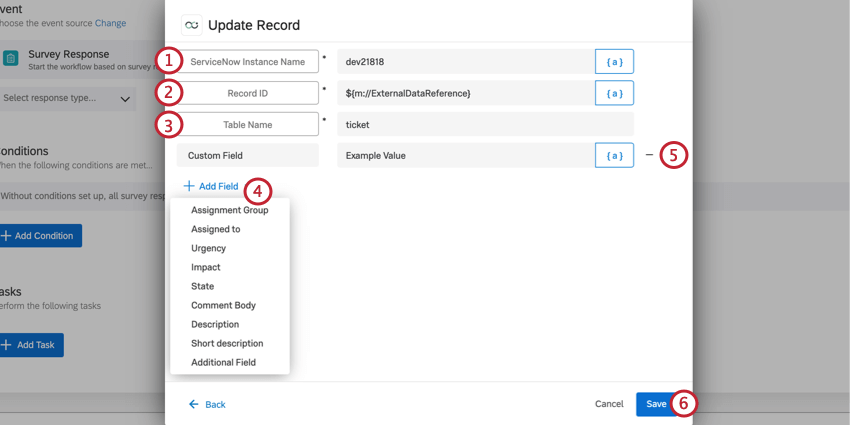
- Enter your ServiceNow Instance Name.
Qtip: When you access your ServiceNow instance, this is a short sequence that appears in the beginning of the URL. For example, if your URL is dev12345.service-now.com, your instance is dev12345.
- Enter a Record ID. This is the Number of the record you want to update with this task.
- Add a Table Name. Your options:
- Your own custom value
- change_request
- change_task
- incident
- problem
- release_task
- ticket
- Click Add Field to determine the ticket fields you want to be updated by this task. You have several options:
- Assignment Group: The ID of the assignment group.
- Assigned to: The ID of the person assigned to the record.
- Urgency: The extent to which the incident can be delayed, or must be addressed with utmost urgency. Possible values include Low, Medium, and High.
- Impact: The effect a record has on business. Possible values include Low, Medium, and High.
- State: The state, or status, of an incident. Values include In Progress, On Hold, Resolved, Closed, and Cancelled.
- Comment: Any additional comment you want to add to the incident.
- Description: Description of the incident.
- Short description: Short text description of the incident.
- Additional Field: Add a custom field. You can add multiple.
Qtip: Click the {a} icon to insert piped text as your field value. Piped text is great for when the value may be dynamic and changing based on survey responses provided.
- Click the minus button ( – ) to remove a field.
- When finished, click Save.
Setting Up an OAuth Connection
OAuth connections allow users to connect their Qualtrics account to other instanced platforms, such as Servicenow.
In Servicenow
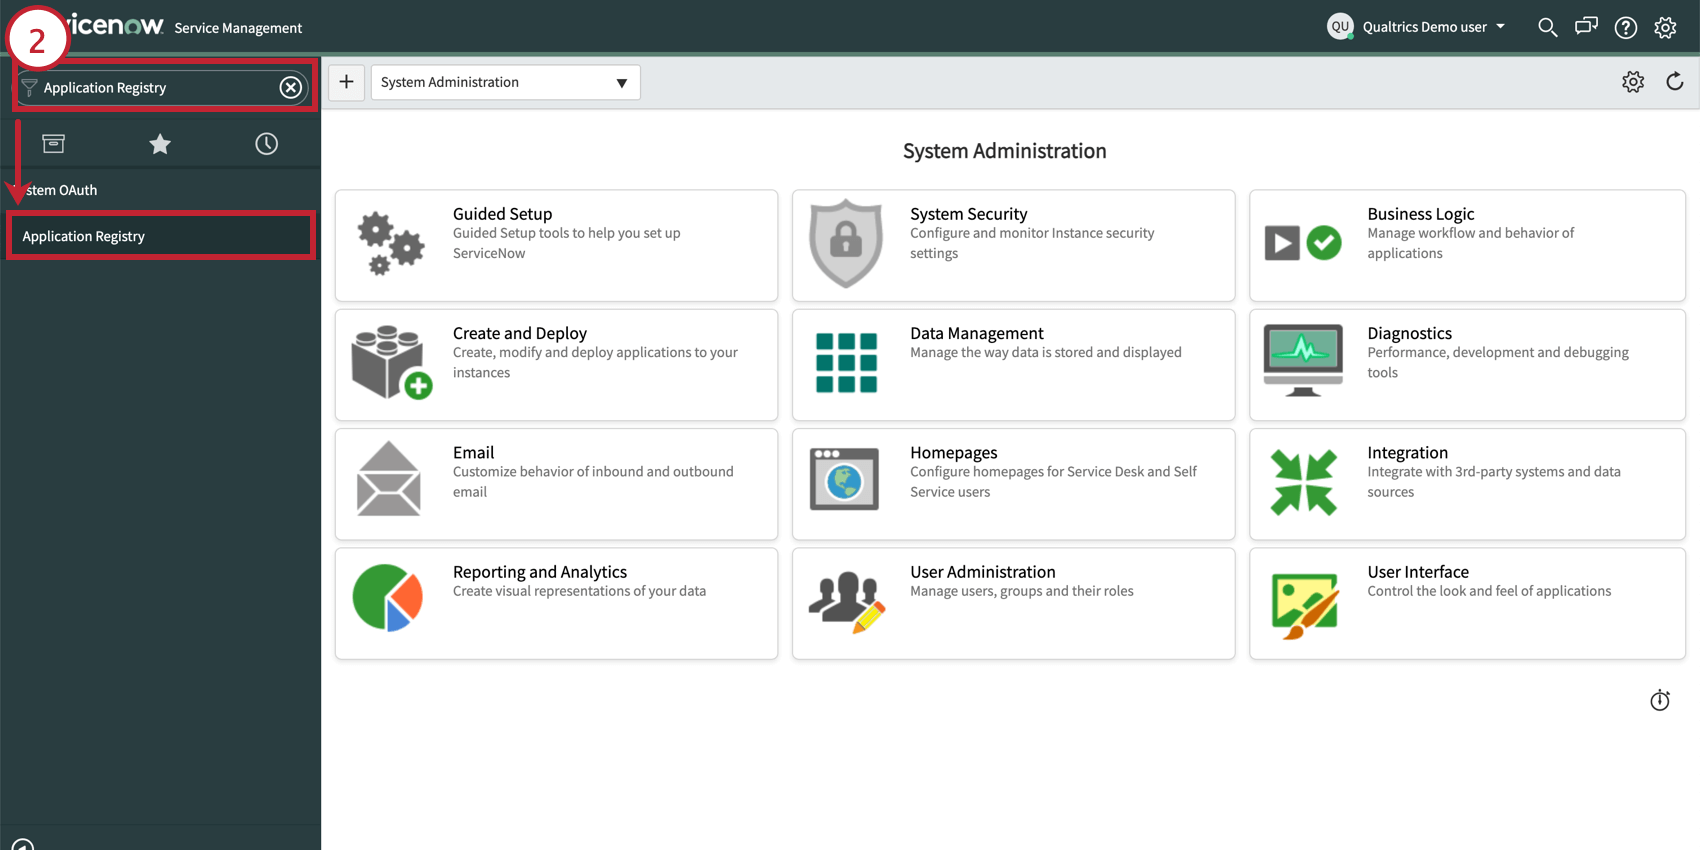
- Login to Servicenow
- Search Application Registry then click that option.
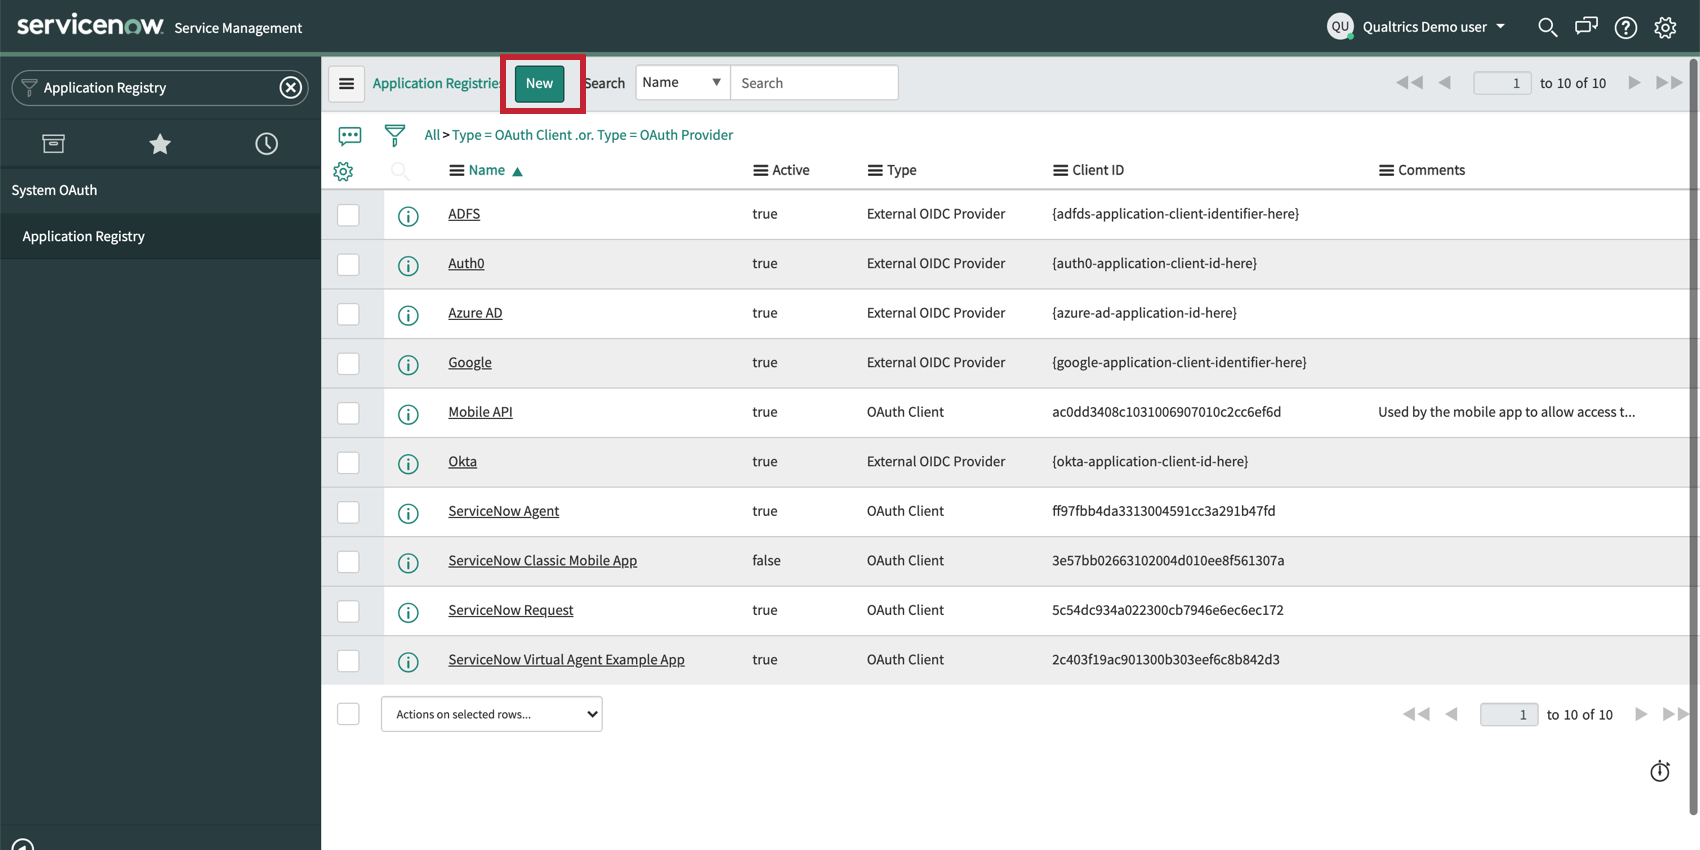
- If creating a new client, click New.
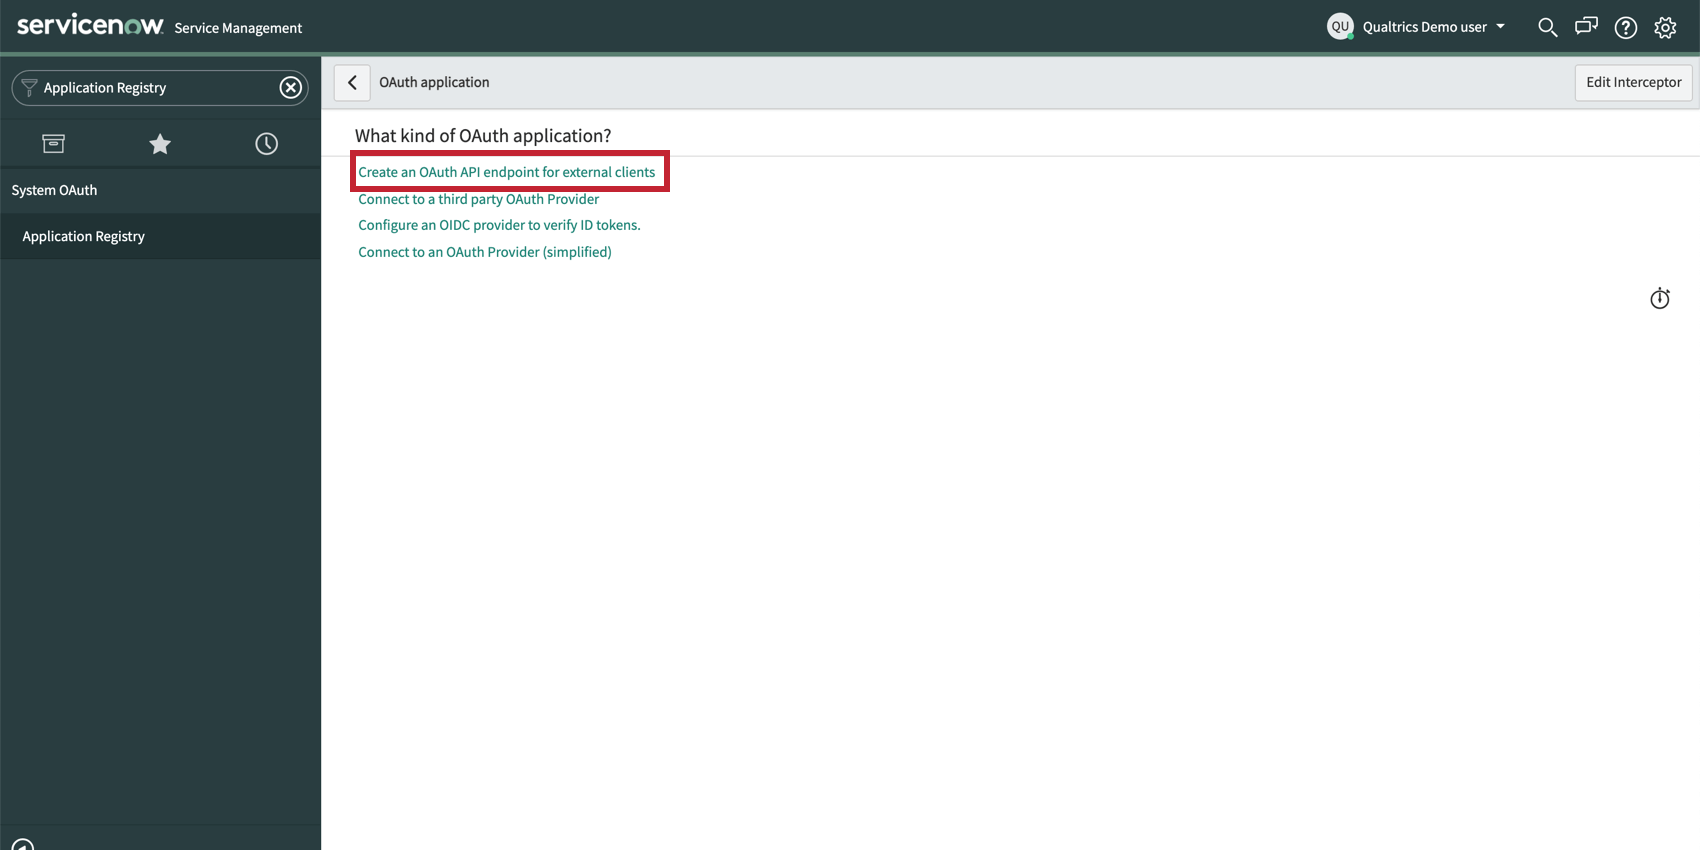
- Click Create an OAuth API endpoint for external clients.
- Add the following redirect URLs and click Submit.
https://<DATACENTER>.qualtrics.com/oauth-client-service/redirecthttps://<BRANDNAME>.qualtrics.com/oauth-client-service/redirect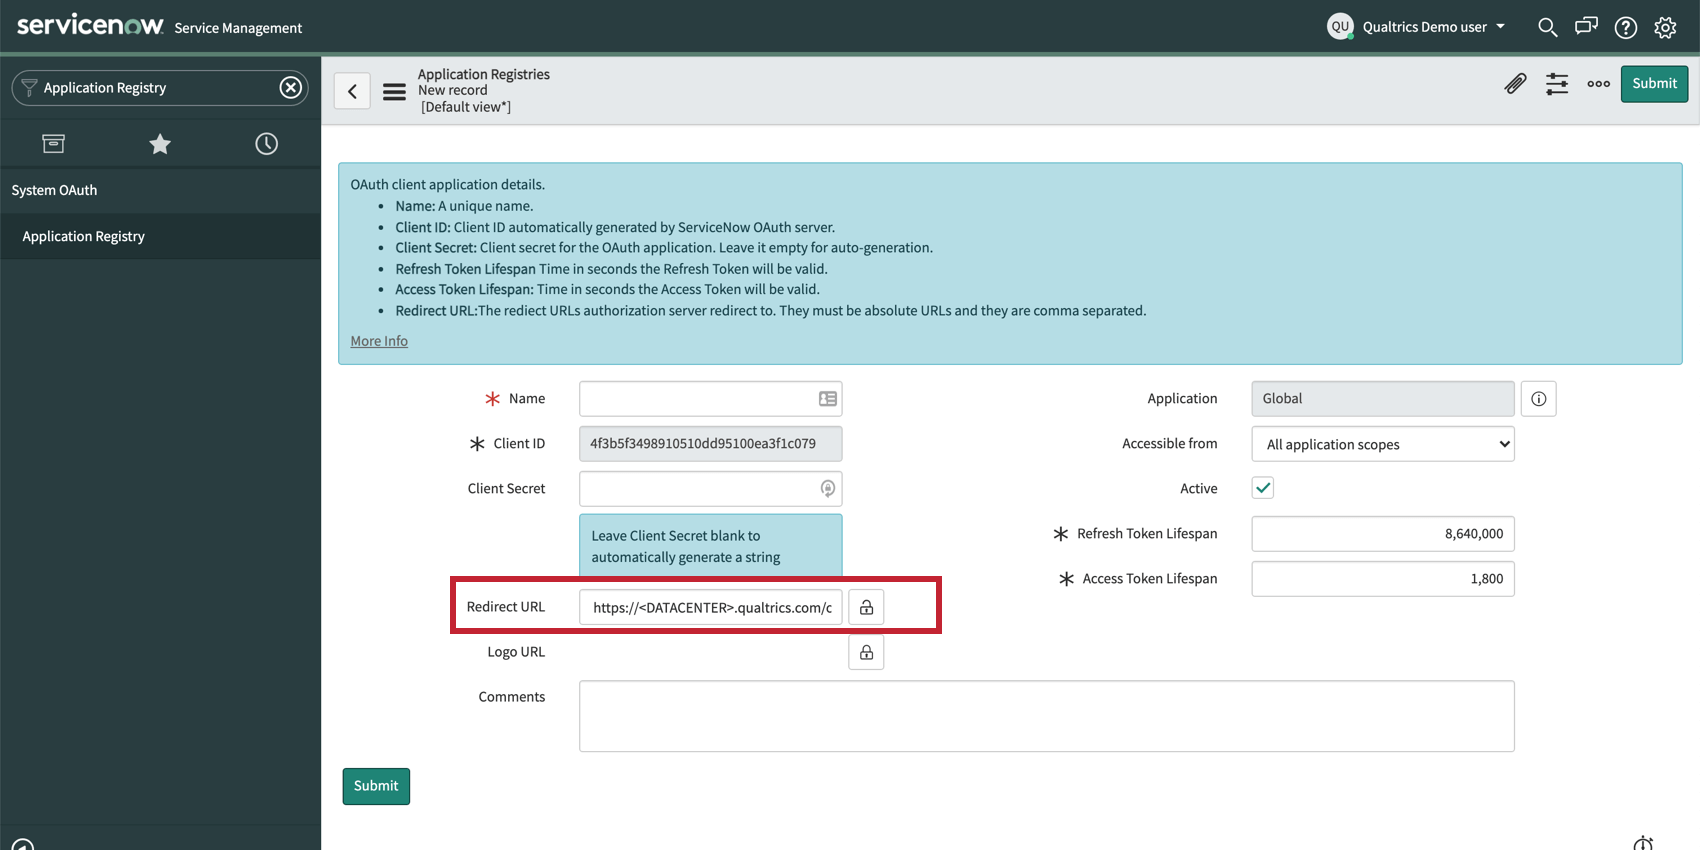
In Qualtrics
- Navigate to Admin.
- Click Extensions.
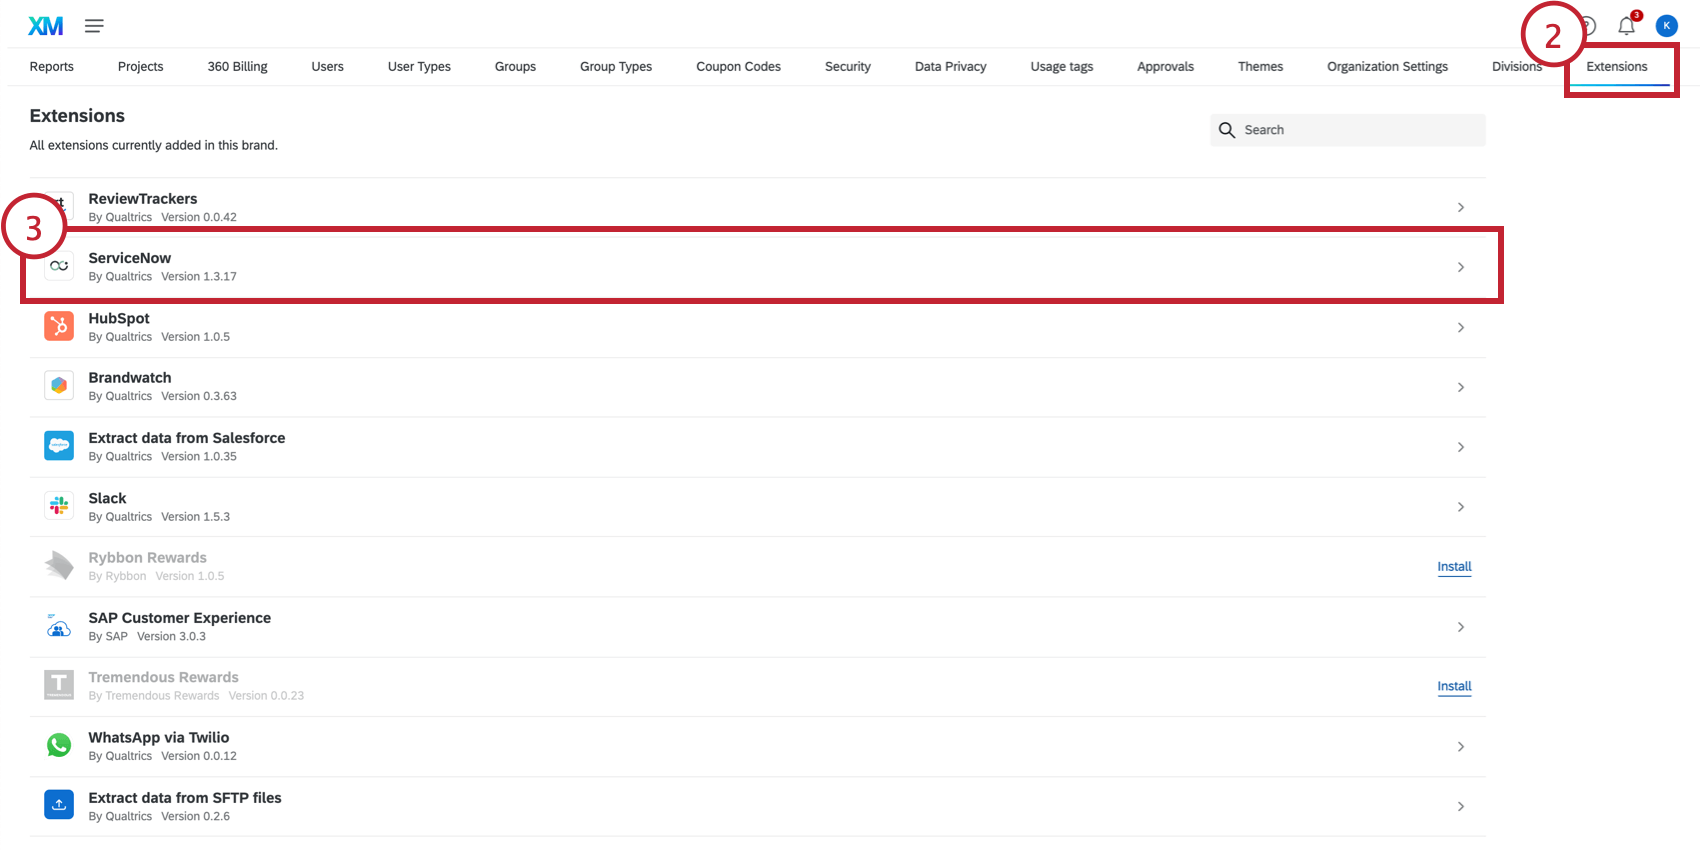
- Select the Servicenow extension.
- Click Add Account.

- Enter an internal name for the extension
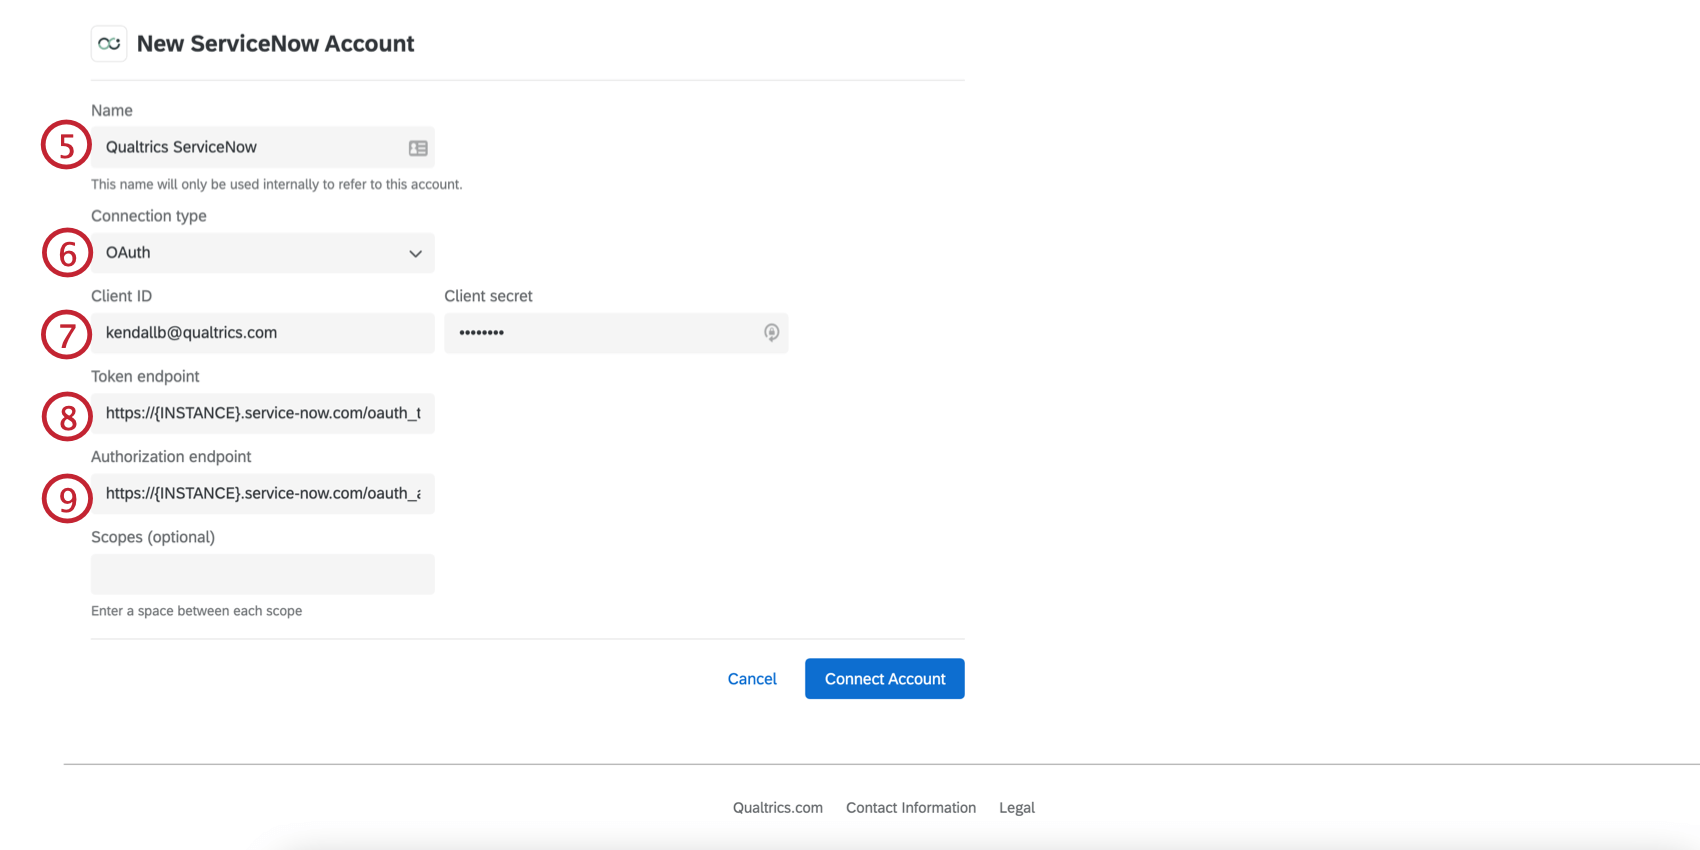
- Select OAuth for the connection type.
- Enter the client ID and secret generated on the Servicenow instance.
- Enter the token endpoint: https://{INSTANCE}.service-now.com/oauth_token.do
- Enter the authorization endpoint: https://{INSTANCE}.service-now.com/oauth_auth.do
Qtip: Your instance is the name you see in the URL before Servicenow’s domain. For example, in https://ven123456.service-now.com/, ven123456 is your instance.
- Click Connect Account.