-

Qualtrics Platform -

Customer Journey Optimizer -

XM Discover -

Qualtrics Social Connect
Importing Contacts from the SAP Customer Data Cloud
About Importing Contacts from the SAP Customer Data Cloud
SAP customers can sync contacts saved in their Customer Data Cloud with Qualtrics XM Directory. This convenient automation lets you map your SAP Customer Data Cloud standard and custom fields and sync the profile and consent data to XM Directory, to jumpstart your CX programs. It’s also easy to pause, resume, or edit automations at any time.
Users must have the Manage Directory permission and access to Automations before they can use this feature.
Setting Up the Automation and its Frequency
- Go to Automations.
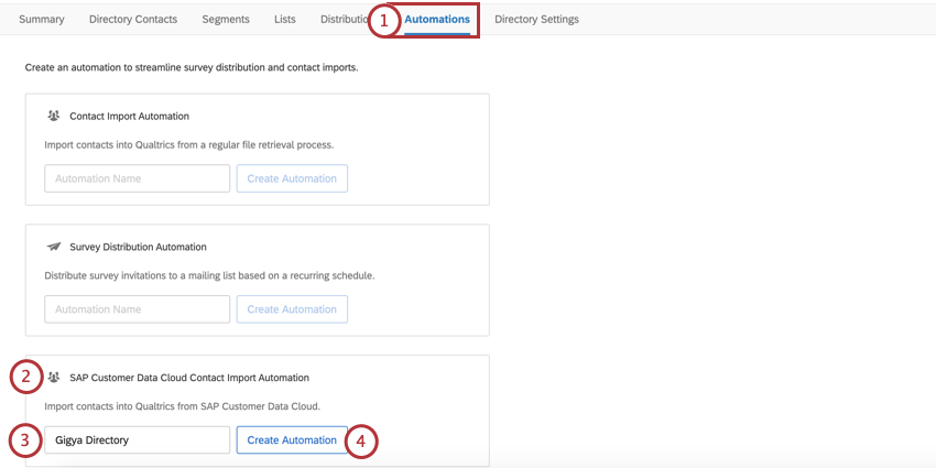
- Scroll down to SAP Customer Data Cloud Contact Import Automation.
- Name your ongoing automation.
- Click Create Automation.
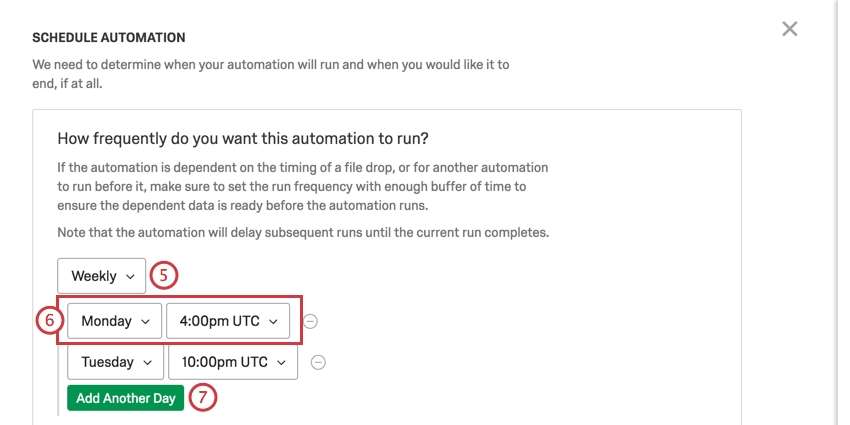
- Determine whether your automation should happen daily, weekly, monthly, or On-Demand. If you select On-Demand, the automation will check files every 15 minutes and process those eligible.

- Determine the time of day / day of the week it should take place. You can run on the hour, or 15, 30, or 45 minutes after the hour.
- Click Add Another Time to add another time of day / week / month this update should occur.
Qtip: There is a limit of 8 times daily, 20 times weekly, or 16 times monthly. While you can technically add the same time multiple times, this will result in the automation only being run once on that time.
- Determine the date you want the first automation to take place.
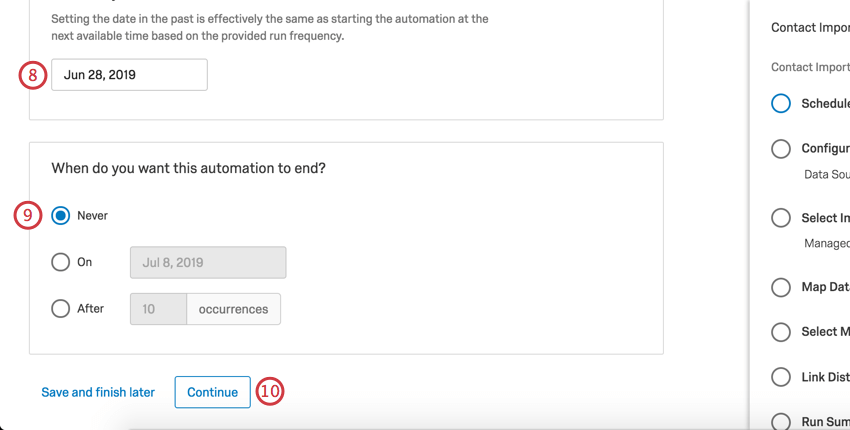 Qtip: If the date is set to today or in the past, the automation will run from now on.
 - Determine when you want the automation to stop importing contacts. You can always modify this later.
- Click Continue to move on to the next step, configuring your SAP Customer Data Cloud Account.

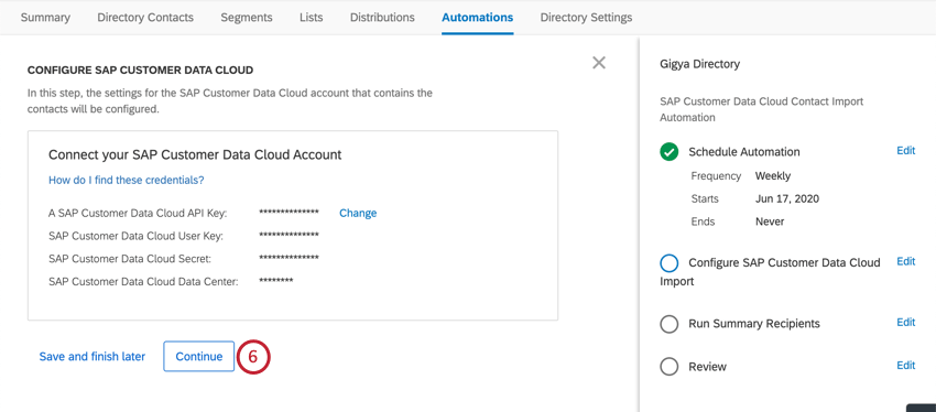
Connect to Your SAP Customer Data Cloud Account
In this step, you’ll connect your Qualtrics automation with your SAP Customer Data Cloud account using a series of credentials. If you are unsure how to find the different IDs in this section, please consult the Global Common Parameters section of Gigya’s support documentation.
- Add your SAP Customer Data Cloud API Key. See instructions for generating an apiKey here.
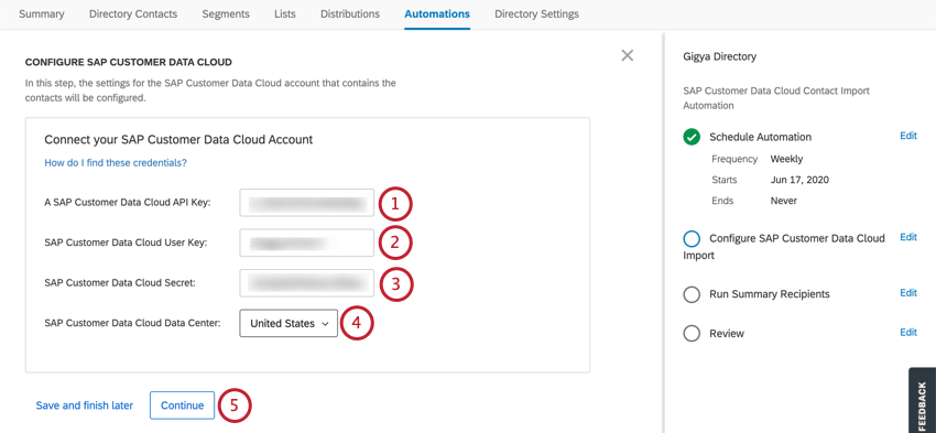
- Add your SAP Customer Data Cloud User Key. The userKey is generated by Creating an Application via the Admin tab of the Gigya Console.
- Add your SAP Customer Data Cloud Secret. The Gigya Secret key can be obtained on the Dashboard page of the Gigya website.
- Select your SAP Customer Data Cloud Data Center. See instructions for identifying here.
- Click Continue.
- You’ll receive a notification at the bottom of the screen letting you know if your credentials were successfully recorded. When you’re ready to proceed to the final steps of your automation, click Continue.
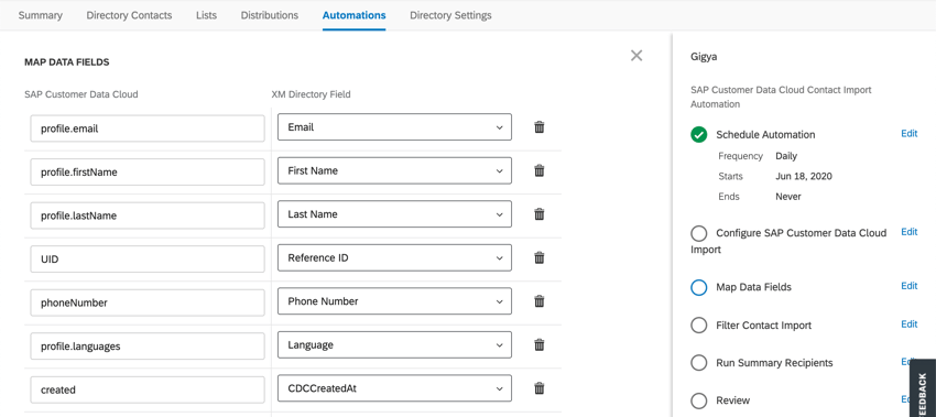
Mapping Fields from SAP Customer Data Cloud to XM Directory
In this step, you will map contact fields from SAP Customer Data Cloud to XM Directory. The column on the left represents the SAP Customer Data Cloud fields, and the column on the right represents the field in XM Directory that you want it to be mapped to.
If you need to retrieve information on the fields in your account, see the documentation for the SAP Customer Data Cloud account object. If the SAP Customer Data Cloud fields you list on the left are not valid, an error message will appear under the invalid field path.
- You will be provided with a list of pre-populated fields by default.
- Click Add Row to map additional fields not listed by default.
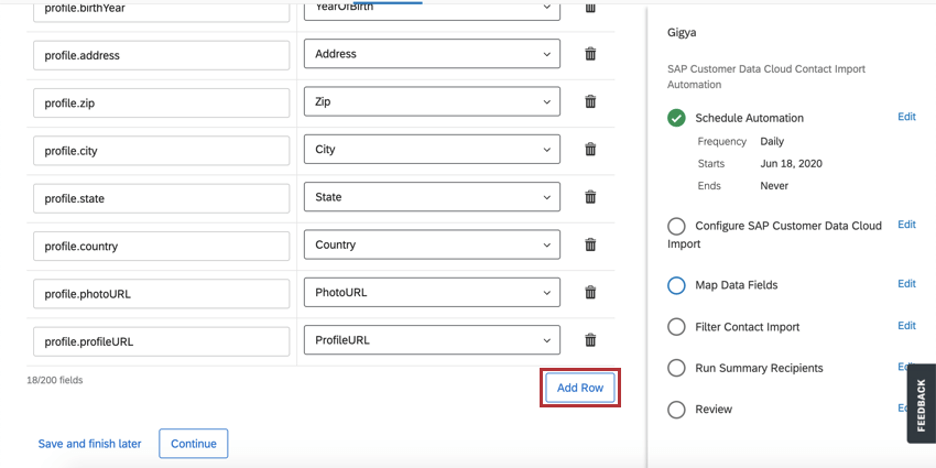
- On the left, enter the name for the SAP Customer Data Cloud field.
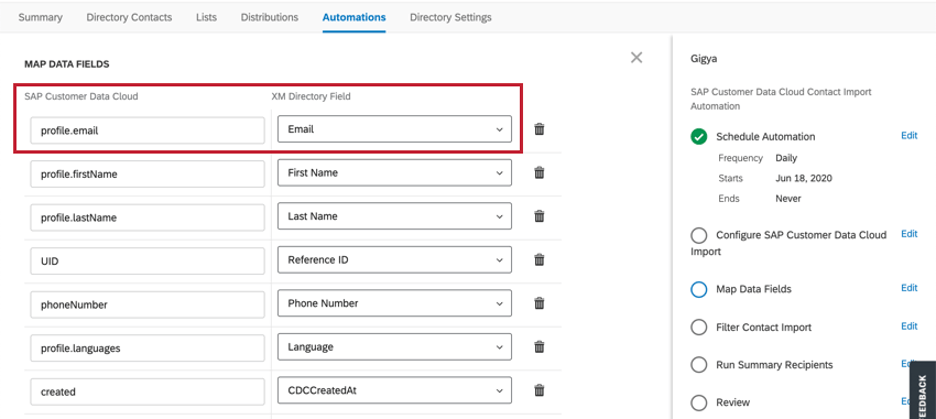
- On the right, use the dropdown to map this to an XM Directory field. You will be able to select one of the standard fields, an embedded data field that already exists in your directory, or click Add new embedded data to add a new field.
- Click the trash icon to delete any of the pre-populated fields that you do not want to include in XM Directory.
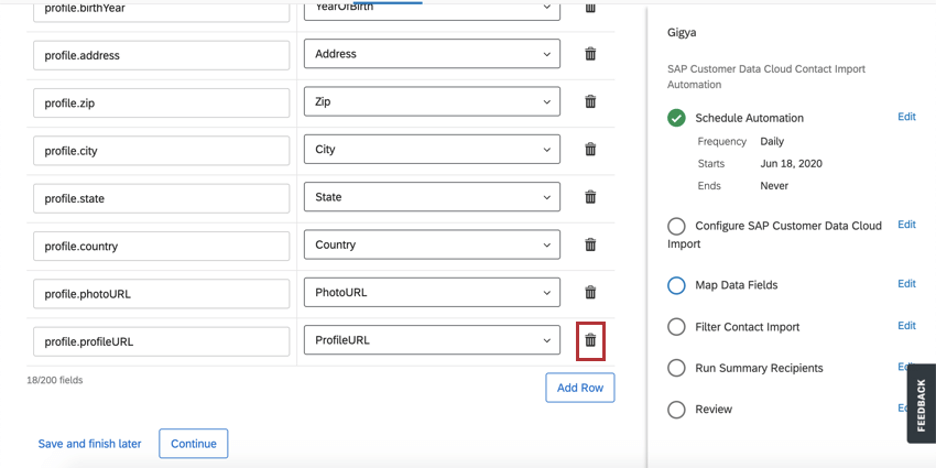
- Make sure there are no error messages next to any of your fields.
- Click Continue to proceed to the next step.
Filtering Customer Data Cloud Contact Imports
In this step, you have the option to limit the contacts imported from your SAP Customer Data Cloud into XM Directory based on the criteria you define. You will need to use SAP Customer Data Cloud’s parameters to define your query. This filter will only accept the “where” clause.
- Determine whether you want to filter your SAP Customer Data Cloud Import or not by selecting either:
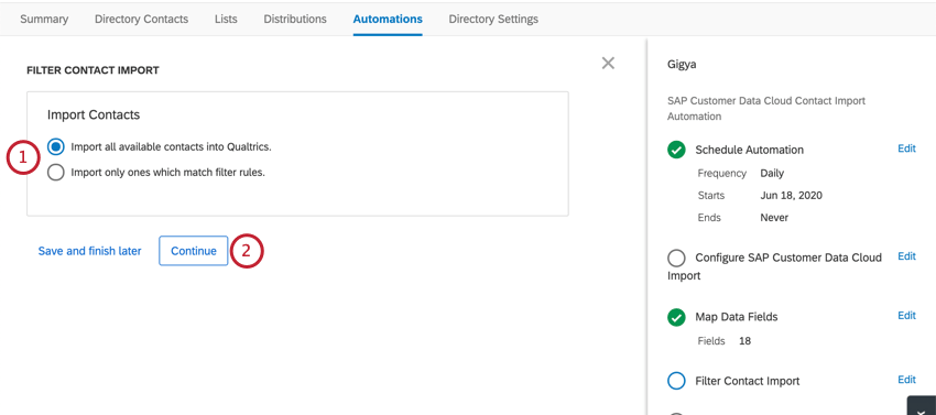
- Import all available contacts into Qualtrics (and proceed without adding a filter)
- Import only ones which match filter rules
- Click Continue.
- If you decided to limit contact imports with a filter, enter the filter parameters in the text area that appears.
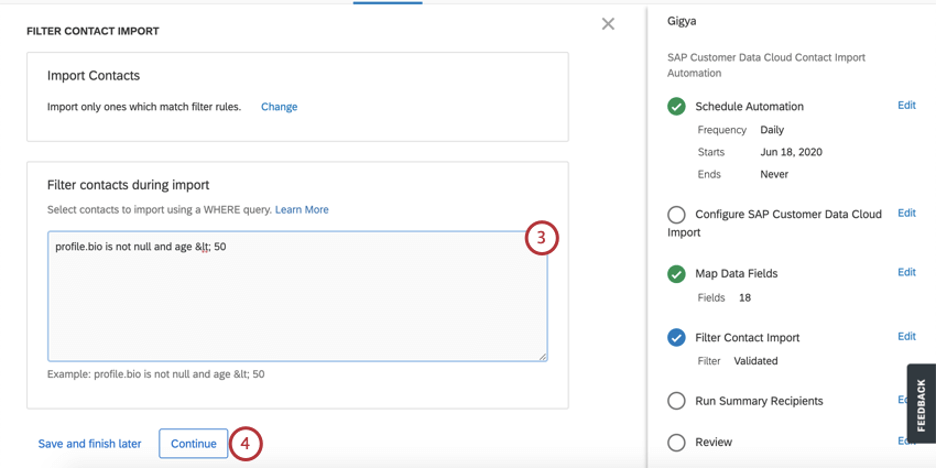 Qtip: You will need to use SAP Customer Data Cloud’s parameters to define your query. This filter will only accept the “where” clause.
 - Click Continue to proceed to the next step.
Sending Run Reports and Enabling the Automation
The final steps of a contact import automation include determining who is emailed when an automation runs, and then enabling the automation. This encompasses the Run Summary Recipients and Review portions of the automation.
- Determine who will be alerted with an email when the automation runs. Use the plus signs ( + ) or the Add Recipient Email button to add additional recipients.
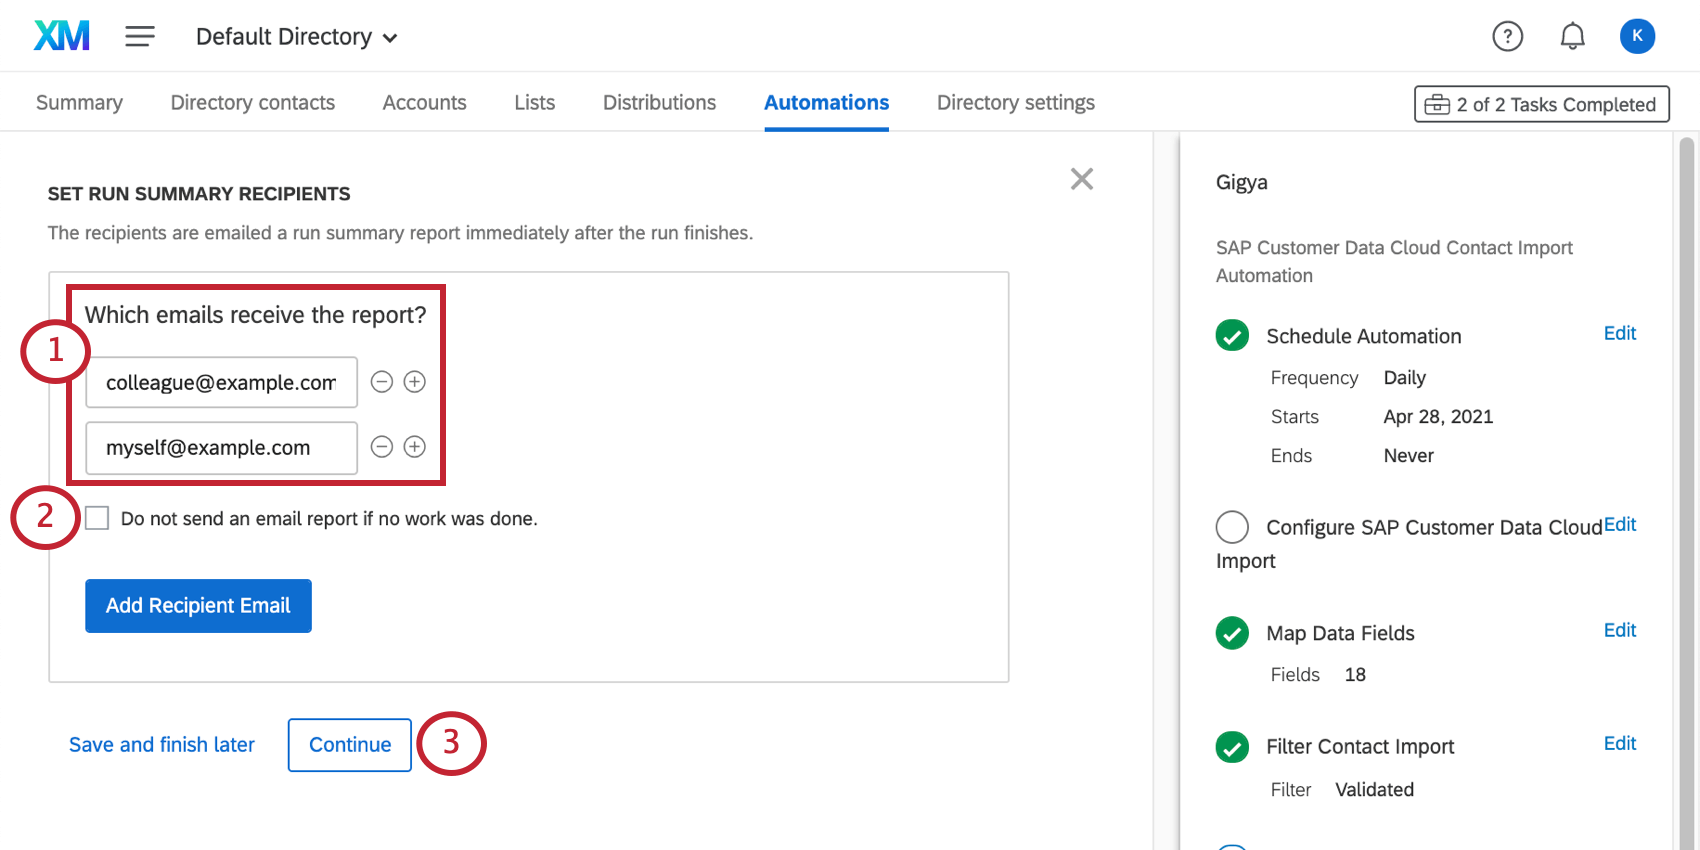
- If you do not want to email a report when there wasn’t any work done to report on, check the box.
- Click Continue.
- Click Edit next to go back to any section and make changes.
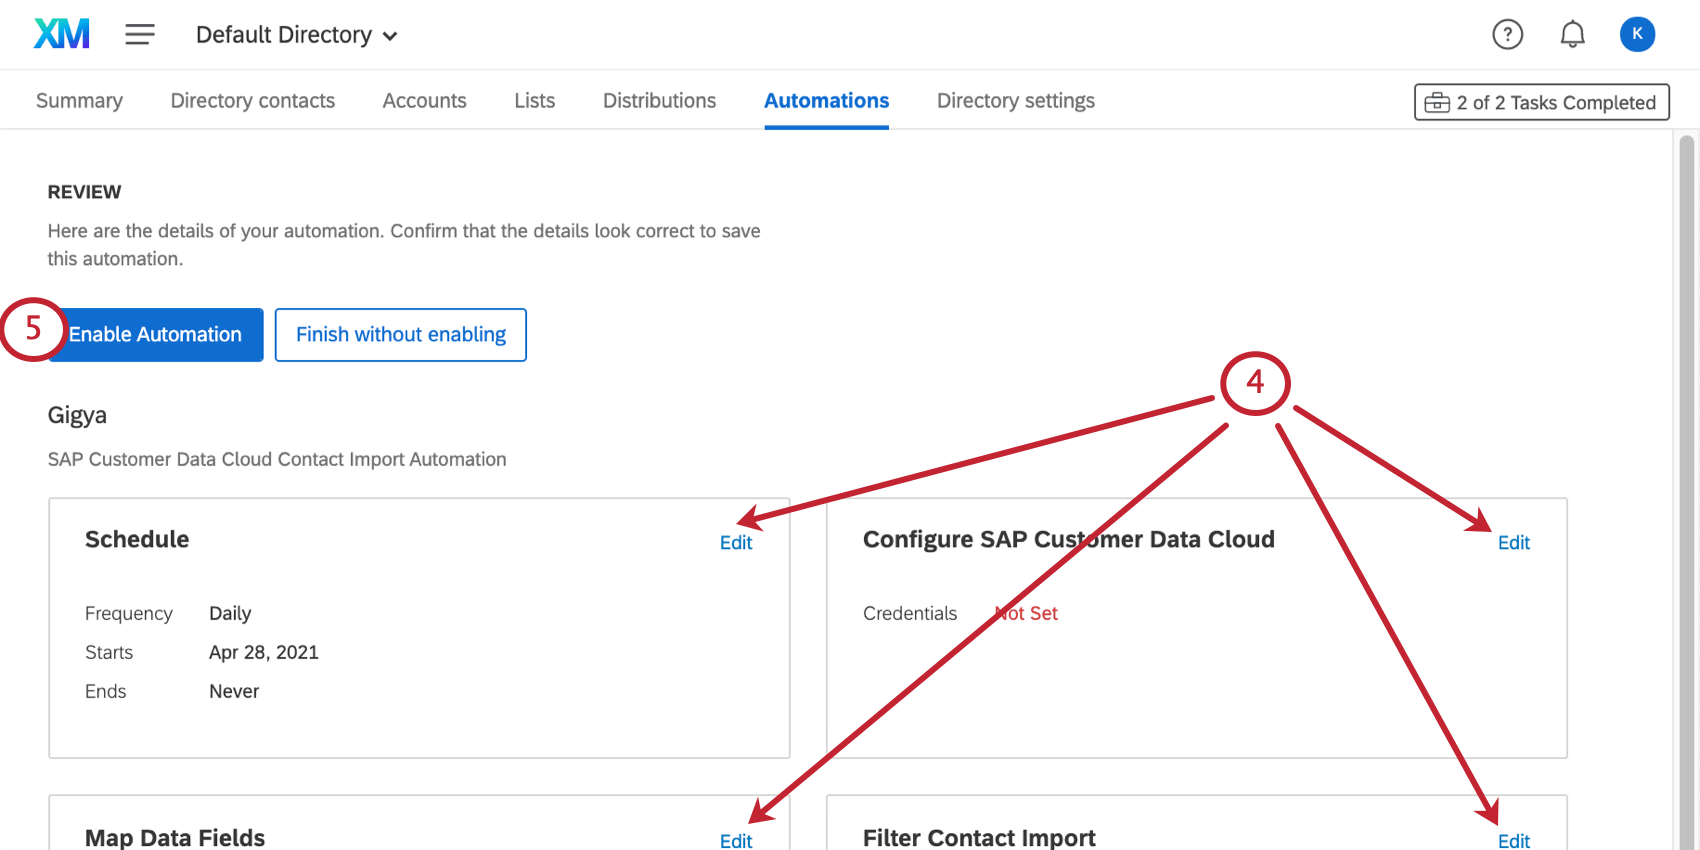
- Click Enable Automation to start your automation, or click Finish without enabling to save the automation but not start it.