-

Qualtrics Platform -

Customer Journey Optimizer -

XM Discover -

Qualtrics Social Connect
Using the WhatsApp Self-Service Model
About the Self-Service Model
Before you can distribute your survey through WhatsApp, you will need to complete some preliminary setup steps. This page goes over those steps for customers on the self-service model. This model is recommended if your company has a pre-existing relationship with Twilio. See a comparison.
Creating and Verifying a Twilio WhatsApp Profile
Step 1: Create a Twilio Account
If you don’t already have a Twilio account, you can sign up for free. If you already have a Twilio account for your business, proceed to the next step.
Step 2: Accept the WhatsApp Terms of Service and the WhatsApp Client Terms on Twilio
Qualtrics partners with Twilio to provide WhatsApp connectivity.
- Go here to accept the WhatsApp Client terms. You must fill out this survey and submit it.
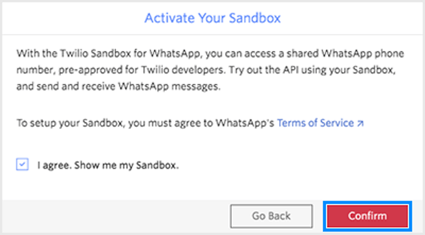
- Access the WhatsApp page in Twilio. Here is a direct link, if you are already logged in.
- Review the Terms of Service.
- To continue, check the agree box, and then click Confirm.
Step 3: Create a Facebook Business Manager Account
Your organization must have its own Facebook Business Manager account in order to be approved for WhatsApp access. This is used by WhatsApp to identify your business and associate your phone numbers.
If your organization doesn’t already have a Facebook Business Manager account, you can create one at business.facebook.com. See Facebook’s instructions for setting up this account.
Find your Facebook Business Manager ID by following the steps listed here on Facebook’s support site and write it down. You need this for the next step, when you enable your Twilio numbers for WhatsApp use.
Step 4: Enable Your Twilio Account for WhatsApp Use
Follow the steps described in Twilio’s documentation to fill out Twilio’s Request Access form. This enables you to use your Twilio numbers for WhatsApp distributions.
Enter No for I wish to provision this account with a third party vendor and leave the Assign approval to alternate Account Sid field empty.
Wait for Twilio’s approval before proceeding to the next step. Once approved, you should get an email from Twilio.
Step 5: Submit a WhatsApp Sender Profile on Twilio
Follow the steps described in Twilio’s documentation to submit a WhatsApp sender profile.
Write down the phone number you’ve selected – you will need it later when you integrate with the Qualtrics WhatsApp extension.
When you receive notice that Twilio has submitted your WhatsApp Business display name and Twilio number to WhatsApp, you can proceed to the next steps.
Step 6: Allow Twilio to send messages on your behalf
Follow the steps described in Twilio’s documentation to approve Twilio in Facebook Business Manager, allowing them to send messages on your behalf.
Step 7: Verify your Facebook Business Manager account
If you have not already verified your Facebook Business Manager account, see Twilio’s documentation.
Wait until Twilio completes the registration process. This usually takes a few days. You will receive an email confirmation that Twilio has finalized the registration of your profile.
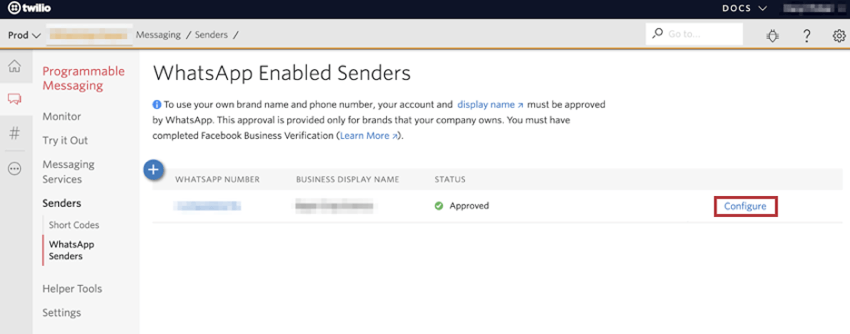
When that happens, you should see Approved next to your profile in Programmable messaging > Senders > WhatsApp Senders.

Integrating Your Twilio Account with Qualtrics
Once Twilio has confirmed your WhatsApp Business Profile registration is complete, you can integrate it with Qualtrics.
Step 1: Connect to the Qualtrics WhatsApp Extension
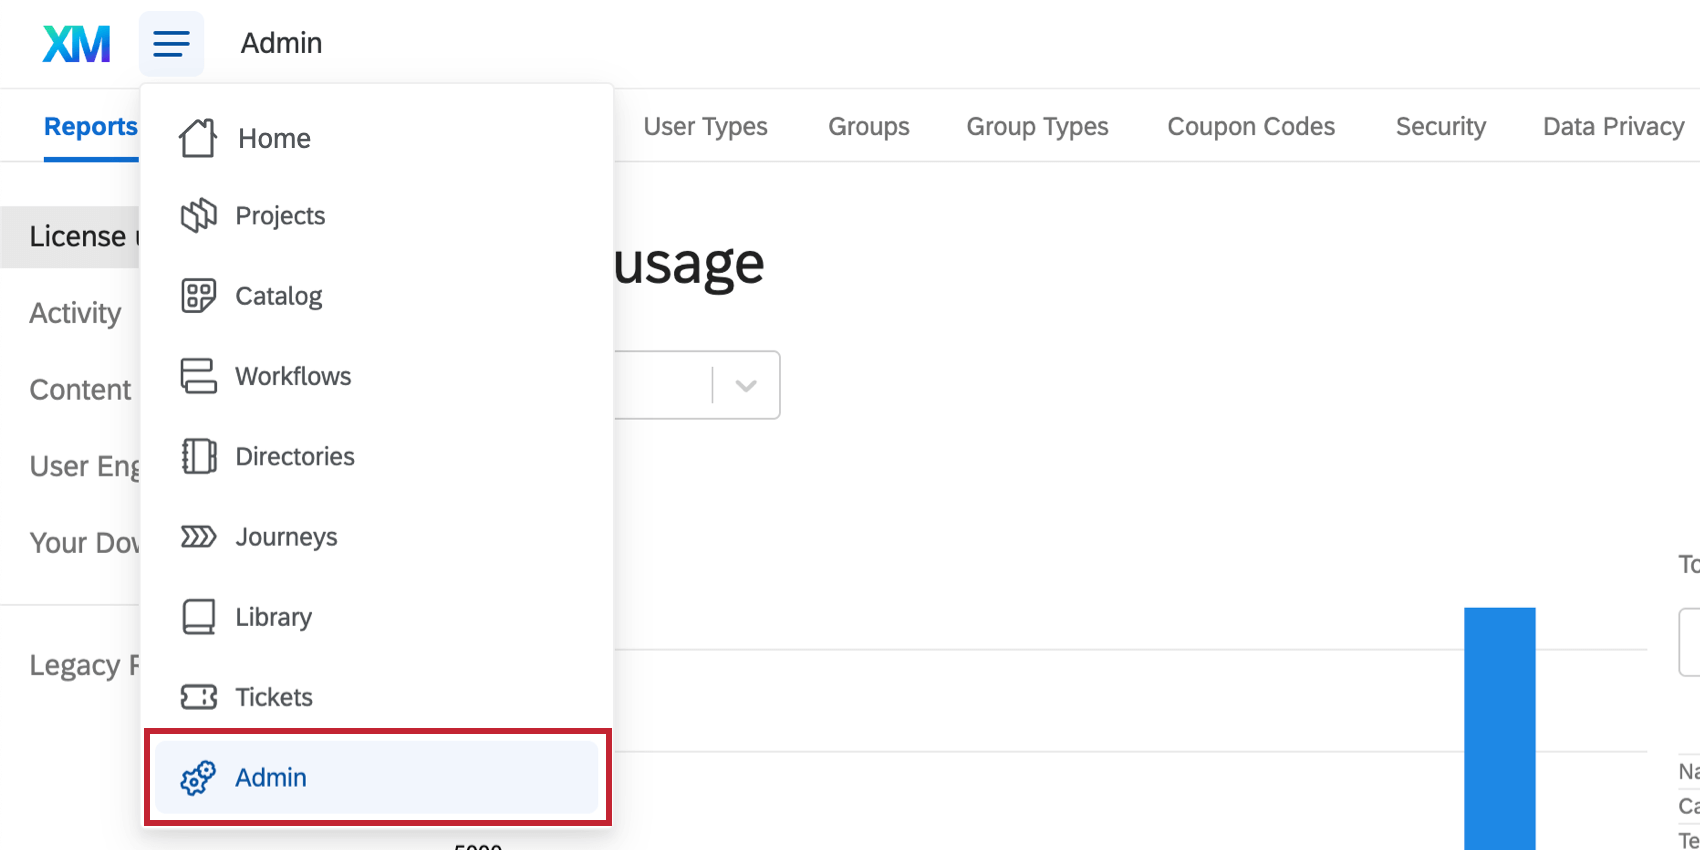
- Go to the Admin page.
- Go to Extensions.
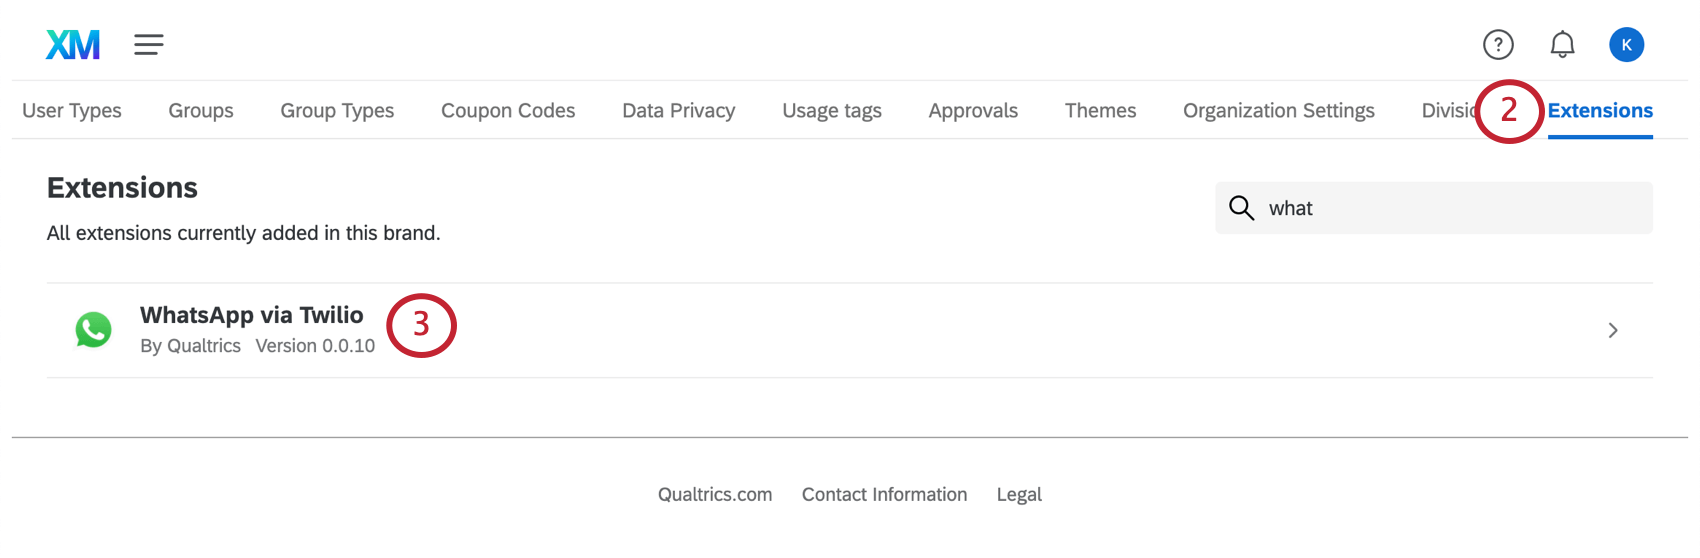
- Select WhatsApp via Twilio.
- Click Add Account.
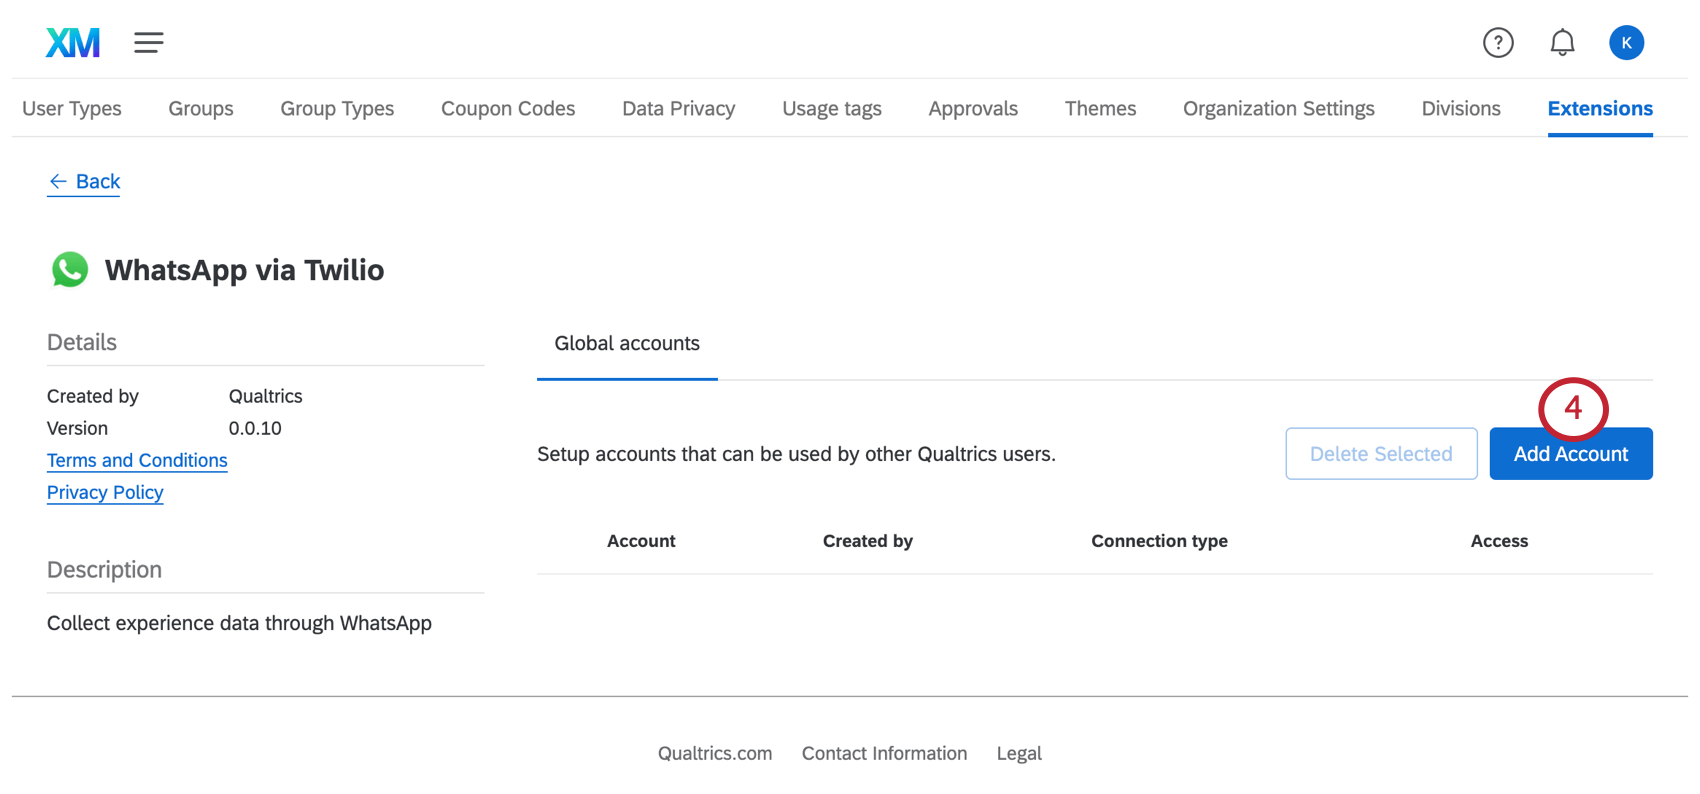
- Under Name, put the phone number you created the WhatsApp sender profile for.
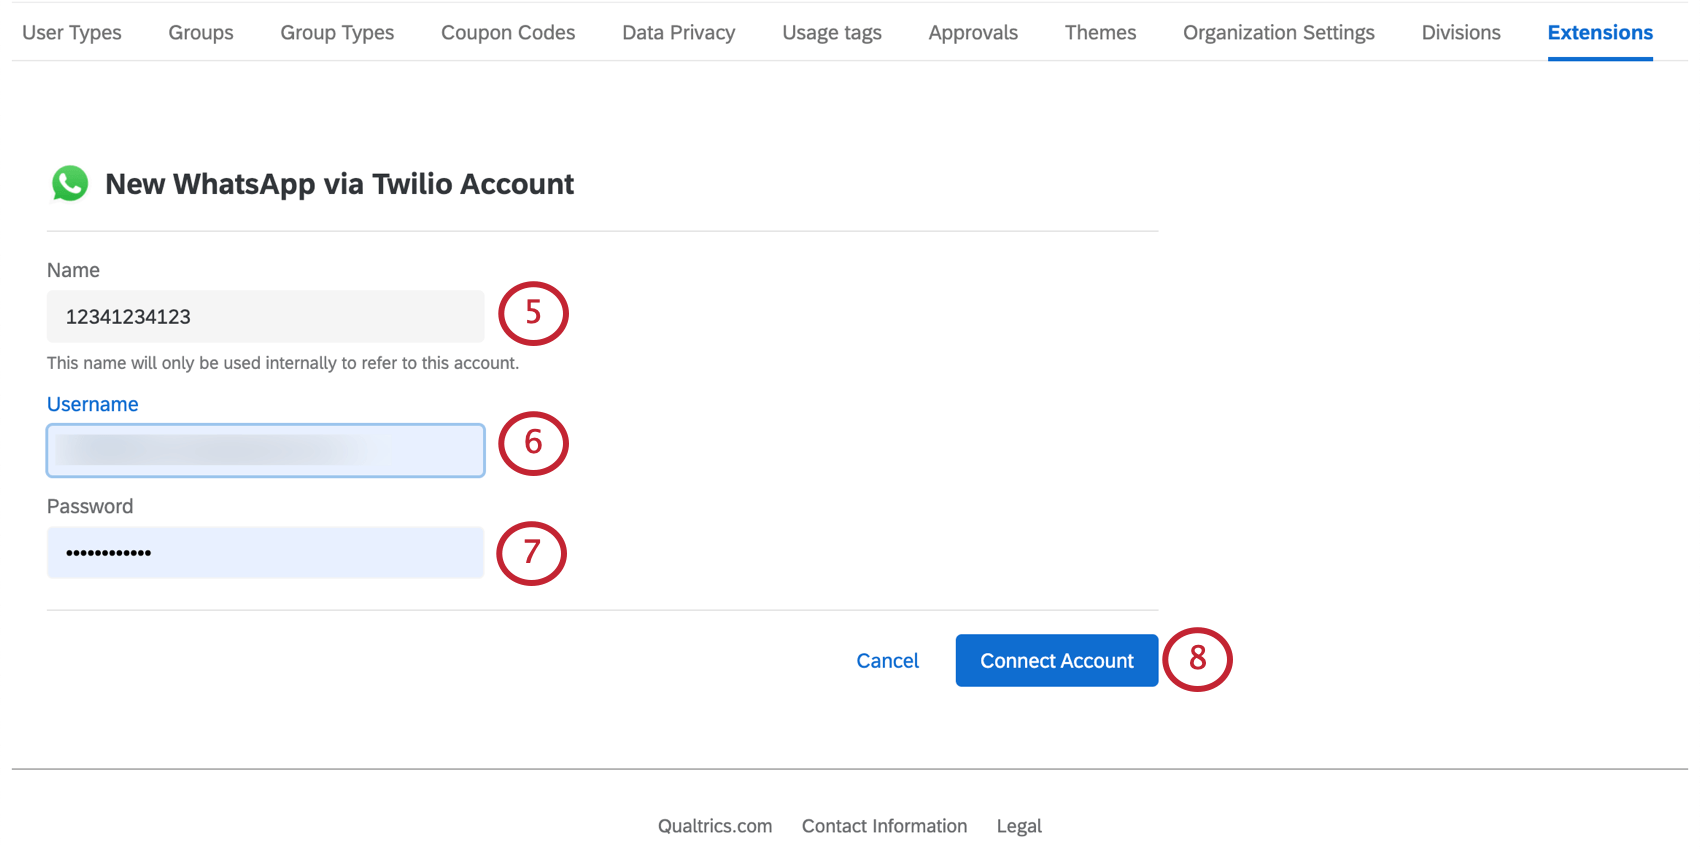 Qtip: There should be only numbers in this field, no plus sign ( + ), dash ( – ), or spaces. For example, 12341234123 (US Number), 48123123123 (Polish number). Note the inclusion of the country code.
 - Under Username, put the Twilio Account SID. This is found in the dashboard after logging into Twilio.
- Under Password, put the Twilio Auth Token. This is found in the dashboard after logging into Twilio.
- Click Connect Account.
If you have additional questions about adding extensions to your Qualtrics license, see the Extensions support page.
Step 2: Configuring the Qualtrics Callback URL in Twilio
In order for the integration between Twilio and Qualtrics to work, you need to set up the callback in Twilio with a Qualtrics HTTP endpoint.
- Log into Twilio.
- Go to Programmable messaging > Senders > WhatsApp Senders.
- Click Configure for the number you used when setting up Qualtrics WhatsApp extension.
- For both A message comes in and Status callback URL, select HTTP Post.
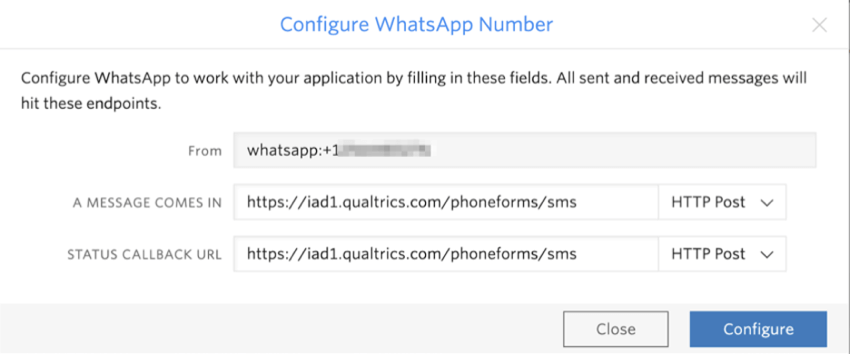
- Paste the URL https://iad1.qualtrics.com/phoneforms/sms into both fields.
- Submit the set up by clicking Configure.
Creating a WhatsApp Template Message
Although WhatsApp opens up new communication possibilities, they also carry a set of protective requirements regarding consent. Before you can distribute surveys in WhatsApp, you will need to create messages meeting WhatsApp’s consent guidelines, and submit these templates to Twilio for approval.
Step 1: Template Message Requirements
Here are some guidelines for drafting your message template:
- Message templates should avoid the word “survey.” Instead, we recommend that you ask respondents to “share their experience” or “give feedback.”
- Please keep in mind that you may have different language versions of the message template to distribute and they need to be approved separately.
- If you modify the template, you must have it approved again. Distributions sent with unapproved messages will fail.
- Invite templates must include survey and opt-out links as Piped Text.
Example for Survey Invitations:
Hi ${m://FirstName}!
We’ve noticed that you started using our new XM Hub Portal. If you like to share your experience please open ${l://SurveyURL}. If you don’t like to receive such notifications in the future please open ${l://OptOutURL}.
Qualtrics XM
2-way templates must be written in the form of a question that explicitly asks for yes/no answers (e.g., 1 – yes; 2 – no). Additionally, your message must include a third option to unsubscribe.
Example for 2-Way:
Hi ${m://FirstName}
We’ve noticed that you started using our new XM Hub Portal. Would you like to share your experience with us?
Enter 1 for yes
Enter 2 for no
Enter 3 to unsubscribe from future notifications like this one
Step 2: Convert the message from Qualtrics to Twilio format
Before you submit the template to Twilio, you need to change the formatting for placeholder values – in a Qualtrics message template these are piped text elements, e.g. ${l://SurveyURL} or ${l://OptOutURL}. Twilio does not recognize this format and uses double curly braces instead: {{TextHere}}
Converting between the two formats is very simple. Just replace every ${<piped text>} element with {{<number>}}.
Here are the examples for the survey invite and 2-way interactive templates we’ve used before:
| Qualtrics Template | Twilio Template | |
| Example 1 | Hi ${m://FirstName}!
We’ve noticed that you started using our new XM Hub Portal. If you like to share your experience please open ${l://SurveyURL}. If you don’t like to receive such notifications in the future please open ${l://OptOutURL}.
Qualtrics XM |
Hi {{1}}!
We’ve noticed that you started using our new XM Hub Portal. If you like to share your experience please open {{2}}. If you don’t like to receive such notifications in the future please open {{3}}.
Qualtrics XM |
| Example 2 | Hi ${m://FirstName}
We’ve noticed that you started using our new XM Hub Portal. Would you like to share your experience with us?
Enter 1 for yes Enter 2 for no Enter 3 to unsubscribe from future notifications like this one |
Hi {{1}}
We’ve noticed that you started using our new XM Hub Portal. Would you like to share your experience with us?
Enter 1 for yes Enter 2 for no Enter 3 to unsubscribe from future notifications like this one |
Step 3: Submit the message template to Twilio and wait for approval
Follow the steps described in Twilio’s documentation to configure WhatsApp message template and submit it for approval.
Wait for the approval before proceeding to the next step.
Step 4: Uploading a Message Template to the Qualtrics Library
Once your messages have been approved, you can upload them to Qualtrics so you can quickly reuse them every time you send a WhatsApp distribution.
- Go to the Library.
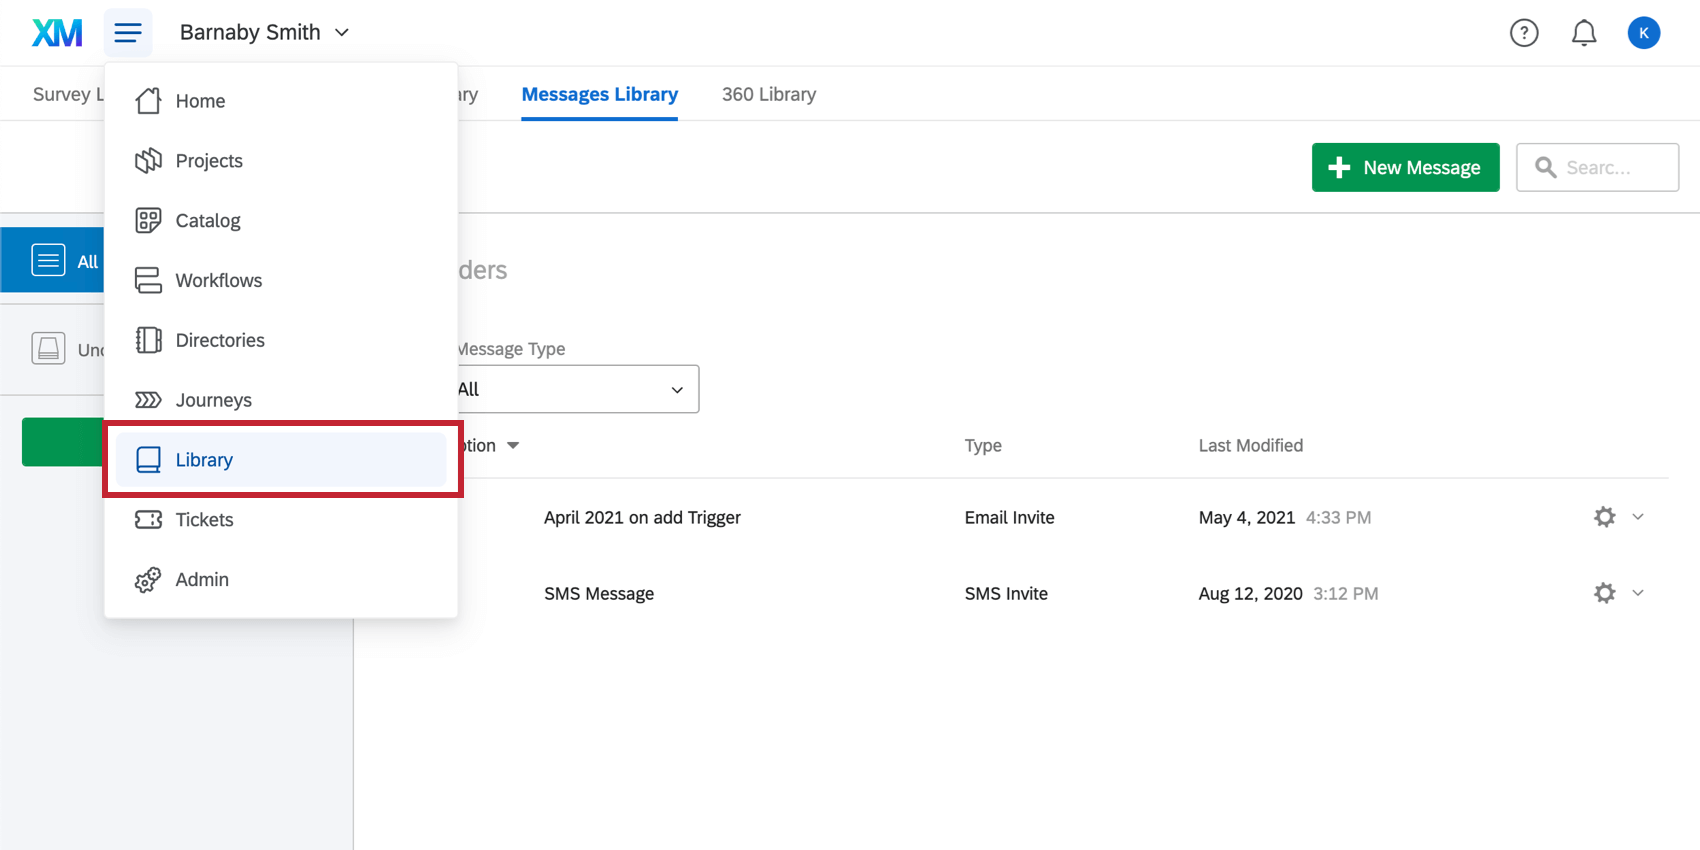
- Click New resource.
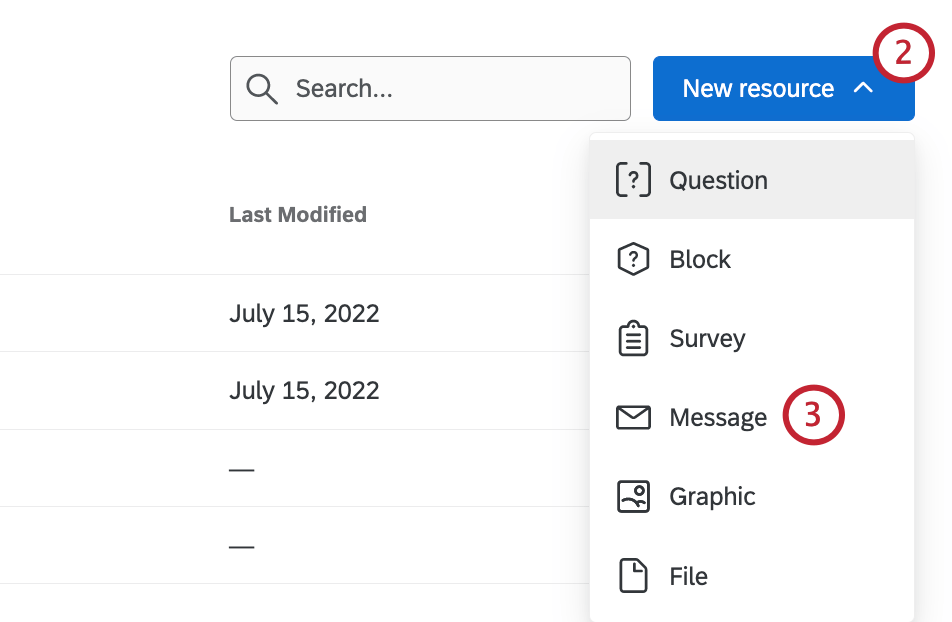
- Select Message.
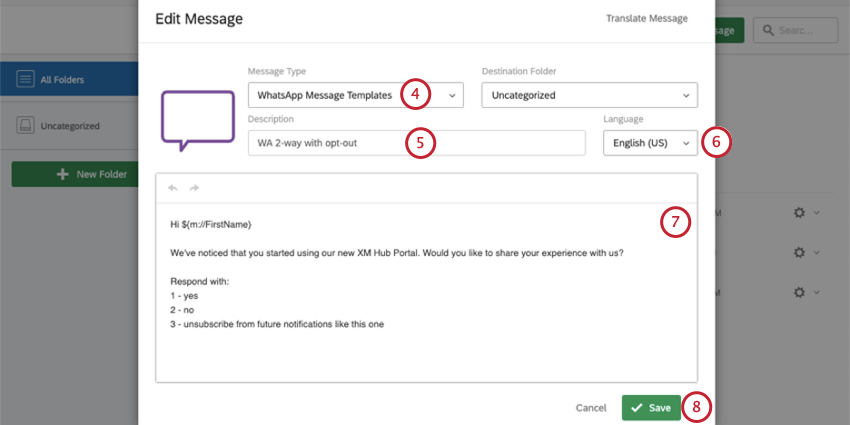
- Set the Message Type to WhatsApp Message Templates.
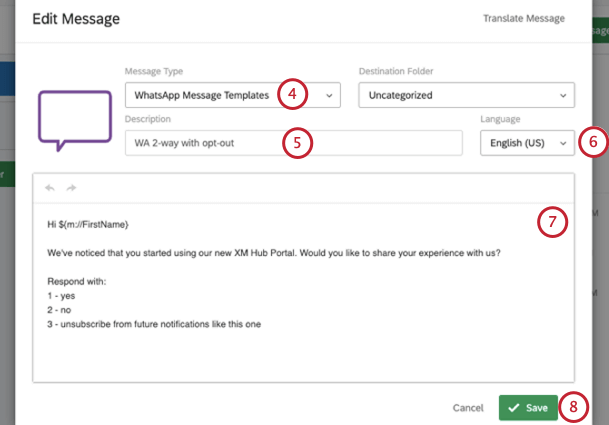
- Name the message.
- Set the language of the message.
Qtip: Every translation of the message has to be separately approved by WhatsApp.
- Type out your message, explaining how the respondent can consent, refuse to take the survey, or opt out of all future WhatsApp surveys.
- Click Save.
Upgrading to a WhatsApp Official Business Account
Although not required, we recommend this step because it adds legitimacy to your WhatsApp distributions and lets respondents know your business can be trusted. For specific steps, see Upgrading to a WhatsApp Official Business Account.
Distributing through WhatsApp
Once you have completed the steps on this support page, you are ready to distribute your survey through WhatsApp. Please see WhatsApp Distributions for more details on how to import WhatsApp numbers, 2-way and survey link distributions, viewing past distributions, and more.