-

Qualtrics Platform -

Customer Journey Optimizer -

XM Discover -

Qualtrics Social Connect
Creating Mailing Lists
About Creating Mailing Lists
Before you can send out invitations for your surveys, you need to create mailing lists. Mailing lists are lists of your directory contacts that you can send emails to. You can create mailing lists either through a file upload or manually.
Unlike contacts in the directory, mailing lists are not visible to the entire organization. However, many of the steps described in adding contacts to mailing lists are similar to adding contacts to the directory. Every contact added to a mailing list will automatically be added to the directory.
Private list data will only be visible within the list it was added to, and will not be visible within the directory.
Projects That Can Use Mailing Lists
You can use XM Directory to build mailing lists and send invitations for several types of Qualtrics projects. However, not every Qualtrics project type is compatible with XM Directory.
XM Directory can be used to send the following:
- Survey projects
- Conjoint / MaxDiff
- Certain non-EX XM Solutions
In contrast, XM Directory cannot be used to distribute any Employee Experience (EX) projects. That means that no EX projects can be used with XM Directory, including Engagement, Pulse, 360, and more.
XM Directory contact data is completely separate from the employee / participant information saved in the Employee Directory. That means that data edited in one directory will never affect the other.
Available Fields
See available fields listed on the Adding Directory Contacts support page.
Private List Data
Private list data is embedded data that can be created in specific mailing lists and is only visible to users with access to the list. Benefits of private list data include controling access to specific attributes, while also avoiding overwriting or editing directory-wide embedded data fields.
Private list data can be enabled by Directory Admins in Directory Settings. See Editing Different Directories for instructions.
Creating a Mailing List
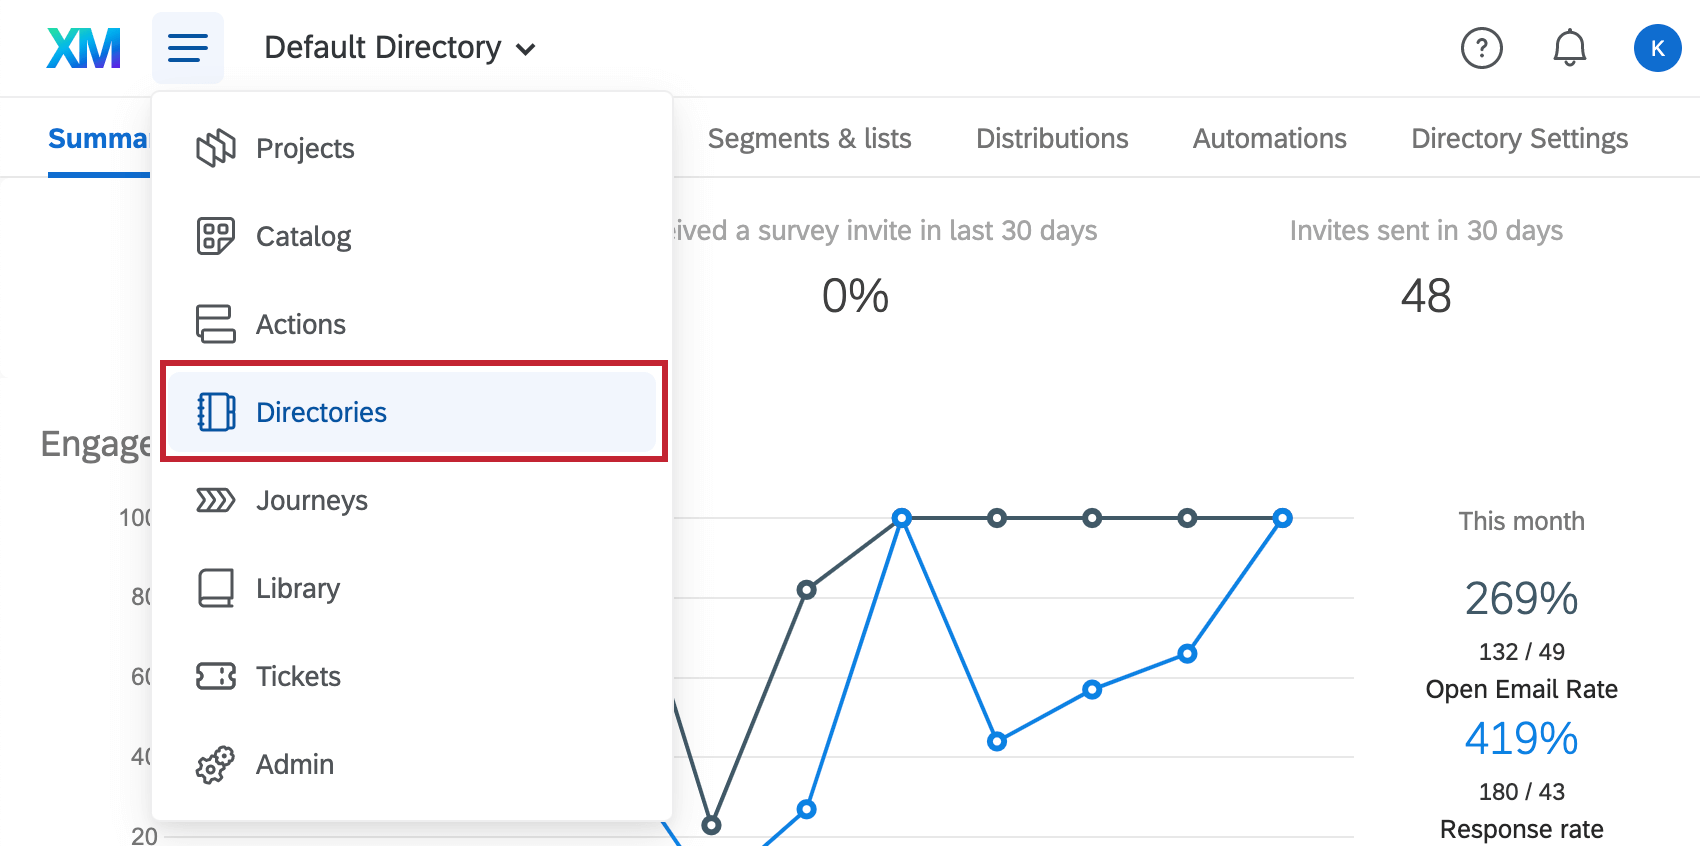
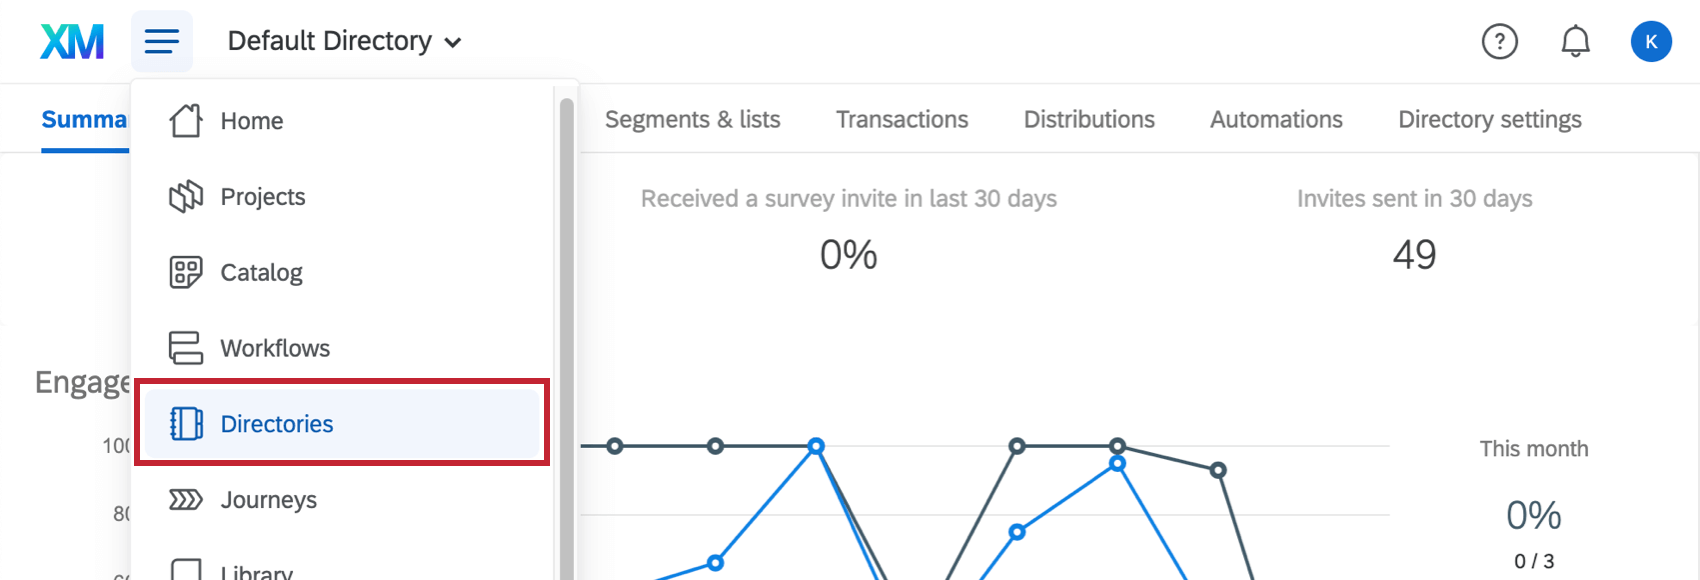
- Navigate to your Directories.
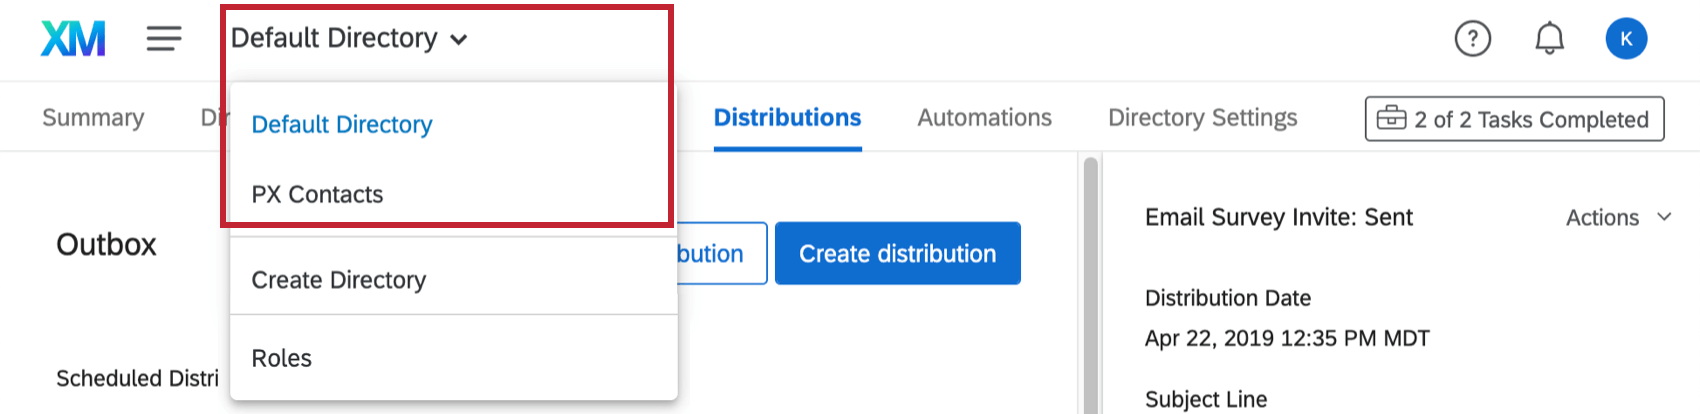
- Select the directory where you’d like to add a list. You may have access to just 1 directory.
- Go to the Segments & lists tab.
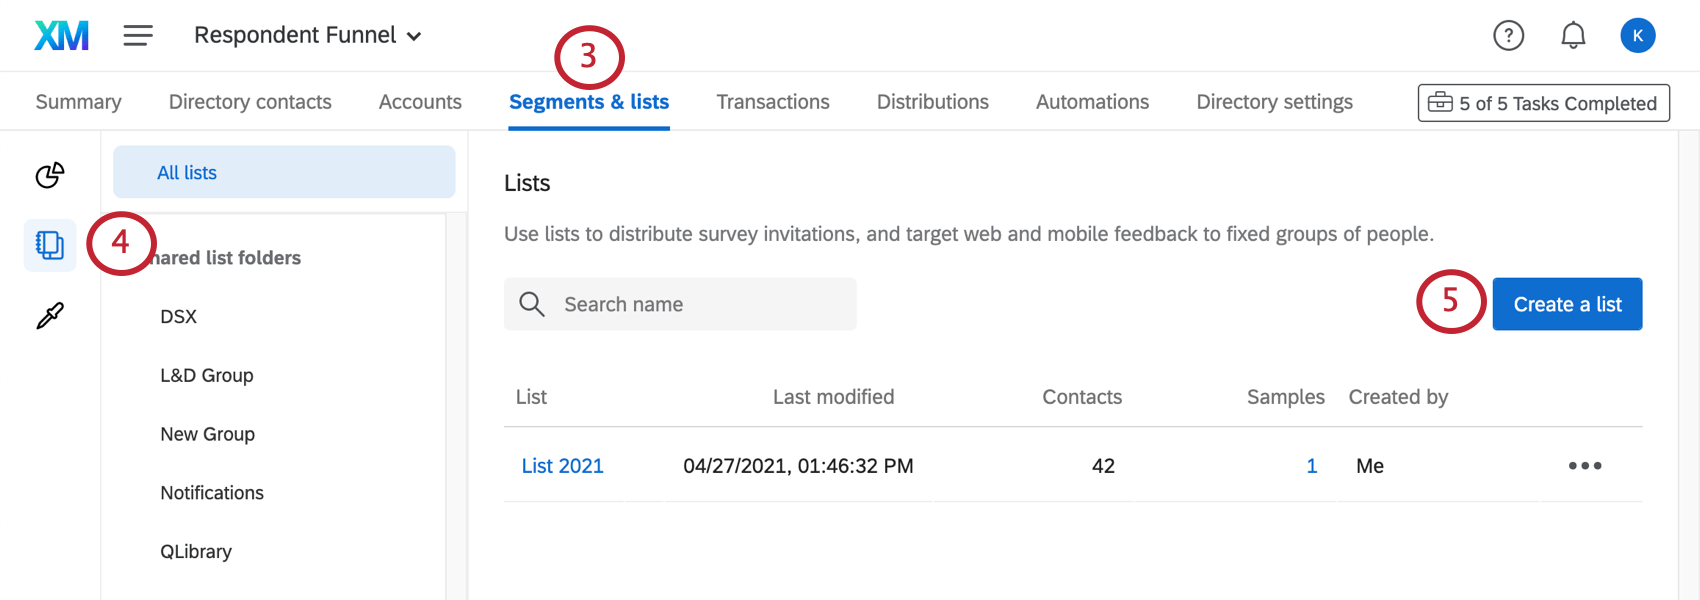
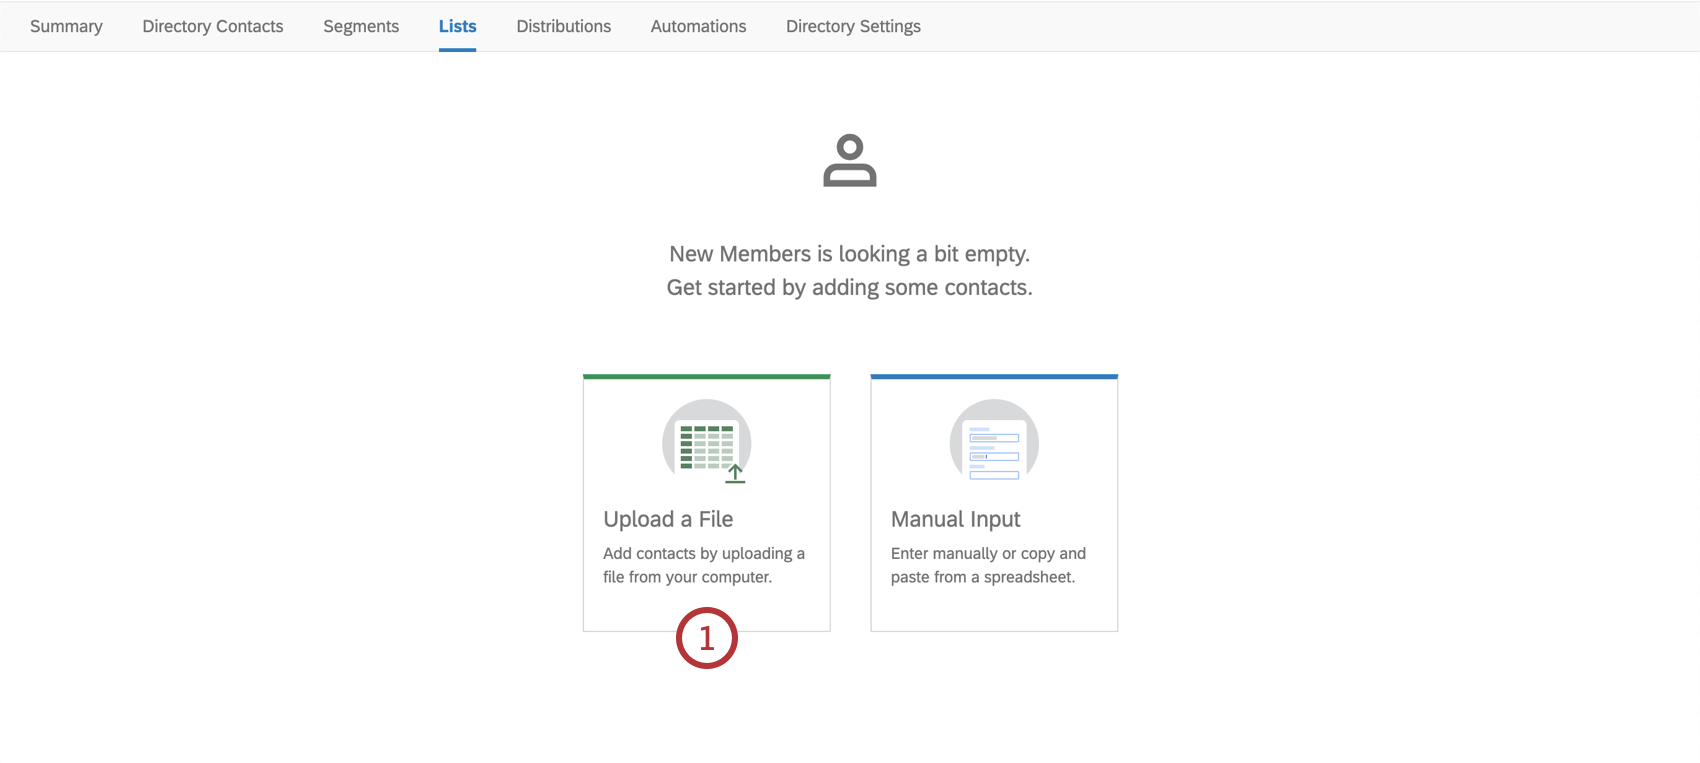
- Select Lists from the left.
- Click Create a list.
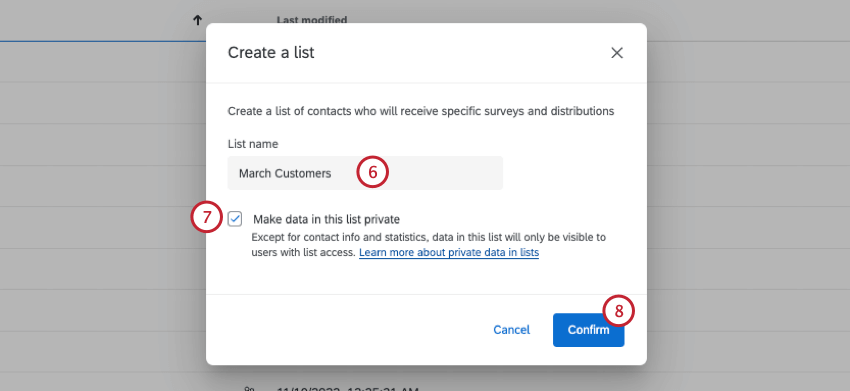
- Name your list.
 Qtip: List names are not compatible with some special characters (e.g., =, {}, or <>).
 - Check the box if you want to Make data in this list private. When selected, data in the list will only be visible to users who have access to the list.
- Click Confirm.
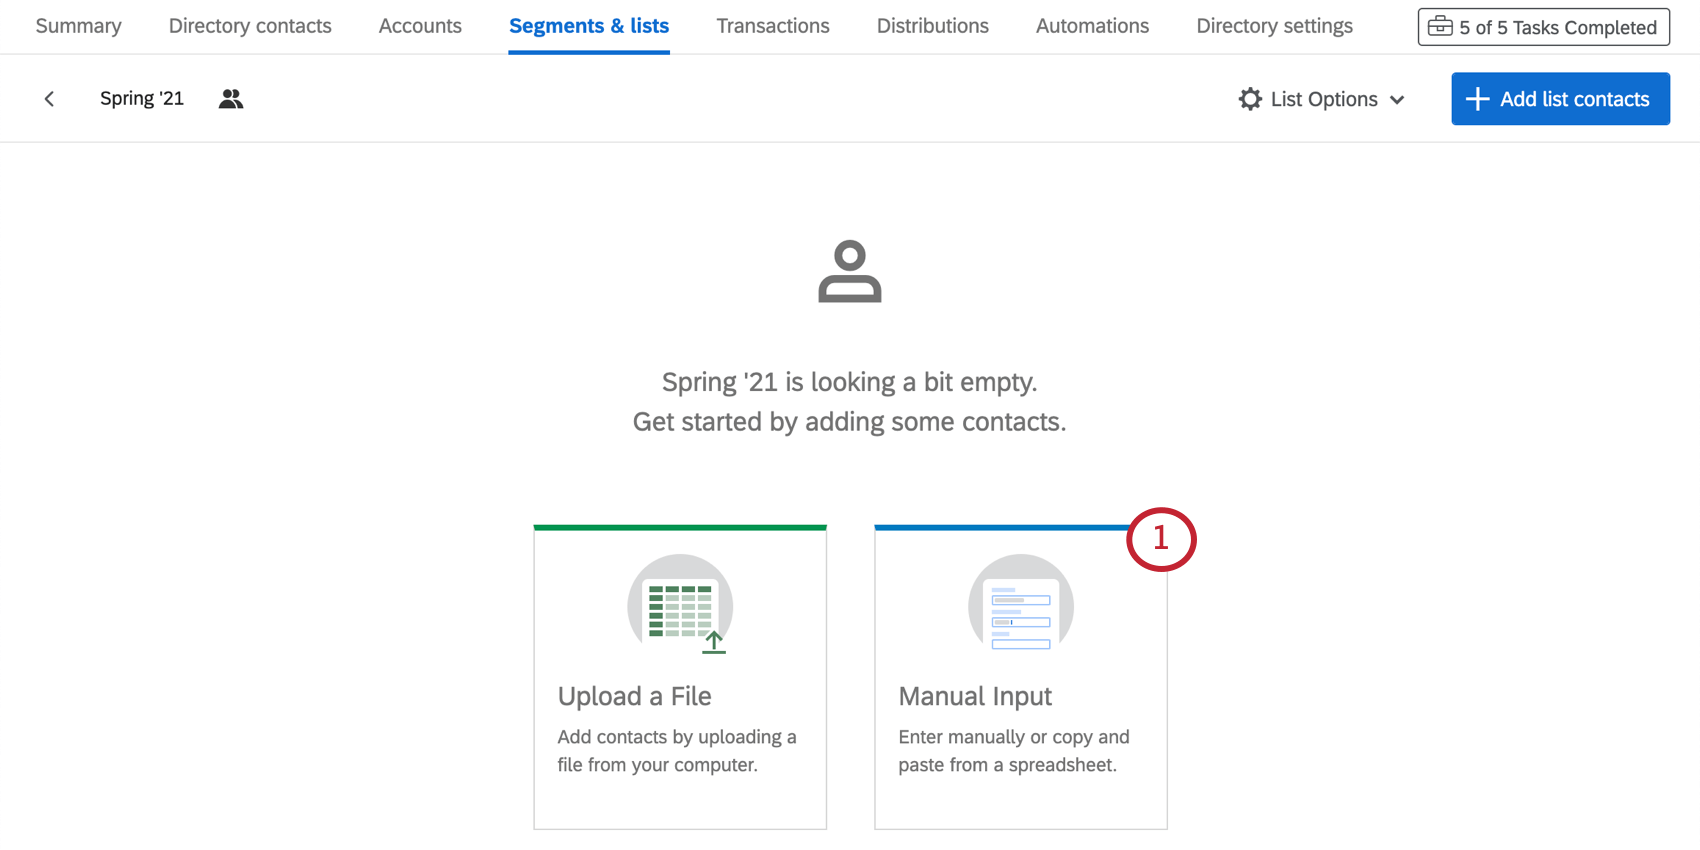
Once inside your contact list, you can choose to upload contacts through a file upload or manually.
Upload a File
- Click Upload a File.
- In Excel, create a document with the required fields and save it as a CSV or TSV. Or, click Download a sample template, fill out the appropriate columns, add any desired Embedded Data, and save the file.
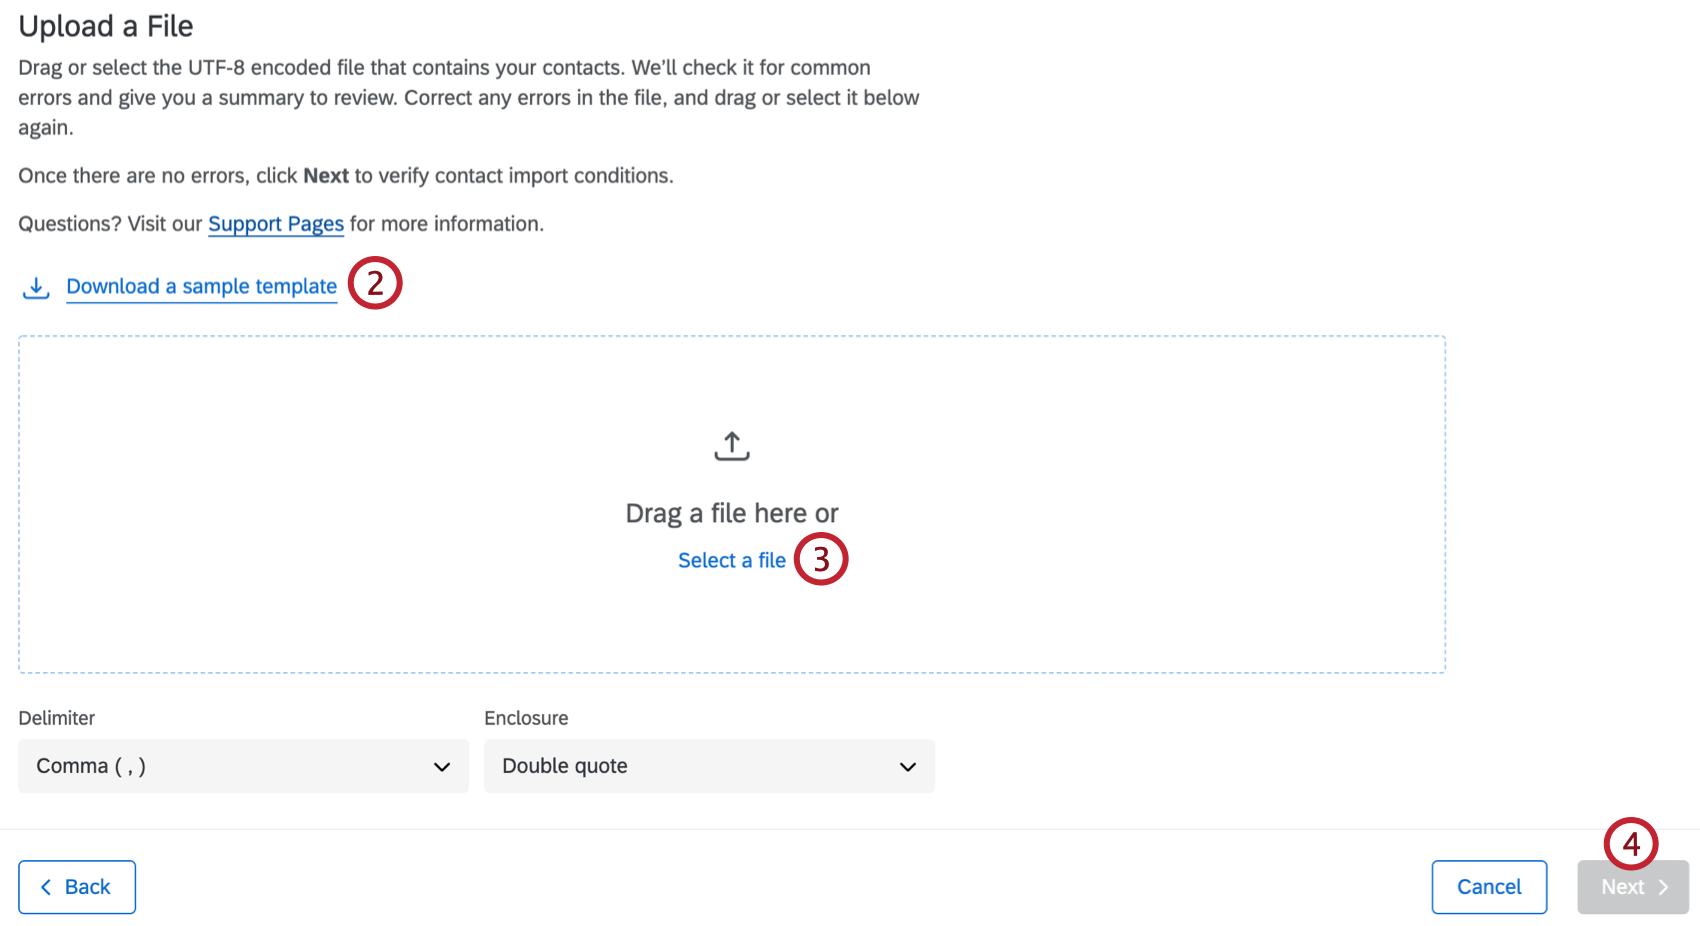
- When the file is ready, click Select a file and select the file from your folder or drag your file into the window.
- Click Next.
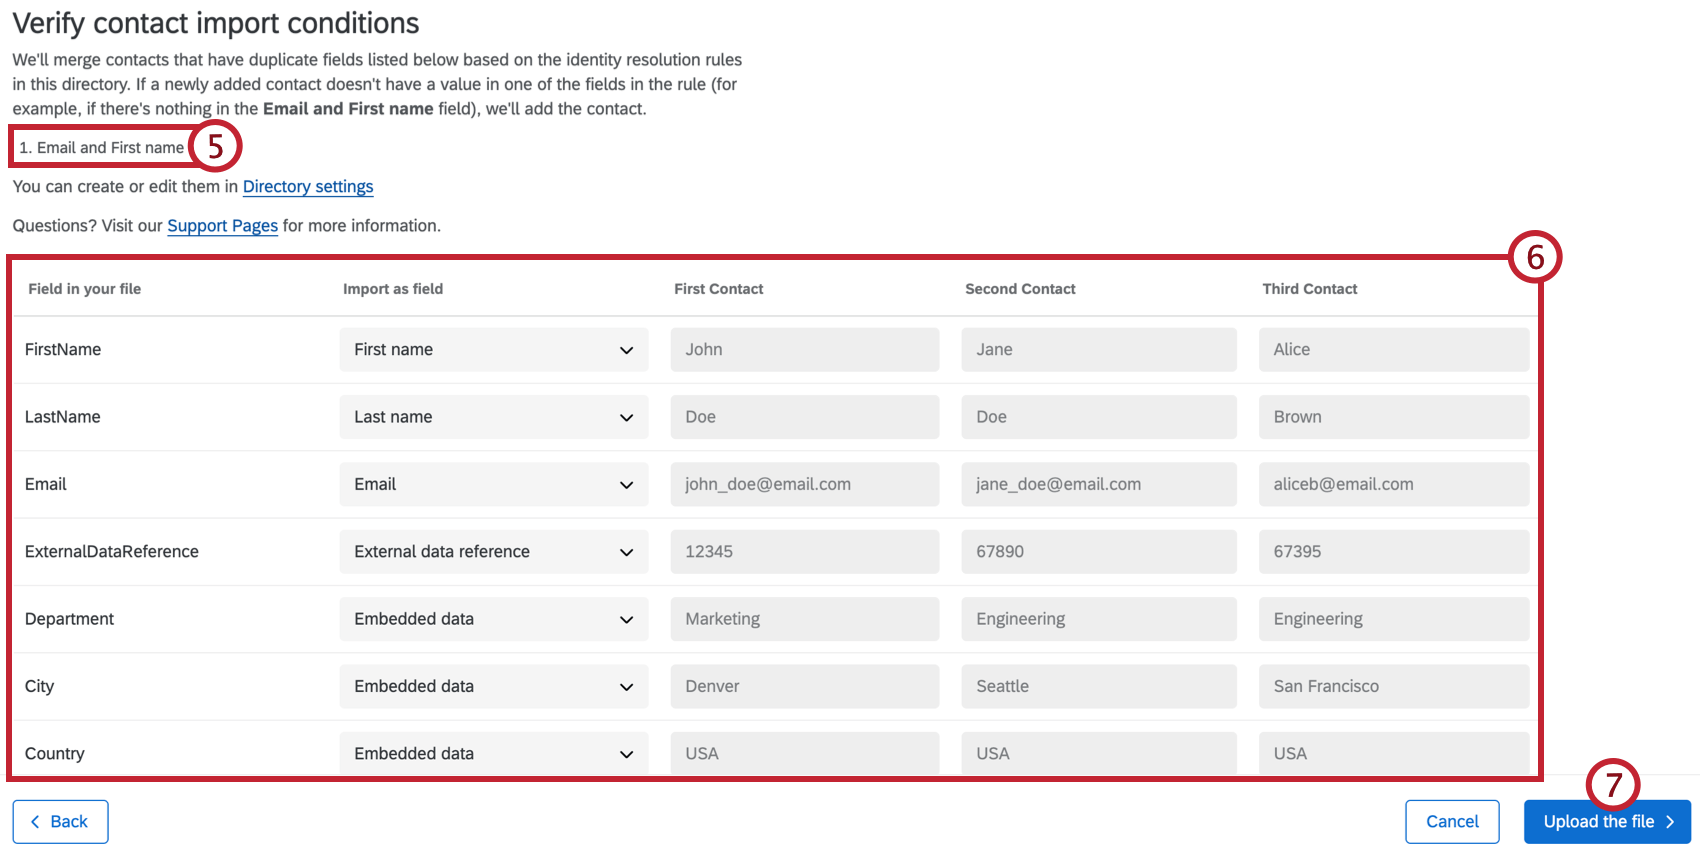
- Review the contact import conditions. Any directory-wide rules for merging duplicate contacts will show up here. These rules are set up in directory settings, and will apply to the contacts in your file.
 Qtip: Access to the Directory Settings tab requires the Manage Directory permission. Talk to your Brand Administrator if you’re interested in getting access to this setting. This permission is not available in XM Directory Lite.
 - Review the fields in your file to make sure the information looks right. If a field has not been properly recognized, click on the field name to view a dropdown of options and select the correct field.
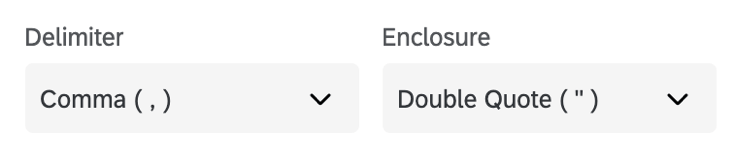
Qtip: If the data is not formatted correctly in the preview (e.g., bunched up instead of divided into columns), your data may not be separating (or “delimiting”) correctly. To fix this, choose a different Delimiter and/or Enclosure above the Verify Fields section.
- Click Upload the file to upload your contacts to the mailing list.
Common Error Messages
- File too large: Your file size exceeds 500 MB, and/or your file has more than 750,000 contacts.
- Some fields in your file have too many characters; make sure that the characters in each of these fields are less than or equal to the numbers shown, and try again: Your file has a field or multiple fields that exceed the character limit. Character limits below:
- Language: 20
- First name: 100
- Last name: 100
- Email address: 254
- Phone number: 20
- External reference: 100
- Embedded data field: 200
- Embedded data value: 1,024
- A header name is missing; check the headers in your file, and try again: You may have a column in your CSV file that is missing a header.
- The file contains one or more rows that don’t map to headers; fix this in your file, and try again: There is a mismatch between the number of headers and the number of fields.
- Duplicate field: Your file has two fields with the same name. Make sure that each field is unique.
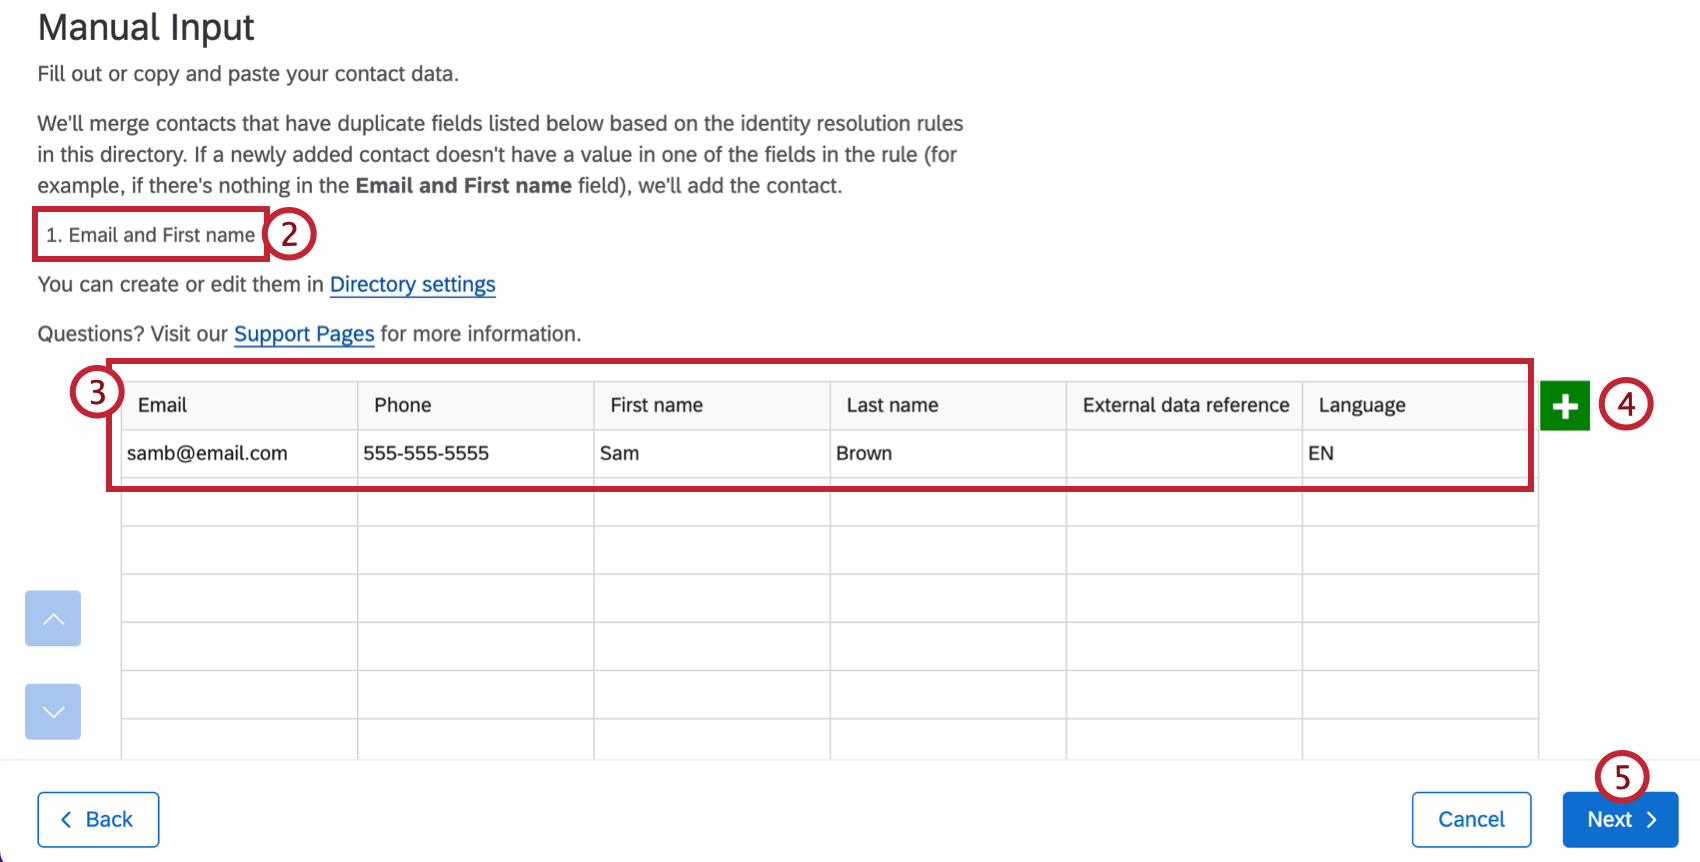
Manual Input
- Select Manual Input.
- Review the contact import conditions. Any directory-wide rules for merging duplicate contacts will show up here. These rules are set up in directory settings, and will apply to the contacts you enter.
 Qtip: Directory settings are not available in XM Directory Lite.
 - Fill out the available fields.
- Click the plus sign (+) to add an additional column for embedded data. Remember, these can be whatever you want.
- Click Next to upload your contacts.
Creating and Updating Contacts Automatically
Often, you may find yourself collecting demographic or transactional data, and you’ll want to either update existing mailing list members or create new lists of new contacts based on information given in a survey response.
The XM Directory task feature, located inside the Workflows tab, can help you set up this process so that mailing lists are automatically created or updated as responses come in.