-

Qualtrics Platform -

Customer Journey Optimizer -

XM Discover -

Qualtrics Social Connect
Ticket Forwarding
About Ticket Forwarding
You can automatically reassign new tickets being assigned to you to another user while you are out of office. While ticket forwarding is enabled, the ticket is directly assigned to the other user instead of the original user.
This feature applies to tickets assigned to a user after ticket forwarding is enabled. For example, tickets I opened last week before I went out of office will not be reassigned. But tickets people try to assign to me while I have forwarding enabled will be reassigned to a person of my choice.
Enabling and Disabling for a Brand
Only Brand Administrators can turn on this setting. Once it is on, it is available for every user in the brand, but users do not have to use it unless they want to.
- On the Follow-up page, go to Tools.
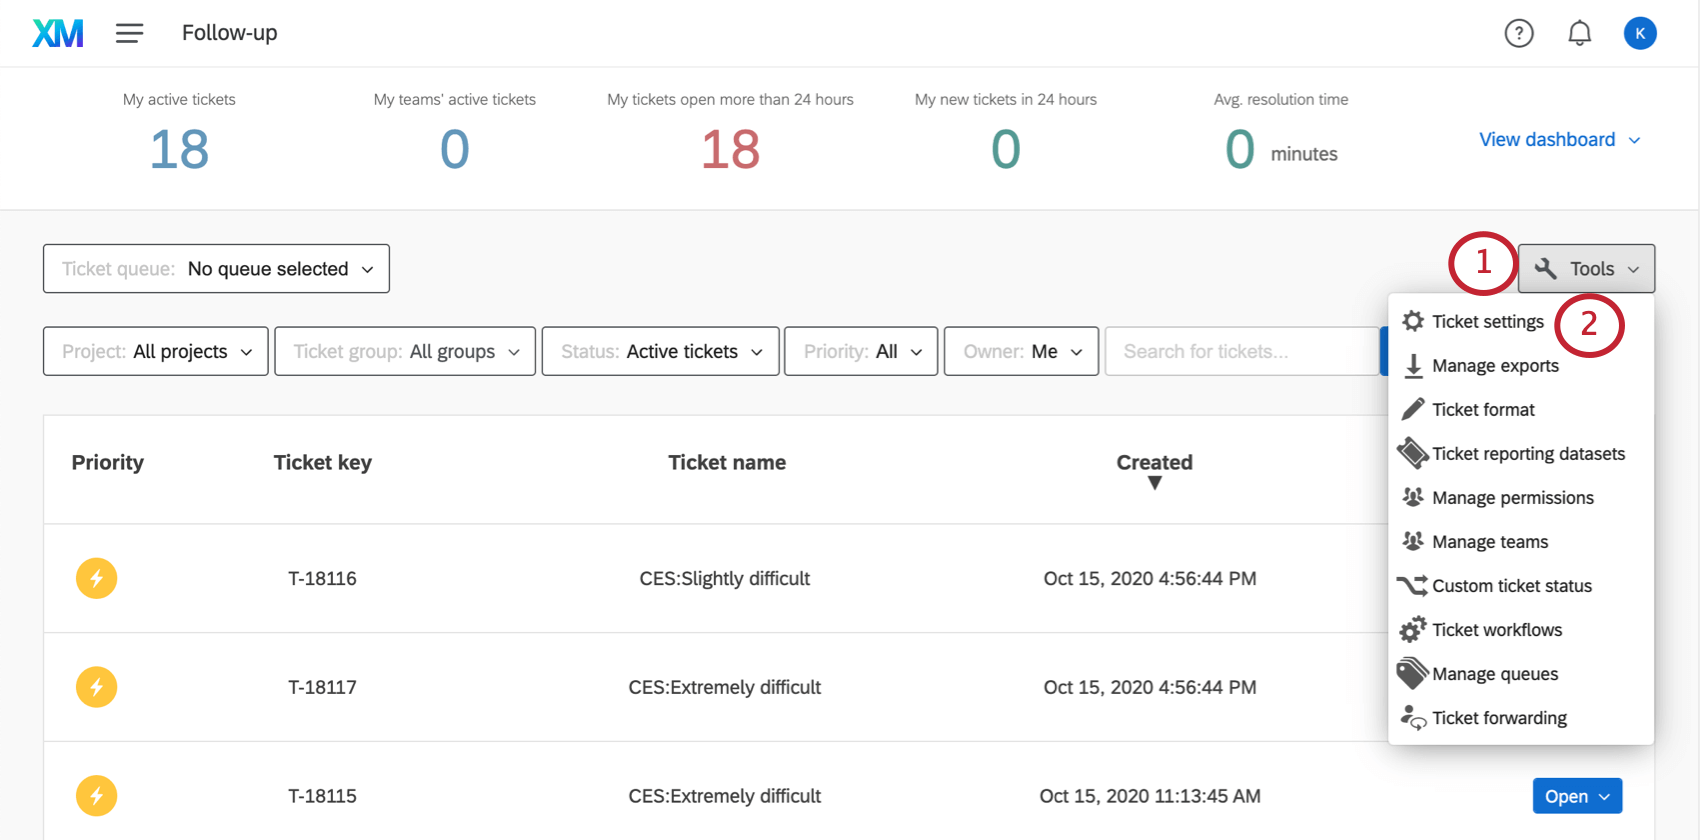
- Select Ticket Settings.
- Select Enable ticket forwarding feature for users.
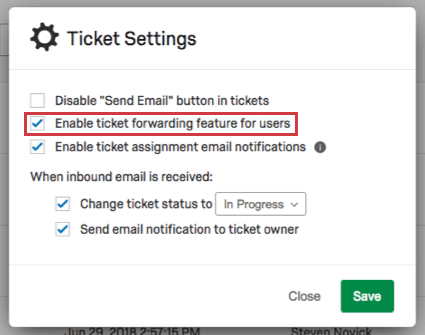
- Click Save.
Using Ticket Forwarding
This section goes over how users can turn on ticket forwarding, and set who receives their ticket while they’re out.
All of your tickets are reassigned during this time. You can turn this off and resume working on your tickets whenever you choose.
Enabling Ticket Forwarding
- On the Follow-up page, go to Tools.
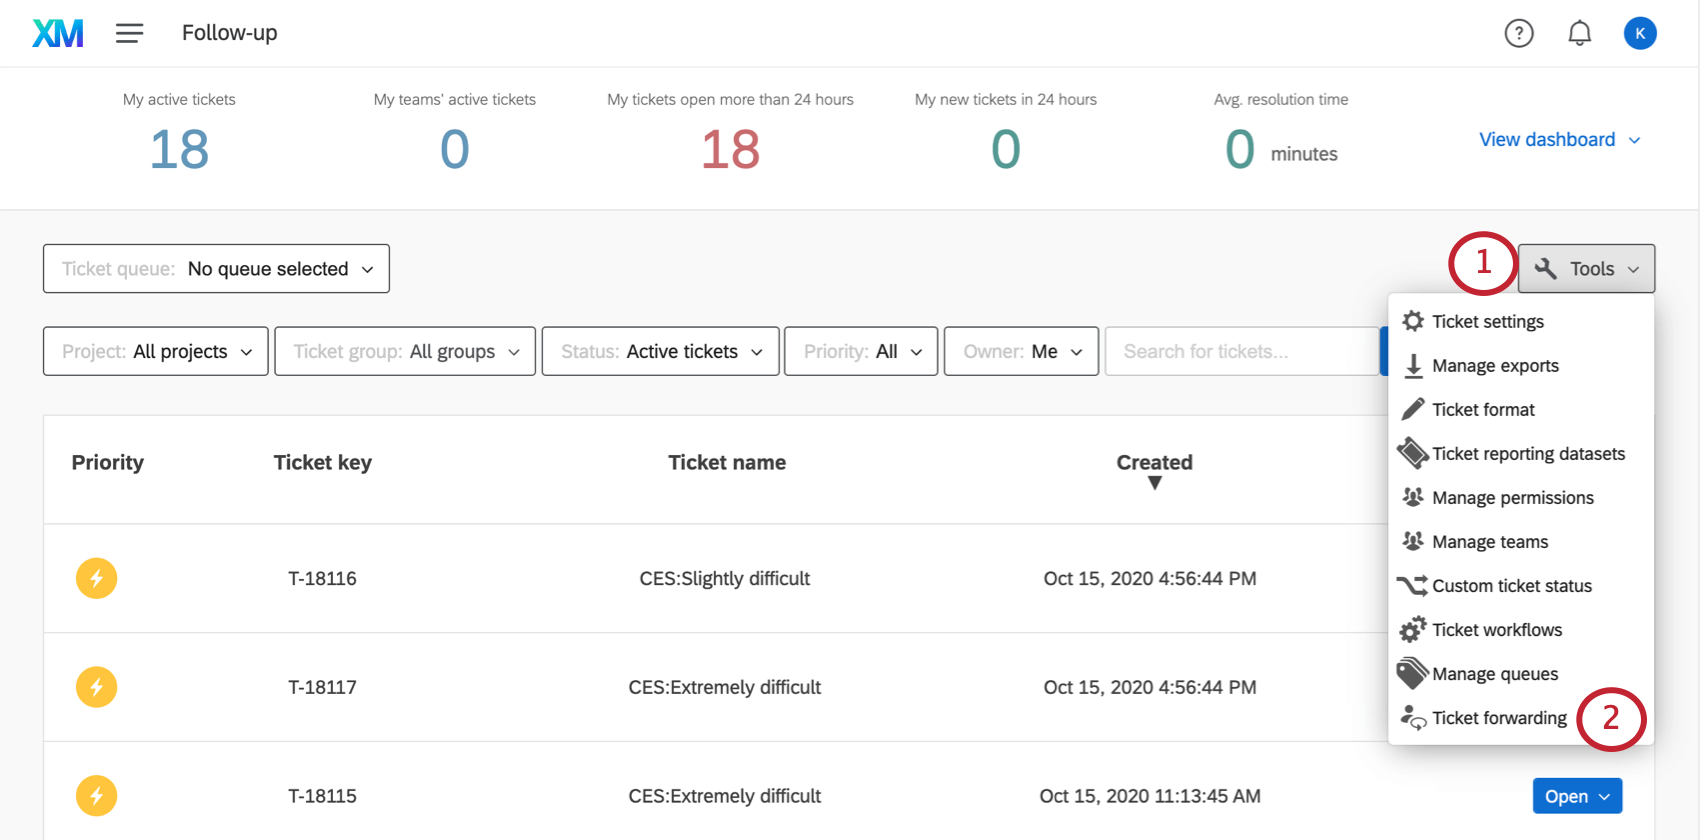
- Click Ticket Forwarding.
- Select Enable Ticket Forwarding.
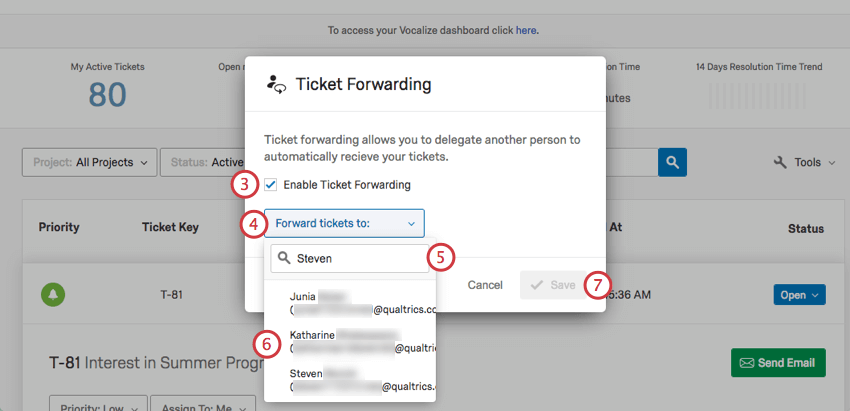
- Click Forward tickets to.
- Type the name of a specific user.
Qtip: You cannot reassign these tickets to teams or to more than 1 person at a time.Qtip: You cannot forward tickets to a user who is already forwarding tickets to another user
- Click the correct user when they appear.
- Click Save.
Disabling Ticket Forwarding
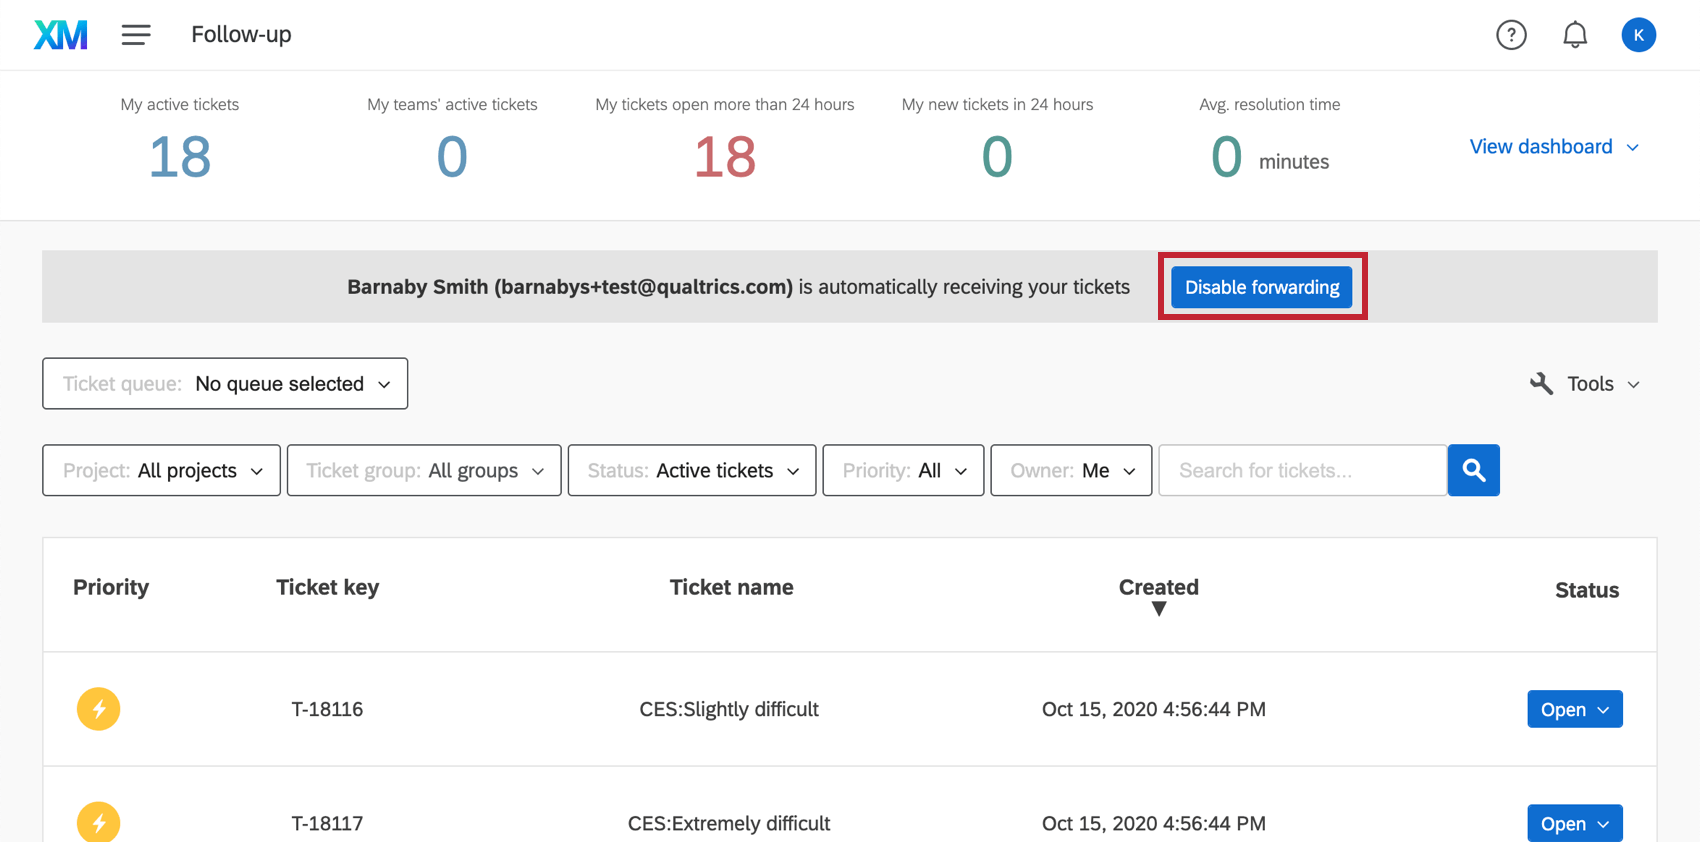
A banner will appear above your ticket settings when you’ve enabled ticket forwarding. To disable it, click Disable Forwarding.
When ticket forwarding is disabled, the tickets reassigned to your person of choice will stay assigned to them. But when people try to reassign new tickets to you, those tickets will go to you.