-

Qualtrics Platform -

Customer Journey Optimizer -

XM Discover -

Qualtrics Social Connect
Extract Data from Qualtrics File Service Task
About Extracting Data from the Qualtrics File Service
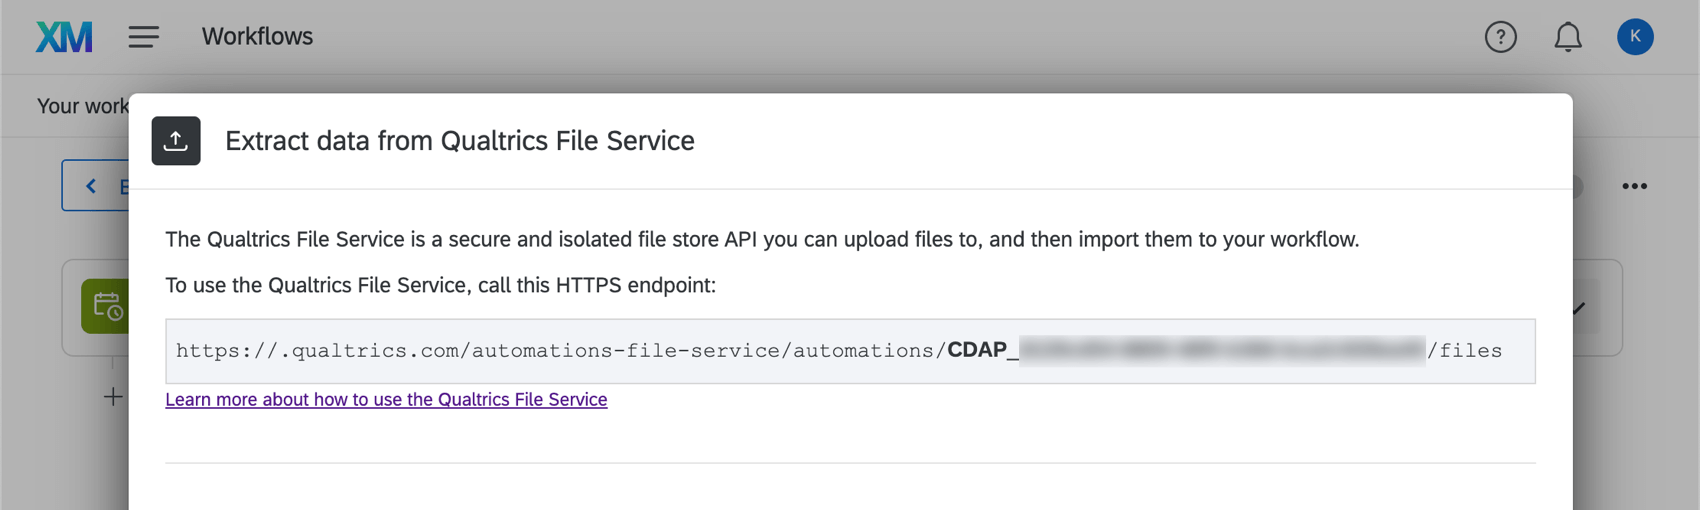
The Qualtrics File Service is a secure and isolated file store API where you can upload files. Using workflows, you can process data you’ve stored in the Qualtrics File service for use elsewhere in Qualtrics. For example, you can store company contacts to the Qualtrics File Service, then regularly import them to your directory.
Example: You can combine the “Extract Data from Qualtrics File Service” task with other loader tasks, such as the Load data to XM Directory task.
Connecting to the Qualtrics File Service
You may need to work with your IT or Software Engineering team to integrate with the Qualtrics File Service. To use the Qualtrics File Service, call the unique HTTPS that appears while you are setting up the task. Then follow the instructions on the Qualtrics File Service support page.
Qtip: Ignore the section on the Qualtrics File Service support page that says “Next Steps.” This is only relevant if you are using the Qualtrics File Service for contact import automations in XM Directory.
Before You Get Started
Before you get started extracting data from the Qualtrics File Service, take the following considerations into account:
- What do you want to do with your data? Take a look at the available loader tasks for a list of options.
- Do your files fit a consistent format? For example, files you hope to import in the same workflow should have the same headers / columns / fields, even if the values differ.
Example: You set up a workflow to regularly upload contacts from the Qualtrics File Service to XM Directory. Every file has columns for Firstname, Lastname, Email, Phone, UniqueID, and Location.
Setting Up an Extract Data from Qualtrics File Service Task
Qtip: Files processed by this workflow will be deleted from the Qualtrics File Service.
Attention: The “Extract Data from Qualtrics File Service task” has a 100 MB file size limit for each individual file.
- Create an ETL workflow.
- Select Data source (ETL extractor).
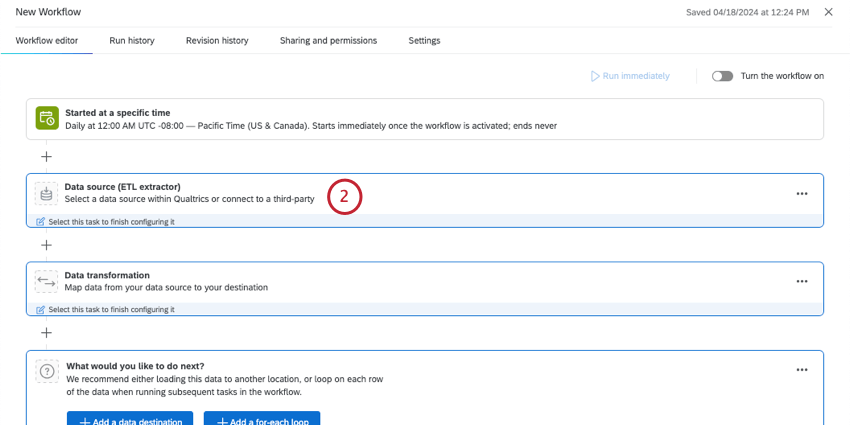
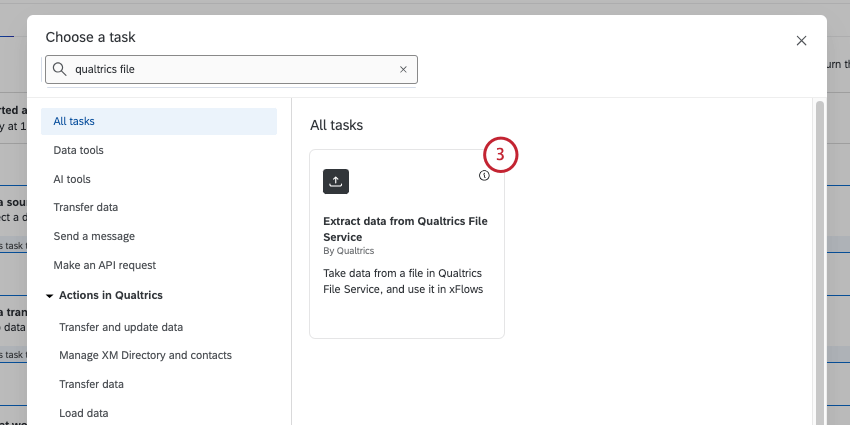
- Select Extract data from Qualtrics File Service.
- Make sure your files are uploaded to the Qualtrics File Service using the unique HTTPS endpoint displayed here. For more information, see Qualtrics File Service.
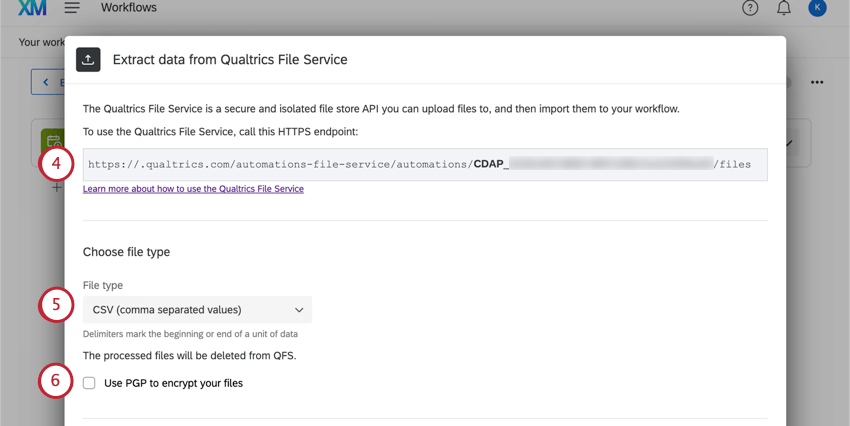
- Choose a file type:
- CSV (comma separated values)
- TSV (tab separated values)
- Custom delimiter: This option is available if you’re using a delimiter other than tabs or commas in your file. Enter the character you use in the field provided. (E.g., ; or | ).
- If desired, select Use PGP to encrypt your files. To learn more about this extra means of encryption and data protection, see PGP Encryption.
- Under Upload sample file, add a sample file that has the same headers as the files that will be processed whenever the workflow runs. Click Choose file to upload the file from your computer.
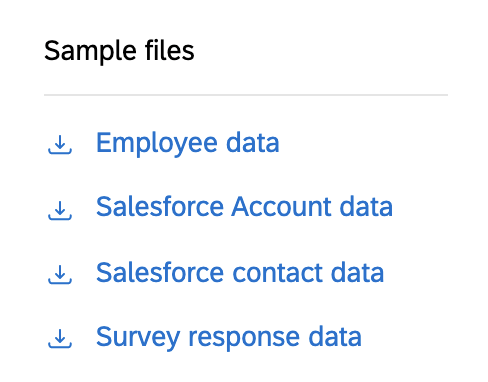
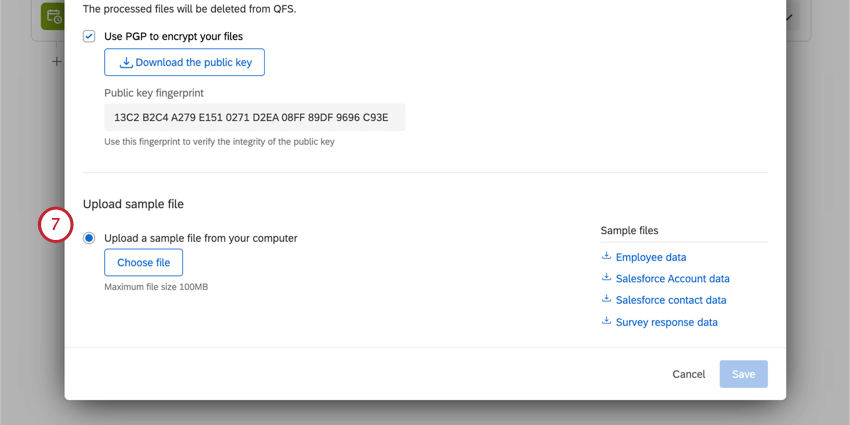 Qtip: If you’d like, you can download the sample files in the task, or download the files in the Example Files section. The only supported file encoding format is UTF-8. Some spreadsheet softwares save files as Unicode UTF-8, which is different from UTF-8, if you are getting unexpected errors. Please ensure that you are exporting in UTF-8 format and not Unicode UTF-8. See CSV & TSV Upload Issues for more troubleshooting steps.
- Verify fields in the file. The table will display the column headers (which represent the individual fields) and their values for the first two rows of data.
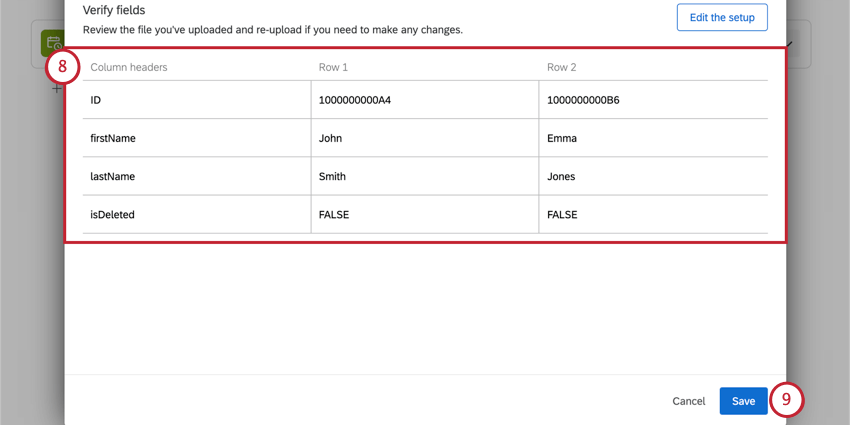 Qtip: If you want to upload a different file or make other changes, click Edit the setup.
 - When you’re finished, click Save.
- Finish building your ETL workflow. When you choose a loader task, you’re deciding the destination of the data you extracted. See available loader tasks for a list of options.
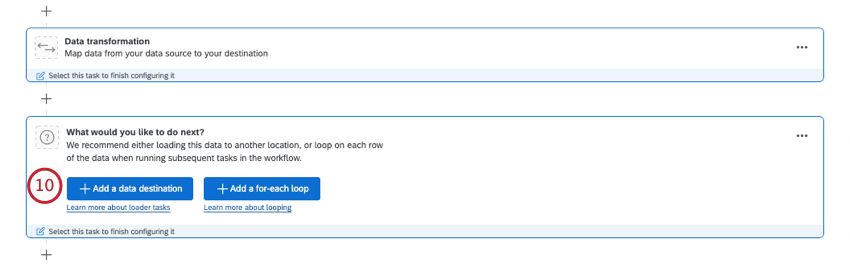
Qtip: To restrict what happens next, you can also create conditions based on the number of files or rows imported before you add a loader task.