-

Qualtrics Platform -

Customer Journey Optimizer -

XM Discover -

Qualtrics Social Connect
Projects Basic Overview
About the Projects Page
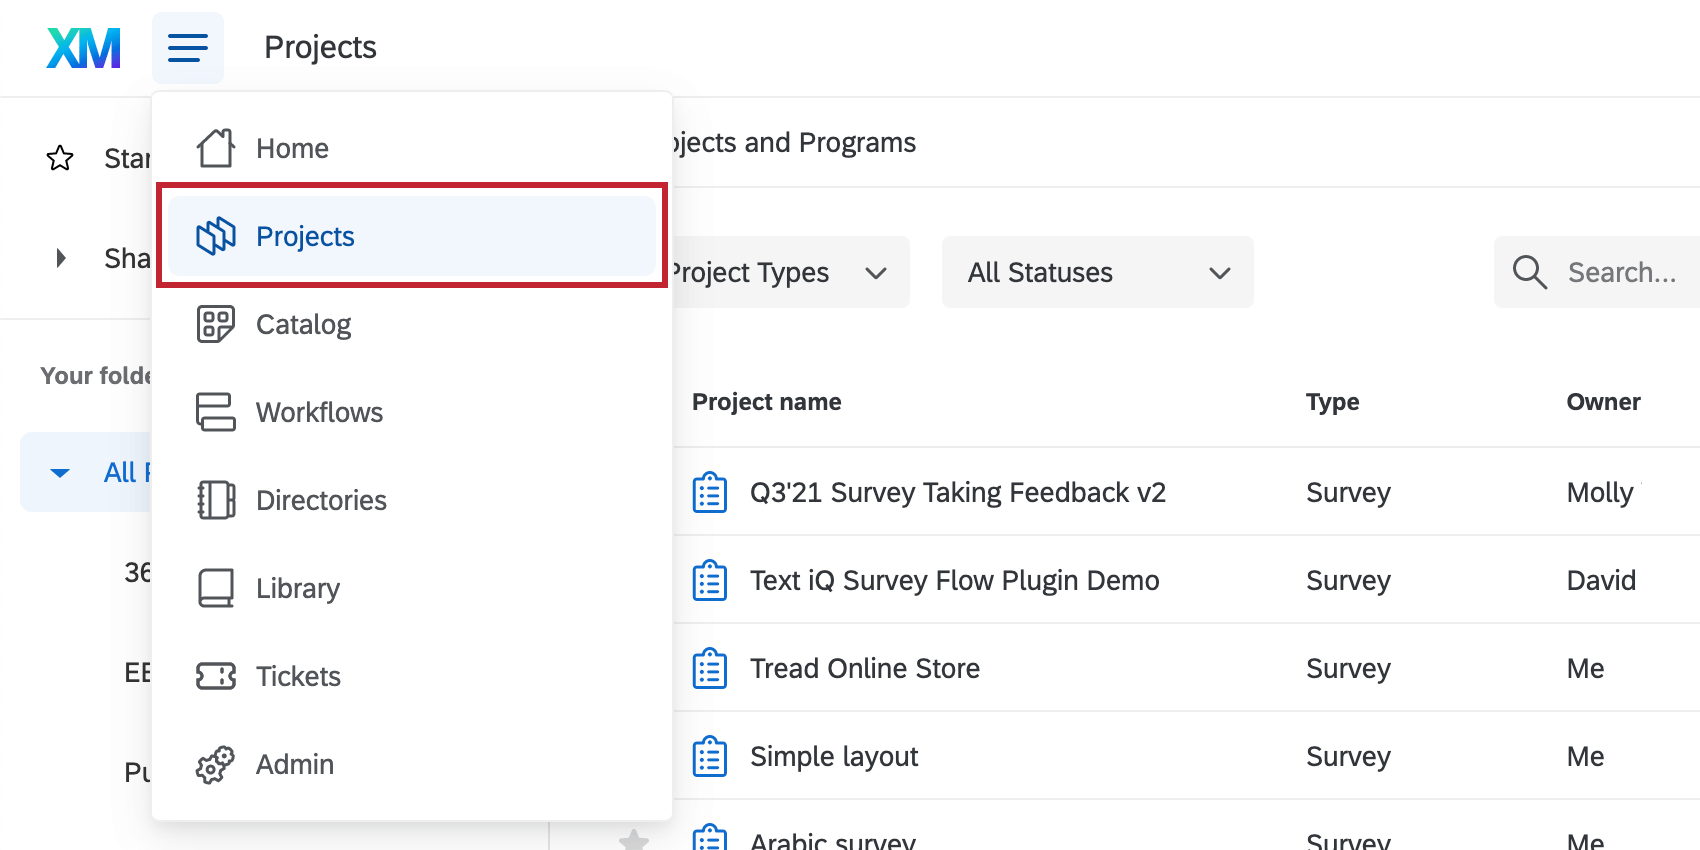
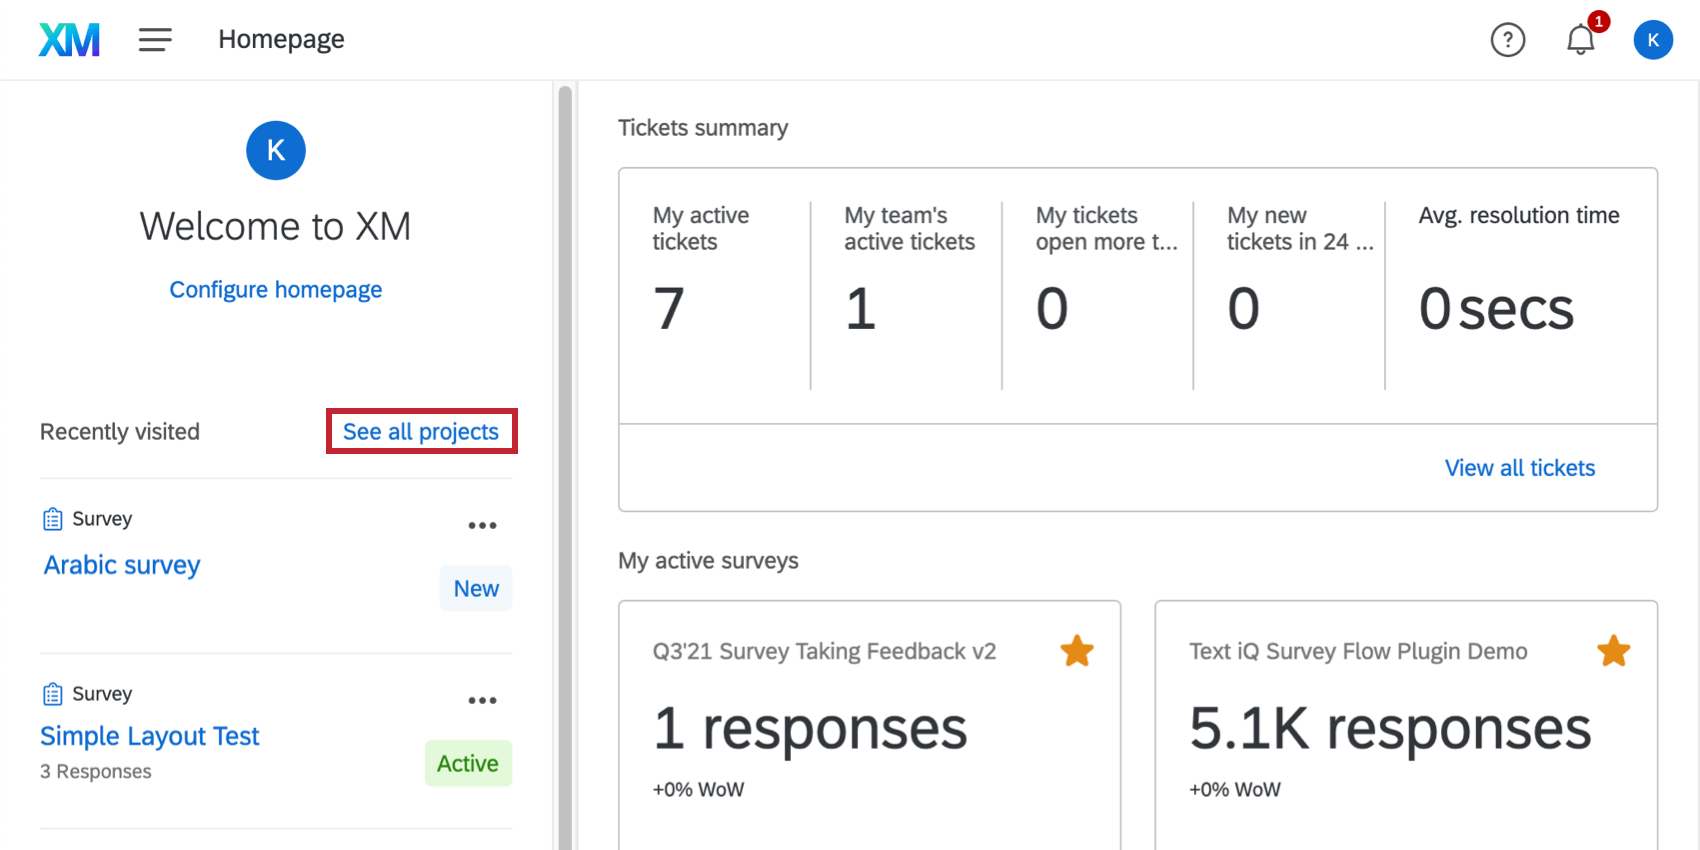
The Projects page is a one-stop shop listing all the XM projects you have created and those that have been shared with you. The Projects page can be accessed in 2 ways:
- Open the navigation menu on any page of the Qualtrics website and select Projects.
- When you first login and land on Home, you can also click See all projects.
The Projects page lets you do the following:
- Create new projects.
- Organize, sort, search, and view your projects.
- Collaborate on projects with colleagues.
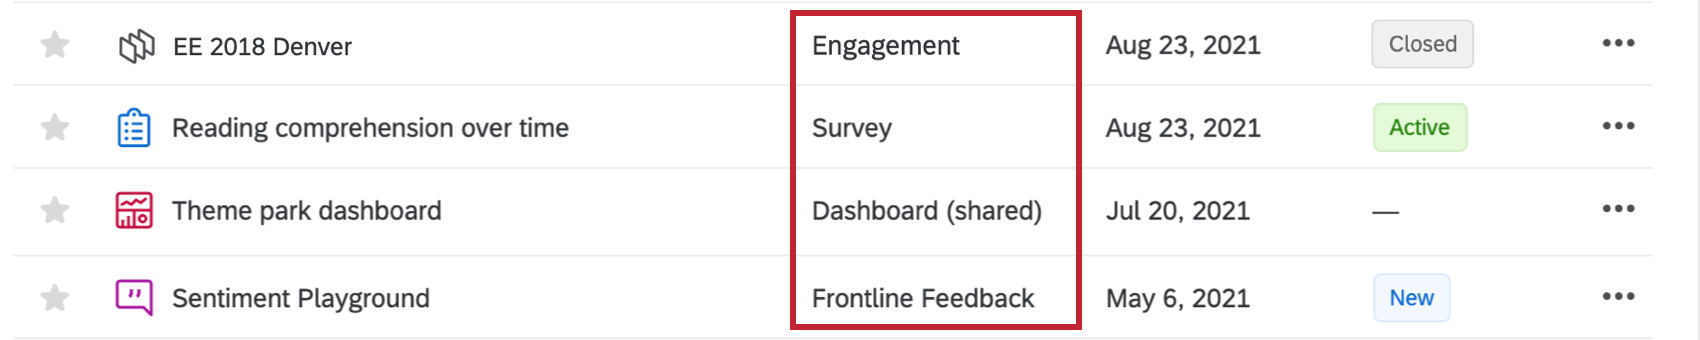
- Identify your projects by their project type.
Selecting Your Project Type
Before creating a project, you must understand the different types of projects available to you. When you create a project in Qualtrics, you have several options for Project type. Each Qualtrics software solution has its own unique strengths, so the project type helps determine which software you can use.
- Survey: Surveys are exactly what they sound like. You can distribute the survey to respondents, analyze the data, and build reports, all from inside one project.
- Imported Data: If you don’t want to create a survey before importing data to Stats iQ for analysis, you can create a standalone Stats iQ project.
- Website & App Insights: Seamlessly integrate feedback surveys to your website with Website and App Insights projects.
- Dashboards Project: Also called CX Dashboards. Visualize your research by building shareable, dynamic reports.
- Conjoint: Conjoint analysis is a market research technique used to identify consumer preferences and evaluate the product trade-offs they would make. Our choice-based model allows your respondents to provide feedback so you can easily narrow down the types of packages and products you should offer.
- MaxDiff: MaxDiff (Maximum Difference) is an advanced survey research technique that is used to obtain preference and importance scores for multiple items. This is done by presenting respondents with samples of the full list of items you wish to assess, and then having them mark the items they prefer the most and the items they prefer the least in each set.
- Frontline Feedback: Collect, organize, and prioritize suggestions from users in your Qualtrics organization.
- Assorted guided solutions: When you create a guided solution, its name will appear as the project type – for example, “Pricing Study (Gabor Granger)” or “Brand Tracker.”
- Reputation Management: Online Reputation management is a means of understanding and managing your brand’s online reputation. Here, you can create dynamic dashboards that report on reviews you receive, and trigger close-the-loop responses when reviews come in that require action.
- Ticket Feedback: Attaches to ticket tasks and lets ticket owners provide additional follow-up details.
- Programs: Organize different related projects in 1 container. Depending on your license, you may be able to access expertly-designed programs, or build your own from scratch.
You can also find a list of Employee Experience projects, such as Engagement, 360, Lifecycle, and more. See Types of Employee Experience Projects for more details.
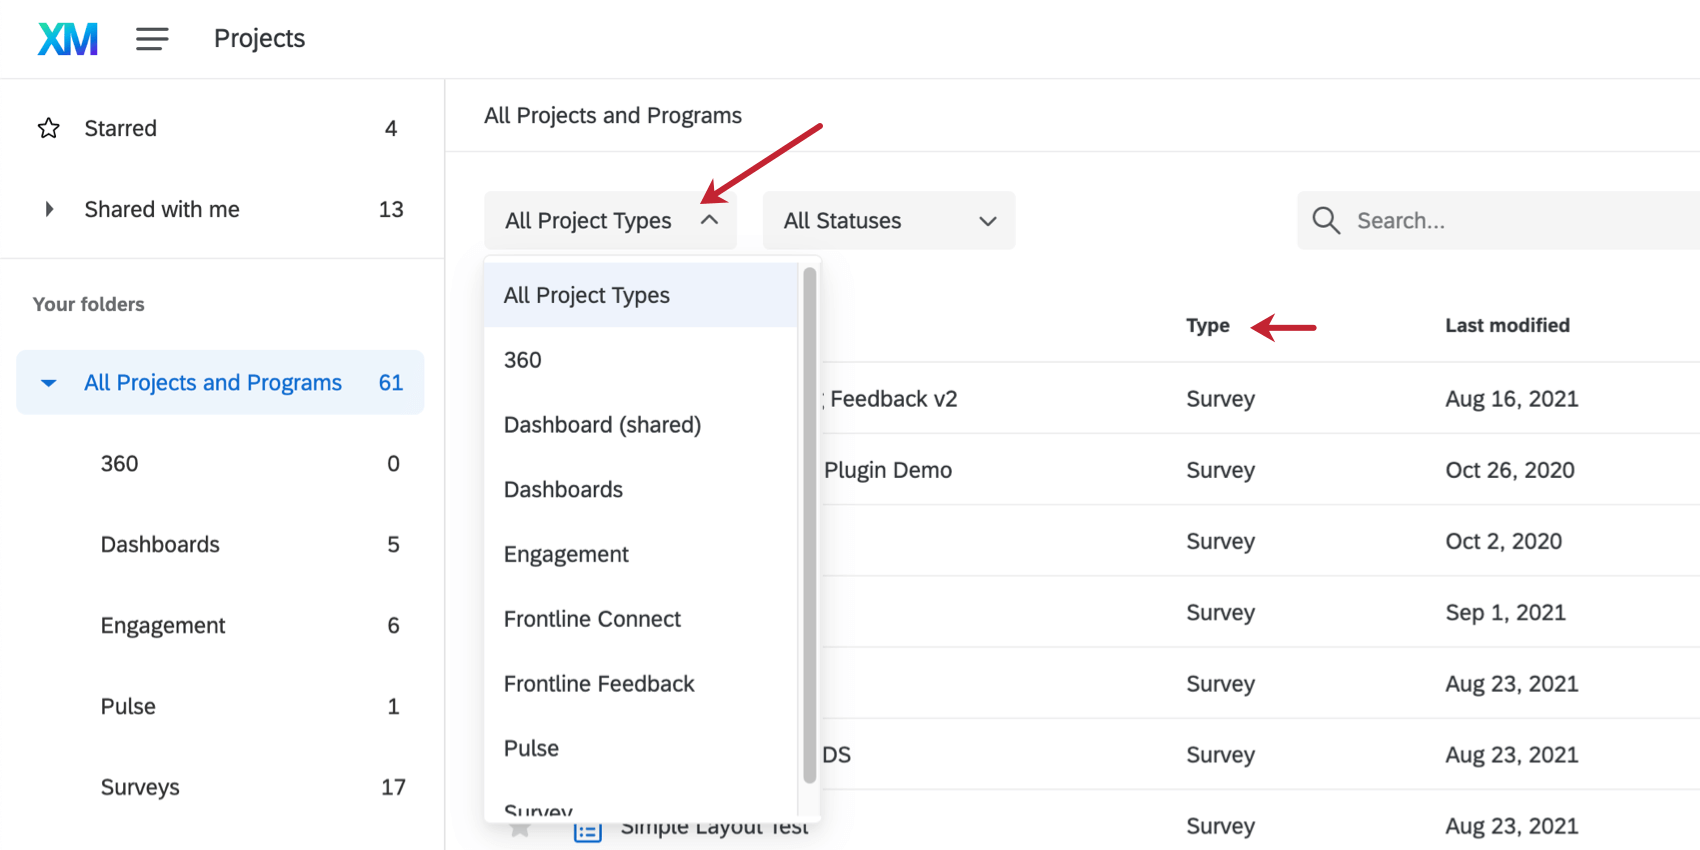
Not only can you sort projects by type, but you can filter by them. See more under Organizing, Viewing, Searching, & Sorting Projects.
Creating New Projects
A typical project consists of a survey, a distribution record, responses, and reports. You can start with any project type available to you. For simplicity’s sake, we’ll start with a survey.
New projects are created on the Catalog page. But you can also easily start from Home or the Projects page itself. Below, we’ll show you what this looks like on the Projects page.
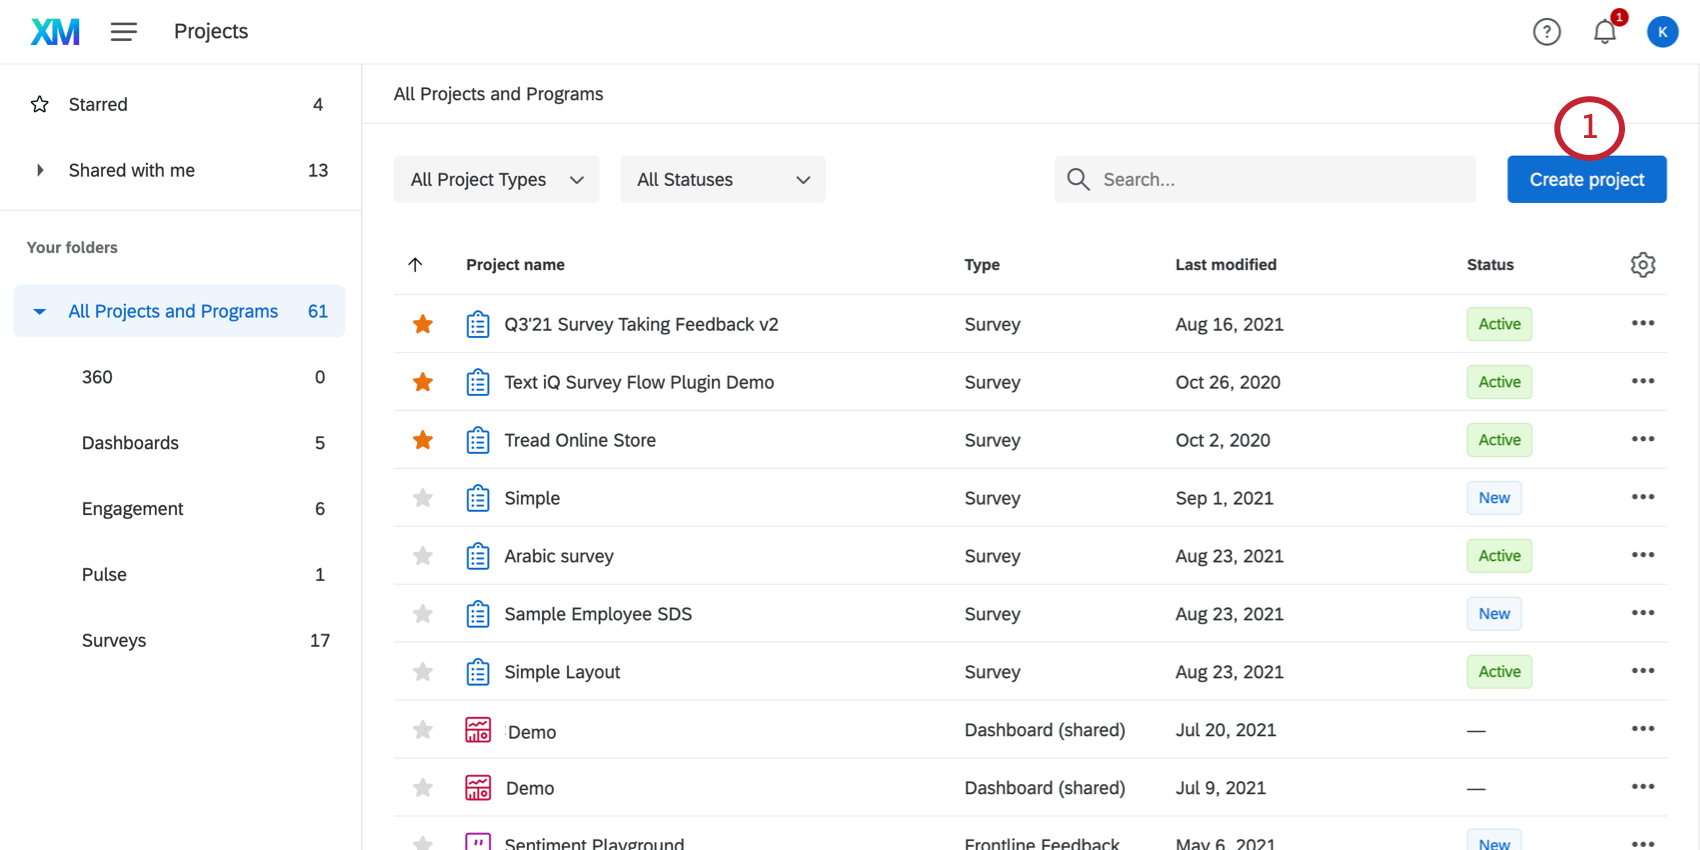
- From any folder on the Projects page, click Create project.
 Qtip: What folder you start in does not affect where your project will be stored once it’s created.
 - Scroll through the sections or filter or search to find the type of project you’d like to create.

- Select from among the many project creation options, including Survey or one of the solutions offered.
- Click Get Started.
Go to the Creating a Project page for step-by-step examples of how to create new projects using any of these options.
Organizing, Viewing, Searching, & Sorting Projects
The Projects page displays practical, at-a-glance information to help you organize, view, monitor, track, and sort through your projects. For example:
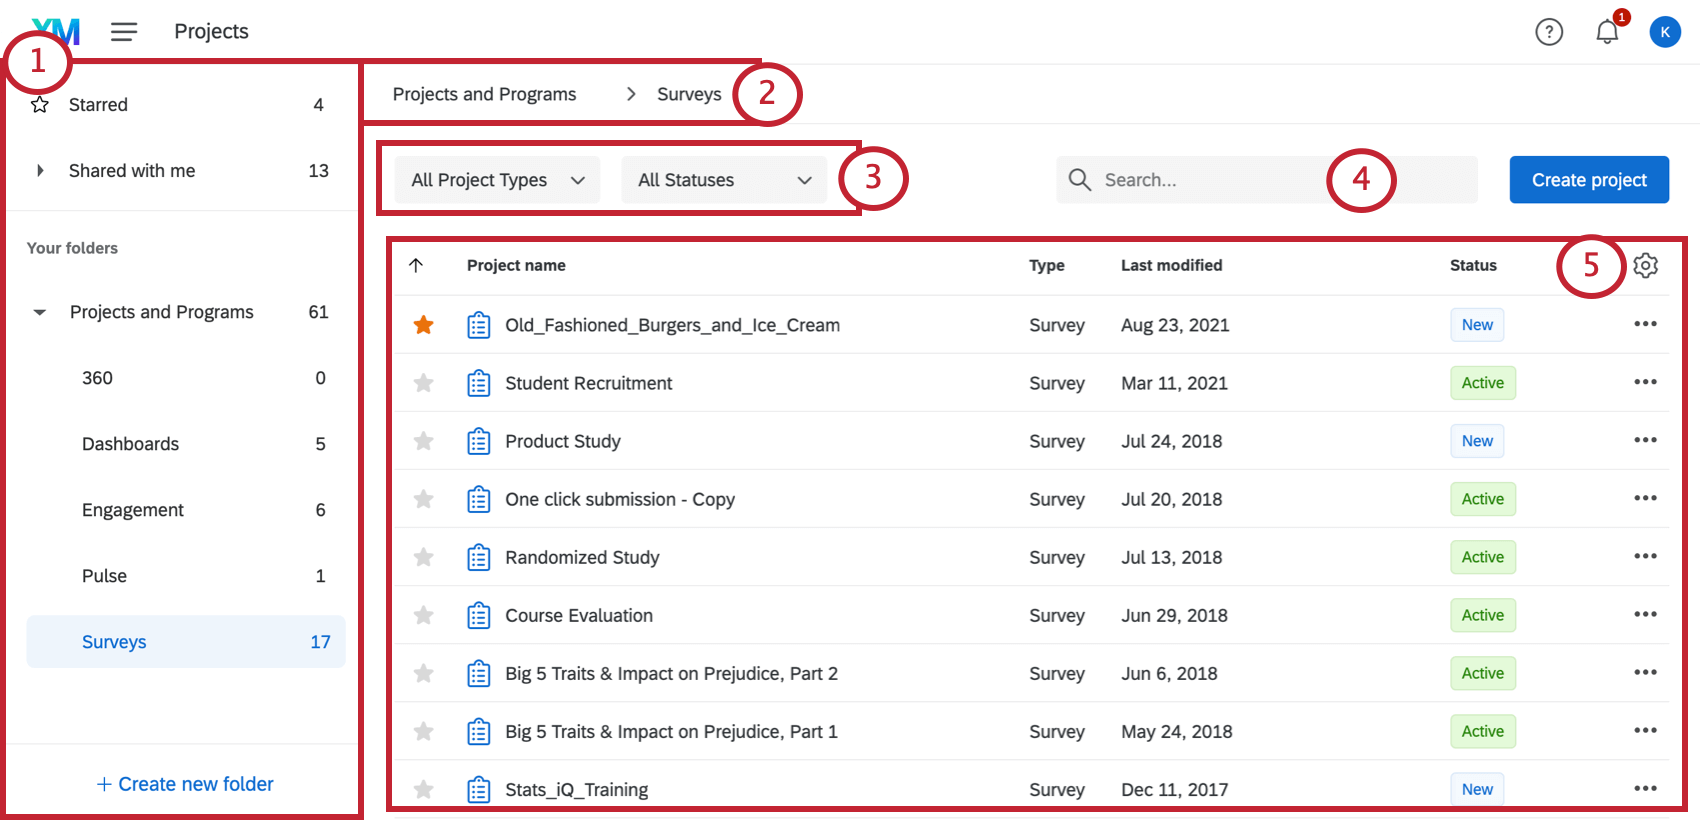
- View and organize projects by folder or category. You can choose between:
- See the folder you’re located inside along the left or the top of the page.
- Filter by project types or statuses.
- Search for projects, programs, and folders by typing terms into the field. This will search by name, survey ID, or project type.
- View different information about your projects and click column headers to sort by that information. You can customize what columns appear here using the gear button on the far-right.
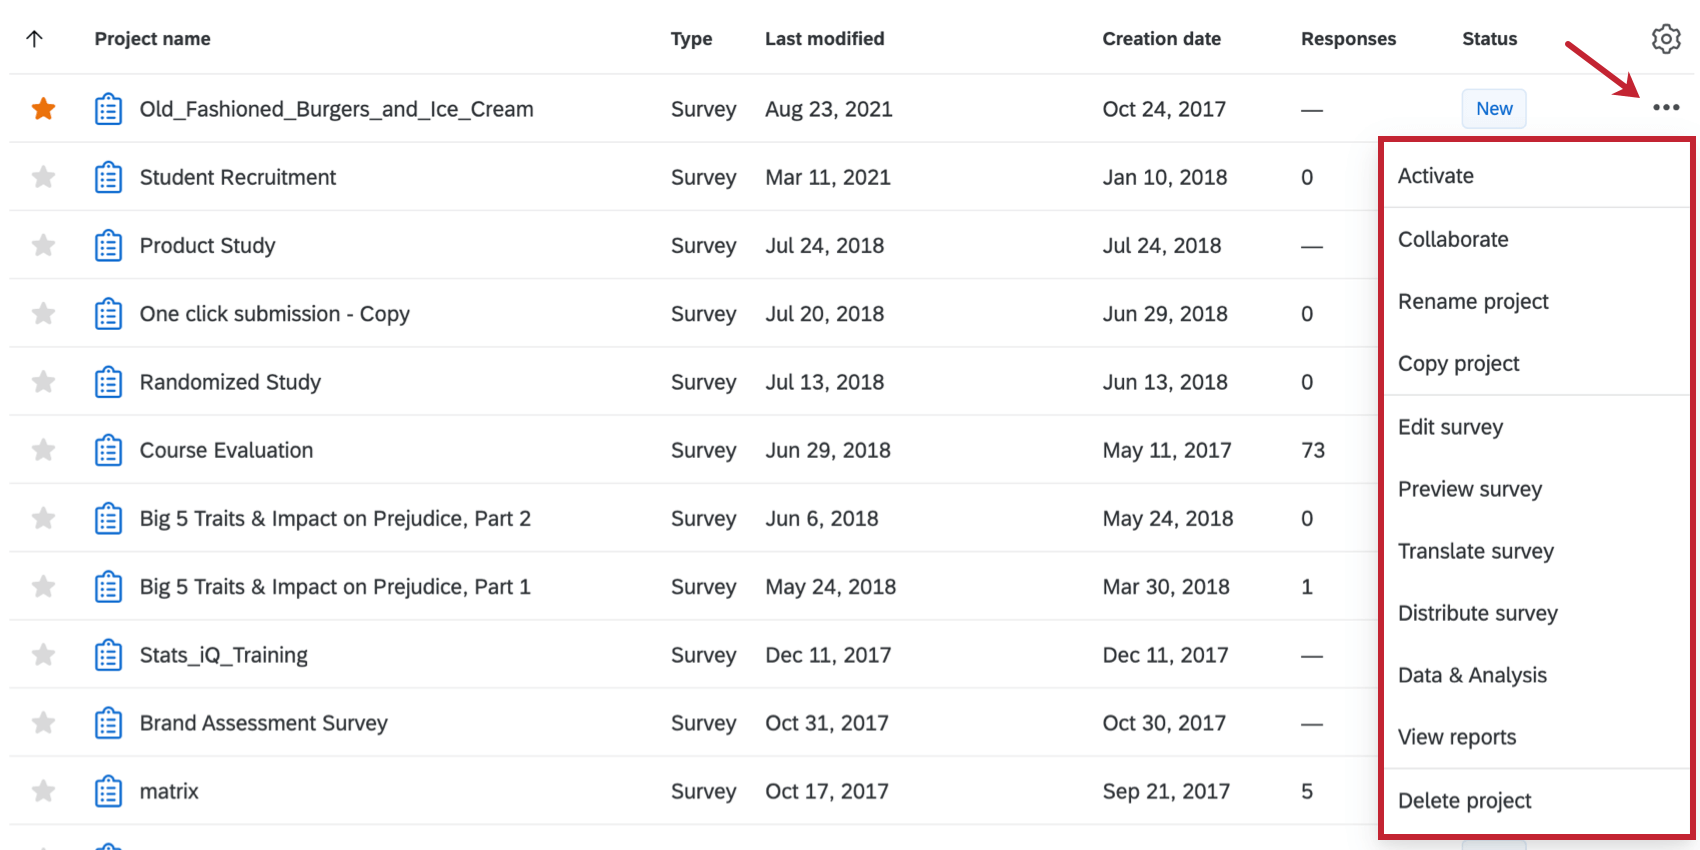
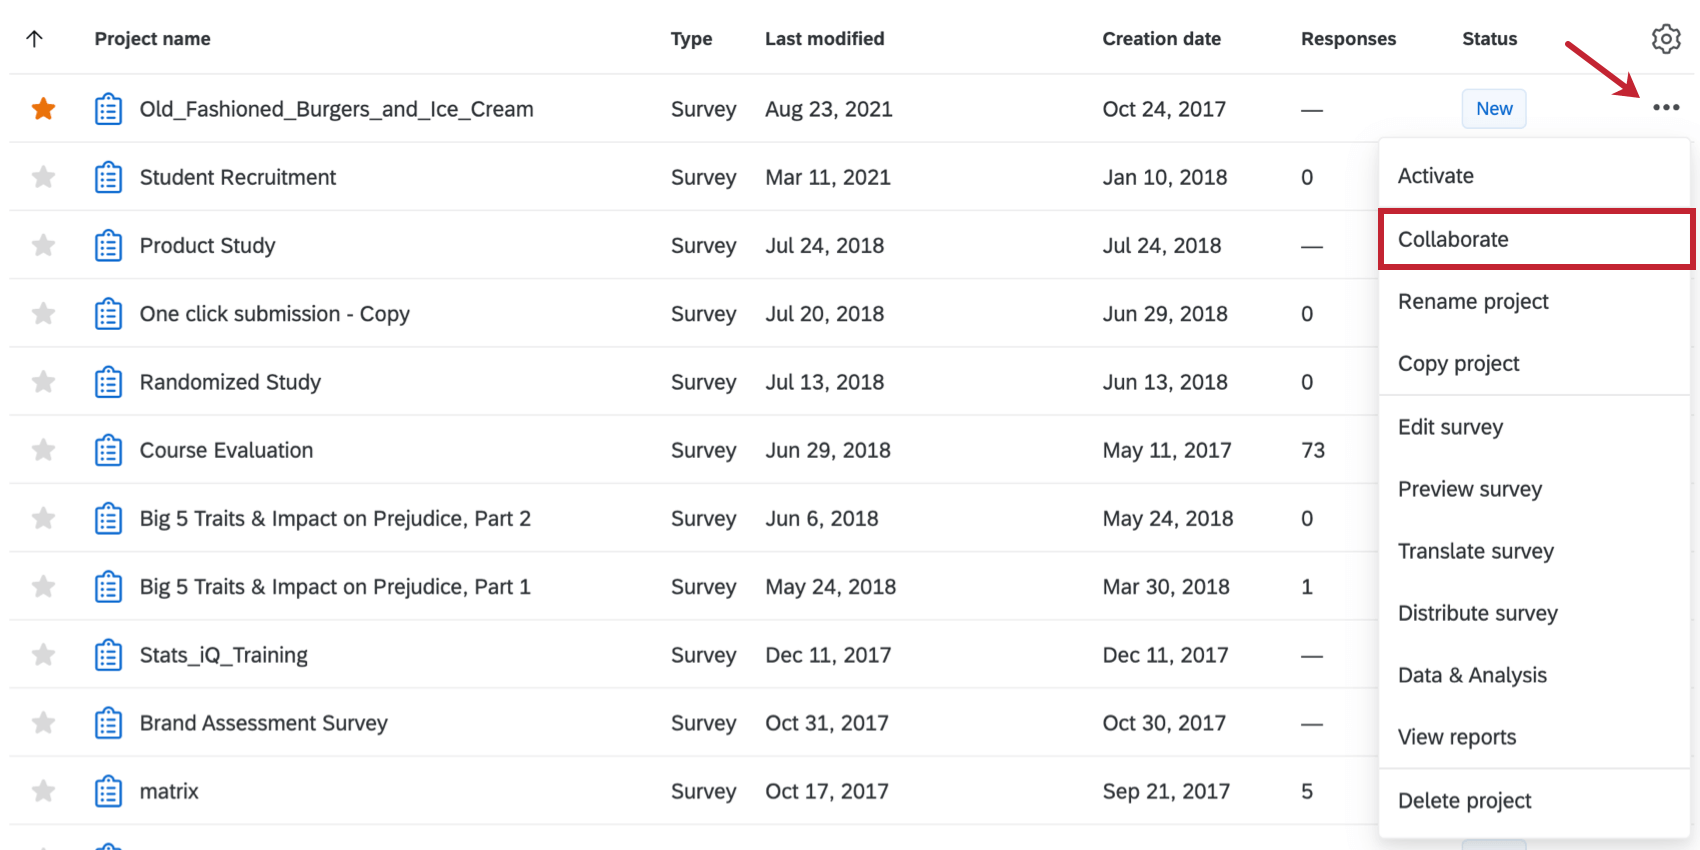
On the far-right of every project name you’ll see 3 dots that open the project actions dropdown menu, which will greatly facilitate your navigation of that project. From here you can activate, rename, copy, edit, translate, and delete your projects, and more.
Go to the Organizing & Viewing Your Projects page for step-by-step examples of how to get the most value and power out of the Projects page. On this page you will go through:
- The project actions dropdown menu’s options.
- The organization of your folders and categories.
- The sorting and searching of your projects.
Collaborating On Projects
Collaborating on projects is as easy as clicking Collaborate from the project actions dropdown menu.
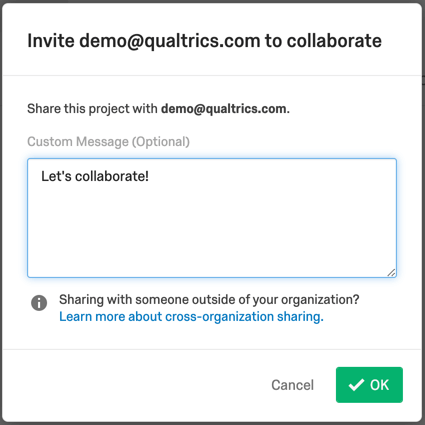
If your account has the proper permissions, you can collaborate with:
- Individuals inside your organization.
- Groups within your organization.
- Collaborators outside your organization.
To begin collaborating, enter a colleague’s email address in the Collaborate popup menu.
- Full access rights: Allows collaborators unrestricted access (while still protecting your account information).
- Limited access rights: The Collaborate on Project popup menu lets you customize access to specific collaborator needs.
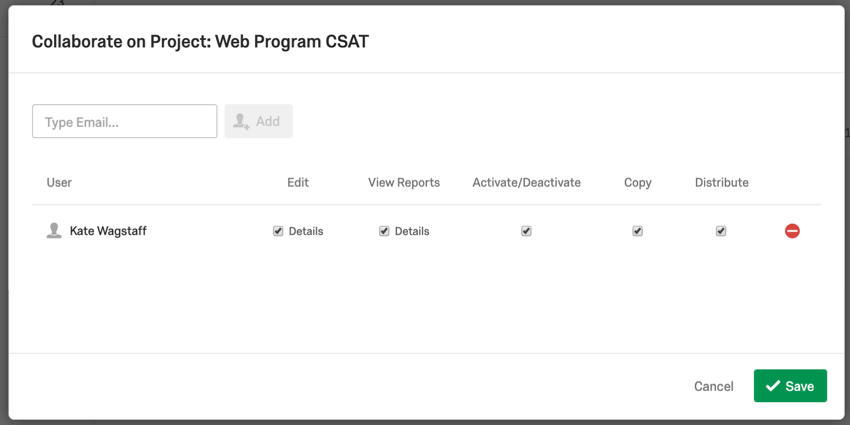
For example, translators may be limited to “Edit” permissions only while their “Activate/Deactivate” and “Distribute” permissions are disabled.
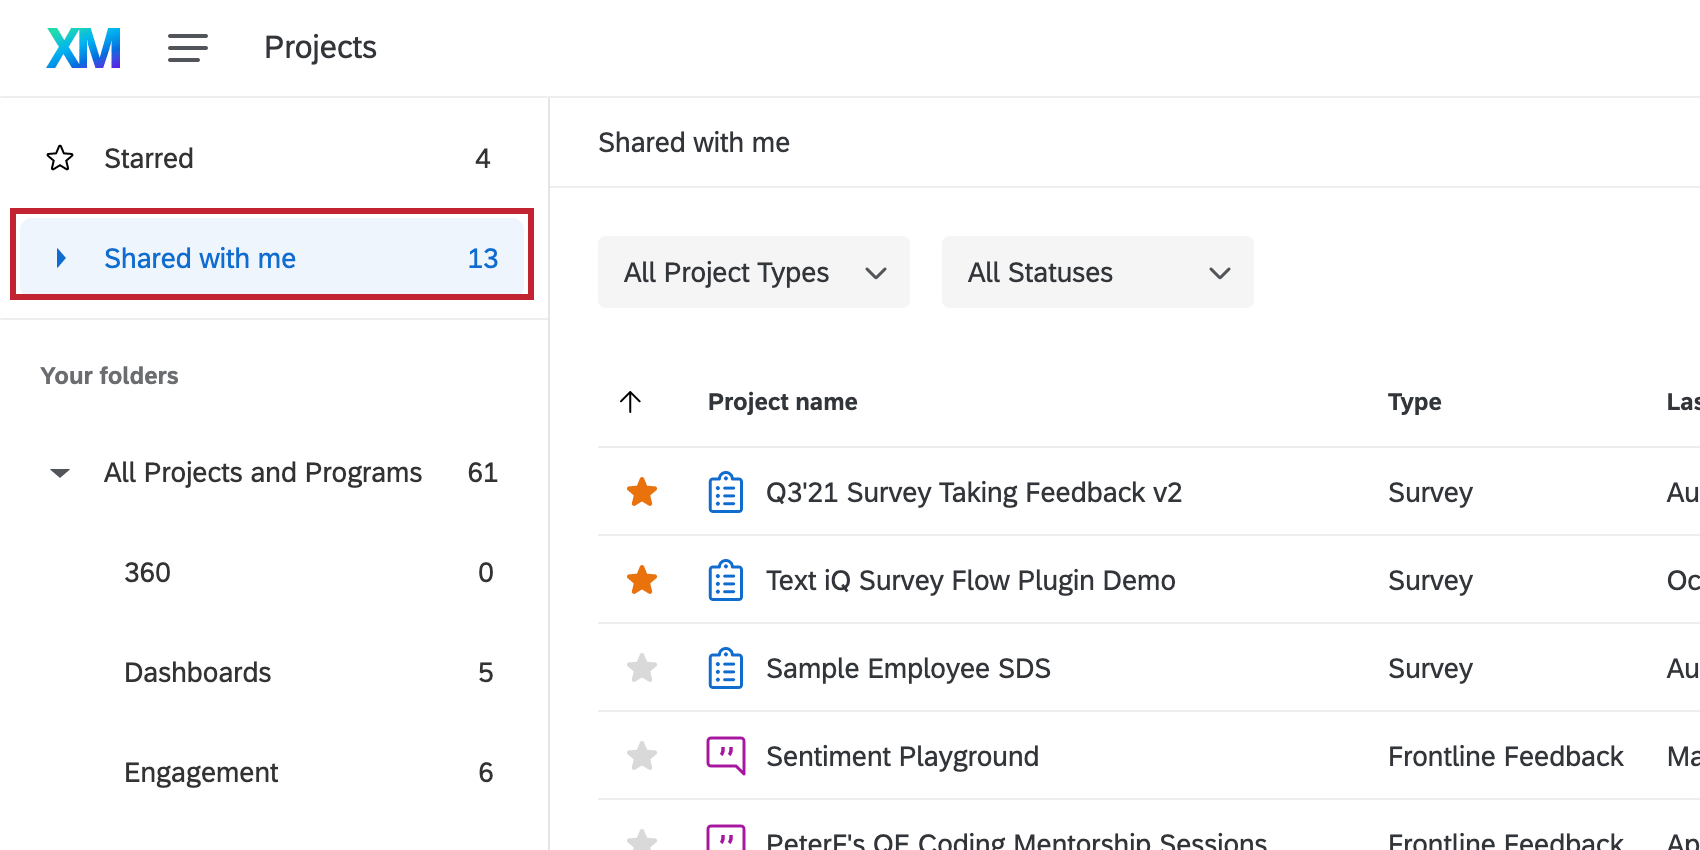
When people invite you to collaborate, their projects will show up in your Projects page. There is even a folder called Shared with me to help you find these projects quickly.
Navigate to the Collaborating on a Project page for step-by-step examples of how to collaborate on projects.