-

Qualtrics Platform -

Customer Journey Optimizer -

XM Discover -

Qualtrics Social Connect
Coupon Codes
About Coupon Codes
As a Brand Administrator of a large organization, coupon codes (or upgrade codes) make managing user permissions easier. Rather than changing permissions one-by-one for several users, you can create coupon codes that change user type or division. Once you’ve created the code, you simply email it to your users and they’ll enter the code into their account to update permissions on their existing accounts, or use these codes during the sign-up process.
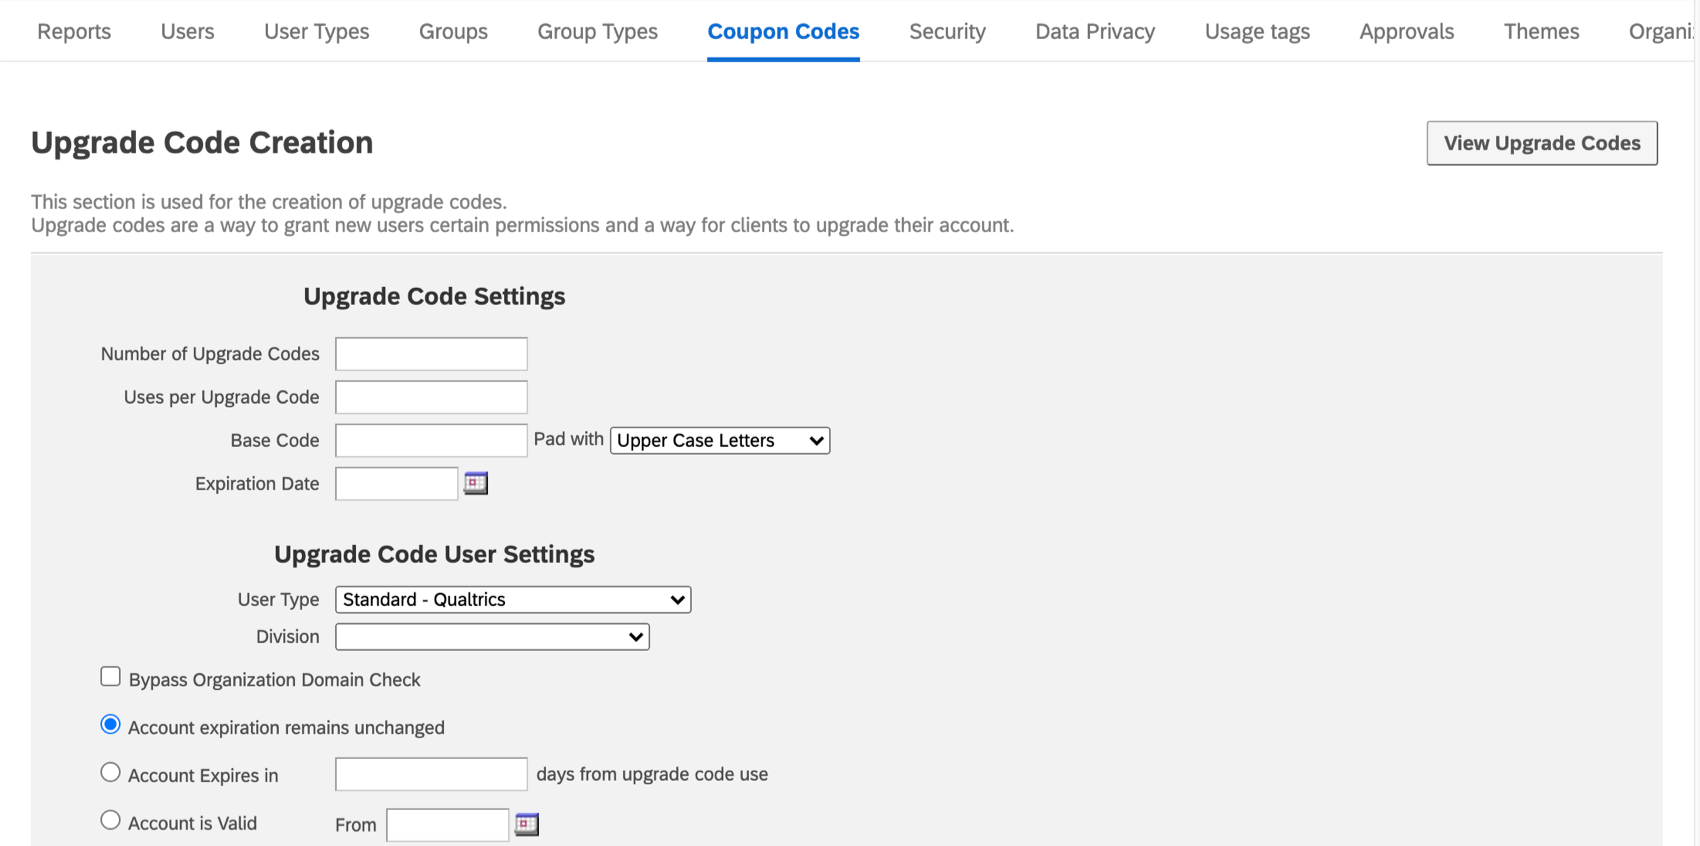
Creating Coupon Codes
- Navigate to the Admin page.
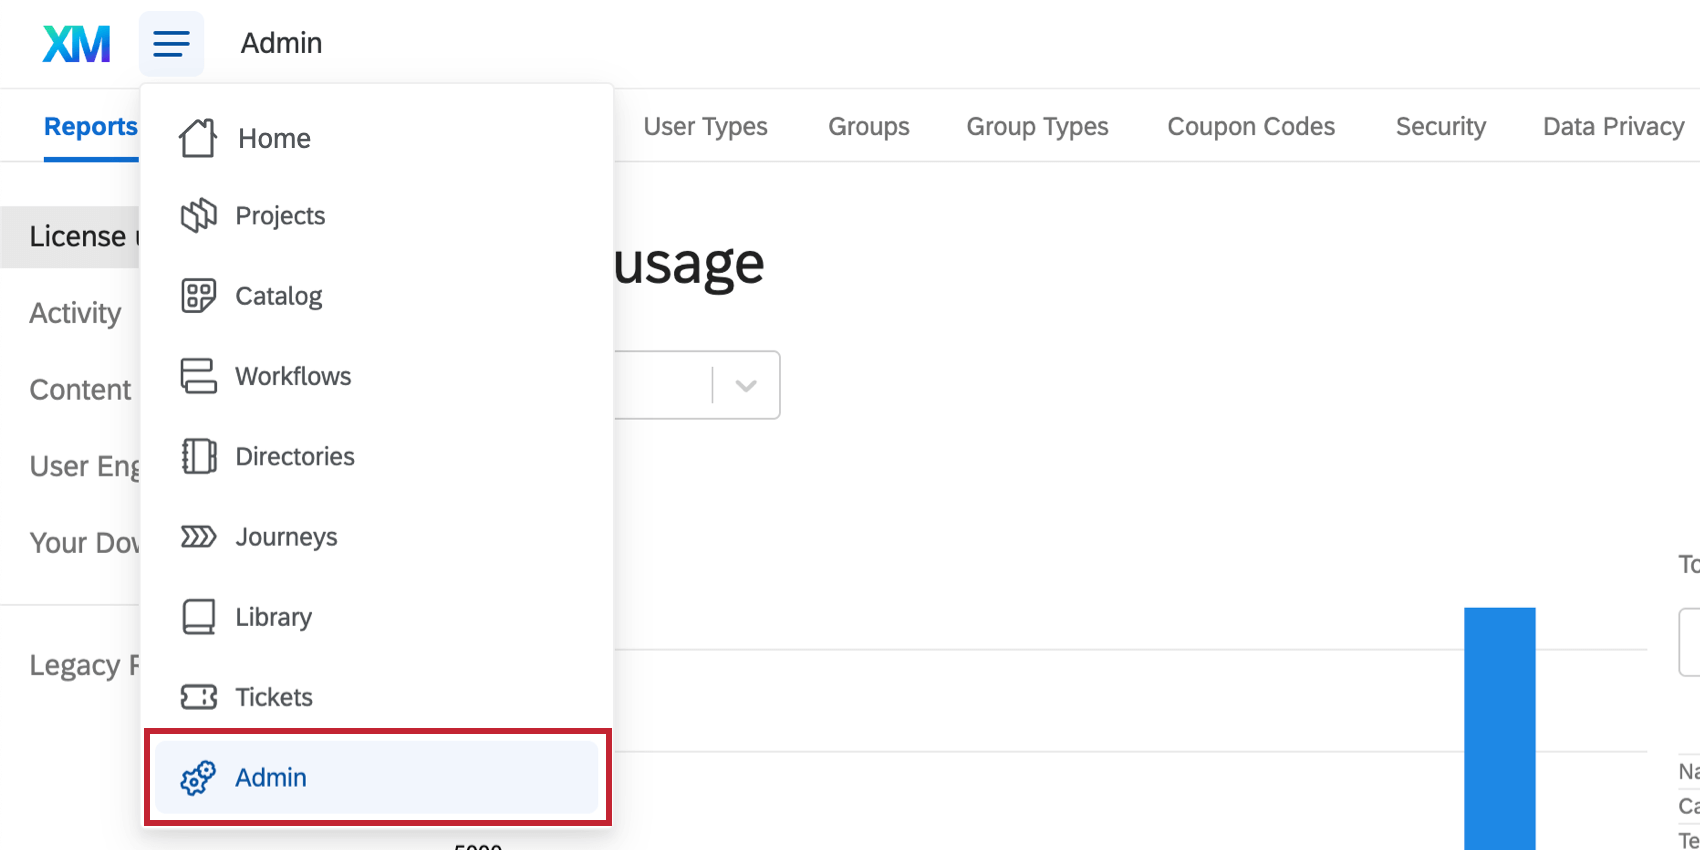
- Select Coupon Codes.
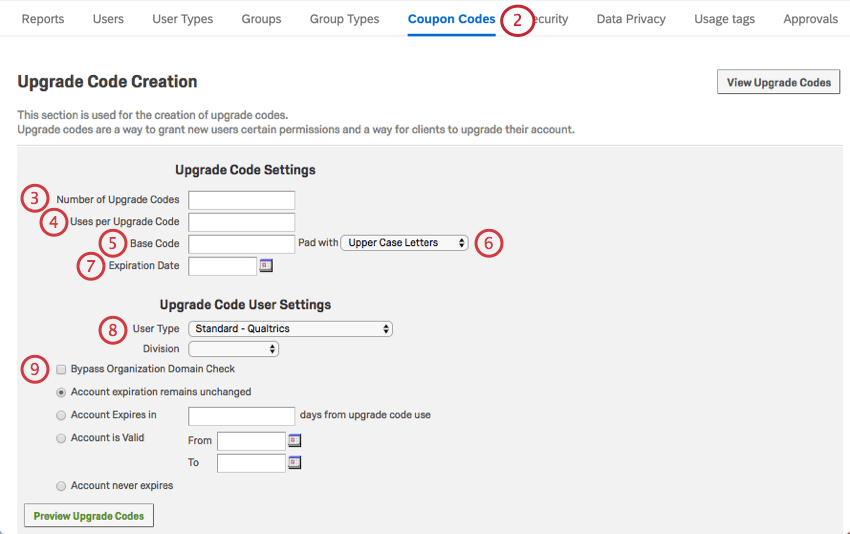
- Enter the Number of Upgrade Codes you want to create.
- In the Uses per Upgrade Code field, enter the number of times each code can be used. Leave this blank to allow a code to be used an indefinite number of times.
- In the Base Code field, enter the text you want to appear at the start of every code.
Qtip: You can use the base code text to help clarify what the code does. A code to move users to the Sales Division might start with “Sales,” and a code to move users to the Support Division might start with “Support.”
- If desired, click the Pad with dropdown to determine what characters will be included after the base code.
- Click the calendar next to Expiration Date to select when you want your codes to expire.
- If desired, select the user type and/or division the code should move accounts to. Leave these fields blank if you don’t want them to change.
- Enable Bypass Organization Domain Check to avoid requiring a specific email domain for users who sign up with the coupon code.
Qtip: Most organizations only allow those with an appropriate email address to create an account. For example, your university may only let users with the same university in their email address sign up for an account. With Bypass Organization Domain Check enabled, this requirement is ignored for anyone using the coupon code.
- If desired, select the type of expiration date the code should place on an account.
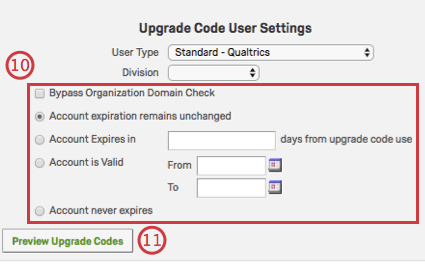
A) Account expiration remains unchanged: The account’s expiration will remain the same.
B) Account Expires in ____ days from upgrade code use: The account will expire a chosen number of days from the code’s initial use. After this date passes, the account will be disabled, but not deleted.
C) Account is Valid From ____ To ____: Choose a date range during which the account is active. After the later date, the account will be marked disabled.
D) Account never expires: No expiration date will be put on the account. - Click Preview Upgrade Codes.
- When you’re satisfied with your settings, click Create Upgrade Codes.
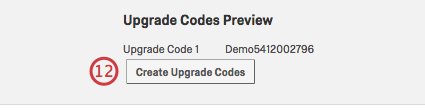
- Distribute the provided codes as needed.
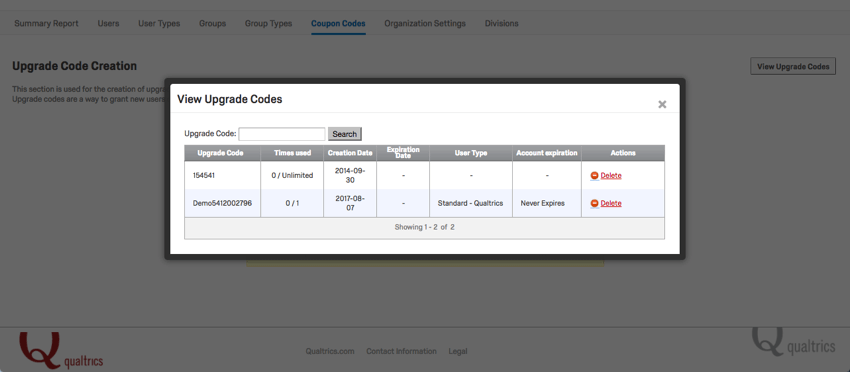
You can view all the codes you created for your brand at any time. Navigate to View Upgrade Codes on the top-right of the Coupon Codes tab, as seen in the example below.
Upgrading as a New User
- Go to your organization’s branded login page.
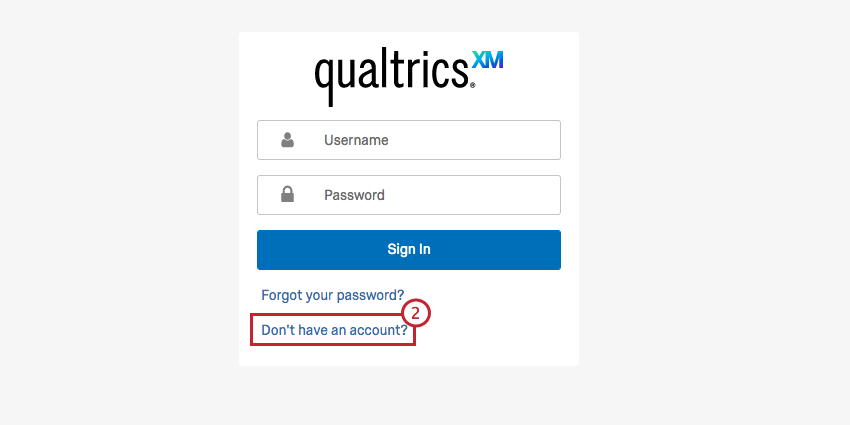
- Click Don’t have an account?
- Enter your Email Address.
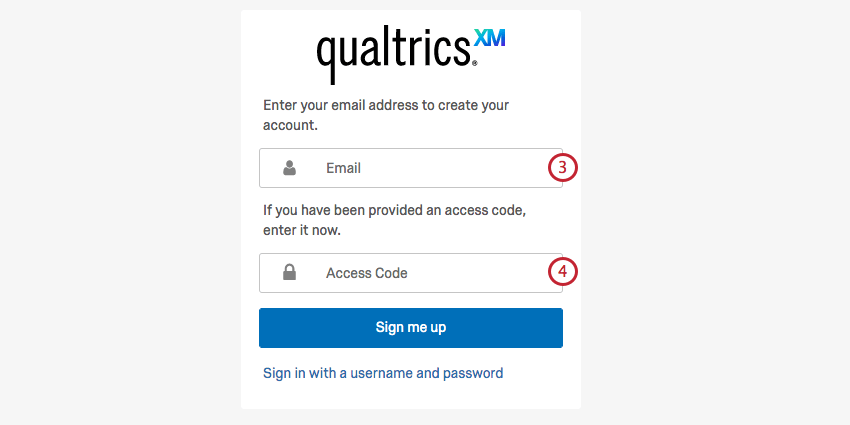
- Insert your code in the Access Code field.
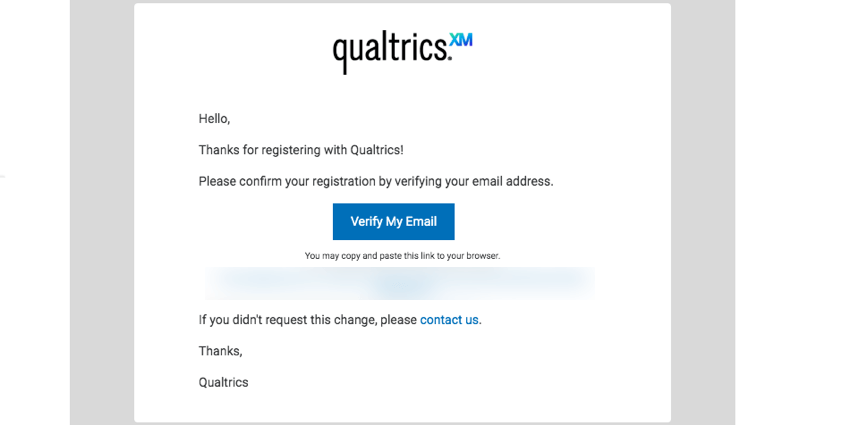
- A verification email will be sent to the email address you provided. Once you’ve verified your account, you’ll be able to finish your account setup.
- Insert your First Name, Last Name, and desired Password.

- Click Create Account.
Upgrading as an Existing User
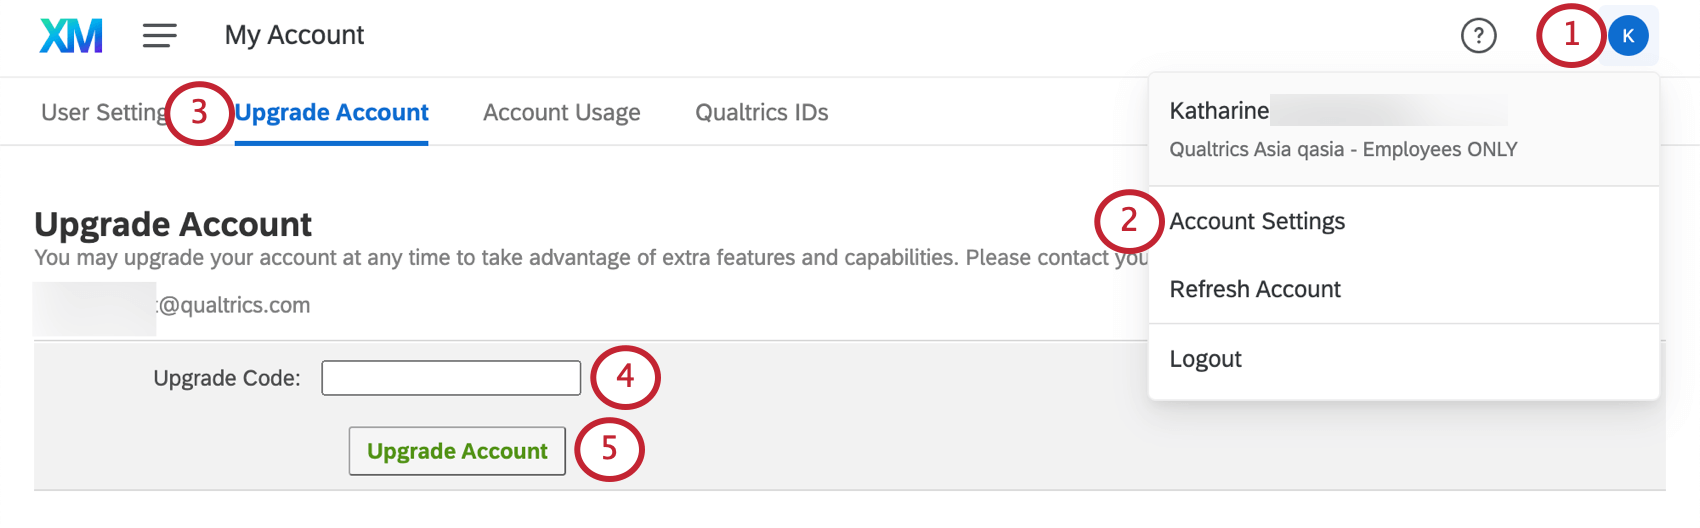
- Click the account settings button in the top-right of your account.
- Select Account Settings.
- Click Upgrade Account.
- Navigate to the Upgrade Code field and paste in your code.
- Click Upgrade Account.