-

Qualtrics Platform -

Customer Journey Optimizer -

XM Discover -

Qualtrics Social Connect
Block Options
About Block Options
Blocks are sets of questions within your survey. Typically, questions are separated into blocks for the purpose of conditionally displaying an entire block of questions, or for randomly presenting entire blocks of questions. These branching and randomization options are found in the survey flow.
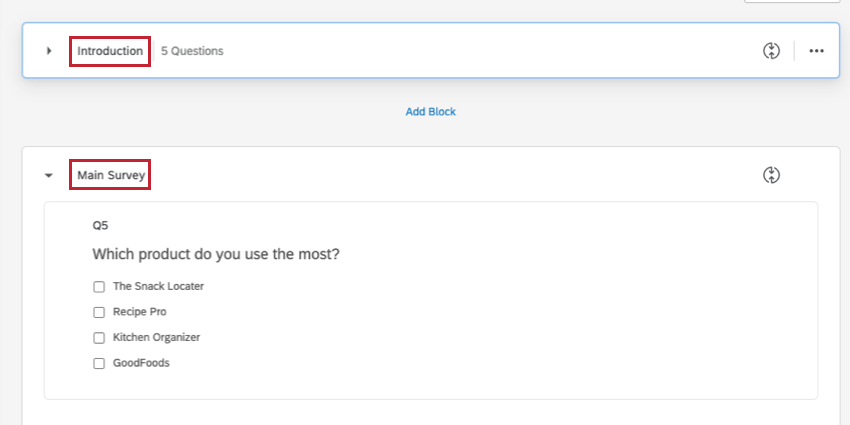
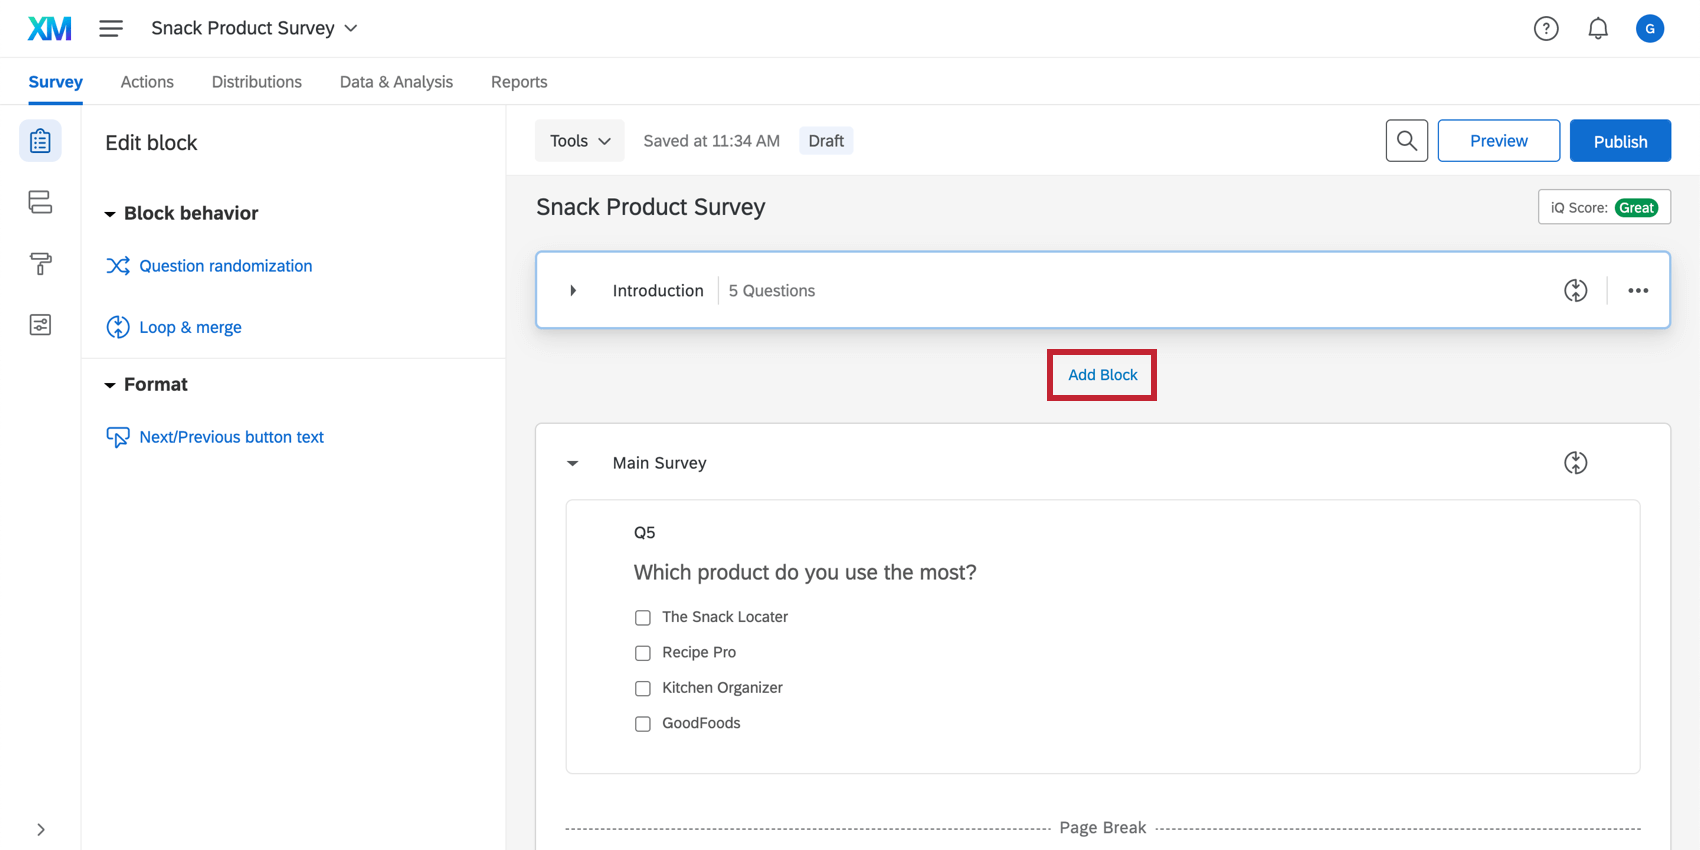
Blocks can also be used to organize longer surveys. For example, the first two questions in your survey might be in a block called “Introduction,” and the rest of your survey questions in a block called “Main Survey.”
On this page you will learn everything you need to create and edit question blocks.
Adding a New Block
When you first create your survey and enter the Survey tab, you’ll notice it already includes one block. If you need another question block, simply click Add Block where you want the block to be inserted (Add Block is located beneath every block).
Splitting an Existing Block
Moving to an Existing Block
- In the Survey tab, select the boxes to the left of each question you would like moved to a separate block.
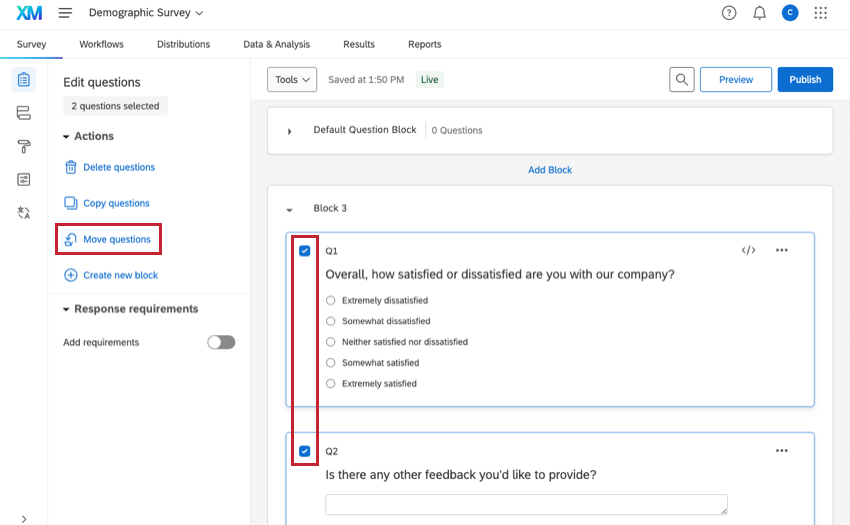
- Click the Move questions option that appears once you have multiple questions selected.
- Select the existing survey block you want to move your questions to.
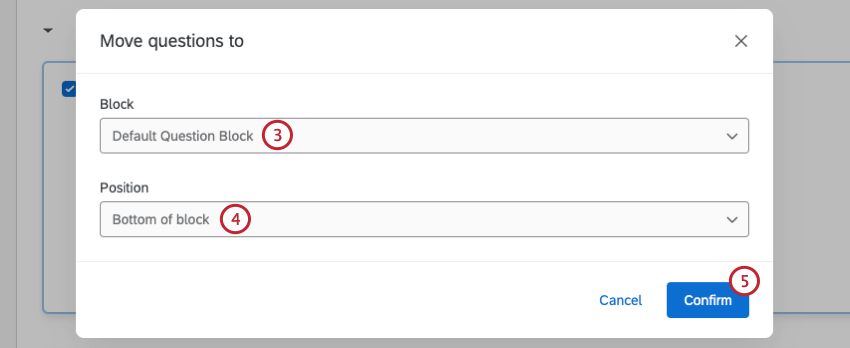
- Select a position for your questions. You can either move them to the Top of block or Bottom of block.
- Click Confirm.
Moving to a New Block
- In the Survey tab, select the boxes to the left of each question you would like moved to a separate block.
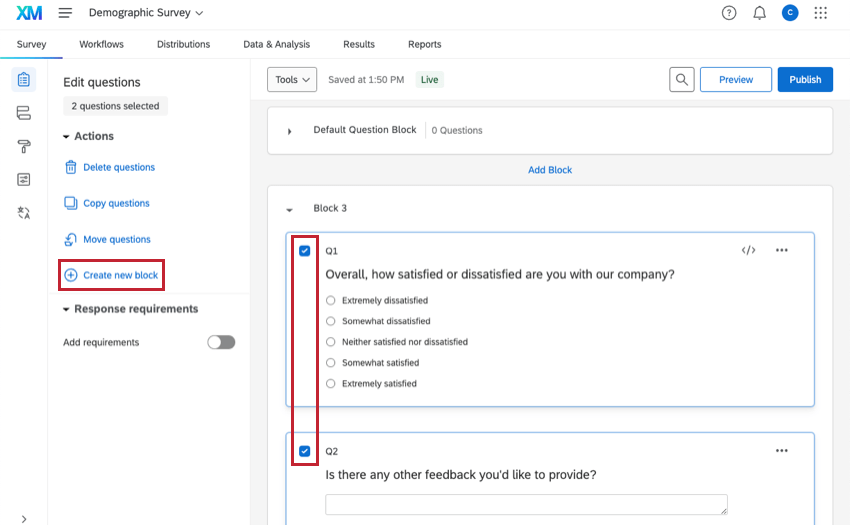
- Click the Create new block option that appears once you have multiple questions selected. Your questions will now be placed in a new block at the bottom of your survey. To move your block elsewhere, drag and drop your block or use the survey flow.
Qtip: A group of consecutive questions can be quickly selected by clicking on the first question and then holding Shift and clicking on the last question. For more information, visit our page on editing multiple questions.
Saving a Block to Your Library
If you’d like to use the same set of questions in multiple surveys but don’t want to create questions from scratch each time, you can save the block to your library.
To save to your library
- In the Survey tab, click the block options for the block you want to save.
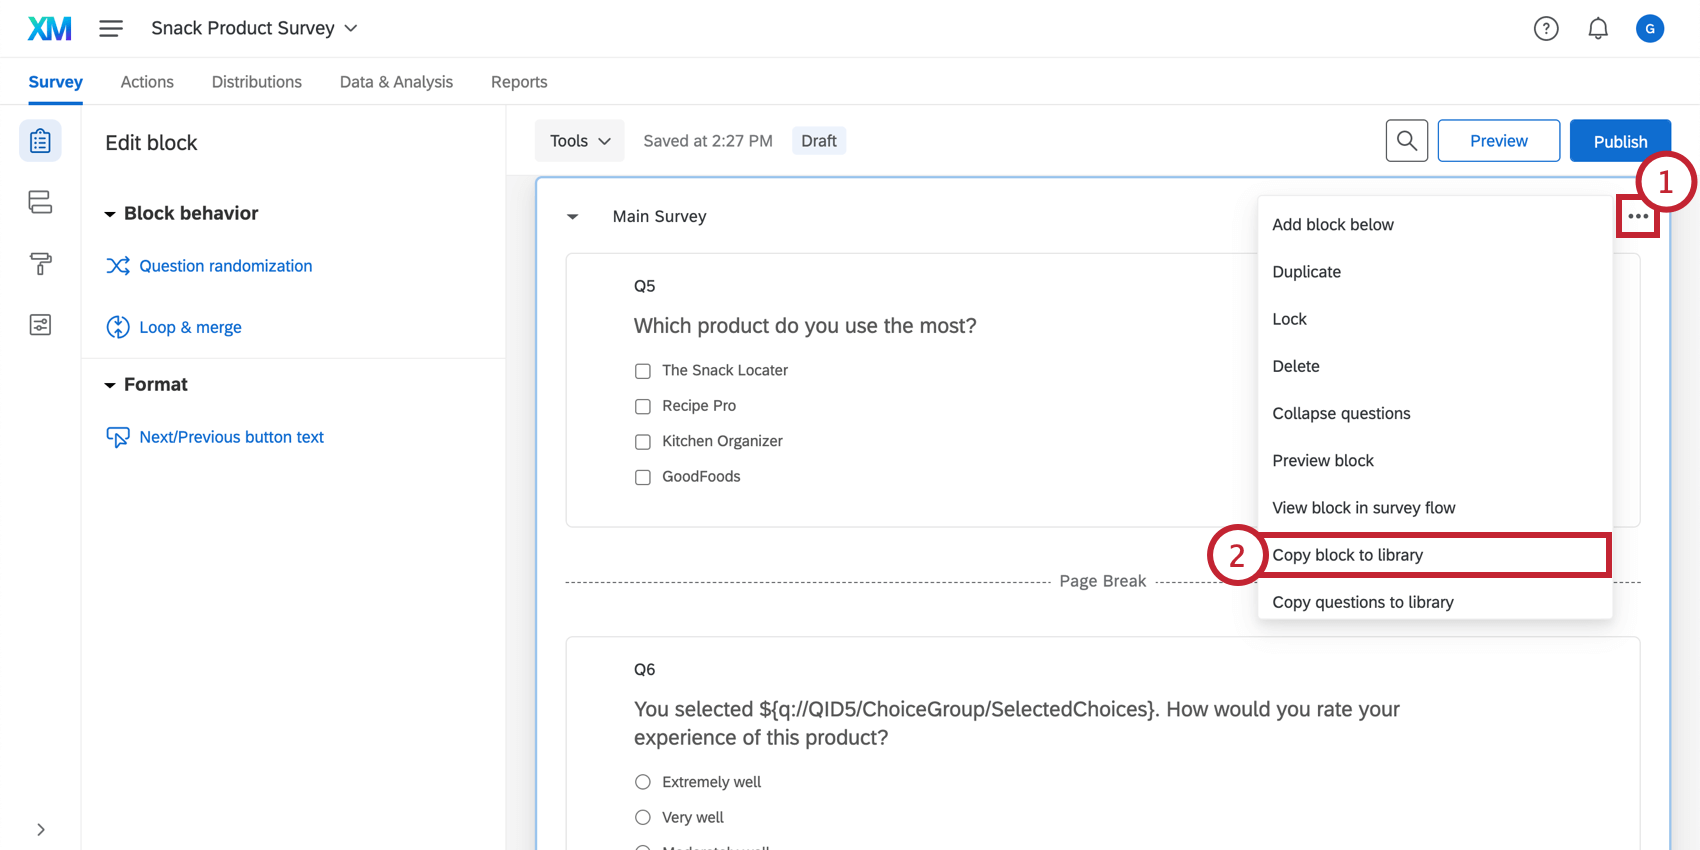
- Select Copy block to library.
- Select the library where your block will be saved, choose a folder to save it in, and give the block a description.
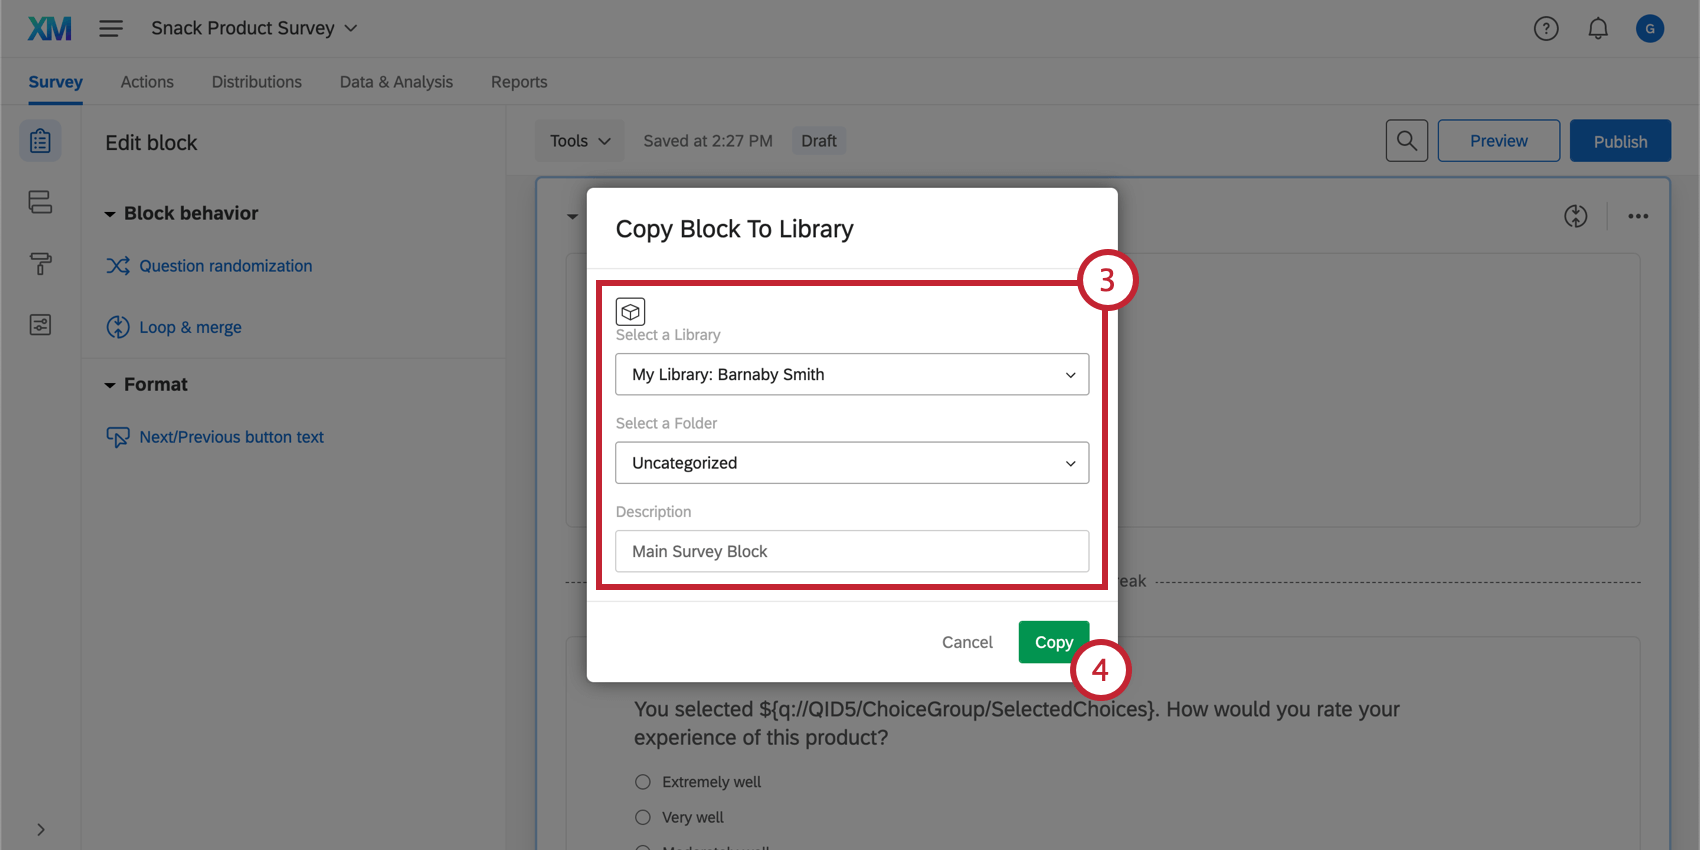 Qtip: Saving the block to your personal library will save it for your own use. You might also see other group libraries available. Blocks saved to a group library will be available for use by all members of that group.
 - Click Copy.
Adding a Block from Your Library
A block that is saved to your library can be added to any survey. This way you don’t have to re-create questions you’ve already created in the past.
Renaming a Block
Qualtrics gives each new block a default name. You can rename a block at any time. Although block names will not appear for survey respondents, names can help you keep your survey organized.
To rename a block
- In the Survey tab, click the current block name.
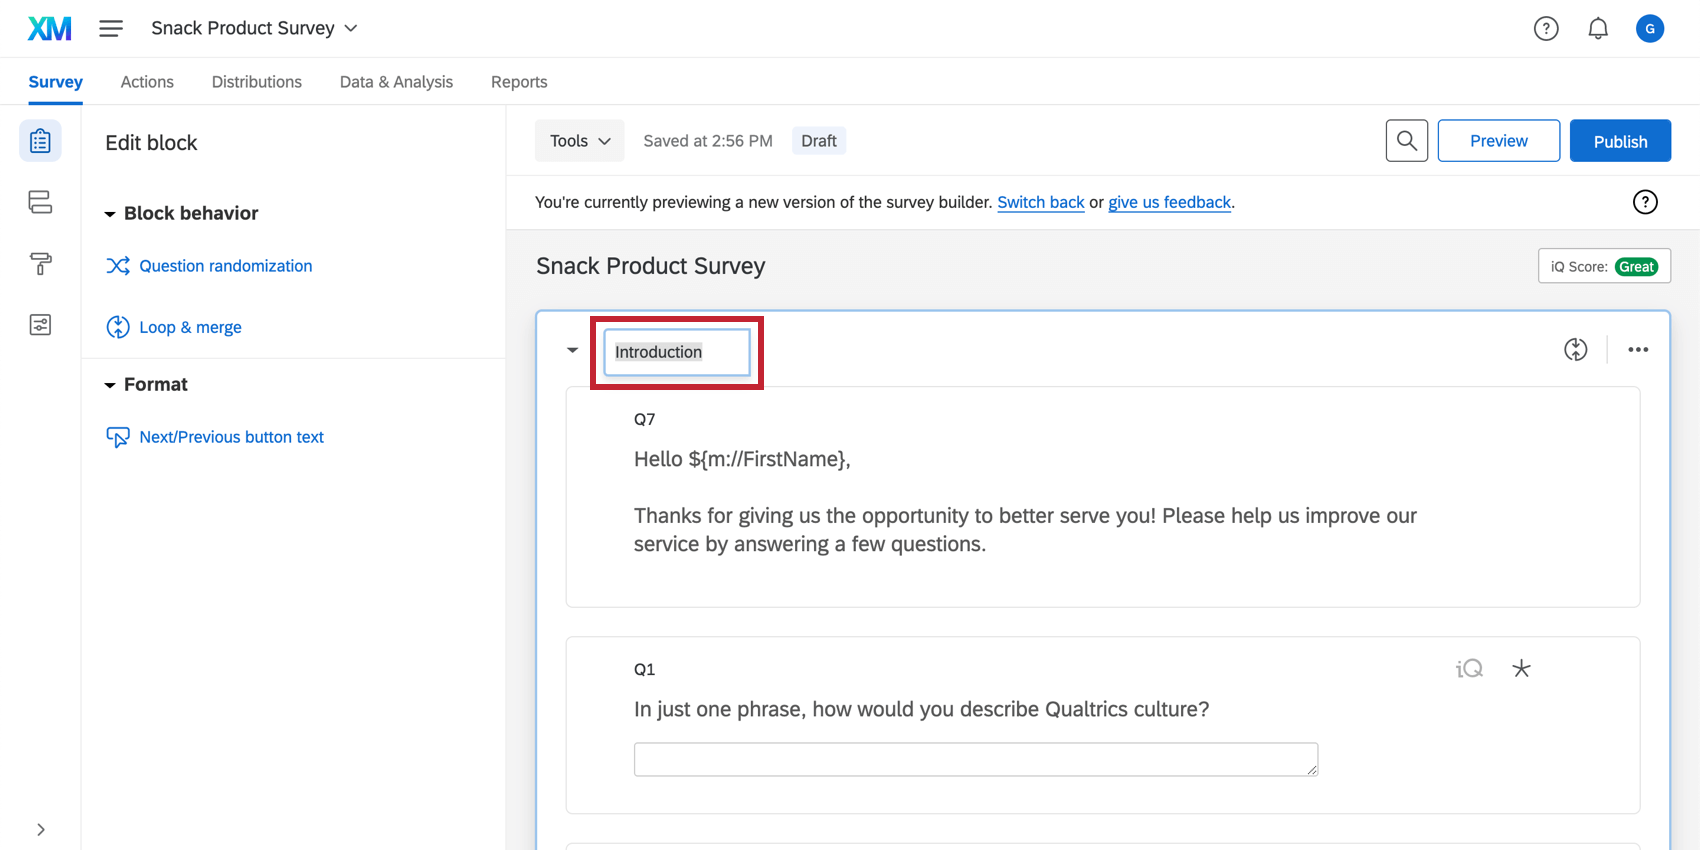
- Type in the new name.
- Click anywhere off of the block name to save the changes.
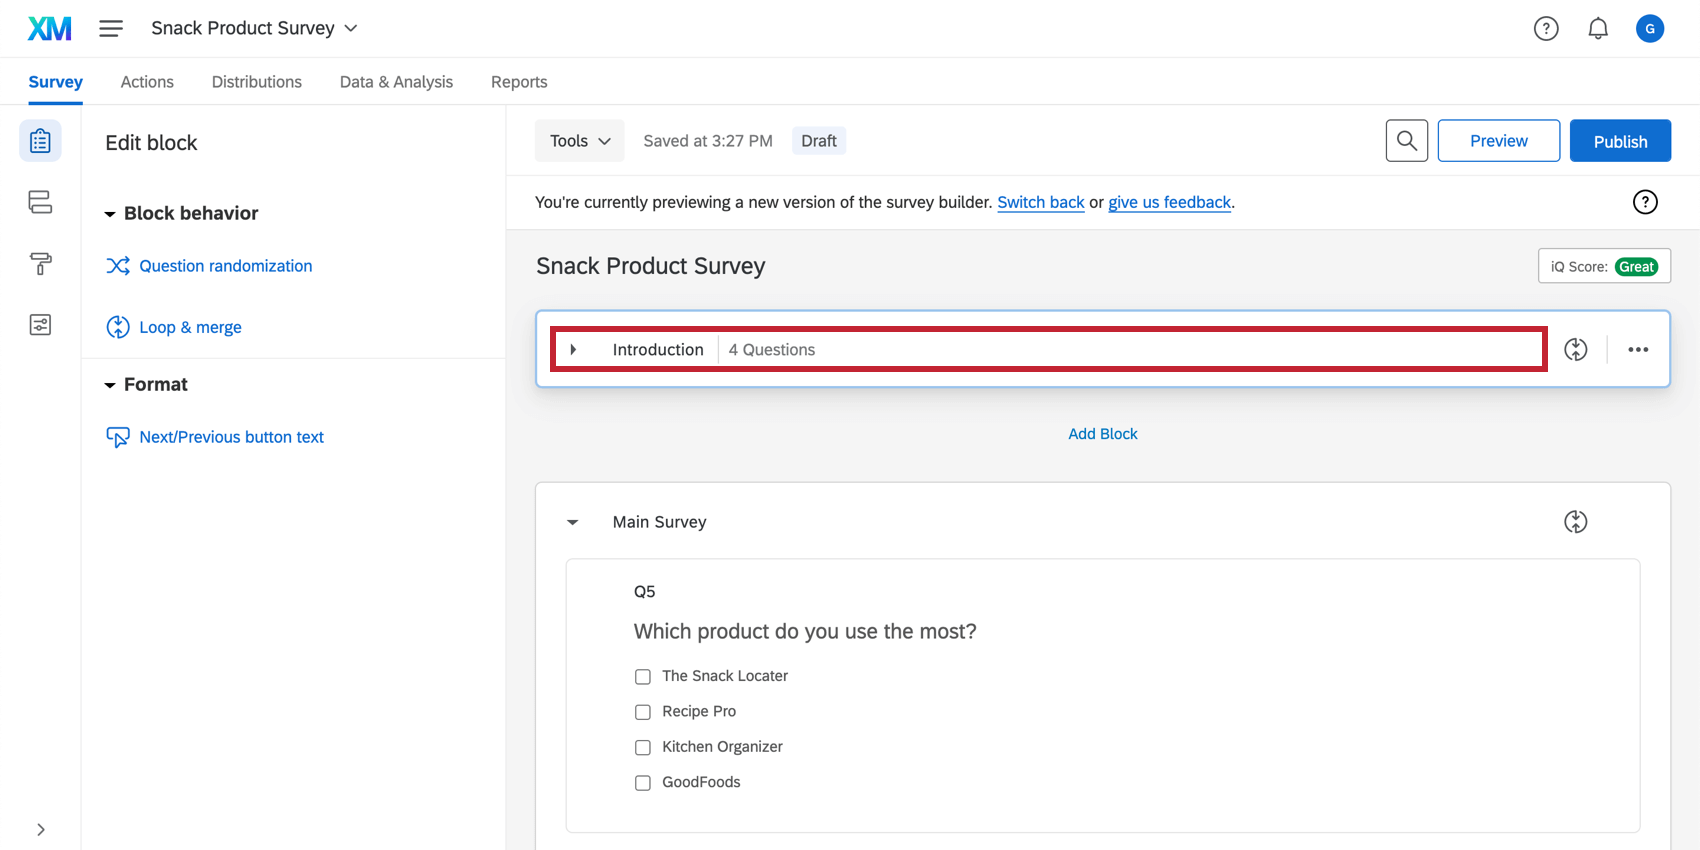
Collapsed Blocks
If you have a number of blocks and only want to view the one you are currently editing, it may be helpful to collapse the other blocks.
To collapse a block, click the arrow next to the block name.
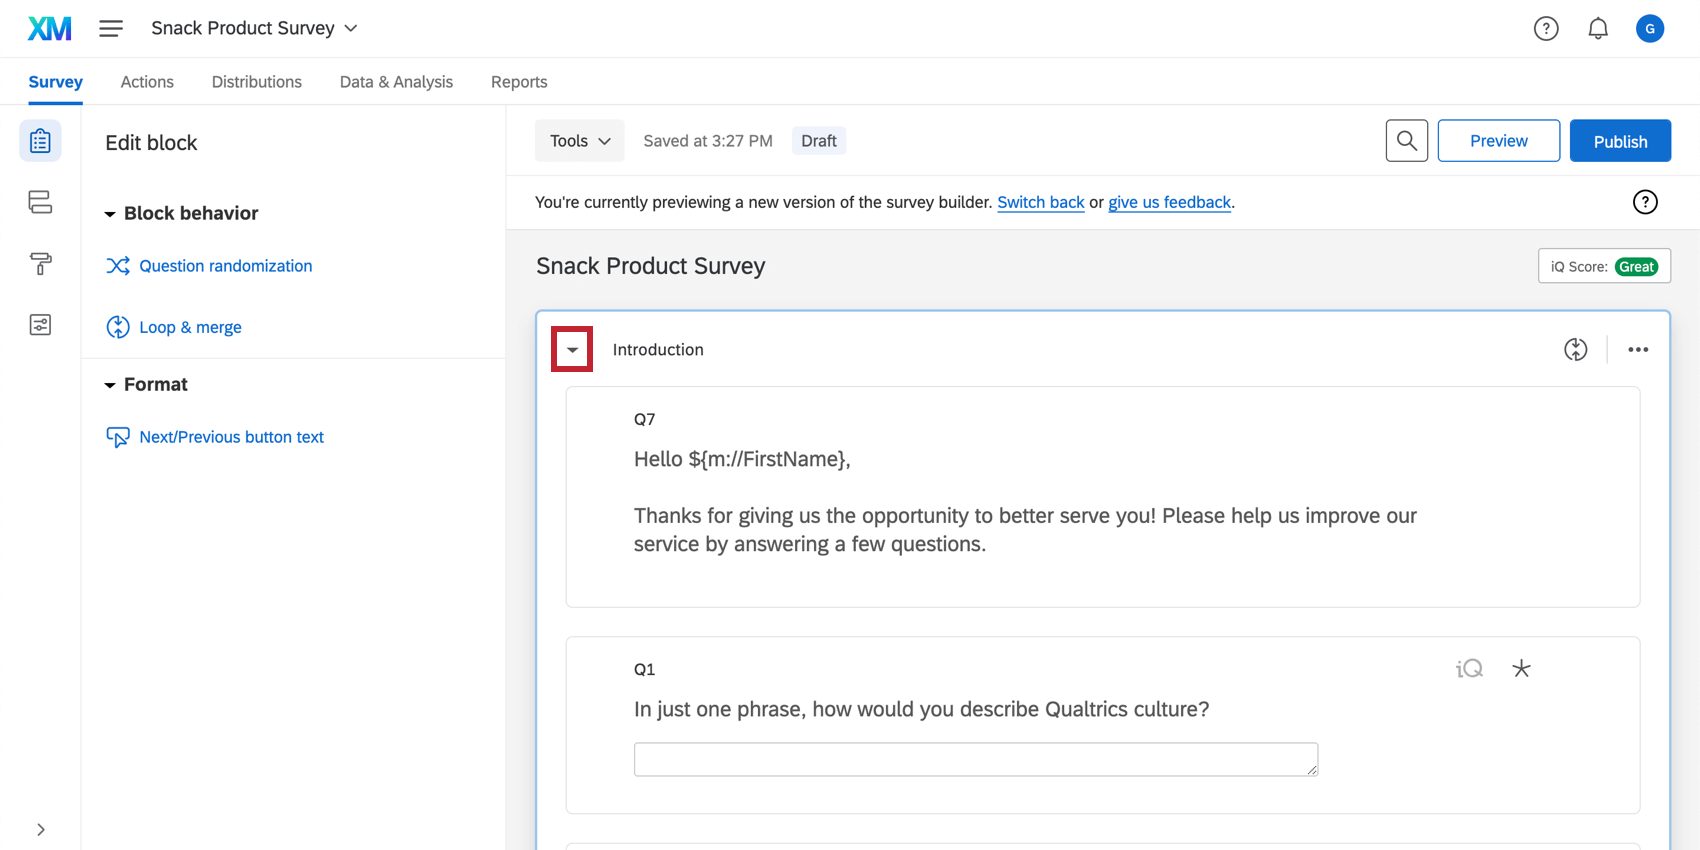
To expand a collapsed block, click anywhere in the collapsed block header.
Large Block Mode
Once a survey has 60+ questions and/or page breaks (including questions/page breaks in the trash), your survey will be in large block mode. This shows a reduced form of the questions. Clicking on a question will expand the question. This saves load time and minimizes scrolling distance in large surveys. At 70+ questions, all blocks in the survey will be automatically collapsed as well.
You can turn large block mode off and back on (once it has been triggered) for a block by clicking on the text next to the block name at the top of the block. When you leave the Survey tab and return to it, the setting will be enabled again.
Using Blocks in the Survey Flow
In the survey flow, you can choose which blocks will be displayed to which respondents, and in what order. To learn how to display a block conditionally, refer to branch logic. To learn how to randomly select a block to display, refer to our block randomization page.
All blocks are automatically included in the survey flow; however, there may be cases where you’d like a block to be included in multiple locations in the flow, or where you’ve removed a block from the flow but would like to put it back. This process is detailed on the Show Block page.
Edit Block
Question randomization
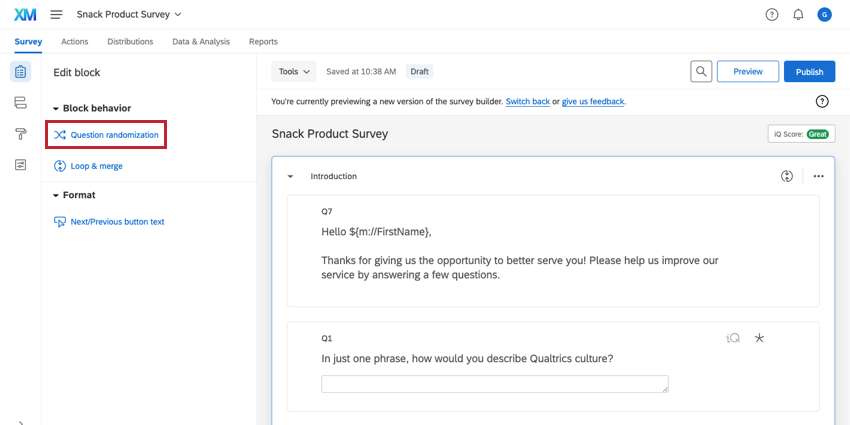
Question randomization allows you to randomize the order of the questions in your block, display only a subset of the questions, and even permanently hide certain questions.
Loop & Merge
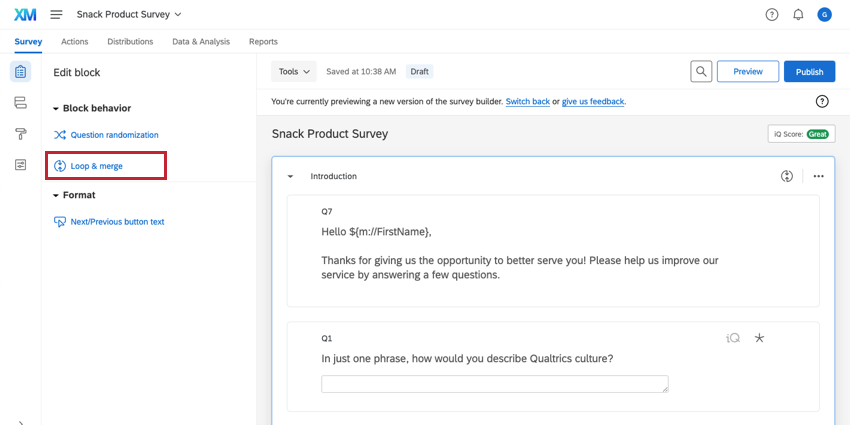
Loop & Merge allows you to present the same questions to a respondent multiple times. For example, if your block is a set of product satisfaction questions, you might want to repeat the block for each product the respondent has purchased.
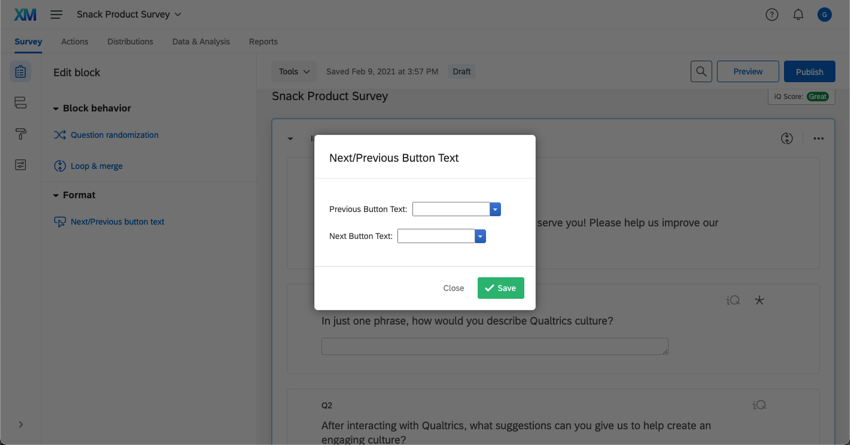
Next / Previous button text
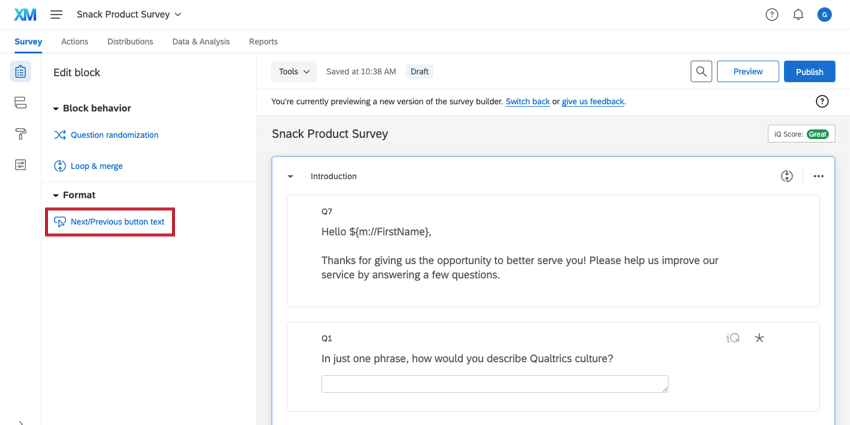
With the Next/Previous Button Text option, you can specify the text of the Next and Previous buttons that respondents see in this particular block.
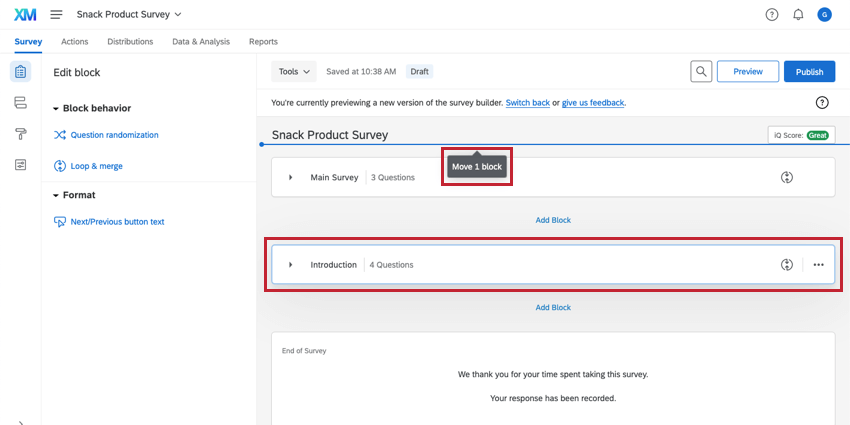
Moving Blocks
Click and drag blocks in order to change the order in which they are presented amongst each other. You can also change block position in the survey flow or block options.
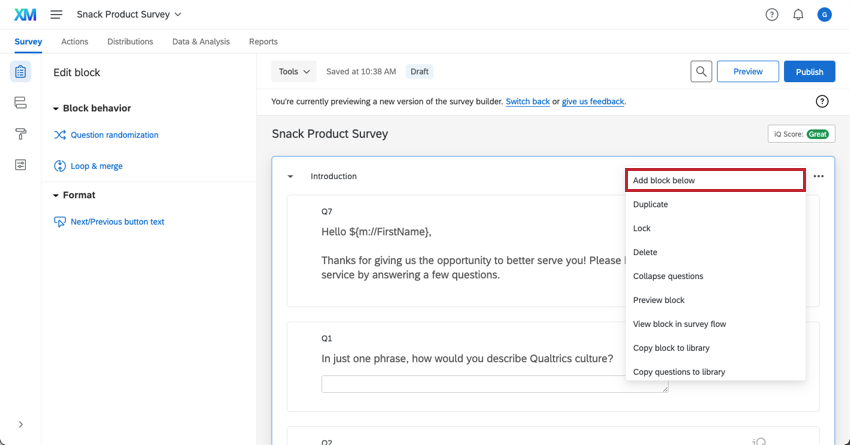
Using Block Options
Block options can be found on the top right of every block. In addition to the abilities mentioned above, the following options are available:

Add Block Below
This option adds a new block below your existing one.
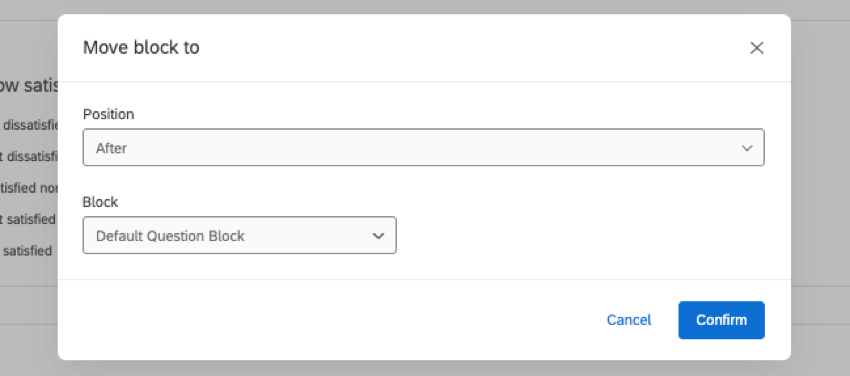
Move block
This option allows you to move the block to a specific position in your survey.
To move a block, click Move block, select a new position in your survey for the block, and click Confirm.
Copy
You can use Copy to create a copy of the block within the survey you are editing. This can be a time-saver if you have similar questions repeated in the survey.
To copy a block, click Copy and enter in the name of the new block. The block will appear at the bottom of your survey and will contain all the questions of the original. Any logic will also be copied, and it will continue to reference the same items that were referenced in the original questions’ logic.

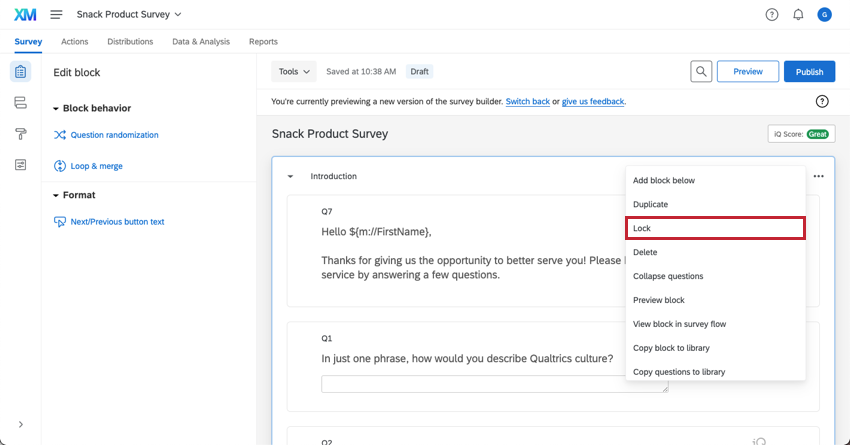
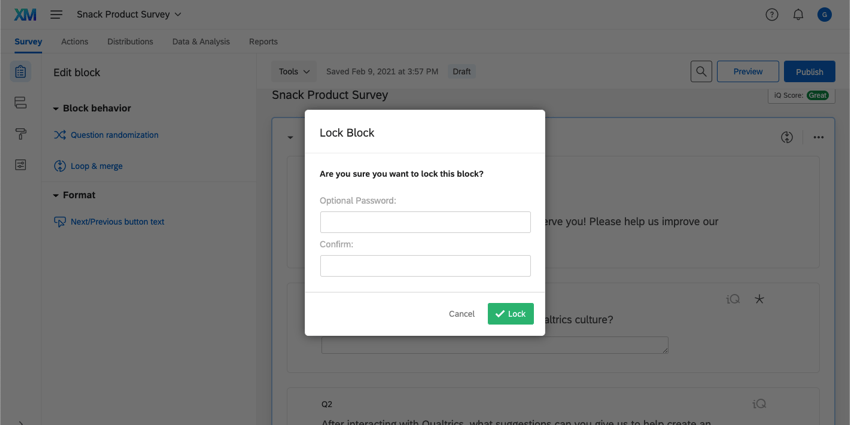
Lock
Lock is useful when others have access to your survey but you do not want any edits to be made to the block. You can add a password to the block so it can only be unlocked for further edits by entering the password.
In the block options menu, you can lock the block without a password by simply clicking Lock. To use a password, first type a password and then click Lock.
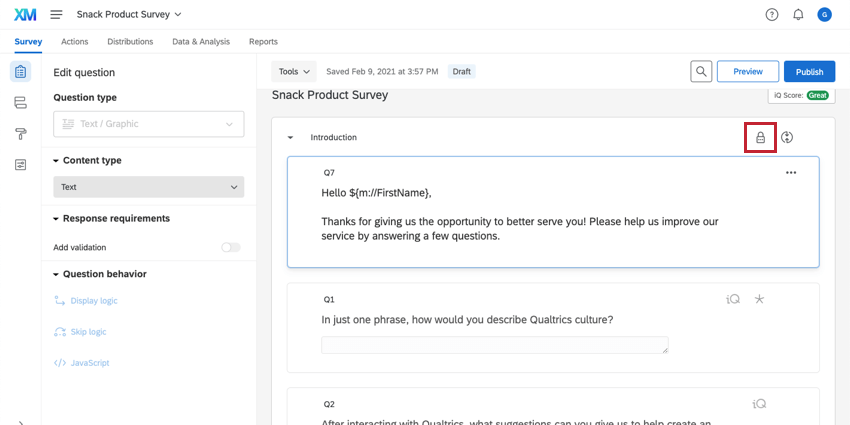
To unlock a block, click the Locked icon. If prompted, enter the appropriate password. Note that once a block has been unlocked, you will need to lock it again to prevent further edits.
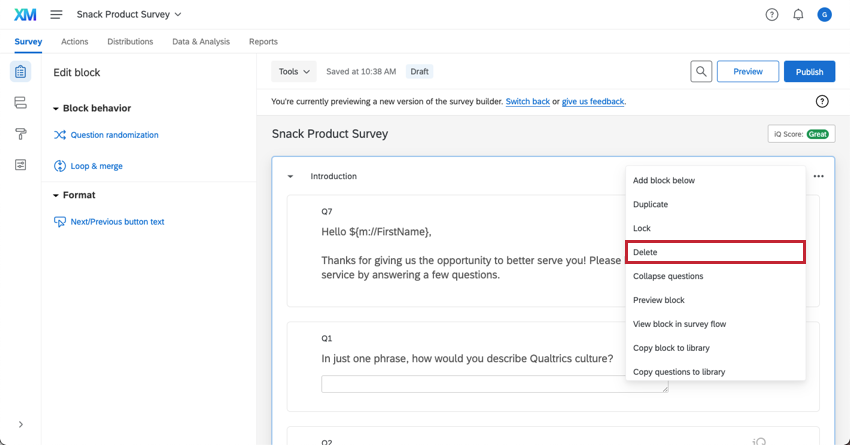
Delete Block
Delete will delete the block and all questions within the block. Be careful when using this option to ensure that you do not delete anything that you need. Deleted questions will be added to the Trash / Unused Questions section at the bottom of the survey.
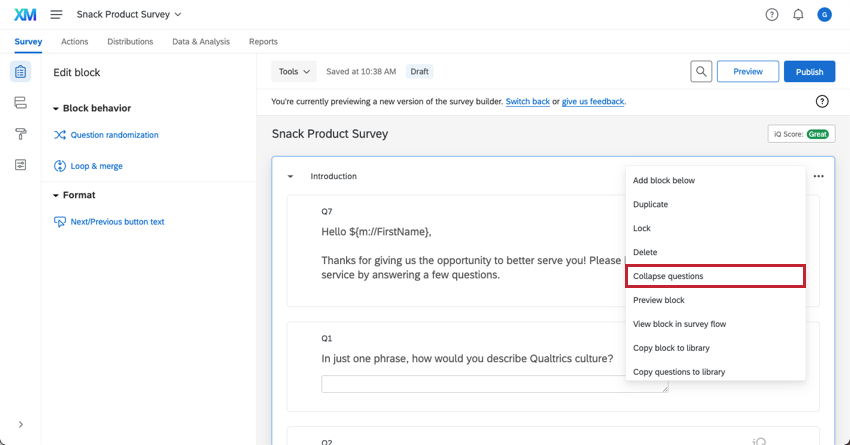
Collapse Questions
Collapse questions reduces the size of your questions for easy navigation and can be enabled or disabled by clicking Collapse questions in the block options. When this option is enabled, the question text and any choice text will display in a condensed format.
When collapsed, an icon appears to the left of your questions and indicates what the question type is. Radio buttons, checkboxes, text entry boxes, and other features of your questions will not display.
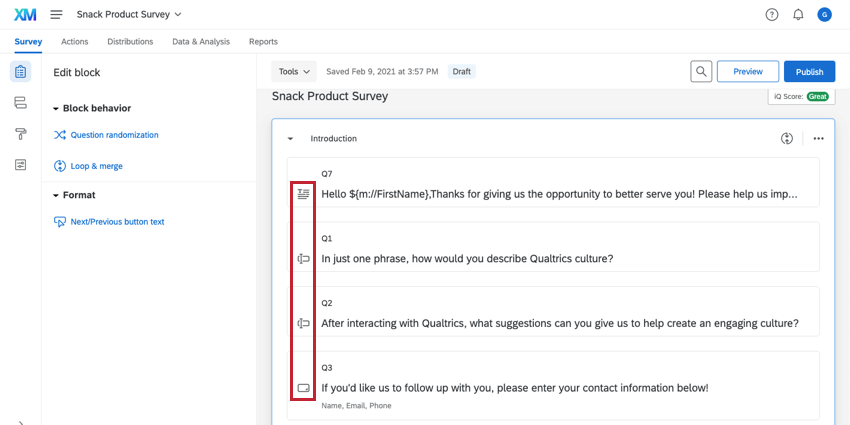
To uncollapse a single question, click on the question. It will remain uncollapsed until you click on a different question.
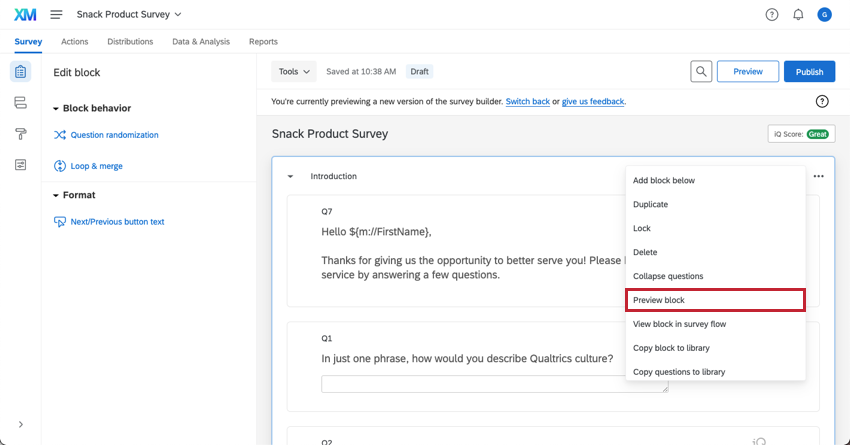
Preview Block
Preview block allows you to preview a single block in your survey. This is especially helpful in longer surveys; rather than previewing your entire survey from the beginning, you can preview just a specific section.
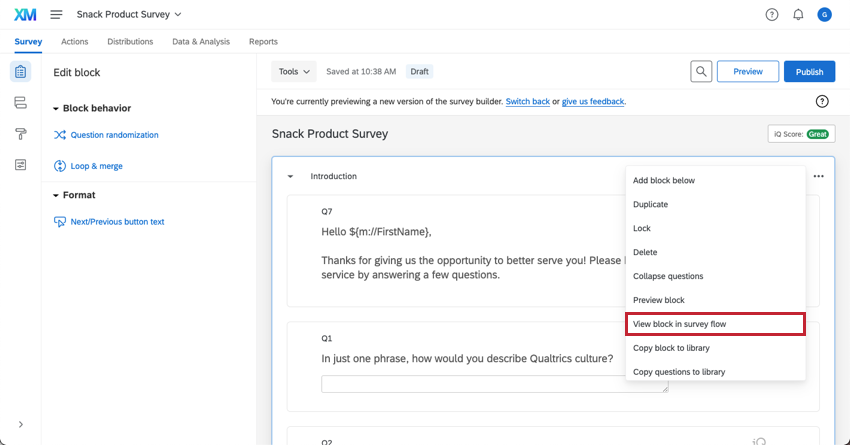
View Block in Survey Flow
View block in survey flow brings you to the block in the survey flow. This option is especially useful if you have a very complex or long survey flow and want to locate the block for troubleshooting.
Copy Questions To Library
Copy Questions To Library is similar to the Copy Block To Library feature, except that it saves each question individually to your library rather than saving the block as a whole. Learn more about it on our Library Surveys page.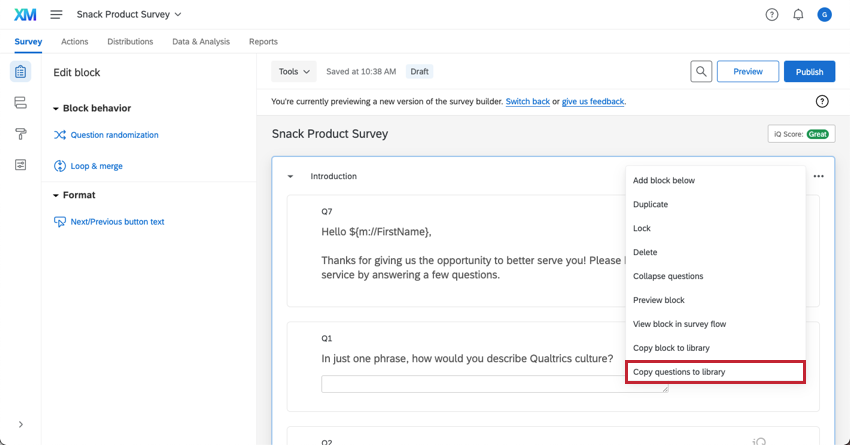
Block Options in Different Project Types
Block options available in just about every type of project where you customize a survey. The options described on this page are available in:
- Survey projects
- XM Solutions
- Engagement
- Lifecycle
- Ad Hoc Employee Research
- Pulse
- 360
- Conjoint
- MaxDiff
For specific considerations for Conjoint and MaxDiff projects, see the this support page.