-

Qualtrics Platform -

Customer Journey Optimizer -

XM Discover -

Qualtrics Social Connect
Insert a Graphic
About Inserting a Graphic
You can easily display graphics in a question, answer choice, header/footer, an email message, or anywhere else in Qualtrics that has a rich content editor.
Qualtrics supports JPG (or JPEG), PNG, and GIF images that are 16MB or smaller. Before you upload a graphic into your survey, make sure you have permission to use the image.
How to Insert Graphics into Questions
- Double-click the question text.
- Selec Rich Content Editor.
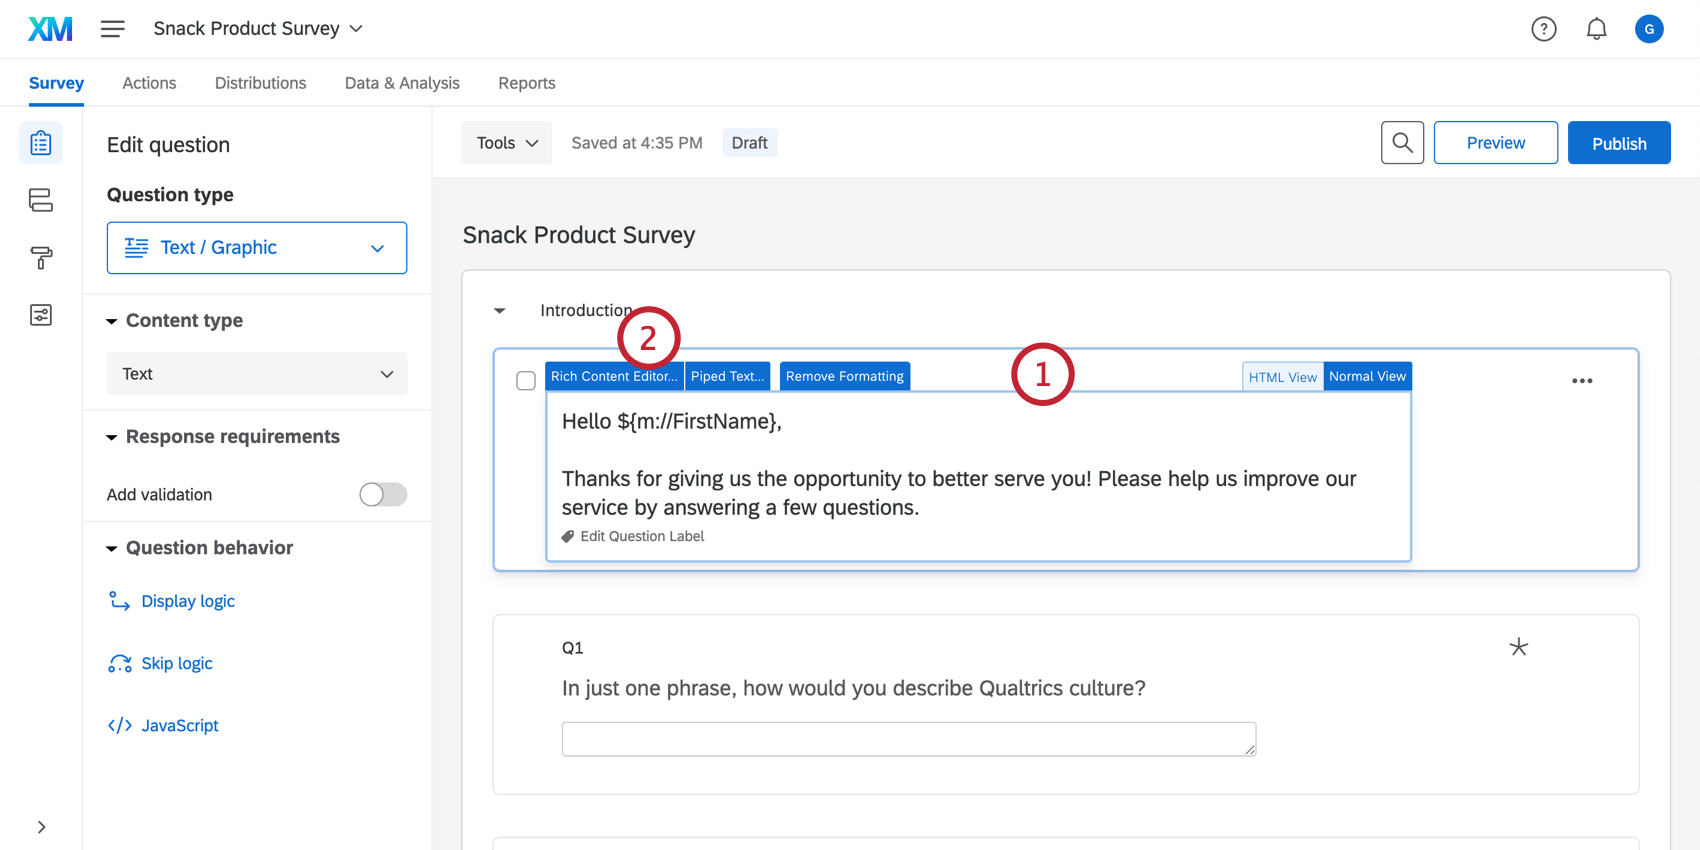
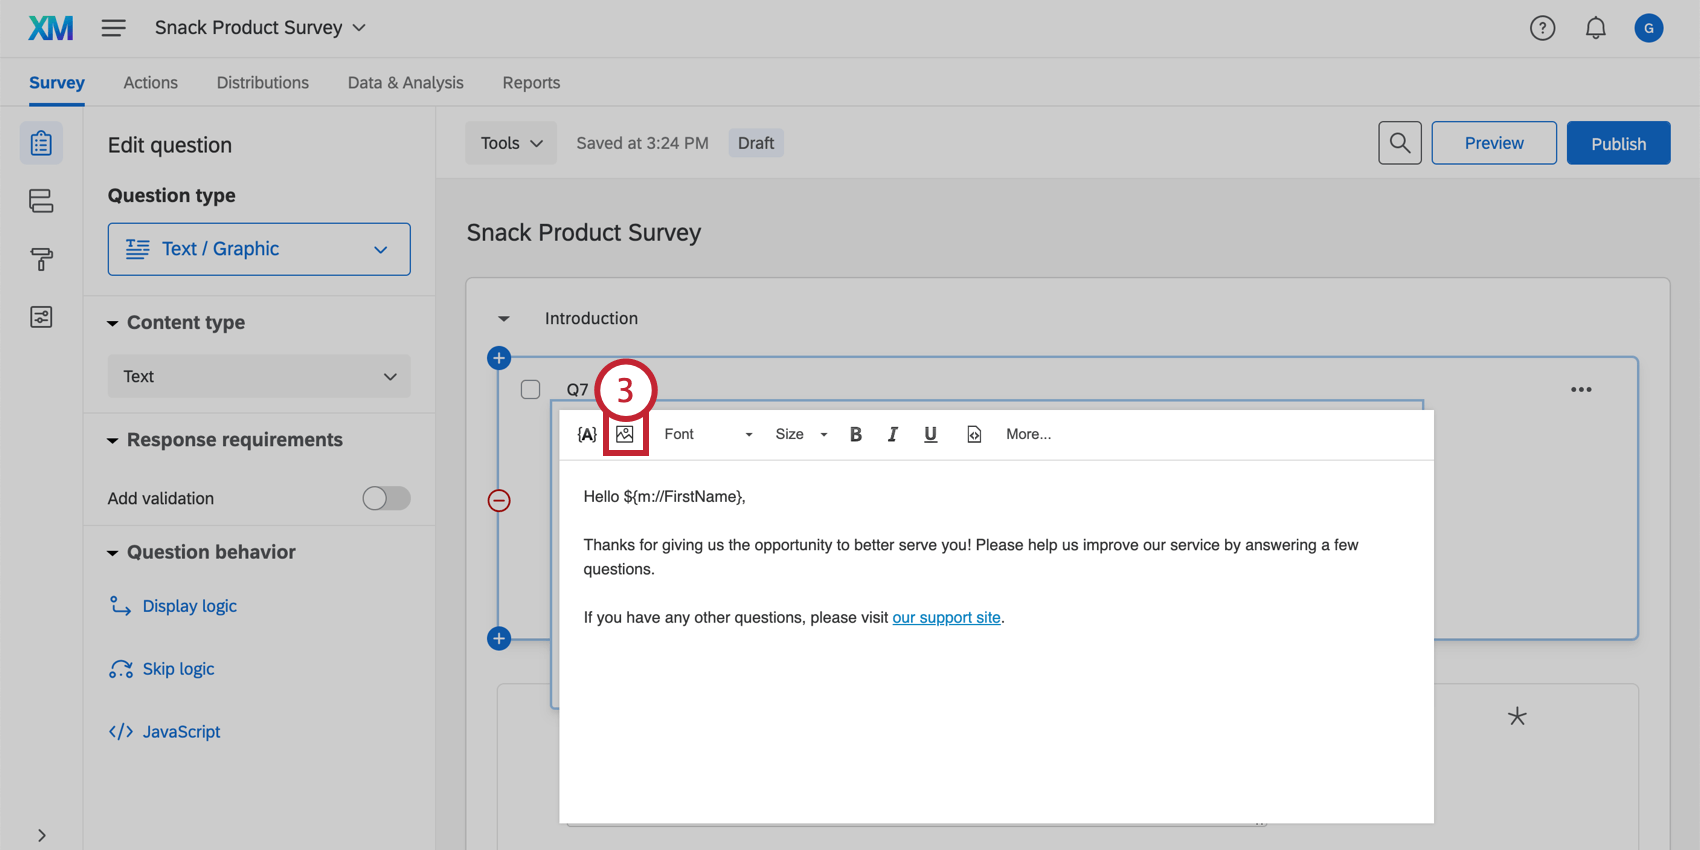
- Click the Insert Graphic icon in the upper left-hand corner.
- Choose the library where your graphic is / will be saved. By default, your account’s personal library will be selected.
Qtip: This step is useful if you happen to belong to one or more group libraries.

- Click on the graphic you want to use, or click Upload a New Graphic to add a new one from your computer / the web.
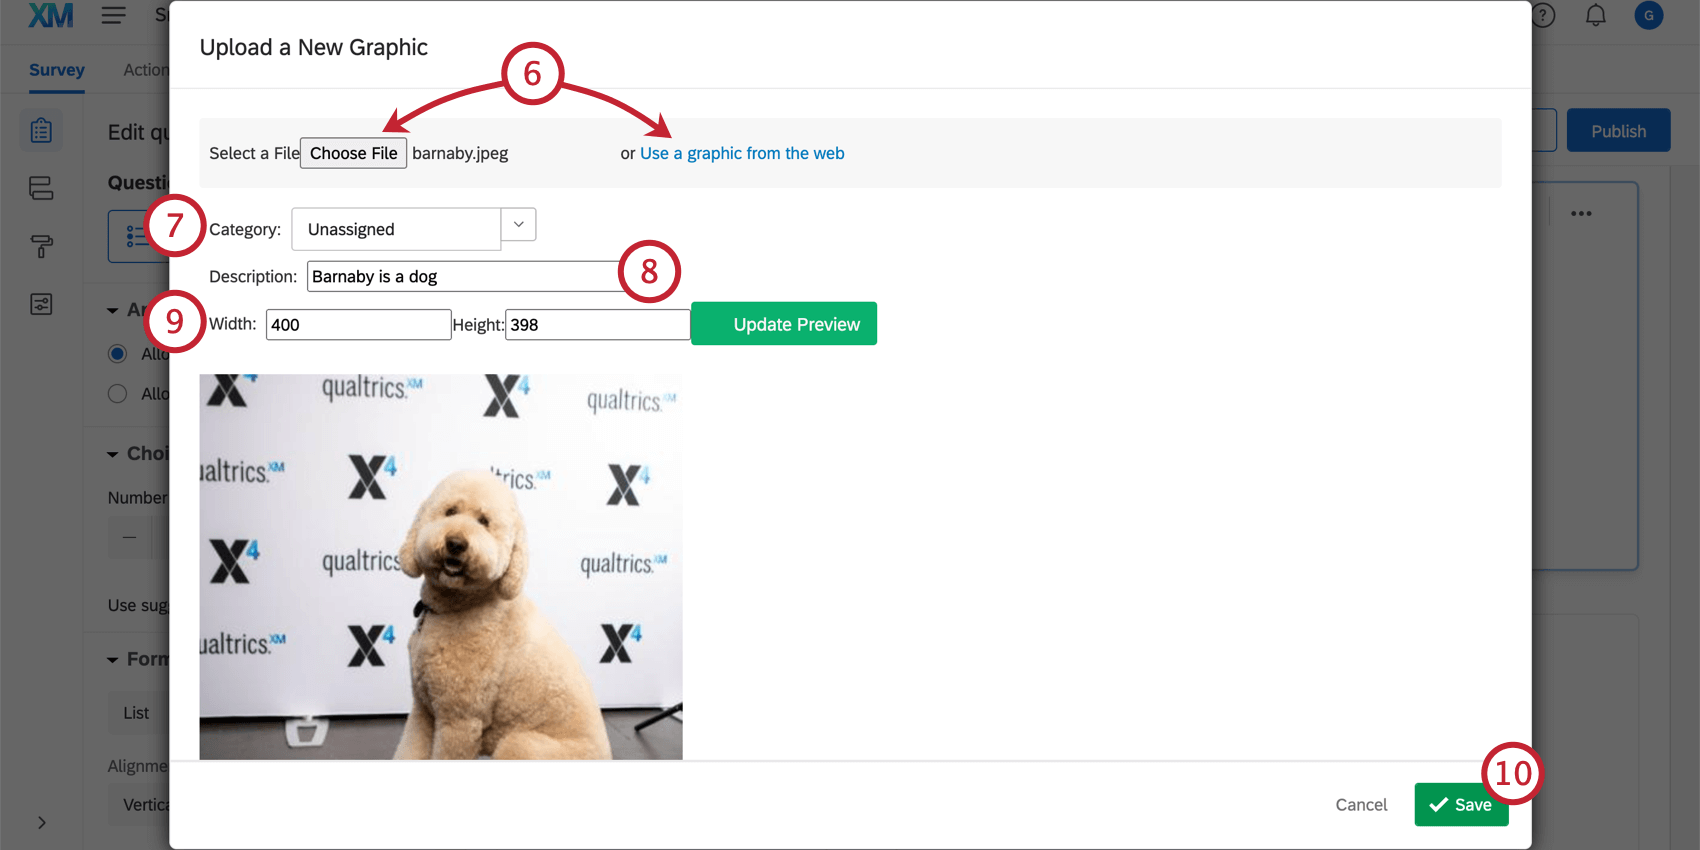
- If you’re uploading a new graphic, you can choose between one of the following:
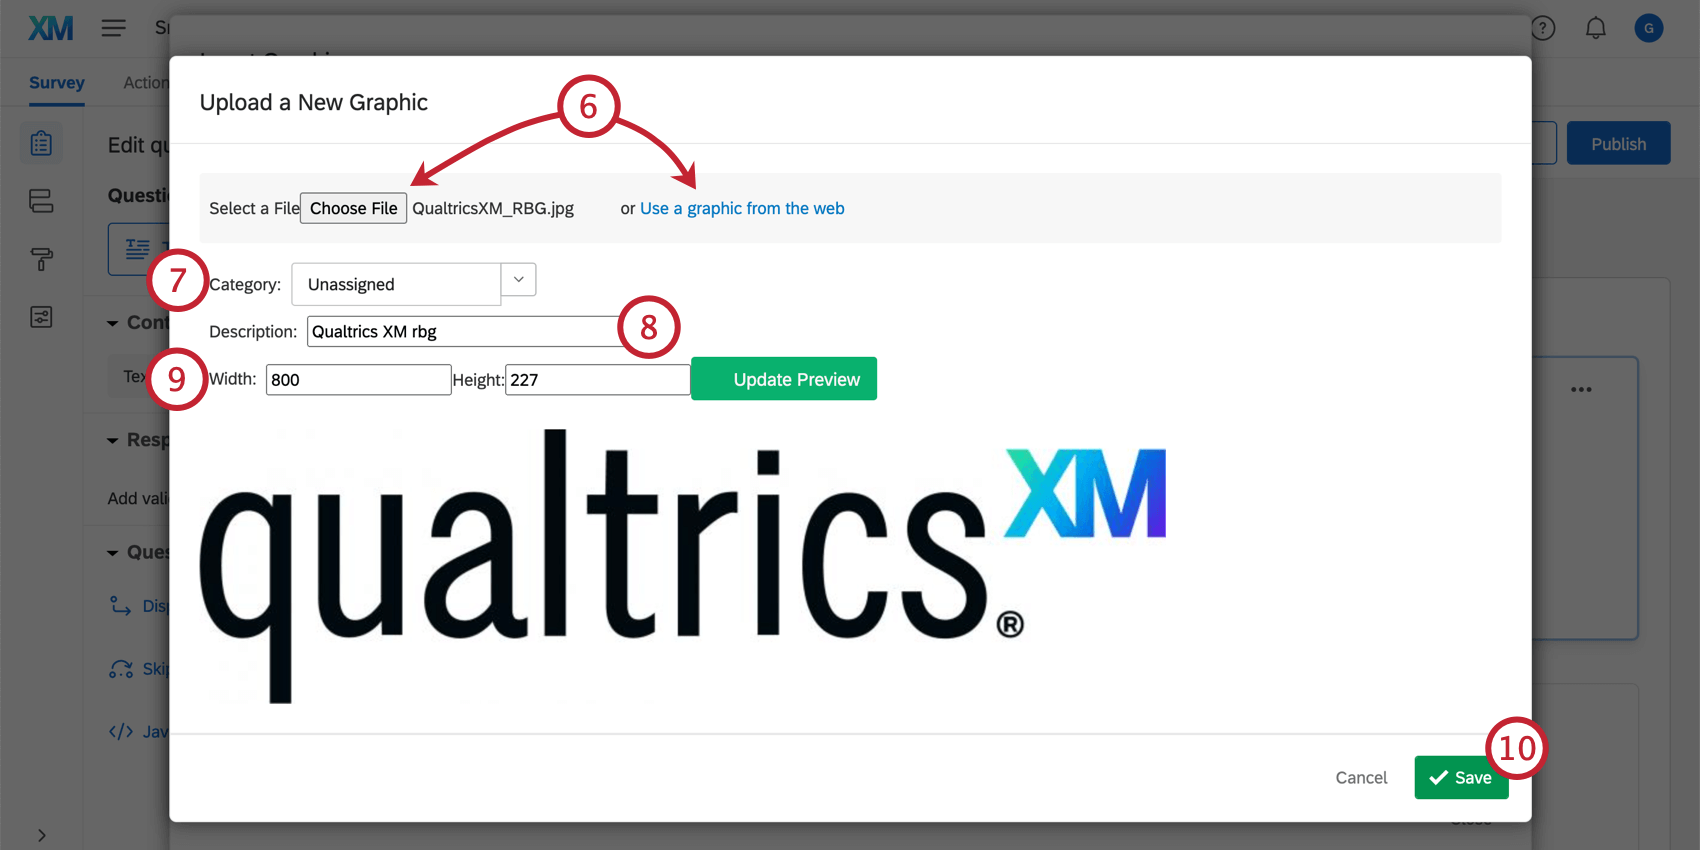
- Choose file: Upload a picture from your computer. This option lets you rename or resize the image before uploading it.
- Use a graphic from the web: Upload an image using a URL. This option lets you rename but not resize the image before uploading it.
Qtip: Make sure the URL ends in a file type, such as .PNG or .JPG. If the URL isn’t valid (such as if it goes to a website instead of an image), this upload method won’t work.
- If desired, choose the folder of your library where this graphic will be saved. You can always change this later.
- If desired, type the name you’d like the image to have in your library. This can make it easier to find later.
- If you chose to upload a graphic from your computer, you can adjust the width and height before it’s saved to Qualtrics.
Qtip: If you update just the height or just the width, the other will automatically adjust so the image can resize without getting stretched or distorted.
- Click Save to save the graphic to your library and add it to your survey.
Image Properties
After inserting an image into the rich content editor, you can right-click on the image and select Image Properties to further edit the parameters of your image.
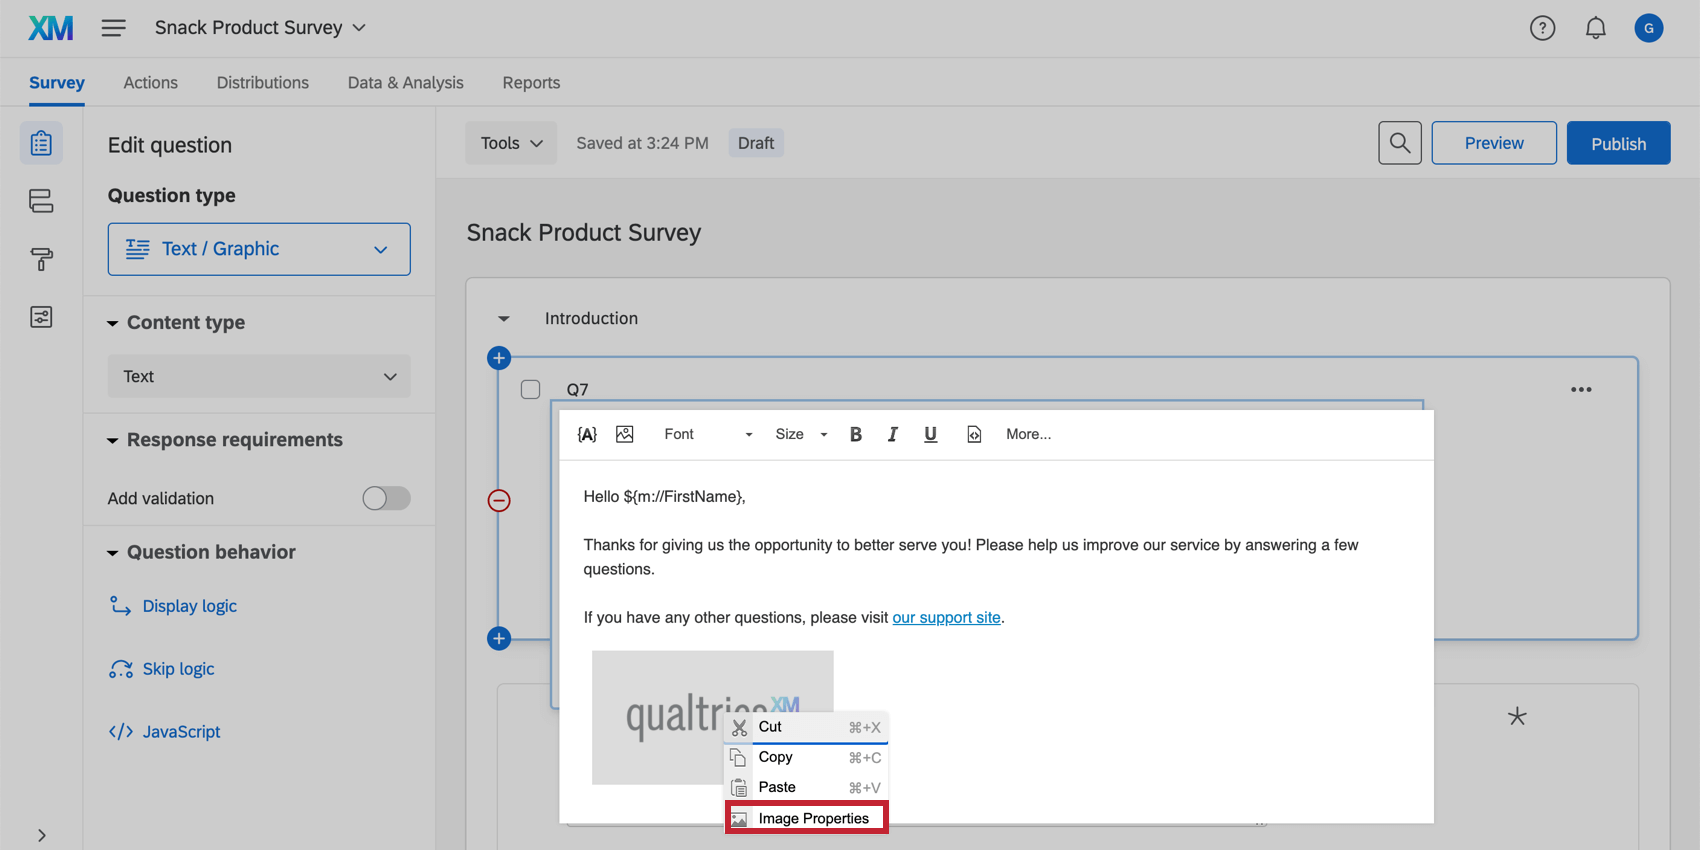
Image Info
This section contains information related to the formatting of your image.
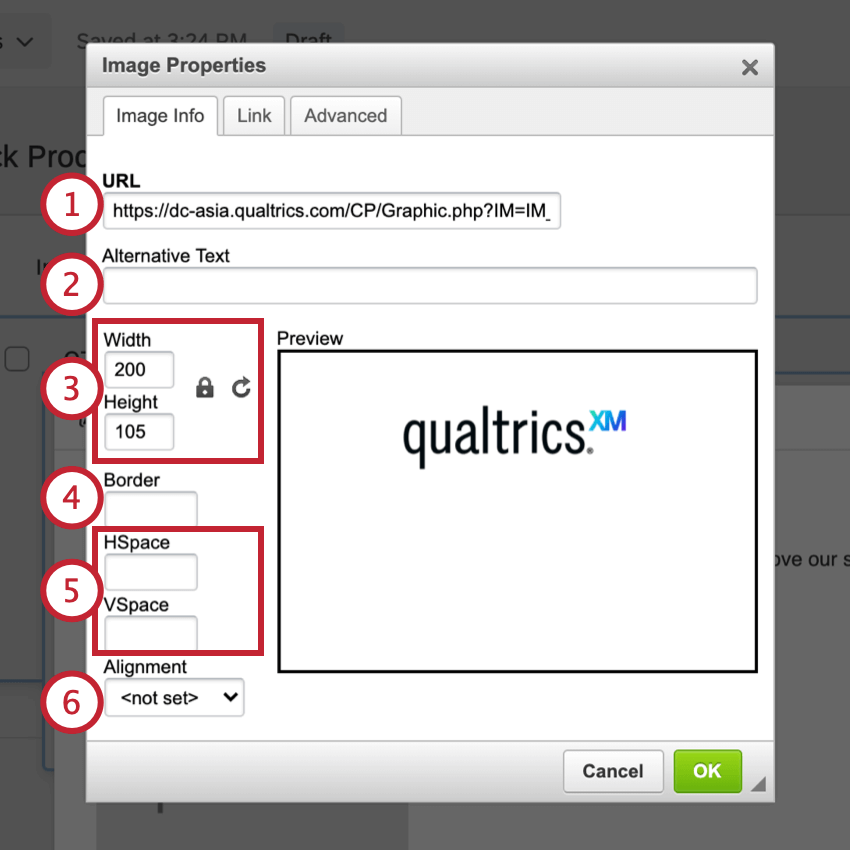
- URL: This is the URL where your image is hosted.
- Alternative Text: This is where you can add a few short words to describe your image. Alt text helps search engines understand what an image is about, but also helps screen readers detect and explain your image.
- Width/Height: You can adjust the width and height (in pixels) of your image here. You can click the lock icon to change whether or not you would like the dimensions to automatically adjust proportionally as you make changes (this can prevent the image from becoming stretched out or distorted as you adjust the dimensions). Select the arrow icon to revert to the image’s original dimensions.
Qtip: If you would like to adjust the dimensions of your image everywhere that the image is being used in your account instead of this single instance, you can change the image dimensions in your Library.
- Border: You can specify the width (in pixels) of a border that will be added around your image.
- HSpace/VSpace: You can adjust the horizontal and vertical spacing (in pixels) of your image here. This essentially is the amount of padding you would like around your image.
- Alignment: You can specify if you would like the image aligned left or right. You can also use the text alignment options in the rich content editor to adjust this.
Qtip: Unfortunately, at this point in time, you cannot adjust how the text wraps around the image.
Link
In this section, you can add a hyperlink to your image so that when someone clicks on the image, they will go to the URL you link here.
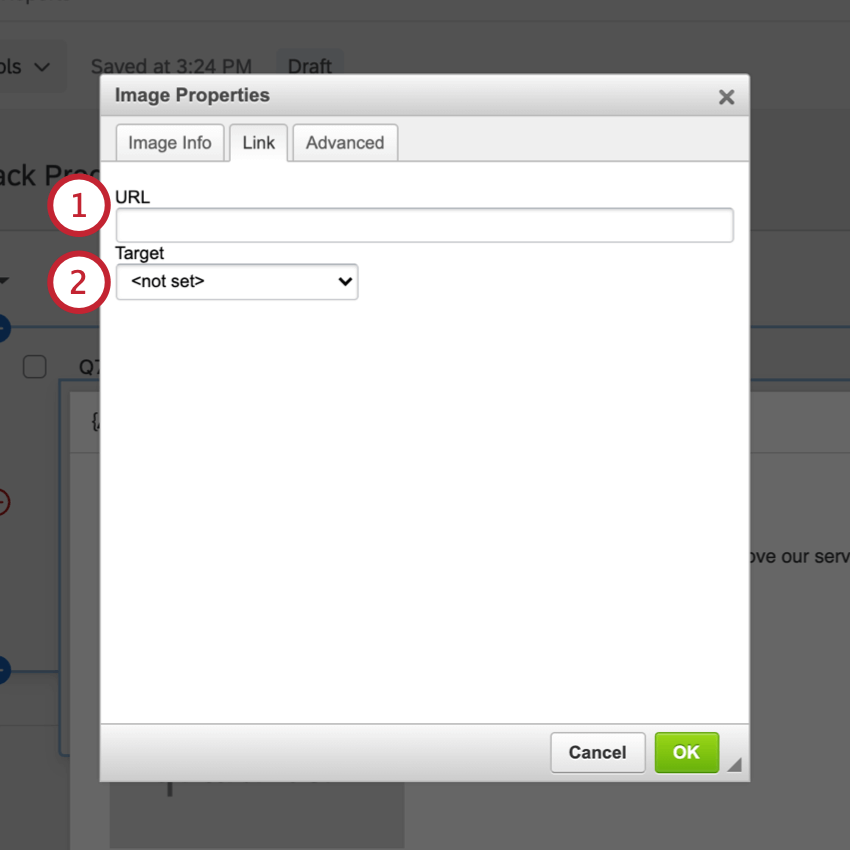
- URL: Add the URL you would like hyperlinked to your image.
- Target: Define how you would like the user redirected to the link when they click on the image.
Qtip: One of the most common options is New Window (_blank), which opens the link a different window/tab. The other options provide ways to make the linked page appear in the same window/tab as the survey.
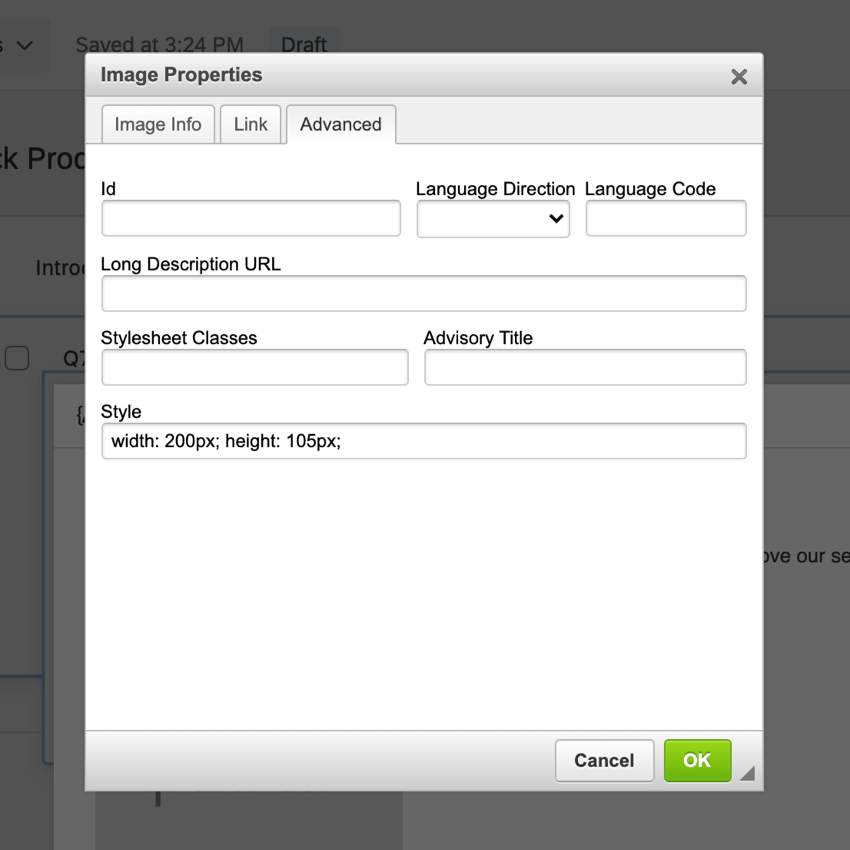
Advanced
This section allows you to add an Id, Language Direction, Language Code, Long Description URL, Stylesheet Classes, Advisory Title, and Style, if desired.
Inserting Graphics into Answer Choices
The steps for adding a graphic to an answer choice are slightly different from adding a graphic to the question text.
- Click on the answer choice that should contain a graphic.
- Click on the blue dropdown menu to the right.
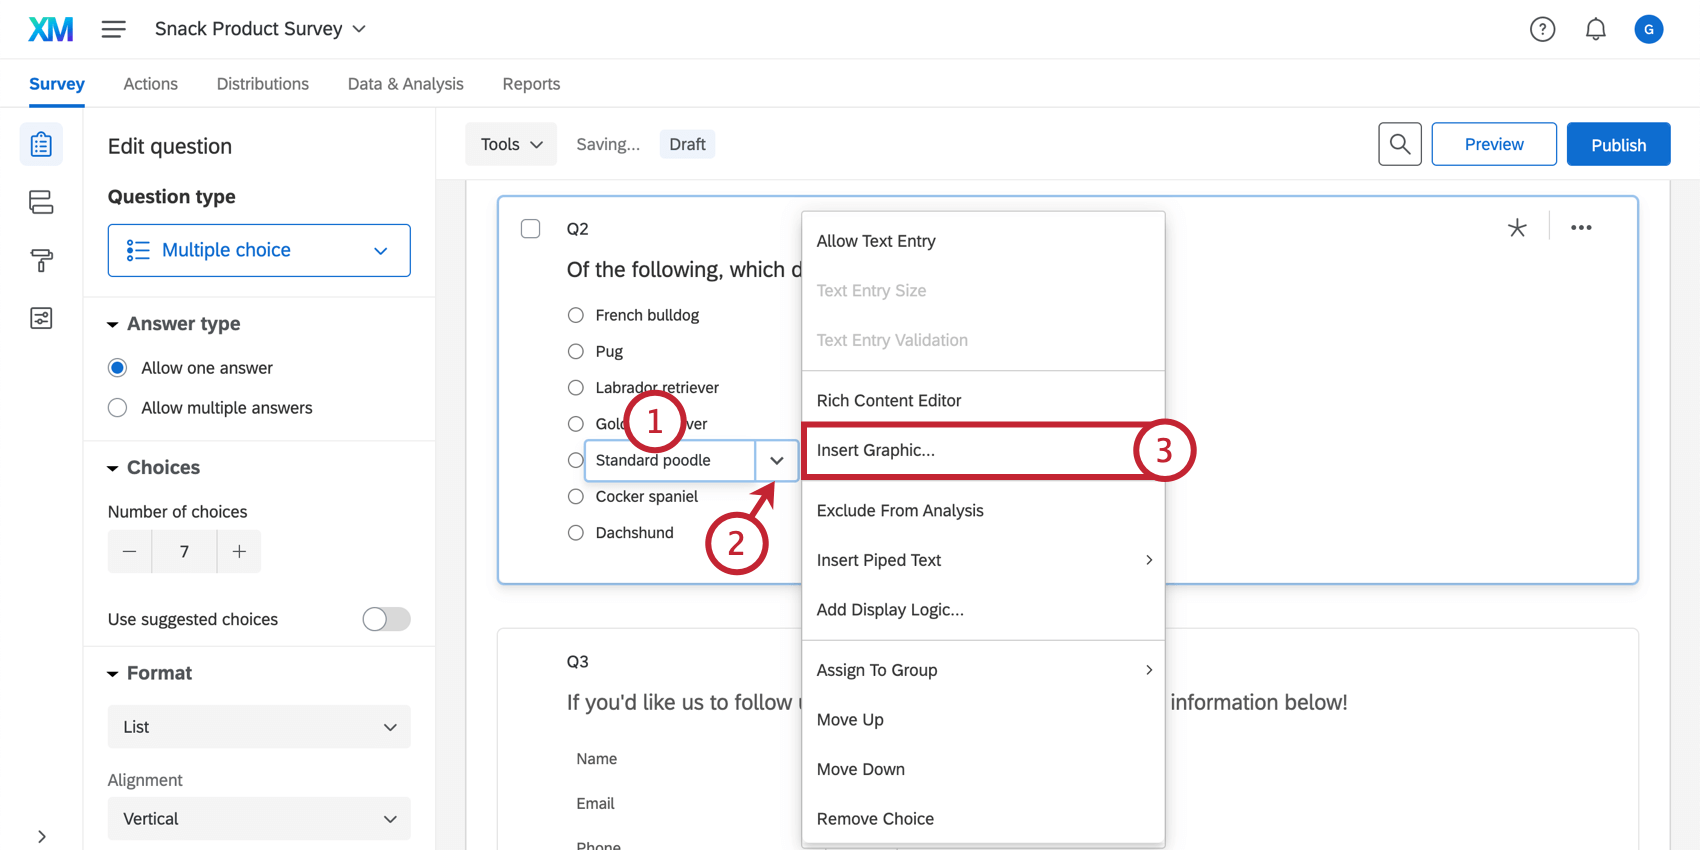
- Select Insert Graphic.
- Choose the library where your graphic is / will be saved. By default, your account’s personal library will be selected.
Qtip: This step is useful if you happen to belong to one or more group libraries. - Click on the graphic you want to use, or click Upload a New Graphic to add a new one from your computer / the web.
- If you’re uploading a new graphic, you can choose between one of the following:
- Choose file: Upload a picture from your computer. This option lets you rename or resize the image before uploading it.
- Use a graphic from the web: Upload an image using a URL. This option lets you rename but not resize the image before uploading it.
-
Qtip: Make sure the URL ends in a file type, such as .PNG or .JPG. If the URL isn’t valid (such as if it goes to a website instead of an image), this upload method won’t work.
- If desired, choose the folder of your library where this graphic will be saved. You can always change this later.
- If desired, type the name you’d like the image to have in your library. This can make it easier to find later.
- If you chose to upload a graphic from your computer, you can adjust the width and height before it’s saved to Qualtrics.
Qtip: If you update just the height or just the width, the other will automatically adjust so the image can resize without getting stretched or distorted.
- Click Save to save the graphic to your library and add it to your answer choice.
Additional Graphic Options
Once you’ve used the Insert Graphic option, additional settings will appear in the dropdown.
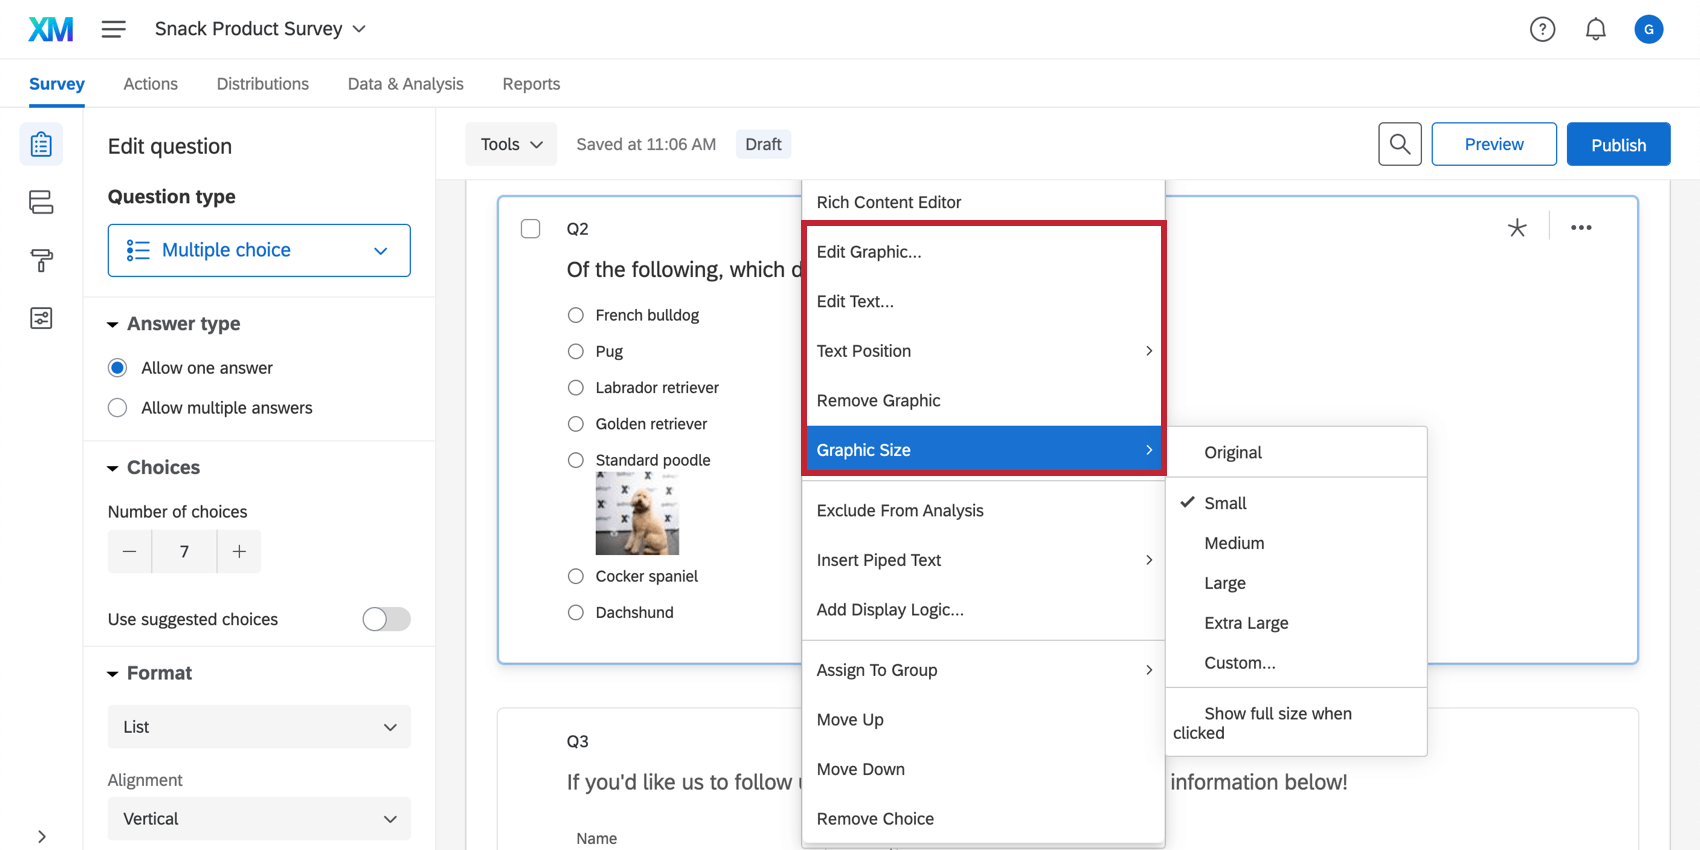
- Edit Graphic: Choose the graphic to insert into the answer choice. This can be from your library, or you can upload a new image to your library. “Edit Graphic” will replace any graphic you currently have added to the answer choice.
- Edit Text: Text for the choice that displays with the graphic.
- Text Position: Change where the text is displayed relative to the image. This setting affects the whole question, so any choices with images attached look consistent.
- Top
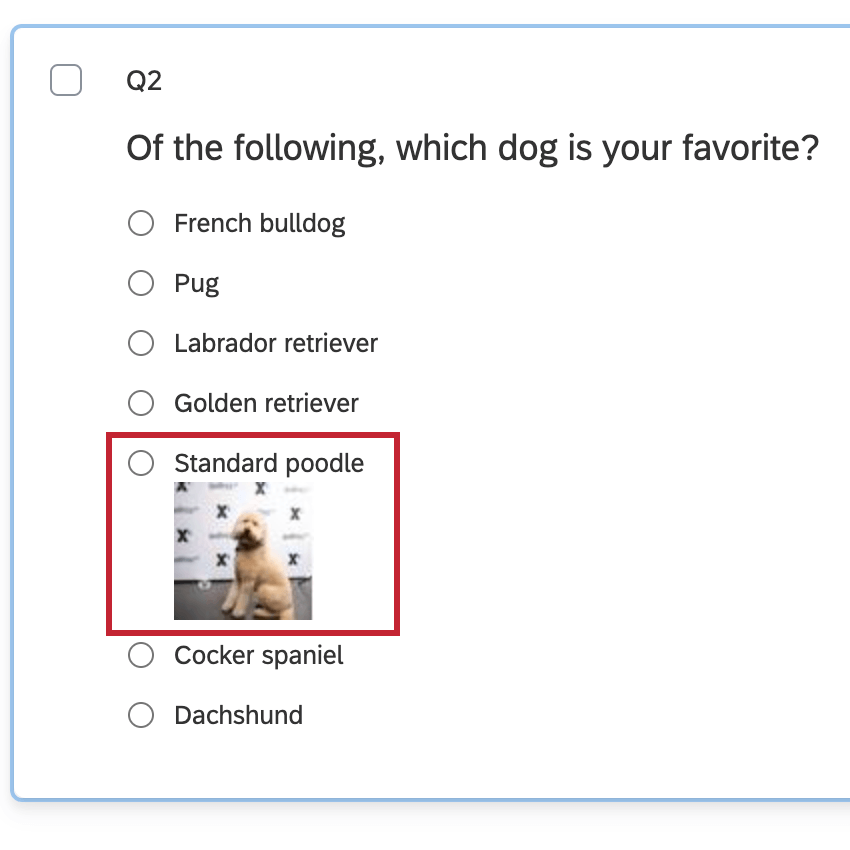
- Bottom
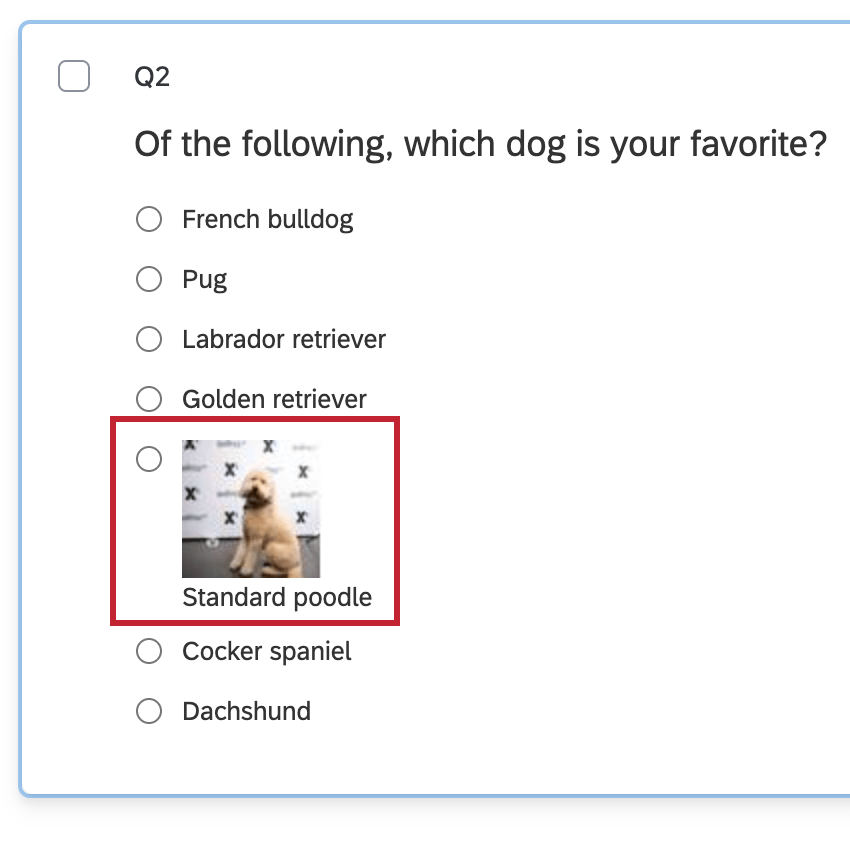
- Left
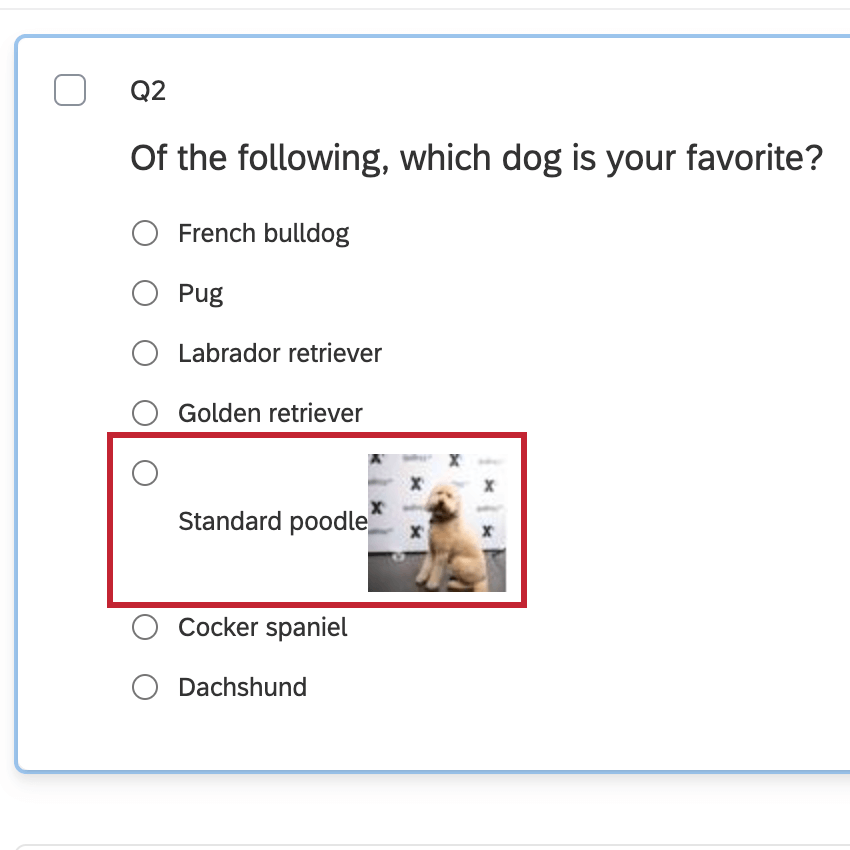
- Right
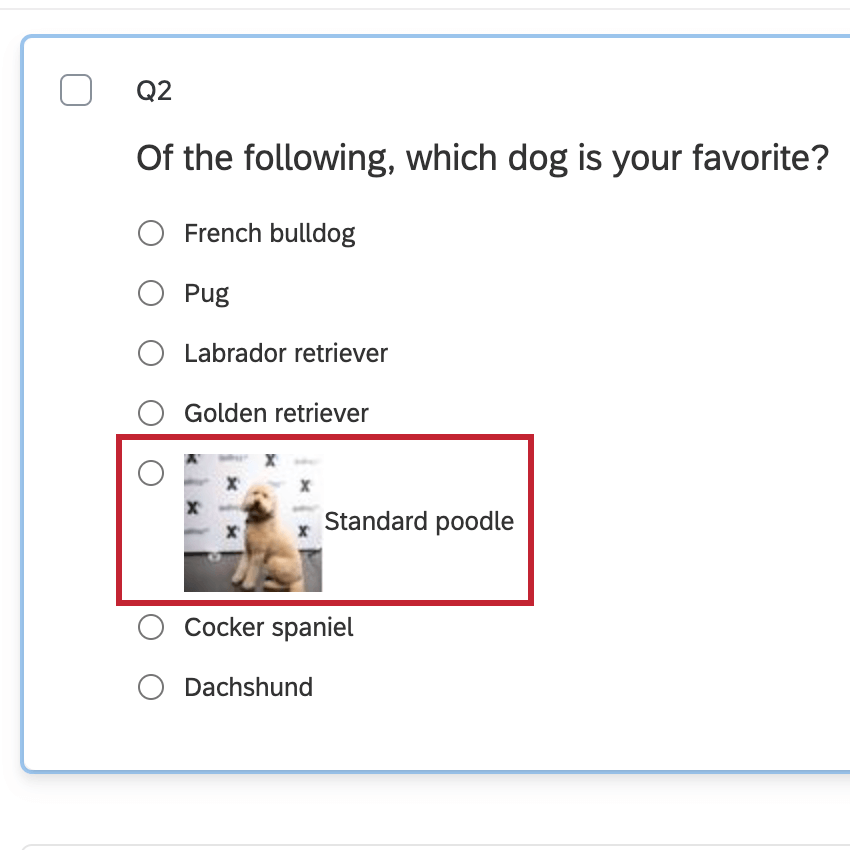
- Top
- Remove Graphic: Remove the graphic from the answer choice.
- Graphic Size: Change the size of the graphic. You can choose from preset dimensions, or choose Custom to adjust the size manually. If you’ve resized the image, you have the option to select Show full size when clicked. This means that when the respondent clicks the image, a full-sized version will open.
Accessing Graphics Saved to Your Library
Once you’ve uploaded an image to Qualtrics, you can access it again at any time by going to your Library. In the library, you can make edits to the graphic’s name, size, and more, which will be reflected in every survey where you’ve inserted the graphic. See the linked support page for more details.
Troubleshooting Graphics
This section goes over a few solutions for common questions that arise when uploading graphics to Qualtrics.
Image Won’t Upload to Qualtrics
- Requirements: All images must meet both of the following requirements before they can be successfully uploaded to Qualtrics:
- Saved as one of the following file types:
- JPG (or JPEG)
- PNG
- GIF
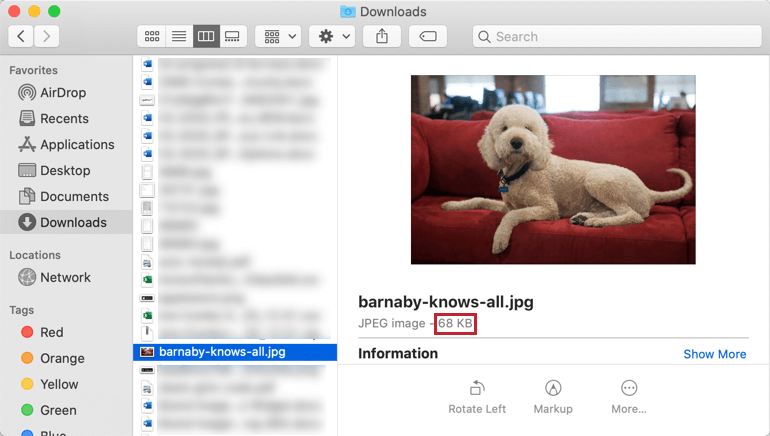
- Size 16MB or smaller.
Qtip: Double-check the size of your image before uploading it to Qualtrics.
- Saved as one of the following file types:
- Image over 16MB: If your image is too large, you must use an image editing program to change its width and / or height before you upload it to Qualtrics.
Qtip: Photoshop, Pixelmator, Gimp (free), and Paint.Net (free) are a few examples of image editing programs.
- For the best user experience: We recommend using PNG files, keeping images below 1MB, and having a width of 770px or narrower. However, if you insert a graphic that is larger than 770px wide, your survey theme should expand to accommodate the picture.
Changing the Size of an Image Already Uploaded to Qualtrics
Depending on how you added the image to Qualtrics, there are a few ways to resize it once it’s been uploaded to Qualtrics; you don’t necessarily need to resize it in an image editing program unless you want to.
- Added using the rich content editor: Right-click the image and adjust the Image Properties. There you can adjust the width and height of the image.
- Graphics on answer choices: If you inserted a graphic on an answer choice using the steps linked in this section, try the additional graphic options for Graphic Size. Here, you can choose from pre-set sizes, or set a Custom size.
- Resize an image used in several places: Is your image in several surveys, emails, and / or messages? Go to the Library and make edits to the image that will be reflected everywhere else it’s used in Qualtrics. You can resize the image directly in the library, or you can make edits on your computer and upload a new version of the image.