-

Qualtrics Platform -

Customer Journey Optimizer -

XM Discover -

Qualtrics Social Connect
Users Tab
About the Users Tab
The Users section is where you determine who can collaborate with you on your project. Here, you can add and remove colleagues and determine what parts of the project they are allowed to edit or access.
Setting Up Users for Website / App Insights Access
Before you do anything, you will want to make sure you have the correct administration settings set up for your users. In Website / App Insights, there are 2 basic levels of access: all projects and assigned projects.
When you click a user on the Admin page and select Website Feedback, you will see these permissions:
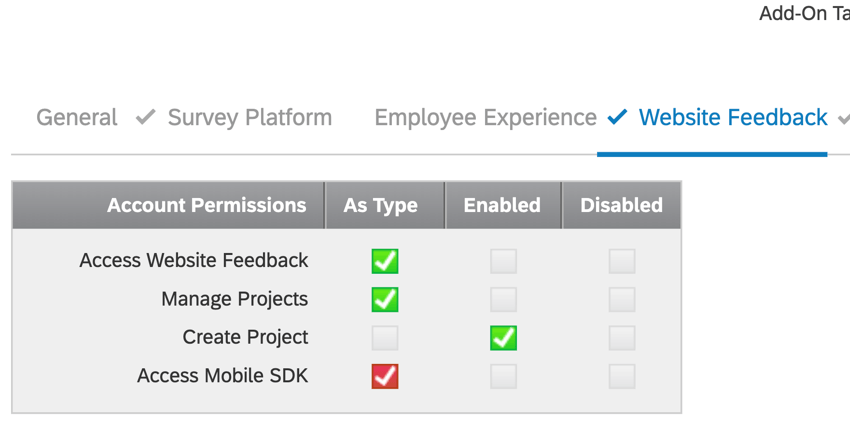
When users have Access Website Feedback selected, they will be able to access this feature. This permission is important for everyone you want to eventually access a Website / App Insights project in some form.
When users have Manage Projects, they are given access to every project in the entire brand. That means that if you want a user to edit only the projects you share with them, you must select Access Website Feedback and deselect Manage Projects.
Adding Users to the Project
Once you have set up your users Website / App Insights access, you are ready to share particular projects with them.
- Go to the Users tab of your Website / App Insights project.
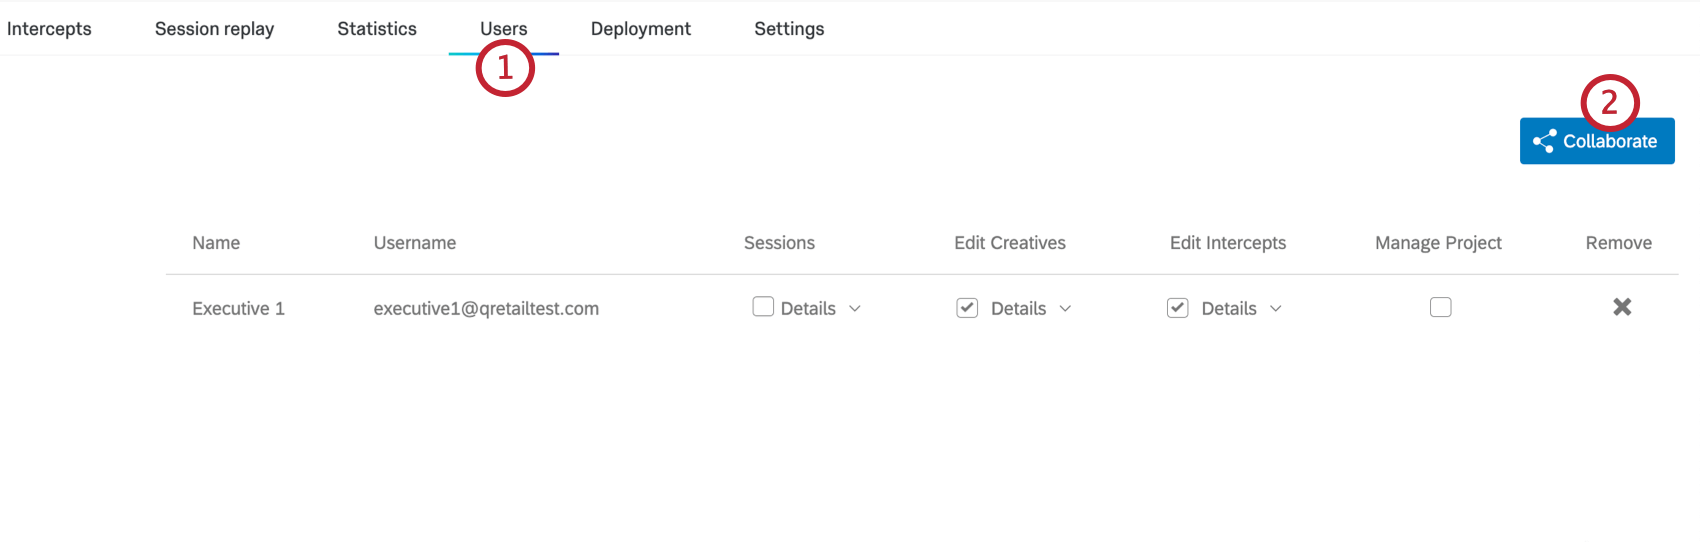
- Click Collaborate.
- Scroll through the list or use the Search bar to quickly locate the desired user.
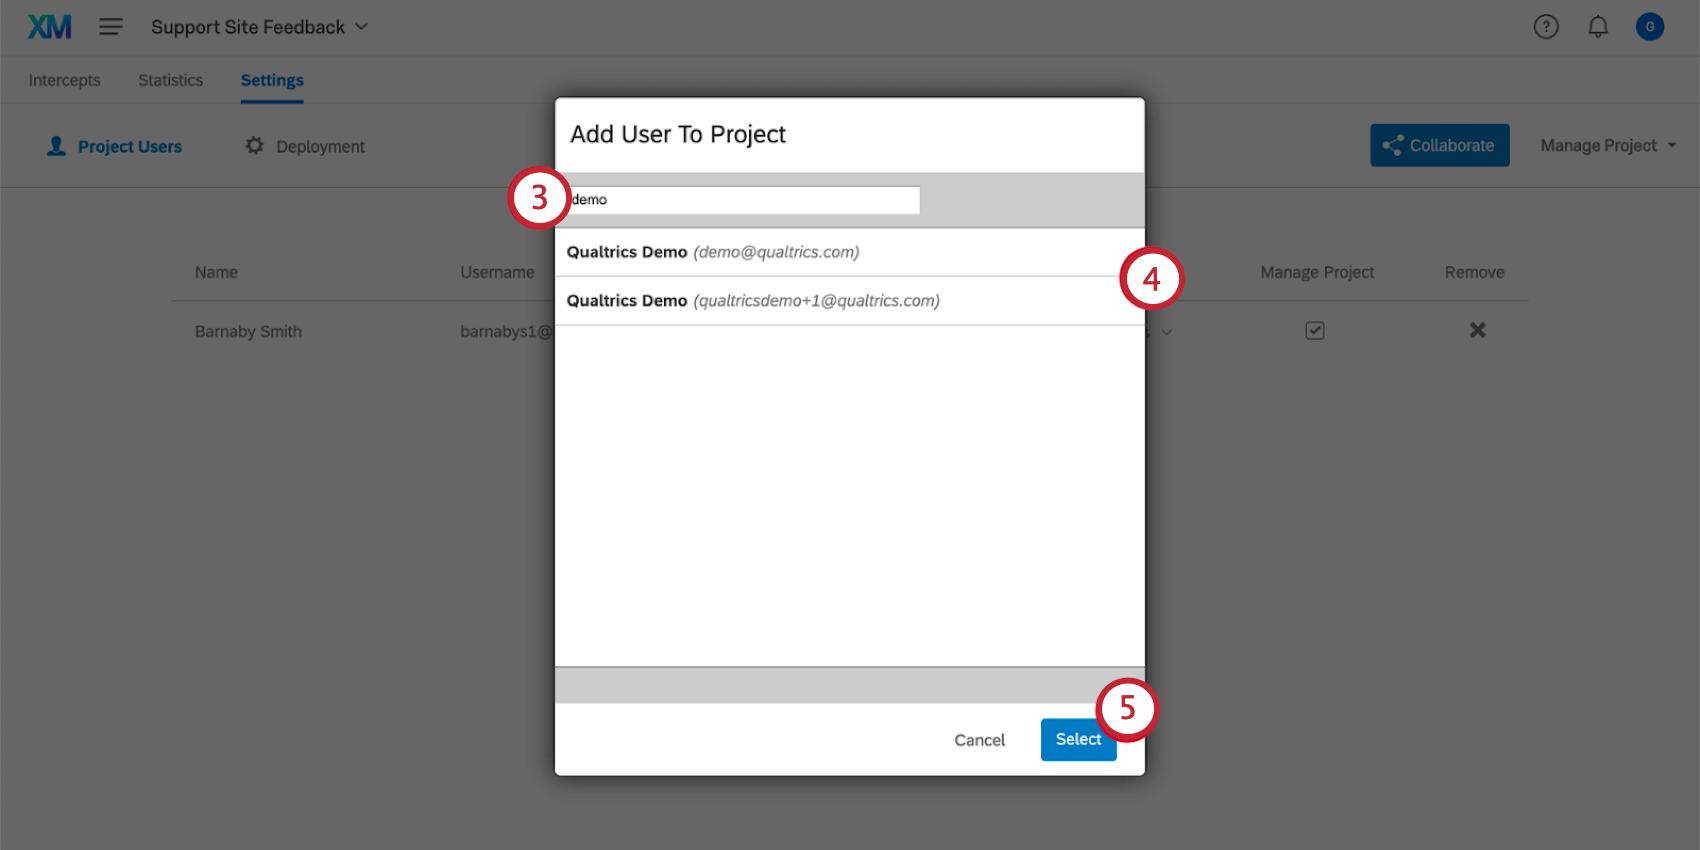
- Click the user’s account name so it’s highlighted in blue.
- Click Select.

Sharing Permissions
With the sharing permissions, you can decide what your colleague is allowed to edit. You never have to give full access to a project if you don’t want to.
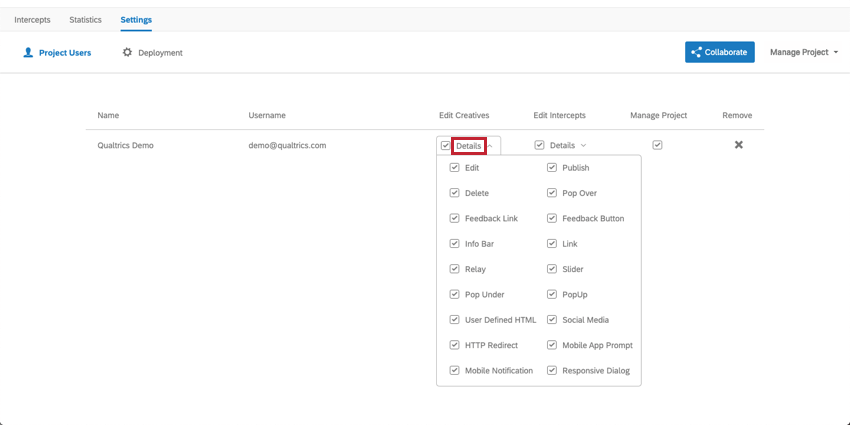
Edit Creatives
If you deselect Edit Creatives, the content of the Creatives tab will disappear and the collaborator will get an error message. For creatives, the error message will say “Select Create new to customize the look and feel of a creative you can link with one of your intercepts,” and for intercepts, the message will say “Select Create new to customize an intercept and start collecting feedback.”
You can also click Details to specify which creative types to restrict the user from editing or creating. For example, if your marketing team only has control over the design for the sliders and pop ups, you can deselect every creative type except for sliders and pop ups.
Select Publish to allow the user to publish the creative, and deselect it to prevent them from publishing. Remember, the user’s edits are still saved, but it requires someone with publishing access to push them to the code.
Select Delete to allow the collaborator to delete creatives.
Edit Intercepts
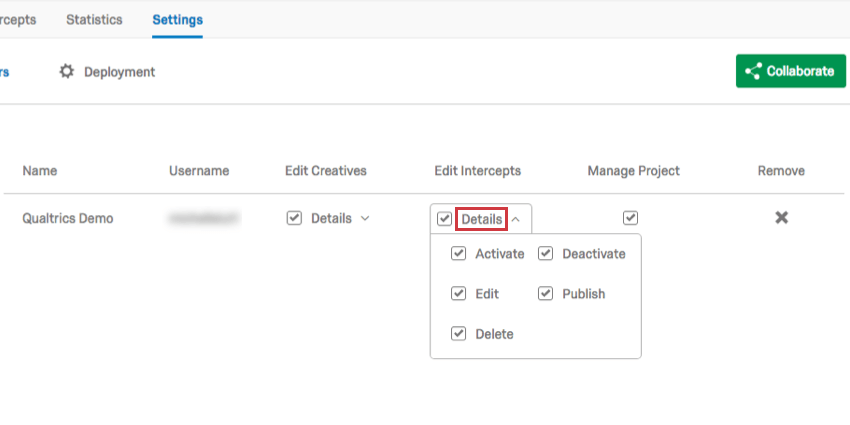
If you deselect Edit Intercepts, the user will not be able to access the content of the Intercepts tab.
Click Details for additional options:
- Activate: When selected, the user can activate an intercept. This does not include the permission to deactivate it.
- Deactivate: When selected, the user can deactivate an intercept. This does not include the permission to activate it.
- Edit: When selected, this allows the user to edit or create intercepts. When deselected, the Intercepts tab content disappears and is replaced with the message: You do not have sufficient permissions to use this section.
- Publish: When selected, users can publish changes to the intercept. When deselected, the user can still make edits (so long as Edit is selected), but they cannot publish those edits.
- Delete: When selected, the user can delete intercepts.
Manage Projects
When selected, collaborators will have access to the Settings tab, which includes Project Users and Deployment. Users granted this permission will have full access to the project, including the ability to edit creatives and intercepts.
When deselected, the content of the Settings tab will disappear, and will be replaced with the message: You do not have sufficient permissions to use this section.