-

Qualtrics Platform -

Customer Journey Optimizer -

XM Discover -

Qualtrics Social Connect
Import Responses
About Importing Responses
You can import data in the Data & Analysis tab to combine responses from 2 identical surveys, re-upload edited data, or bring your own data into a survey.
Preparing Your Survey
Before importing, you’ll first need a survey to import your data to. Your survey’s format and your data file format must match exactly. This can be achieved using 1 of these 3 options:
- The survey you downloaded the data from
- A copy of the survey you downloaded the data from
- A survey identical to the one that collected the data you are importing.
Preparing a File
The data importer allows you to upload responses without perfecting your data file, giving you the ability to re-order columns, adjust the time zone, specify values, and more. However, even if your file contains a few correctable errors, you still have to make sure that your data is presented in a format Qualtrics can read.
The easiest way to prepare your file is to export a Data Table file in CSV or TSV format. However, so long as you use the same format for each column’s header, you can also use a TXT file.
Double Quotes
Double quotes in response data can cause your file to fail when importing. To resolve this issue, you must pre-process the data before importing into Qualtrics. You can fix this issue by using 1 of below methods:
- Remove all double quotes (“).
Example: For example, My name is “Tom” becomes My name is Tom.
- Wrap the cells containing the response with double quotes in an additional set of double quotes, and then escape the double quote with another double quote.
Example: For example, My name is “Tom” becomes My name is “”Tom”””.
- Escape the quoted text with backslashes.
Example: For example, My name is “Tom” becomes My name is \”Tom\”.
Importing Responses
- Navigate to the Data section on the Data & Analysis tab.
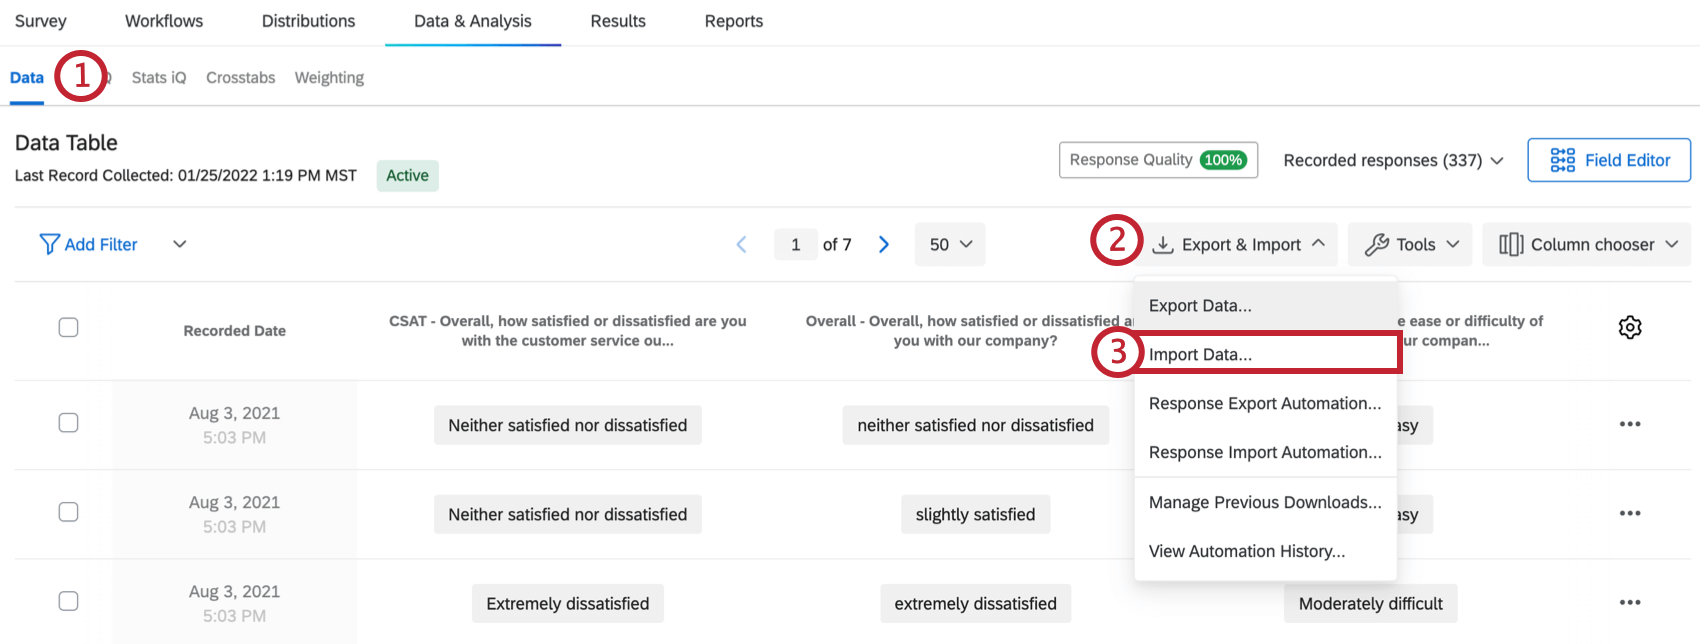
- Click on Export & Import.
- Select Import Data.
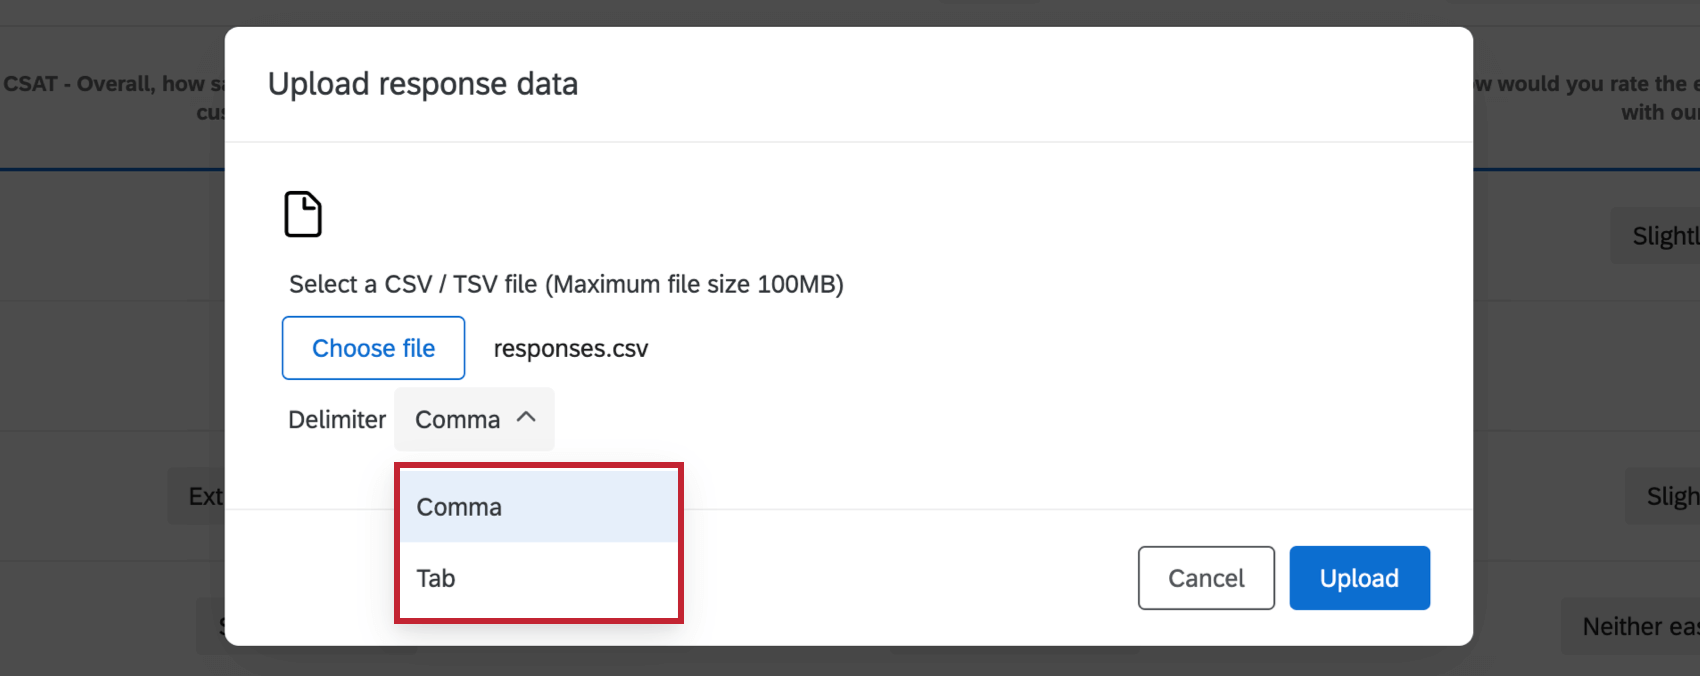
- Click Choose file and select the file you wish to upload. This can be in CSV, TSV or TXT format.

- If desired, adjust your Delimiter. Generally this is set to Comma for CSV and Tab for TSV.
Qtip: This option is especially helpful if you are uploading a TXT file. You can specify your delimiter here.
- Click Upload.
- On this window, you can check whether your fields are pulling in correctly and assign different values. See the Configuring Your Import section below for more information on this part of the process.
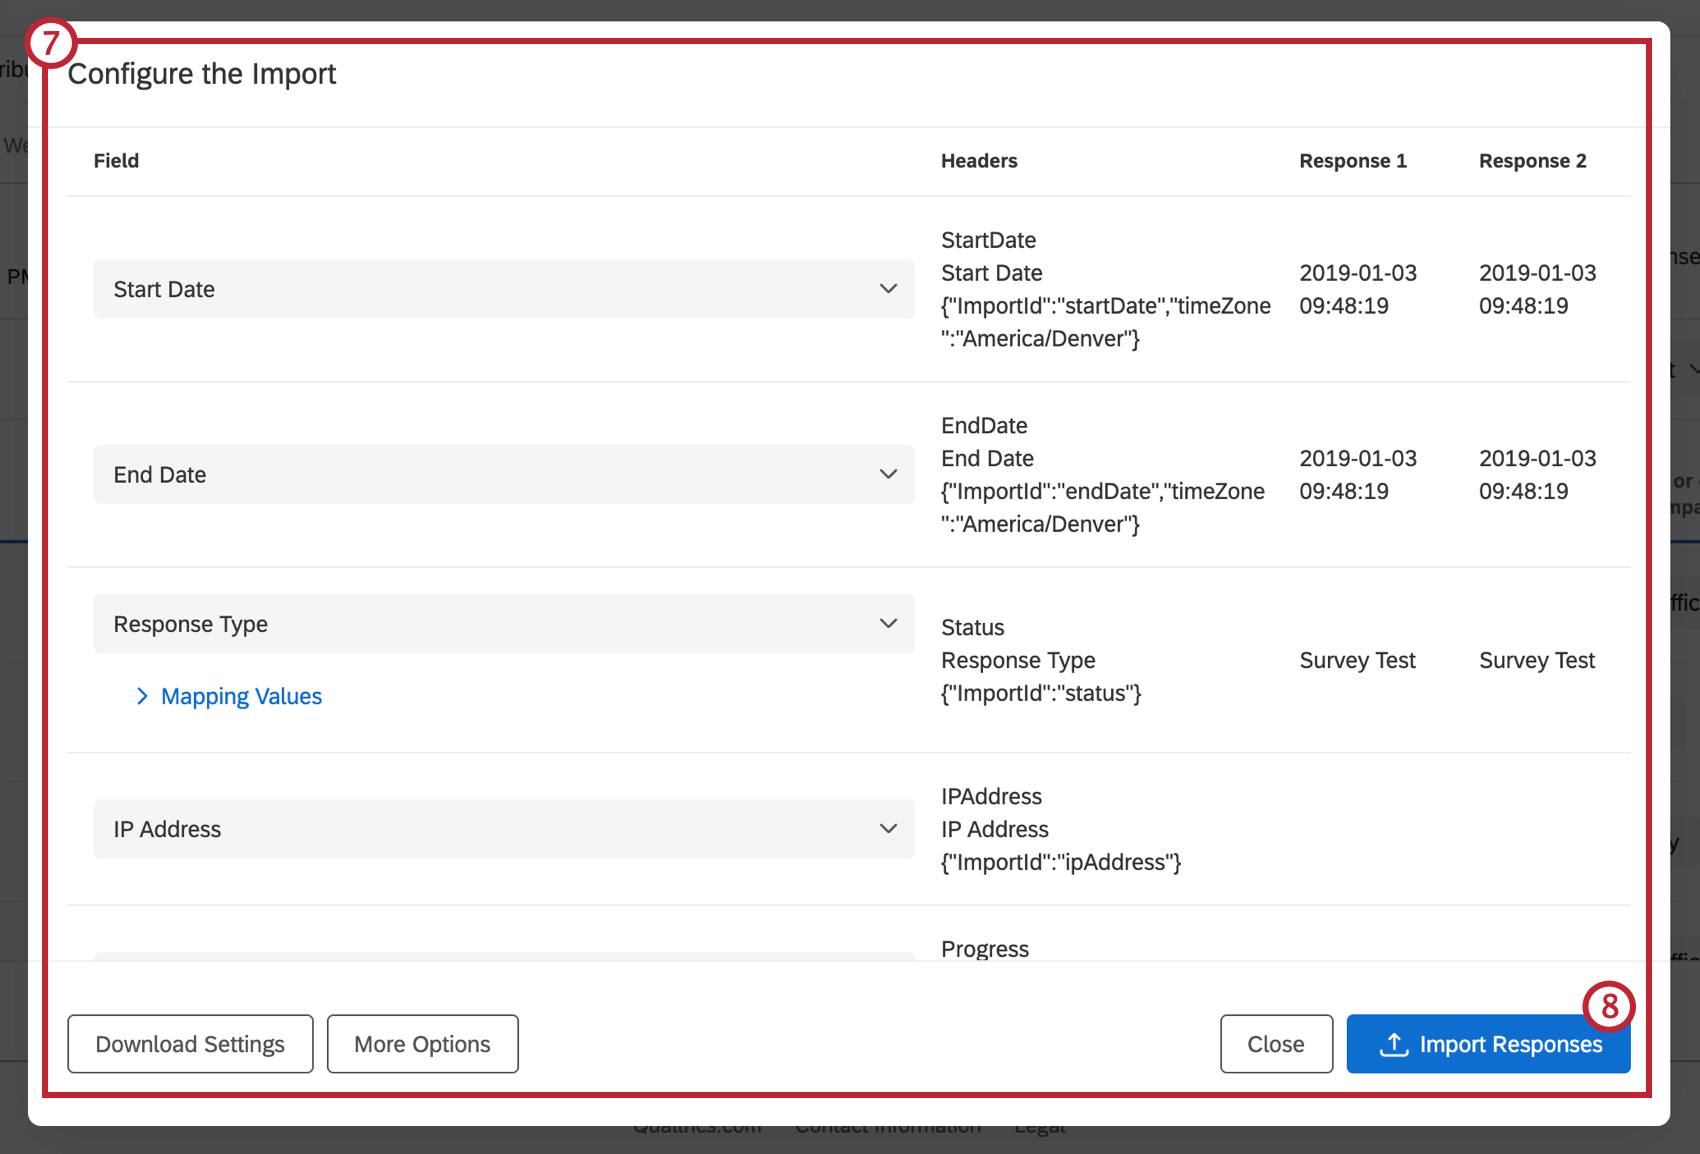
- Click Import Responses.
Configuring Your Import
After you’ve selected the file you want to upload, you have a chance to check the file’s contents and make formatting changes right inside Qualtrics. This saves you time, so that you don’t have to open your file in Excel and make edits.
Correcting Columns
Did some of your columns come in out of order? Maybe there are certain variables you don’t want to import at all. Click on the column header to either change the variable or select to Ignore the contents.
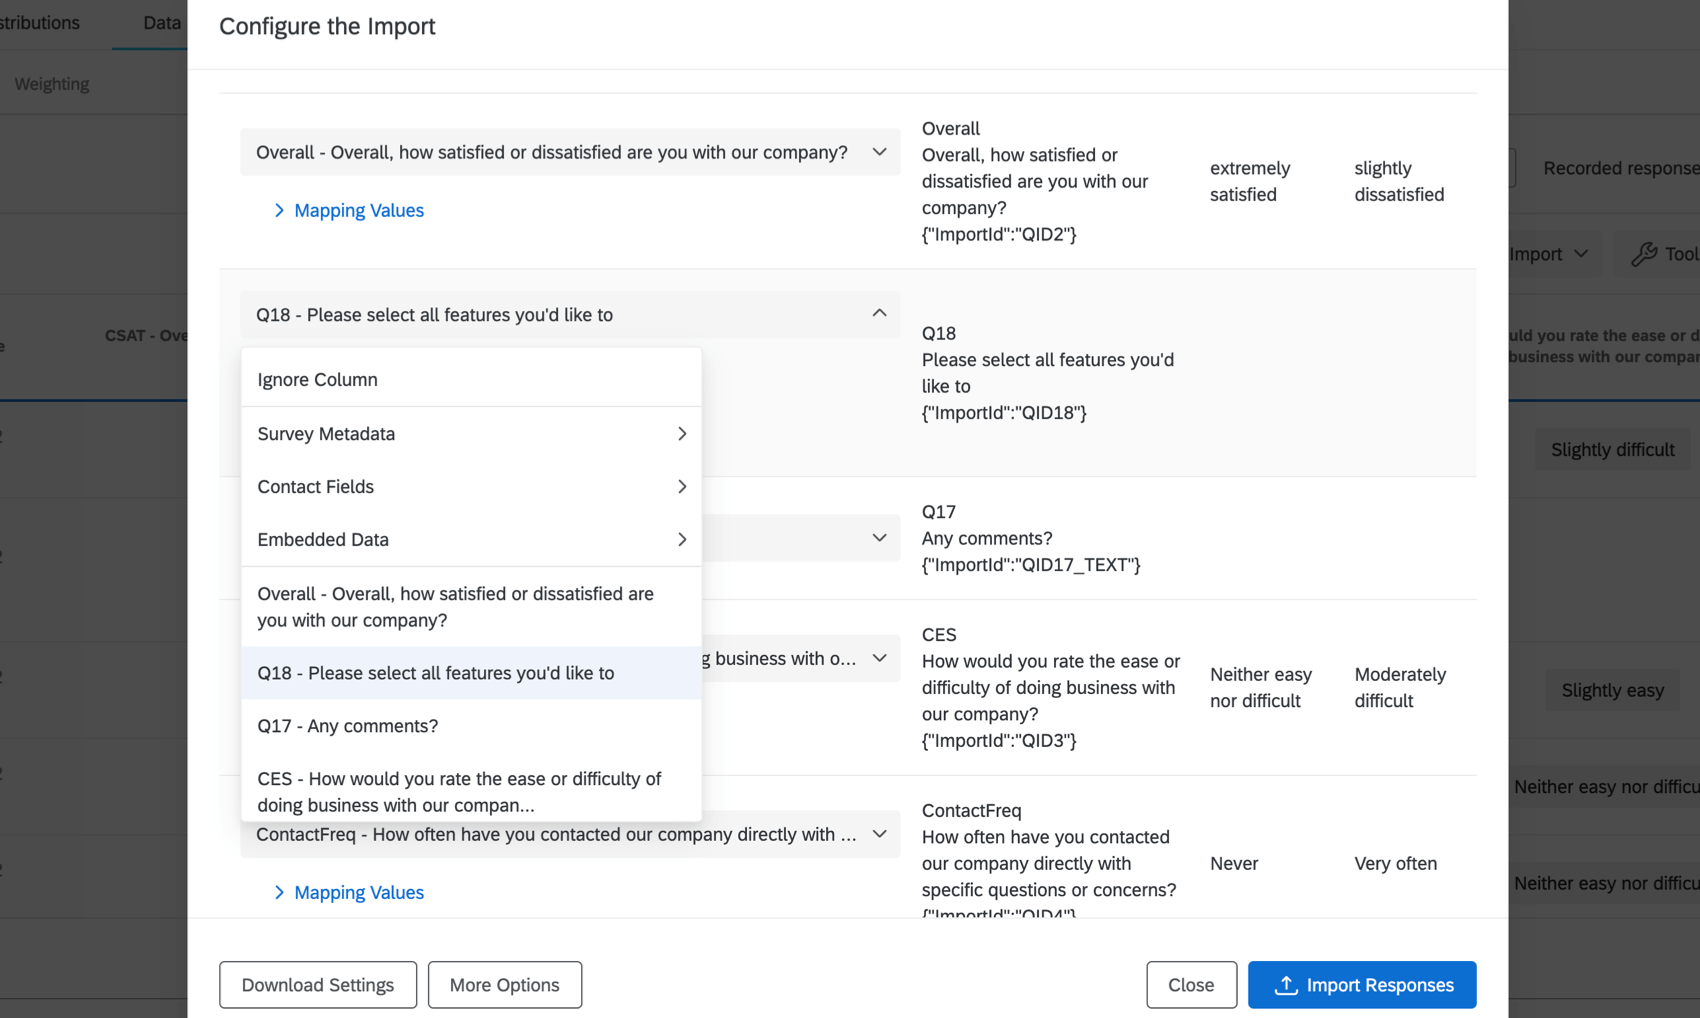
When a column is ignored, the variable is not deleted from Qualtrics, but the data from the column will not upload.
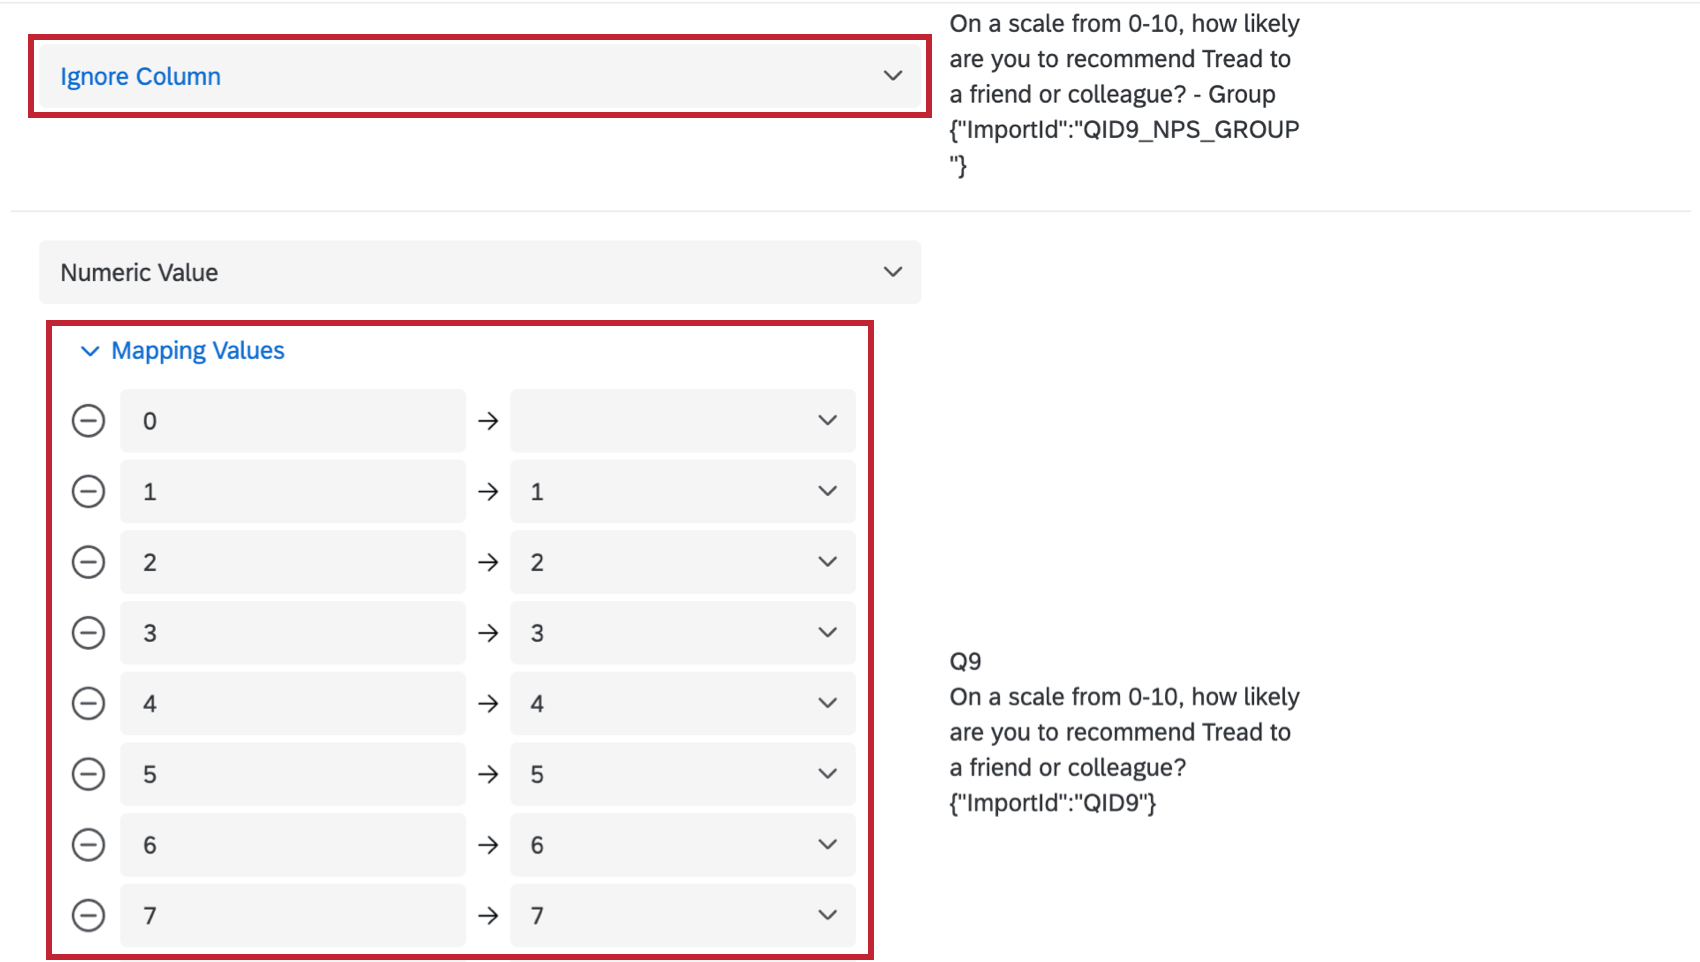
Mapping Values
Sometimes even after cleaning your data, you’ll find small errors. Maybe an answer was consistently misspelled when entered into the Excel sheet. Maybe your capitalization is wrong, or you accidentally used the wrong recode values. Mapping values allows you to adjust your import without having to reopen your file and make edits.
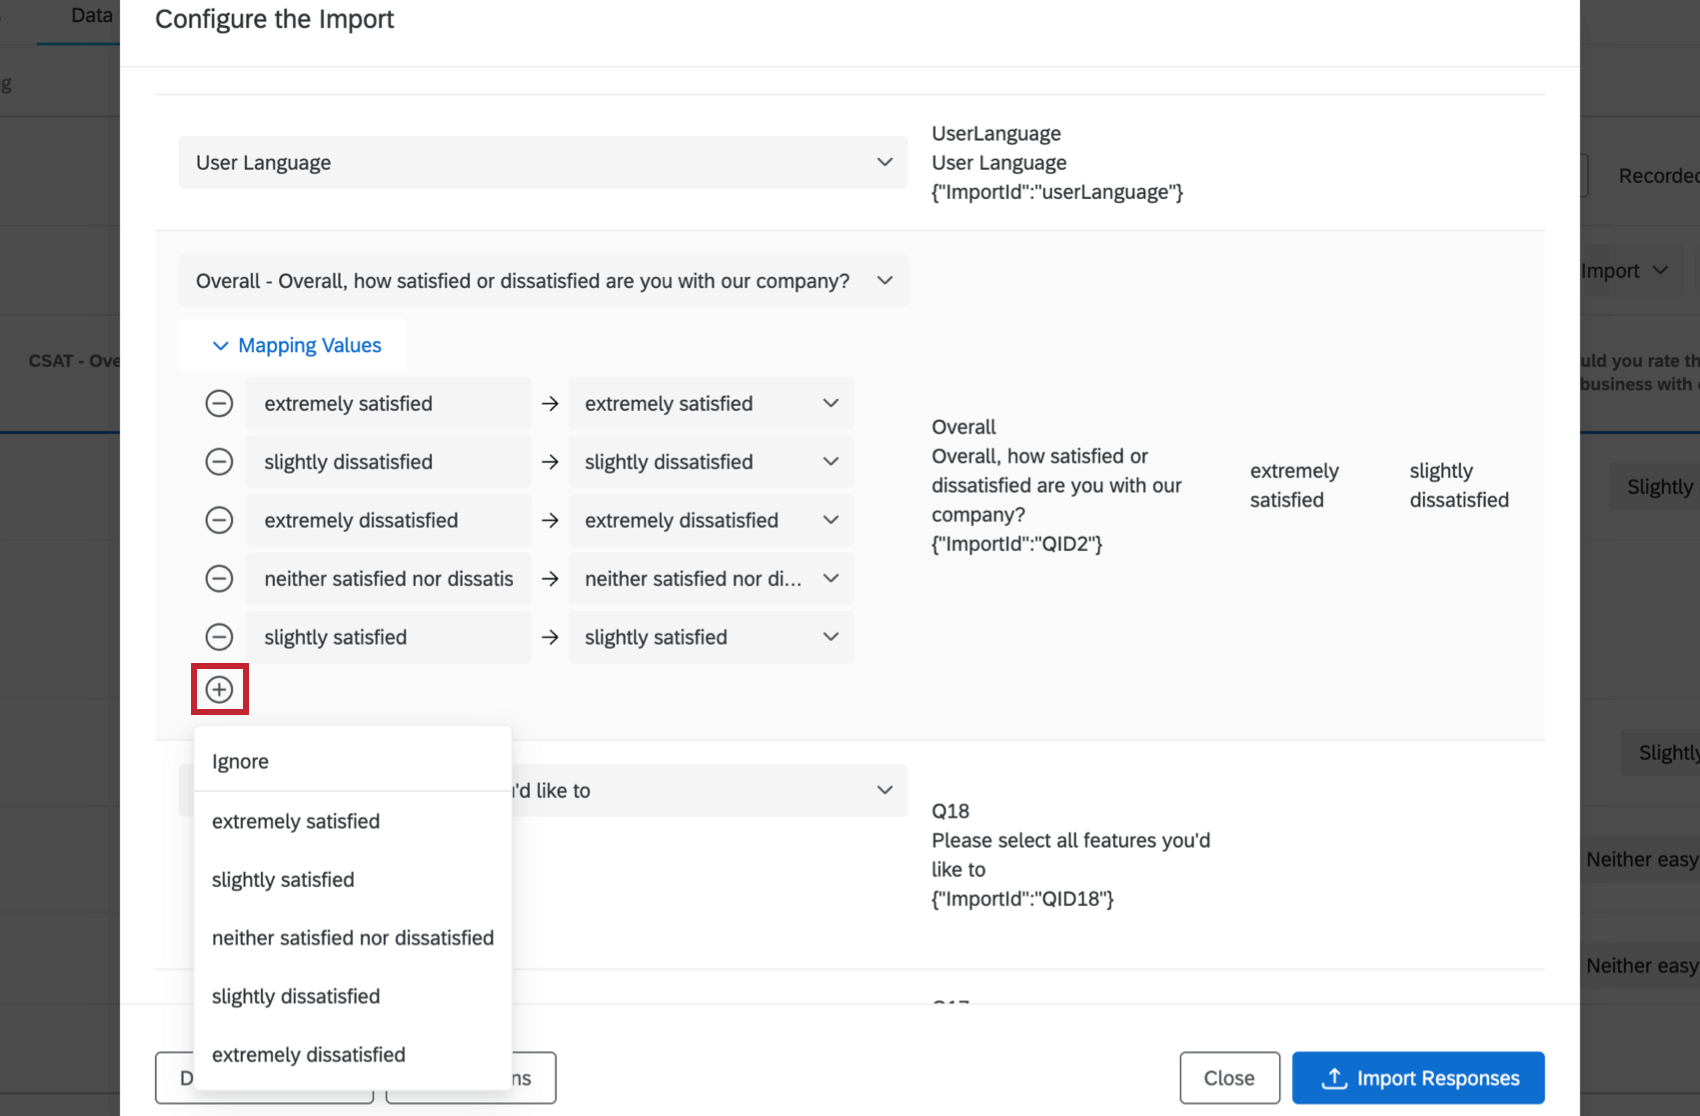
To get started, click the dropdown arrow next to Mapping Values to expand the list of possible values.
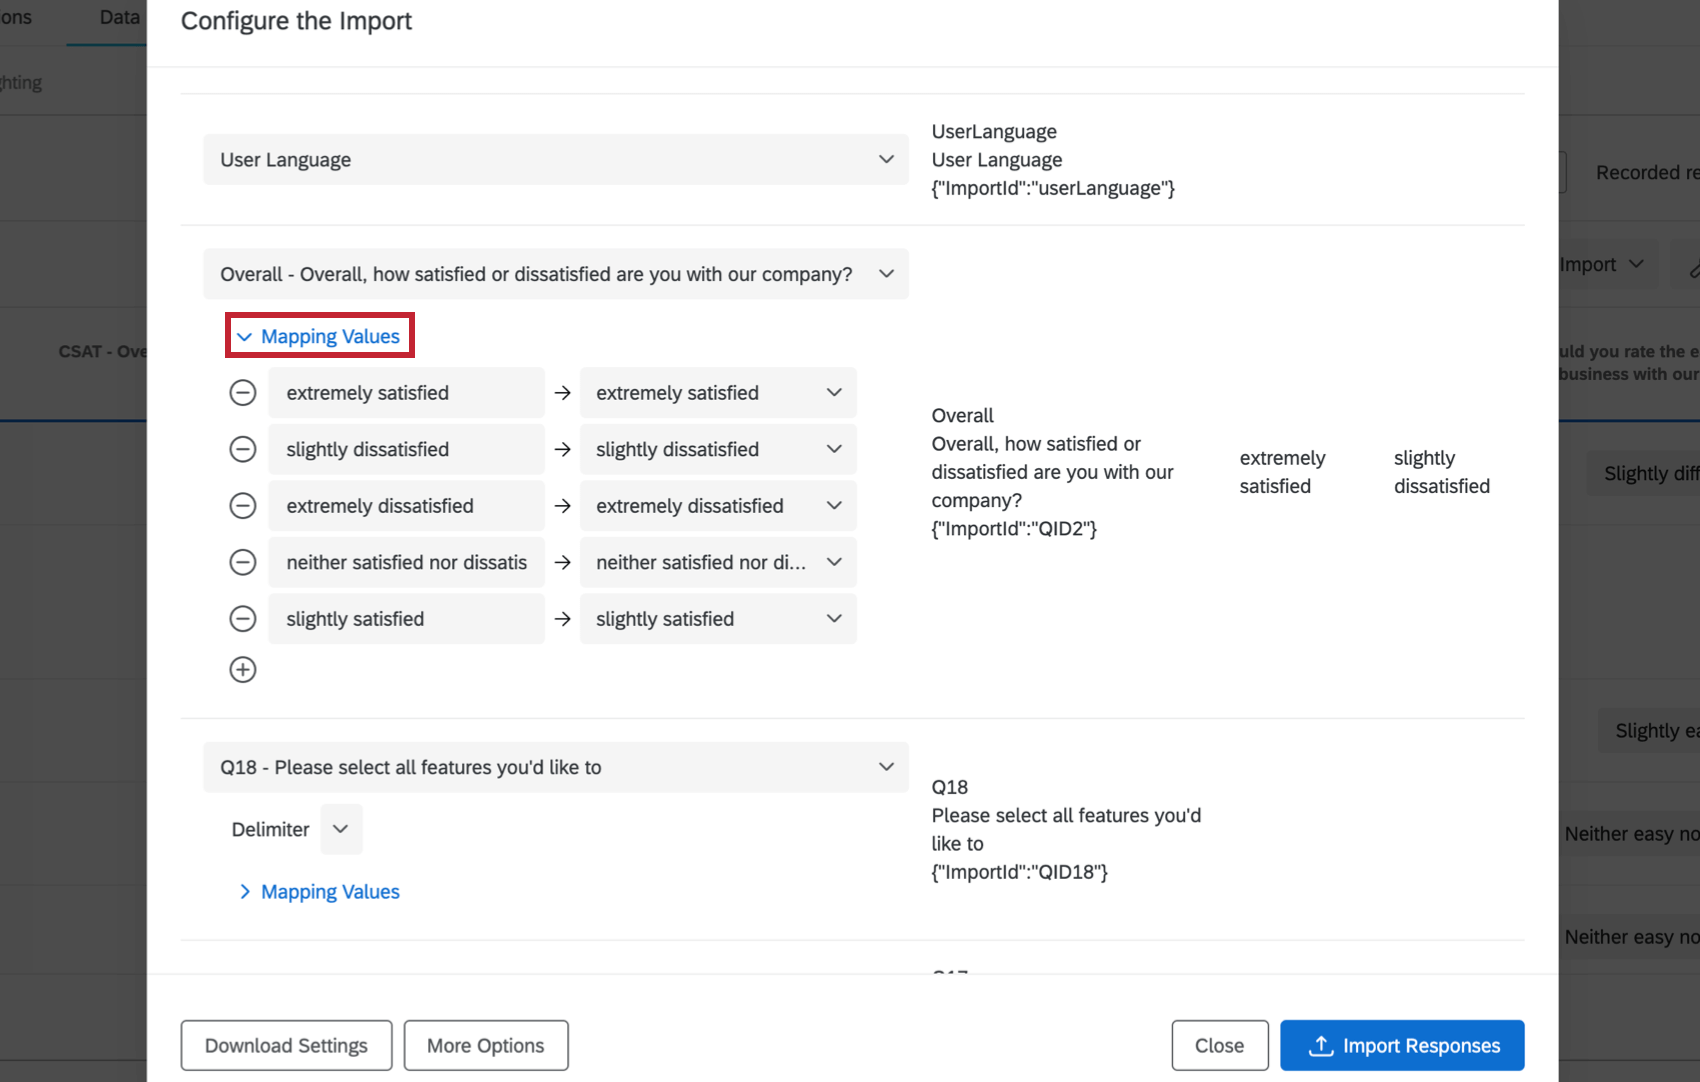
On the right are the possible choices for the question. Since in the example here the question is “How satisfied are you with our product,” the possible answers range from Extremely Satisfied to Extremely Dissatisfied on a 5 point scale.
On the left are the exact values typed into the data file. Ideally, these should be exactly the same, but in cases where you might have mistyped a few entries or mixed choice text and numeric data together, you may want to add additional values here.
To add another value, click the plus sign ( + ), then select the answer choice that the new value is going to correspond to.
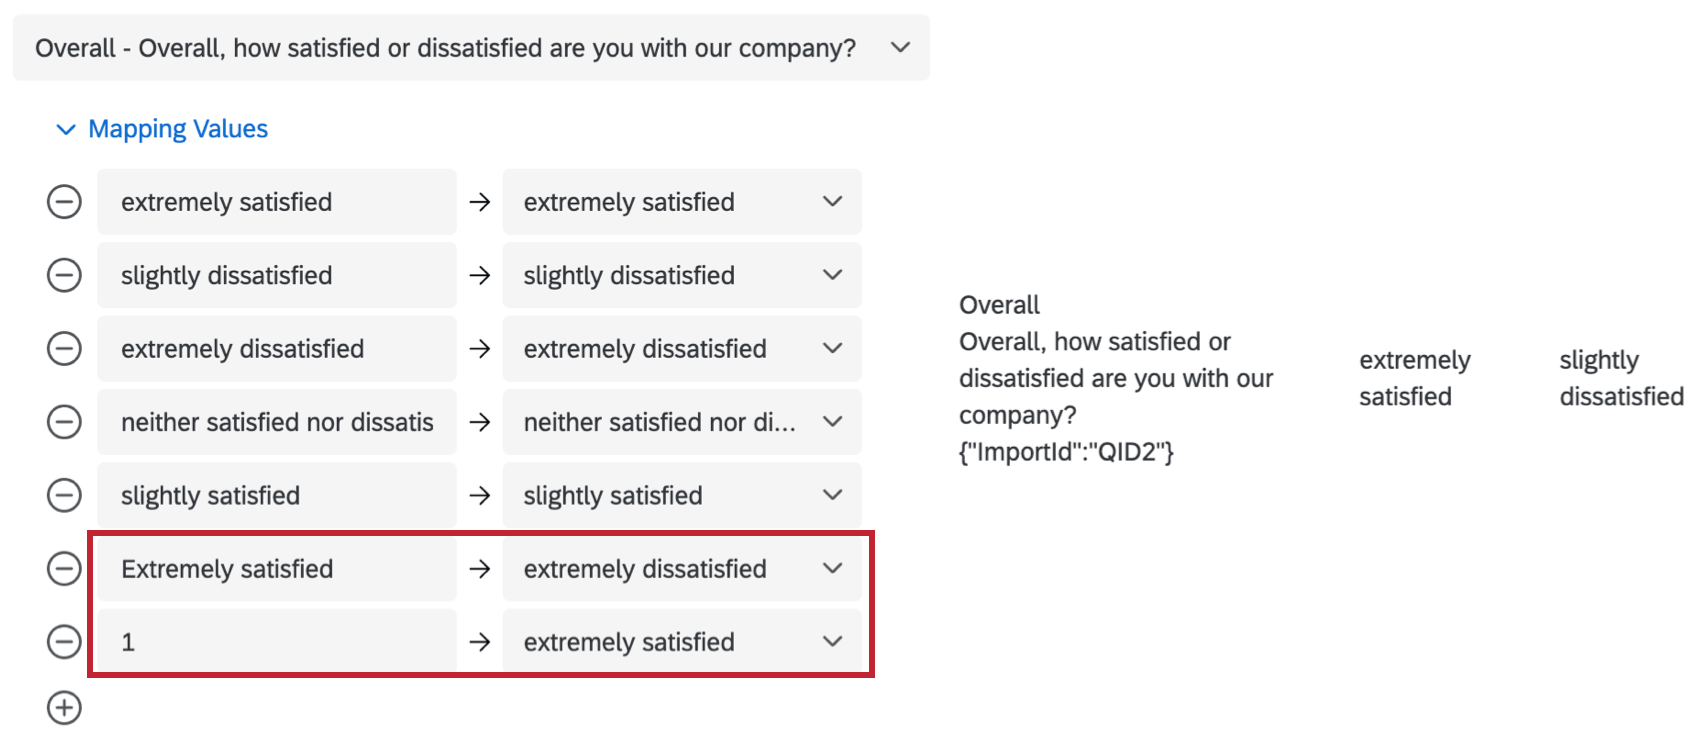
Hover over the value and click the minus (–) sign to eliminate a choice.
The new value will appear at the bottom of the list. You can modify the label on the left and the value on the right. You can add values as many times as you need to.
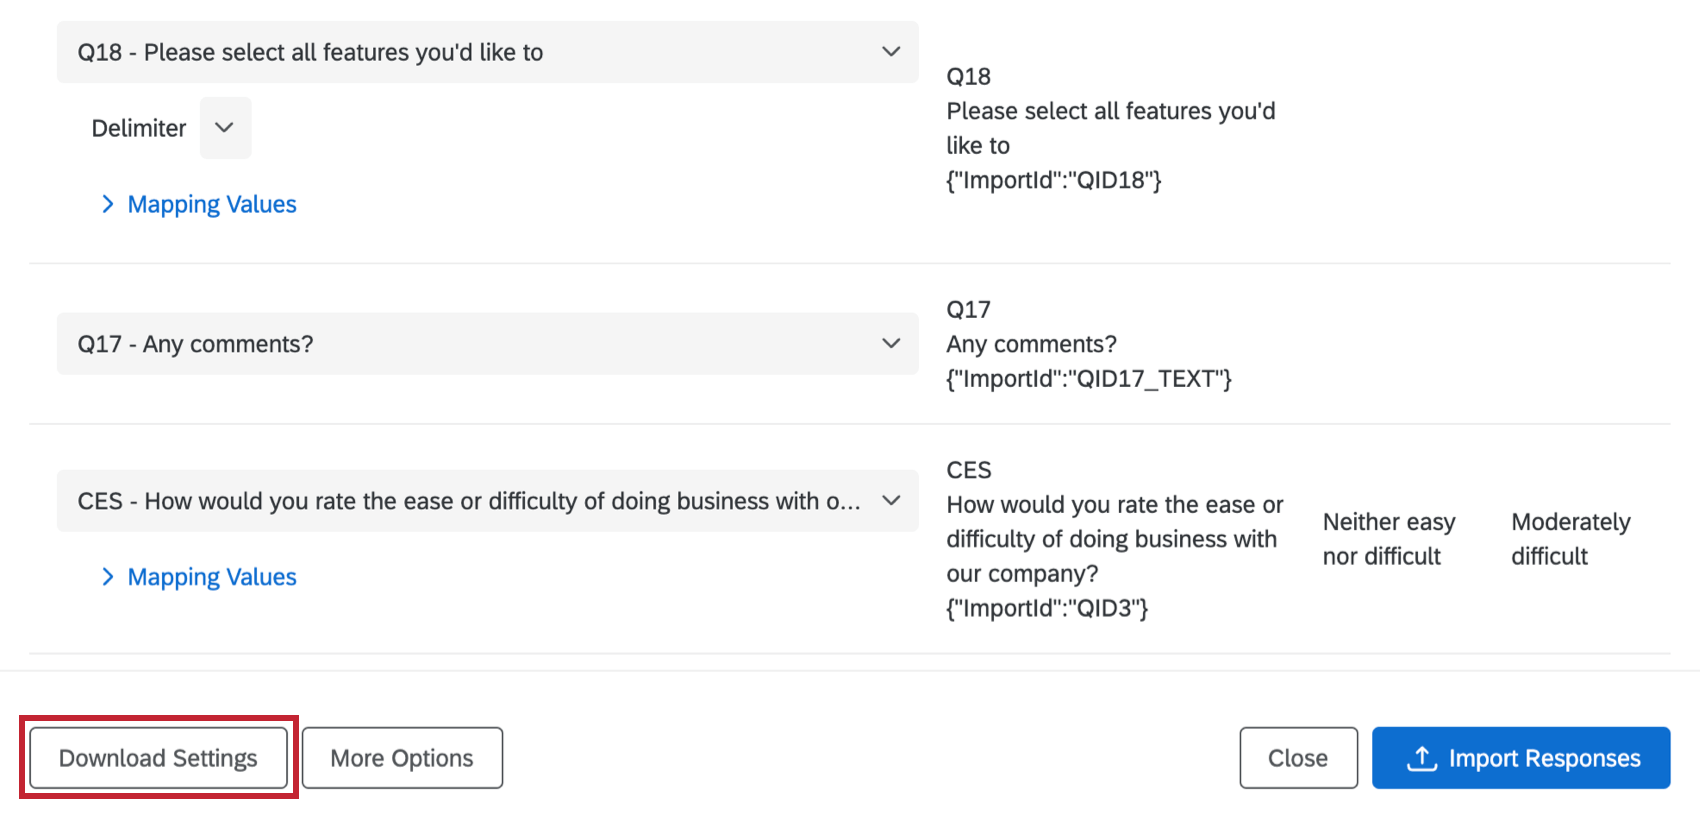
Download and Load Settings
When you click Download Settings, you will receive a JSON file of the settings used for the Import.
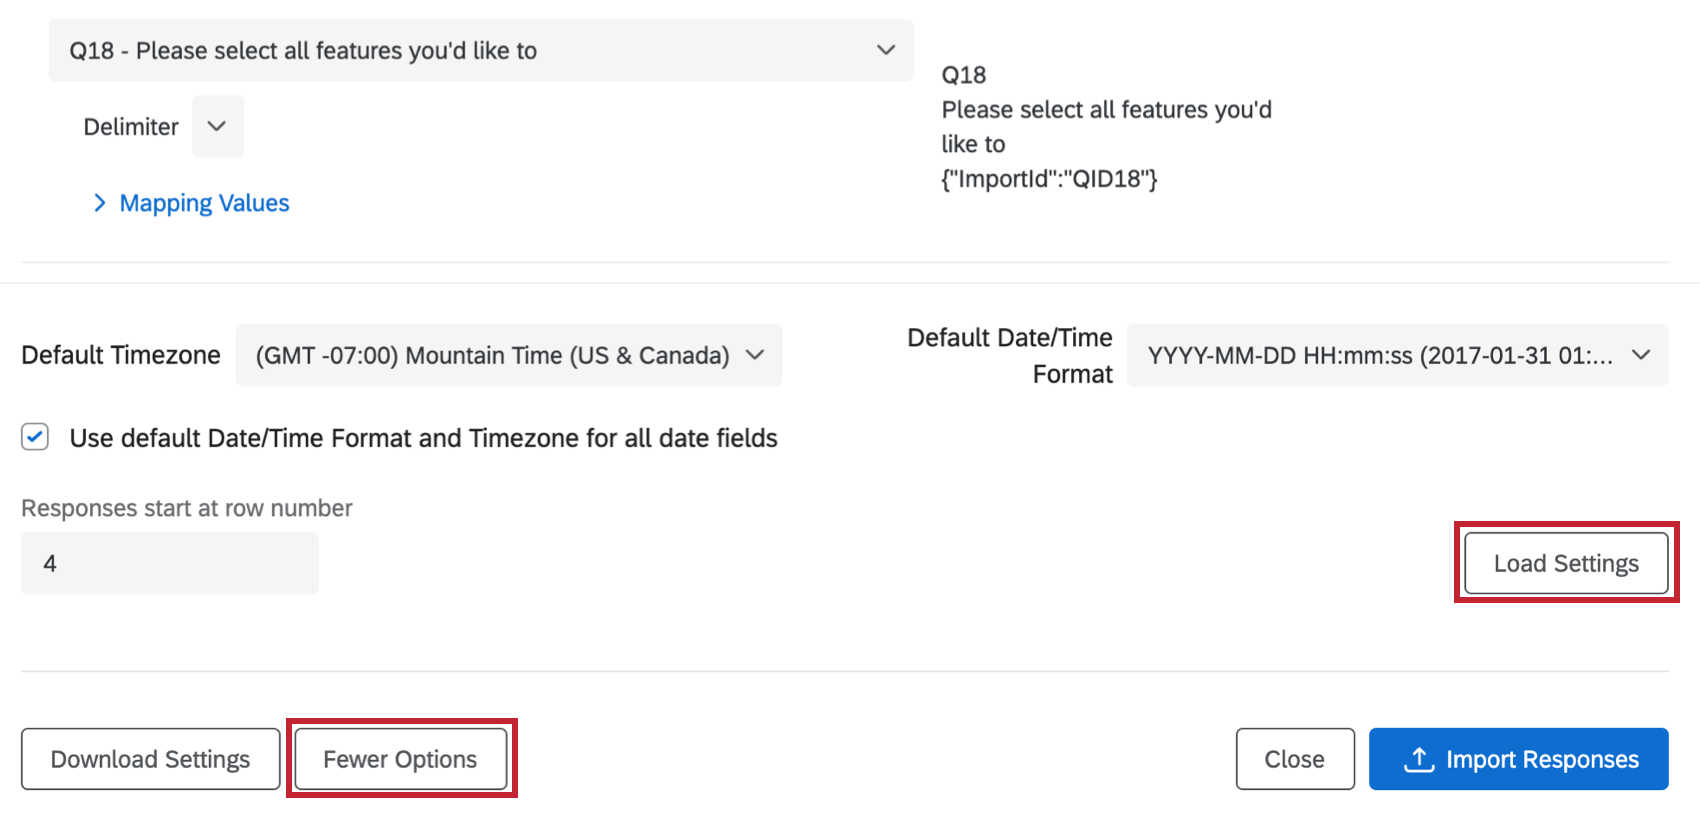
To reuse these settings on future imports, click More Options then Load Settings and select the settings file.
This option can be helpful if you are adept at JSON. If you do not know JSON, it is advised that you do not try to edit this file.
More Options
When you click More Options on the bottom-left of your Load Settings tab, you will be provided additional settings for your importer.

- Timezone: Determine the time zone of the data file. This settings applies to all date fields in the file.
- Date/Time Format: Determine the date/time format of the whole data file. If you exported the file from Qualtrics, the importer will try to detect the time zone you set on your account at the time the file was exported.
- Response start at row number: The importer usually detects this automatically. This setting determines the row where your headers end and data begins. For example, if this says 4, that means there are three rows of headers.
Troubleshooting Table Imports
The Table importer is the default importer when importing responses.
- The Table importer only accepts comma and tab separated files.
- If some of your fields are being skipped or your imported values don’t align with your survey questions, you’ll want to check your question mapping from within the import window. See the Configuring Your Import section for tips on reviewing your file from within the data importer.
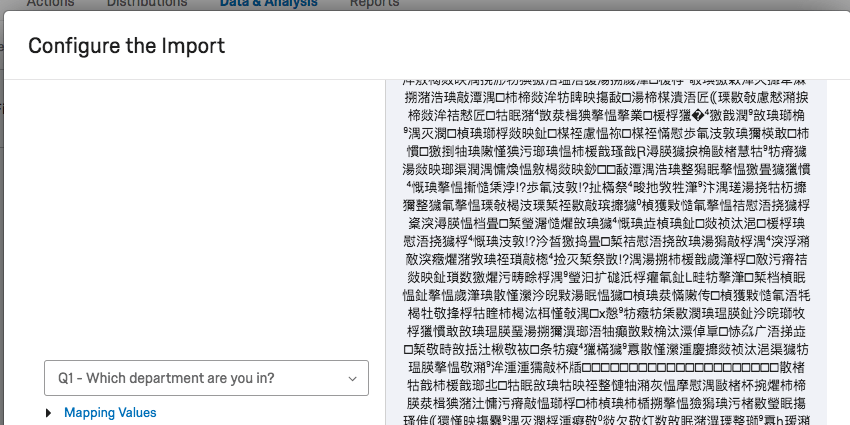
- If your data is importing with characters you don’t recognize, your file is saved in an incompatible format. You will need to save your file as a TSV or CSV with UTF-8 encoding. For more tips troubleshooting CSV formatting, read the CSV/TSV Upload Issues page.
Importing Responses into Different Project Types
You can import response data in many different types of projects. The steps and options described on this page apply to the following project types:
There are a few other types of projects where you can import response data. However, there are important differences to keep in mind:
- For Imported Data projects, see Creating an Imported Data Project and Data & Analysis in Imported Data Projects.
- For 360 projects, see Importing Response Data (360).
- For all other Employee Experience projects, see Importing Response Data (EX).
- For Conjoint and MaxDiff, see Data & Analysis (Conjoint & MaxDiff).