
Look & Feel Basic Overview
What's on this page
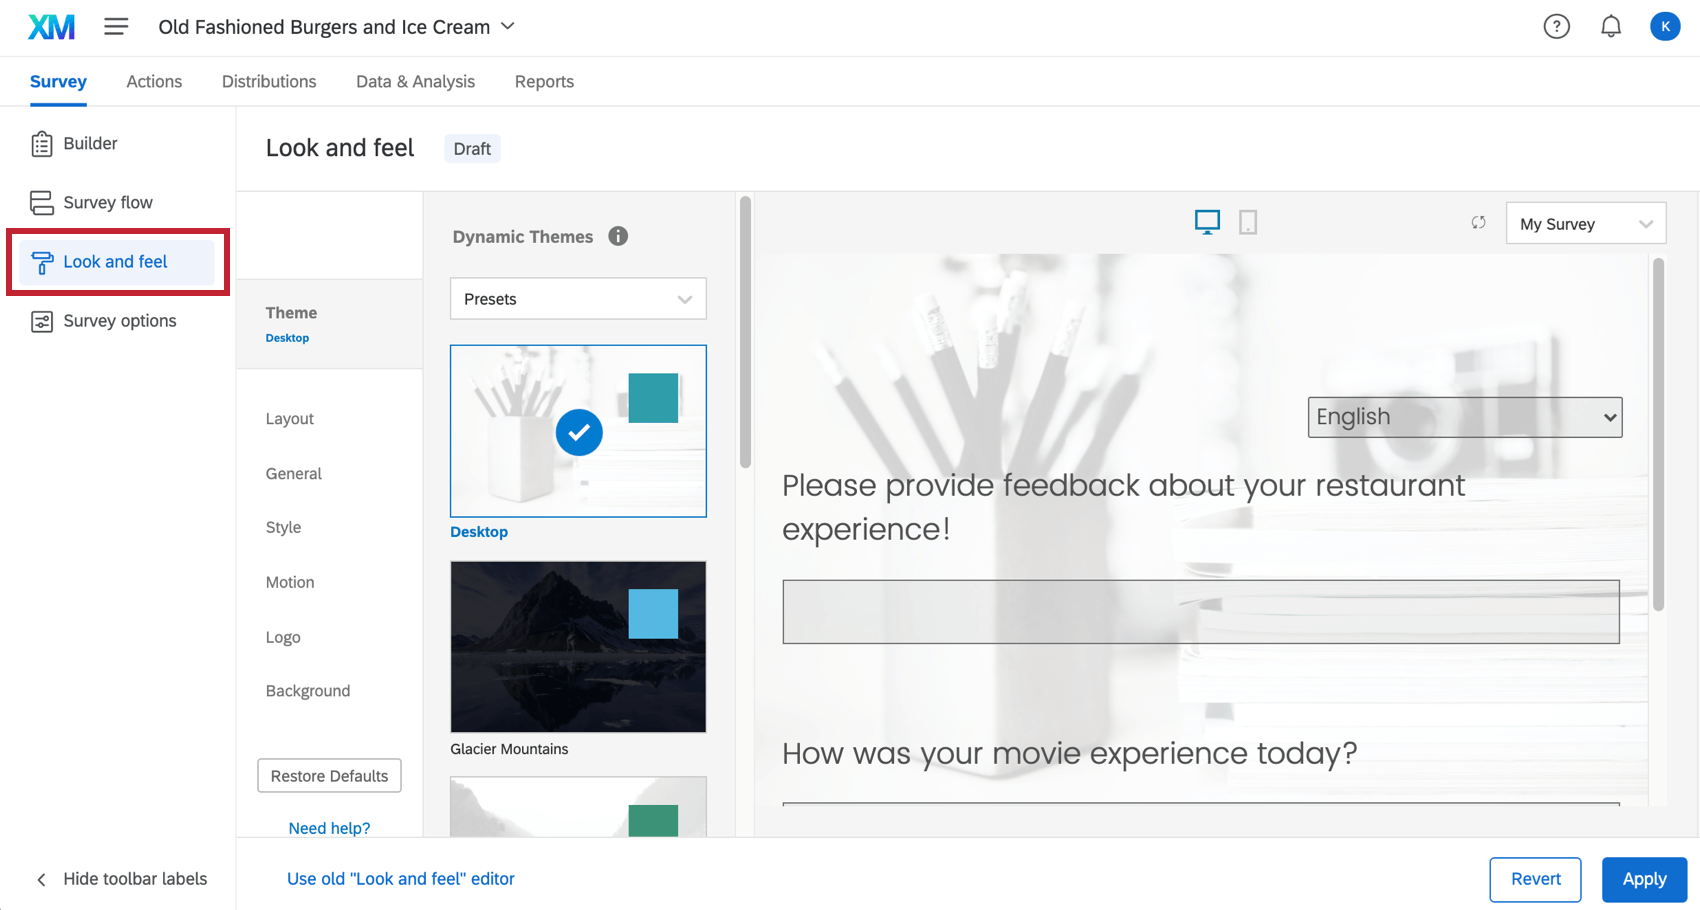
About the Look and Feel Menu
The way your survey looks can impact how well it performs, so we’ve given you lots of ways to customize how your survey appears to respondents. Whether you use a branded theme built by your organization, or you choose to individually customize specific survey elements yourself, Qualtrics lets you build visually appealing surveys like no other platform.
To access these customization options, go to the Look and feel menu in the Survey tab.
Customizing a Project’s Appearance
Using the Look and feel menu, you can customize many aspects of your survey’s appearance. Here are some common changes you might want to make, complete with links to relevant support pages:
- Change the survey theme: Choose from preconfigured settings for quick and easy survey theming Qtip: If you’re a Brand Administrator and want your colleagues to use branded themes, you can build themes for the whole organization to use.

- Brand your survey: Add a dynamic logo, background, header, and footer to make your survey instantly recognizable.
- Change the survey layout: Customize the appearance and button styling of your survey.
- Limit questions per page: Determine how many questions should appear on each page of the survey, without having to add many separate page breaks.
- Customize the Next and Back button text: Customize the Next and Back button text to fit your survey’s needs. This feature also allows you to choose a translated message for your button text, enabling multi-language surveys.
- Add a progress bar: Show respondents how far along they are in your survey.
- Change colors: Set the primary and secondary colors for your survey.
- Change fonts: Apply a font typeface and sizing to your entire survey.
- Control survey motion: Determine how your survey moves. You can set the page transition animation, enable survey autoadvance , and set your survey to autofocus on the currently selected question.
- Add custom CSS: Add custom CSS to your survey to accomplish endless custom survey theming.
Customizing Look and Feel in Different Projects
The look and feel menu functions the same in just about every type of project where you customize a survey. This includes:
FAQs
How can I change the background/theme of my survey?
How can I change the background/theme of my survey?
Why are all of my fonts different in my survey? How do I fix it?
Why are all of my fonts different in my survey? How do I fix it?
Global font changes are made in the Look and feel menu and local font changes are made in the rich content editor for that specific question or answer choice.
Local font changes override global font changes, so if you made both types, you’ll end up with a mix between the global font settings and the local font settings for questions. Follow these steps to clear away all local formatting and let the global changes take effect uniformly: Note that global changes made within Look and feel do not show up in the Survey tab. You need to preview the survey to see the changes and styling.
How do I update or report problems with static themes?
How do I update or report problems with static themes?
That's great! Thank you for your feedback!
Thank you for your feedback!