
Distributing Course Evaluations
What's on this page
About Distributing Course Evaluations
Course evaluations can be configured to send on a recurring basis, or once on a set day and time. Recurring automations will run daily and send evaluations for any courses that meet your specified criteria, while one-time evaluations will only send once, and must be created manually.
Qtip: After they are created, new evaluations may take a few minutes to show up within the Evaluations tab.
Attention: Course evaluations should be distributed using this method. Do not attempt to distribute course evaluations using normal survey distribution methods.
Sending Recurring Evaluations
Qtip: A recurring evaluation will only be valid if the person who created it still has a valid Qualtrics account. If the account that created it is deleted or disabled, the evaluation will stop working.
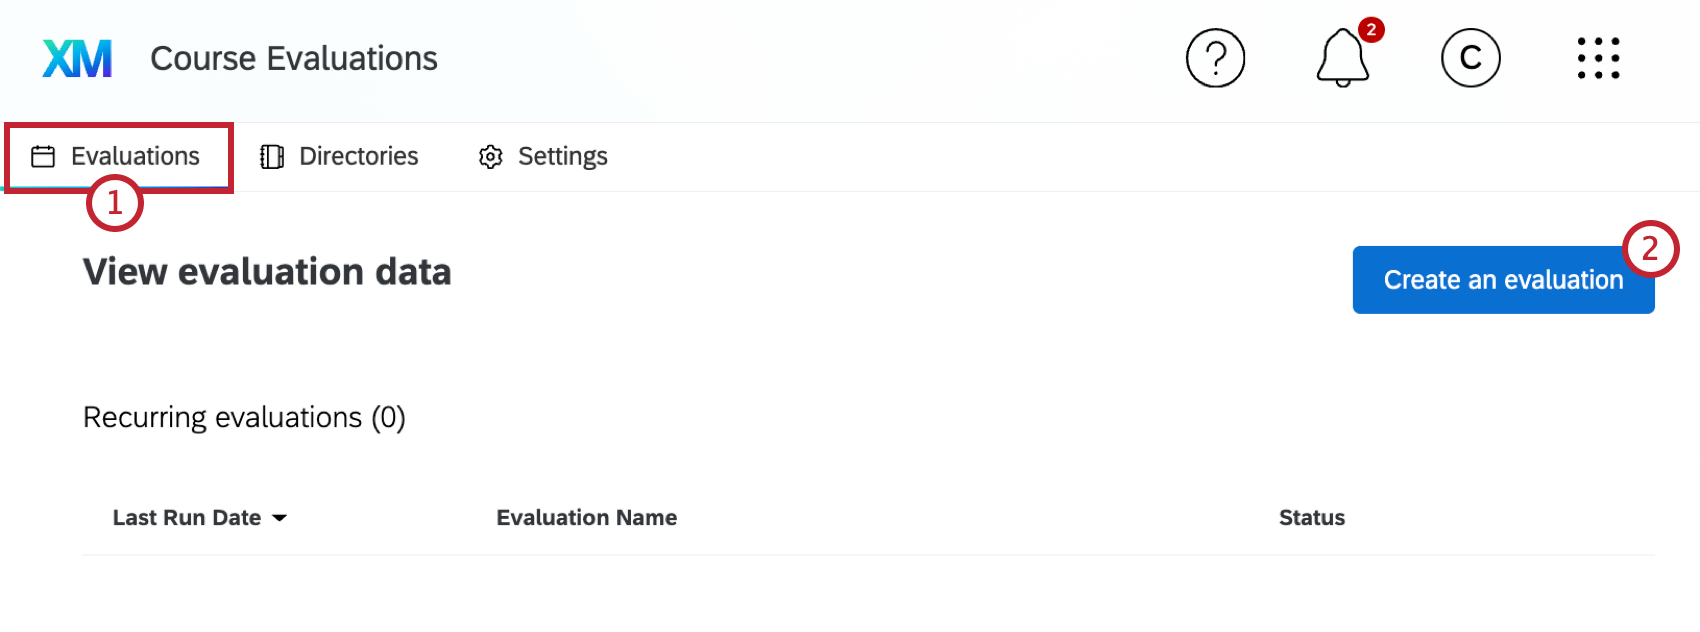
Navigate to the Evaluations tab.
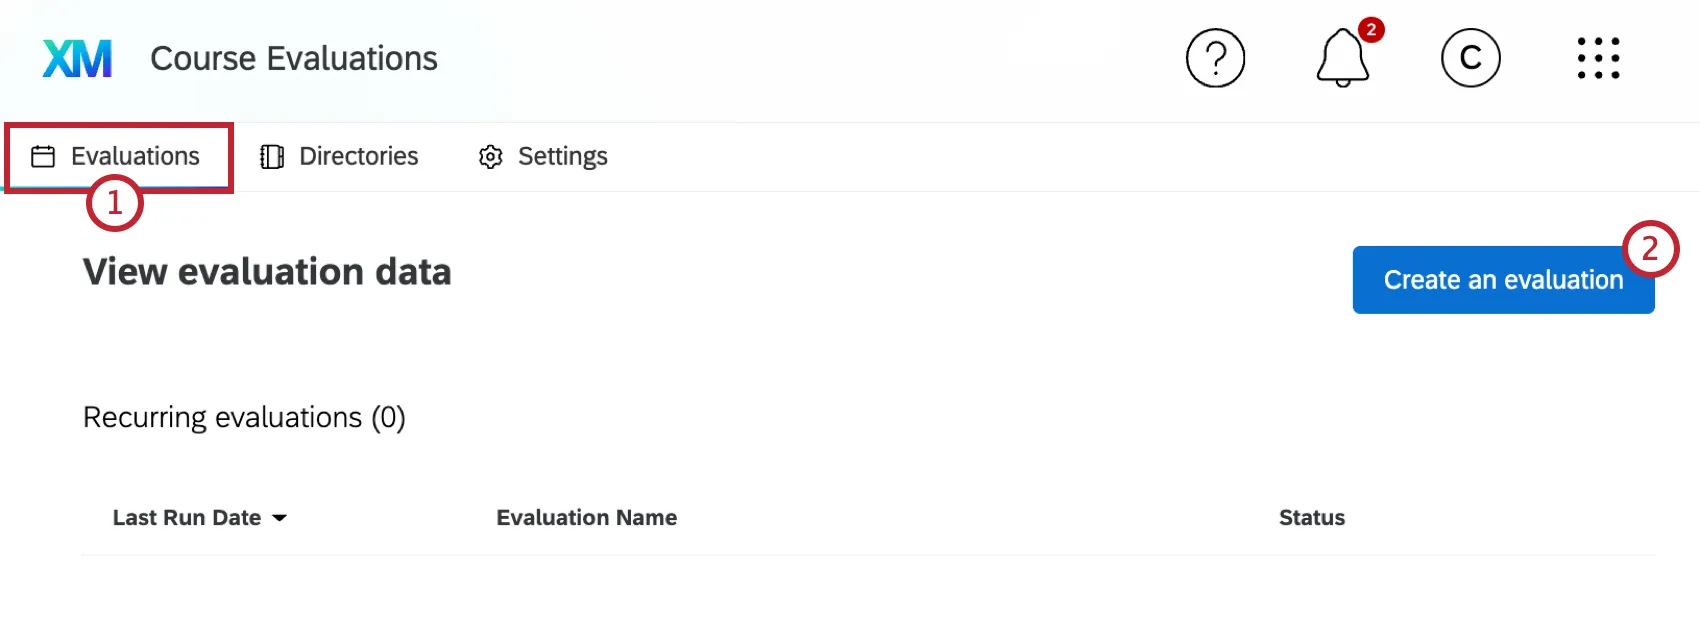
Click Create an evaluation.
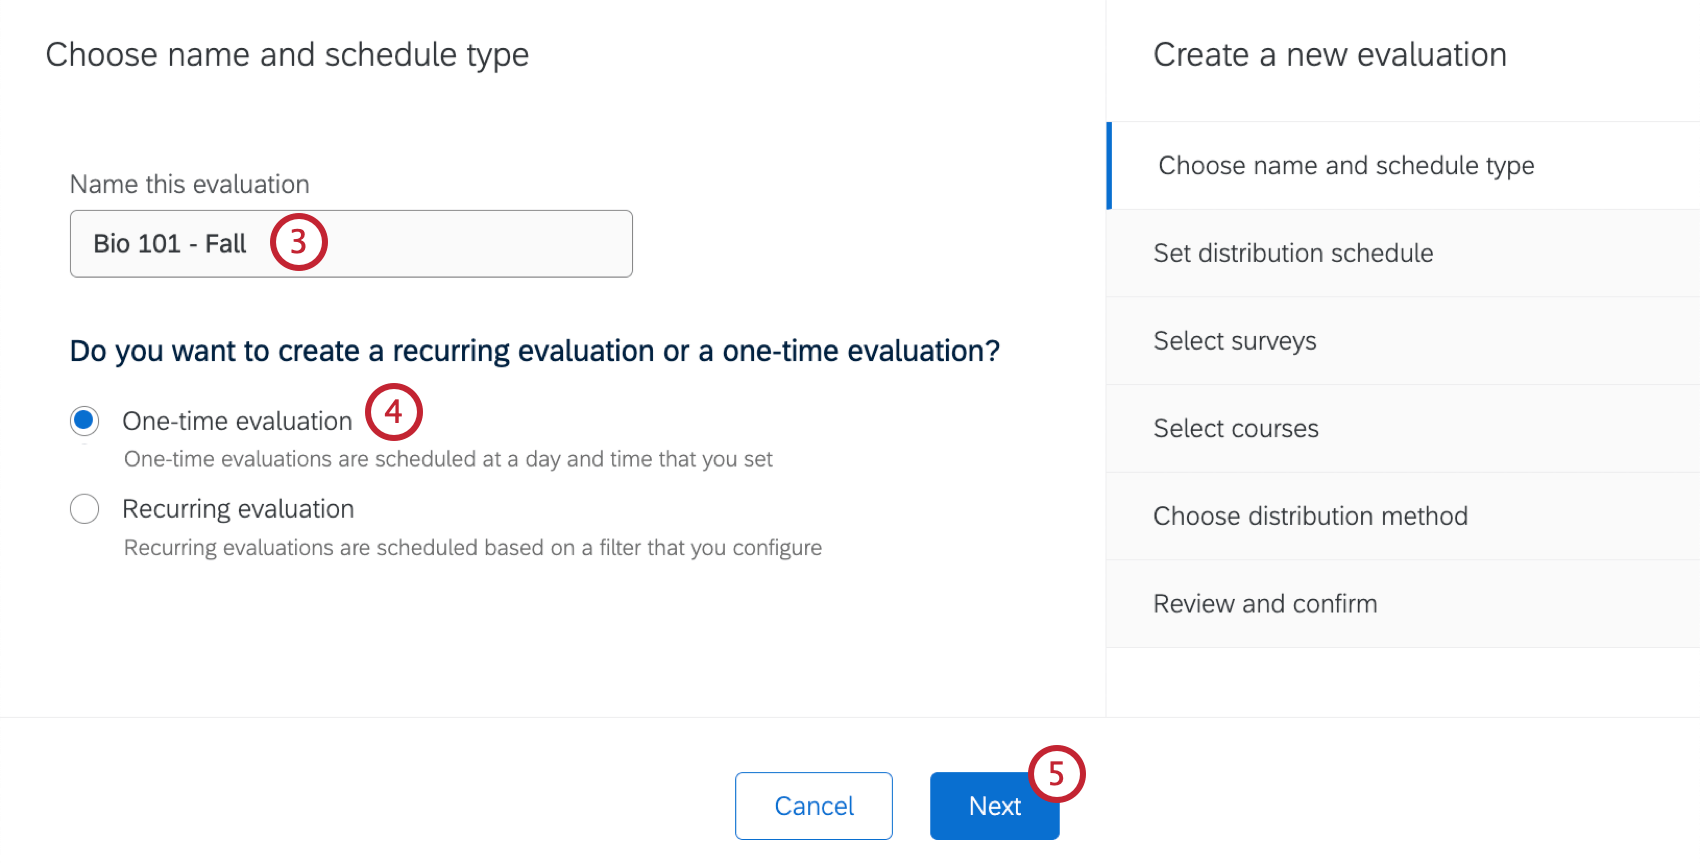
Enter a name for your evaluation.
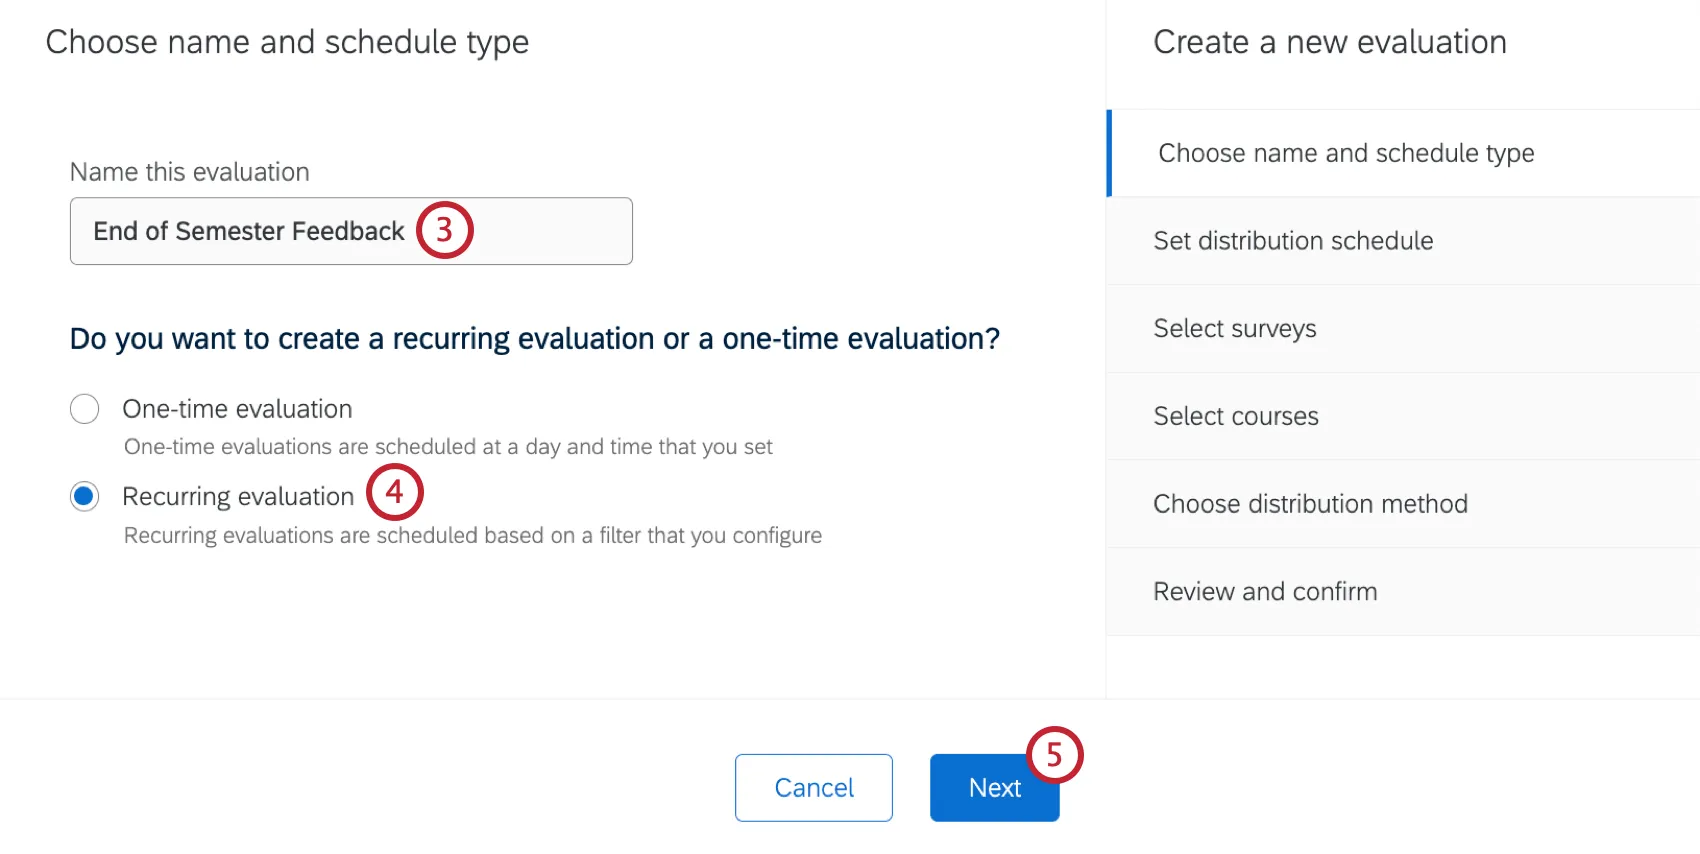
Select Recurring evaluation.
Click Next.
Select a send date for your evaluations. These dates are set based on the start date or end date of the course.
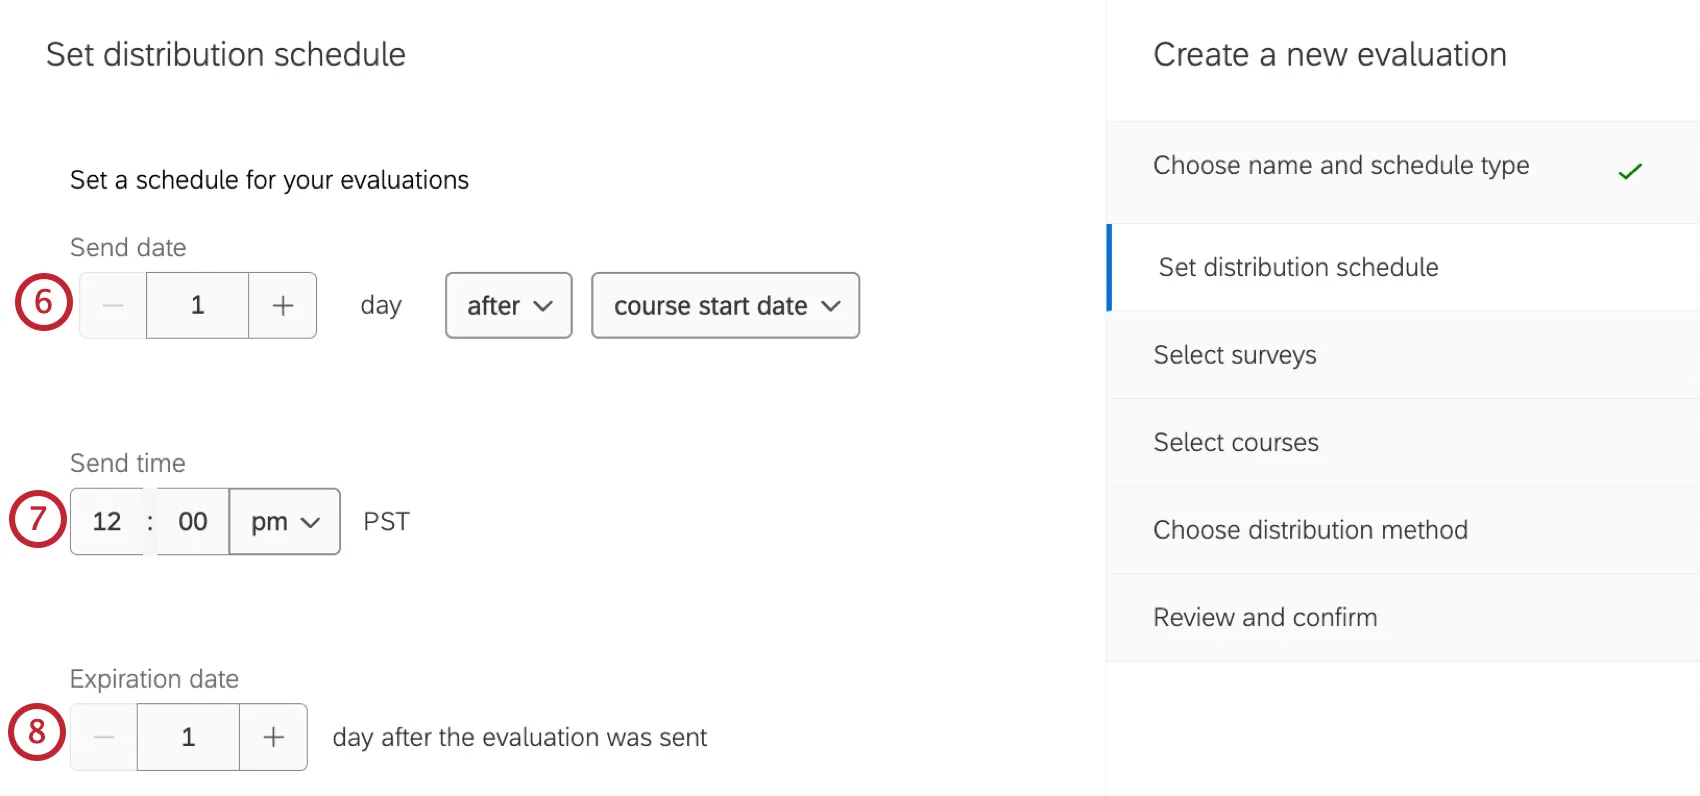
Example: Each time this automation runs it will send evaluations for courses that started 1 day ago.
Select a send time for your evaluation. Evaluations will send in the time zone of your account.
Set an expiration date for your evaluation. This determines when your evaluation links will expire.
Qtip: Any survey expiration date that is set will override the expiration date of your course evaluation. If the survey link has expired, no new responses can be collected.
If you are ready for your evaluation to start sending, click Enable evaluations. You can also enable the evaluation later, but if this is unchecked your recurring automation will not start running.

If desired, enter emails for people you want to receive a report when an evaluation is sent. This option is similar to adding report emails within Organization Settings, but it will only send reports for this specific evaluation. To add emails, type them into the box one at a time and click enter.
If desired, click Send report only on creation of distribution. When this option is checked, a report will only be sent to the specified recipients when distributions are created. When this option is unchecked, a report will be sent daily, regardless of whether or not distributions were sent.
Click Next.
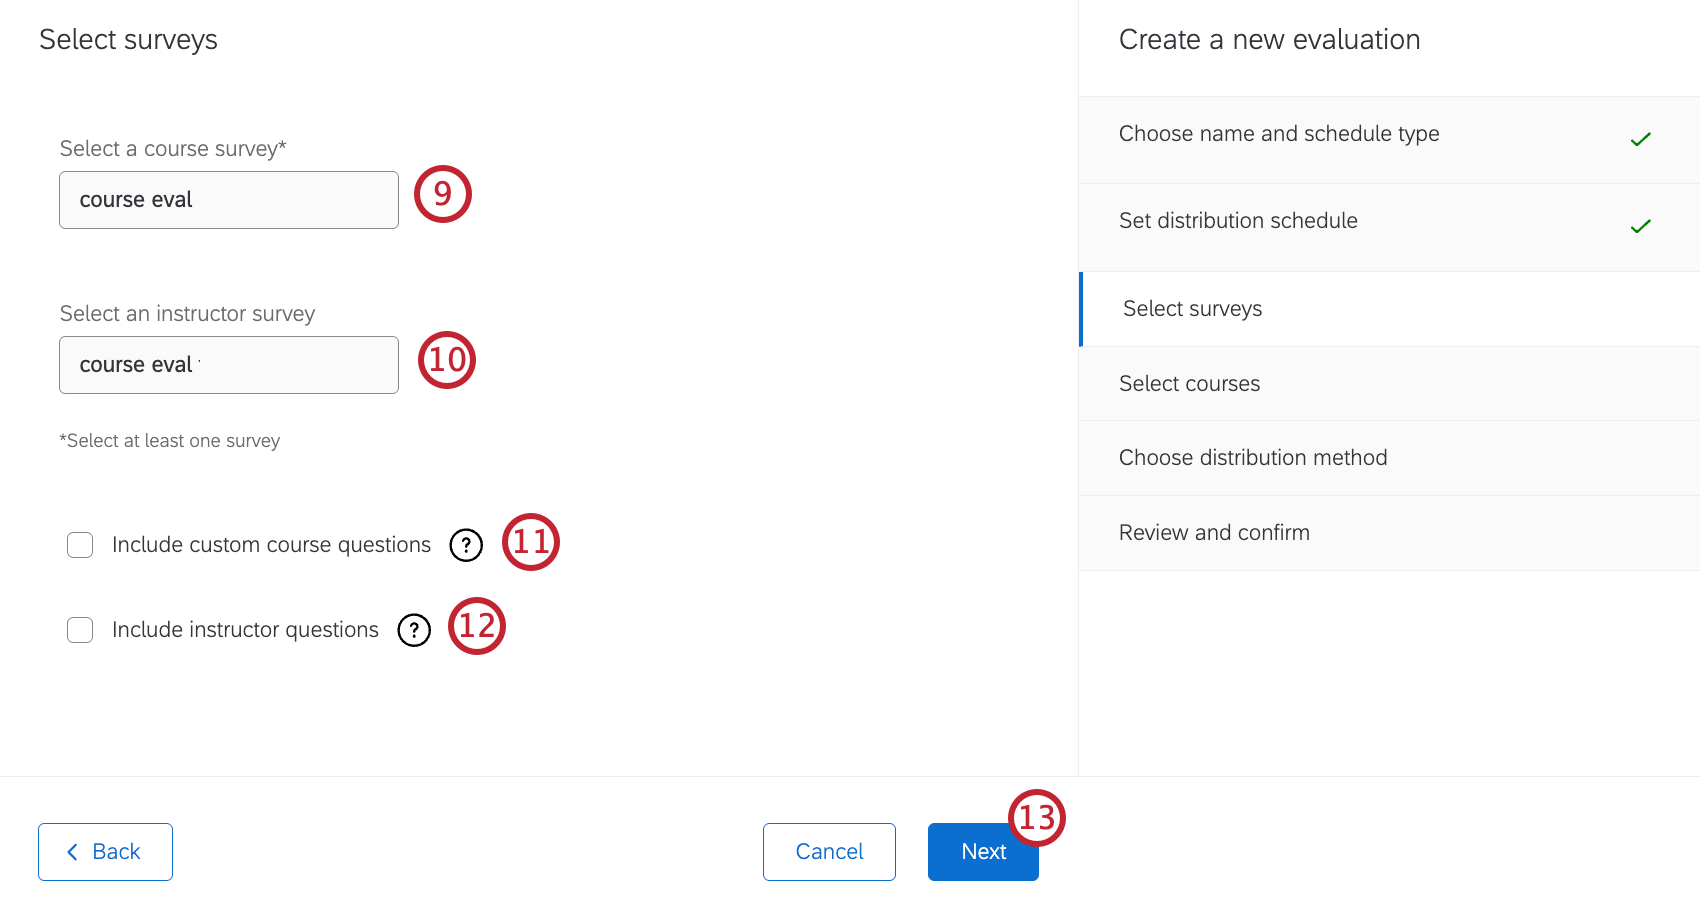
Select a course survey from the dropdown. For more information, see Creating Evaluation Surveys.
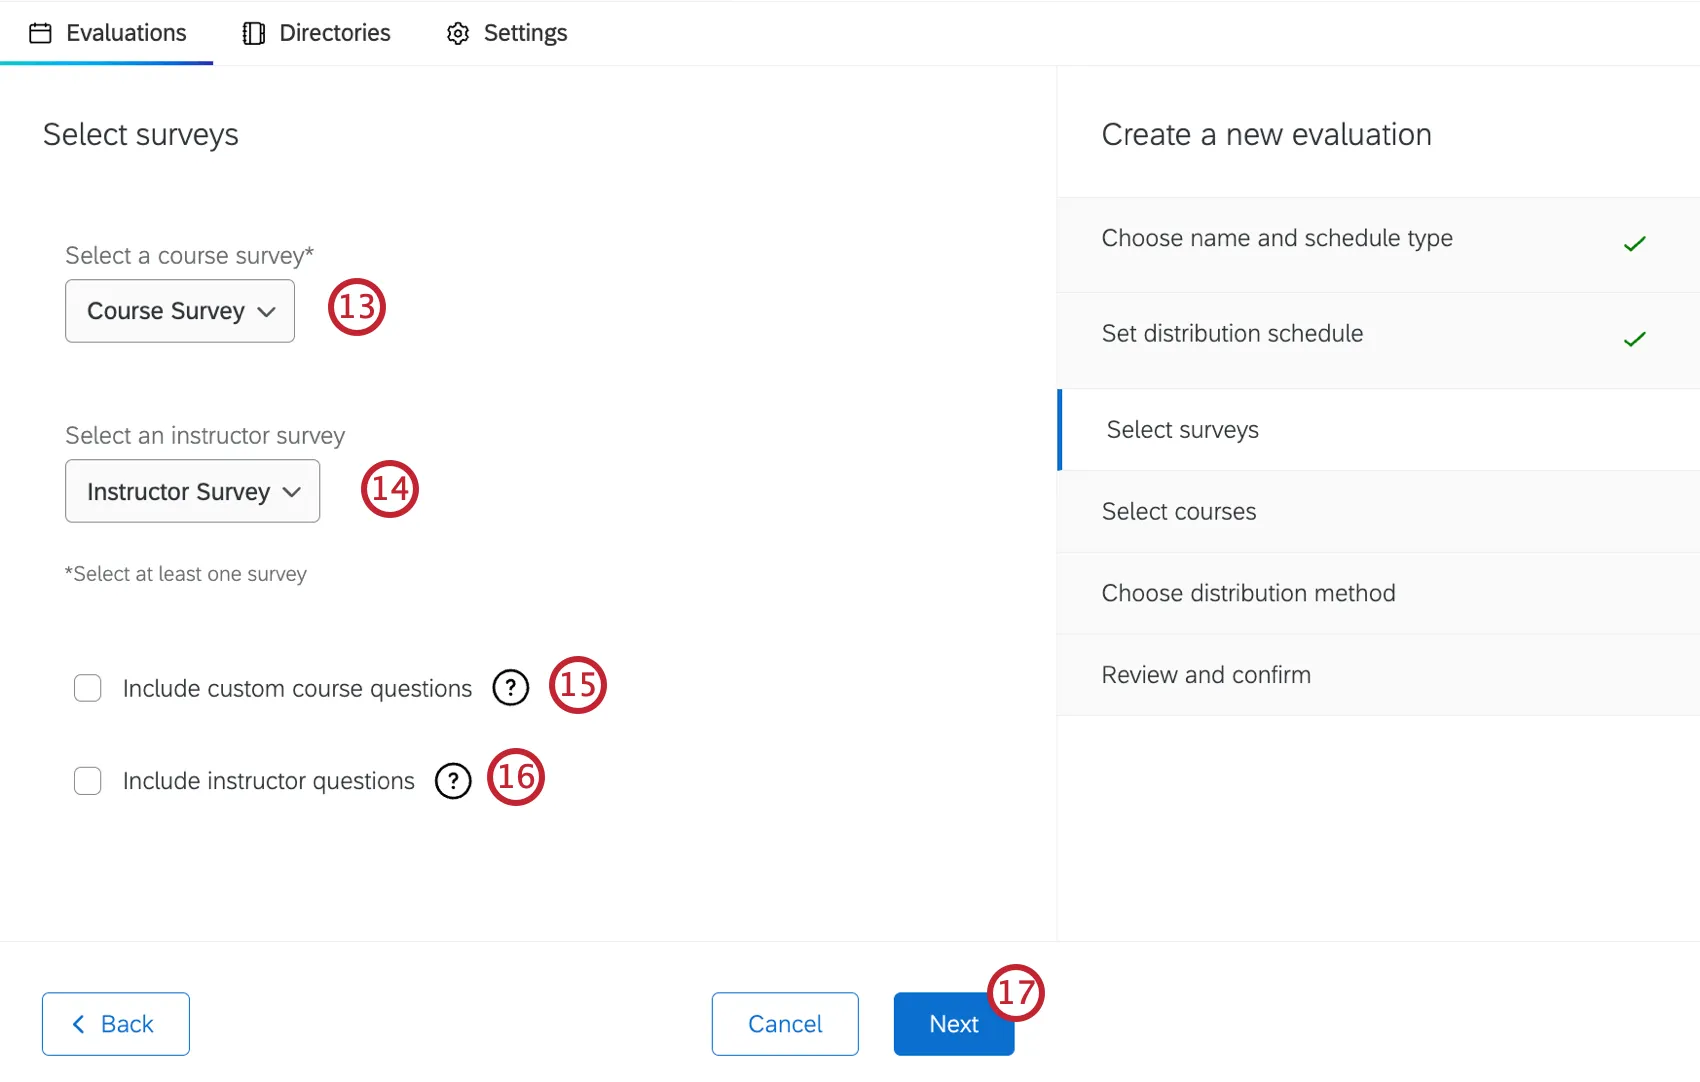
Select an instructor survey from the dropdown. You don't have to send both a course survey and an instructor survey.
Choose if you want to include custom course questions. When checked, course coordinators can add custom questions to the course survey.
Qtip: This option is only available if a course survey is selected, and a course question bank survey is configured in settings
Choose if you want to include instructor questions. When checked, instructors can select questions from the question bank survey generated in Organization Settings.
Qtip: This option is only available if an instructor survey is selected, and a teacher question bank survey is configured in settings.
Click Next.
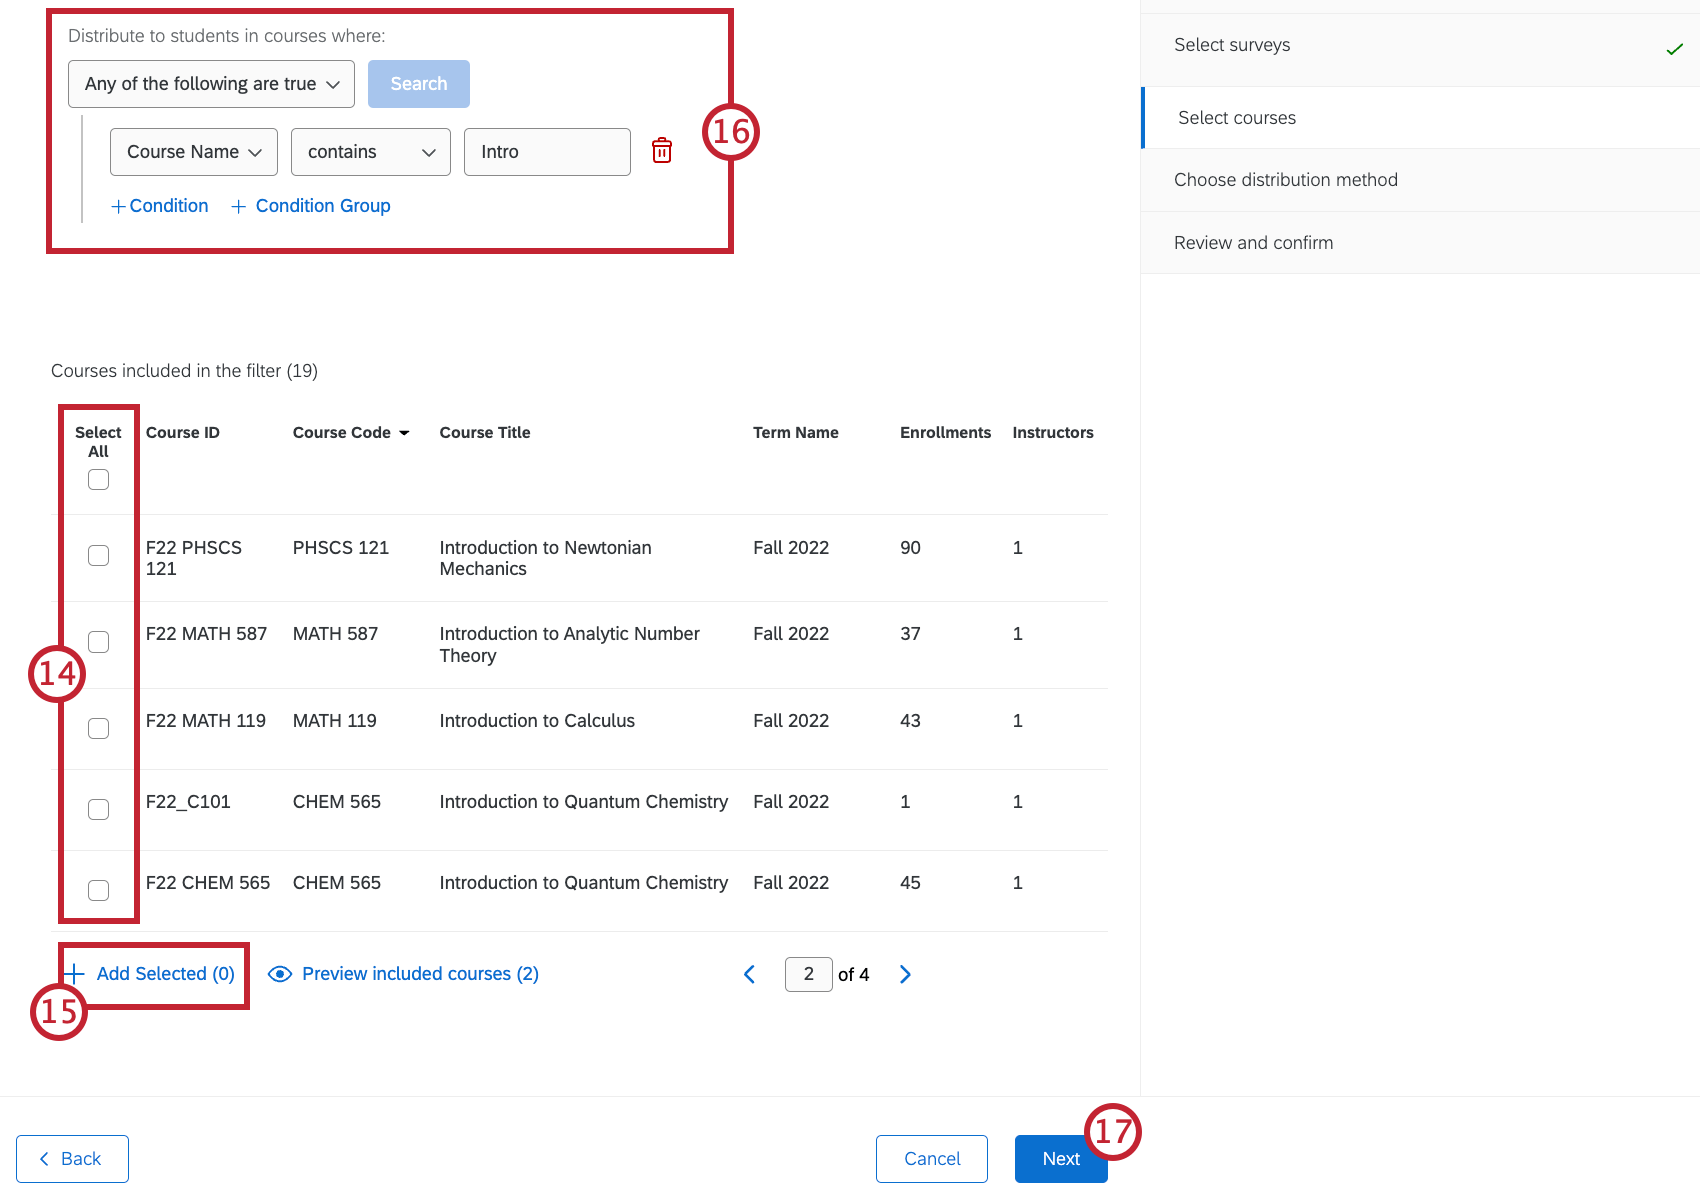
Select which courses will be included in your evaluation automation by adding conditions and condition groups to the filter. The table at the bottom will display all the courses that meet your filter conditions.
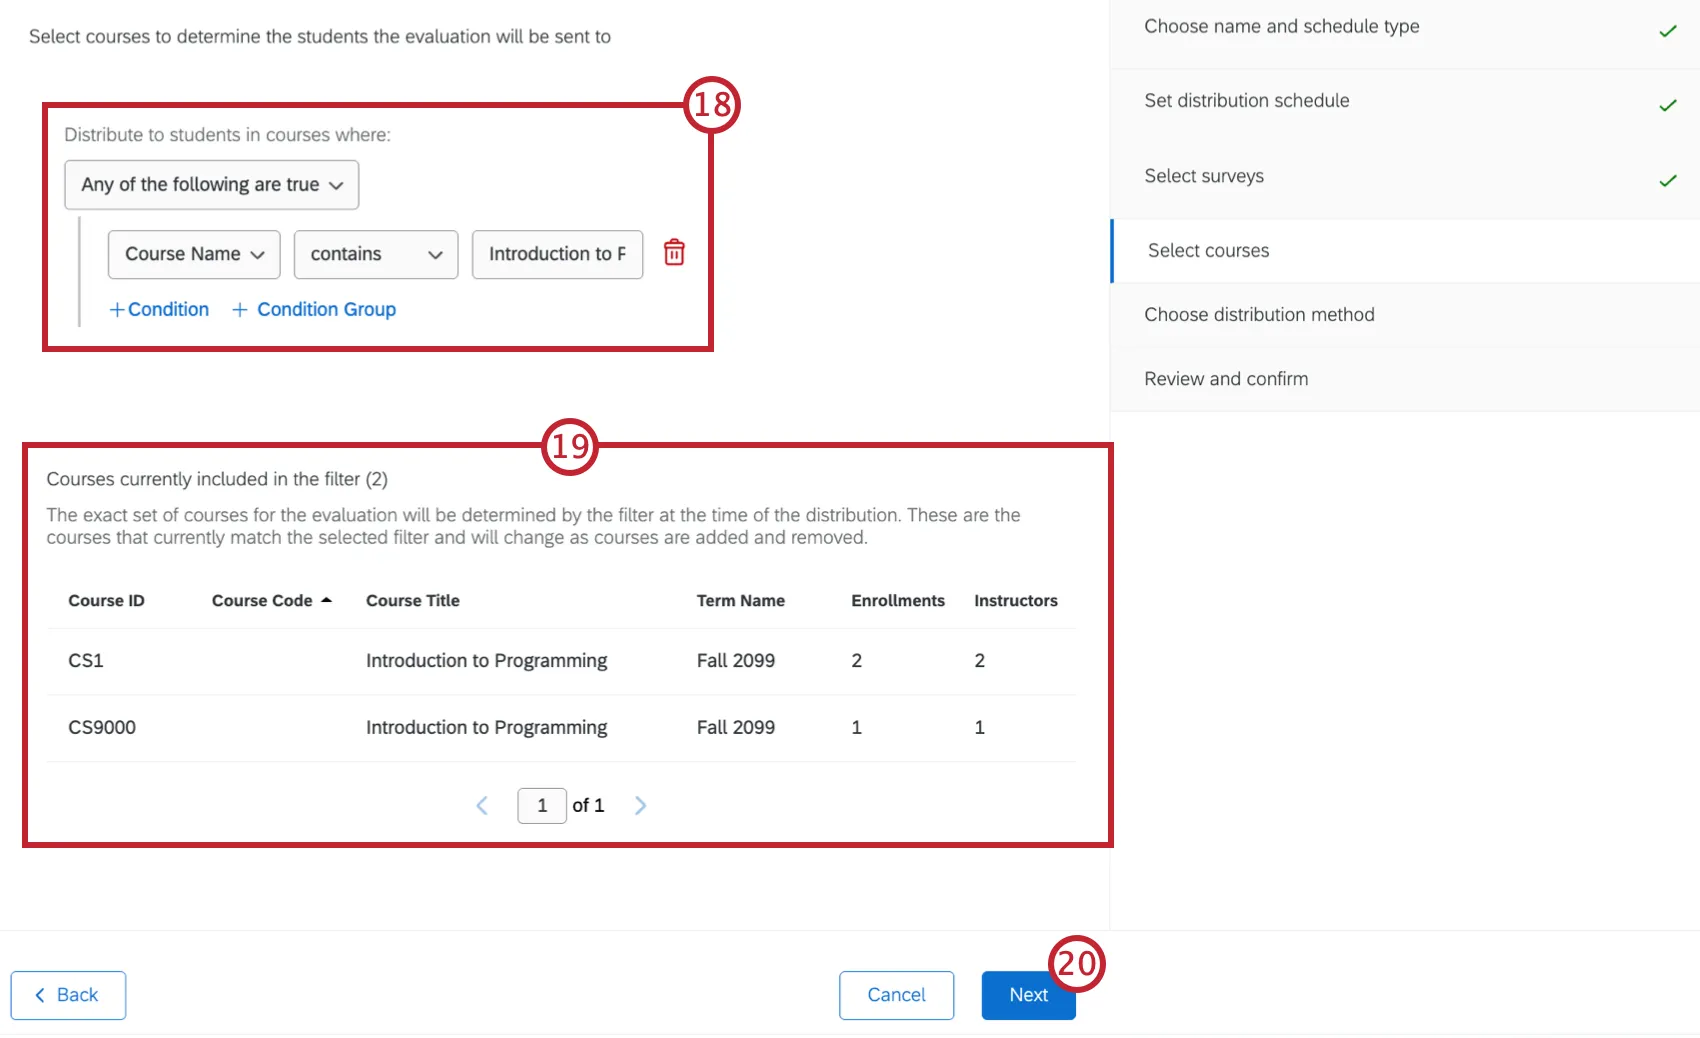
Qtip: If you don’t add any conditions to the filter, all of your courses will be included in the automation.
Qtip: You can only filter by course data, which is data you map as Course Data when importing it. You cannot filter by student data or embedded data.
Review the course table to make sure evaluations will be sent for the correct courses.
Click Next.
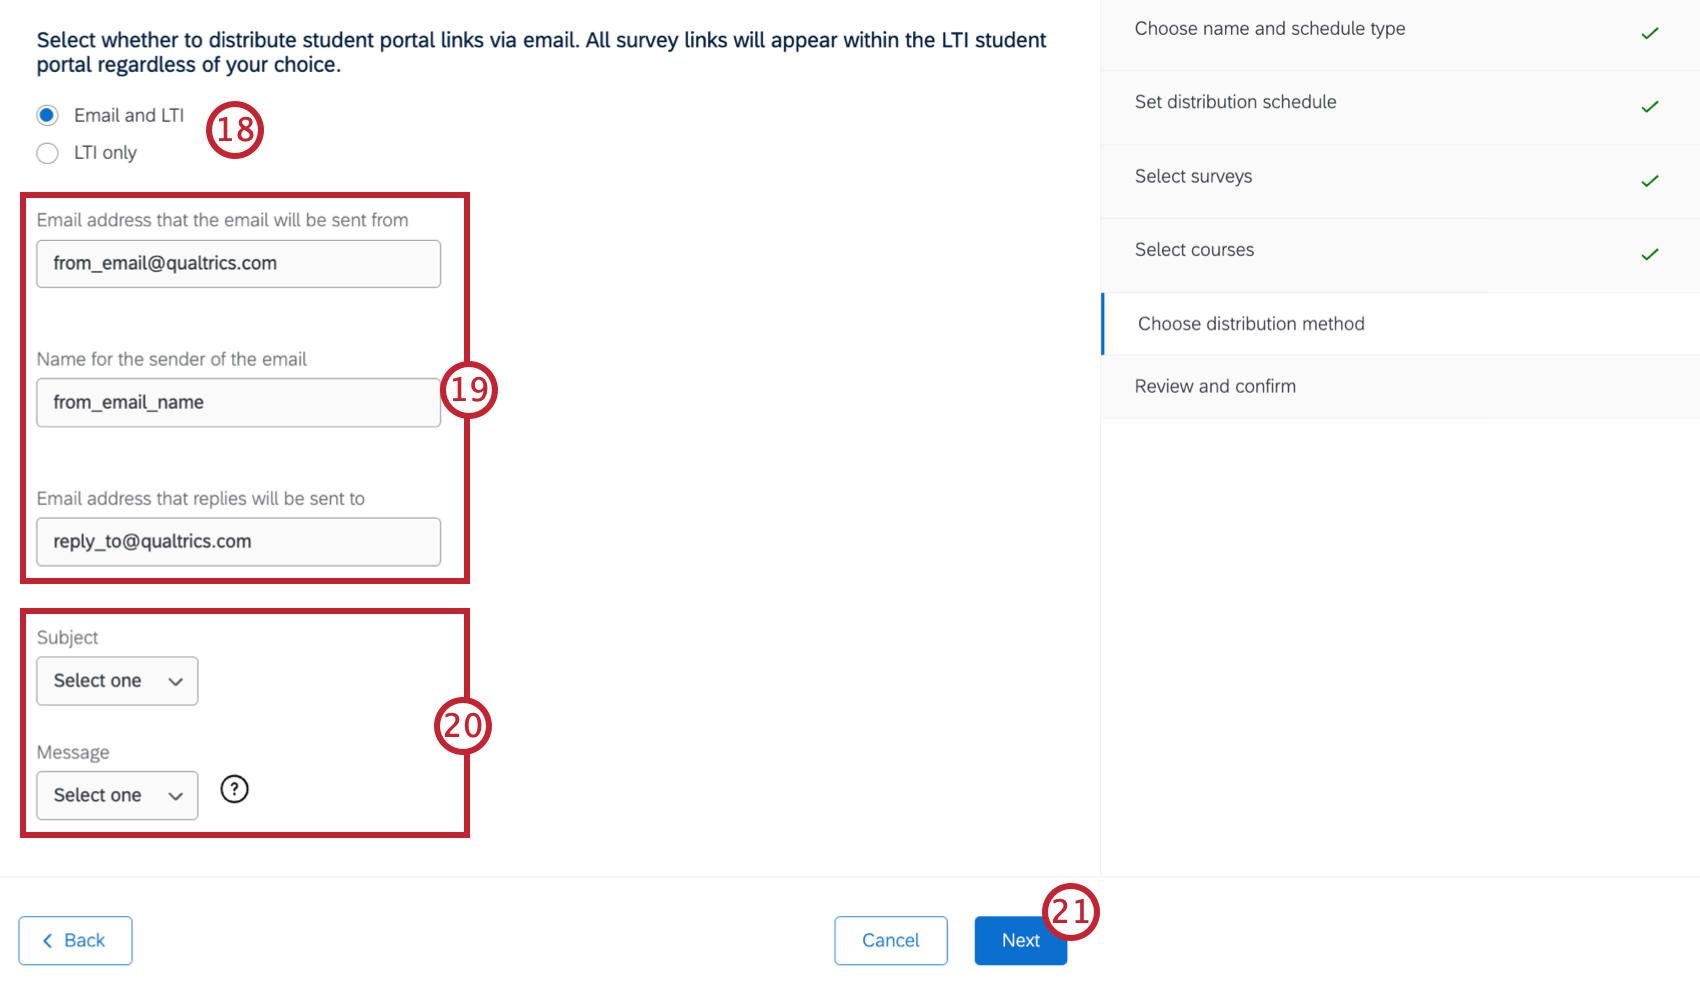
Select whether you want to distribute your evaluations by Email and LTI or LTI only.

If you are distributing your evaluations by both email and LTI, enter a “From” email, “From” name, and “Reply-to” email that your evaluations will send from.
If you are distributing your evaluations by both email and LTI, select an email subject and email message from your messages library.
Click Next.
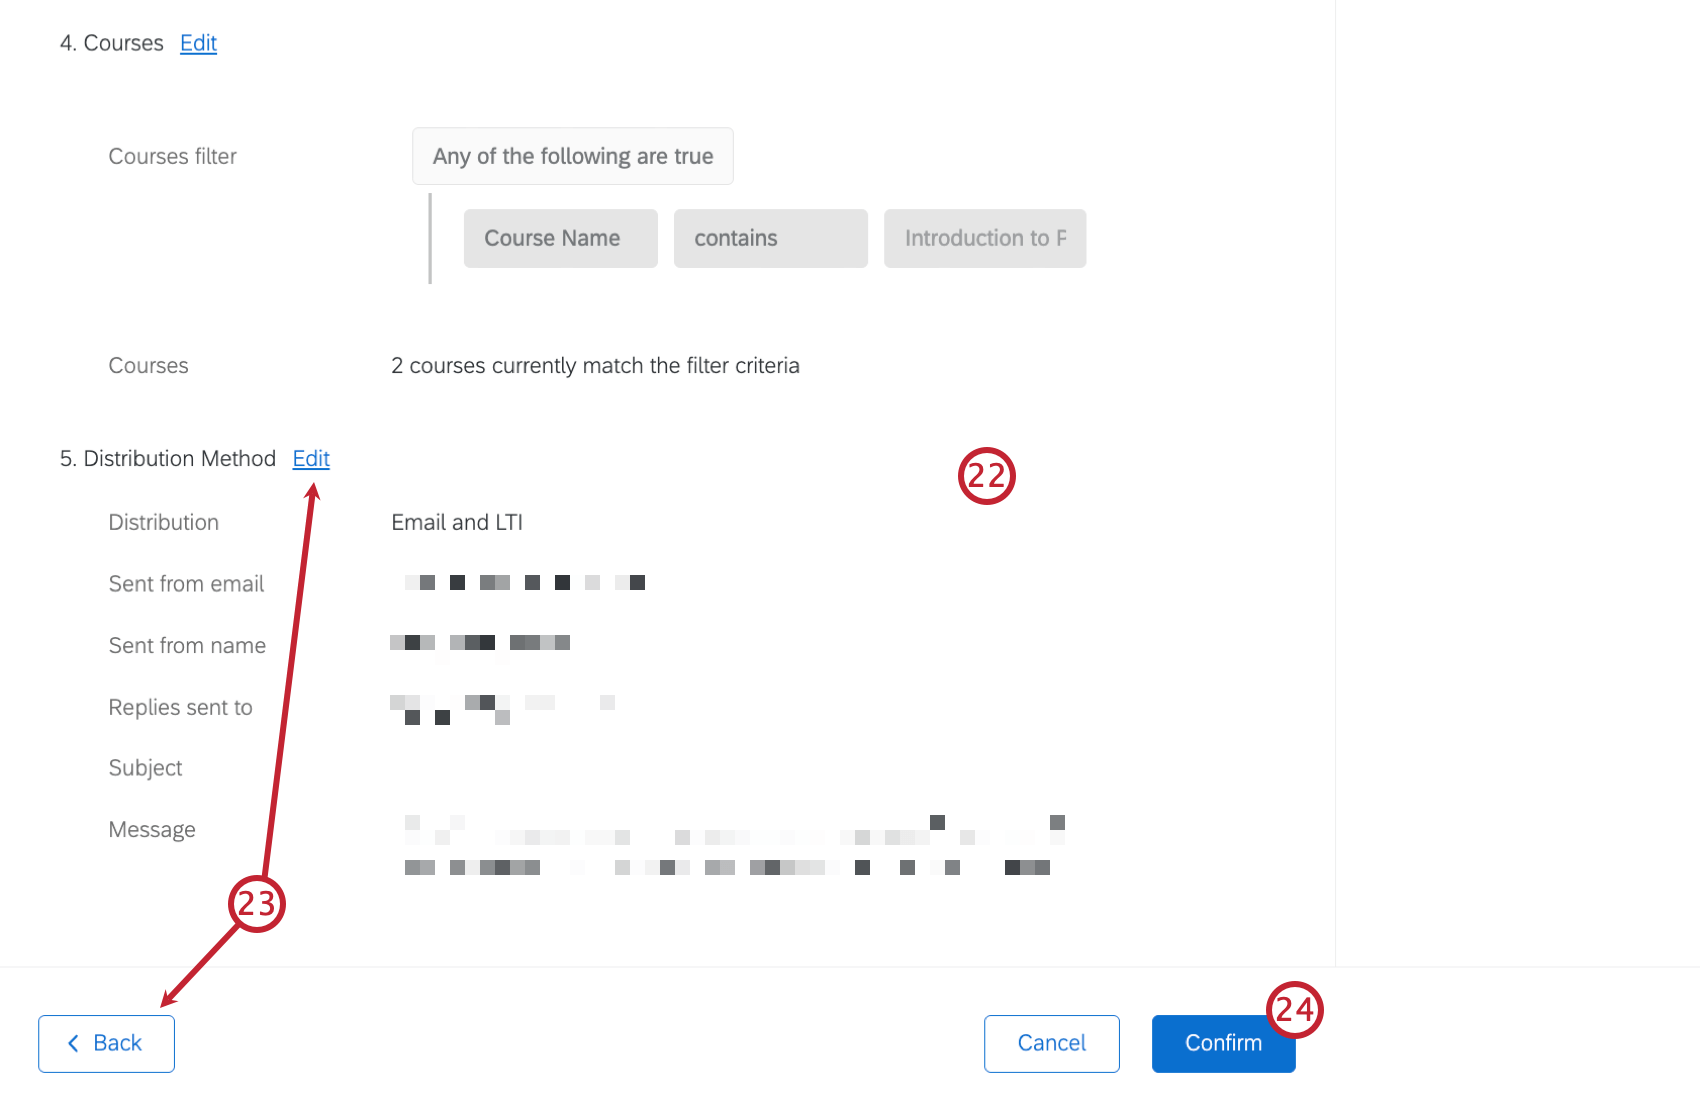
Review the evaluation settings you just created to make sure everything looks correct.

If you need to make any changes click Back, or select Edit next to the specific section you want to edit.
Once everything looks correct, click Confirm to enable the automation.
Sending One-time Evaluations
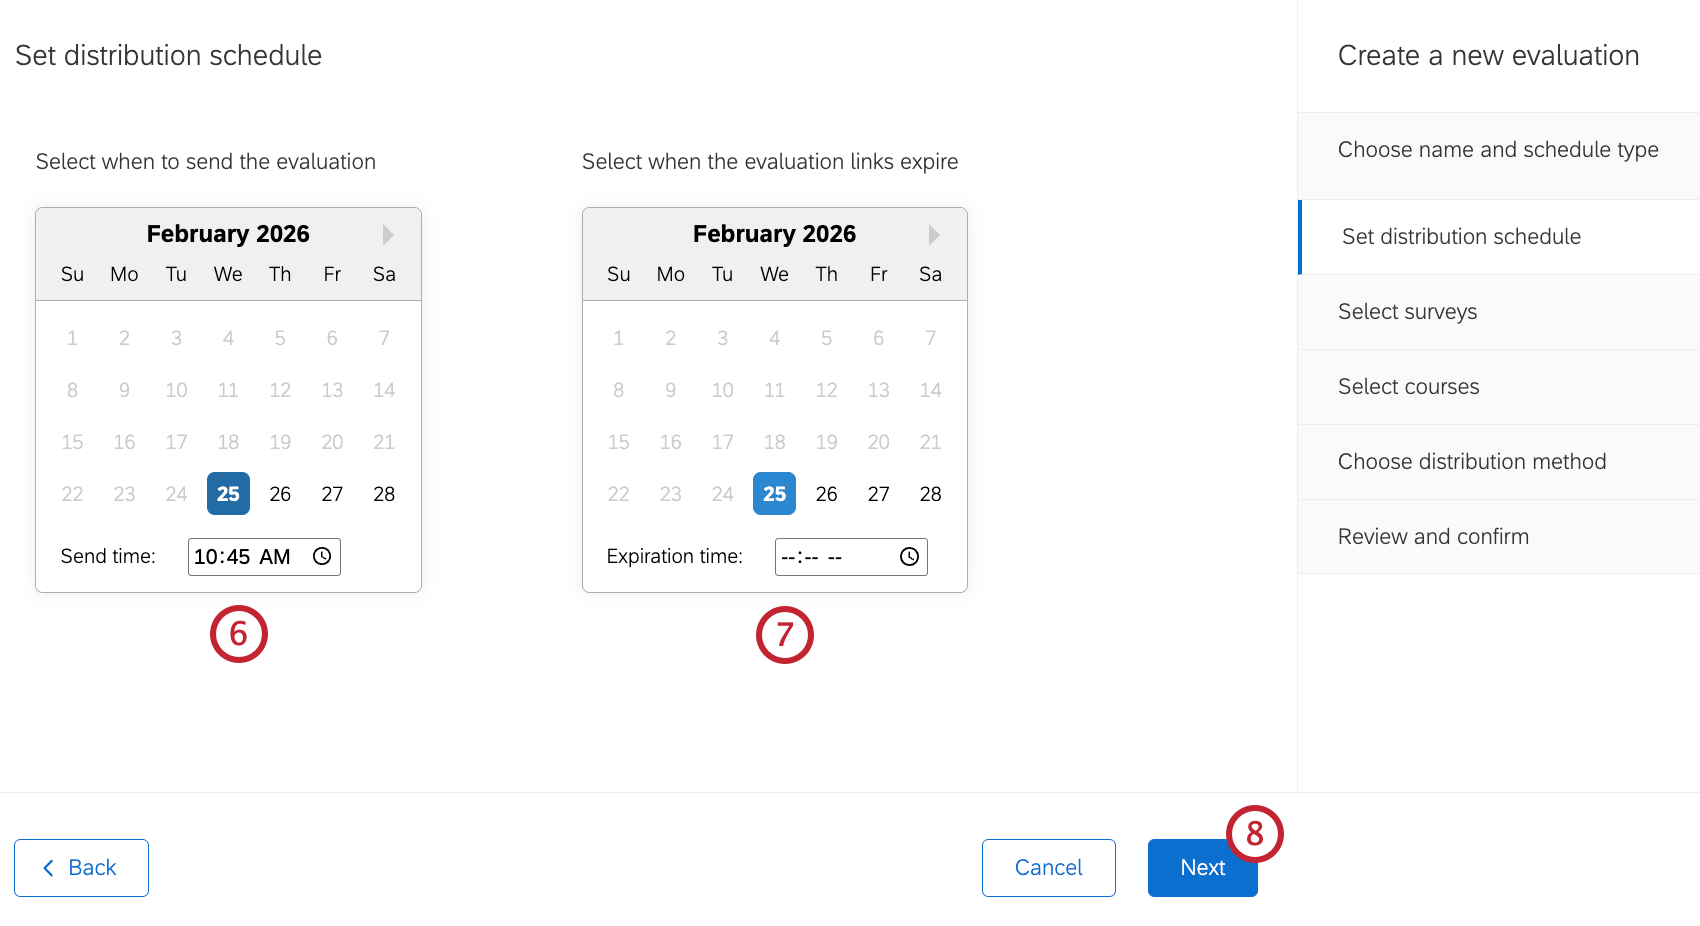
Qtip: You can enter the time manually, or you can click the clock icon to choose from a dropdown selection of times.
Qtip: This option is only available if a course survey is selected, and a course question bank survey is configured in settings.
Qtip: This option is only available if an instructor survey is selected, and a teacher question bank survey is configured in settings.
Qtip: You can search through your courses by using the arrows to navigate through the pages in the table.
Qtip: To view only your selected courses, click Preview included courses. From here you can also delete courses by selecting them and clicking Remove selected. To return to the filter results click View filter results.
Qtip: You can only filter by course data, which is data you map as Course Data when importing it. You cannot filter by student data or embedded data.
That's great! Thank you for your feedback!
Thank you for your feedback!