

Zendesk Event
What's on this page
About Zendesk Events
Zendesk events allow you to begin a workflow in Qualtrics based on events in Zendesk. This includes when a ticket requester or assignee is changed, or when a ticket field is modified. You can then use the data passed from Zendesk in subsequent workflow tasks.
Qtip: With Zendesk events, no additional configuration is necessary on the Zendesk side.

Setting up a Zendesk Event
Navigate to the Workflows tab of a project, or the stand-alone Workflows page.
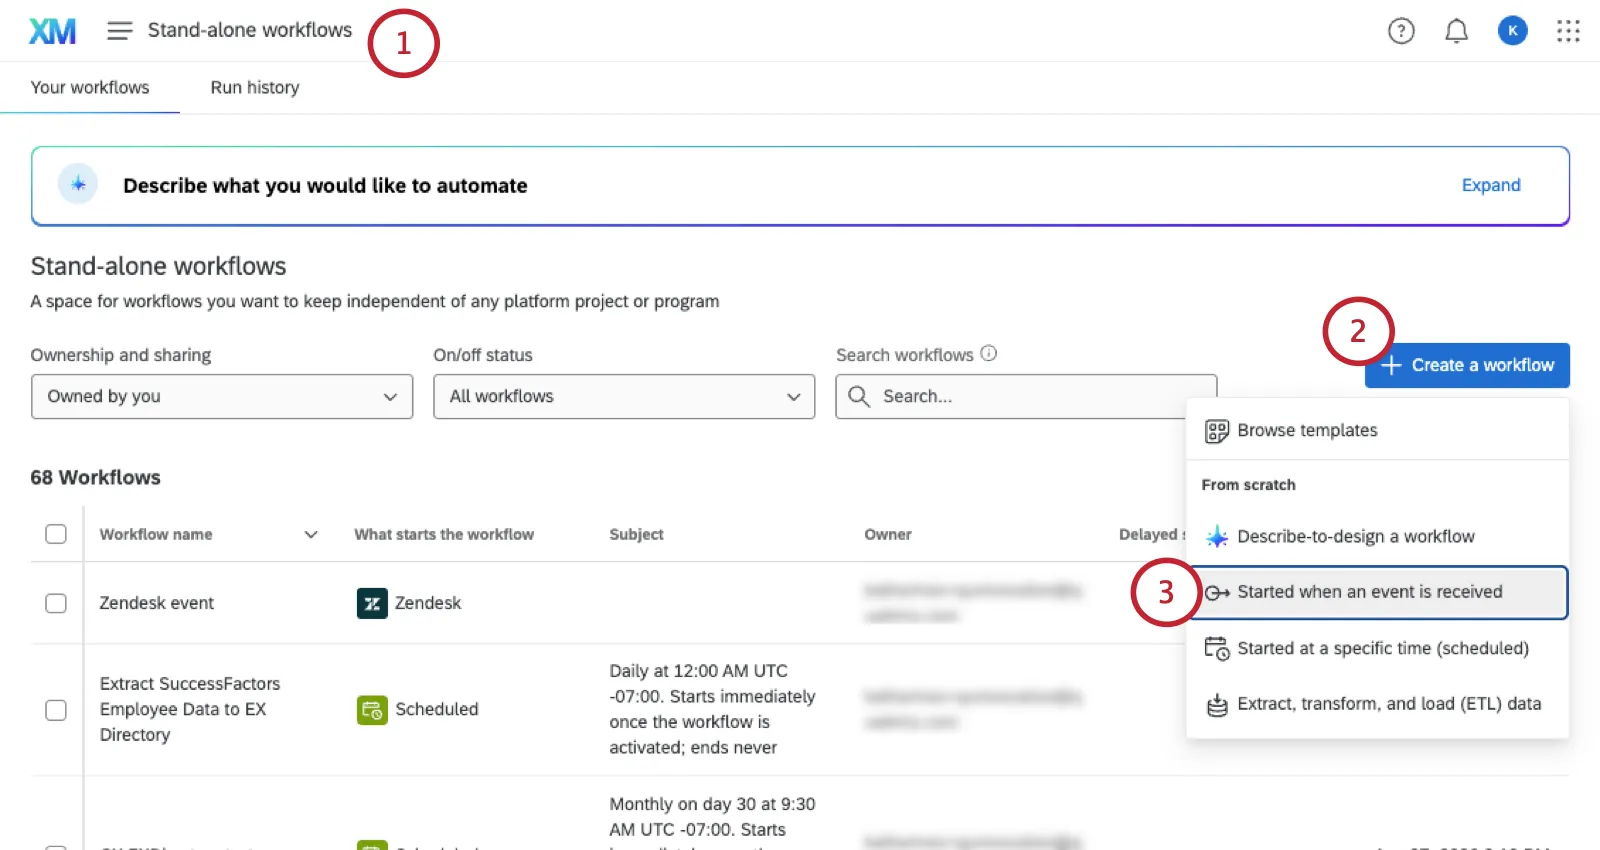
Click Create a workflow.
Select Started when an event is received.
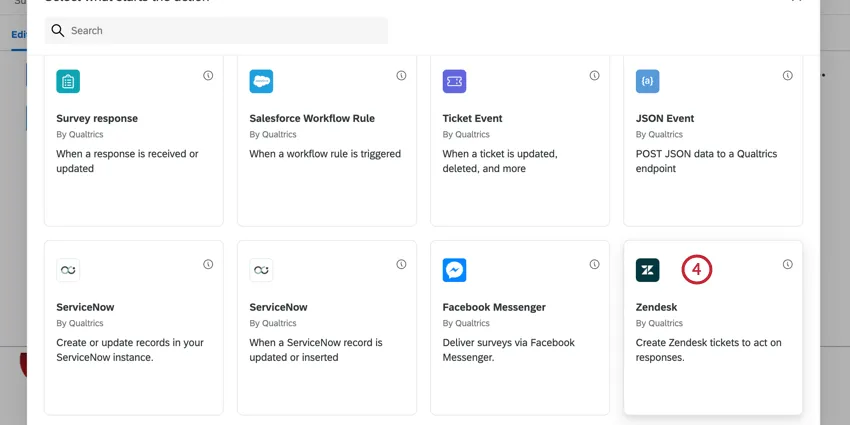
Choose the Zendesk event.
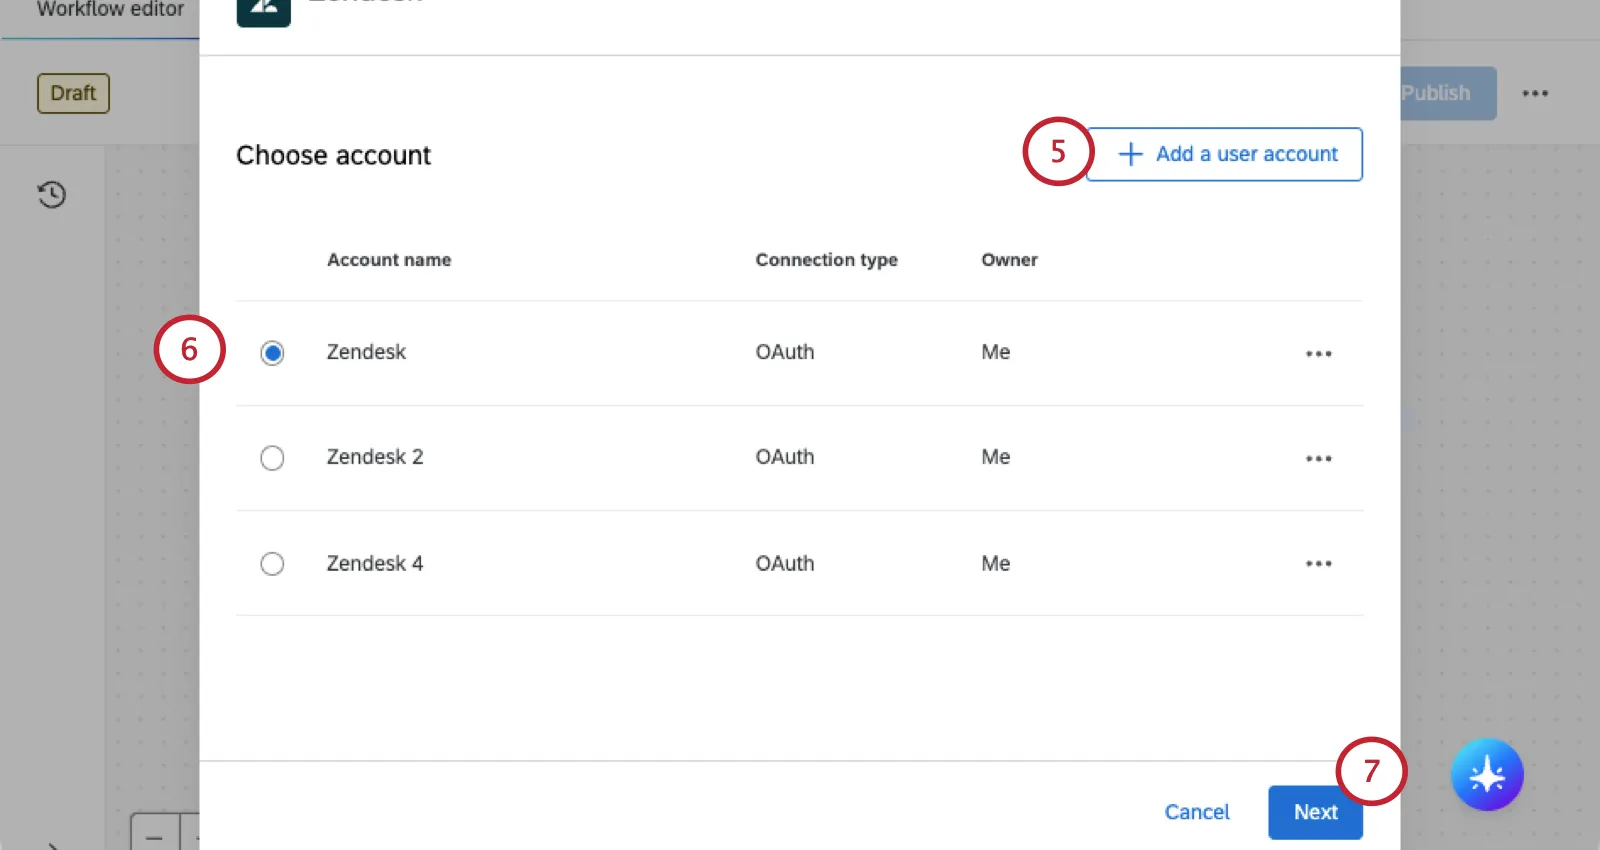
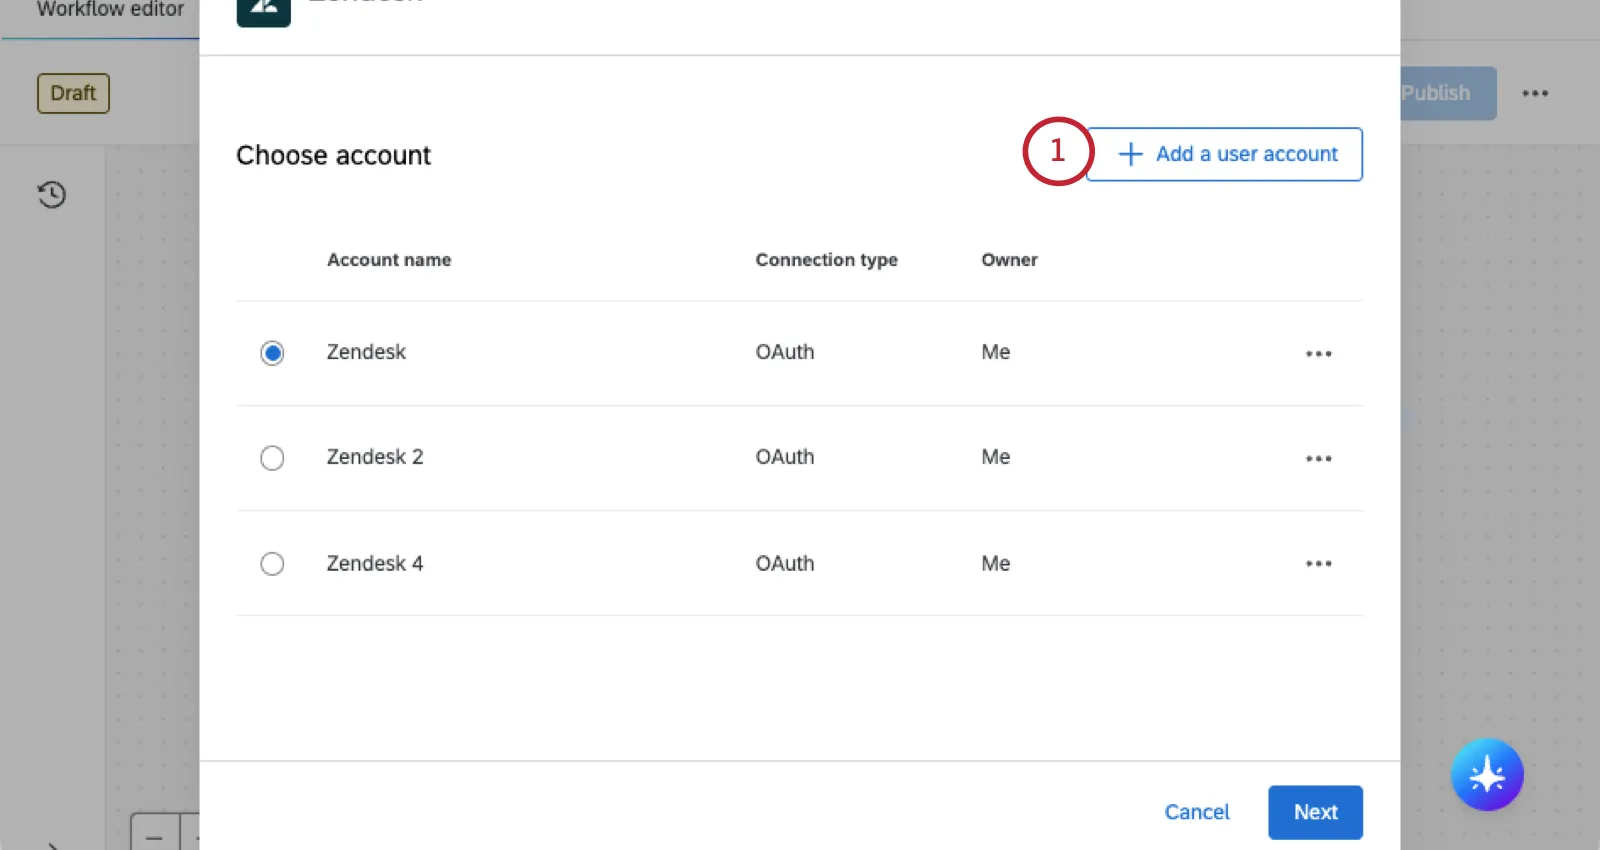
If you need to add a new Zendesk account, click Add user account.
Qtip: You can connect to Zendesk via OAuth. Visit the linked section for step-by-step instructions.
Choose the Zendesk account to use. Your options include any Zendesk accounts you’ve previously connected to Qualtrics in addition to any brandwide accounts added by your Brand Administrator.
Click Next.
Select the fields that will be passed from Zendesk. These fields can be used in conditions and subsequent workflow tasks. You may choose multiple or Select all.
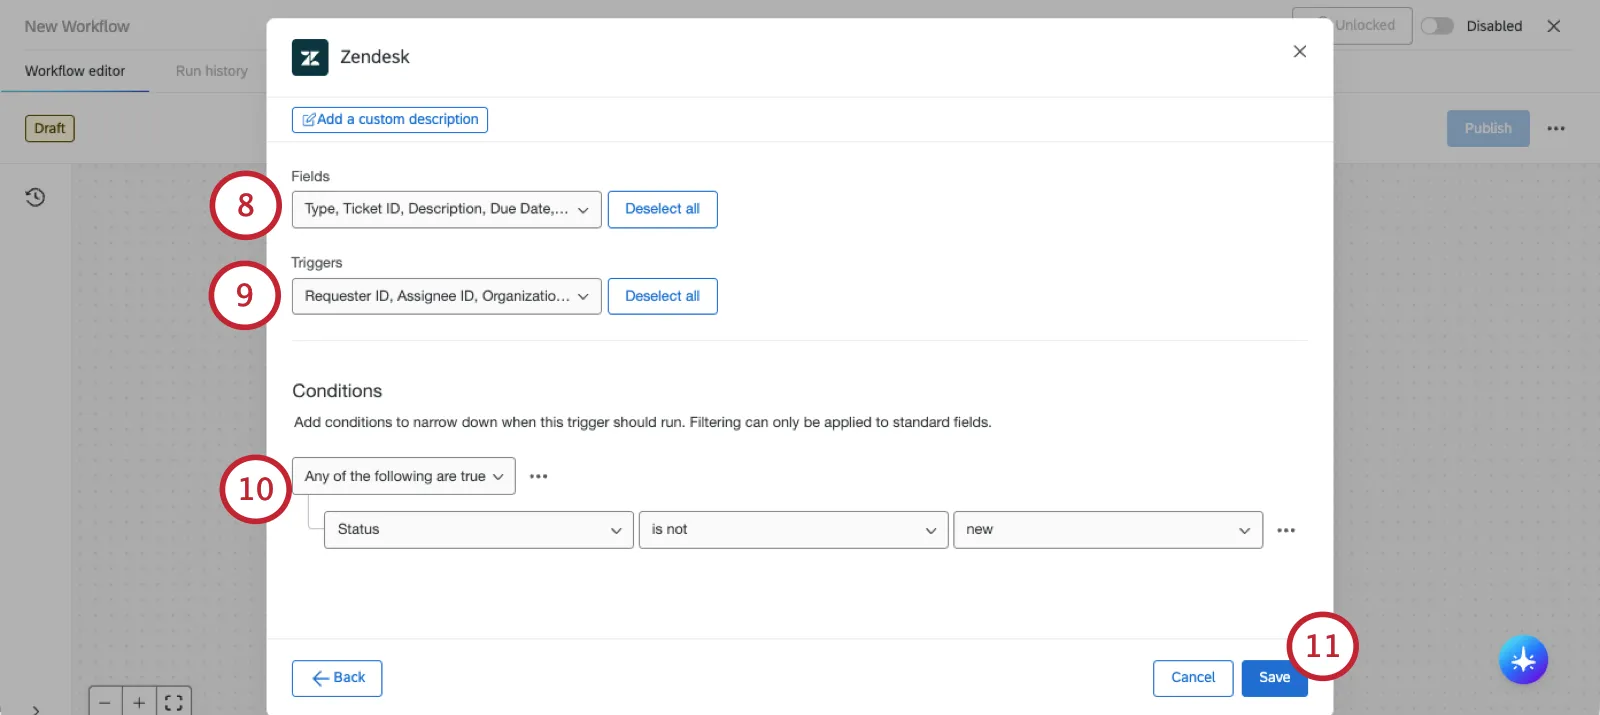
Qtip: You cannot modify the fields that appear here.
Select which triggers will start the workflow. You may choose multiple or even all triggers. Your options include:
- Select All
- Requester ID Change
- Assignee ID Change
- Organization ID Change
- Status Change
- Type Change
- Priority Change
- Group ID Change
If desired, build conditions for your Zendesk event. These conditions determine the criteria in Zendesk for the event to trigger. See Building Zendesk Conditions for more information.
Qtip: These conditions are conditions from Zendesk being set up within the task.
When finished, click Save.
If desired, add conditions to your workflow.
Qtip: These conditions are separate from the conditions you set up in your event. You may base your conditions here on your previous ticket fields that are listed in step 12.
Example: In this example, we have a condition for the ticket field “multiline” is not equal to “no”. This field is a custom field that can’t be used in the event conditions, but can be used in the conditions outside the event.
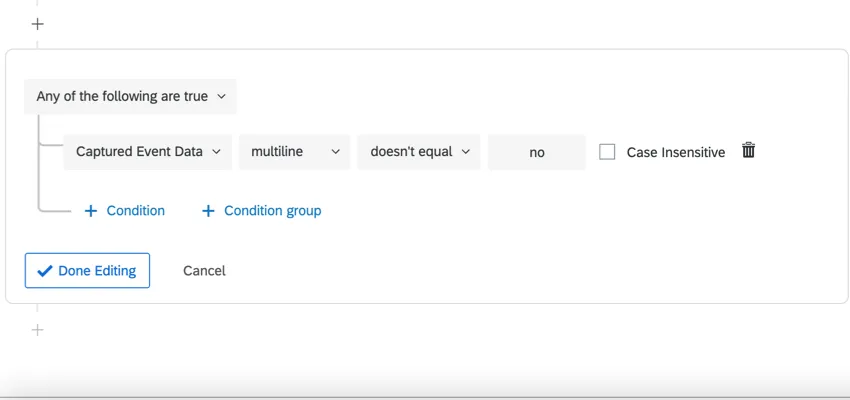

You can now choose the task that happens as a result of the event. See Defining Tasks for more information.
Building Zendesk Conditions
When setting up your Zendesk event, you can set conditions that determine when the event triggers. These conditions are represent conditions within Zendesk.
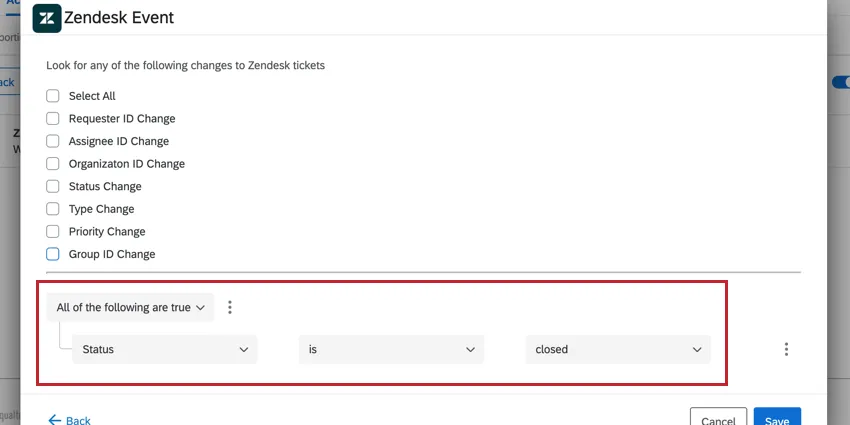
Example: Let’s say your Zendesk event is set up to trigger for ticket status changes. However, you don’t want the event to trigger for every ticket status change; you only want it to trigger when the status is changed to closed. You can set up conditions to trigger when “Status” “is” “closed.”
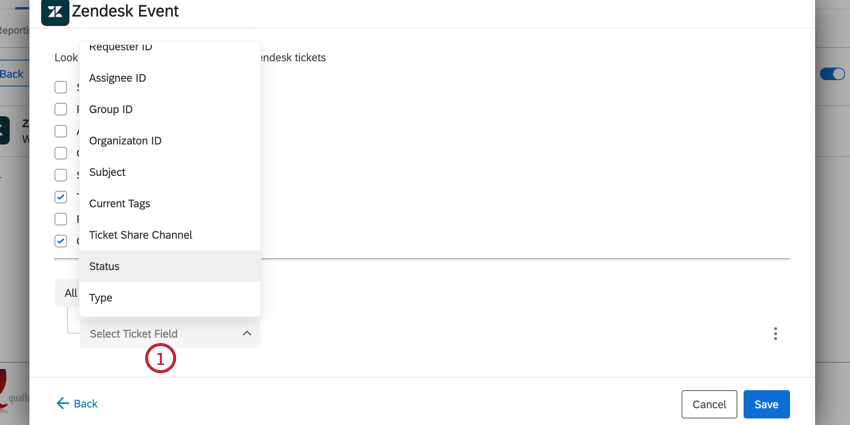
- Requester ID
- Assignee ID
- Group ID
- Organization ID
- Subject
- Current Tags
- Ticket Share Channel
- Status
- Type
- Priority
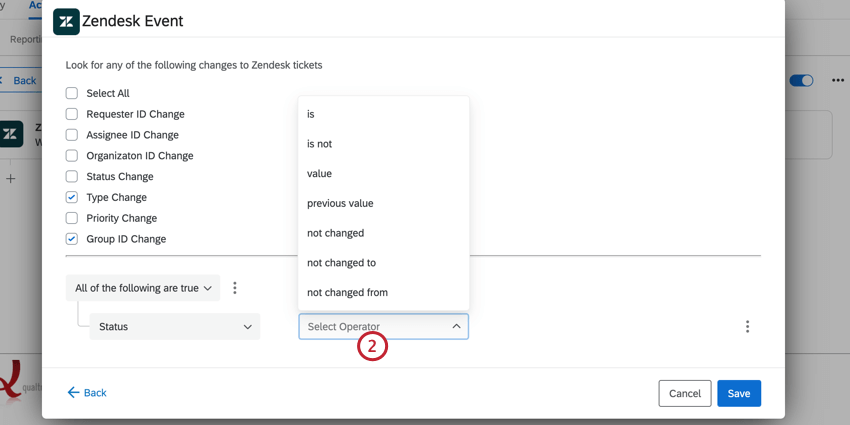
Qtip: The “value” operator corresponds to “changed to” meaning it only looks at the ticket’s new value. For example, if your condition is “status value closed” then the event will trigger if a ticket’s status is changed to closed.
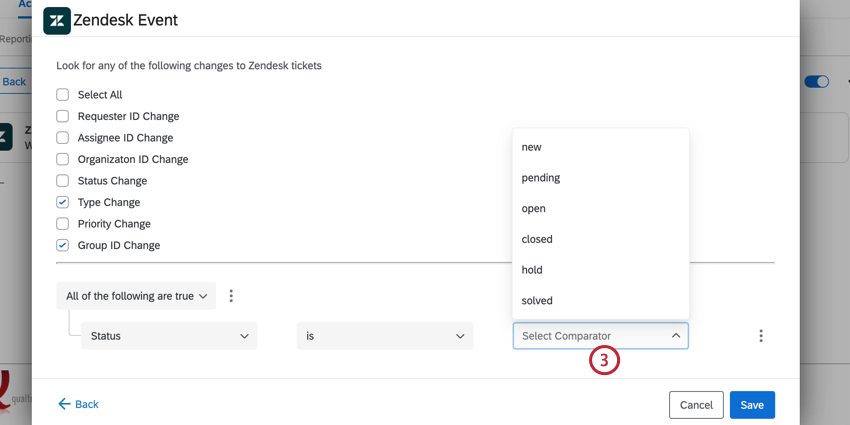
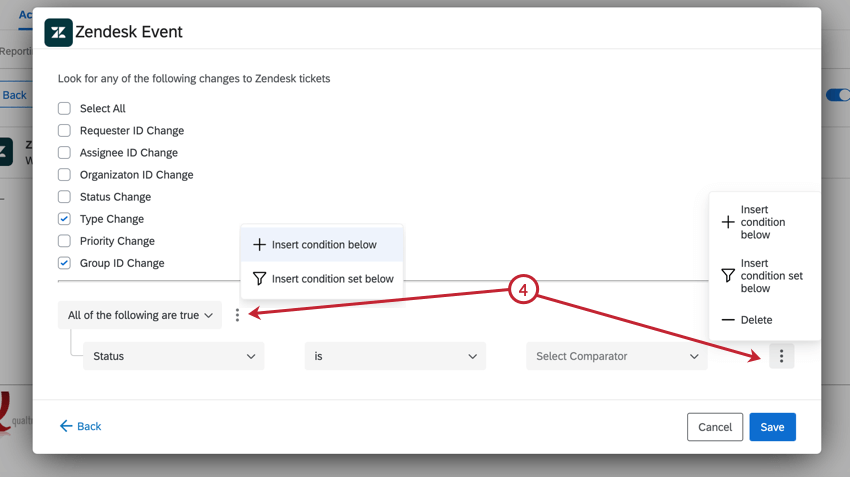
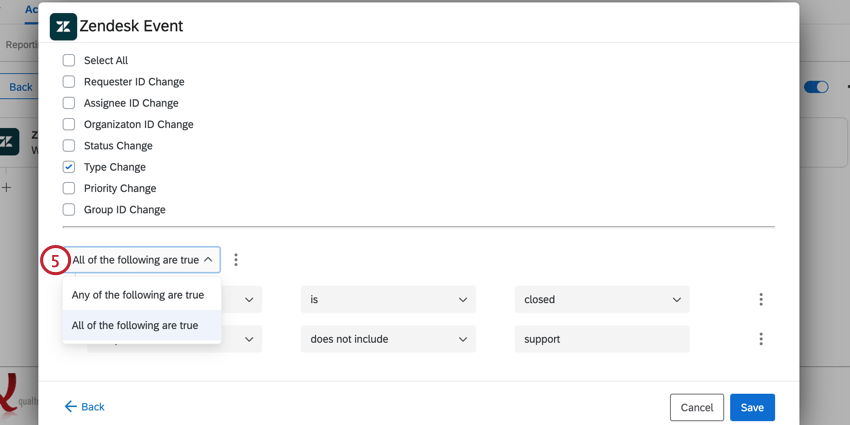
Qtip: If you’ve added condition sets, each condition set will have its own all/any option for you to choose.
Example: Let’s break down the example from earlier. The condition’s ticket field is “Status” since we want to trigger based on the ticket status. Our operator is “is” since we only want tickets with one specific value. Our comparator is “closed” since that’s the status we’re interested in.
Setting up an OAuth Connection
OAuth connections allow you to connect you Qualtrics account to other instanced platforms, such as Zendesk, without directly providing your username and password. This authentication method is fast and easy to use.
Qtip: The steps below show how to add a user account during workflow setup. Brand Admins can also add an account from the Extensions page in Admin.
Click Add a user account.
Name this account. This will only appear internally.
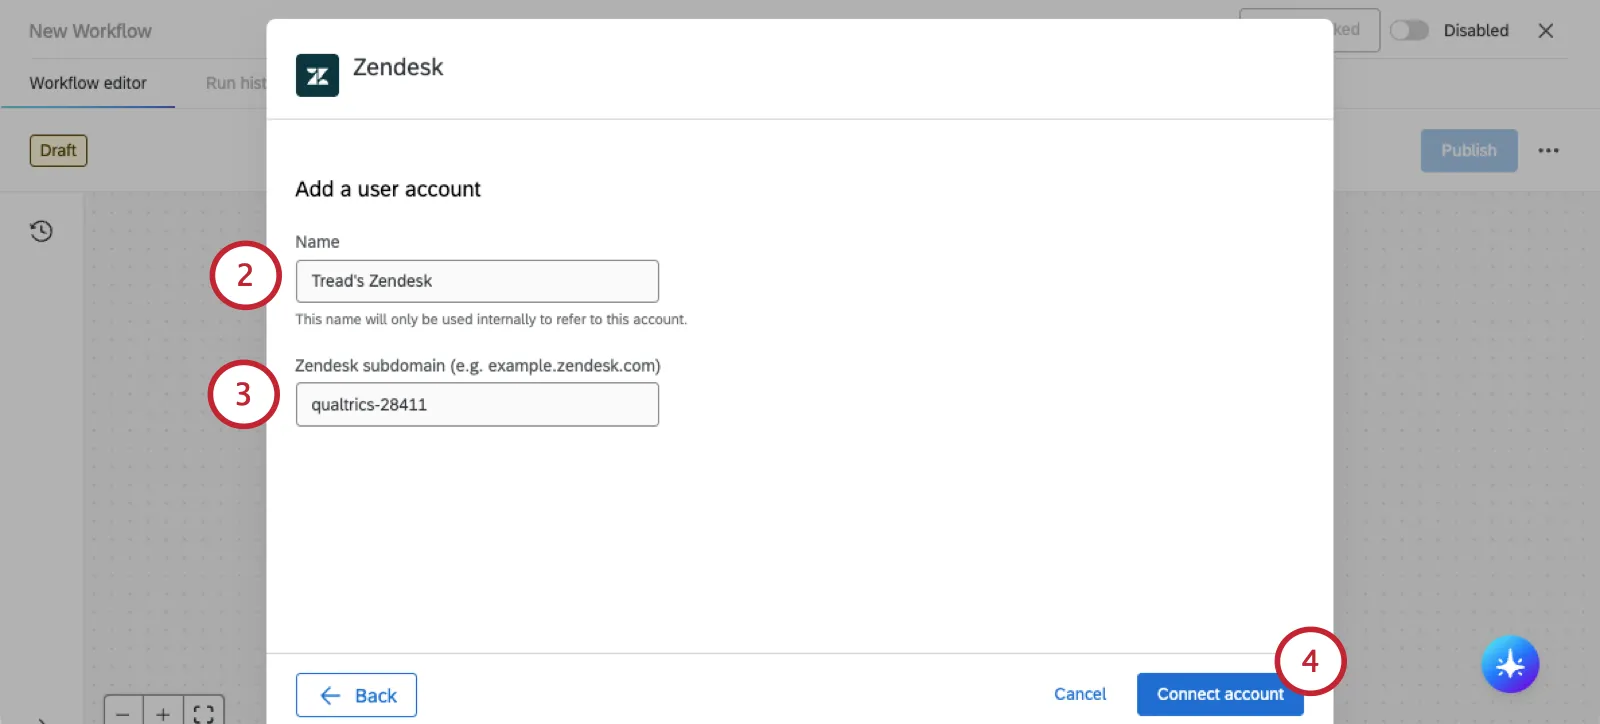
Add your Zendesk subdomain.
Example: If your subdomain is example-domain.zendesk.com, you'd enter example-subdomain.
Click Connect account.
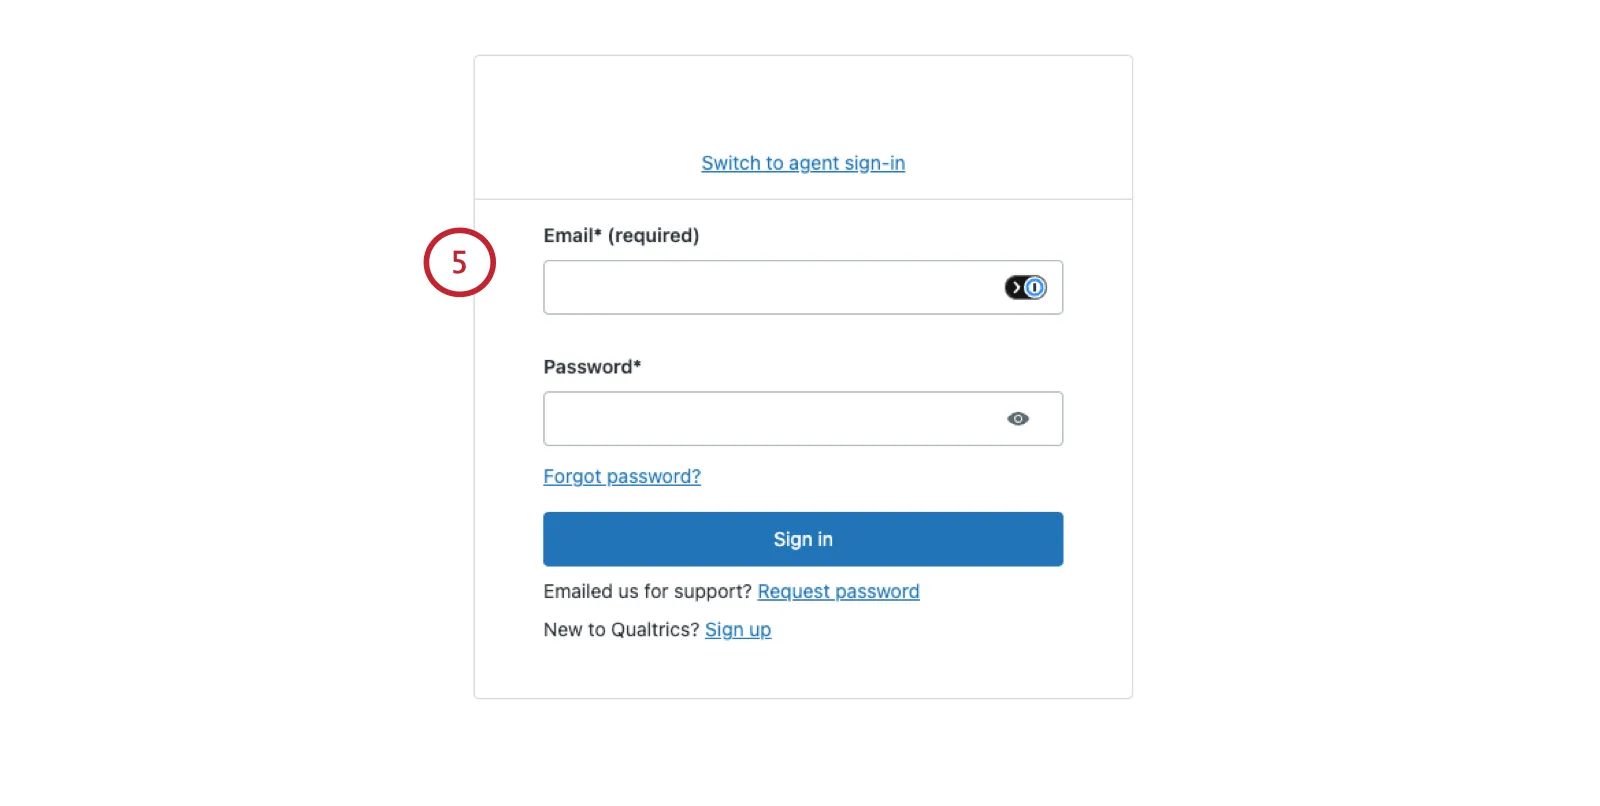
Zendesk will open in a new tab. If you aren't logged in already, sign into your account.
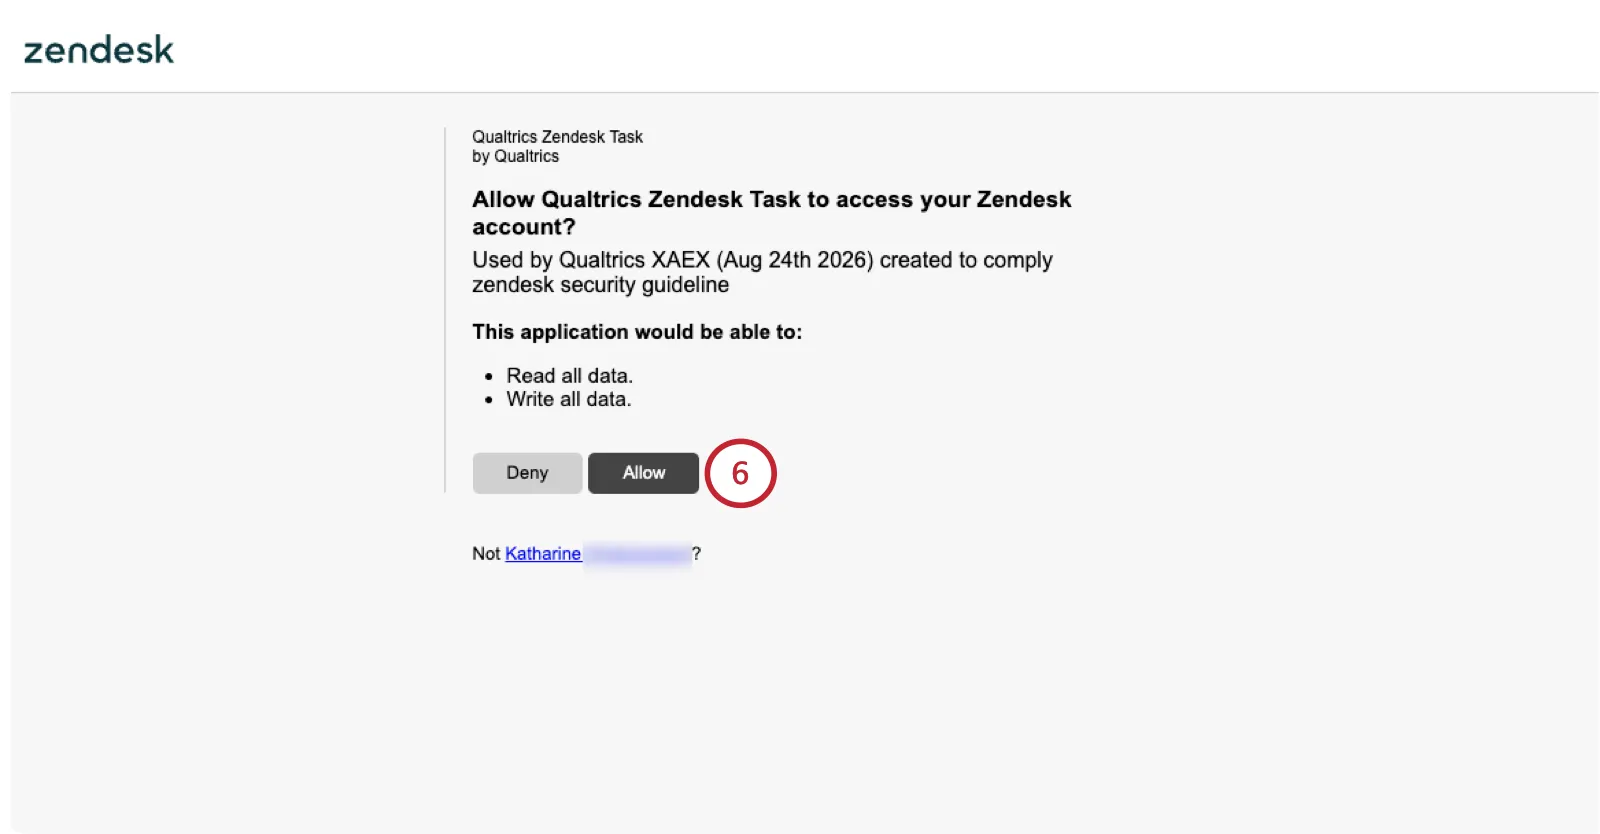
Read the permissions and select Allow.
You now have an account to select.
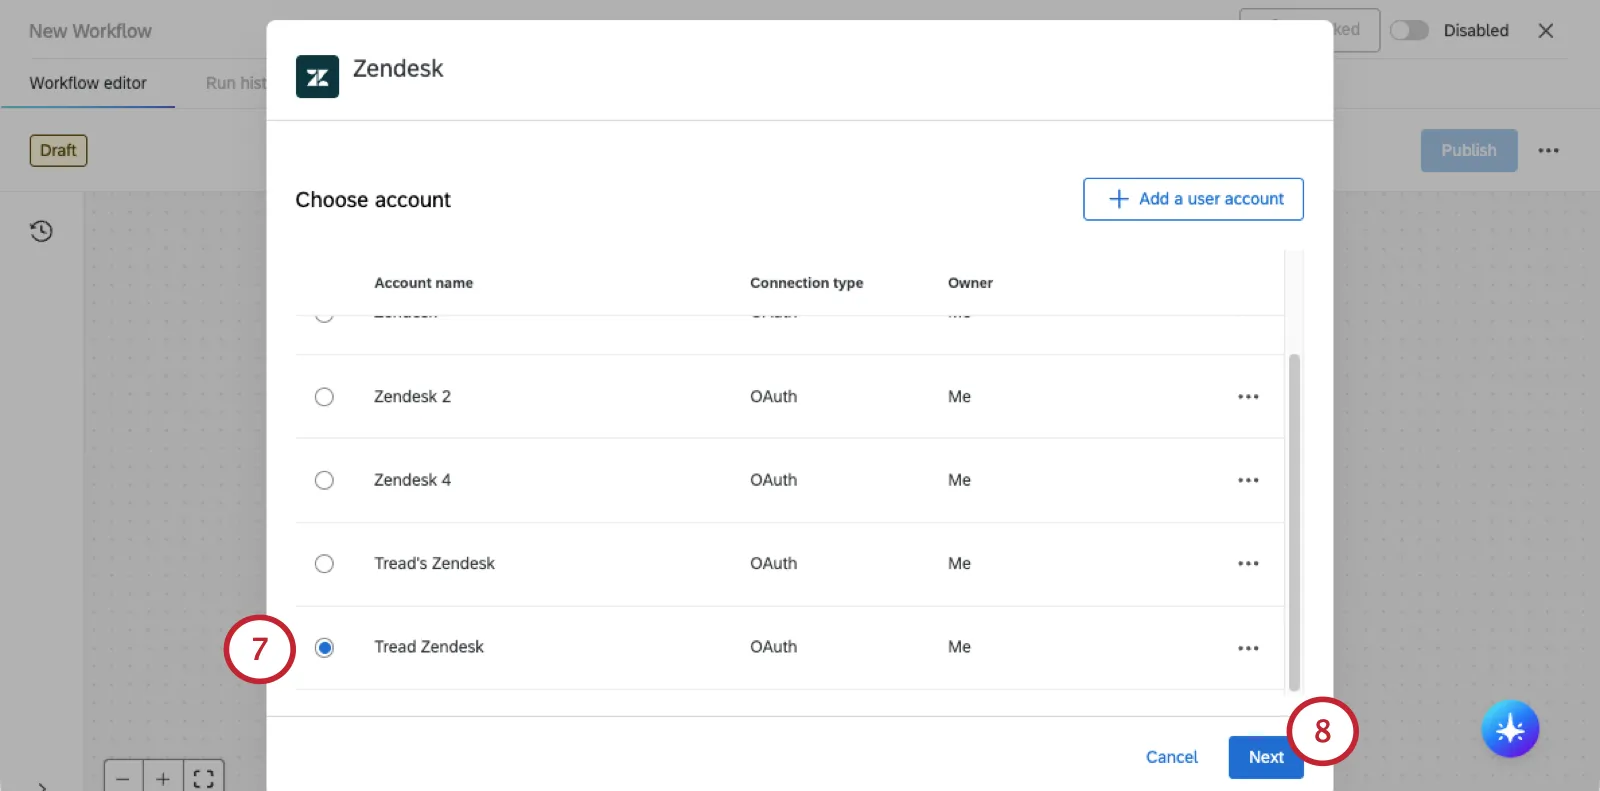
Click Next to continue building your workflow.
Qtip: If you get an error when trying to connect to an existing account, try Refresh account. You will be prompted to log into Zendesk and approve the Qualtrics connection again.

FAQs
Do I have access to all extensions available through the Workflows templates?
Do I have access to all extensions available through the Workflows templates?
Is there a link to all Workflows events and tasks?
Is there a link to all Workflows events and tasks?
What are Workflows templates?
What are Workflows templates?
What are workflows? / Where are actions?
What are workflows? / Where are actions?
There are no changes to workflow functionality as part of this update.
That's great! Thank you for your feedback!
Thank you for your feedback!