
Insert a Hyperlink
What's on this page
About Inserting a Hyperlink
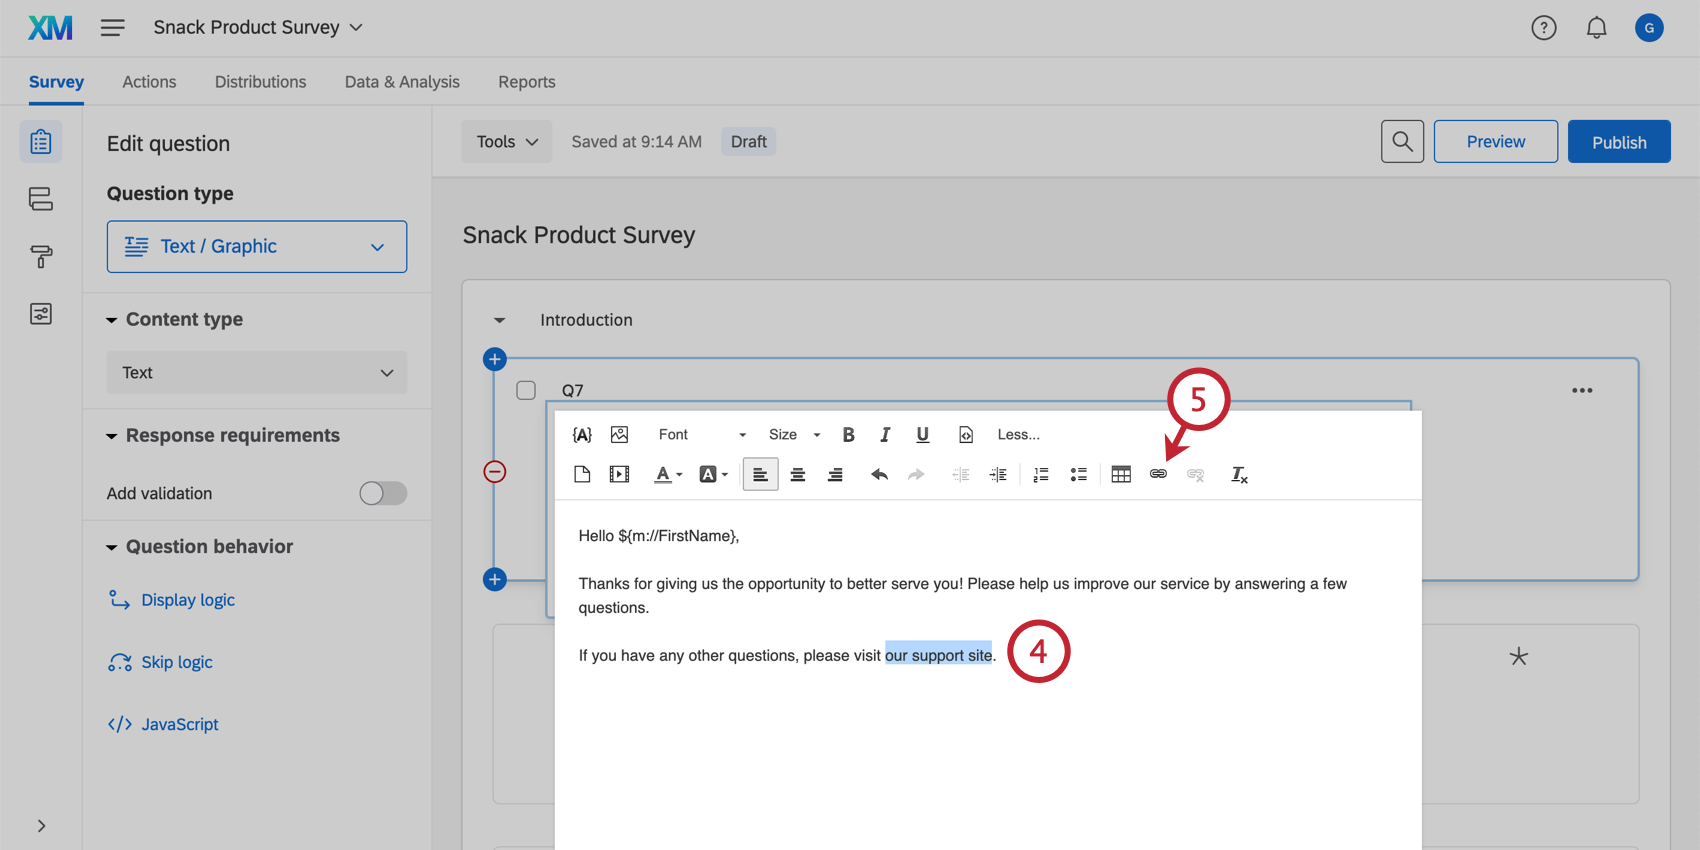
Sometimes you’ll want to provide your respondents with hyperlink to a website or email address. You can use the rich content editor to insert a hyperlink into your survey, email message, and other similar places.
Qtip: The instructions below are for inserting a hyperlink into a question in the Survey tab, but you can insert a hyperlink wherever you have access to the rich content editor (Header/Footer in the Look and feel, emails, etc.).
Qtip: If you are hyperlinking with piped text, then the protocol must be set as <other> for the link to function as expected. For example, if you want to hyperlink the text, “Click here to see your file!” in an email task, you must change the protocol in the link to <other>. For more information, see Passing Information via Query Strings.
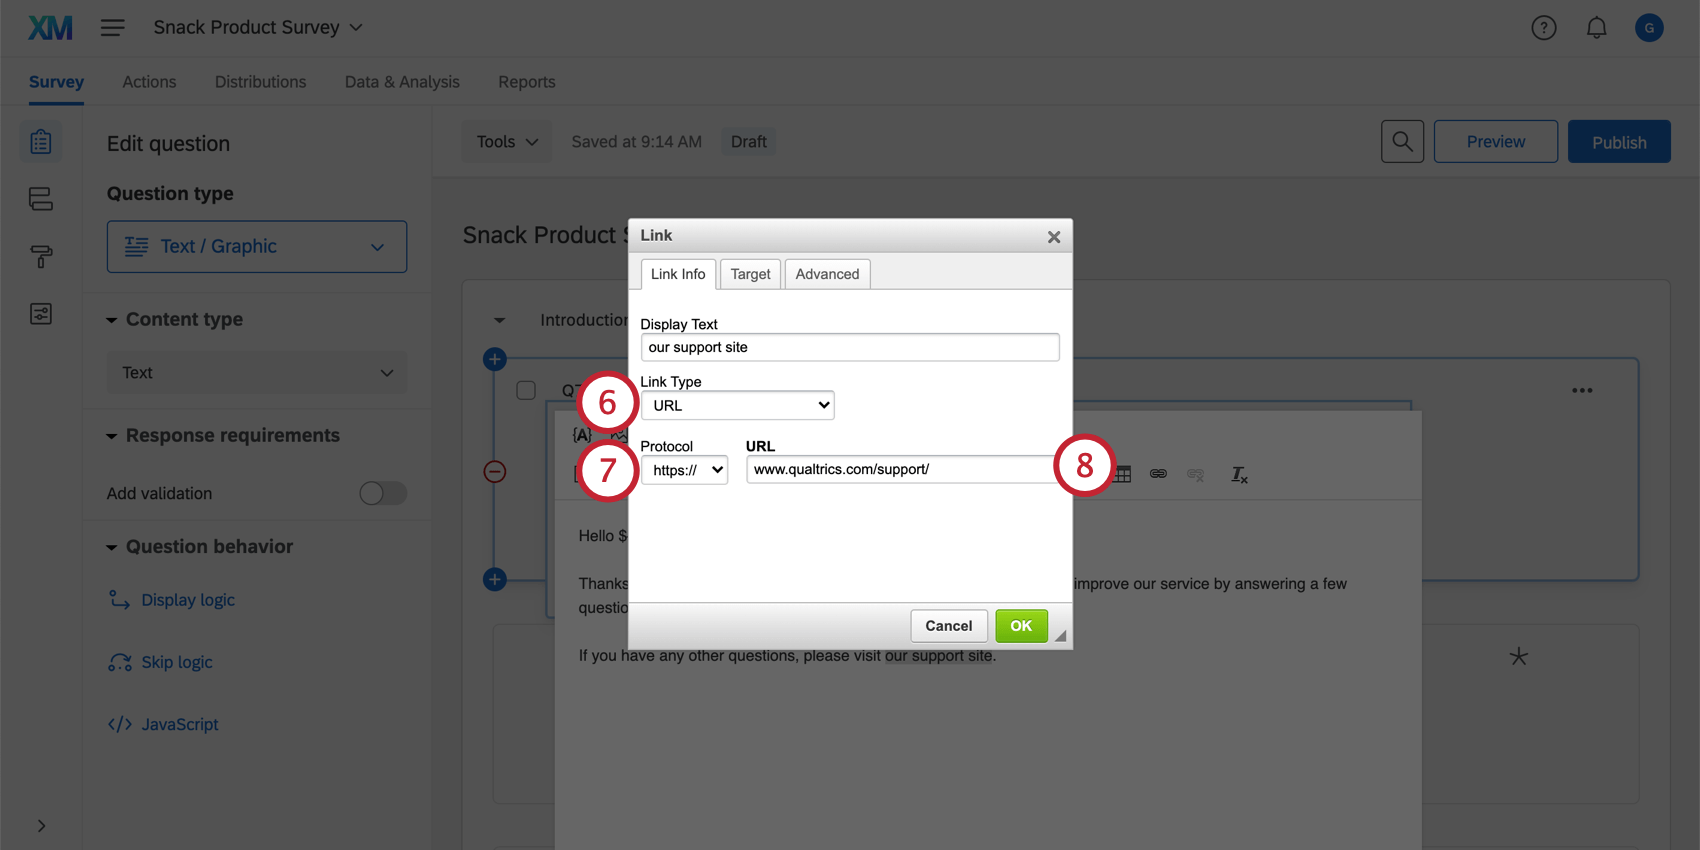
How to Insert a URL Hyperlink
Qtip: To unlink text, you can click the Unlink icon located to the right of the link icon.
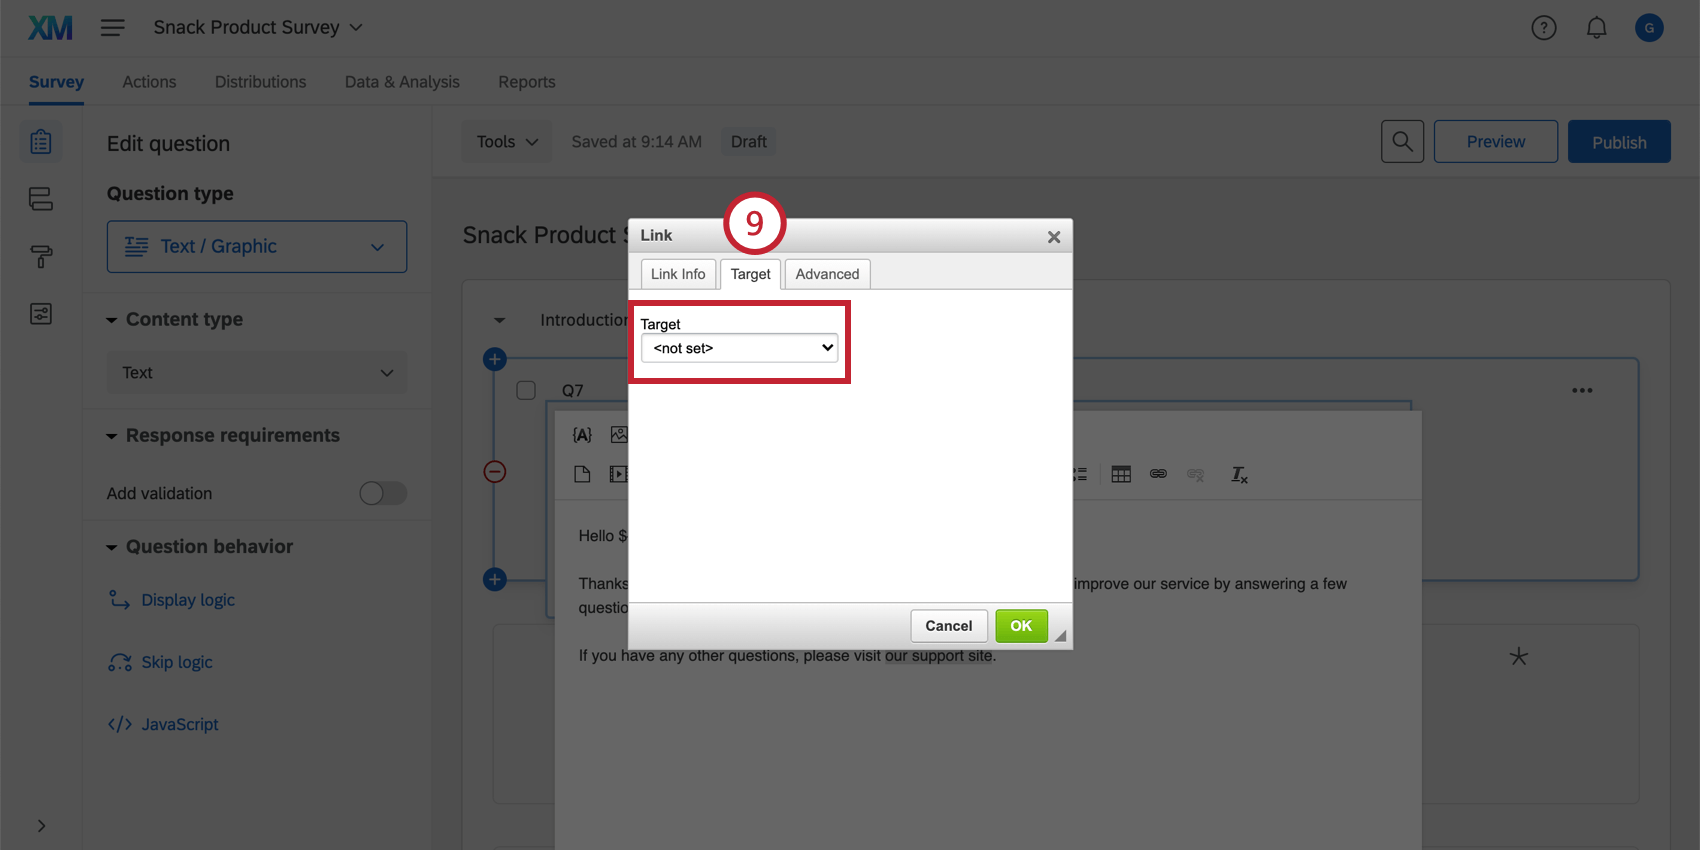
Qtip: One of the most common options is New Window (_blank), which opens the link a different window/tab. The other options provide ways to make the linked page appear in the same window/tab as the survey. You must have the “Allow All HTML Markup” user permission enabled to use this setting.
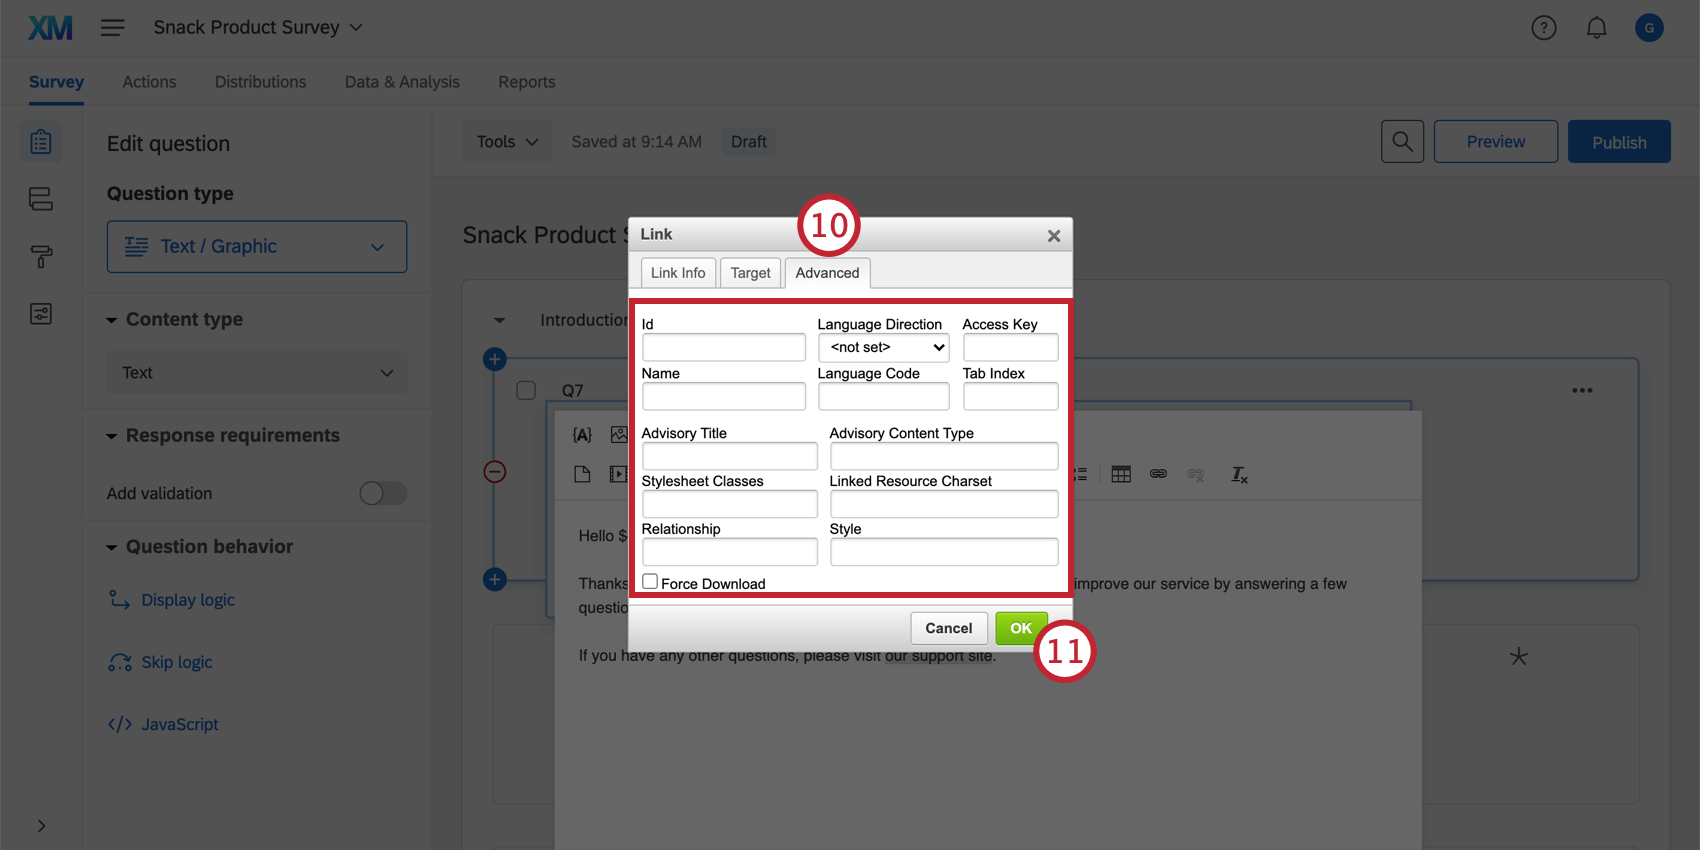
Attention: Custom coding features are provided as-is and may require programming knowledge to implement. Our support team does not offer assistance or consultation on coding these fields. You can always try asking our community of dedicated users instead. If you’d like to know more about our custom coding services, please contact your Qualtrics Account Executive.
- ID: The unique identifier for a specific HTML element. Can be used in CSS and JavaScript.
- Name: An older version of ID. Updated browsers usually do not use this attribute.
- Advisory Title: A short description of the element’s purpose.
- Stylesheet Classes: Non-unique identifiers used in CSS and JavaScript to apply styles to elements.
- Relationship: Describes a type of link and how it relates to the target website.
- Language Direction: Describes if the language is read left to right (LTR) or right to left (RTL). If this is not set, the user agent will decide the text’s direction.
- Language Code: The language of the element. Enter the BCP 47 code for the language.
- Access Key: A hint for a keyboard shortcut for the link if the user has configured the shortcut.
- Tab Index: An integer attribute indicating if the element should participate in keyboard navigation via the tab key.
- Advisory Content: Obsolete in newer browser versions. Provides a hint at the target link’s MIME type which denotes the file format of the link’s target.
- Linked Resource Charset: Obsolete in newer versions and suggested not to be used. Hints at the character’s encoding.
- Style: Contains CSS styling declarations to be applied to the element.
- Force Download: Prompts the user’s browser to download the linked URL instead of navigating to it. The behavior differs between browsers.
Before you go on to distribute your survey, make sure to test your hyperlink by previewing your survey and clicking on the link.
Qtip: If you want to automatically send your respondents to a specific URL after they take your survey, you can use the URL Redirect features in Survey Options or in End of Survey elements.
Linking to a Text Anchor
Text anchors allow you to link to content in the same question. For example, if you have a long disclaimer with various sections in your survey, you can use a text anchor to link to the top of each section—ultimately making it easier for your participants to navigate. Text anchors must be specified in the question in order to use this option.
Attention: Custom coding features are provided as-is and may require programming knowledge to implement. Our support team does not offer assistance or consultation on custom coding. You can always try asking our community of dedicated users instead. If you’d like to know more about our custom coding services, please contact your Qualtrics Account Executive.
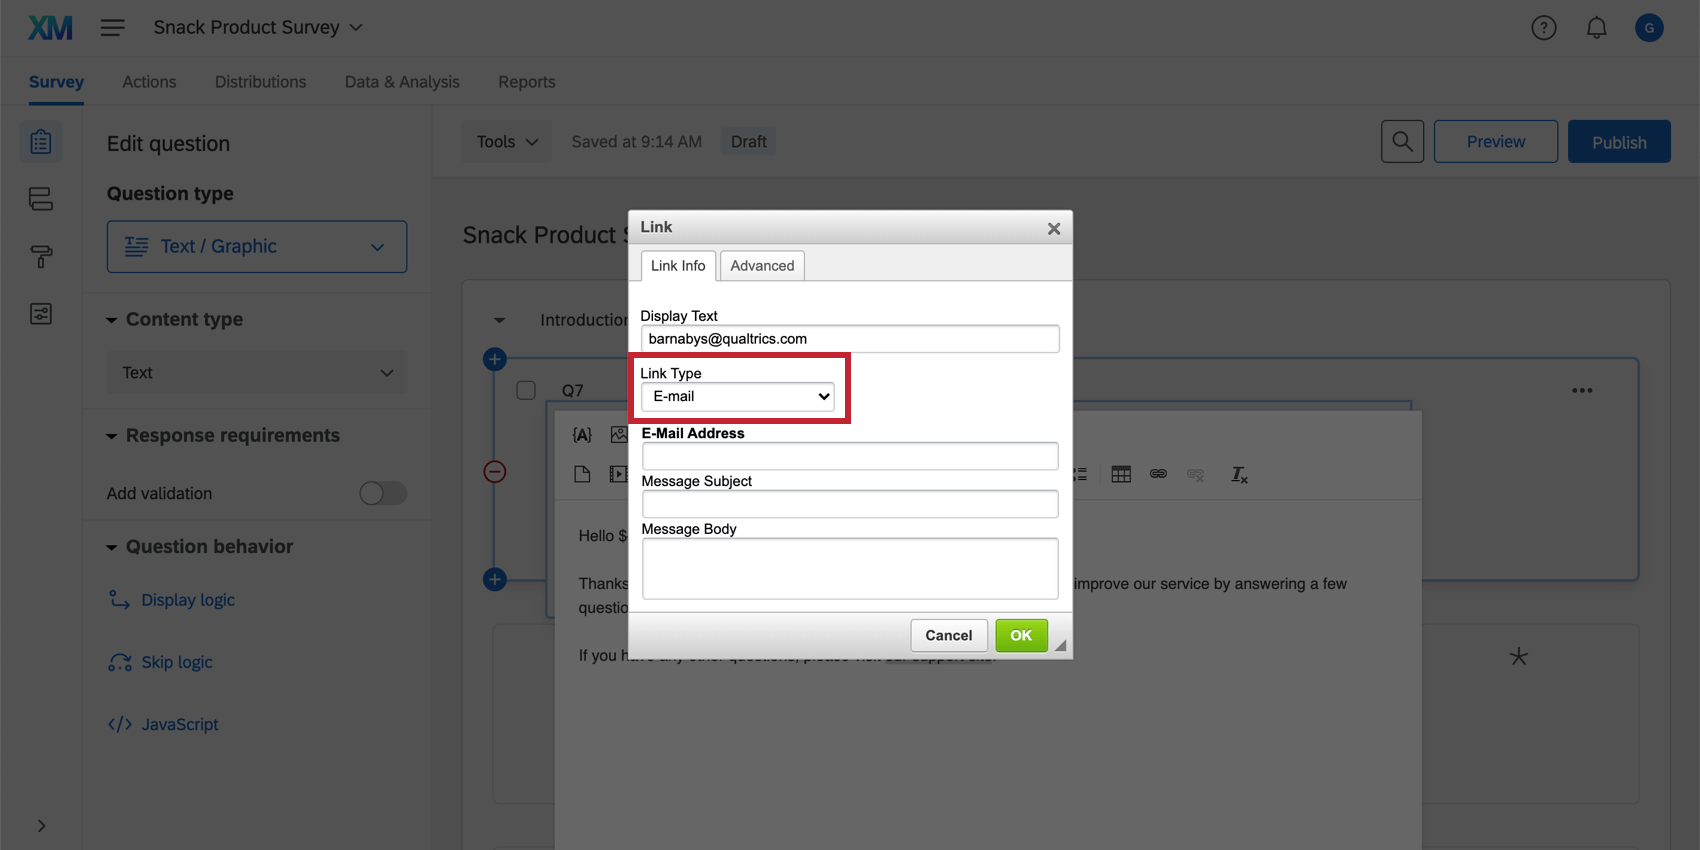
Linking to an Email Address
Linking to an email address allows you to open an email to the specified address in your default email application. Respondents can click on the linked text and easily send an email to the predetermined recipient.
To set this up, choose the E-mail Link Type, as seen below.
The following fields are available to set up:
- E-mail Address: The address for them to send the email to (required).
- Message Subject: Specify a subject line for the email (optional).
- Message Body: Specify text for the email to contain (optional). Respondents can change it before sending.
That's great! Thank you for your feedback!
Thank you for your feedback!