
Settings in Bain Outer Loop Actions
What's on this page
Attention: This feature is only available to users on the new simplified pricing and packaging plans or customers who actively participated in the Preview Program for this feature. For more information, see Qualtrics Public Preview. If you have questions about your Qualtrics pricing and packaging plan, reach out to Account Services.
About Settings
Within Bain Outer Loop Actions projects there are customizations that project admins can control. This includes custom statuses, categories, and topics that can be used within elevations and themes. These can all be created and managed within the Settings tab.
Attention: This tab is only available to users with the project admin role.
Qtip: For an overview of Bain Outer Loop Actions projects, see Bain Outer Loop Actions Overview.
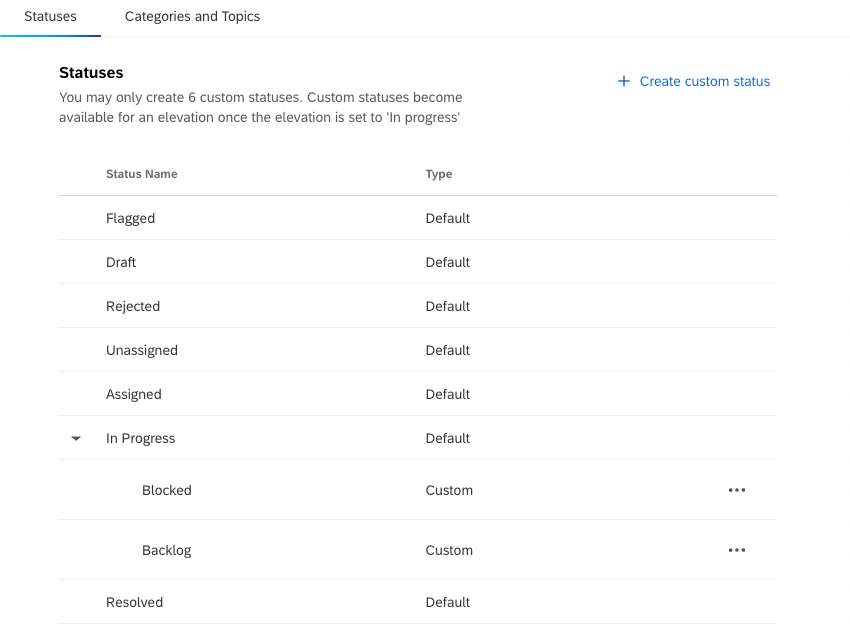
Statuses
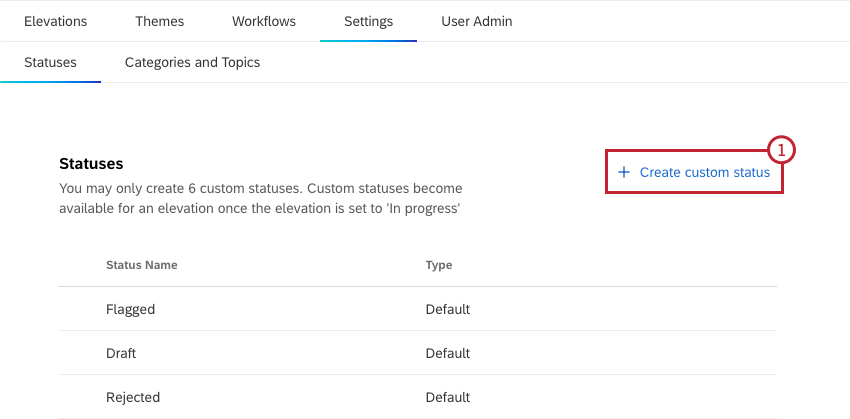
In the Statuses section of the Settings tab, project admins can view a table of all available statuses, including both default statuses and custom statuses. Admins can also create custom statuses. Each project can have up to 6 custom statuses. Any custom statuses created for the project will be nested under “In Progress” within the table.
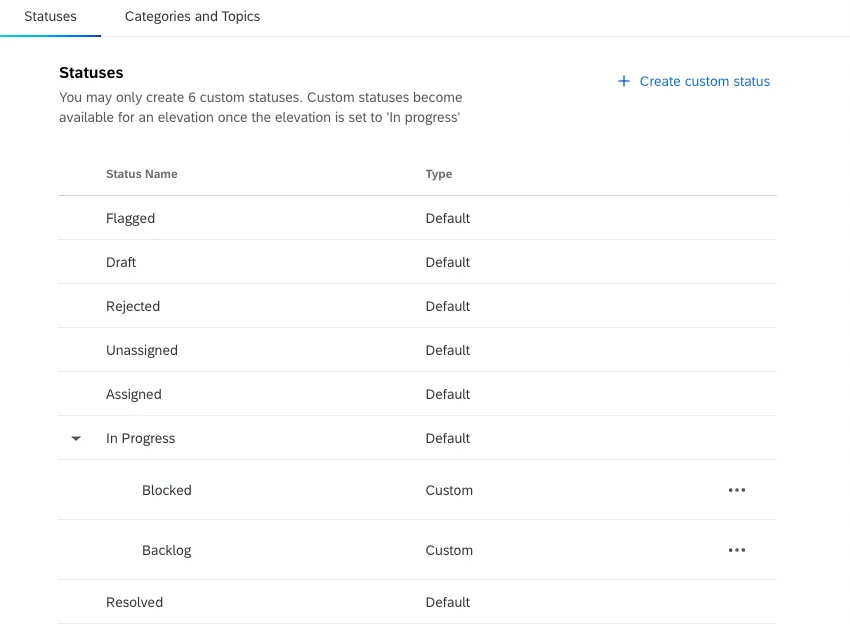
These custom statuses can be used in both elevations and themes.
Attention: Custom statuses are only available for elevations once they are in progress.
Creating a Custom Status
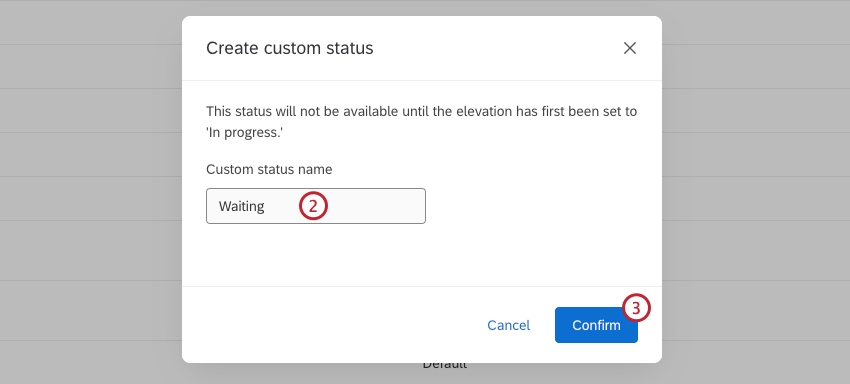
Attention: Each custom status must have a unique name.
Custom Status Options
Click the 3 horizontal dots next to a custom status to open the options menu. You can perform the following actions:
- Update: Change the name of the status.
- Delete: Delete the custom status. Any elevations and themes with the status will be set to “In progress”.
- Move up: Move the custom status up in the custom status list.
- Move down: Move the custom status down in the custom status list.
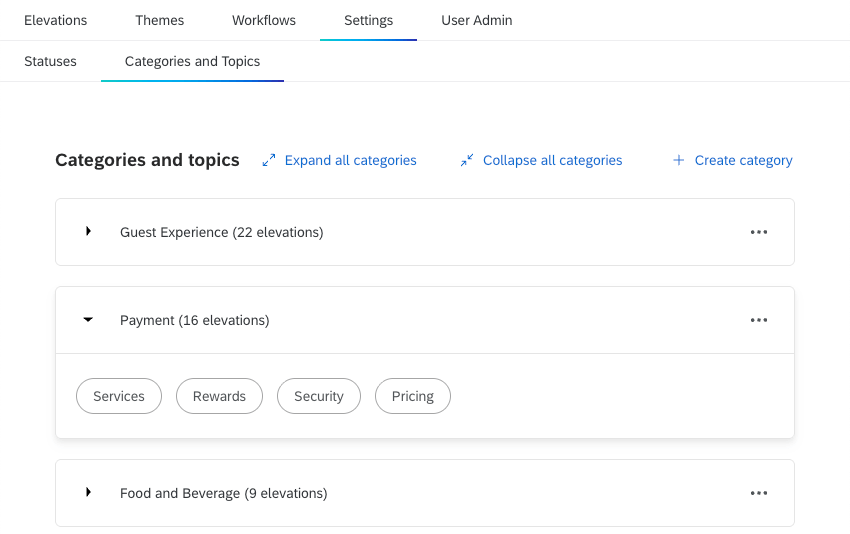
Categories and Topics
In the Categories and Topics section of the Settings tab, project admins can view all the categories and topics that have been created for the project. These categories and topics can be assigned to elevations to help sort them.

Clicking a category will expand it to display the topics within it. Select Expand all categories to expand every category. Select Collapse all categories to collapse all categories.
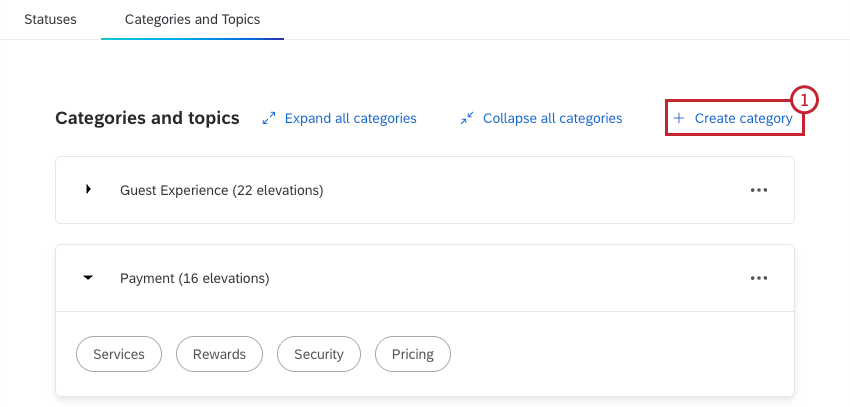
Creating Categories and Topics
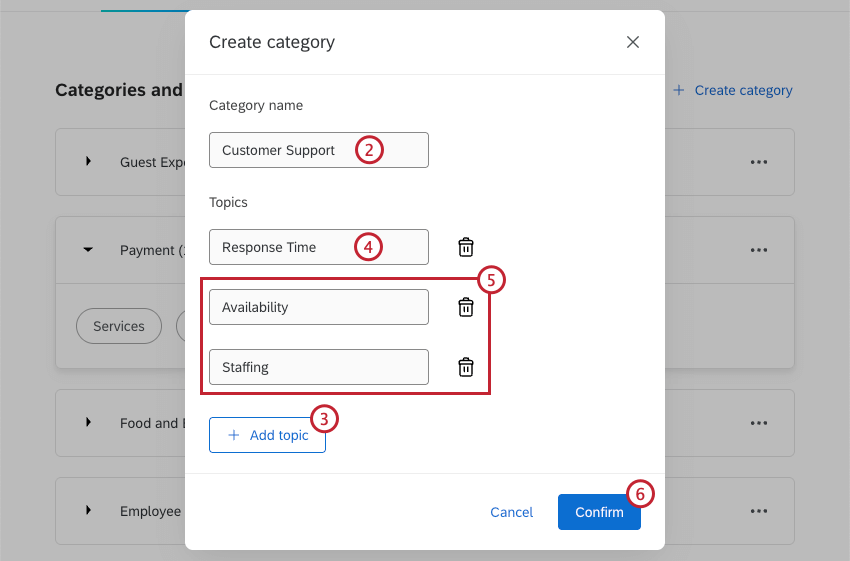
Qtip: You can add up to 20 topics. Each topic must have a unique name.
Category Options
Click the 3 horizontal dots next to a category to open the options menu. You can perform the following actions:
- Manage category and topics: Edit the category and topic names, add additional topics, or delete topics. This will update all elevations that have this category and/or topic assigned.
- Delete category: Delete the category. This will delete all associated topics and remove them from all elevations.
That's great! Thank you for your feedback!
Thank you for your feedback!