
Ticket Workflows
What's on this page
About Ticket Workflows
Ticket workflows provide a means for escalating tickets in a timely and efficient manner. Make sure no ticket is neglected by ensuring tickets of a certain age are either reassigned, given a new status, or emailed to appropriate parties.
Not only can you reassign tickets untouched since their creation, but you can reassign those being neglected by their owner. The focus on customer attention makes this feature ideal for any close-the-loop program.
The Ticket Workflows described in this article have nothing to do with the Workflows (xFlow) feature, Ticket Tasks, or Update Ticket Tasks.
Qtip: Only Brand Administrators and users with the permission Qualtrics Tickets Admin enabled can edit and create ticket workflows.
Qtip: There is a limit of 50 ticket workflows per brand.
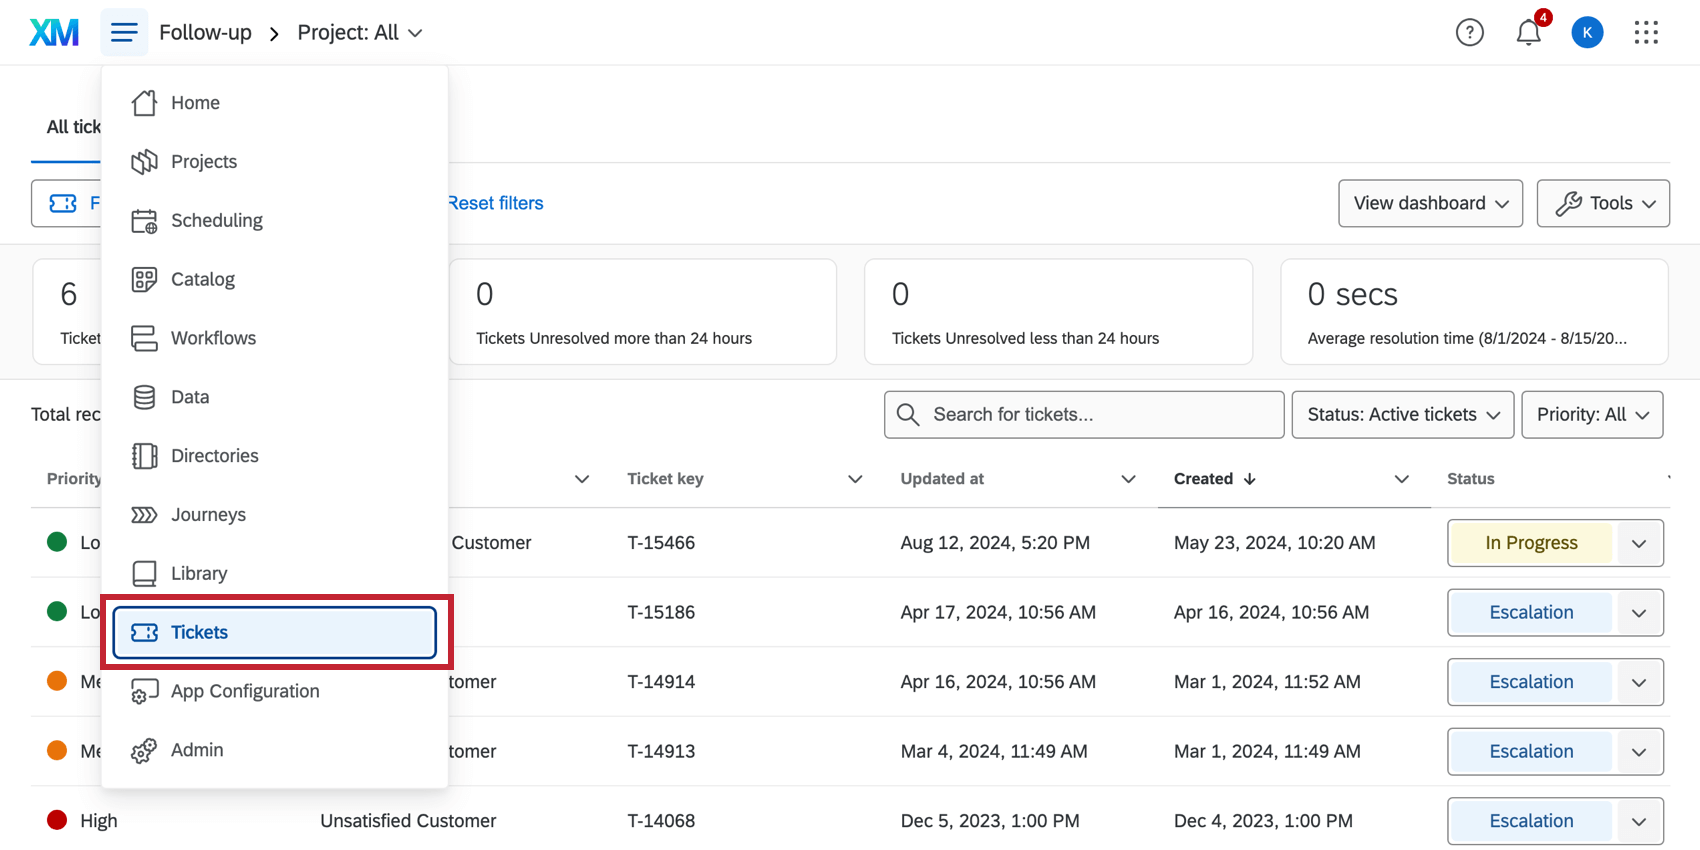
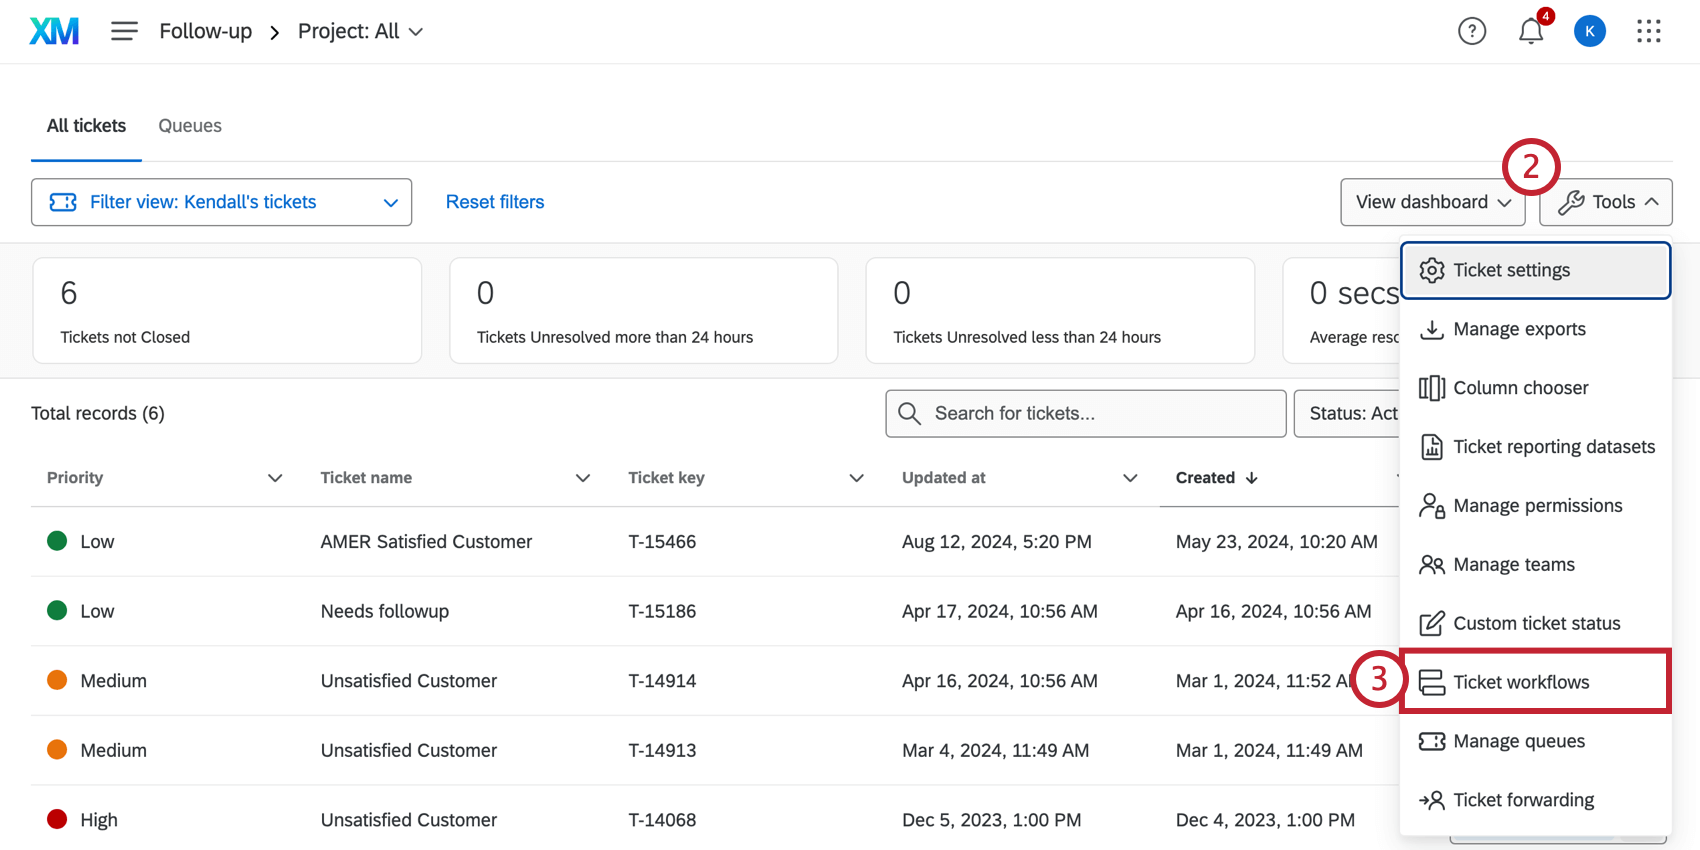
Creating Ticket Workflows
Attention: The only tickets included in each ticket workflow are those that match the conditions set in the workflow, and those that were created or updated after the ticket workflow was created. This means ticket workflows are not retroactive.
Ticket workflows do not run on any tickets that have been closed. You can specify if you only want them to run for tickets set to in progress, open, or a custom status.
The same ticket workflow won’t execute more than once on the same ticket. More than one ticket workflow can be applied to each ticket. Ticket workflows are not project-specific unless specified in your conditions.

Qtip: If you choose to escalate the ticket based on when it is updated, the workflow will not run when the ticket is first created. It will only run after existing tickets are updated.
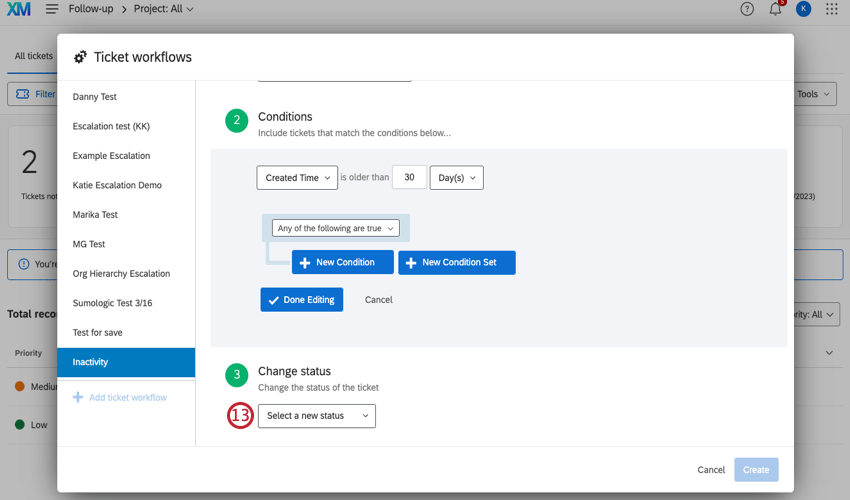
Qtip: This is an exact amount of time. If you specify 30 days, tickets under or over 30 days old will not be included. In the above example, the ticket workflow will go into affect 30 days after an eligible ticket is created.
Qtip: This condition is only included for Change Status and Re-Assign Ticket actions. If you have chosen Schedule Email, you will not have an age condition to set.
- Status: Specify if you only want the ticket workflow to apply tickets set as In Progress, Open, or a custom status. Closed tickets are not affected by ticket workflows.
- Priority: Specify that only tickets of a certain priority will be affected by a ticket workflow. For example, maybe you want high priority tickets reassigned after 3 days, but low priority tickets to only be reassigned if they’ve waited 10 days.
- Project: Only tickets connected to the selected survey project will have a ticket workflow applied. Qtip: Only active projects can be selected from the dropdown.

- Owner/Team: Only tickets belonging to a certain person or team will have a ticket workflow applied.
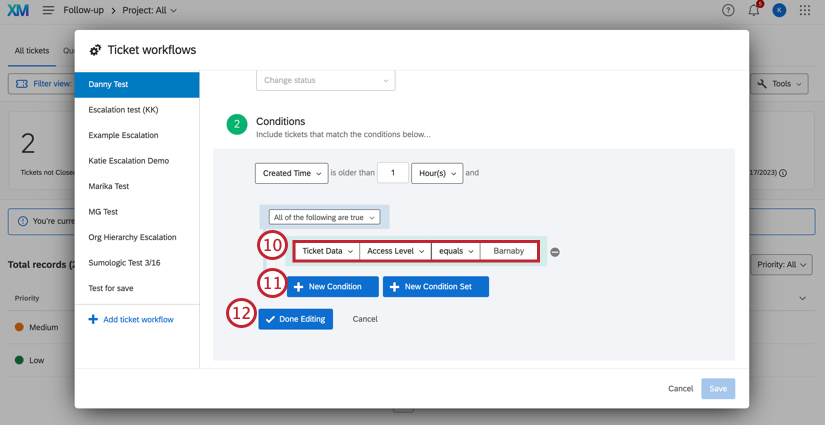
- Ticket Data: Only tickets with certain ticket data values will have a ticket workflow applied. You may use any ticket data, including those that have special characters in their values or names. Qtip: When using ticket data as a condition or a value in the ticket Workflow, make sure that ticket data is not hidden. See the Tickets Task page for more on hiding and displaying ticket data.
- Created Time: This condition is available under the Schedule Email action, only. It refers to the length of time since the ticket was created.
- Last Updated Time: This condition is available under the Schedule Email action, only. It refers to the length of time since the ticket was last updated. Qtip: For a given condition (row), the condition will be valid if ANY of the values selected match a ticket.
Qtip: You can nest and combine statements to create complex conditions under which tickets are included in the ticket workflow. See New Conditions and Condition Sets, All vs. Any, and Nesting Logic for more information.
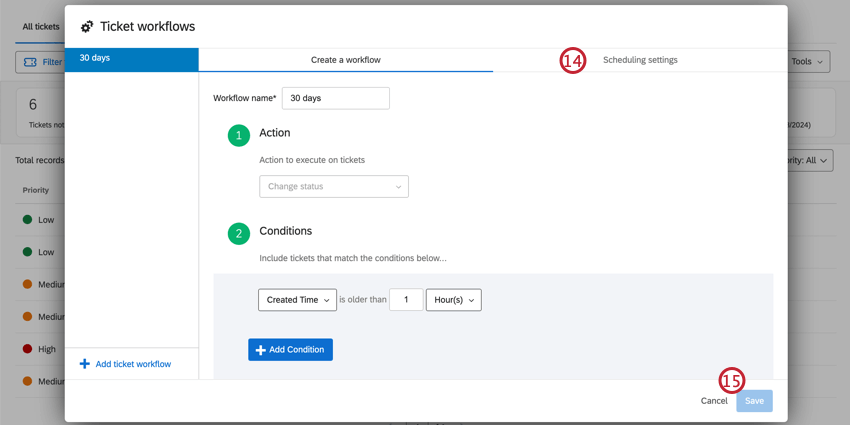
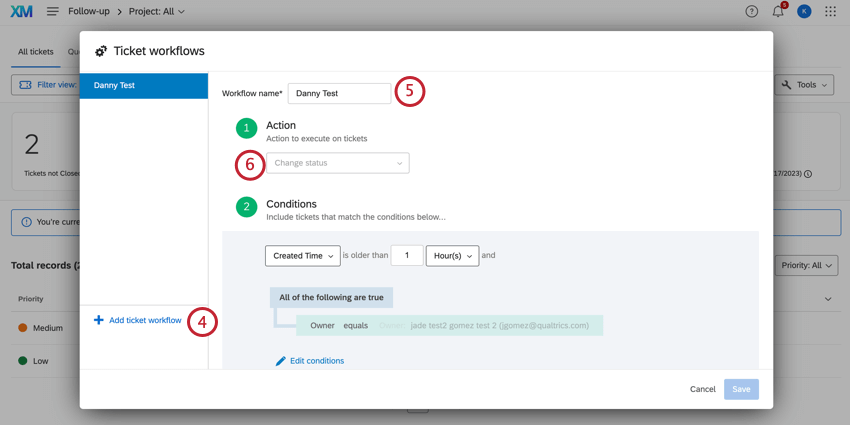
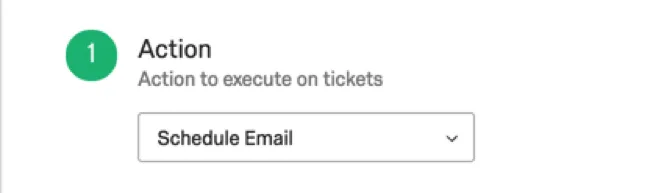
Workflow Action
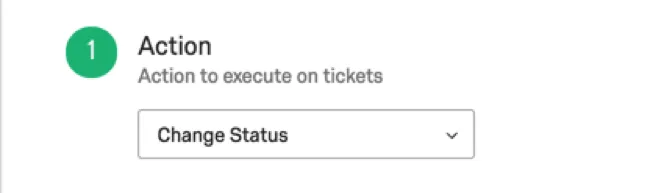
In the Action step of a ticket workflow, you determine what will happen to tickets sent through this ticket workflow. You can decide whether tickets are reassigned to another user when the conditions are met, if they receive a status change, or if an email is sent.
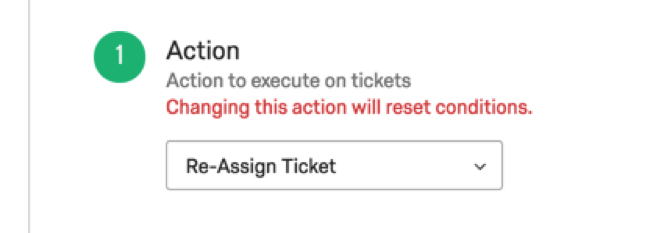
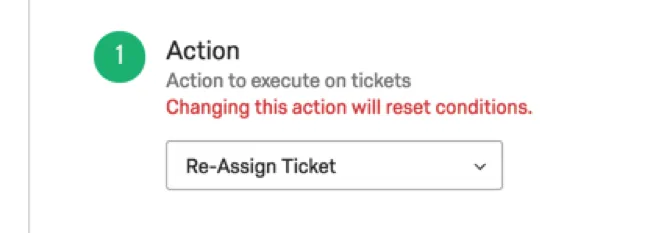
Re-Assign Ticket
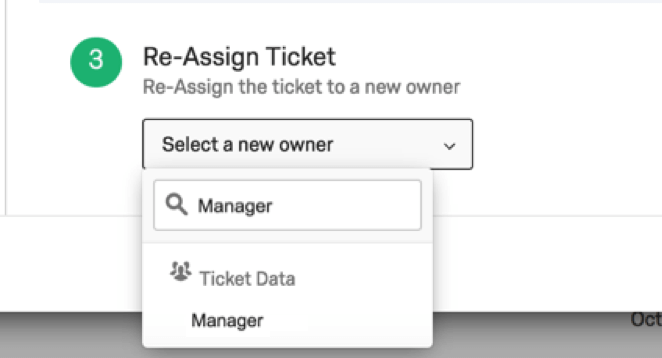
If you chose to reassign the ticket, you will have to decide who takes it. You must select a specific person or a ticket data field that contains the Qualtrics username of the person you would like to escalate to.
When using ticket data to reassign ticket owners, type the name of the ticket data in the field, and it will appear as would a name or team. You will only be able to select ticket data that appears on at least one existing ticket. The value of the ticket data must be the username of the Qualtrics user you want to re-assign to, which is frequently but not always the email address.

If you have hierarchies enabled on your brand, you can also escalate a ticket to the parent or grandparent units of your organization’s hierarchy. See Ticket Escalation Using Hierarchies for more details.
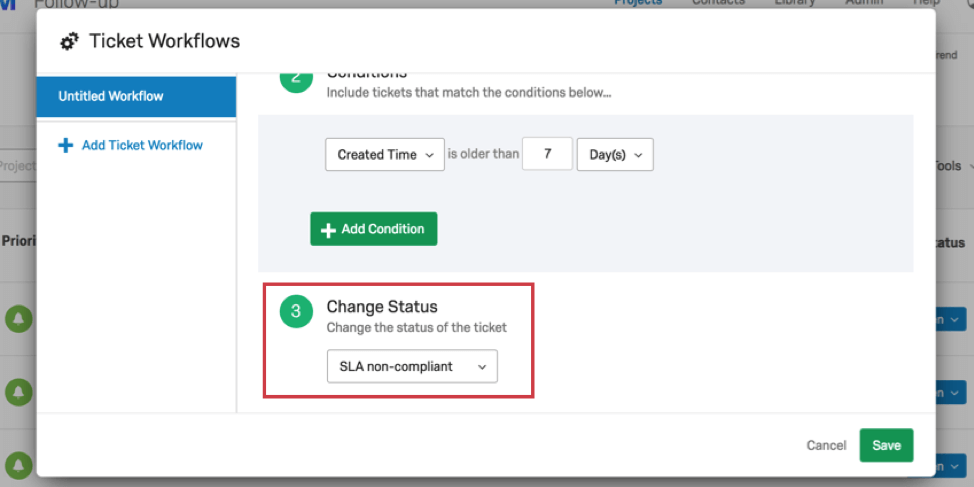
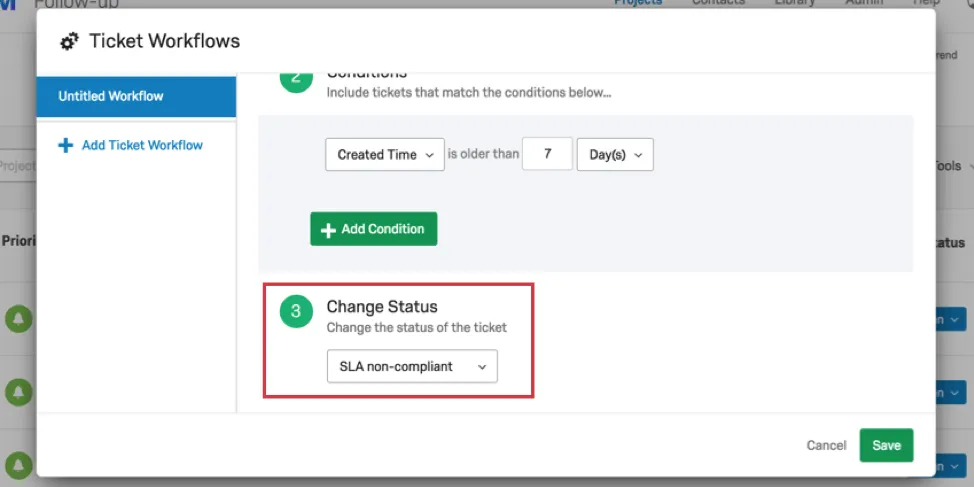
Change Status
If you chose to change the status, you will have to select the status you want the ticket to change to.

Qtip: If you have customized your ticket statuses, the Re-Assign Ticket action will override the Ticket statuses can move backward option. Even if this option is disabled, ticket workflows can always move backwards.
Schedule Email
Schedule Email is exactly what it sounds like; when this action is selected, you can schedule an email to go out containing tickets that meet the defined conditions.
See the Ticket Reminders support page for more information on how to set this up.
Scheduling Settings
Use the scheduling settings to customize which days count towards the length of time set in the conditions. This is helpful if you only want to count business days or if you want to exclude public holidays.
Best practice is to switch the time zone to one that matches your ticket owners (the people actioning tickets), to accurately calculate working and non-working days.
Attention: Scheduling settings do not apply to Ticket Reminders.

Example: For example, if you would like to skip Saturdays and Sundays when calculating the length of time, you would leave Saturday and Sunday unchecked.
To add an excluded date, such as a public holiday, click Add excluded date then select a date and add a description. You can add up to 100 excluded dates.

Updating Ticket Workflows
Attention: Ticket workflows are not retroactive. If you change a ticket workflow, it won’t process any old tickets it already processed unless that ticket was updated after the workflow was edited. This is the case even if the ticket matches other workflow criteria.
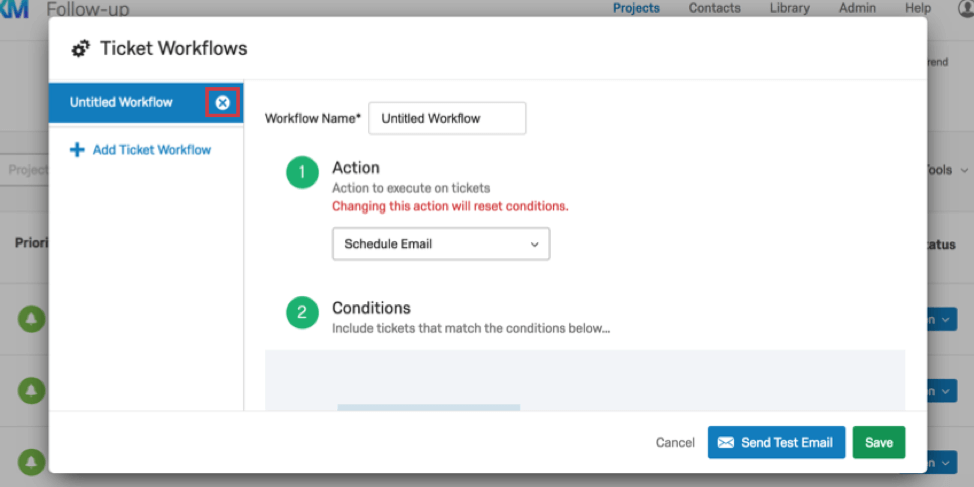
Deleting Workflows
Attention: You cannot retrieve a ticket workflow once it is deleted!
Go into the ticket workflows menu. Once there, highlight over the ticket workflow you wish to delete. Click X to delete the ticket workflow.

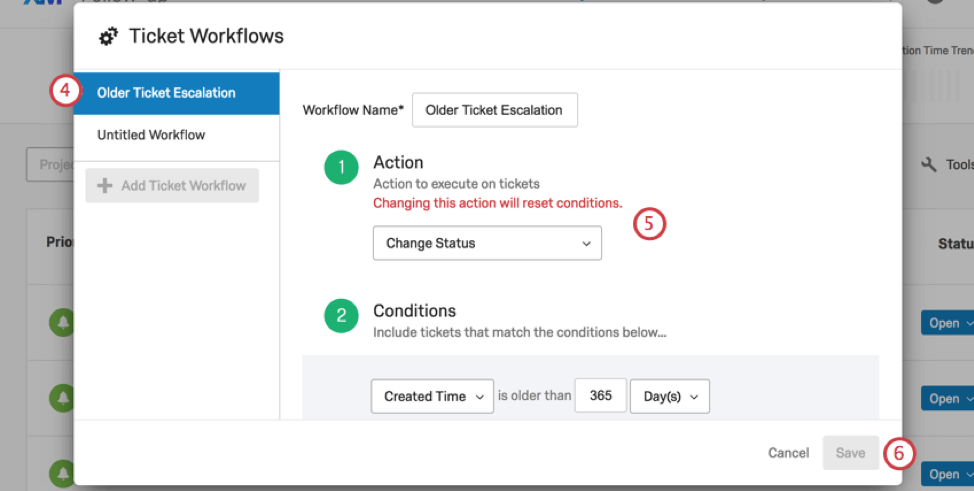
Example of Change Status Workflow
Let’s say your company has a service level agreement (SLA) for how long it takes to address a ticket. You promise your clients they will only have to wait one week maximum for the issue in their ticket to be addressed and closed.
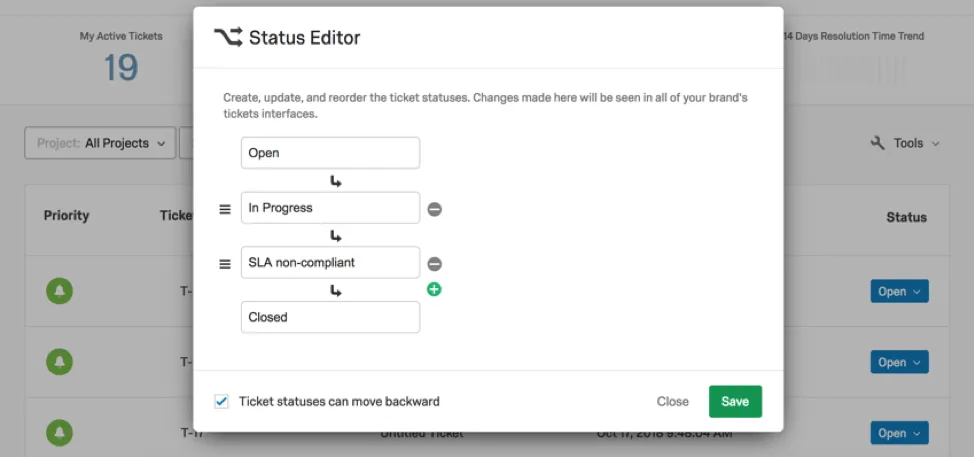
You could start by creating a custom status that flags non-compliance with an SLA.
Then, when setting your ticket workflow, you can set the condition to say that if a ticket that hasn’t been updated in 7 or more days, it is assigned a status of SLA non-compliant.
Ticket Escalation Using Hierarchies
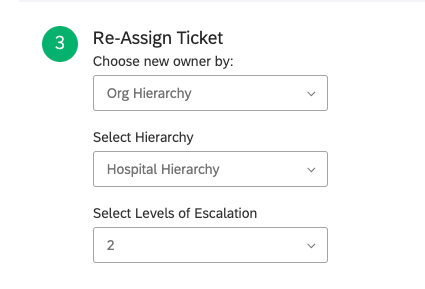
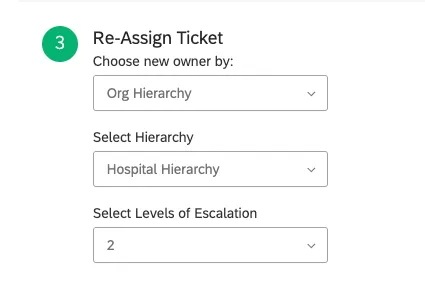
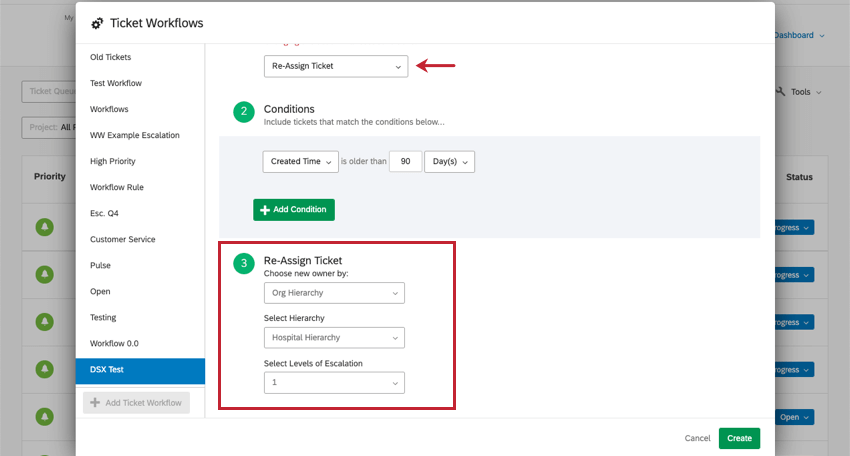
When you select the Re-Assign Ticket action, you can choose the new ticket owner by Org Hierarchy.
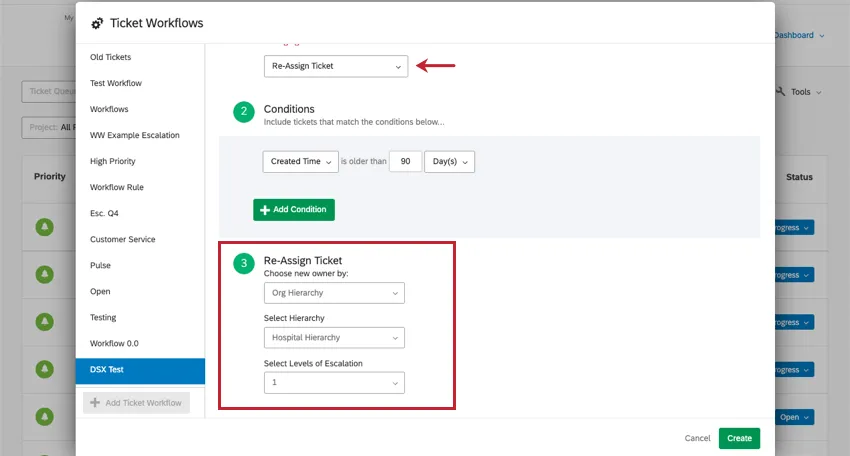
From there, you select the hierarchy you use in this ticket workflow, then select the unit that should be forwarded the tickets. You can choose how many levels above the ticket owner’s unit the ticket should be reassigned to:
- Parent Unit (1): If a ticket meets the ticket workflow’s conditions, then it will be reassigned to someone in the unit above the current ticket owner. This kind of ticket workflow is ideal if a certain status or age signifies that a more senior team at your company must follow up with the ticket.
- Grandparent Unit (2): You will also be able to select the unit directly above the parent unit. This is useful if some of your company’s units are very small, or if you want larger groups of employees working towards a common goal.
Example: Let’s say the ticket owner belongs to the Web Design team. The Web Design Team belongs to the Digital Marketing department – that makes Digital Marketing the parent unit of Web Design. The Digital Marketing department sits under the rest of Marketing – that makes Marketing the grandparent unit of Web Design.
That's great! Thank you for your feedback!
Thank you for your feedback!