
Action Plans Dashboard Settings (CX)
What's on this page
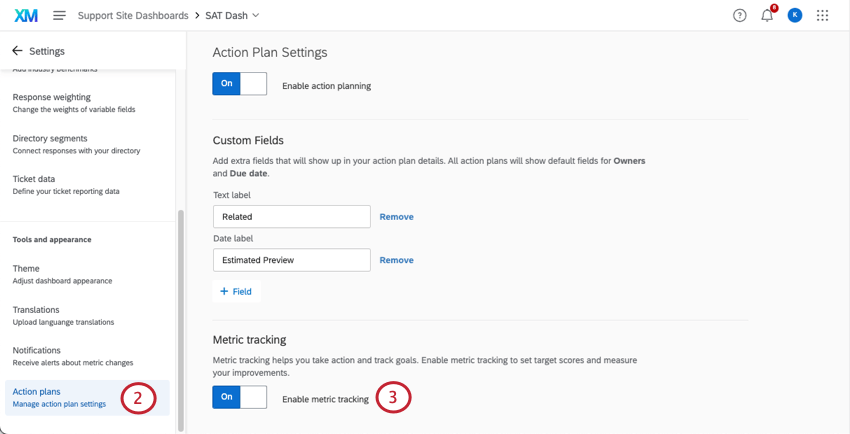
About Action Plans Dashboard Settings
Inside the Action plans section of your dashboard’s settings, you can enable action planning. You can also set up additional fields for users fill out when they create action plans.
Changes made on this page are automatically saved.
Qtip: Nothing will appear on this page until you have been given editing rights to the dashboard.
Qtip: This page is referring to action planning in CX Dashboard projects only.
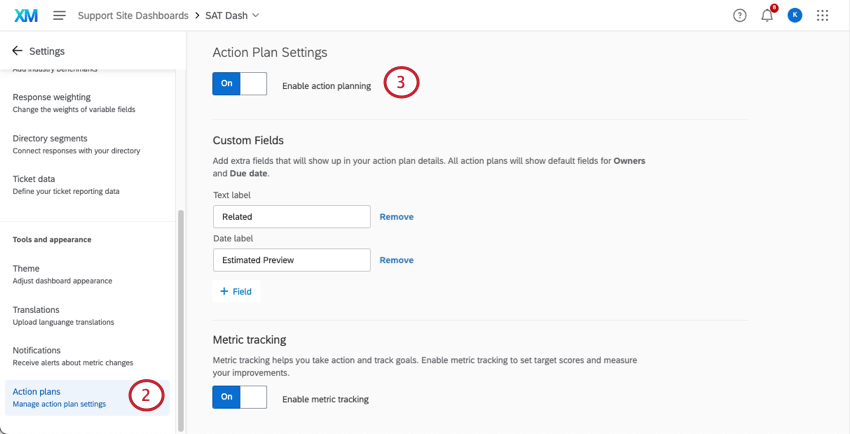
Enabling Action Planning
Before you can start using action planning in your dashboard, you need to enable it.

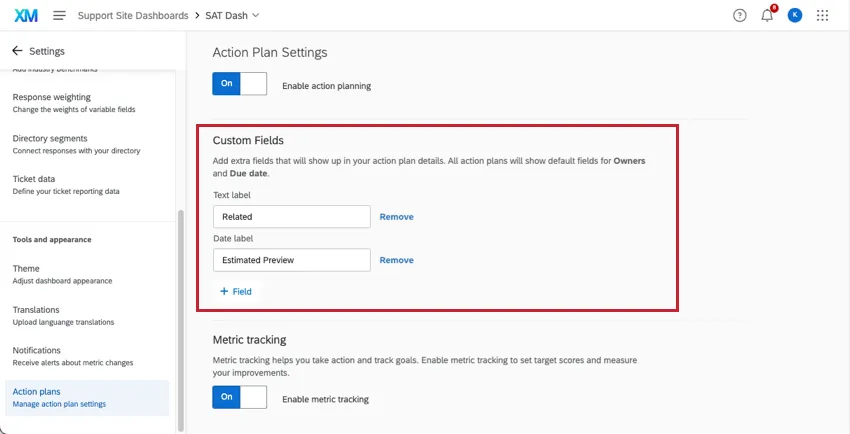
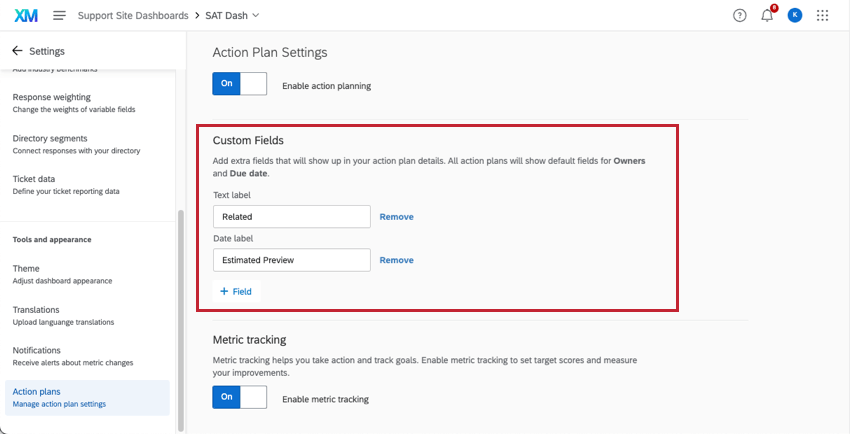
Adding Custom Fields to Action Plans
By default, all action plans have a field for owners and the plan’s due date. However, if you want to add extra fields that action plan users should fill out, you can make the following edits in the Action Plans section of your dashboard’s settings.
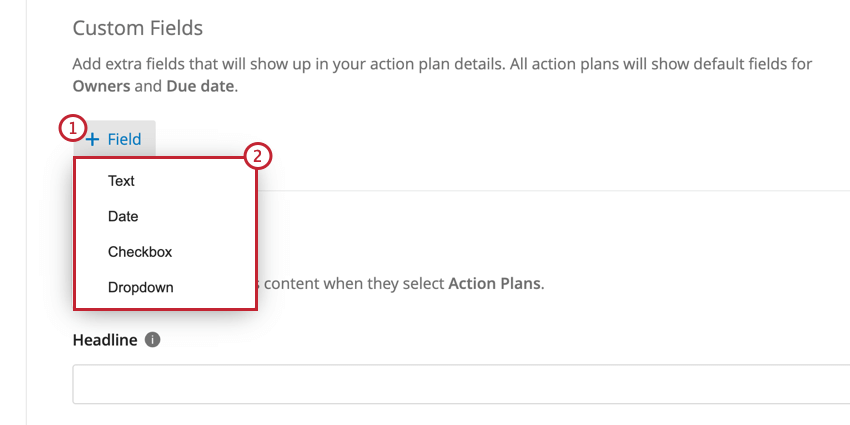
- Text: A field where the user can type an open-ended response. When used in action plan reporting, this acts like an Open Text field.
- Date: A field where the user can enter a date. When used in action plan reporting, this acts like a Date field.
- Checkbox: A field that functions like a multiple choice question where a user selects one or more options using checkboxes. When used in action plan reporting, this acts like a Text Set / Multi-Answer Text Set.
- Dropdown: A field that functions like a multiple choice question where a user selects one or more options using a dropdown menu. When used in action plan reporting, this acts like a Text Set / Multi-Answer Text Set.
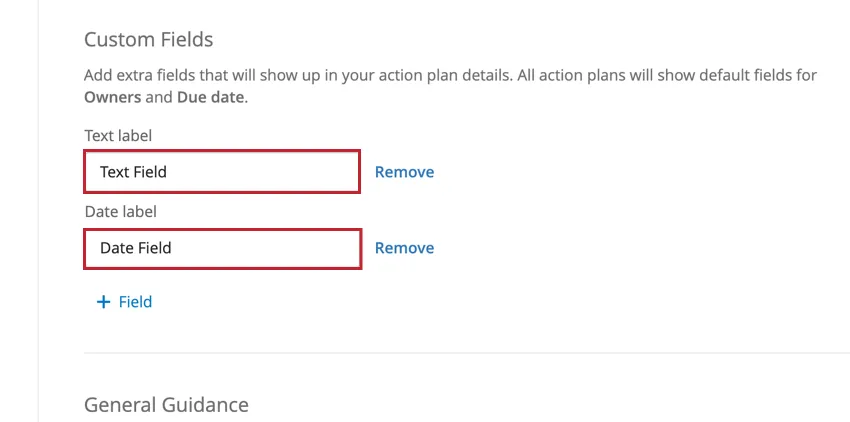
Text and Date Fields
For Text and Date fields, you need to specify a label for the field. This will be the name of the field users see when creating an action plan. To add a label for a field, enter it into the label box associated with the field.
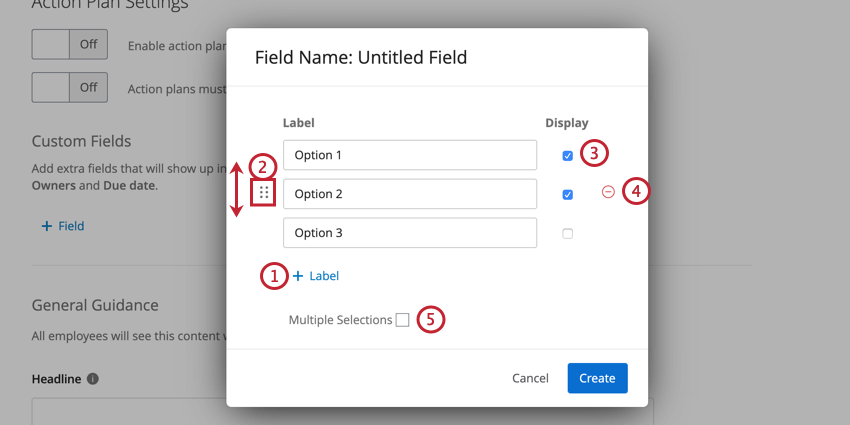
Checkbox and Dropdown Fields
Checkbox and Dropdown fields are set up in the same way. After adding one of these fields, you’ll see a second screen for customizing the field. Your customization options are as follow:
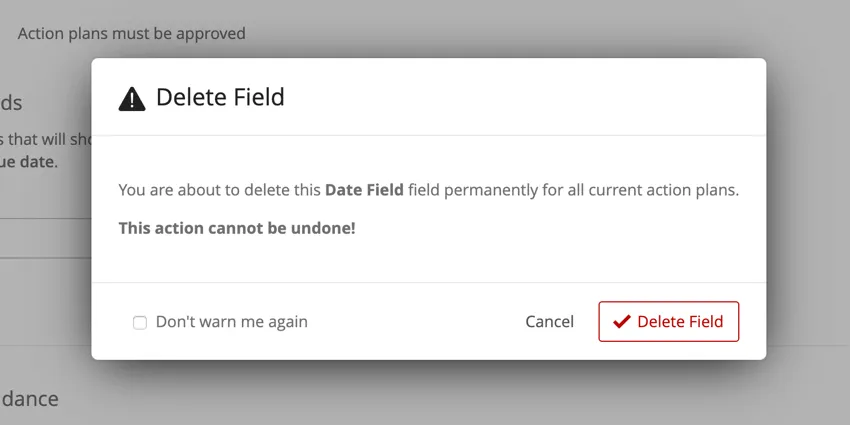
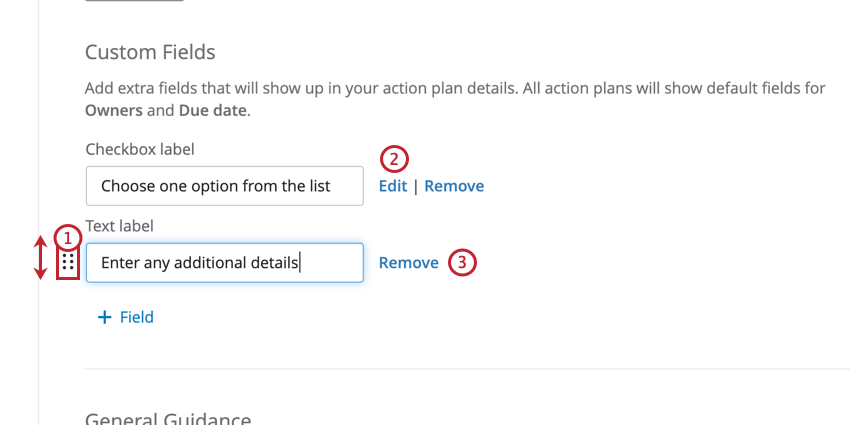
Managing Custom Fields
You can perform the following actions on your custom fields:

Qtip: After clicking Remove, you’ll be asked to confirm your decision. Once a field is deleted, any data associated with that field is also deleted and is irretrievable!
Metric Tracking
Measurable action planning allows users to measure the impact of strategic action-taking with metrics from their customer feedback dashboards. These action plans can be created manually in the action plan creator or by clicking Improve on any focus areas widget.
That's great! Thank you for your feedback!
Thank you for your feedback!