
Genesys Cloud Inbound Connector
What's on this page
About the Genesys Cloud Inbound Connector
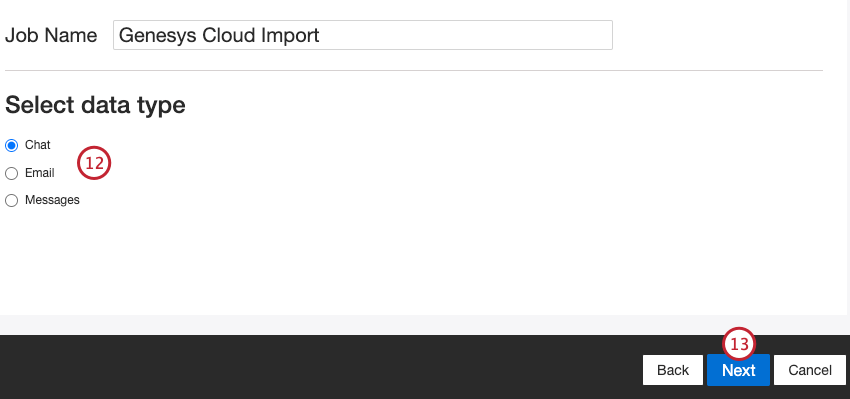
You can use the Genesys Cloud inbound connector to load chat data from your Genesys Cloud account into XM Discover.
Attention: The Genesys connector can only retrieve chats and messages for conversations less than 60 days old.
Required Setup in Genesys Cloud
To connect XM Discover to Genesys Cloud, you will need the following information about your Genesys account:
- Client Key
- Client Secret
- Username and password
- Environment URL for your organization
Additionally, you must create an OAuth client within Genesys Cloud. See the Genesys documentation for step-by-step instructions on creating the client. Make sure to provide the following details during setup:
- Grant Type: Select Code Authorization.
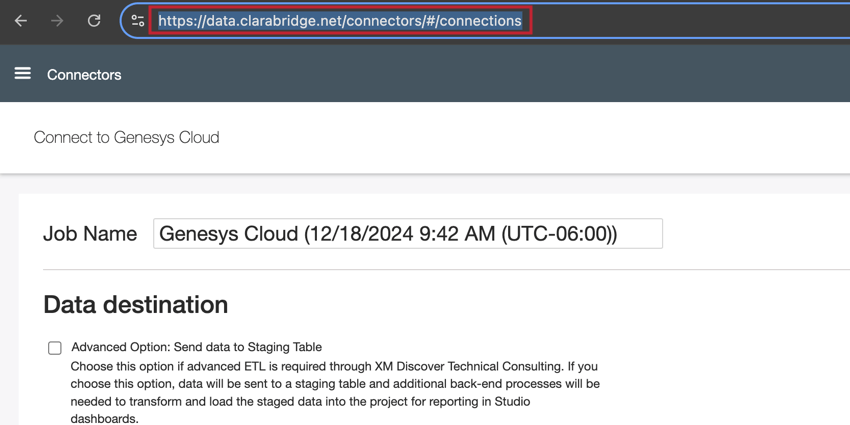
- Authorized redirect URL: Copy the page URL when setting up the connection in XM Discover. After the site domain, delete the rest of the URL and add this string to the end of it:
/connectors?token_type=genesys.Example: In this example, the base URL is
https://data.clarabridge.net/connectors/#/connections.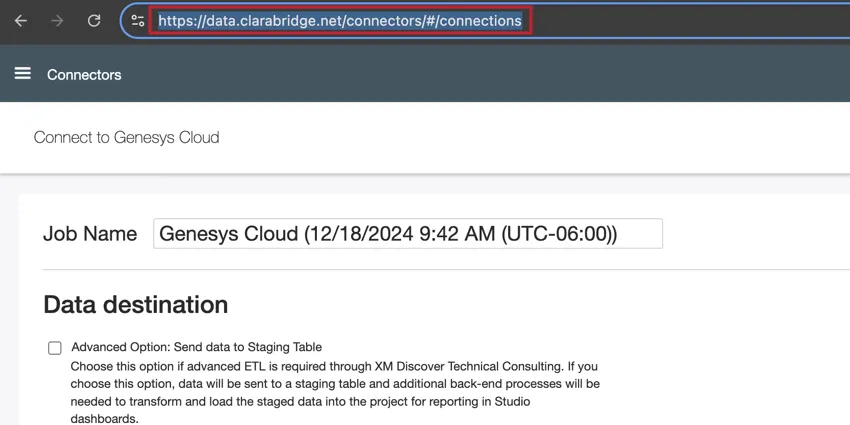
After removing the end of the URL and adding the necessary string, the final authorized redirect URL is:https://data.clarabridge.net/connectors?token_type=genesys. - Scope: Select the following:
- analytics:readonly
- conversations
- messaging:readonly
- routing:readonly
- users:readonly
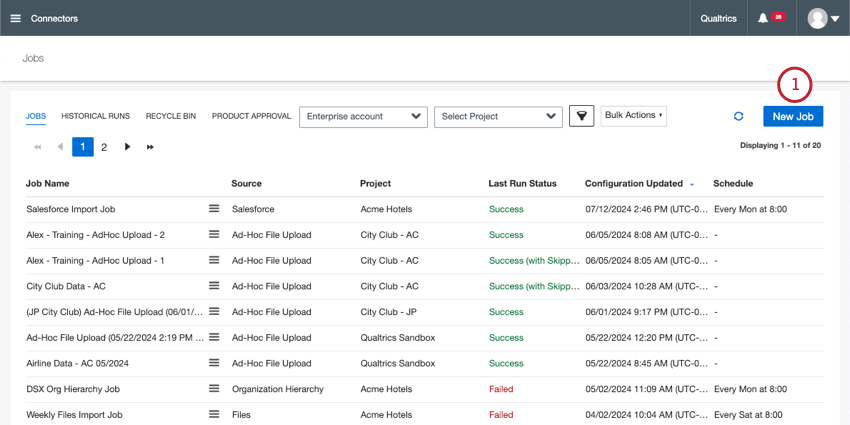
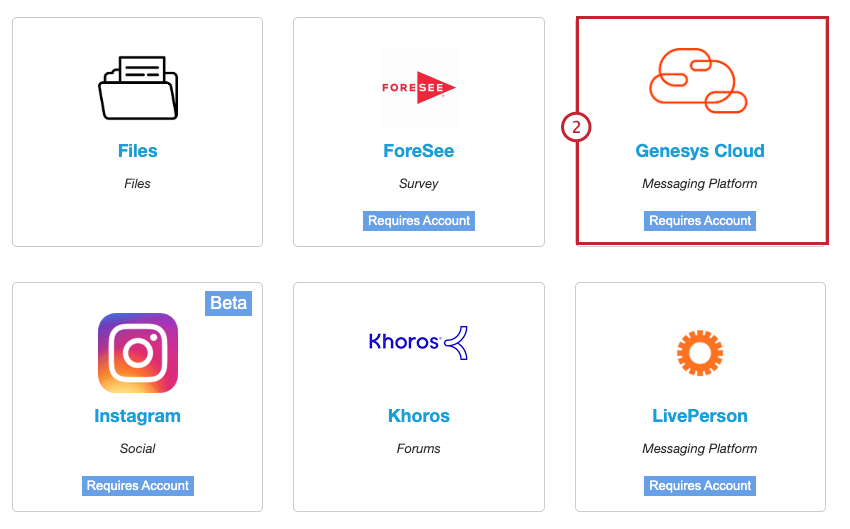
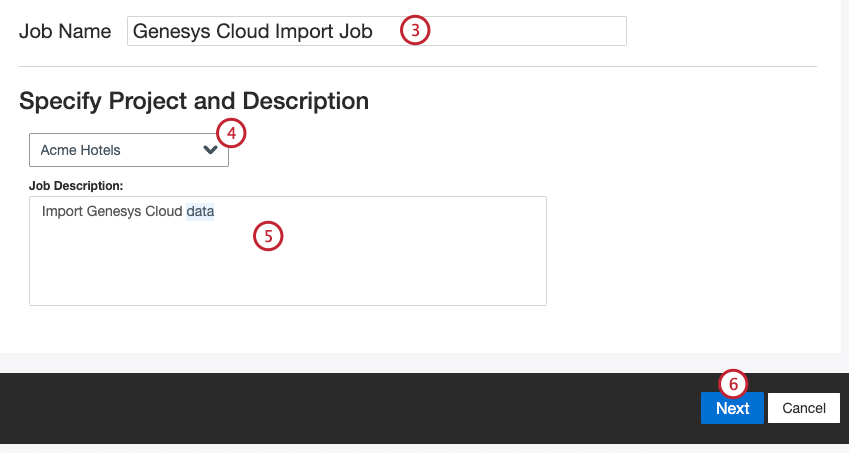
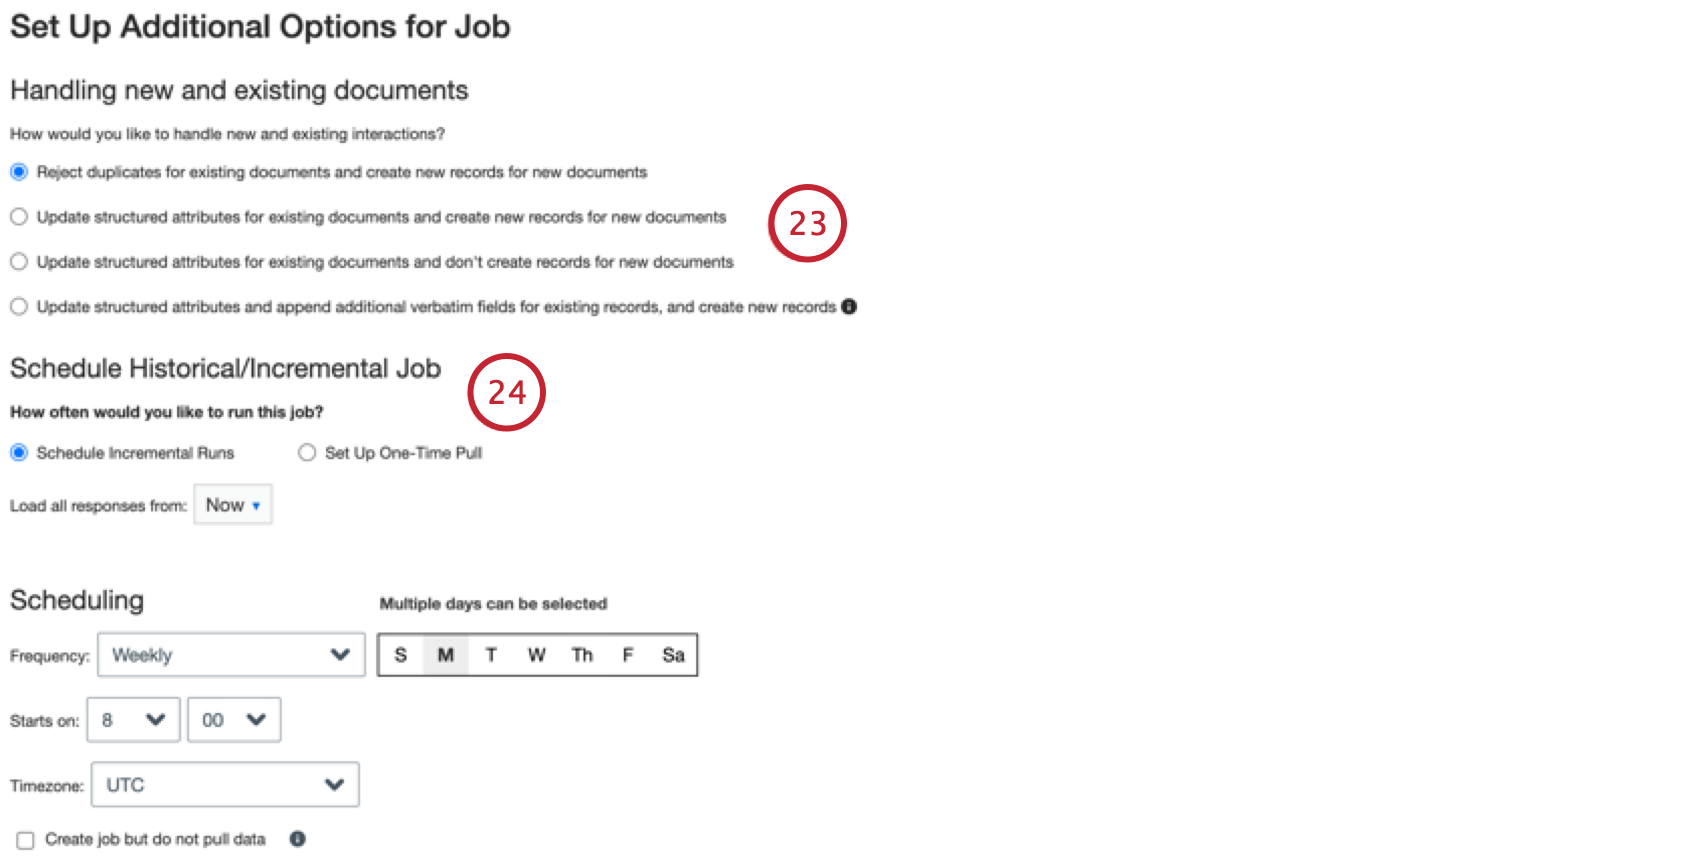
Setting Up a Genesys Cloud Inbound Job
Qtip: The “Manage Jobs” permission is required to use this feature.
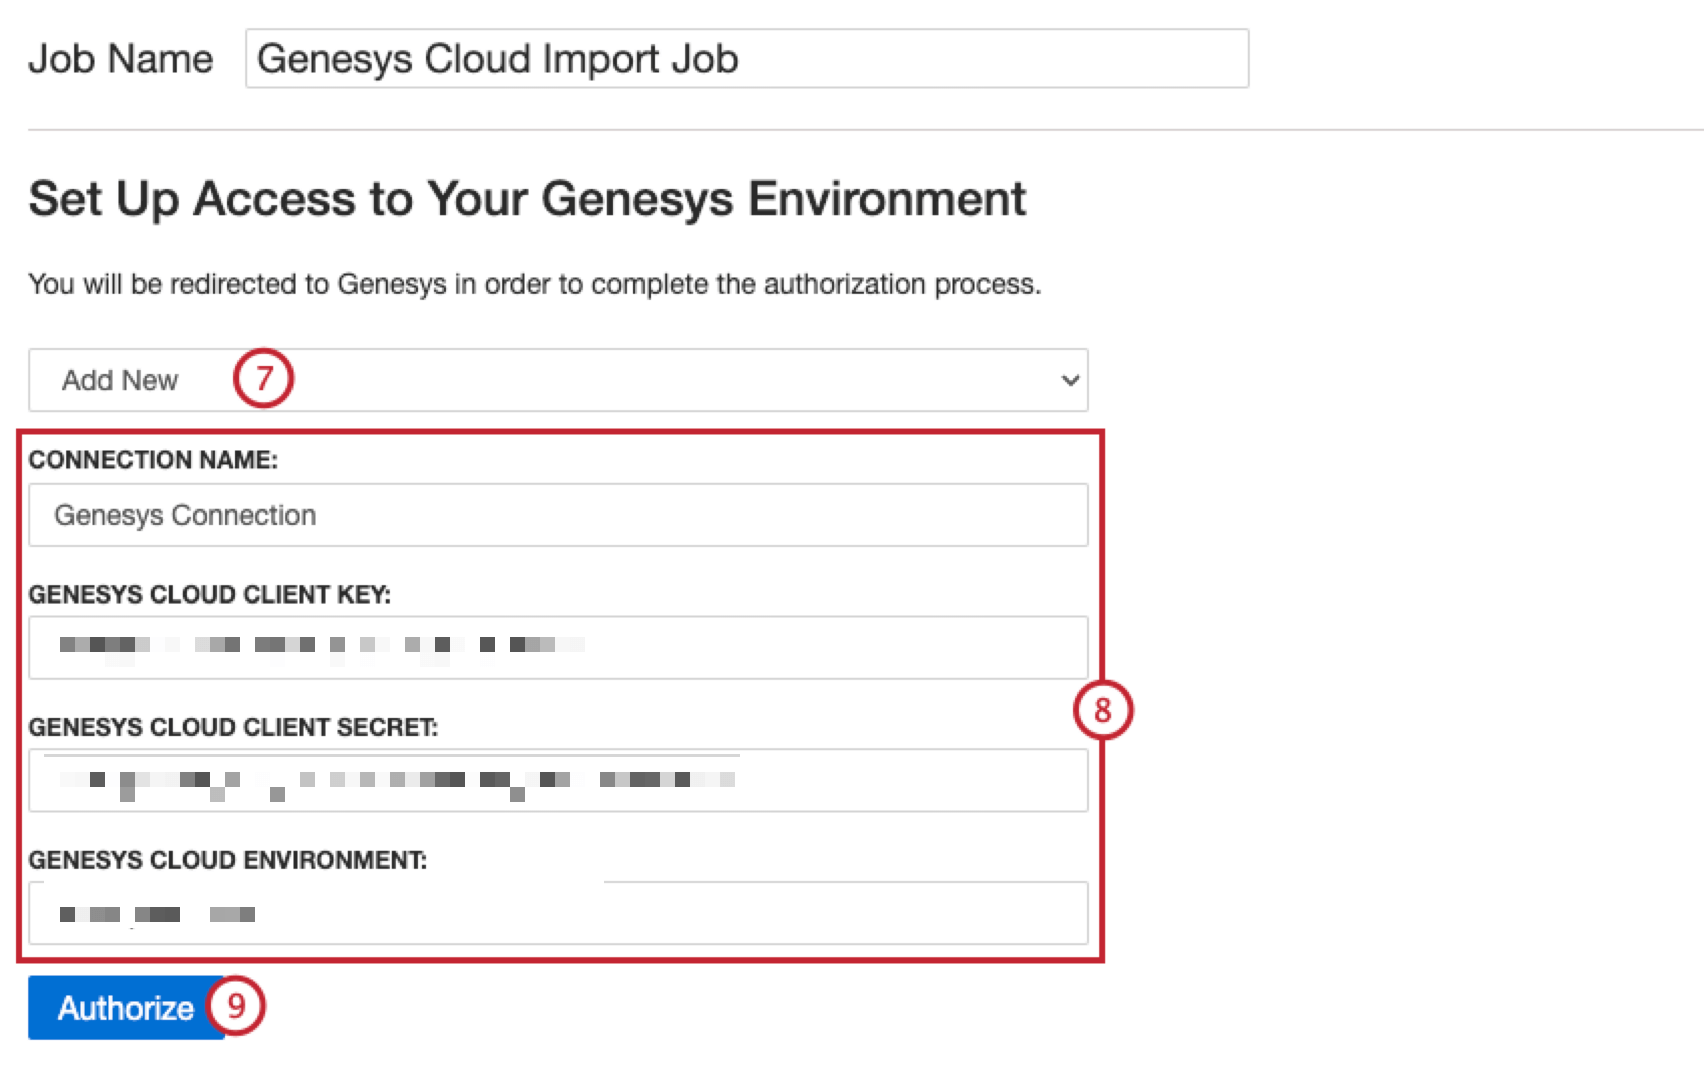
- Connection Name: Give the connection a name so you can identify it.
- Genesys Cloud Client Key: Your Genesys Consumer Key.
- Genesys Cloud Client Secret: Your Genesys Consumer Secret.
- Genesys Cloud Environment: Your organization’s Genesys environment URL. Qtip: Find your region in the AWS regions for Genesys Cloud list, then copy the part of the URL after “https://login.”.

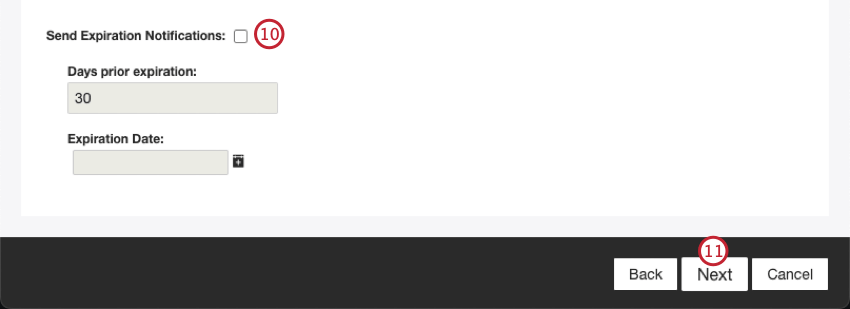
- Send Expiration Notifications: Select this option to allow your credentials to expire.
- Days prior expiration: If enabling expiration notifications, enter how many days you’d like to be notified before the expiration. You may enter a value between 1 to 100 days.
- Expiration Date: Set the date when the credentials will expire. Click on the box to open a calendar to pick the date.
Qtip: If source data is deleted in Genesys, the connector will return blank values for the missing data for the following fields:
- agentIds
- agentNames
- agentDivisions
- latestAgentId
- latestAgentDivisionId
- latestAgentDivision
- latestAgent
- conversionQueues
- latestQueue
Qtip: Click Download Sample Data to download an Excel file with sample data to your computer.
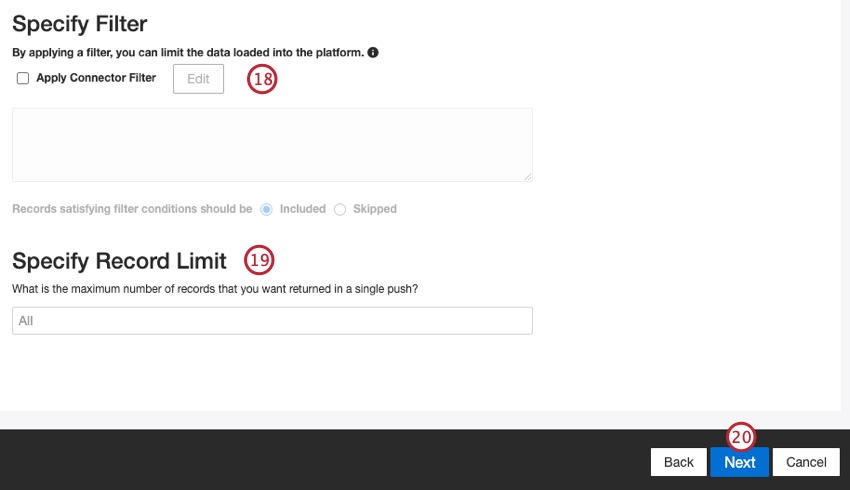
Qtip: For conversational data, the limit is applied based on conversations rather than rows.
Attention: Authenticated sessions from Genesys Cloud expire after 24 hours if they are not used. If scheduling recurring runs, then the schedule must be daily or more frequent. If your session has expired, then your job will fail with aStatus Code: 400, Reason: { error: 'invalid_grant' }. You can fix this error by editing your job and re-authenticating.
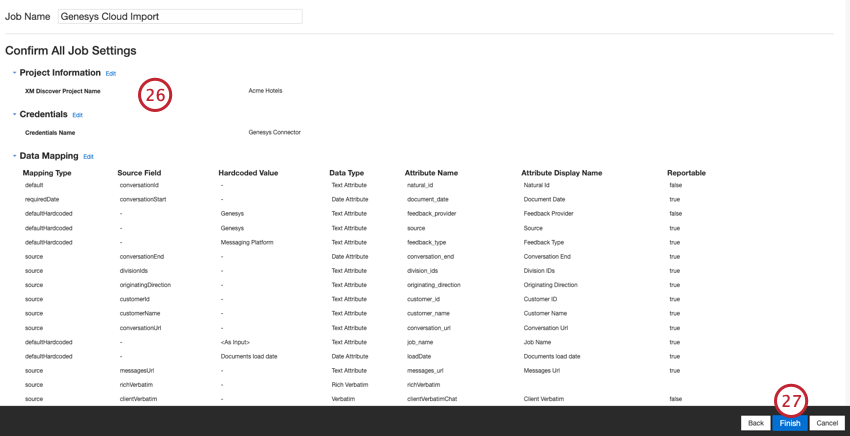
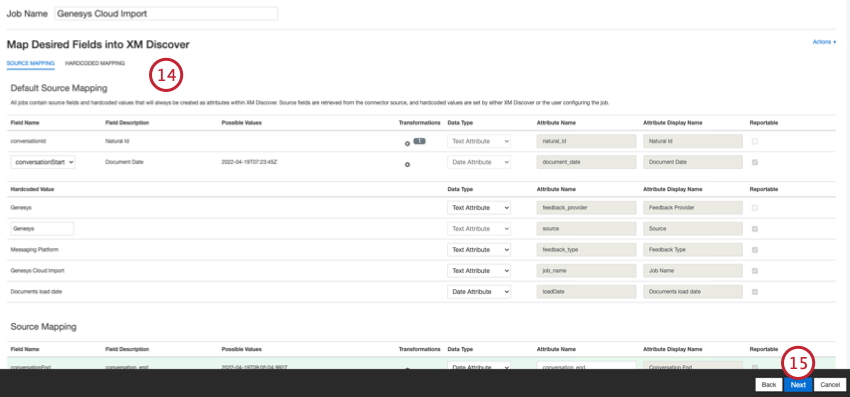
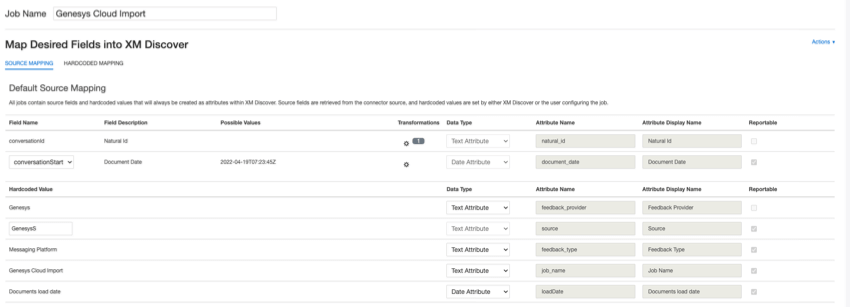
Data Mapping
Attention: As field names are case-sensitive in Connectors, the first letter of the field name must be upper-case as displayed in the Data Sample to ensure data mappings are accurate and the job succeeds.
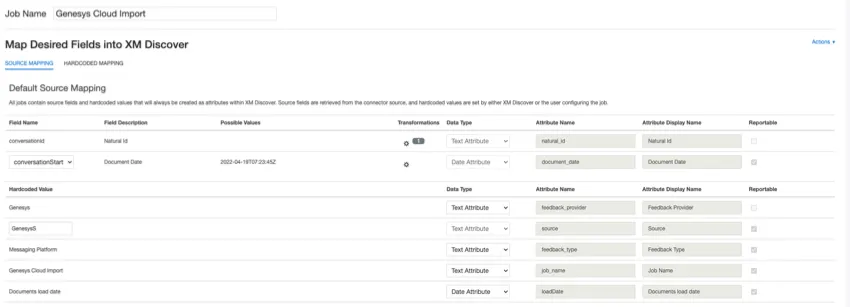
Default Fields
This section contains information on the default fields for Genesys Cloud inbound jobs.
- Natural Id: A unique identifier of a document. It is highly recommended to have a unique ID for each document to process duplicates correctly. For Natural ID, you can select any text or numeric field from your data. Alternatively, you can automatically generate IDs by adding a custom field.
- Document Date: The primary date field associated with a document. This date is used in XM Discover reports, trends, alerts, and so on. You can choose one of the following options:
- conversationStart (default): The date and time the chat activity started.
- conversationEnd: The date and time the chat activity ended.
- If source data contains other date fields, you can choose one of them.
- You can also set a specific document date.
- feedback_provider: Identifies data obtained from a specific provider. For Genesys Cloud documents, this attribute’s value is set to “Genesys” and cannot be changed.
- source: Identifies data obtained from a specific source. This can be anything that describes the origin of data, such as the name of a survey or a mobile marketing campaign. By default, this attribute’s value is set to “Genesys.” Use custom transformations to set a custom value, define an expression, or map it to another field.
- feedback_type: Identifies data based on its type. This is useful for reporting when your project contains different types of data (for example, surveys and social media feedback). By default, this attribute’s value is set “Messaging Platform”. Use custom transformations to set a custom value, define an expression, or map it to another field.
- job_name: Identifies data based on the name of the job used to upload it. You can modify this attribute’s value during the setup via the Job Name field that is displayed at the top of each page during the setup.
- loadDate: Indicates when a document was uploaded into XM Discover. This field is set automatically and cannot be changed.
Additional Source Fields
In addition to the default fields, there are more source fields available within the Genesys connector.
- agentDivisions: Divisions of all agents involved in a conversation.
- agentIds: Unique identifiers of all agents involved in a conversation .
- agentNames: Names of all agents involved in a conversation.
- chatDuration: How long a conversation lasted.
- conversationQueues: All queues of a conversation.
- customerSessions: A primary identifier of the customer journey.
- howEnded: How a conversation ended.
- latestAgent: Name of the last agent involved in a conversation.
- latestAgentDivision: Name of the division for the last agent involved in a conversation.
- latestAgentDivisionId: Unique identifier of the division for the last agent involved in the conversation.
- latestAgentId: Unique identifier of the last agent involved in a conversation.
- latestQueue: Name of the last queue of a conversation.
Custom Fields
Custom customer attributes can be added to your data mapping by using the custom_fields prefix. Custom attributes will depend on your Genesys instance configuration. For instructions on viewing these attributes in Genesys, see the Genesys documentation.

Example: To add the custom field “dialerContextId”, enter the source field name as “custom_fields.dialerContextId”.
That's great! Thank you for your feedback!
Thank you for your feedback!