
Data Mapping (Discover)
What's on this page
About Data Mapping in Discover
The purpose of data mapping is to define the structure and format of data in your XM Discover project. When uploading data into XM Discover, you must map data fields from an external source (such as a third-party service or a file) to data fields in your XM Discover project.
When mapping data in XM Discover, you can:
- Define the values of the default data fields in XM Discover.
- Choose which data fields should be uploaded as new attributes and which should be connected to existing attributes.
- Set the data type for new fields.
- Skip fields you don’t want to upload.
Accessing Data Mapping
There are two ways you can access data mapping options for a job:
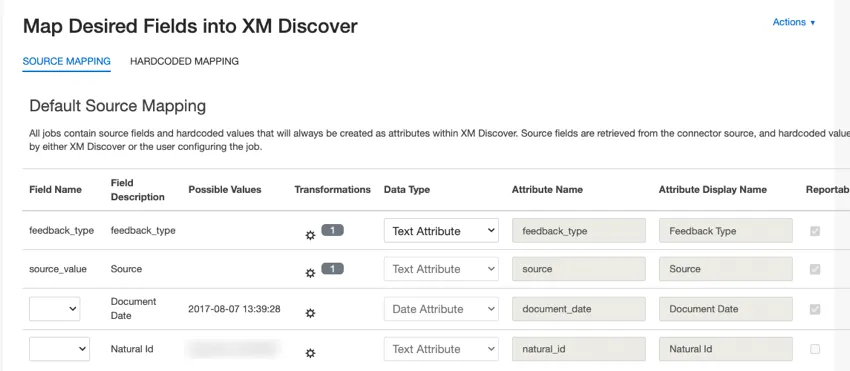
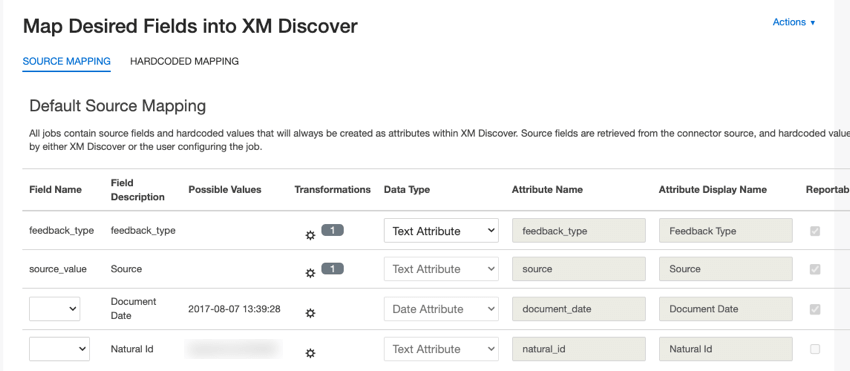
- When creating a job: You can perform the initial data mapping setup on the Map Desired Fields into XM Discover page.
- For existing jobs: You can access the data mapping setup by selecting the Data Mapping option from the job’s actions menu.


Mapping Data
Follow the steps in this section when mapping data in XM Discover:
Qtip: If you want to unmap an existing field, change its data type to “Do Not Map.”
- White: The field is mapped to a new attribute, meaning XM Discover has not found an attribute in the project that matches this field.
- Green: The field is mapped to an existing attribute and is named identically.
- Yellow: The field is mapped to an existing attribute, but the name does not match exactly. Example: If your source has a field called NAME and you have an existing attribute called NAMES, you will most likely see them mapped on a yellow background.

- Red: The field contains a mapping problem, such as a data type mismatch or an incorrect name. Example: The data type of a field is set to “Text Attribute,” but a field with the same name already exists in XM Discover as a “Number Attribute.” To fix this, select the correct data type from the Data Type dropdown menu.
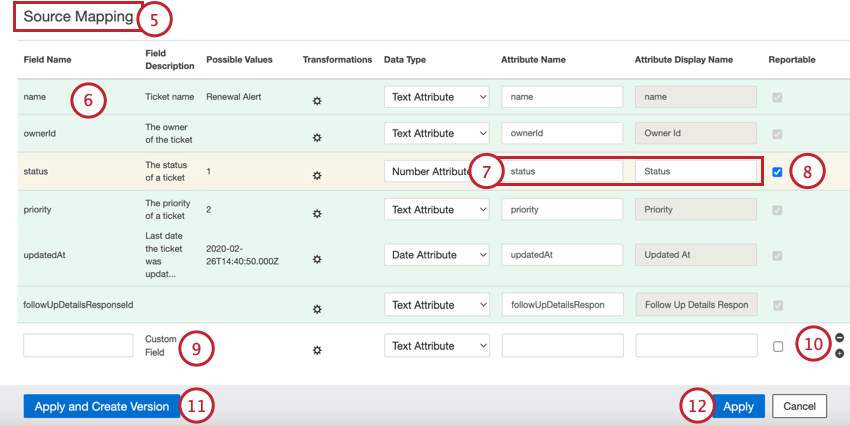
- Attribute Name: Contains the name of the field as it will be saved in XM Discover. This name cannot contain spaces and cannot exceed 21 characters for a structured data field, or 30 characters for a verbatim field. Qtip: If you want to map a new field to an existing field, then enter the existing attribute name into this column.

- Attribute Display Name: Contains the name of the field as it will be presented to users (for example, in reports). This name can contain spaces and cannot exceed 99 characters. Qtip: For verbatim fields, Attribute Display Name is automatically set to match the Attribute Name.
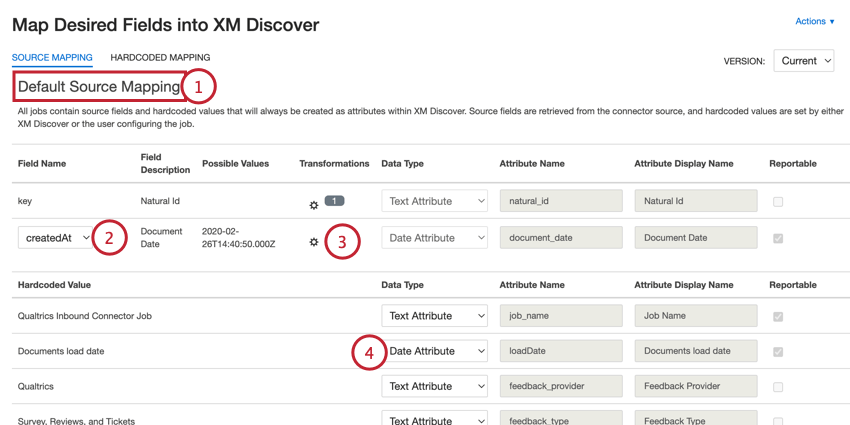
Hardcoded Data Mappings
If desired, you can add hardcoded data mappings, which will apply the specified hardcoded values for all records uploaded via the job:
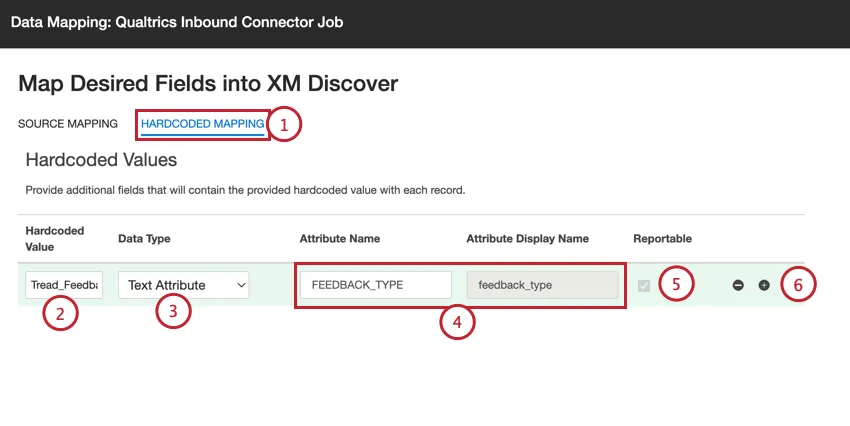
Qtip: Make sure to click Apply to save your changes.
Mapping Conversational Fields
Qtip: Transformations are not supported for conversational verbatim fields.
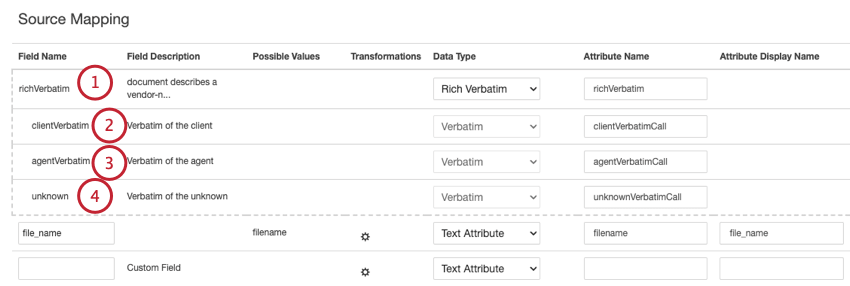
This section covers how to map conversational fields for conversational data, such as call and chat interactions. In the Source Mapping section, you can configure the following conversational data fields:

- clientVerbatim: Tracks the client’s side of the conversation.
- agentVerbatim: Tracks the representative’s side of the conversation.
- unknown: Tracks other parts of the conversation where it isn’t clear who the speaker is, or the speaker is neither the client or agent. Qtip: The same verbatim cannot be used for different types of conversational data. If you want your project to host several types of conversation, use separate pairs of conversational verbatims per conversation type.
- clientVerbatimChat for digital interactions.
- clientVerbatimCall for call interactions.
- agentVerbatimChat for digital interactions.
- agentVerbatimCall for call interactions.
- unknownVerbatimChat for digital interactions.
- unknownVerbatimCall for call interactions.
Data Types
When defining fields in XM Discover, you can set the field’s data type to 1 of the following:
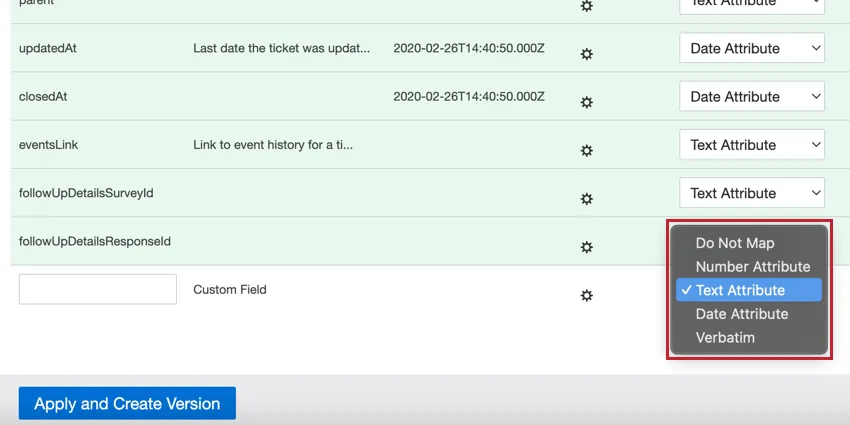
- Do Not Map: Do not upload this field into XM Discover.
- Number Attribute: For number fields. You can perform calculations on these attributes. Qtip: Only select Number Attribute if you want to perform calculations on this number. A good example of a numeric attribute is age, as it may be interesting to see the average age of survey participants. A bad example of a numeric attribute is the model year of a car, which would be better chosen as a Text Attribute.
- Text Attribute: For text fields with a discrete set of values. Qtip: When Connectors creates a new text attribute, it will be case sensitive by default. If you would like to have a case insensitive text attribute, create it in Designer first.
- Date Attribute: For date fields.
- Verbatim: For verbatim fields and text comments. Use verbatim for fields with unstructured data that you want to be processed by the XM Discover NLP engine.
Qtip: If a field is mapped to an existing attribute, then you cannot change its type. However, you can unmap the field by selecting Do Not Map.
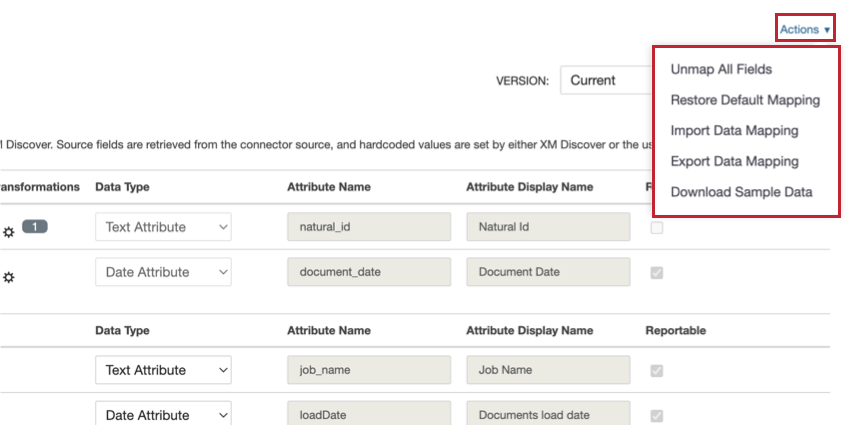
Data Mapping Actions
The Actions menu allows you to perform the following tasks:
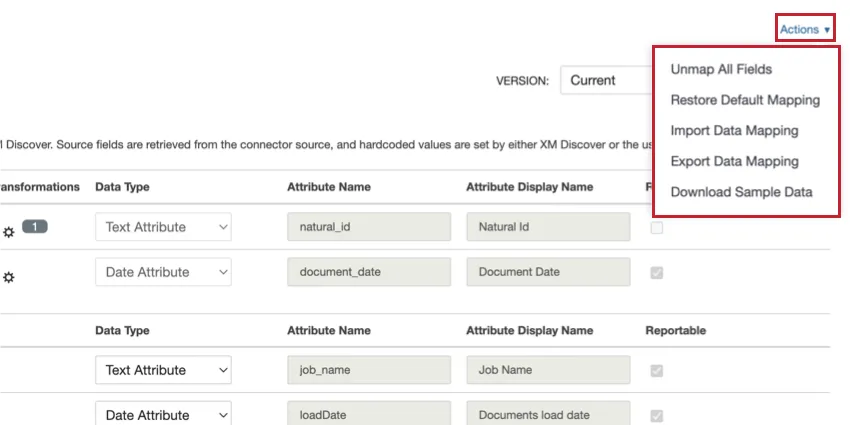
- Unmap All Fields: Removes the mapping for all fields in the “Source Mapping” section of data mapping, setting all fields to “Do Not Map.”
- Restore Default Mapping: Removes any custom field mapping and restores the default data mapping for the connector.
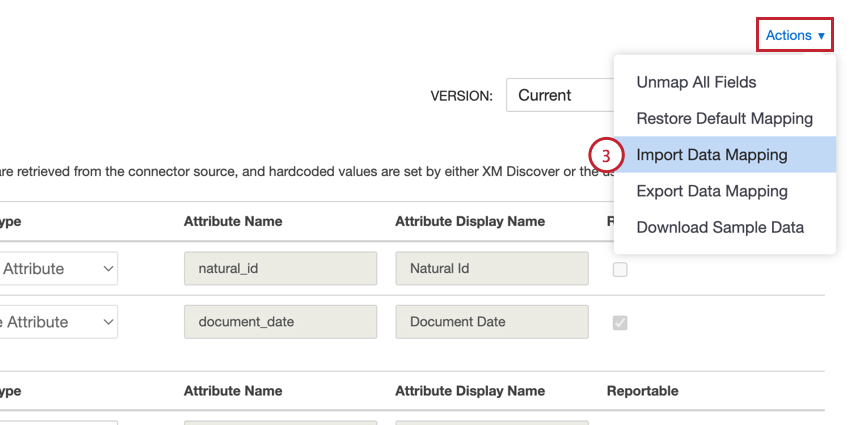
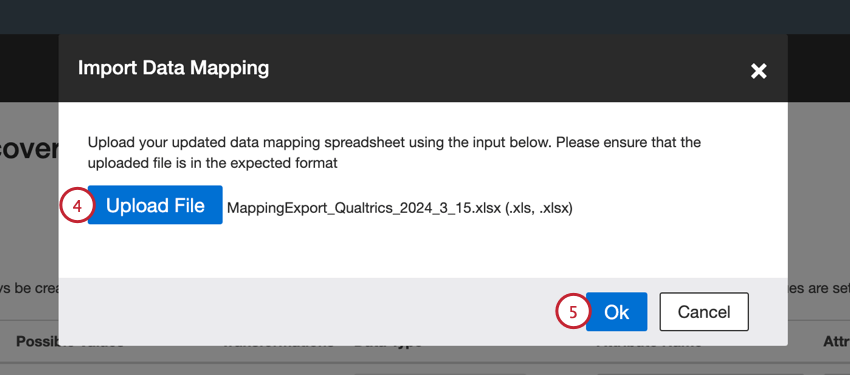
- Import Data Mapping: Allows you to import a file containing your data mapping. See Importing & Exporting Data Mapping for more information.
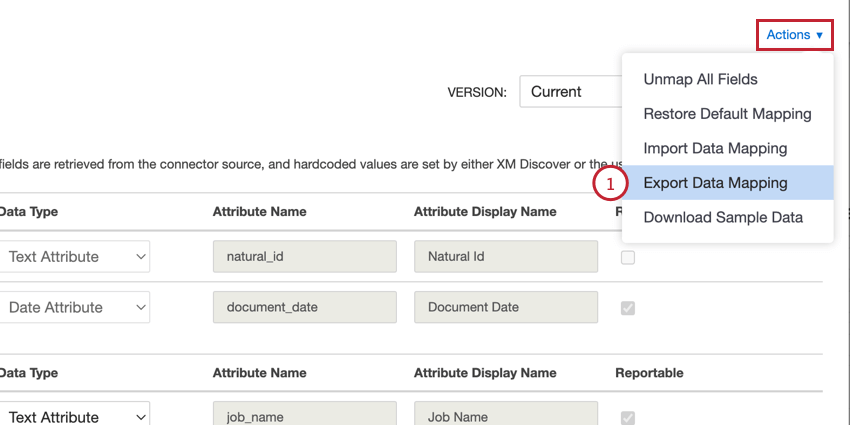
- Export Data Mapping: Allows you to export a file containing your data mapping. See Importing & Exporting Data Mapping for more information.
- Update Mapping from sample file: This option is only available for XM Discover Link and Files connectors. Allows you to update your mapping by uploading one of the XM Discover data format sample files.
- Download Sample Data: When mapping data fields from third-party services, you can download an Excel spreadsheet with sample data to better understand the type of data to expect in your project. This spreadsheet contains 2 sheets:
- Standard Data: Unmapped source fields with default names and values (before mapping).
- Mapped Data: Mapped fields with transformed names and values (after mapping).
Importing & Exporting Data Mapping
You can export your data mapping to an Excel spreadsheet, which allows you to make changes to your mapping outside of XM Discover. You can then import this file to update your mapping. These options also enable you to quickly reuse your data mappings across jobs.
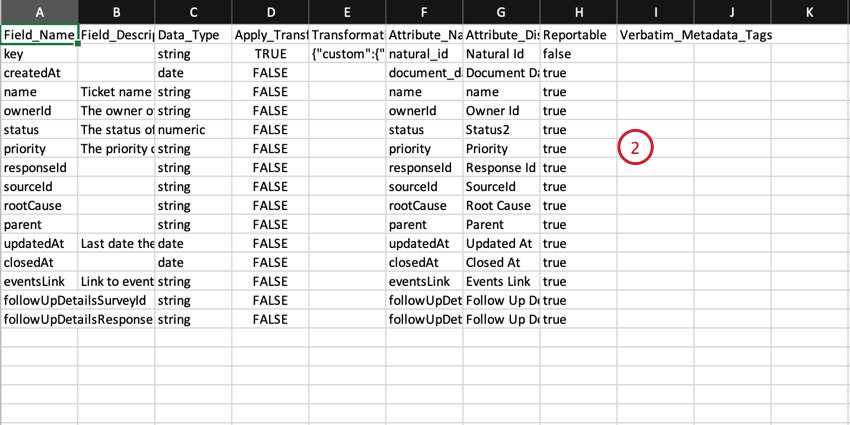
- The column names match the columns displayed in the data mapping window in Discover.
- You can create new custom fields by adding new rows.
- Do not add any new columns.
- Save your file as an XLS os XLSX file.
Qtip: Make sure to click Apply to save your changes.
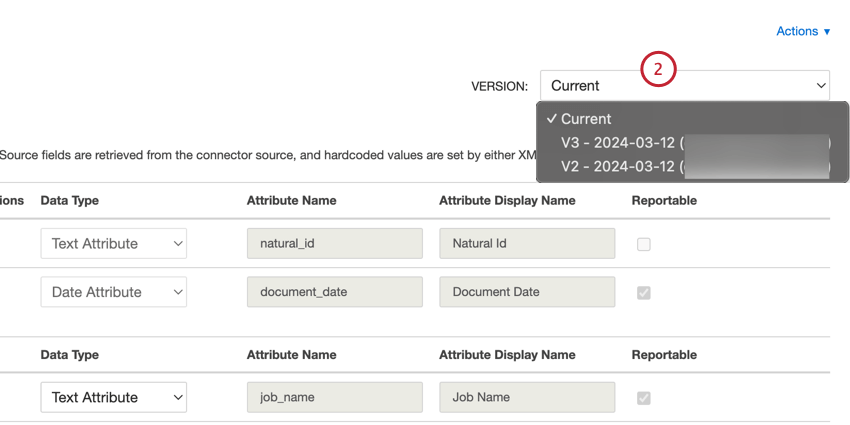
Data Mapping Versions
The data mapper for a job keeps track of up to 30 of the most recently saved versions of your job’s data mapping. You can restore any of these saved data mappings if needed.
Attention: A data mapping version is a daily snapshot of a job’s data mapping configuration. A version is created whenever a data mapping is saved. For multiple data mapping changes made within the current day, each one is initially saved separately. At the end of each day, if there are multiple versions for that day, the system keeps the most recent version and deletes the rest.
Switch between data mapping versions by following the below steps:
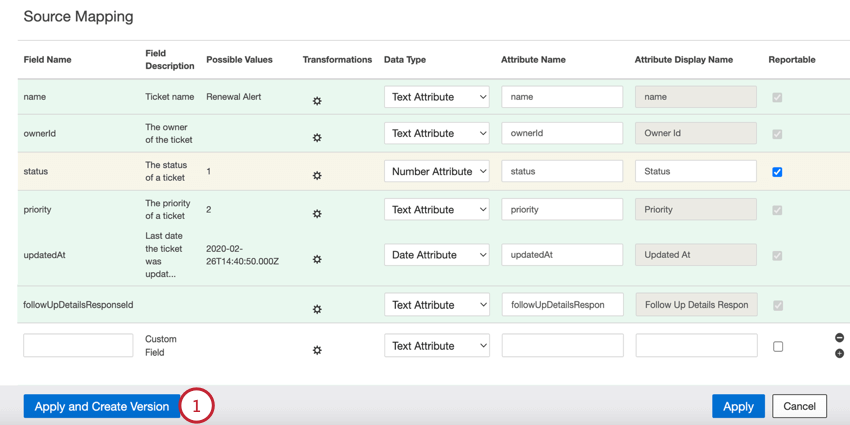
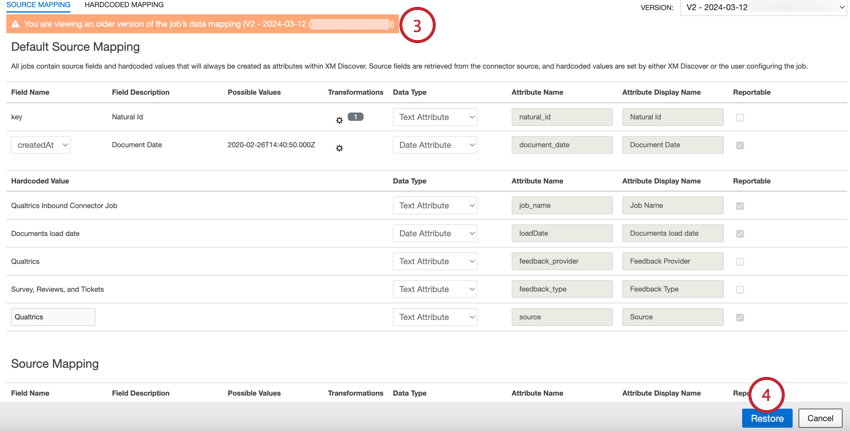
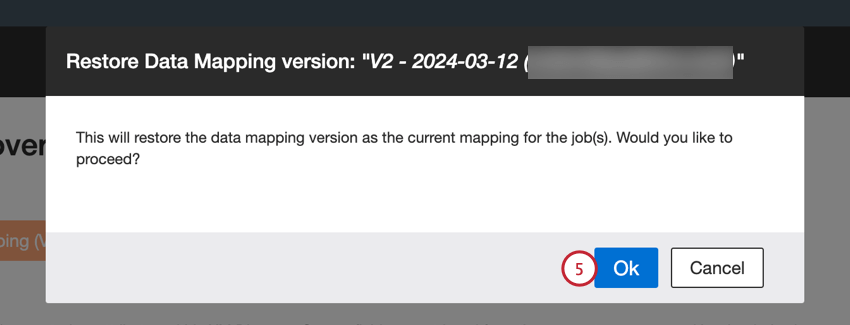

- Create a version for the current mapping and restore this version: Save the unsaved mapping as a separate version and restore the selected version.
- Restore this version without creating a version for the current mapping: Lose the unsaved mapping and restore the selected version.
Qtip: Make sure to click Apply to save your changes.
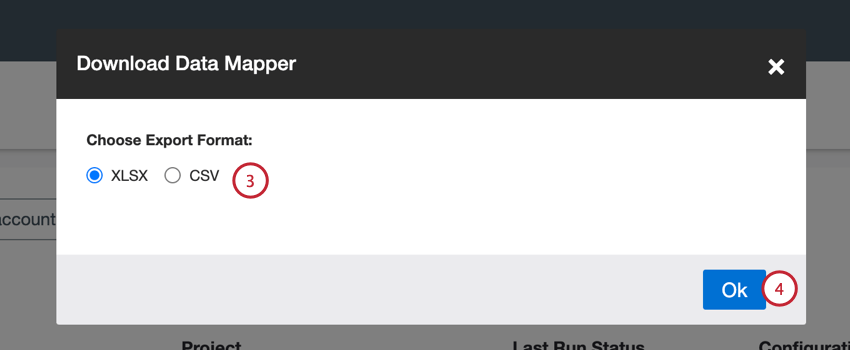
Data Mapper Report
The data mapper report enables you to verify cross-source mappings using an automatically generated mapping file.

Qtip: You can only download the data mapper if all selected jobs are in the same project.
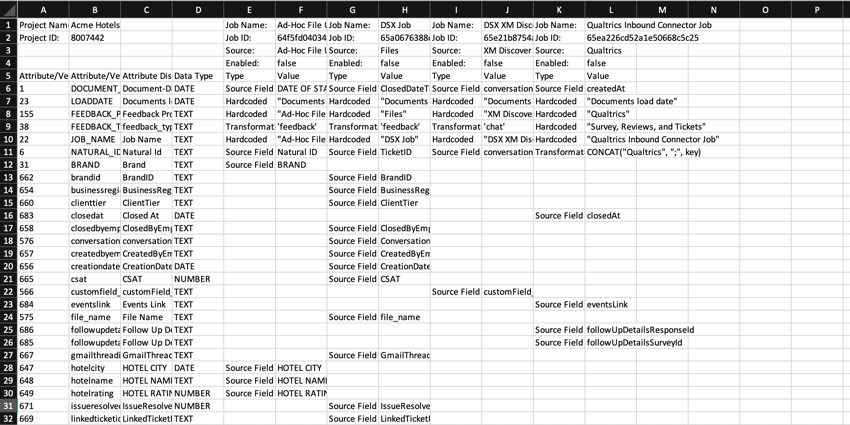
Once your file is downloaded, the following fields are available in the report:
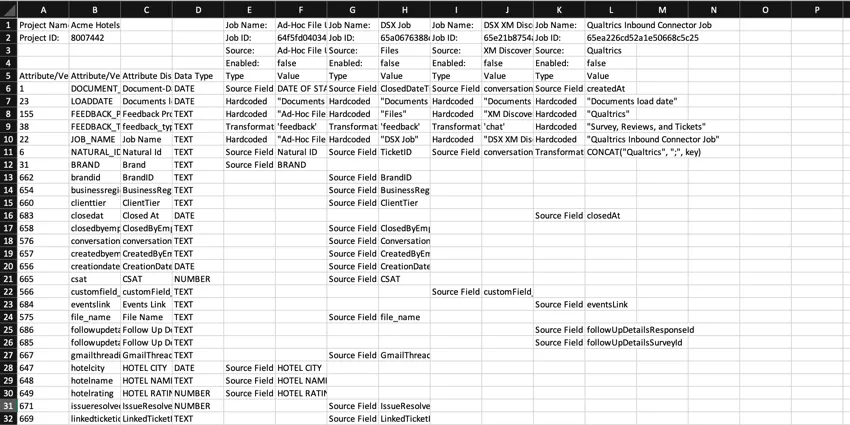
- Project Name: The name of the XM Discover project into which data is uploaded.
- Project ID: The ID of the project.
- Job Name: The name of the job.
- Job ID: The ID of the job.
- Source: The data source for which this job is configured.
- Enabled: The status that indicates whether the job is enabled or not.
- Attribute/Verbatim type ID: The ID of the attribute/verbatim.
- Attribute/Verbatim Name: The system name of the attribute/verbatim saved by XM Discover.
- Attribute Display Name: The display name of the attribute saved by XM Discover. You can leave it the same as “Attribute Name” or provide a more user-friendly version.
- Data Type: The type of the attribute. Possible values include:
- NUMBER: Set automatically for fields of the numeric type.
- TEXT: Set automatically for fields of the text type.
- DATE: Set automatically for fields of the date type.
- VERBATIM: Set for verbatim fields and text comments.
- Type: The type of the mapped data field. Possible values include:
- Source Field: The type of the data field with default source mappings for common attributes that are added to all documents uploaded via this job.
- Hardcoded: The type of the data field with hardcoded values for each record.
- Transformations: The type of the data field with transformed and modified source field values.
- Value: The value of the attribute.
That's great! Thank you for your feedback!
Thank you for your feedback!