
Creating Books (Studio)
What's on this page
About Books
Books, or tabbed dashboards, let you combine up to 20 different dashboards into a single report. Books allow users to switch between related dashboards easily and quickly without having to go back to the homepage.
You can add a single dashboard to multiple books, and changes you make to that dashboard will be reflected in every book it is included in. Mix and match existing dashboards into different books for different audiences.
Creating a Book
To create a book, you need to provide a name for it and select the dashboards to include in it. You can add a single dashboard to multiple books.
Qtip: You will need the Create Dashboard permission to perform the steps below.
There are several ways to create a book:
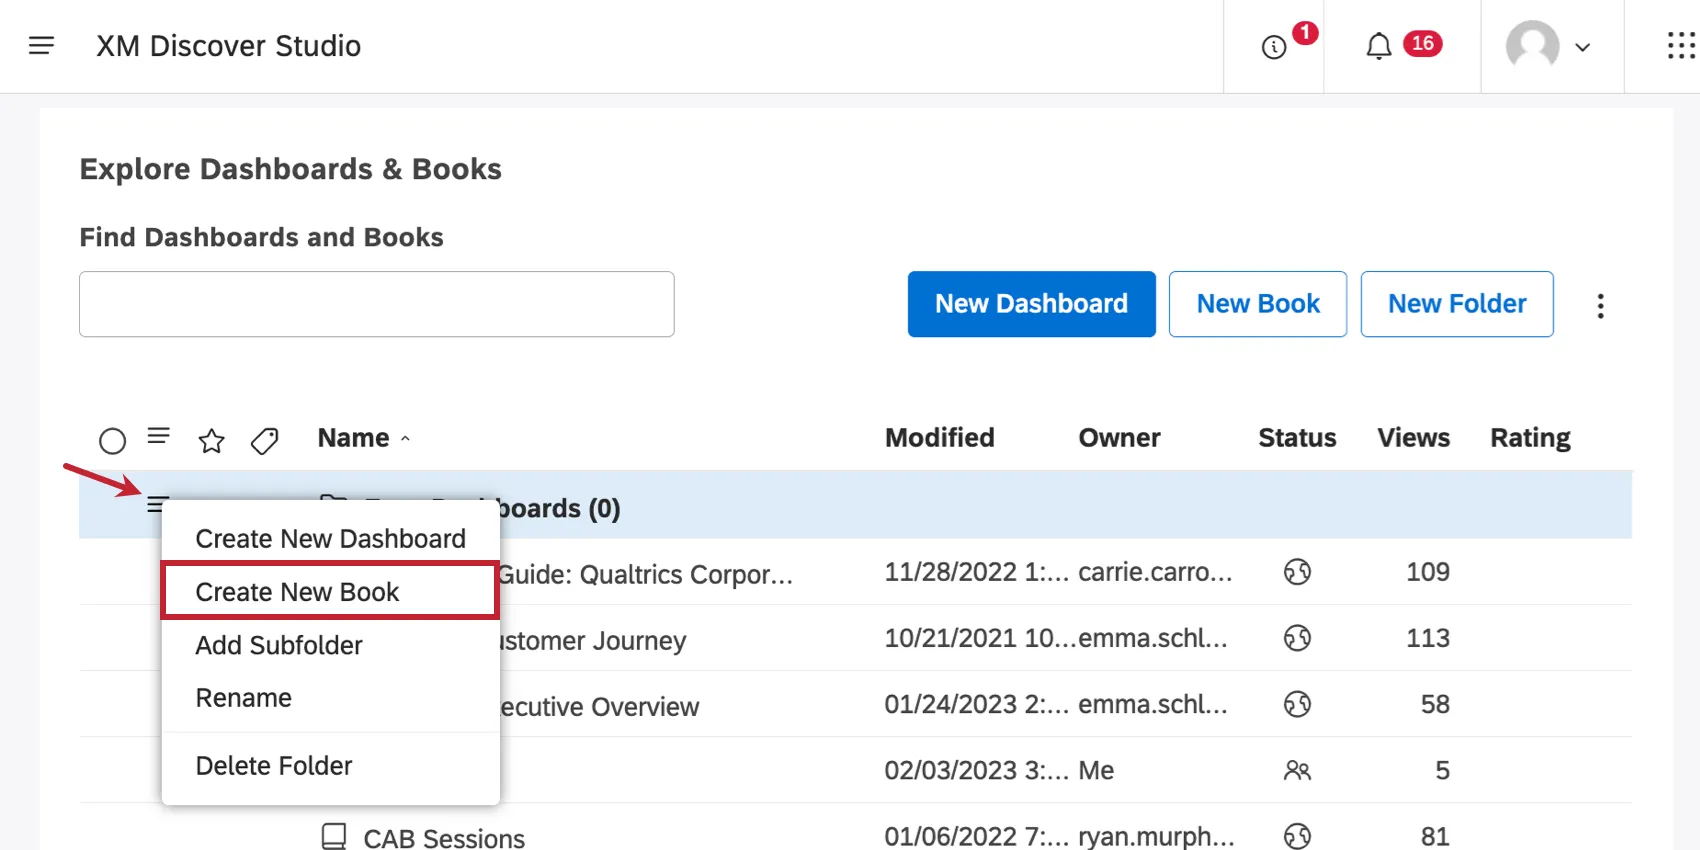
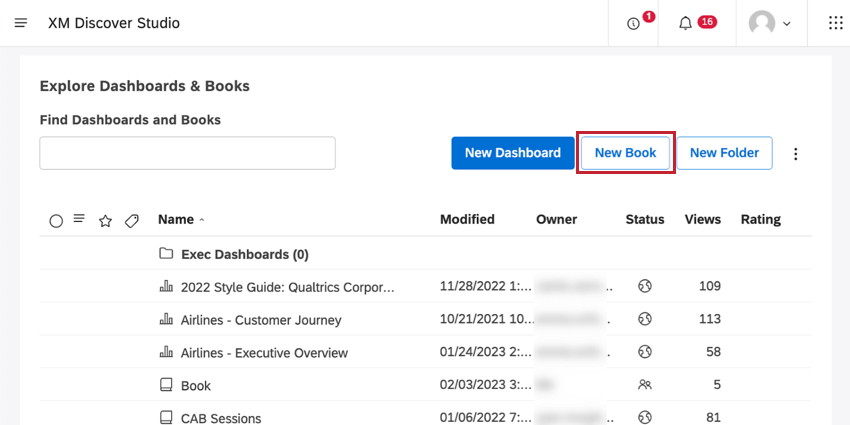
- On the Studio homepage, when you scroll down to Explore Dashboards & Books, click the New Book button.

- To create a book inside a specific folder, click the options next to that folder and select Create New Book.
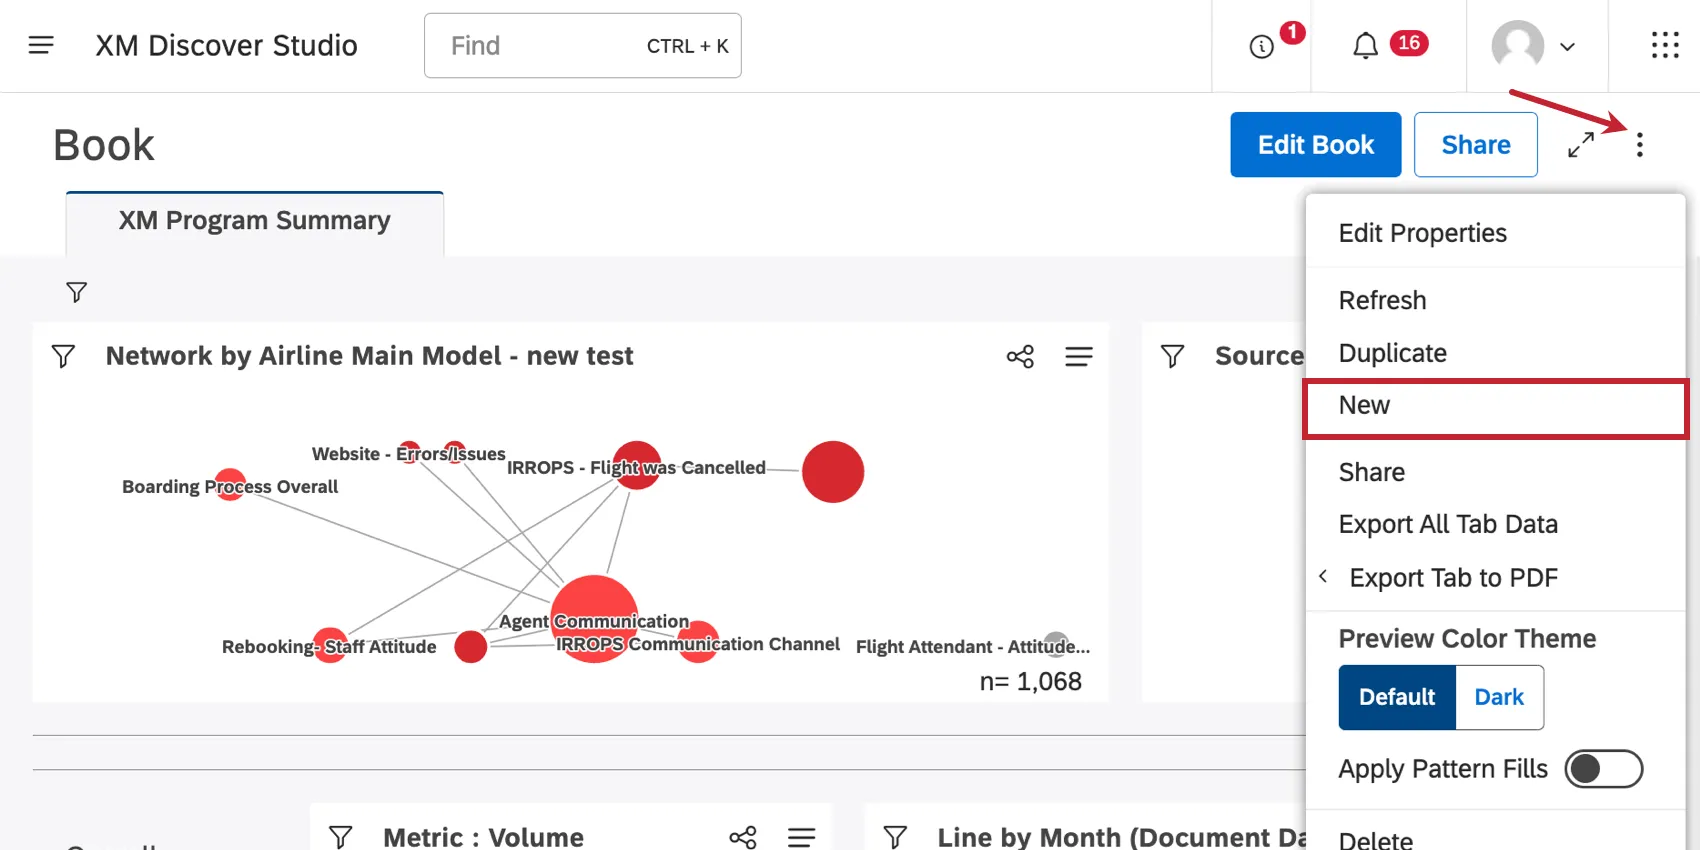
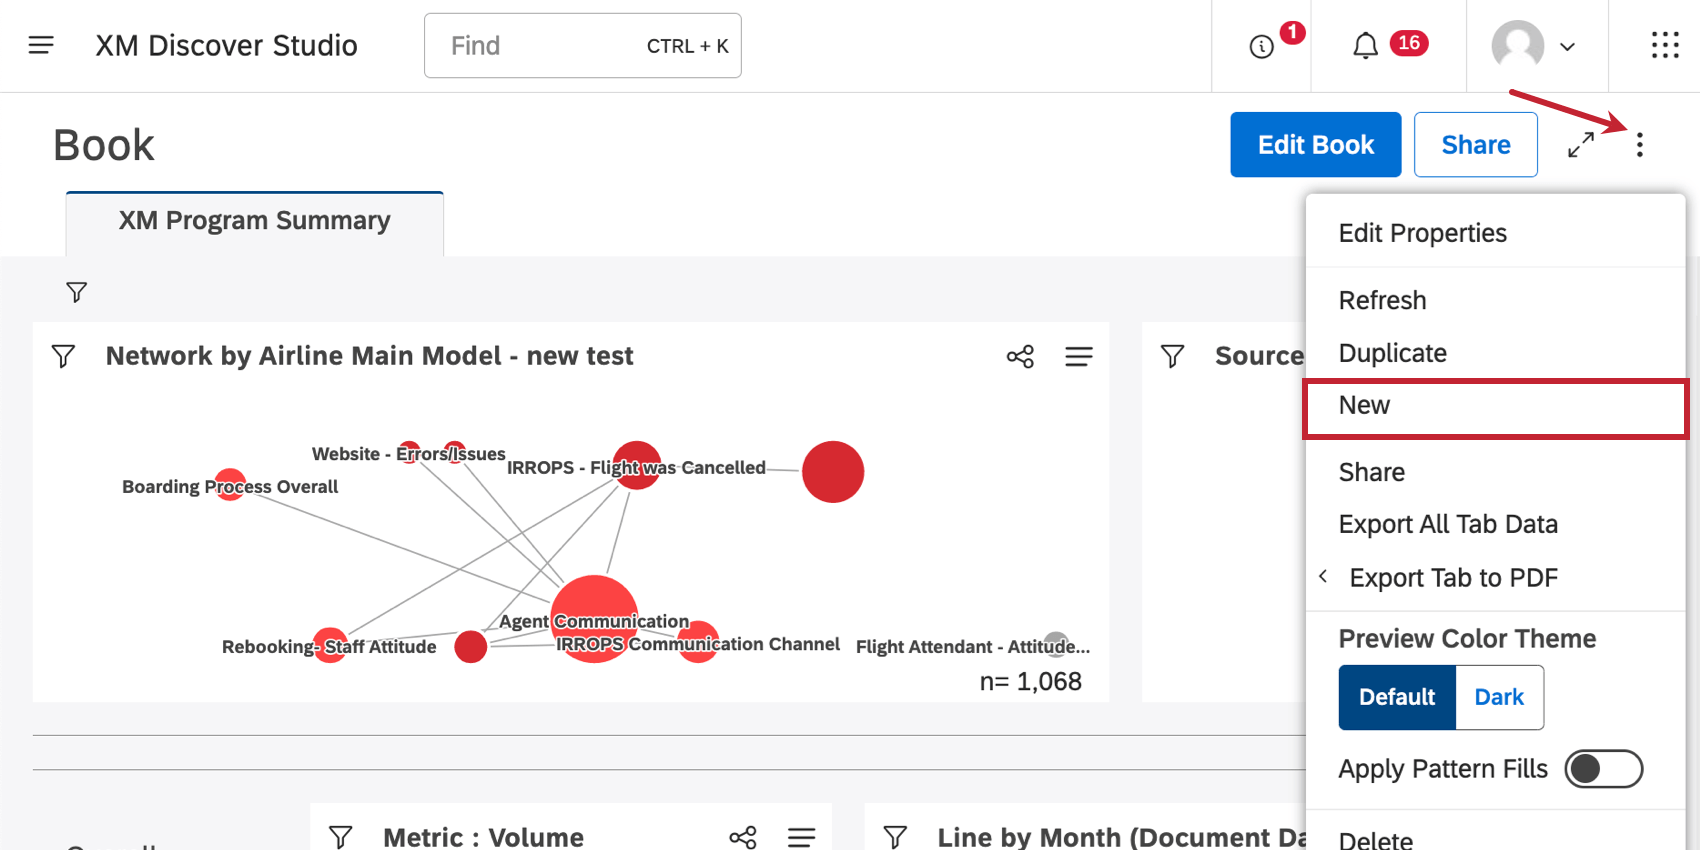
- When viewing or editing any book, expand the options menu in the header and select New.
- Alternatively, you can duplicate a book.

Once you select one of these options, it’s time to start creating your book.
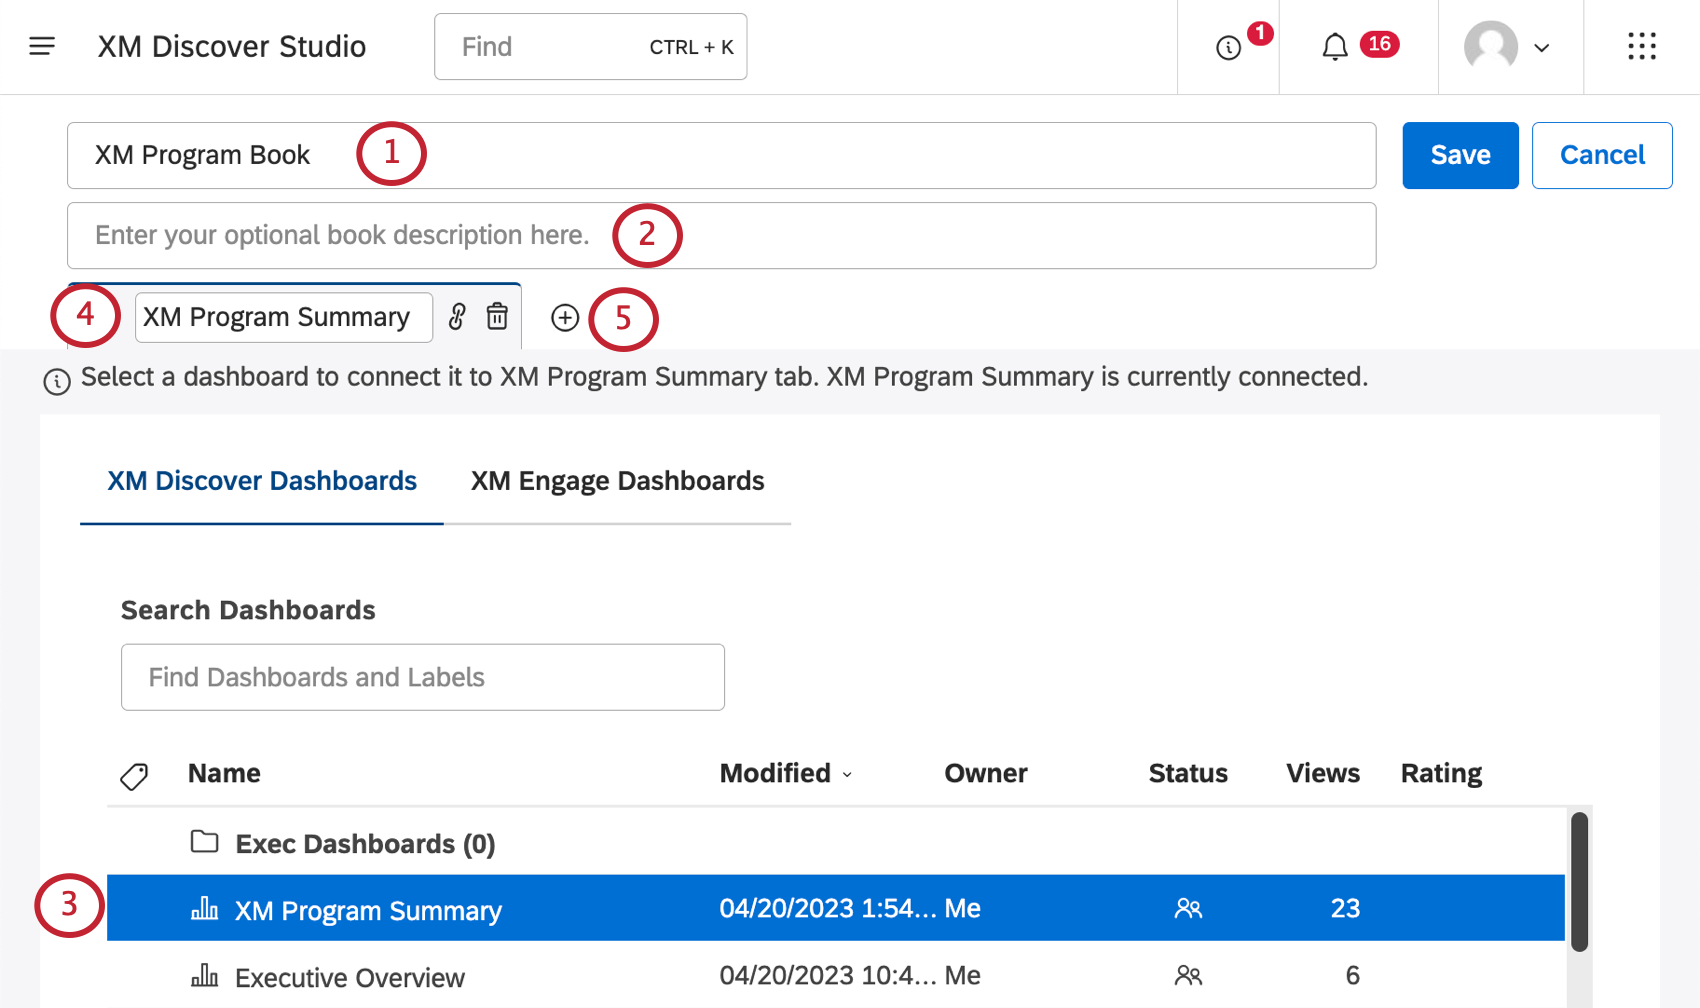
Qtip: Book names must be unique.
Qtip: For guidance on which dashboards you can add, see Editing Books.
Qtip: The maximum length for a tab name is 50 characters. Longer dashboard names are automatically shortened.
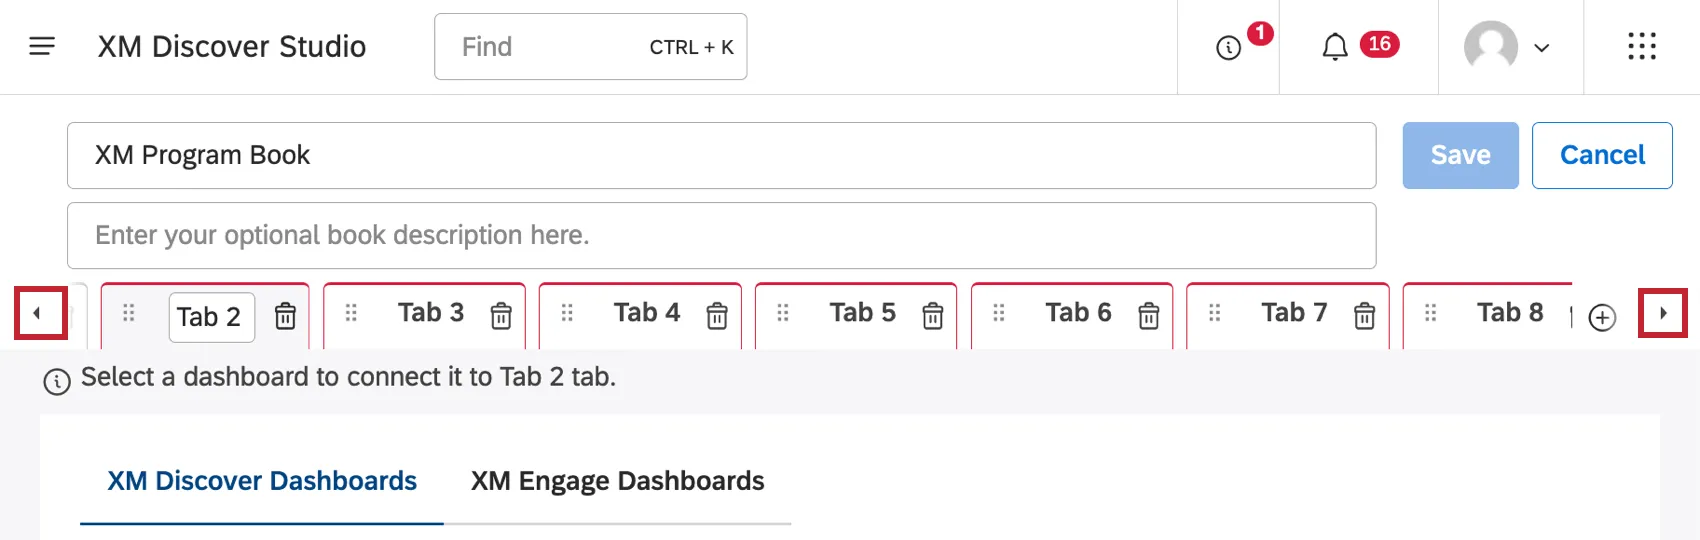
Qtip: Click the name of the tab to switch to it. The current tab is highlighted.
Qtip: All book tabs appear in a single row. Use the arrows to navigate tabs.

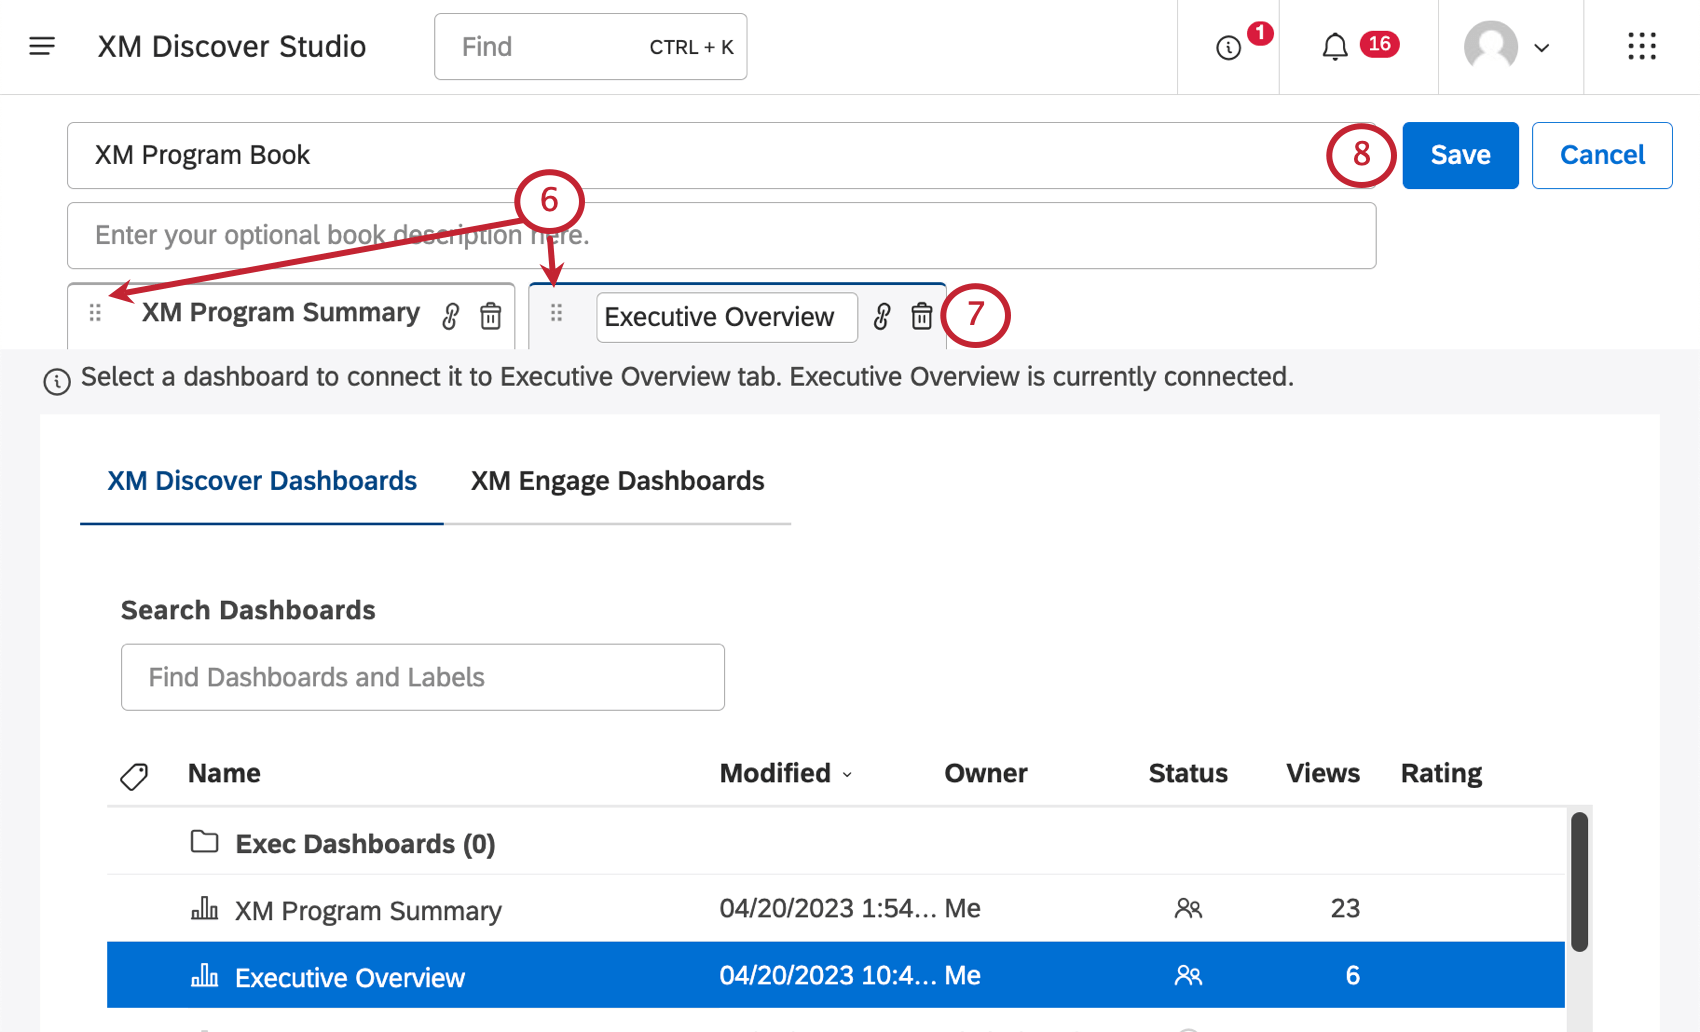
Qtip: By default, viewers will land on the first tab when they enter the book.
Books appear under Explore Dashboards & Books with a book icon next to their names.
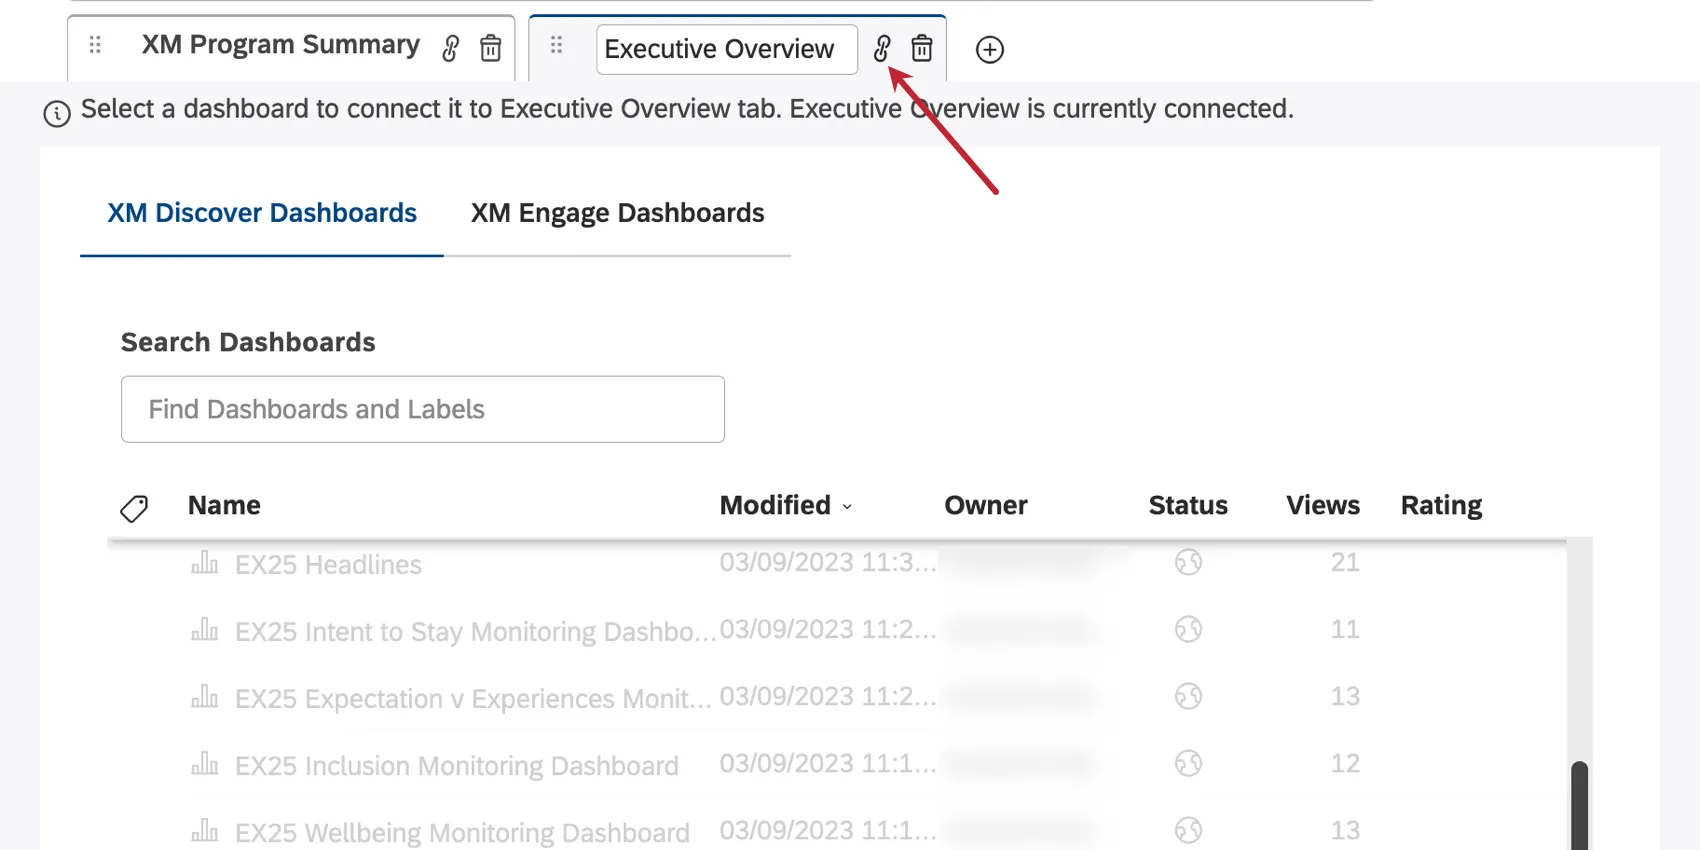
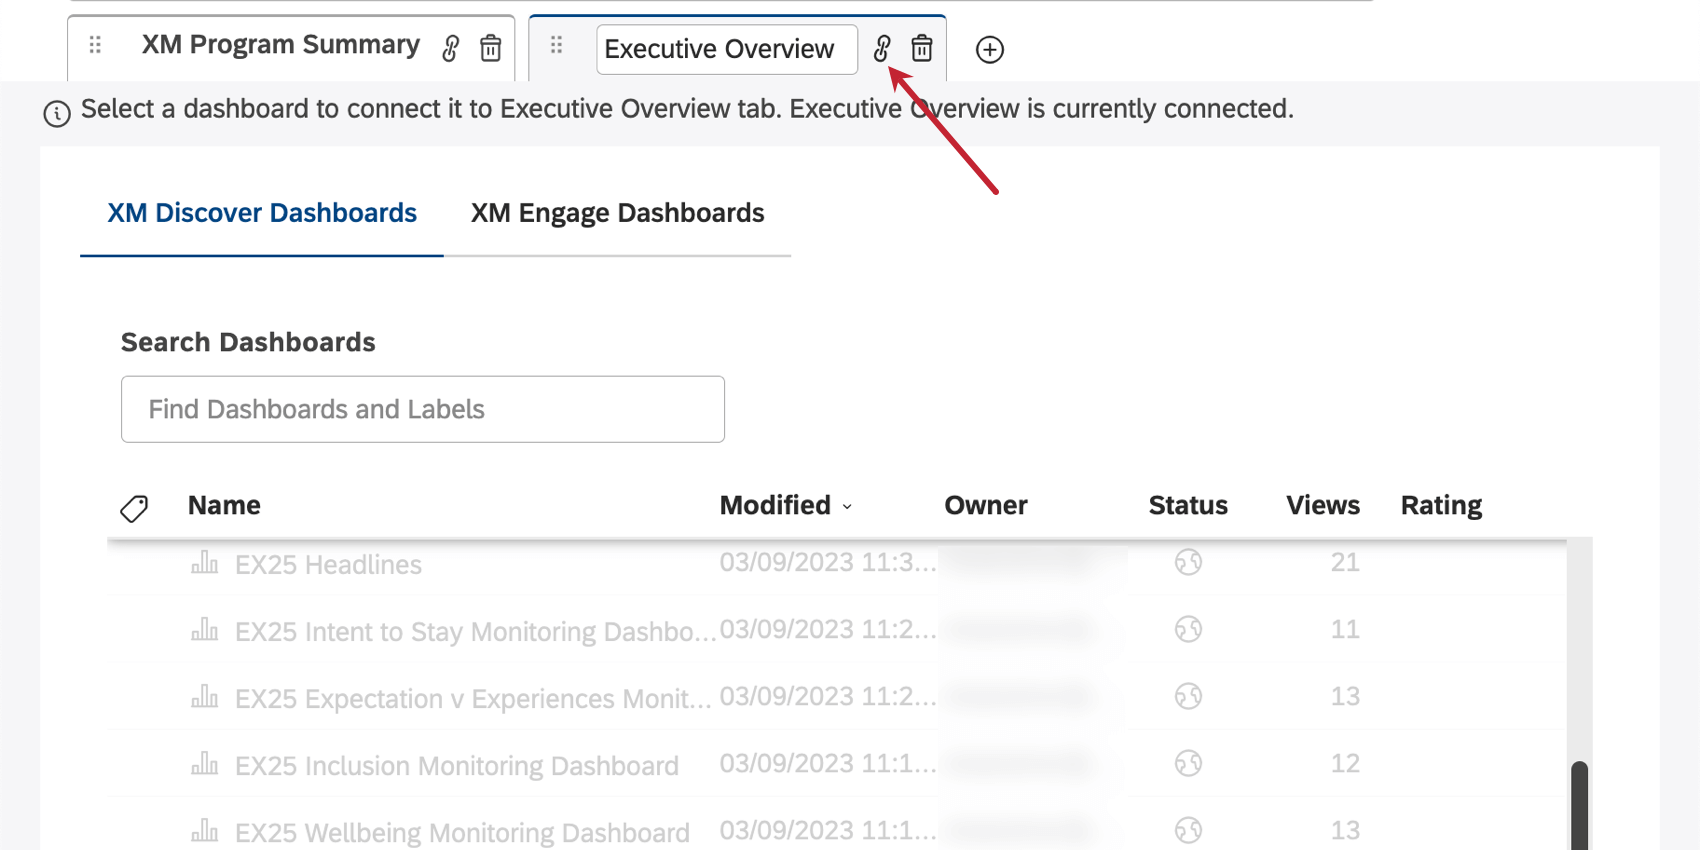
Qtip: If you have a long list of dashboards and aren’t sure which one is connected to a tab, click the link icon. It will automatically scroll you to the linked dashboard in your list.
Embedding Qualtrics Dashboards in XM Discover
Users with access to XM Discover and CX or EX dashboards can use Studio as the single reporting platform by embedding their dashboards in Studio books. For more information, see Embedding Qualtrics Dashboards in XM Discover.
That's great! Thank you for your feedback!
Thank you for your feedback!