
Employee Directory (EX)
What's on this page
About the Employee Directory
Your Employee Directory contains a list of all people – participants or administrators – uploaded for use in EX projects. Each person may or may not be included in a project or hierarchy. Additional staff can be added manually or by mass import.
The directory is useful because it allows you to save a lot of information about people for reuse across multiple projects. For example, you can save metadata, manager-direct reports relationships, and email addresses inside the directory.
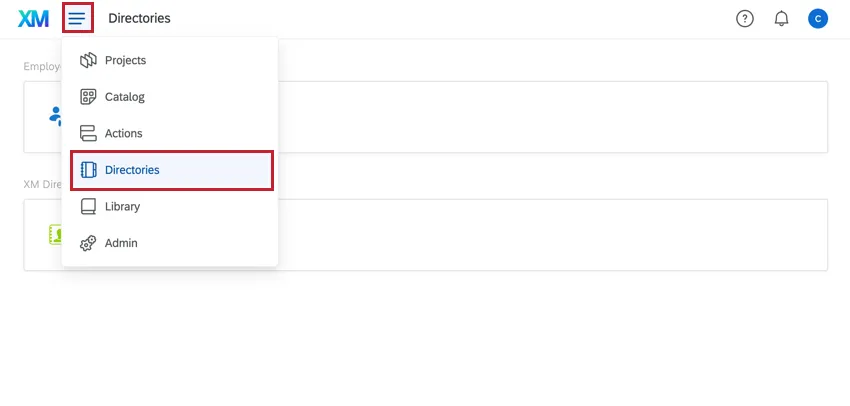
To navigate to the Employee Directory, use the navigation menu in the top-left to select Directories and then choose Employee Directory.

Qtip: By default, only Brand Administrators, EX Administrators, and Employee Insights Admins will have access to the Employee Directory. To give access to other users, enable the Access Directories account permission. Note that users with access to the Employee Directory will be able to view and modify all personal information and metadata for all users within your license.
Attention: Your directory contains every participant and user in your entire organization! Be very careful when adding and removing people, since you are not just adding or removing them from a single project.
Global Information Window
When you click on a person’s name or email address inside the Employee Directory, this opens the global information window. Here, you can view and revise information about a particular person in your directory.
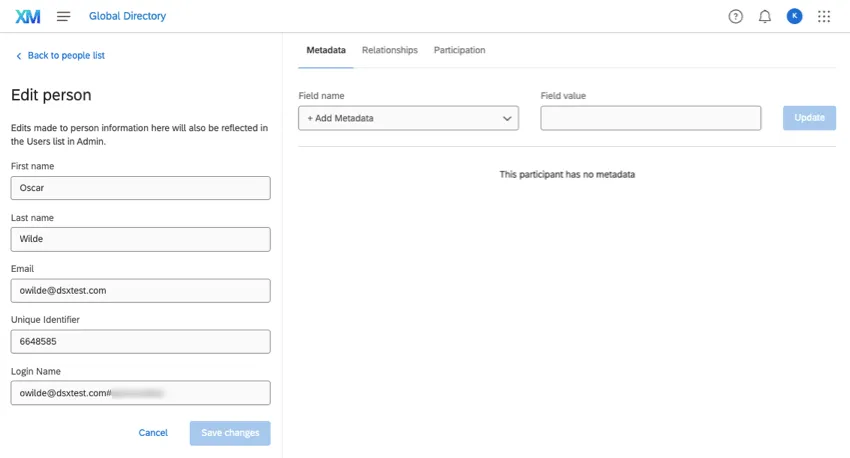
Basic Information
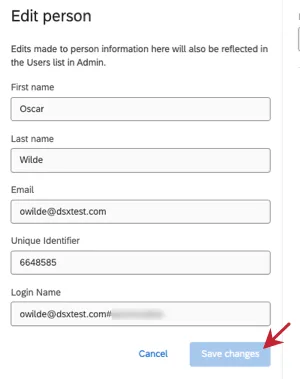
On the left, you’ll see information about the First Name, Last Name, Email, Unique Identifier, and Login Name. To edit a field, click the field and type in the new value. Then click Save changes.
This change will reflect in the Admin page and all projects in which the individual is a participant.
Metadata
Click Metadata to see a participant’s metadata, edit it, or add additional fields.
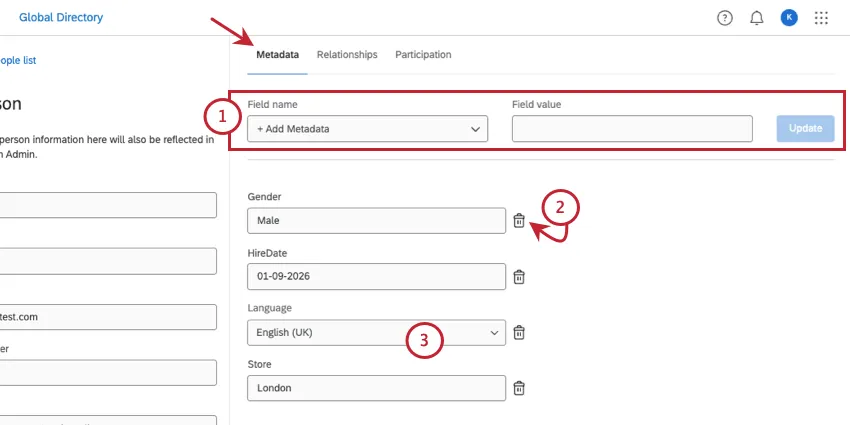
Qtip: If you’d like to remove fields from the entire directory, see Manage Metadata.
Attention: Changes made to metadata in the directory will not reflect in projects. The only exception is 360 projects with a status of New.
Relationships tab
The Relationships tab allows you to manage a person’s relationships in 360 projects. Relationships established here can be loaded quickly and efficiently into a 360 project for future use.
These relationships will not affect other EX projects, like Employee Engagement or Employee Lifecycle, in any way.

To add a relationship:
To remove a relationship, click the dropdown next to a relationship and select Delete.
Participation tab
The Participation tab displays every 360, Employee Engagement, and Employee Lifecycle project the person is listed as a participant in.
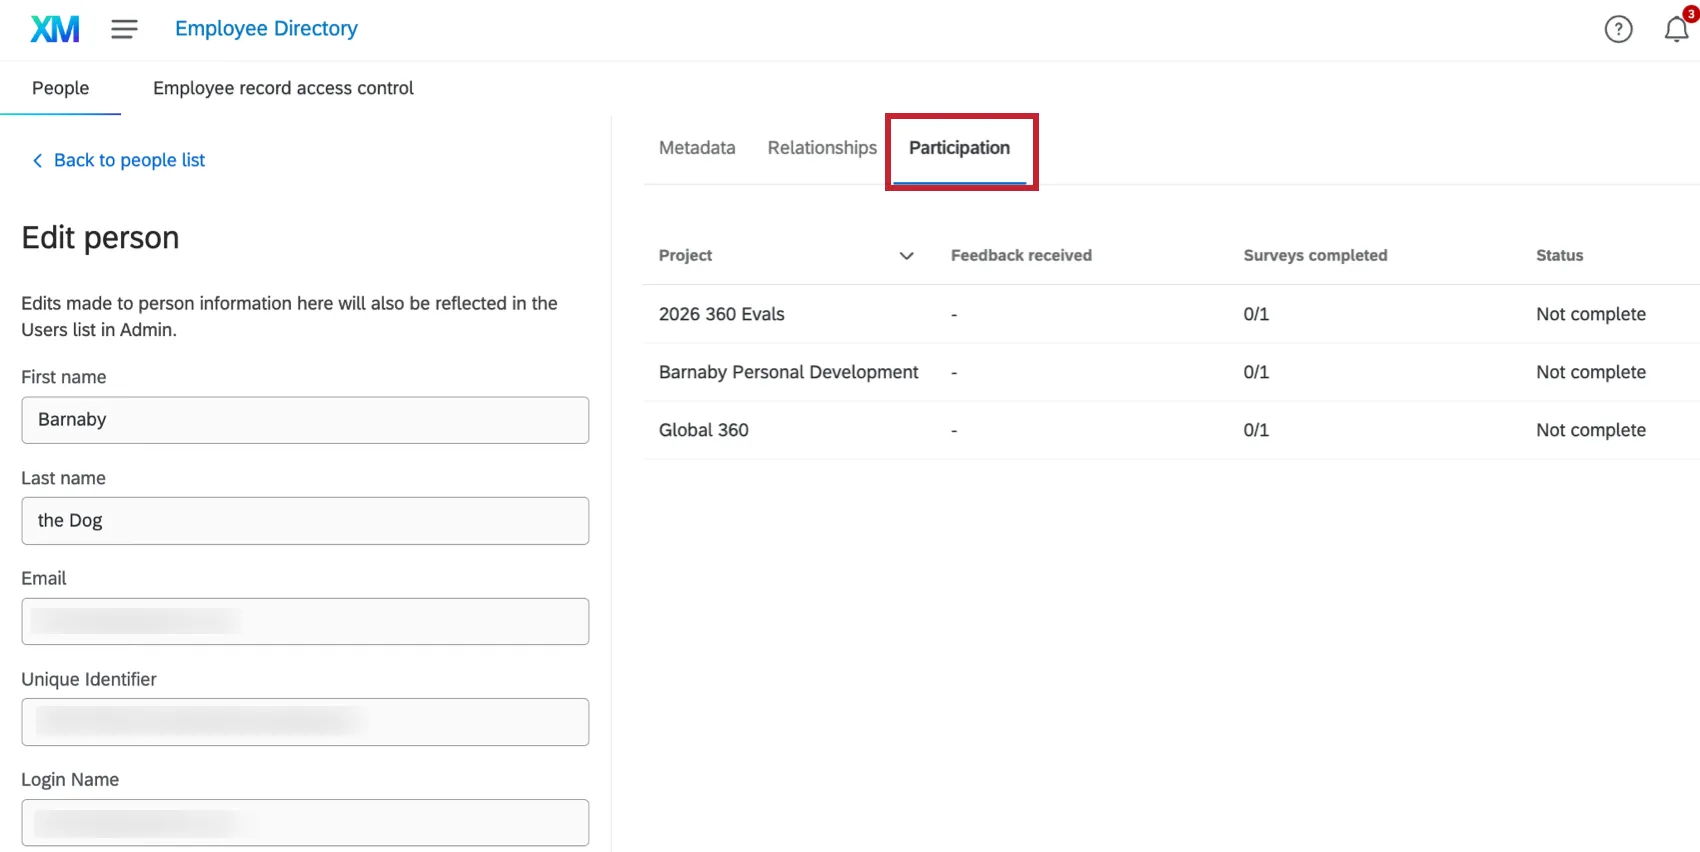
- Project: The project’s name.
- Feedback received: In a 360 project, this is how many other participants submitted feedback evaluations for this person.
- Surveys completed: In a 360 project, this is how many feedback evaluations this person completed for themselves and other people. In an Employee Engagement project, this number is 1, because the person only completes 1 survey per project.
- Status: Whether the participant’s response is Complete or Not Complete.
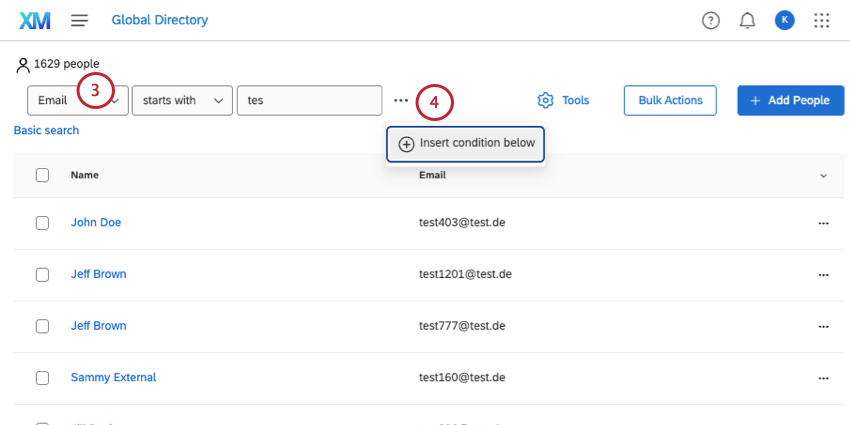
Searching the Directory
You can search for a desired participant by typing a name or email address into the Search bar, or you can make use of the Advanced Search feature.
Conducting an Advanced Search

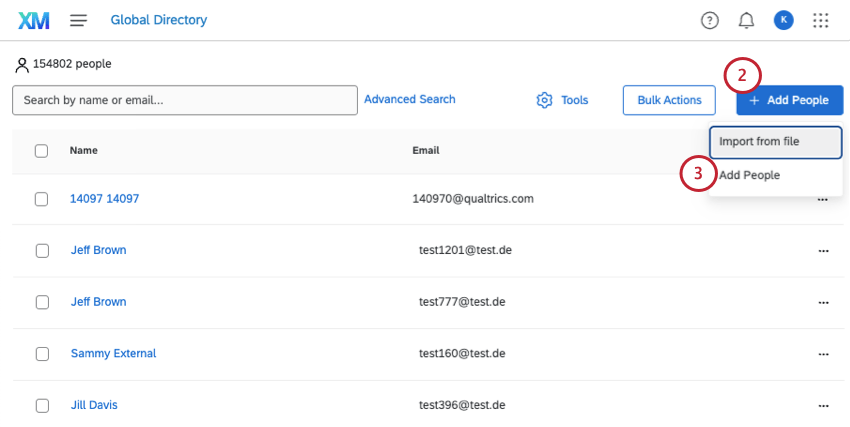
Adding People Manually
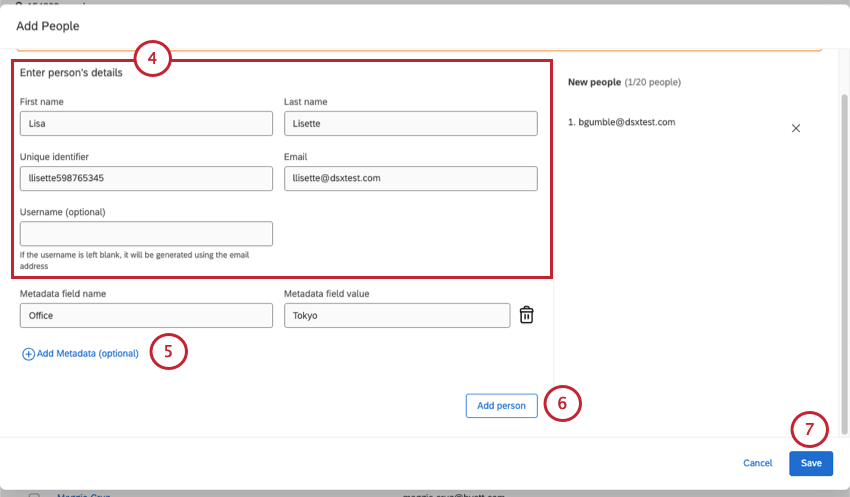
Attention: Make sure you are using the correct Username for your organization. For example, Jane Doe’s username at Company, Inc. might be jdoe@companyinc.org. You can also leave Username blank to have one automatically generated using the email address. If your company uses SSO, leave this field blank, and the SSO format of #brandname will appear at the end automatically.
Qtip: You may need to scroll to see this button.
Qtip: This window can also be used to edit users. If you use the search box to find existing users, or enter the Unique identifier exactly as it’s saved in the directory, you can change a user’s name, language, email, and metadata. When you click Add, instead of creating a duplicate person, the directory will just update the person using the unique ID as a reference.
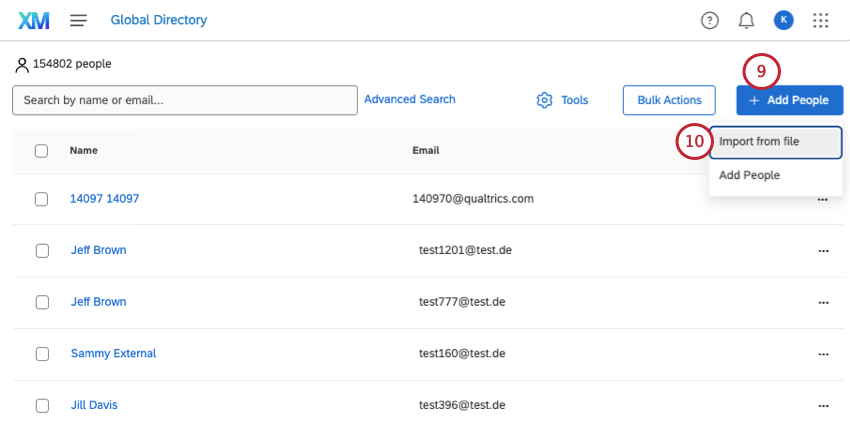
Importing People
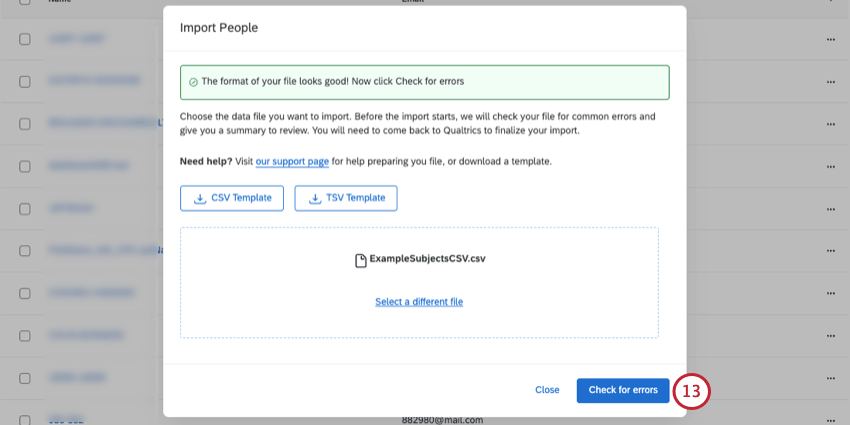
Instead of adding people manually, you can also upload a spreadsheet.
How to Import People
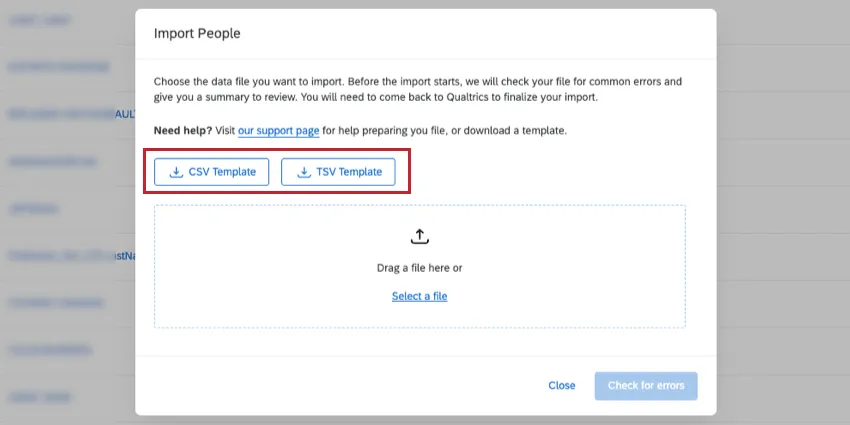
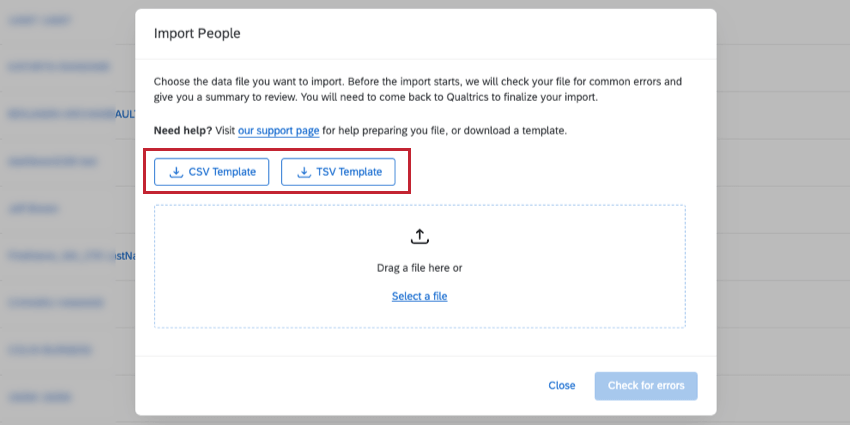
Qtip: Check out an example file by clicking either CSV Template or TSV Template. If you decide not to use the example document to upload people to your directory, make sure the Unique Identifier, Email, FirstName, LastName, UserName, Password, and Language fields match this formatting exactly (including spacing and capitalization) if you choose to add them.
Import Fields
- Unique Identifier: The means of differentiating the participant from others in the directory. See Unique Identifiers for more details. This field is required.
- Email: The person’s email address. This field is required.
- FirstName: The person’s first name. This field is required.
- LastName: The person’s last name. This field is required.
- UserName: The username a person uses to log into dashboards, admin accounts, and more. If you don’t provide a username, the email address will be used. For organizations with SSO, a hashtag (#) followed by the organization’s ID will be added to the email to create a username.
- Password: The password a person uses to log into dashboards, admin accounts, and more.
- ManagerID: The email address or username of the person’s manager.
- Language: The language the user should see the survey in. This field has a pre-defined set of Available Language Codes. EN, for example, refers to English, while FR refers to French.
You can also add as many custom columns as you want. These columns are referred to as metadata, and can be used in the dashboard to create more dynamic filters and data reporting.
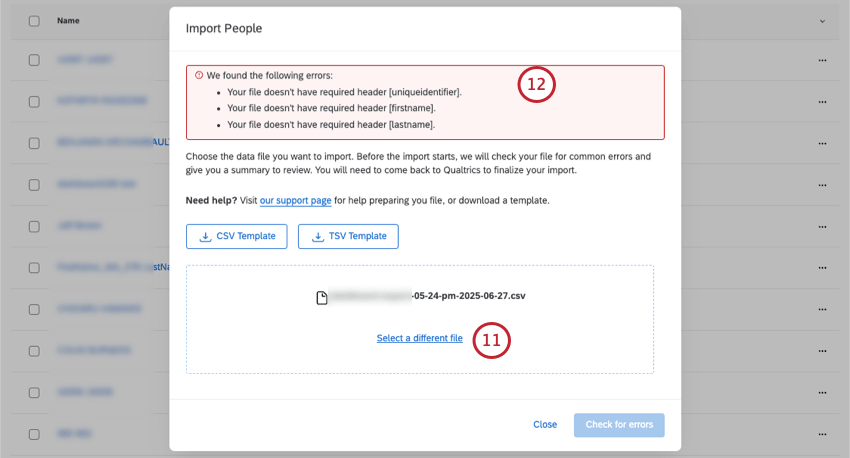
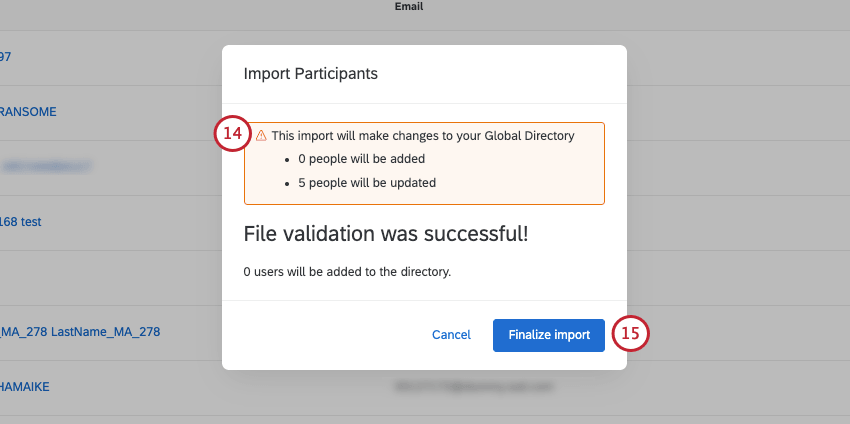
Errors Detected
If the importer detects errors with your import, you will be given an error report that you can download as a CSV file. This report contains information about which rows in your column contain the errors.
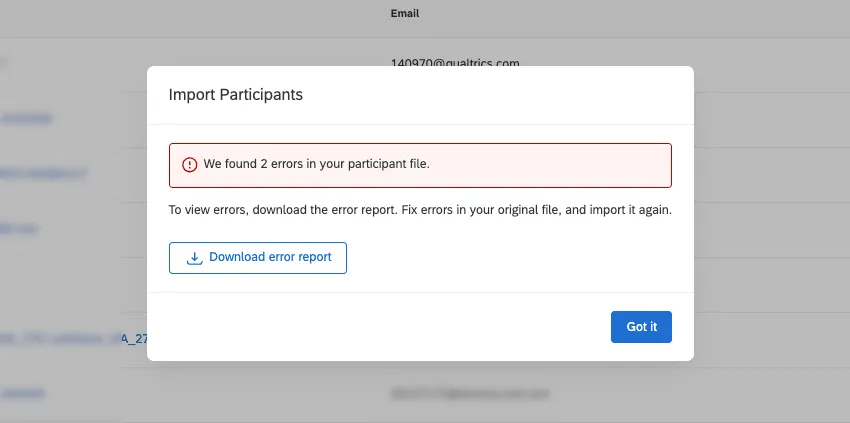
Click Download Error Report to view this.
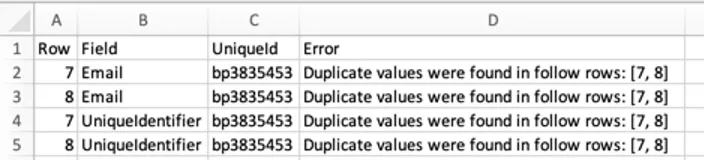
The report will give the exact row of the file that had the error, the field that had the issue, and the unique identifier of the participant who had the error.
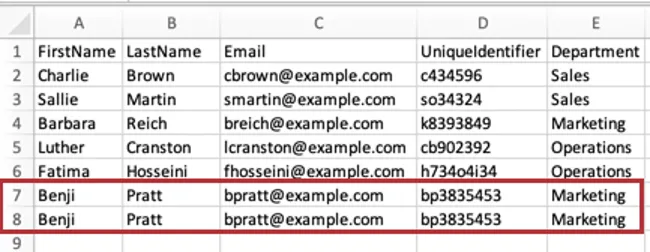
Example: We accidentally uploaded our user with the unique identifier “bp3835453” twice. Both the unique identifier and email address are the exact same on each of the 2 rows. If we erase 1 of the rows, the issue will be resolved when we go back to upload the file.
Qtip: The person importer does not detect hierarchy-specific issues.
Common Errors to Watch Out For
Although this is not an exhaustive list, here are some general tips for building your file to help you avoid issues uploading participants:
- Make sure the first row of the file has UniqueIdentifier, First Name, Last Name, and Email.
Your file headers should not contain any special characters – this includes characters that are not numbers or the English alphabet.

Qtip: This rule only applies to headers, not column values.
- Headers cannot exceed 100 characters.
- Your file headers should not use terms from existing Qualtrics fields:
- SID
- RID
- Auditable
- EndDate
- RecordedDate
- StartDate
- Status
- Points
- Be careful not to include duplicates of the same row – no 2 participants should have the same unique identifier or email.
- The file should not have more than 200 header fields.
- The file should not have more headers than columns.
- Make sure column values do not exceed 1000 characters.
Removing People
Attention: You must be a Brand Administrator to remove someone from the Employee Directory. If you are not a Brand Administrator and would like someone to be removed, contact your Brand Administrator.
Warning: Deleting someone from the directory also deletes all of their responses in all projects! Be very sure you want to remove someone before doing so.
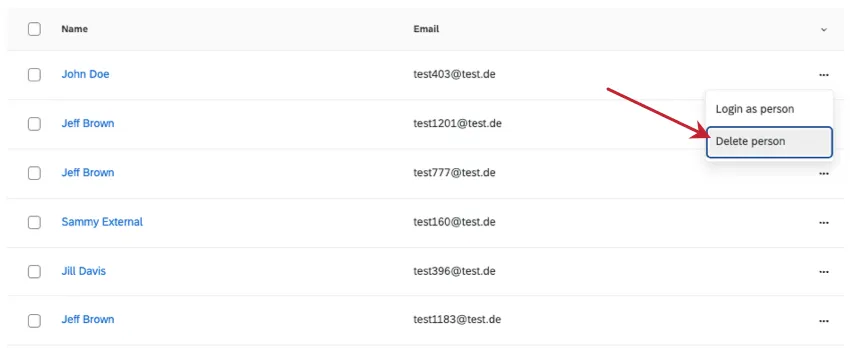
Individually removing one employee at a time
To remove 1 employee from the directory, click the arrow next to them, and then select Delete person.
Manually removing multiple employees at a time
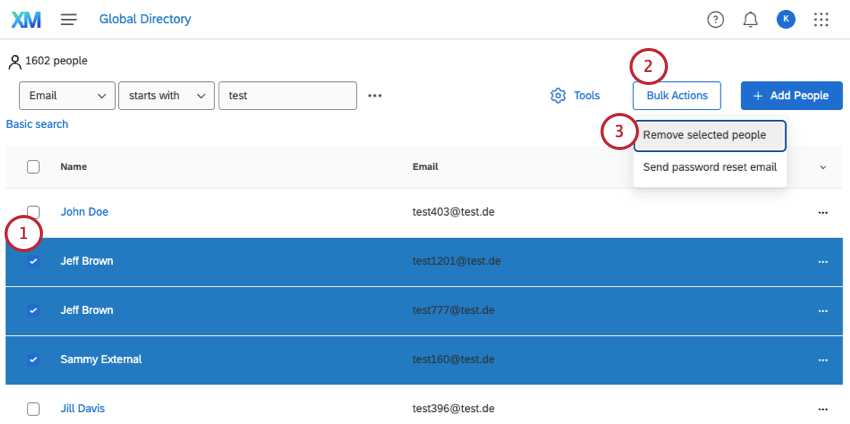
Qtip: There is a “select all” box you can use to select all of the people shown on a single page.
Removing many employees at once
Using a spreadsheet, you can upload a list of employees you’d like to delete from the directory. See Delete People from Directory.
Editing Multiple People at a Time
Using the import option, you can also edit multiple people in your directory at a time. Every time you import into the directory, the directory looks for a unique identifier that has already been assigned to a person. If it finds that person, it updates them with the new information instead of adding a duplicate.
Additionally, you need to be careful if your file contains the Email field. This Email field will be read as the participant’s username if no UserName field is specified. This can cause issues when updating participants in bulk if participants share the same email address. We recommend that you only include the UniqueIdentifier when updating participants, unless you need to update their email address or login name. If you need to update 1 of those fields, then we recommend including both in your import to prevent errors.
Qtip: Remember that uploading edits to participant metadata in a project is different from uploading edits in the directory. To ensure responses are updated to reflect new metadata, go to the project whose responses you’d like to update update responses with new metadata.
When importing people into the directory, you can only add onto existing fields. If you include a metadata field as a header with no values, this will erase any previously uploaded values for the participants in the file. Excluding a column altogether will not remove that data.
Example: If you initially uploaded people into the directory with Age and Department metadata, then decide to import another file with the same people, but no column for Department, Department will not be removed. However, if the column Department is included in the file and has blank values, then this metadata will be removed for any participant in the file.
Qtip: Metadata edits made in the directory only apply to the directory, and metadata edits made to the project only apply to the project. However, if edits are made to first name, last name, UserName, email, or Unique Identifier, the information will be updated across the platform.
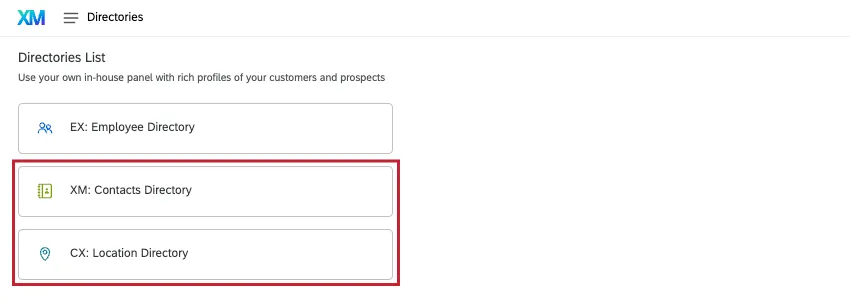
Other Directories
When you visit the Directories page, there may be multiple choices. The first is the Employee Directory, which gives a list of possible participants for your Employee Experience projects. The second is the Contacts Directory. You may also see a Location Directory. These directories are completely separate from the Employee Directory.
The Contacts Directory contains lists of respondents for the Survey Platform instead of participants for Employee Experience projects. These contacts do not have any means of accessing features like dashboards and participant portals. Someone can be listed in both the Employee and Contacts directory, but a person listed in one directory is not automatically entered in the other, and changes to one do not affect the other.
The specific features available in the Contacts Directory differs based on the software you have purchased. See either XM Directory Lite or XM Directory.
The Location Directory contains location data that can be referenced in different projects and CX Dashboards.
Qtip: Interested in either of these options? Contact your Qualtrics Account Executive for more information.
FAQs
I'm uploading employees to my directory, and my organization has SSO. How do I format the UserName column?
I'm uploading employees to my directory, and my organization has SSO. How do I format the UserName column?
You should not include the SSO suffix (#brandID) in the participant usernames. Qualtrics will automatically add the suffix on all usernames. If you do include the SSO suffix, Qualtrics will add it a second time.
Can you set whether someone is a respondent (or non-respondent) in the employee directory?
Can you set whether someone is a respondent (or non-respondent) in the employee directory?
Are changes to members of my employee directory reflected in my project’s participants?
Are changes to members of my employee directory reflected in my project’s participants?
If you update someone’s unique identifier, first name, last name, or login information, this information will always be reflected in any projects that person is a participant in.
That's great! Thank you for your feedback!
Thank you for your feedback!