
Static vs. Dynamic Org Hierarchies
What's on this page
About Static vs. Dynamic Org Hierarchies
In order to add org hierarchy information to your dataset, the dataset needs to contain the users’ unique identifiers. If you are using an imported data project as a source in your dashboard, this is as simple as including a column with each user’s unique identifier in your CSV file.
However, if you are working with a survey project, you need to make sure the correct information is pulling into the survey before you can map it to the dashboard. There are 2 ways to do this. We will describe these methods in the next sections of the page.
Please note that this page describes functionality that is different from dashboarding in Employee Experience projects.
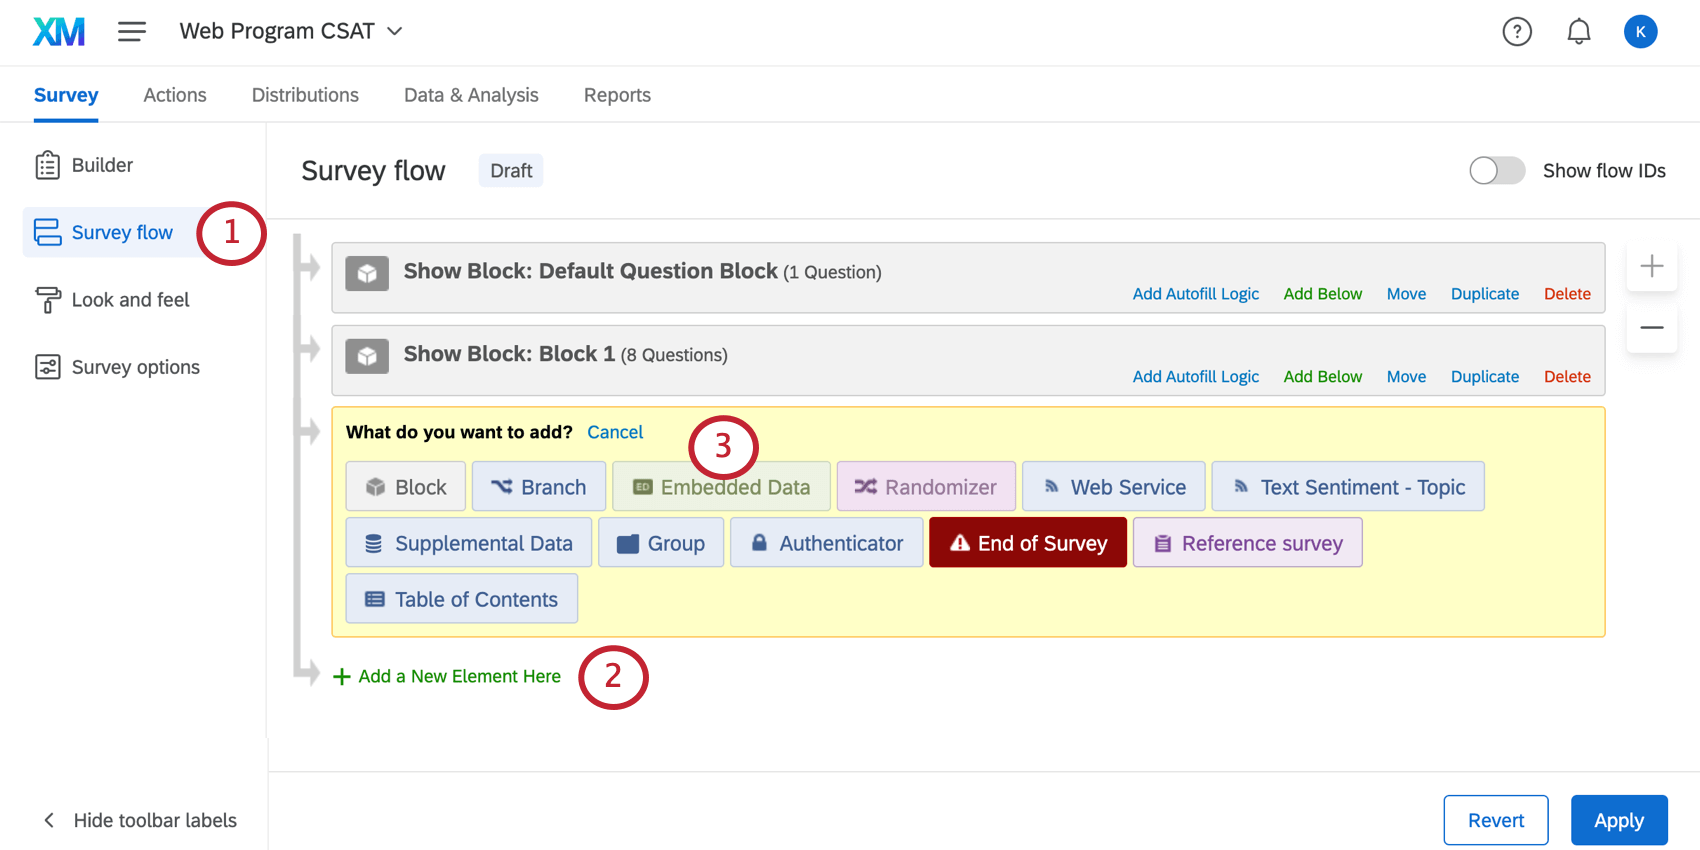
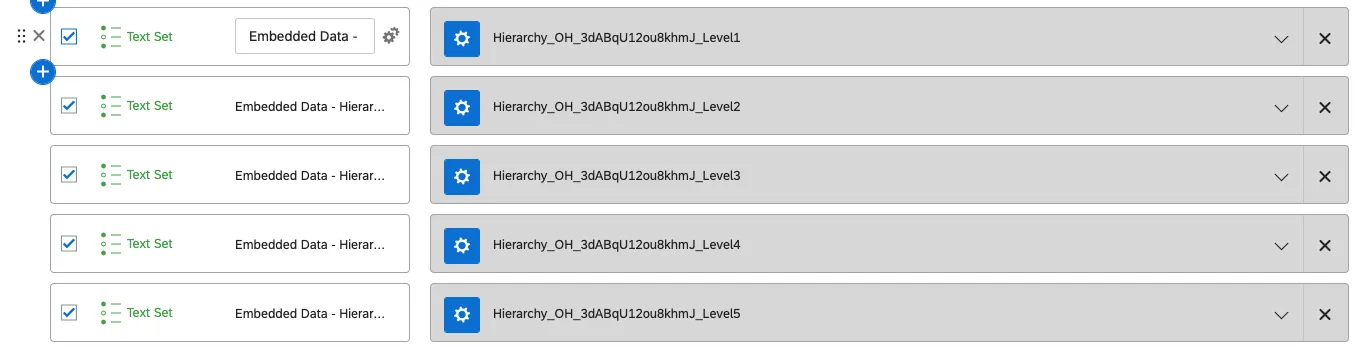
Option One: Static Hierarchies
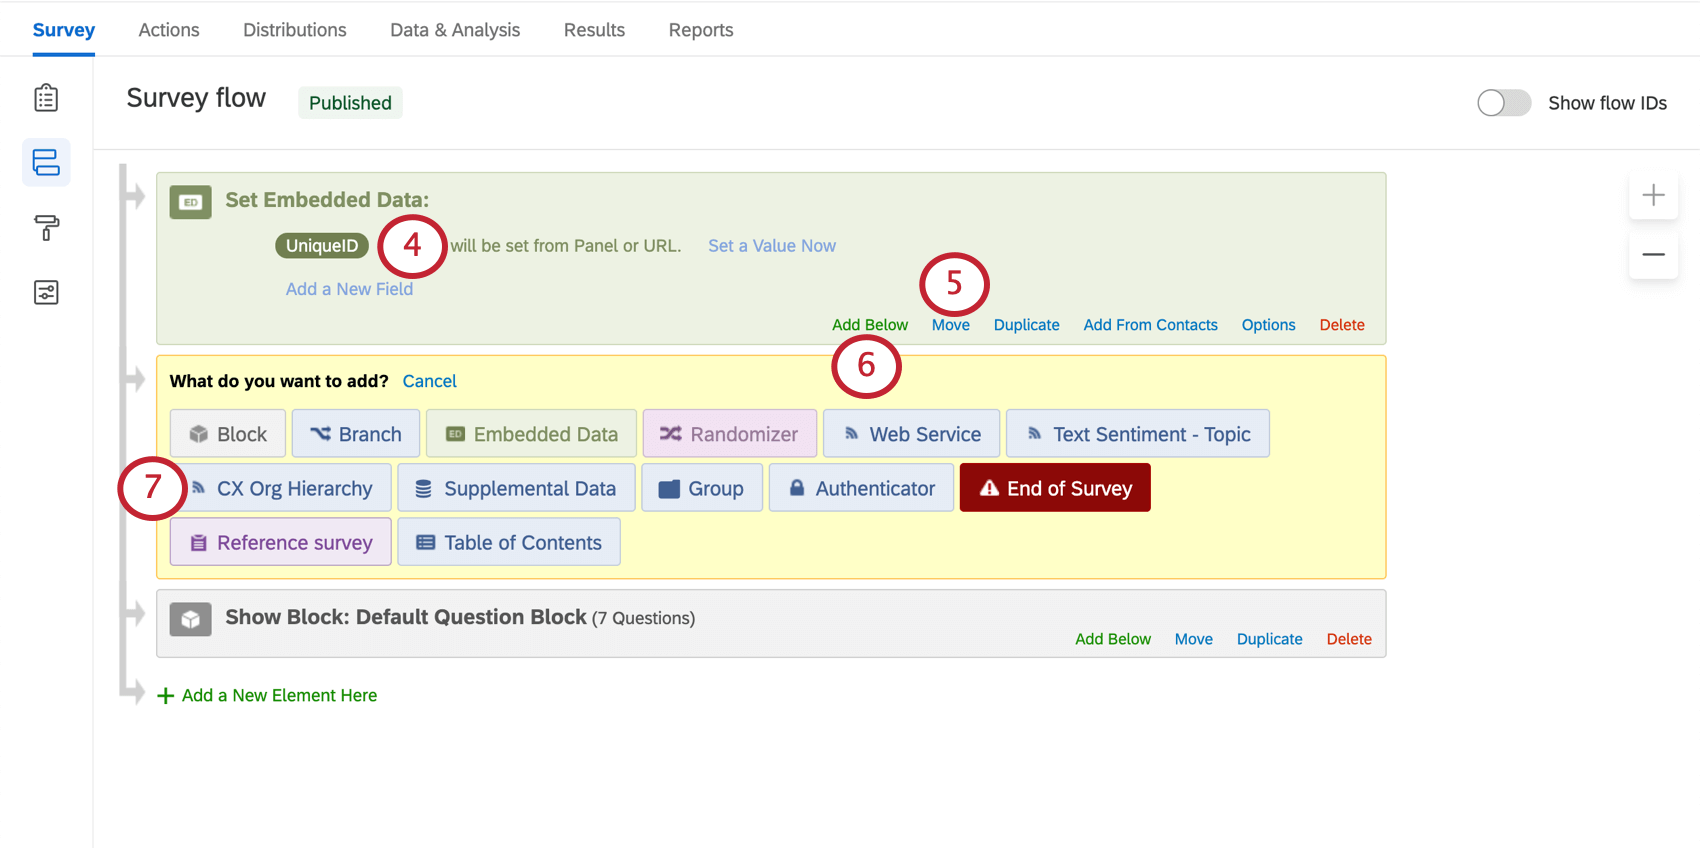
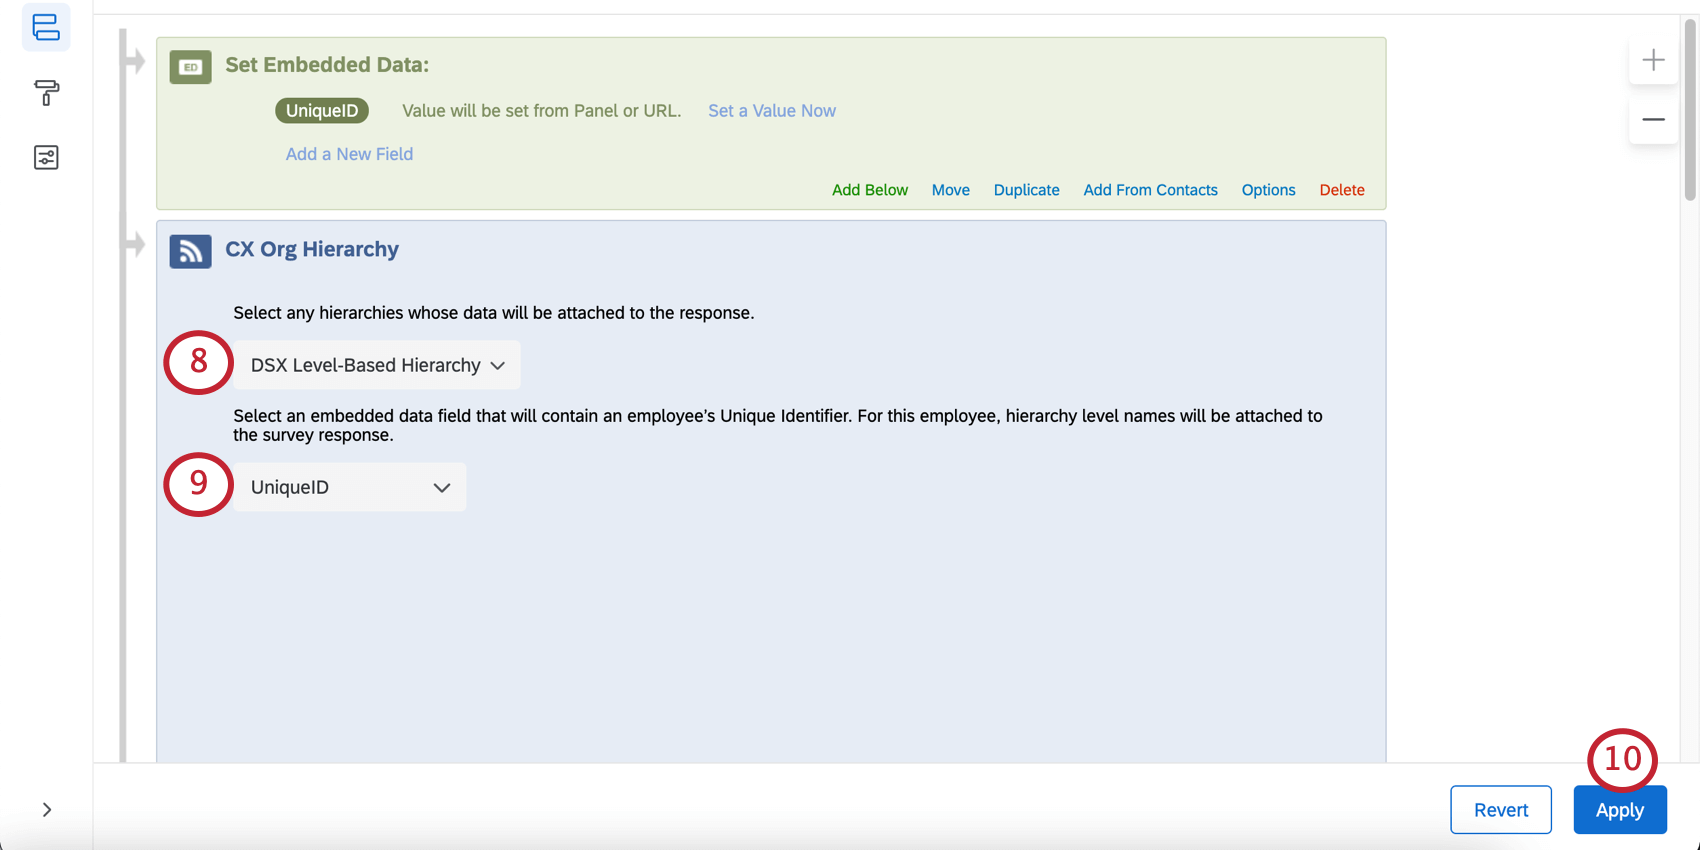
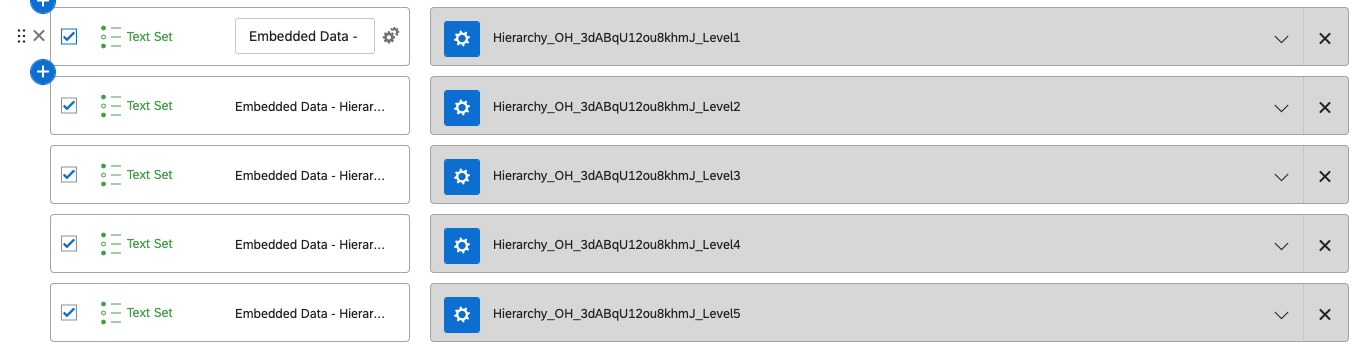
This first method allows you to add the hierarchy information directly to the survey response data as additional embedded data. This means that if adjustments are made to the hierarchy after data is collected, the hierarchy updates will only be reflected on future response data, since the hierarchy information is being added to the response at the time the survey was taken.
Qtip: This option is only available if you are using a level-based hierarchy.
Warning: This must match what’s in your mailing lists exactly, with the same capitalization, spacing, and spelling.
Qtip: Please note that only level-based hierarchies are supported at this time.
Qtip: You cannot create this element under any other survey flow element – e.g., you cannot add it under a branch, randomizer, or group. You can select multiple hierarchies within the same element.
Using a static hierarchy to filter a dashboard
When using a static hierarchy approach, you will not need to add an org hierarchy filter to your dashboard. Instead, you can filter by individual embedded data filters equating to hierarchy levels or by using a drill down field group. Changes to the hierarchy will not be dynamic with a filter created this way.
Qtip: While the same responses can be used for both dynamic and static hierarchies, you should only visualize the data using one approach at a time per dashboard. For example, you can use a drill down filter in your static dashboard and an org hierarchy filter in a different dynamic dashboard, but not both in the same dashboard.
Distributing Your Survey
Once your embedded data field and org hierarchy have been added to your survey flow, add the unique identifier field as a column in your contact list (XM Directory, non-XM Directory contacts). Make sure the way you spell the field’s name is consistent between the contact list and the survey flow.
Qtip: Contact lists can be used to distribute surveys through email, SMS text, personal links, and authenticators. Authenticators allow you to use one link to distribute your survey, putting the onus on the respondent to login with certain credentials before they can complete the survey. If your organization uses single sign-on (SSO), it’s even easier to capture user information using an SSO authenticator.
Option Two: Dynamic Hierarchies
This second method allows you to link the hierarchy to the dashboard data, not just the survey response itself. As a result, if the hierarchy changes, it will be reflected in the dashboard data.
Hierarchy information is linked with the response by matching a unique identifier in the response to the user’s unique identifier in the hierarchy. Hierarchy information is then matched to the dashboard data. Any time the hierarchy is updated, it will automatically match to the dashboard data, allowing for dynamic updates.
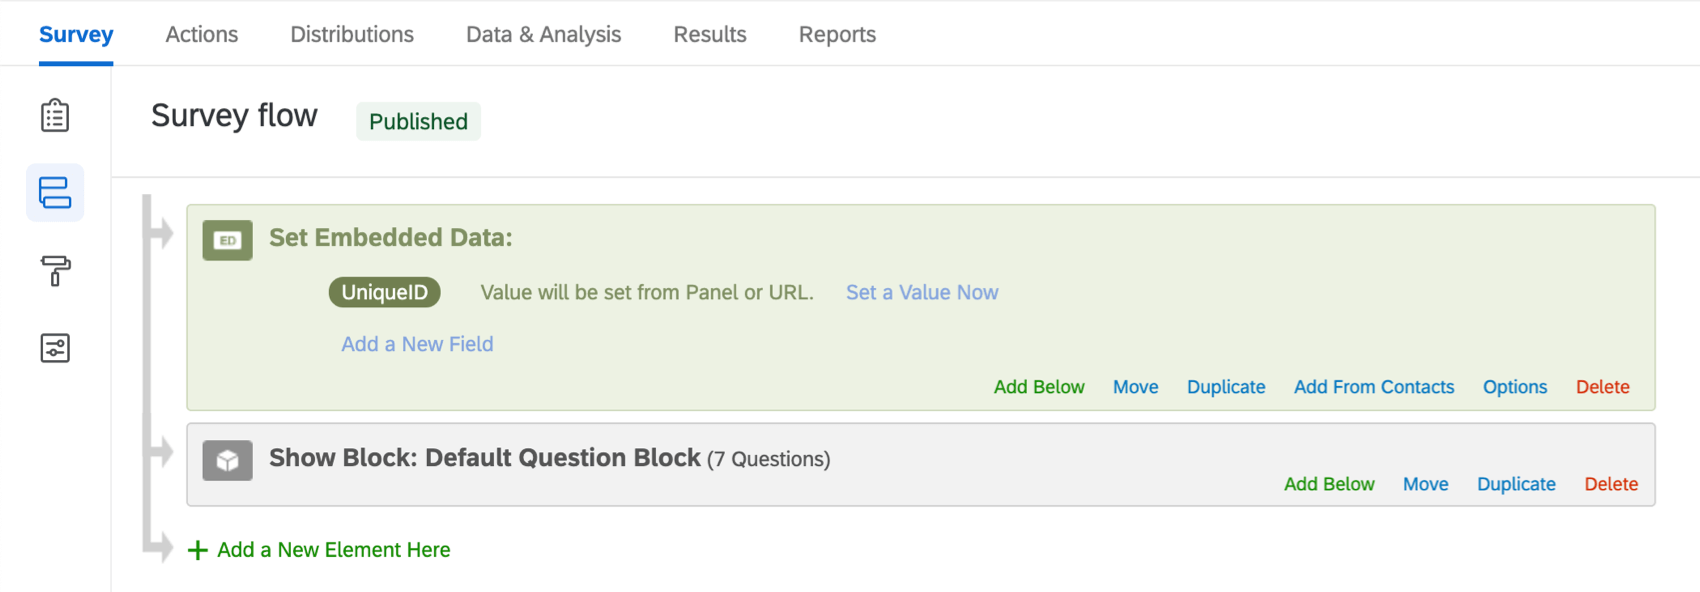
In order to implement dynamic hierarchies, first make sure that the response contains a unique identifier that matches the unique identifier of a user in your hierarchy. Then follow the steps to add an org hierarchy to a CX Dashboard.
If you haven’t collected data in your survey project yet, you can include unique identifiers with contact lists used to distribute the survey. Just add it as a column to your list (XM Directory, non-XM Directory contacts) and then include an embedded data field at the top of your survey flow. Make sure the way you spell the field’s name is consistent between the contact list and the survey flow.
Qtip: The embedded data can even be added to the survey flow retroactively, so long as you included this information in the contact list before you collected your survey data.
Warning: This embedded data must match what’s in your mailing lists exactly, with the same capitalization, spacing, and spelling.
Qtip: Contact lists can be used to distribute surveys through email, SMS text, personal links, and authenticators. Authenticators allow you to use one link to distribute your survey, putting the onus on the respondent to login with certain credentials before they can complete the survey. If your organization uses single sign-on (SSO), it’s even easier to capture user information using an SSO authenticator.
Existing Survey Data
If you’ve already collected survey data and need to add unique identifiers, then try these steps:
Alternatively, if you aren’t worried about user error, you can add a text entry question to the survey that asks for the unique identifier, then send respondents retake links. This is not recommended if you used an authenticator.
That's great! Thank you for your feedback!
Thank you for your feedback!