
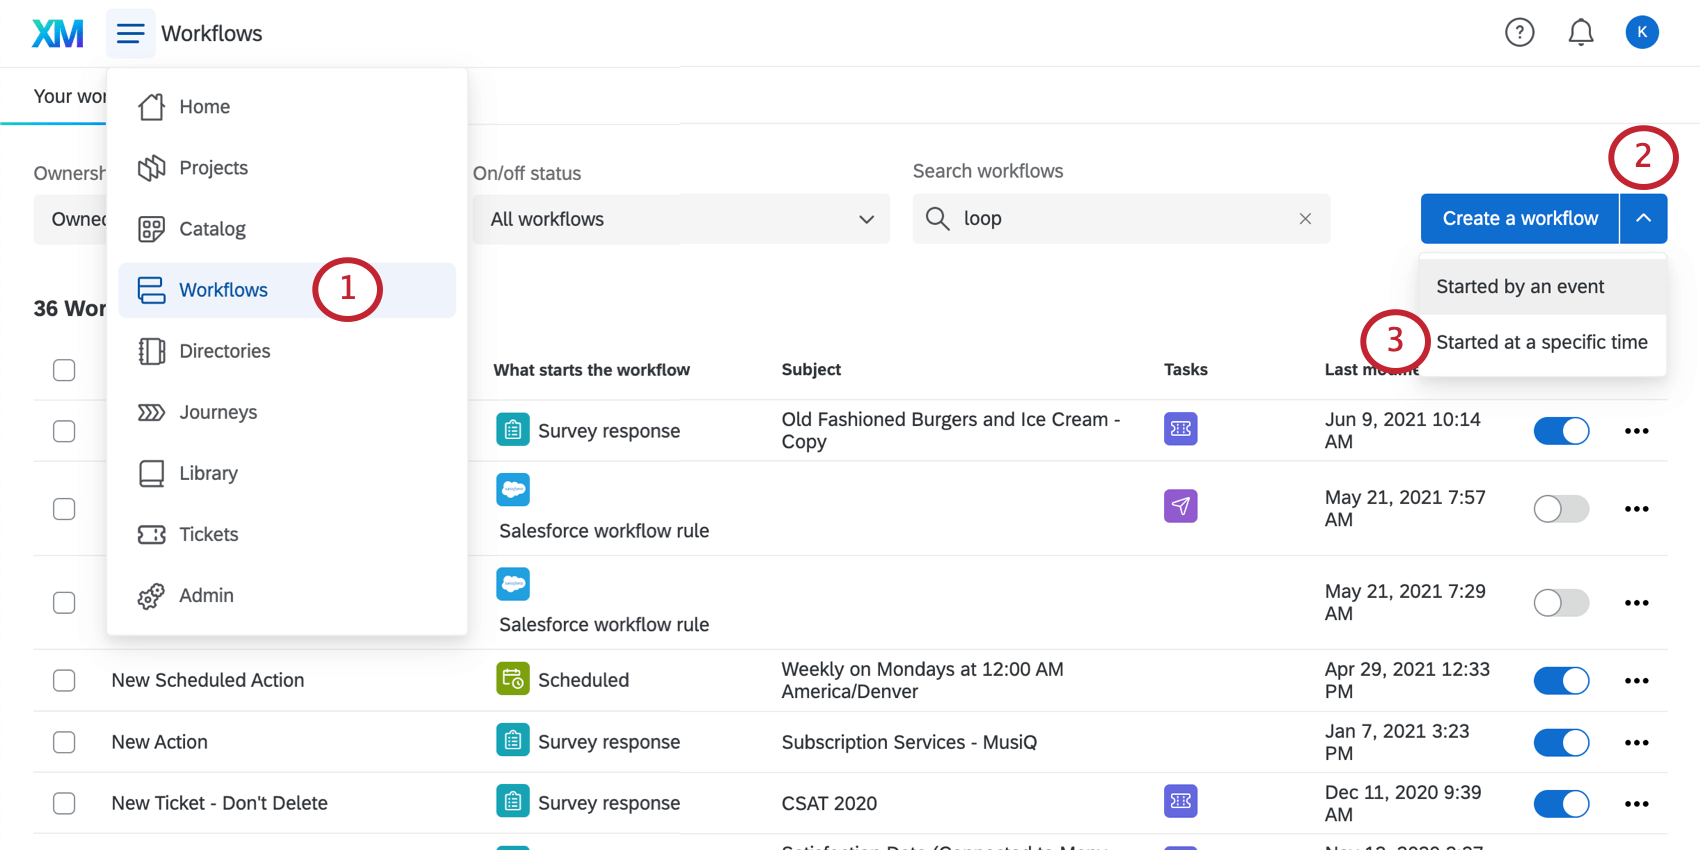
Workflow Loops
What's on this page
About Workflow Loops
You can use workflow loops to execute a set of automated tasks for multiple entries in a list. For example, you can send an NPS summary to each store manager containing the average NPS for their store, or send a monthly employee satisfaction score to each people manager in the organization.
Qualtrics achieves workflow loops through scheduled data extraction tasks. You can be specific about what gets executed for each data entry that’s extracted, otherwise known as a “list.” In other words, this is the list of all the people in a particular role (e.g., account managers, people managers, etc.), or all cities (e.g., Seattle, New York, etc.), or, more generally, all items in a table.
Example: For each manager, you want to calculate the weekly NPS score for their store, then email the manager if the NPS score is below a certain threshold.
Data Extraction Tasks
When creating workflows that loop, the first task you must add is a data extraction task. These types of tasks extract data from another source that you can then use or save elsewhere. Sources you can extract data from include:
Qtip: See a full list on Available Extractor Tasks.
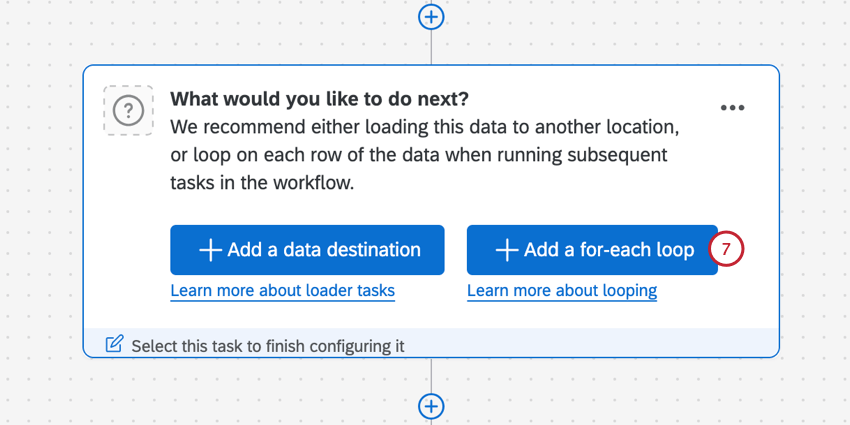
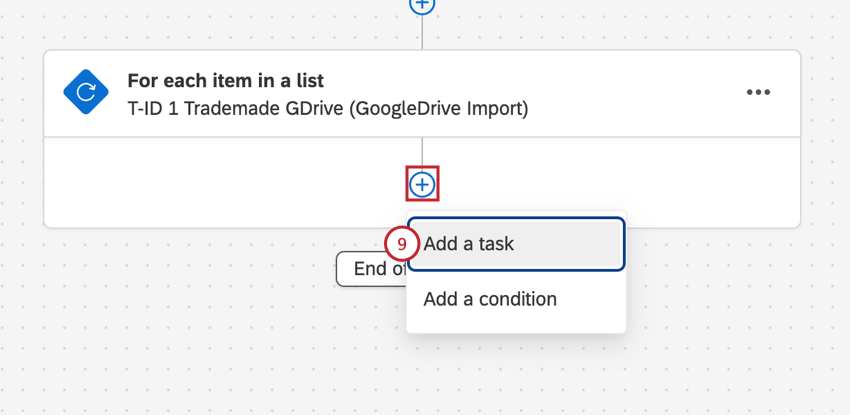
One of these tasks must be added to the workflow before you can specify what happens on each loop. Once you start building the tasks that appear in each loop, you are allowed to add any additional tasks you want.
Requirements for Workflow Loops
Before you create a workflow loop, here are some important things to keep in mind:
- Workflow loops are only compatible with scheduled workflows.
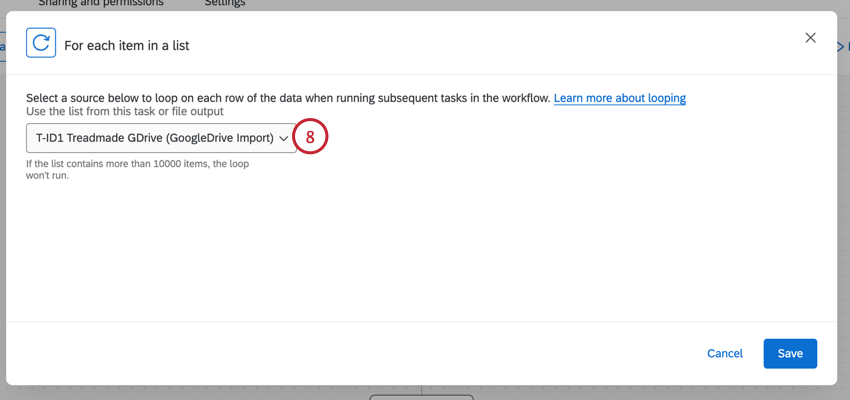
- You can only add 1 loop list to a workflow at a time. That means if you’ve added multiple data extraction tasks to your workflow, you can only base a loop off 1 of them.
- There can not be more than 10,000 rows across all files in the loop. Qtip: If you exceed 10,000 rows, the workflow will not run.

- Loops can only process files of a certain size. That means the file you extract must meet the following requirements:
- The file cannot be larger than 1GB.
- Each row cannot exceed 1MB.
- Loops cannot be added inside other loops.
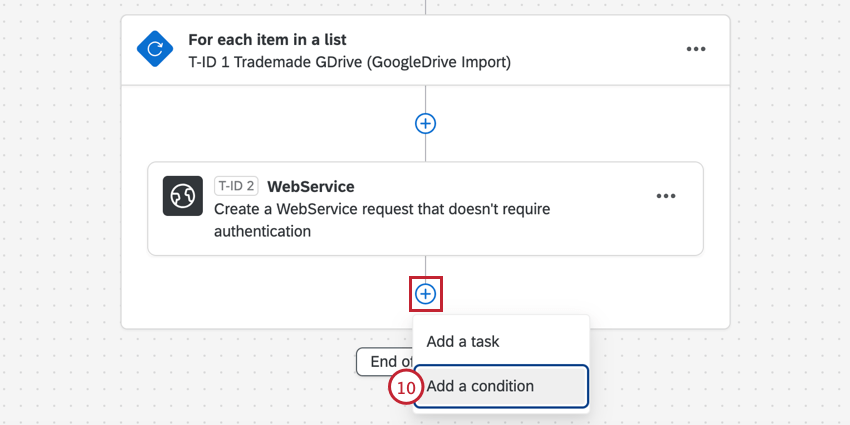
- You can only add up to 5 tasks in a looping list.
Setting Up Workflow Loops
This section covers how to set up a workflow loop using the example of sending a weekly NPS email to users that belong to the manager role. However, this is not the only use of workflow loops.
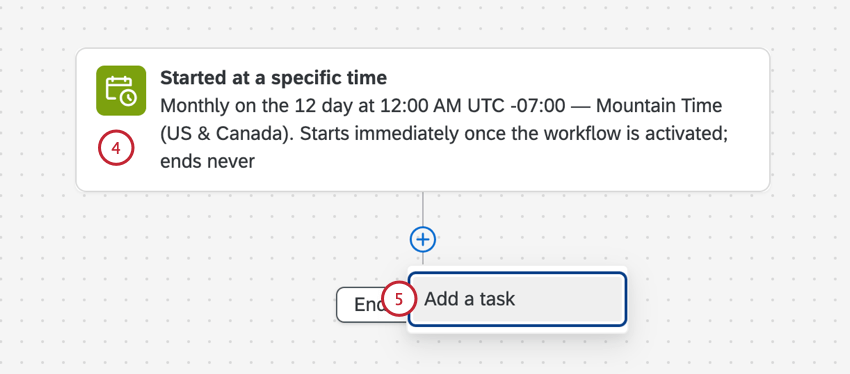
Example: We want to send an NPS email to each manager at the start of every week. Thus we chose to make our workflow happen weekly on Monday at 9am.
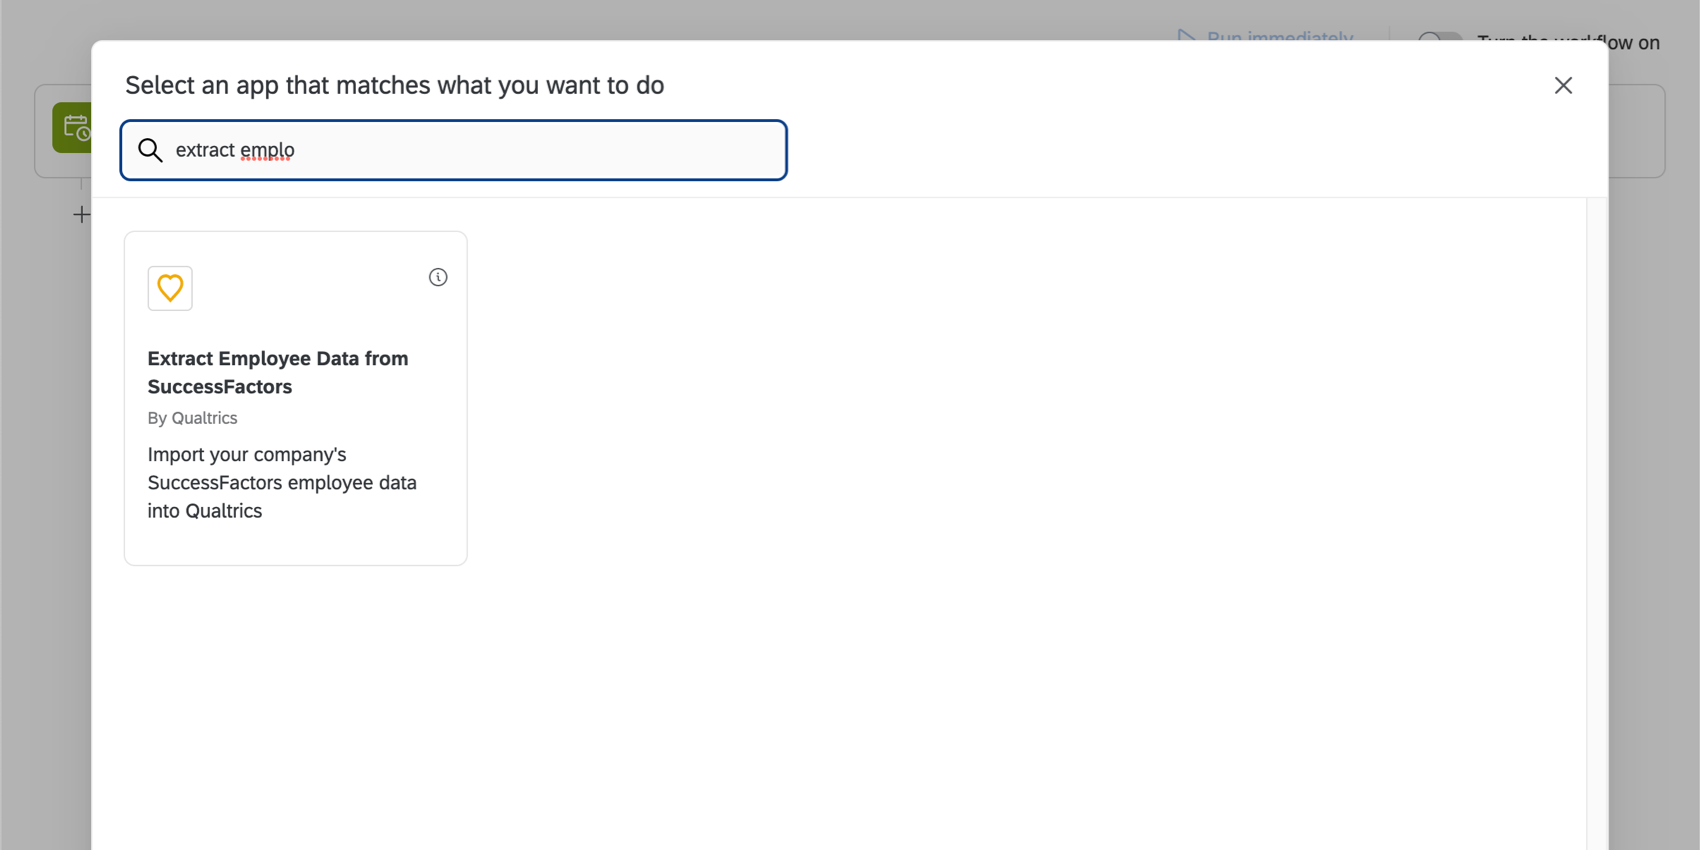
Example: We chose Extract employee data from SuccessFactors because we want to repeat certain workflows for every manager, who we have saved in SuccessFactors.
Warning: You should not use other data extractor, transformer or loader tasks inside of your loop. See this page for a list of such tasks. If you want to use a data loader task, consider building a standard ETL workflow instead of using loops.
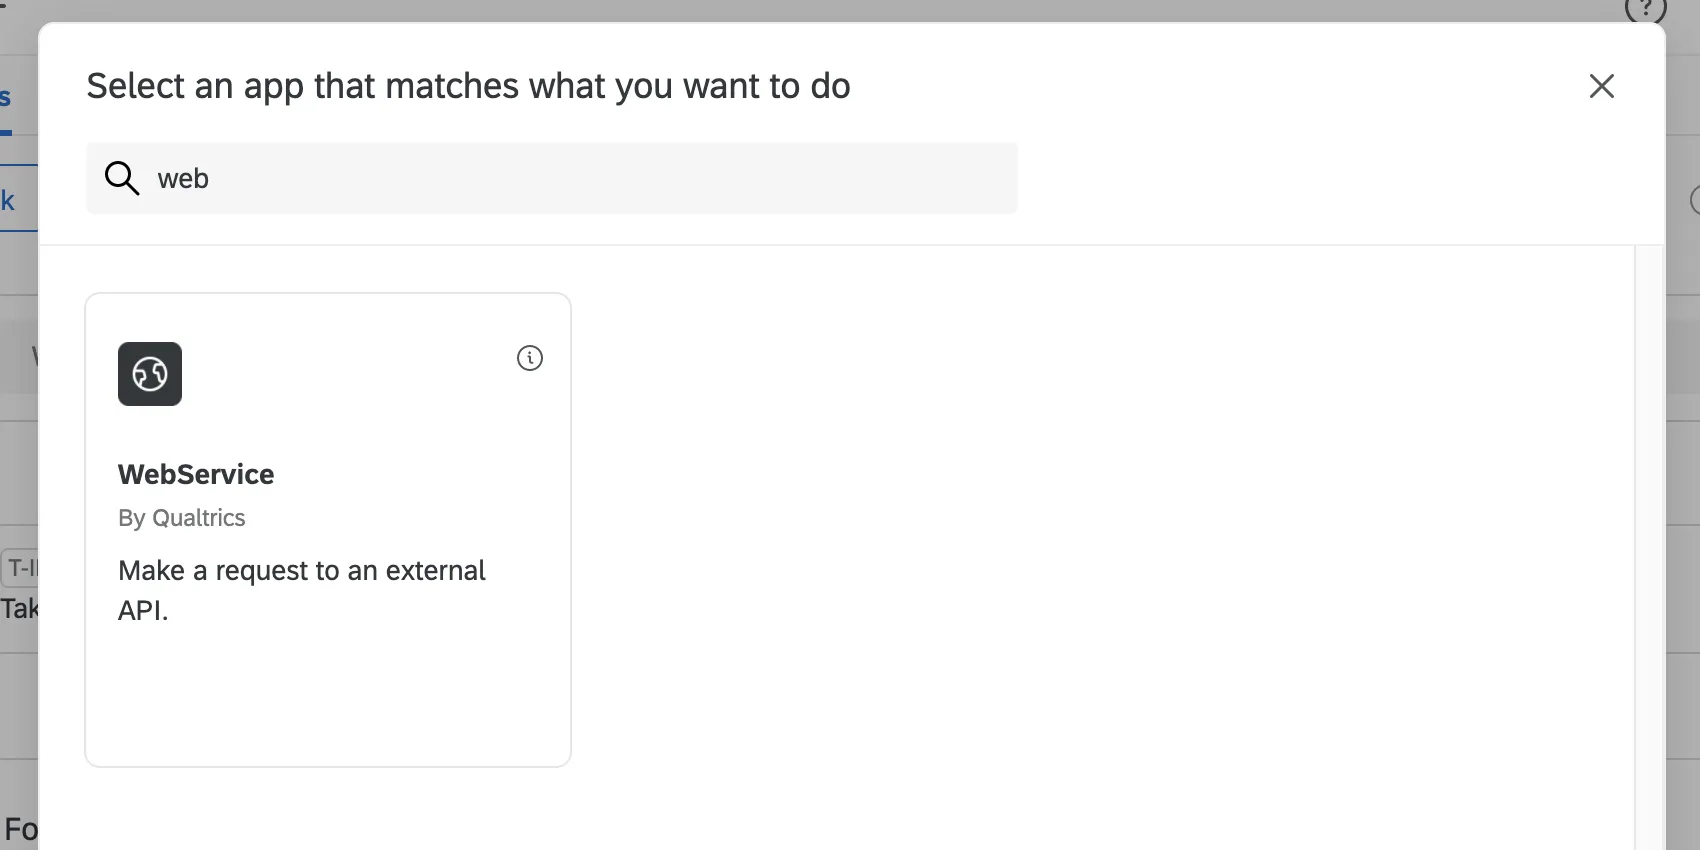
Example: We add a web service task so we can use API to pull each user’s name and email address.

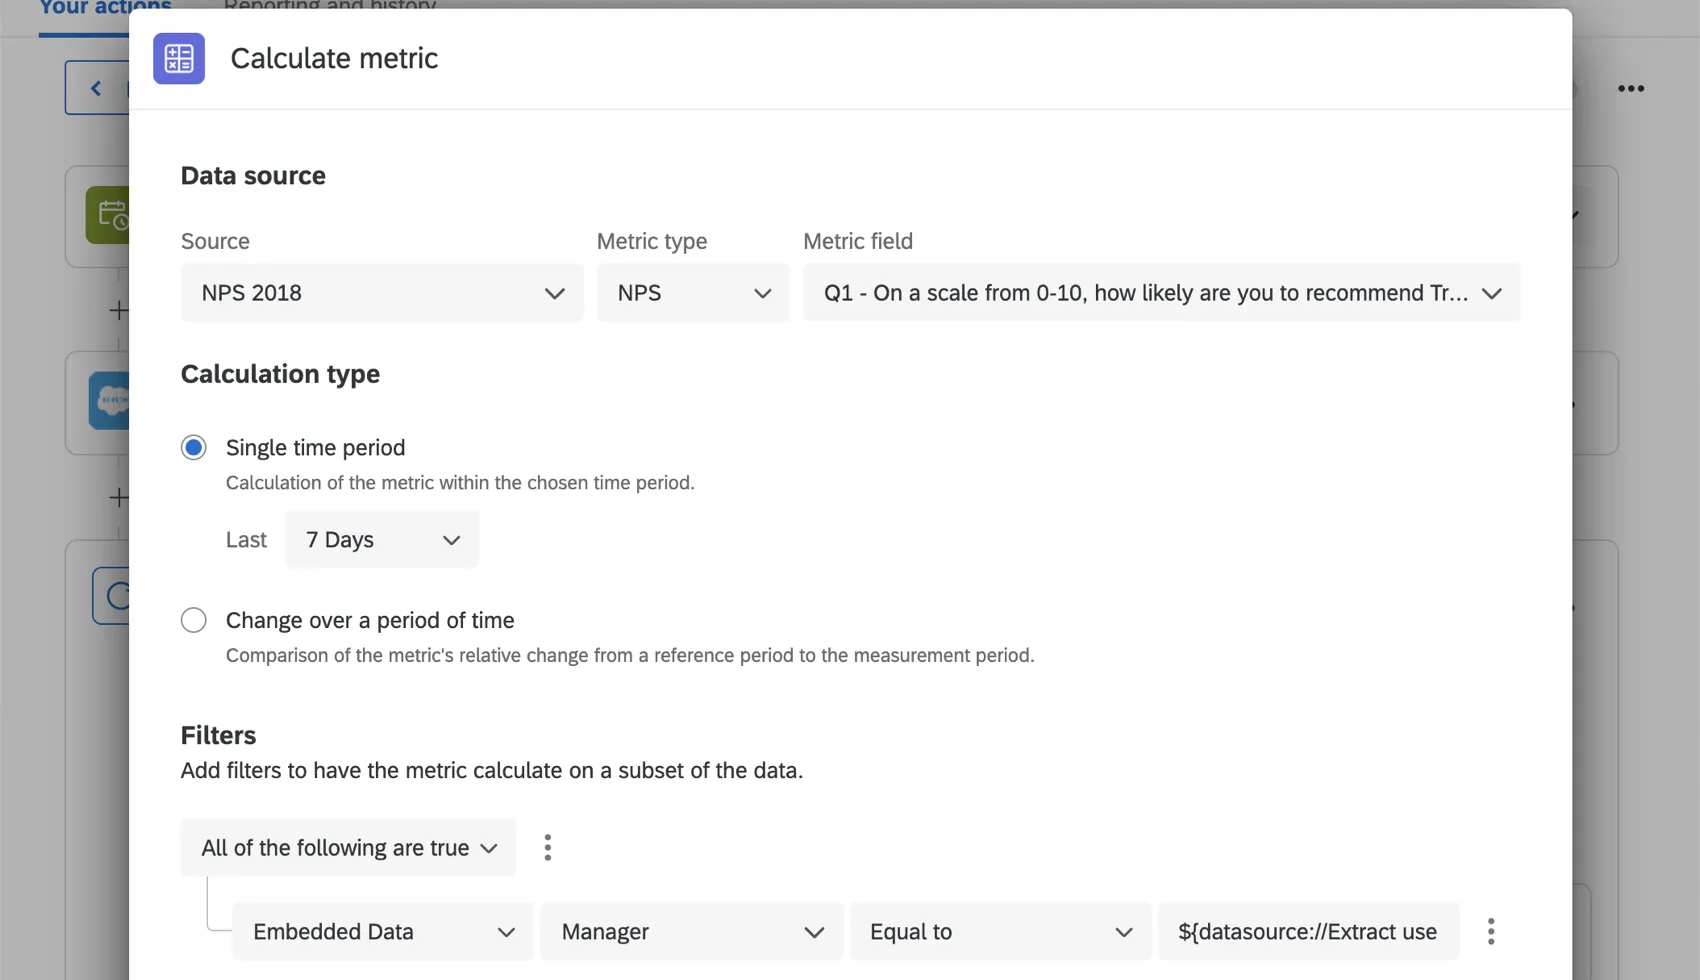
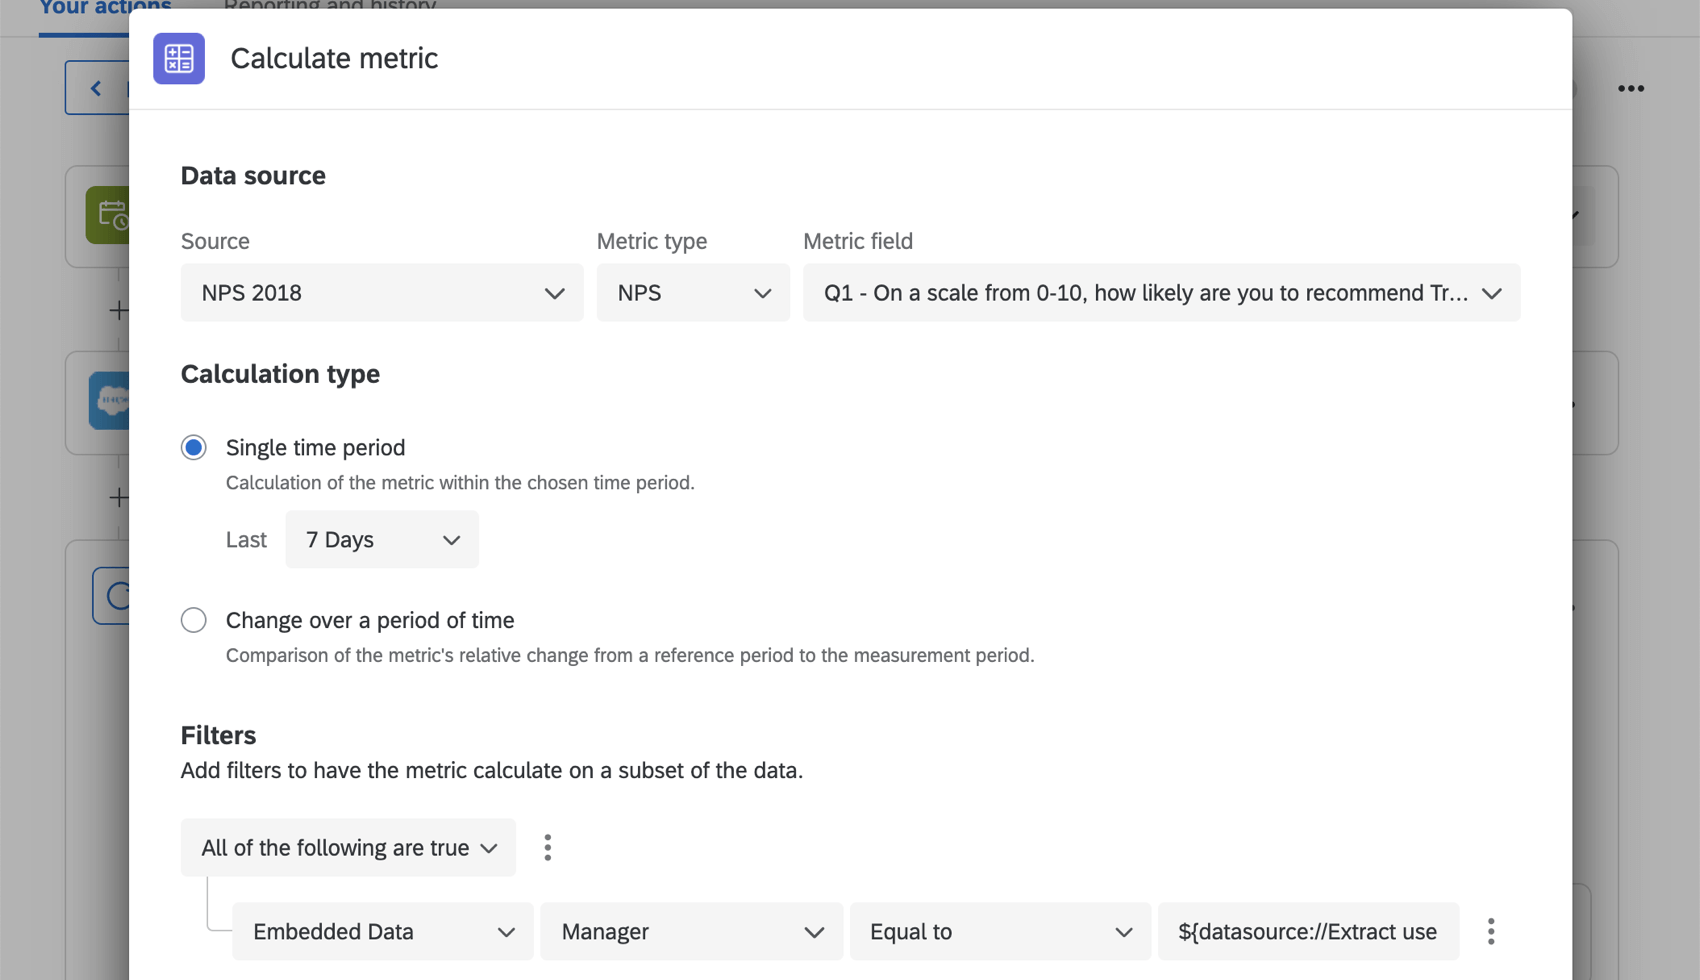
Example: Next, we add a calculate metric task to find their NPS score. We set up a filter on this task so that the Manager embedded data field must be equal to the user’s ID. Note that this is represented as piped text for the user ID field extracted during the web service’s API call. Without this filter, the wrong NPS score could be calculated.
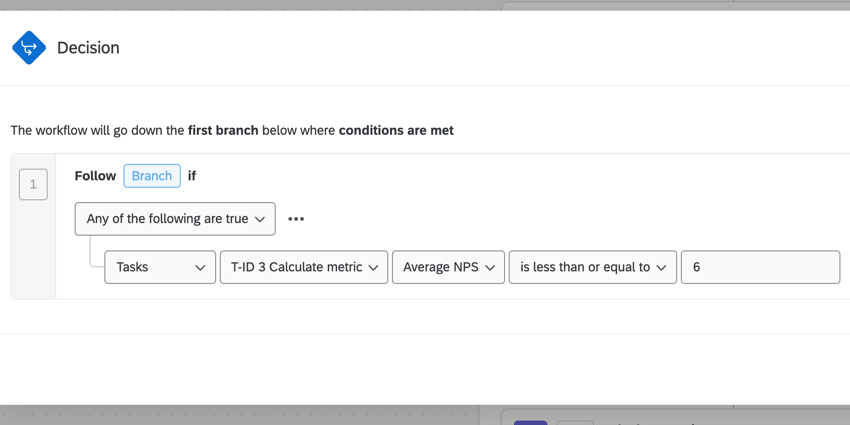
Example: We only want to send an email for NPS scores that count as detractors, so we set a condition to only send if the calculate metric task’s NPS is less than or equal to 6.

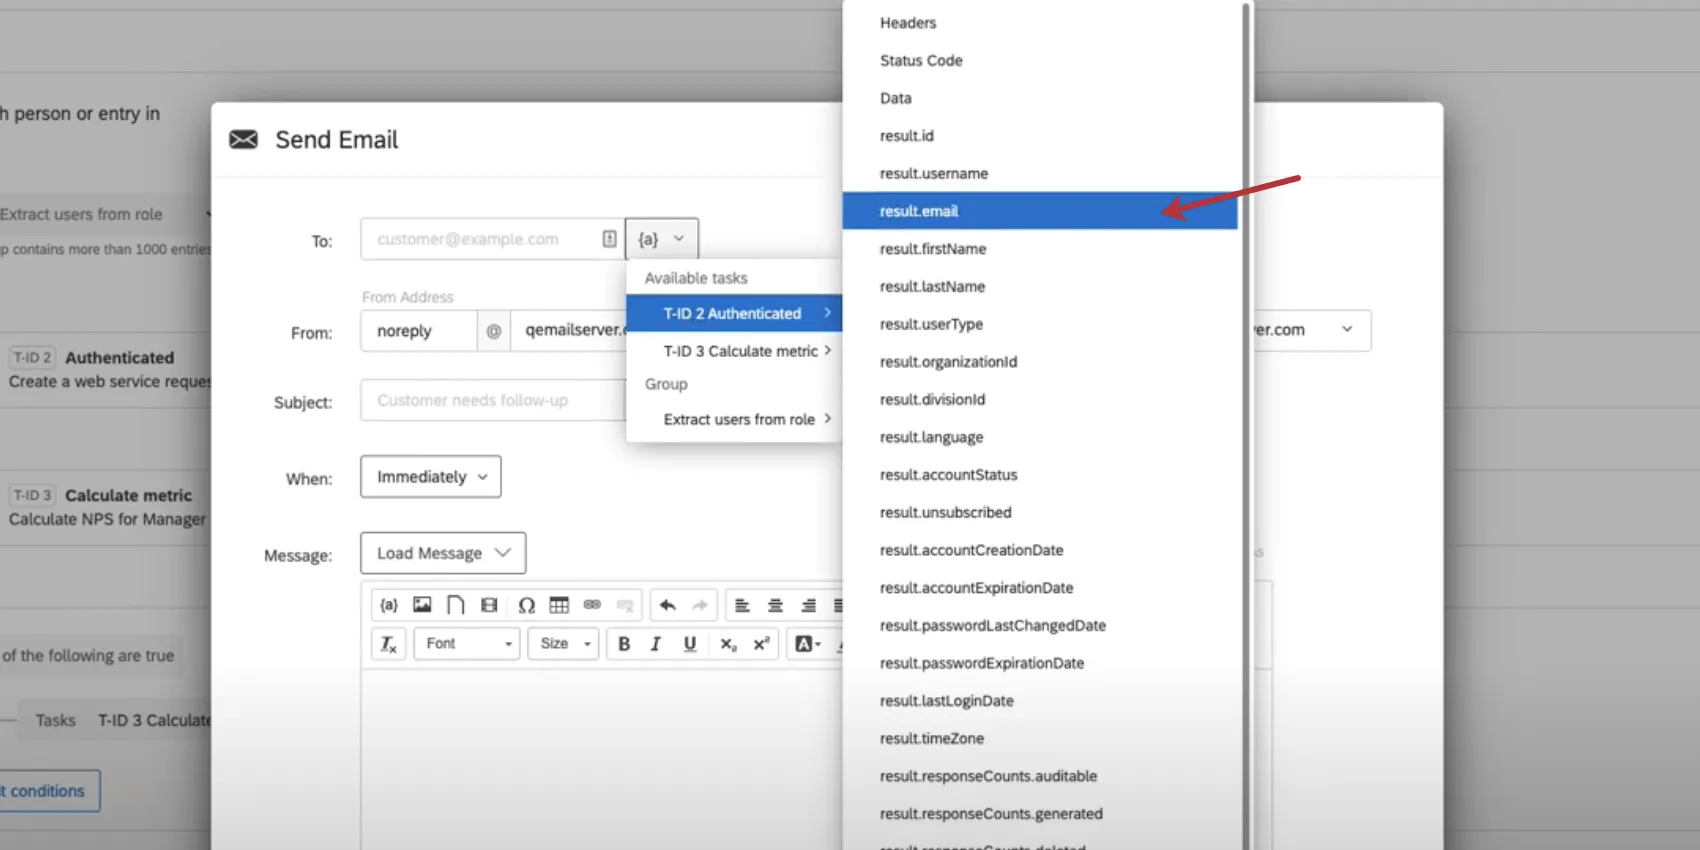
Example: We add an email task, which allows us to set up the NPS email we’ve been planning all along. We can use piped text to get an email address from the web service task and the NPS score from the calculate metric task.

Run History
When you look at the run history for a workflow with loops, you can see the run history for each of the loops triggered. This enables you to narrow down performance issues related to specific workflow loops.
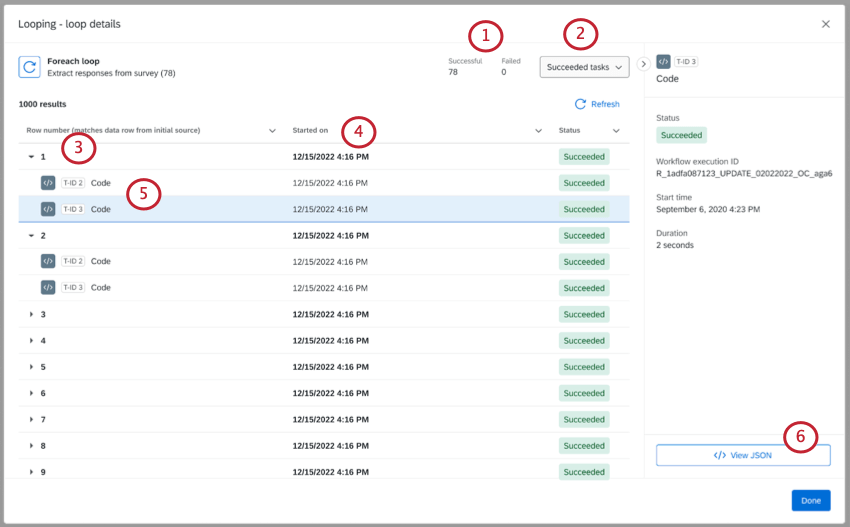
When you’re inside the Run History tab, click the name of the workflow to see more details. In addition to the workflow’s event and tasks, you’ll also see For each loop. Click this to see a breakdown of how each event and task performed in each loop.
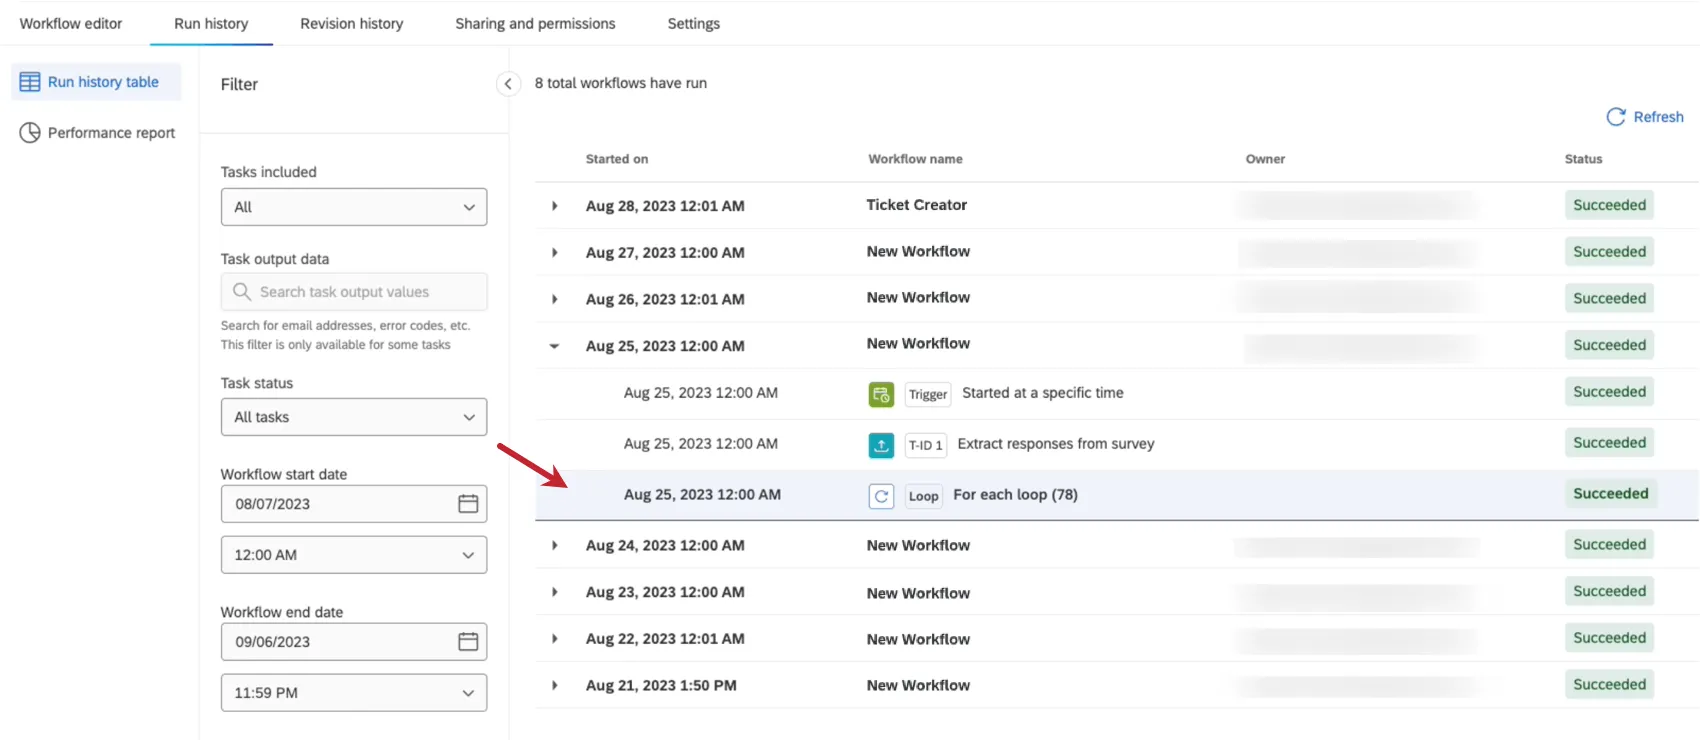
Qtip: The number in parentheses next to For each loop shows you the number of times the loop was successfully run.
Qtip: See more on Workflow Statuses.
Qtip: For more details on the information included in a run history, see Run History.
That's great! Thank you for your feedback!
Thank you for your feedback!