
Organizing Feedback Requests
What's on this page
About Organizing Feedback Requests
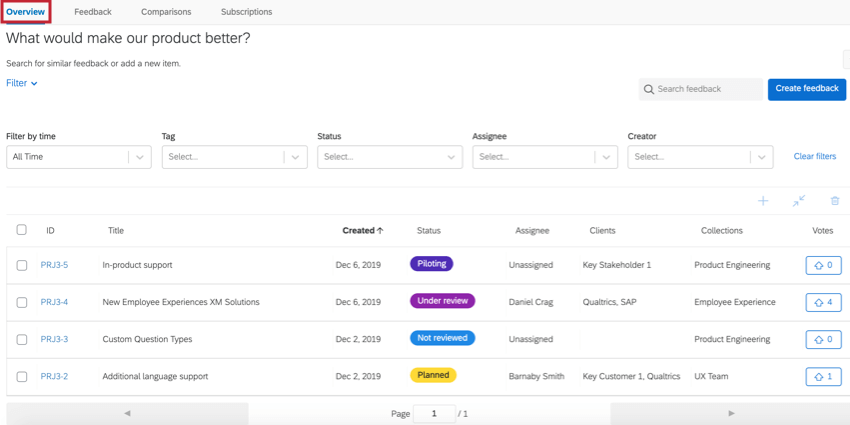
The Overview tab of your Frontline Feedback project contains a table of every feedback request with built-in filters so users can easily sort through requests. Additionally, project administrators can merge requests, add requests to collections, and delete feedback requests from this page.
Searching & Filtering Feedback Requests
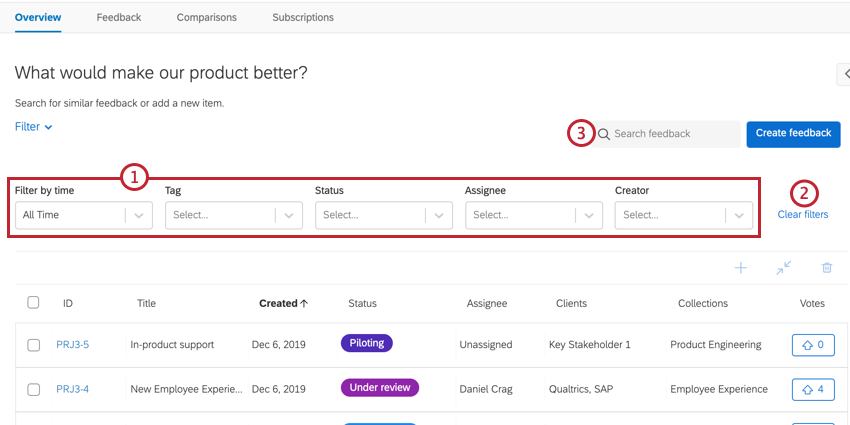
All users with access to the Frontline Feedback project will be able to view, search, and filter feedback requests from the Overview tab.
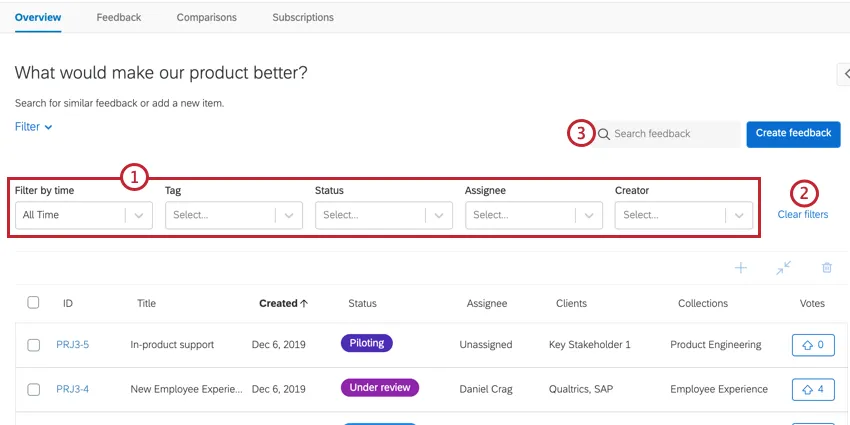
- Filter by time: Filter by the amount of time that has passed since the feedback request’s creation date.
- Tag: Filter by any tags on the feedback requests.
- Status: Filter by the feedback request’s status.
- Assignee: Filter by the user listed as the request’s assignee.
- Creator: Filter by the user who created the feedback request.
Qtip: You can apply multiple filters to narrow down your results. Filters are additive, meaning there’s an implied “and” between filters.
Qtip: If you search for a feedback request that doesn’t exist, and you’d like to submit it yourself, click the Create Feedback button next to the search bar to submit a new request. See Submitting & Managing Feedback for more details on creating feedback requests.
Once you’ve found the request you’re interested in, click the request’s ID to view the full request.
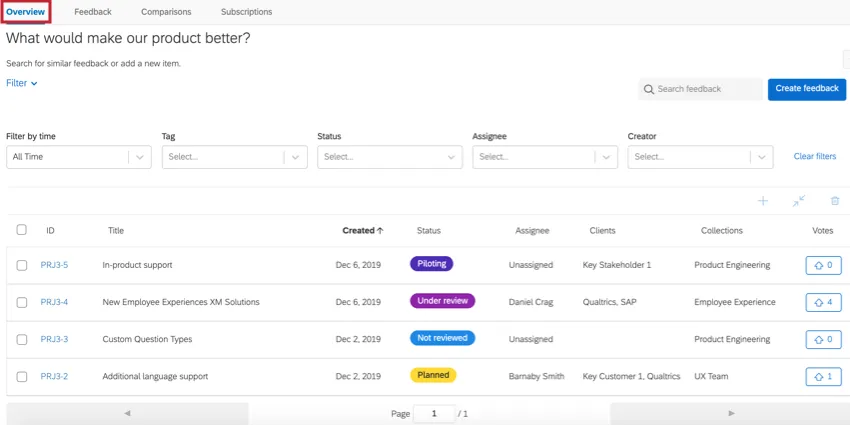
Feedback Requests Table
The requests listed at the bottom of the Overview tab will adjust based on the filters you apply. This table contains the following information about feedback requests:
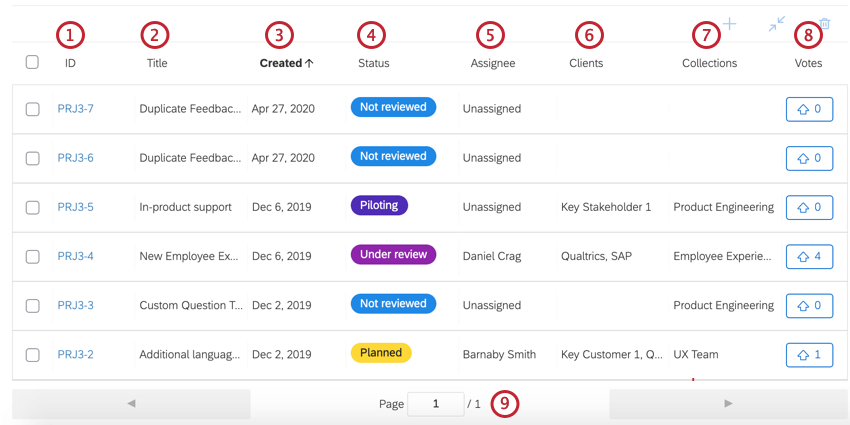
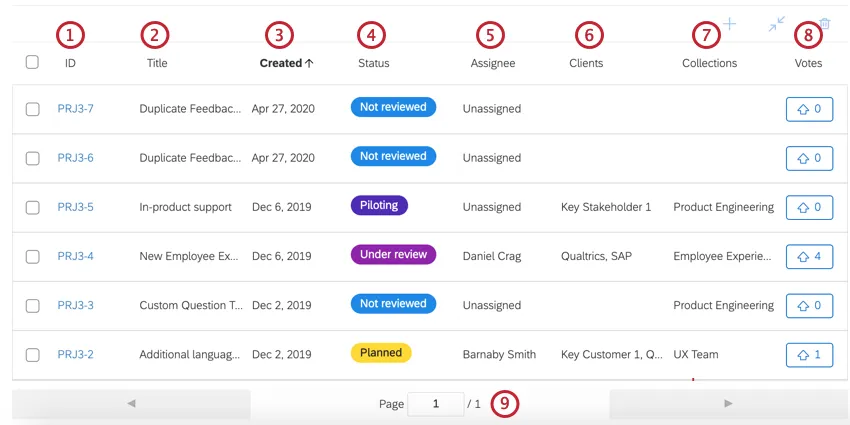
You can click on any of these fields at the top of the table to sort by that field. For example, in the image above, we sorted the table by the Created field, indicated by the field name being bolded with an arrow next to it.
Additional Administrator Actions
If you are either an Owner or Moderator for the project, there are additional actions you can take on feedback requests from the Overview tab. This includes adding requests to collections, merging requests, and deleting requests.
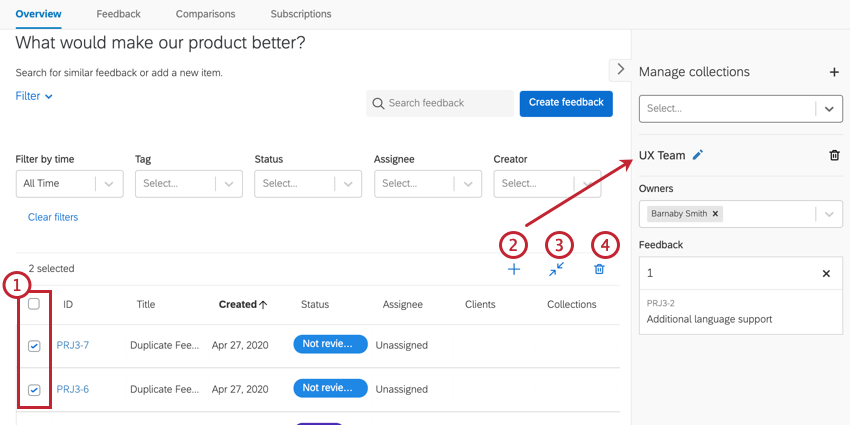
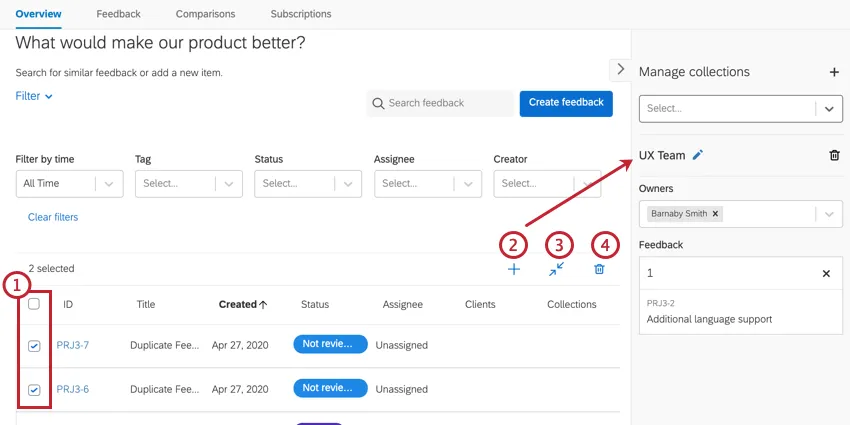
Example: In the above image, the collection “UX Team” is selected.
Merging Feedback Requests
Sometimes, your users may submit duplicate feedback requests. Instead of deleting the duplicate requests and potentially losing some ideas with that request, you can merge your requests together to consolidate the ideas to one feedback request.
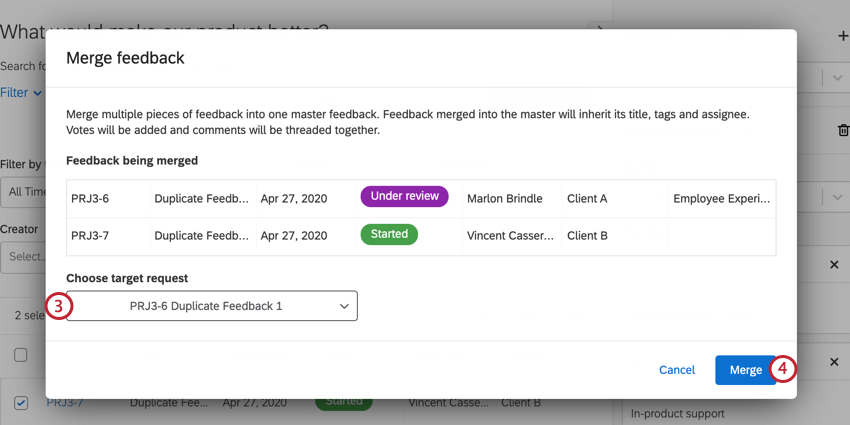
When merging requests, all tags, votes, collections, and comments are consolidated in the newly merged request. The title, ID, description, assignee, and status of the newly merged request will be the same as the chosen target request, which acts as the master feedback request that the other ones merge into. The title and description of the duplicate requests will be commented on the new request once merged.
How to Merge Feedback Requests
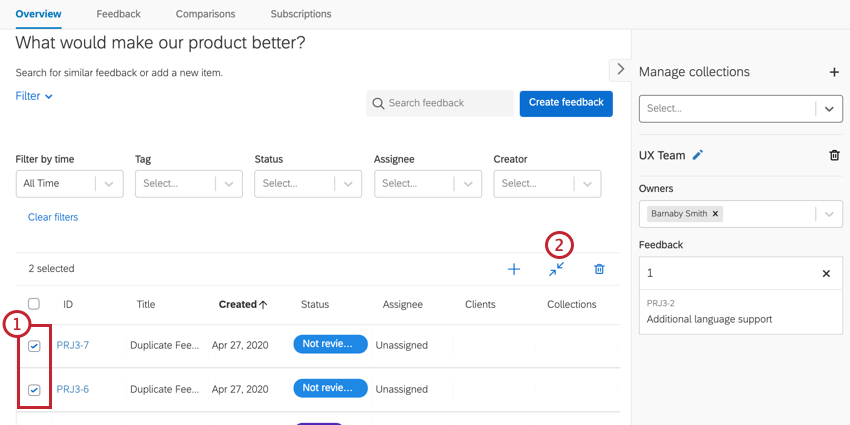
Qtip: You need to select at least 2 feedback requests before you can use the merge feature.
That's great! Thank you for your feedback!
Thank you for your feedback!