Loading...
Skip to article
  • Qualtrics Platform
    Qualtrics Platform
  • Customer Journey Optimizer
    Customer Journey Optimizer
  • XM Discover
    XM Discover
  • Qualtrics Social Connect
    Qualtrics Social Connect

Lookup Task


Was this helpful?


This site is protected by reCAPTCHA and the Google Privacy Policy and Terms of Service apply.

The feedback you submit here is used only to help improve this page.

That’s great! Thank you for your feedback!

Thank you for your feedback!


About the Lookup Task

The Lookup task enables you to reference a supplemental data source in your workflows and use the related data in your workflows. This task functions similarly to the VLOOKUP function in many spreadsheet applications. When the workflow runs, the lookup task searches a specific column in the supplemental data source for a value. If a value is found in the specified column, the lookup task returns other column values in that same row.  You can then use these lookup values in subsequent conditions and tasks in your workflow via piped text.

Example: You can lookup the correct email address associated with a Store ID when the Store ID is passed into the workflow as part of the event trigger. If there are Store IDs that have different email addresses, the lookup task can be used to find the correct email address to be used in a following email task.

Other common uses for the lookup task include:
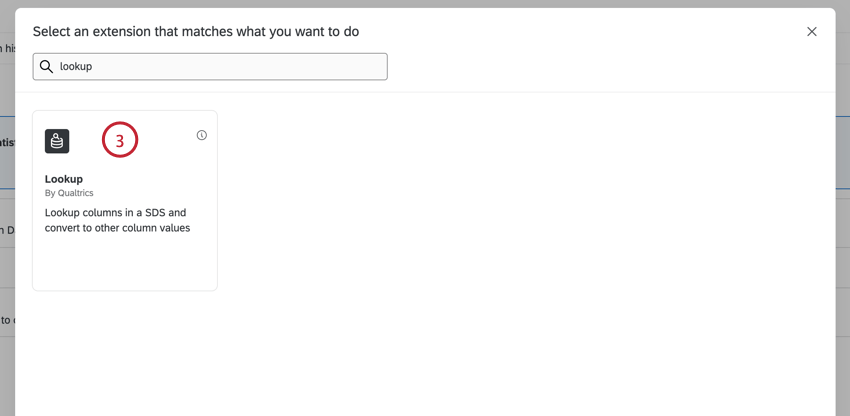
  1. Eliminating redundant duplicate workflows by:
    • Looking up a slack channel name to send a message to based on the office name that is passed into the workflow via the event trigger embedded data.
    • Or, dynamically looking up an email address to send an email to.
  2. Reducing long workflow condition blocks by looking up if some embedded data field passed in with the event trigger belongs to a certain “group” for which the workflow should run. You can then use the lookup field in your subsequent workflow conditions.
  3. Looking up a zip code using a city name.
  4. Converting metric measurements to imperial units and vice versa.

Setting up a Lookup Task

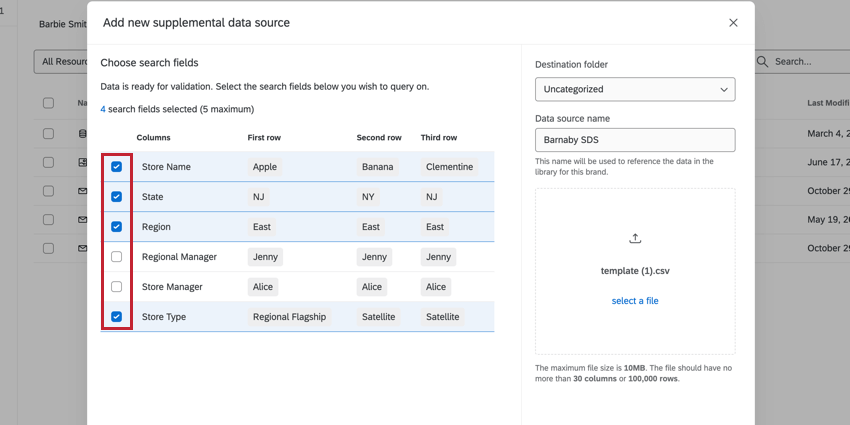
Before you can use the lookup task, you must create a supplemental data source that contains the data used in the lookup. Follow the linked instructions to create a supplemental data source.

Qtip: You’ll need to choose at least 1 field as a search field to perform a proper lookup.choosing search fields in the supplemental data source
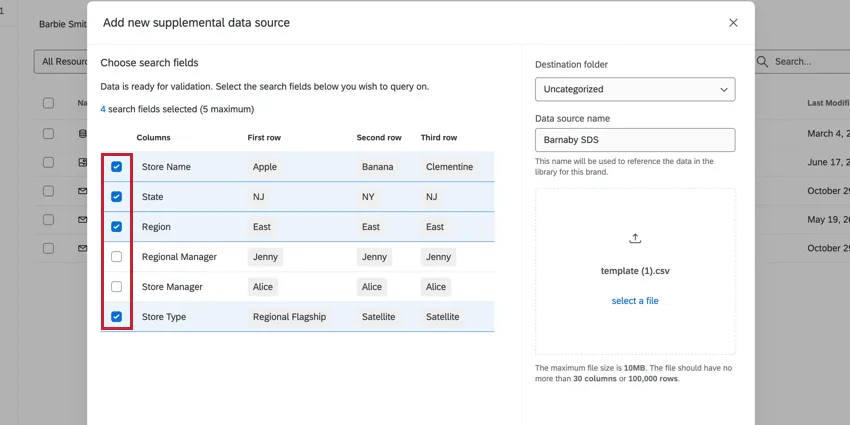
See the supplemental data sources support page for more information on platform limits, such as the maximum number of characters in values.
  1. Follow the linked instructions to create a workflow.
  2. Click the plus sign ( + ) and select Task.
    clicking the plus sign and adding a task
  3. Choose the Lookup task.
    selecting the lookup task
  4. Use the dropdown menu to choose the supplemental data source you created earlier.
    configuring the lookup
  5. In the Lookup column field, choose the field from the supplemental data source that you’d like to use to perform the lookup.
  6. Choose the Operator. The operator determines how the lookup column relates to the lookup key. Your options include:
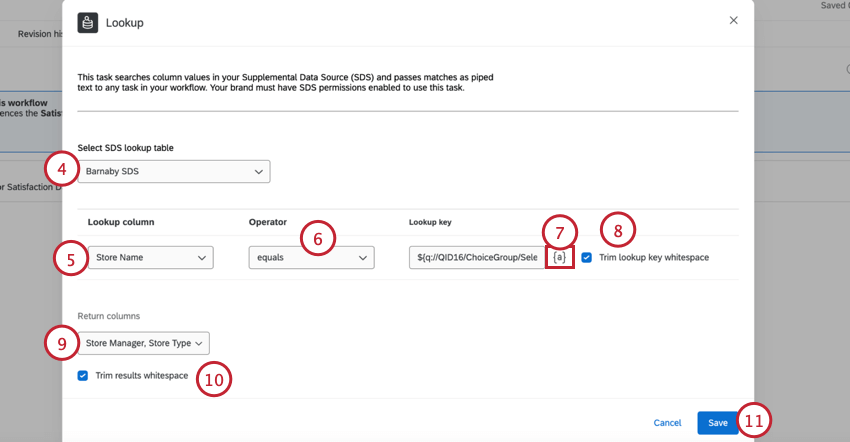
    • equals: The values for the lookup key and lookup column must match. This operator is not case sensitive.
    • startsWith: The values from the lookup key must match the beginning of the lookup column.
      Example: If my lookup key is “Bl” and my lookup column values are “Brown,” “Blue,” and “Yellow,” then “Blue” will be returned.
  7. Use the piped text menu, {a}, to choose the field to use as your lookup key. To perform the lookup, the value for this field will be compared against the values in the lookup column.
    Qtip: Often, this is an embedded data field passed into the workflow via the event trigger.
  8. If desired, enable the Trim lookup key whitespace option. This will remove any empty characters from the value received for your lookup key field.
  9. For the Return columns, choose the fields you’d like to be returned in the lookup. You can select multiple fields here.
  10. If desired, enable the Trim results whitespace option. This will remove any empty characters from the results of your lookup.
  11. Click Save.
  12. Continue creating your workflow by adding additional tasks. When creating your tasks, you can reference the result of the lookup task by using the piped text menu. This piped text menu contains the following:
    the piped text menu for a task, showing the lookup outputs

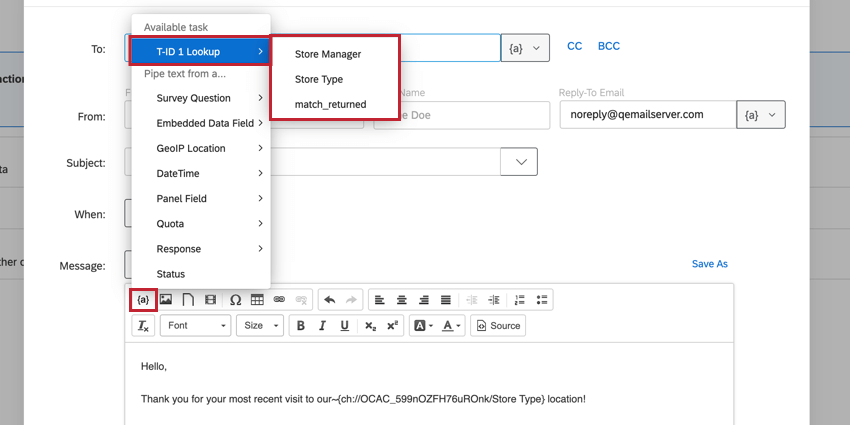
    • The fields you selected as Return columns in the lookup task.
    • A field called match_returned which indicates if results were retrieved via the lookup. This field will resolve to “true” if a result was returned by the lookup. This field will resolve to “false” if no result was returned by the lookup.
  13. You can also use the lookup task fields when building conditions. When building your conditions, select Tasks and then your lookup task to create a condition based on the lookup fields.
    creating a workflow condition using a lookup task field

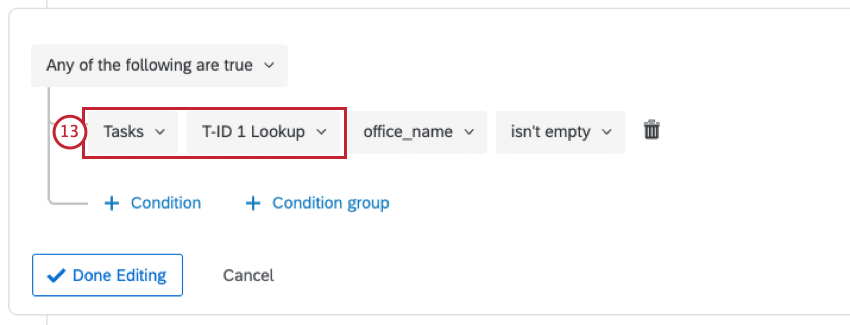
    Qtip: The “match_returned” field is particularly useful for workflow conditions since it represents whether or not the lookup was successful.
Qtip: If your lookup task fails with a 429 error, the workflow will automatically retry after a few minutes.