
Master Account Properties
What's on this page
About Master Account Properties
You can customize your master account and define account properties, including for example defining a custom SMTP server to send Studio notification emails from Studio via your email server, password settings and link sharing settings, in the Master Account Properties tab.
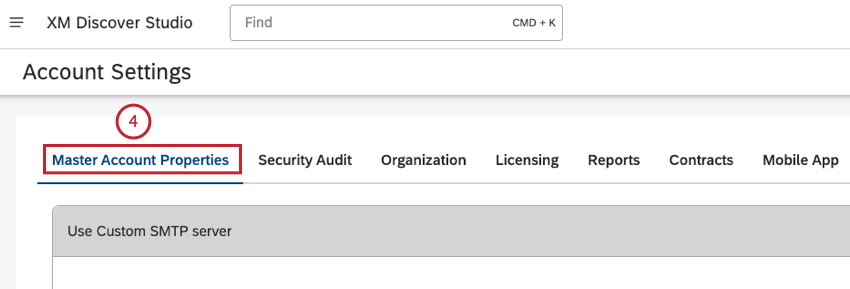
Accessing the Master Account Properties Tab
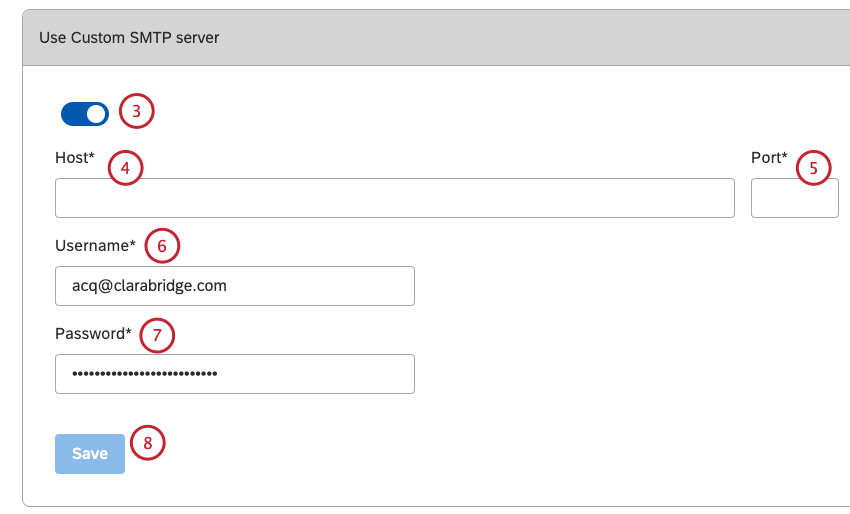
Use Custom SMTP Server
You can specify custom SMTP server details to send notification emails from Studio via your email server.
Allowed Email Domains
You can restrict the email domains allowed during user registration and dashboard sharing.

- A domain name can only contain alpha characters and dashes. There is no need to use the @ symbol.
- Domain names cannot end or begin with a dash.
- Domain name length cannot exceed 60 characters.
- Top-level domain length cannot exceed 3 characters.
- Domain names are case-insensitive.
Qtip: If you want to add several domains, enter them one by one.
Qtip: All allowed domains are listed below the box. To remove a domain from the list of allowed domains, click the x button next to it.
Qtip: Enabling email domain restriction or removing a previously allowed domain does not affect existing users.
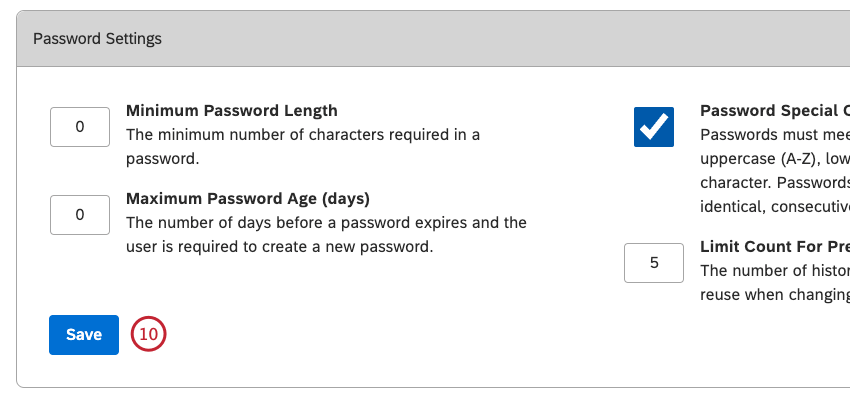
Password Settings
You can define password complexity and login lockout settings.
We do not force password resets when password complexity parameters are updated. However, if you wish to enforce new password policies, you can bulk select users and use the Reset Password option in the actions menu.
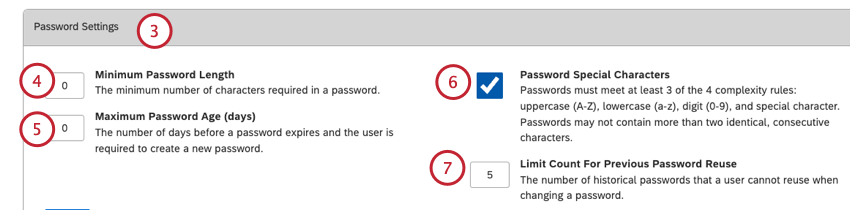
- Must include uppercase characters (A-Z).
- Must include lowercase characters (a-z).
- Must include digits (0-9).
- Must include special characters (such as punctuation marks).
- Passwords may not contain more than two identical consecutive characters.
Attention: We strongly recommend enabling this option to increase password safety.
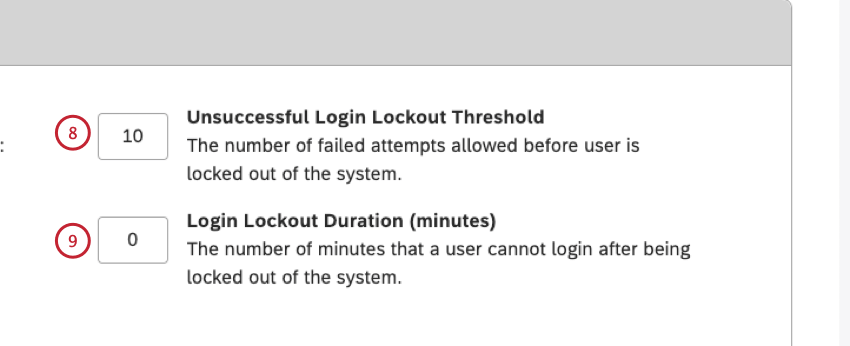
Qtip: If a user exceeds the limit of allowed failed login attempts, they will not be able to sign in for the duration of the login lockout. At the same time, the user will receive an email notification prompting them to reset their password and regain access to the account. This is a way to bypass the lockout timer and a support request.
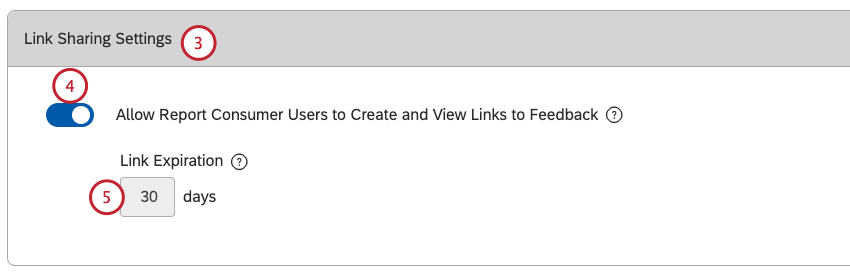
Link Sharing Settings
You can control whether users without explicit data access should be able to copy, share, and view links to specific documents for a limited time.
Qtip: For more information about link sharing please see the How Does Link Sharing Work? subsection below. For more information about accessing feedback, please see the Accessing Feedback Without Explicit Data Access subsection below.
Accessing Feedback Without Explicit Data Access
When you share a dashboard with other users, you invite them to view your dashboard reports the same way you do. In other words, Studio renders widgets on your behalf for all viewers, regardless of their data access level.
If a viewer has a Drill to Feedback in View Mode permission, it allows them to view the actual customer feedback in document explorer.
Qtip: This permission is not necessary if your dashboard has a feedback widget—in this case any dashboard viewer will be able to view its feedback.
How Does Link Sharing Work?
- When link sharing is disabled (default behavior):
- Only users with explicit data access can copy links to documents in document explorer and feedback widgets.
- Documents via links are displayed on behalf of the viewer and require explicit data access.
- When link sharing is enabled:
- Users without explicit data access can copy links to documents in document explorer (if they have access to a corresponding dashboard and a Drill to Feedback in View Mode permission) and feedback widgets in the pane view (if they have access to a corresponding dashboard).
- Documents via links are displayed for all Studio users of your Master Account, regardless of their data access, for a limited time (30 days by default). Expired links are no longer available to users without explicit data access.
- For users with project data access links never expire, provided the original data is still there.
Allow Account Owners to Manage Master Account Objects
Attention: You must contact your Discover account team to get “View As” functionality enabled for your XM Discover license.
Enabling Allow Account Owners to Manage Master Account Objects gives Account Owners the ability to manage dashboards, books, metrics, and filters on behalf of users of your Master Account. This includes giving Account Owners “view as” (proxy login) access.

Qtip: Whenever an Account Owner starts a session on behalf of another user, a ViewAsUserEvent action is logged in the security log. All actions performed on behalf of another user are marked with an asterisk (*) in front of their name in the log.
Allow Customer Admins to Manage Master Account Objects
Attention: You must contact your Discover account team to get “View As” functionality enabled for your XM Discover license.
Enabling Allow Customer Admins to Manage Master Account Objects gives Account Administrators the ability to manage dashboards, books, metrics, and filters on behalf of users of your Master Account. This includes giving Account Administrators “view as” (proxy login) access.

Qtip: Whenever an Account Administrator starts a session on behalf of another user, a ViewAsUserEvent action is logged in the security log. All actions performed on behalf of another user are marked with an asterisk (*) in front of their name in the log.
Allow Export of Users and Groups
You can decide whether the administrators in your master account can export a list of users and groups.
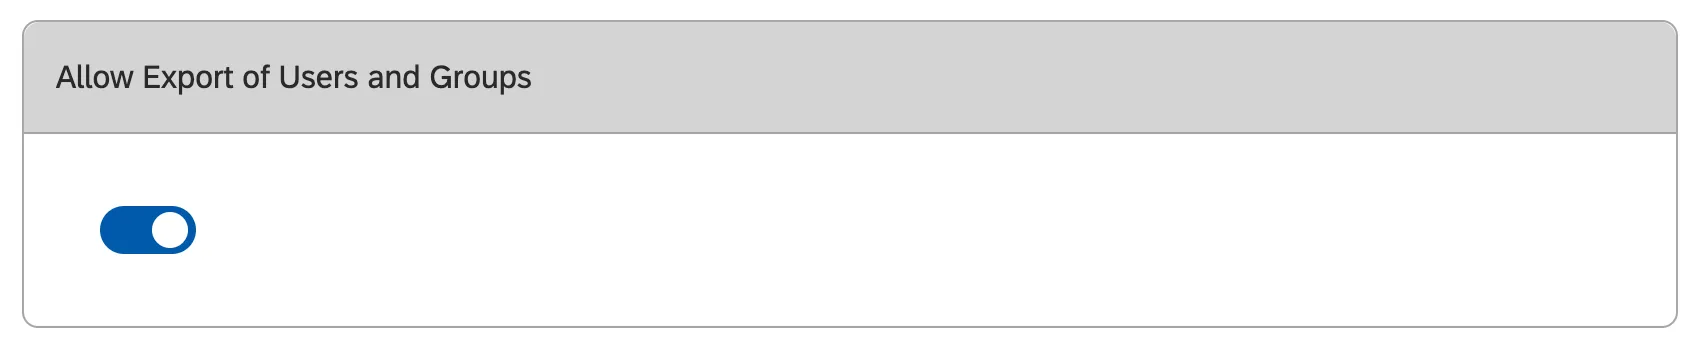
When this setting is enabled, users will be able to export user or group information.
When this setting is disabled, no one export this information, including you and other administrators in your master account. Enable the setting to give users this functionality back.
Qtip: Even when this setting is enabled, users must still have the Manage Users or Manage Groups permissions enabled to export this information.
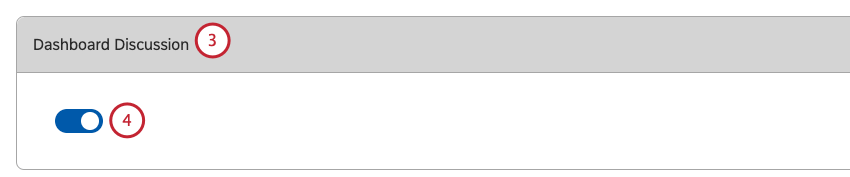
Dashboard Discussions
You can enable or disable dashboard discussions. This option is enabled by default.
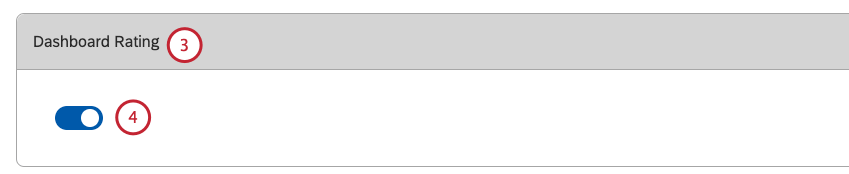
Dashboard Rating
You can allow users to rate dashboards or hide this feature. This option is enabled by default.
Qtip: Rating actions that are performed by users when the toggle is on are preserved if the administrator toggles this feature off and on again.
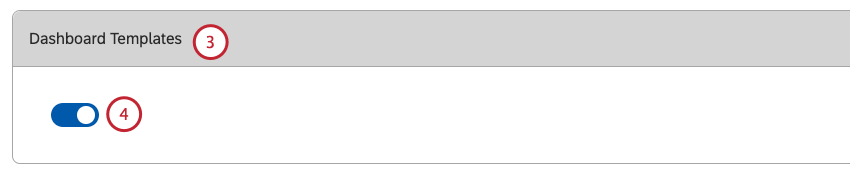
Dashboard Templates
Studio dashboard templates provide a quick way of creating meaningful dashboards for different business purposes. You can allow users to select a template or hide this feature.
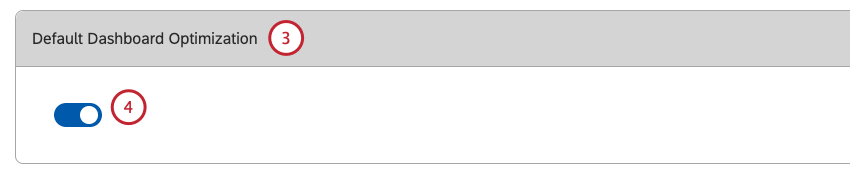
Default Dashboard Optimization
The Default Dashboard Optimization setting lets you define the default optimization setting for all newly created dashboards. You can change this setting per dashboard in dashboard properties.
Qtip: This setting does not affect existing dashboards.
Define Default Dashboard Optimization Setting
Ideas Forum
You can enable users to provide feedback via the XM Discover Ideas Forum or hide this feature.
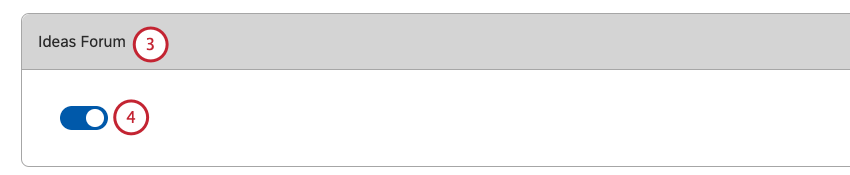
Qtip: Feedback provided by users when the toggle is turned on is preserved if the administrator toggles this feature off and on again.
Quick Translate
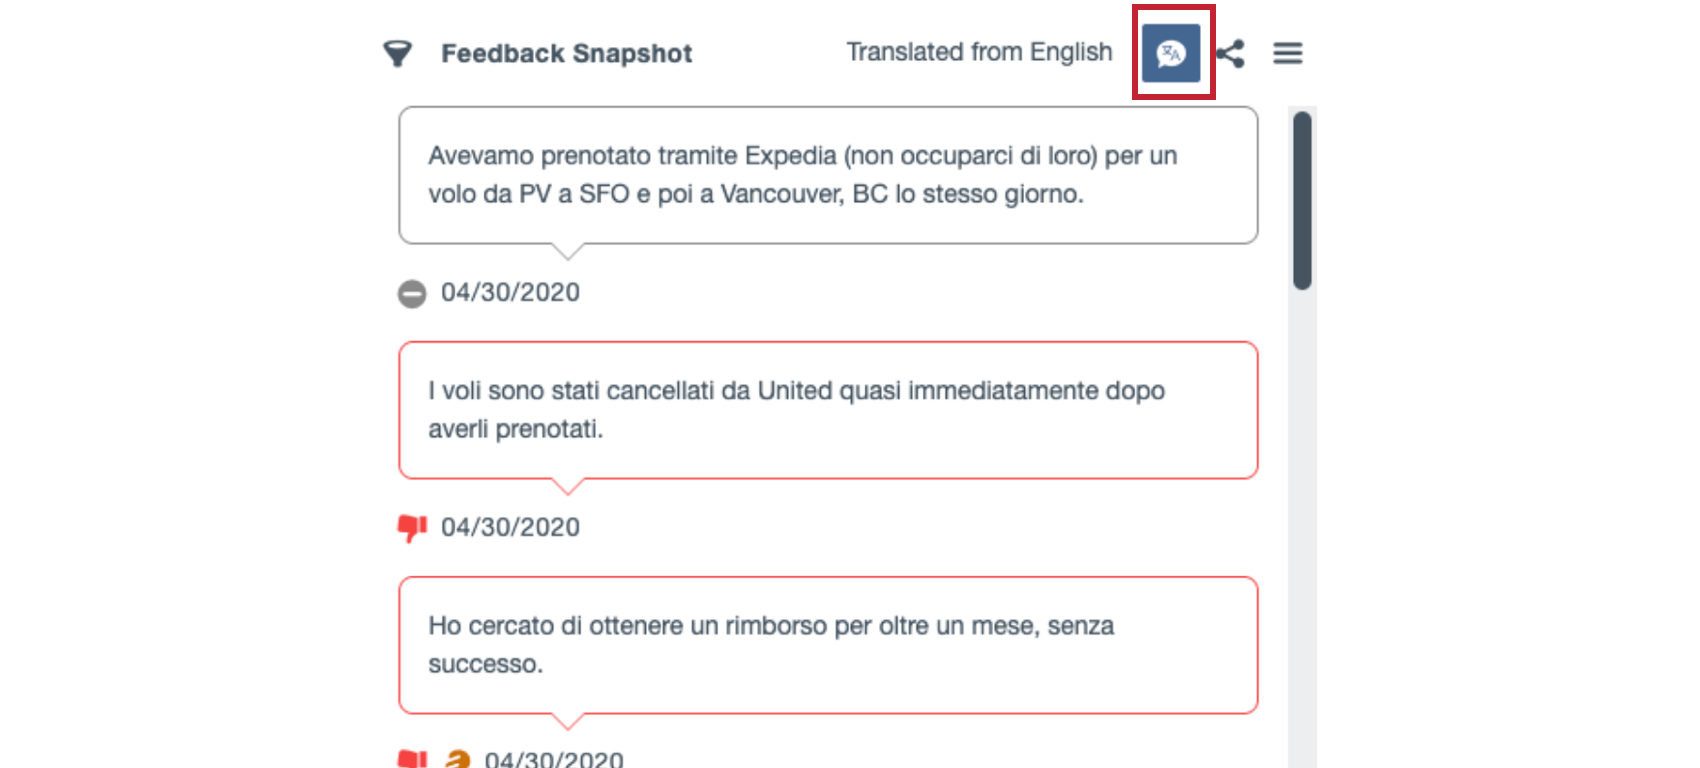
You can enable or disable the quick translate option to get a quick translation of feedback in document explorer and the feedback widget. This will generate the translation from whatever the original language is into your choice of “Translate Language” set in your user preferences. Please note that this uses a third-party translation service.
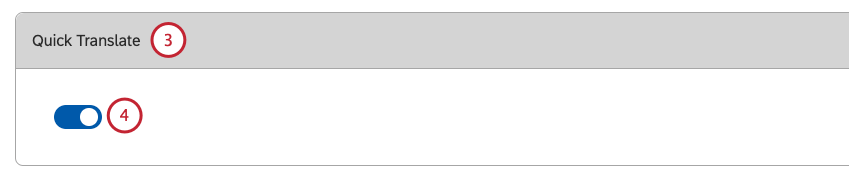
Once this feature is enabled, you can translate a document you’re viewing by clicking the quick translate button.

Screening Settings
You can decide whether or not you want users in your account to see sentences that contain profane words. For information about feedback screening, please see the Feedback Screening subsection below.

Feedback Screening
Enabling feedback screening replaces all sentences where the CB Profanity enrichment is detected in unstructured feedback with the phrase [This feedback has been hidden due to detected profanity.]
Feedback screening affects all dashboards, document explorer, and interactions explorer. It also masks tooltips in the conversational spine graph. This applies both to Studio and the Pulse app.
Feedback screening affects all users, except for those who belong to any group with a View Profanity permission. This permission cannot be applied to individual users, only groups.
For feedback widgets displaying the Verbatim view, the entire verbatim is hidden with the above message.
Widget Editing Previews
Qtip: This action requires the Manage Settings permission.
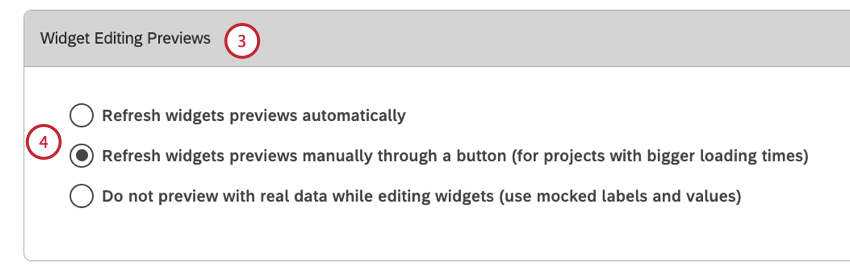
- Refresh widgets previews automatically to allow users to automatically see all updates in preview mode, even when new data is not being used, without having to click Update Preview.
- Refresh widgets previews manually through a button (for projects with bigger loading times) to enable users to click Update Preview and see their latest updates using new data in preview mode.
- Do not preview with read data while editing widgets (use mocked labels and values) to allow users to preview without using real data and using mocked labels and values.
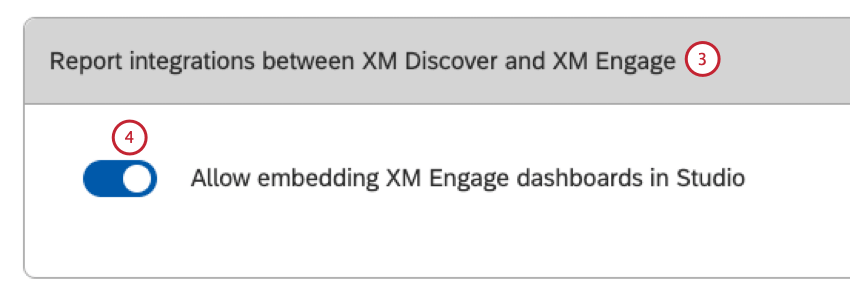
Report Integrations Between XM Discover and XM Engage
Qtip: This action requires the Manage Settings permission.
Once the API integration between your XM Discover account and Qualtrics is set up, you can enable this feature in account settings in Studio.
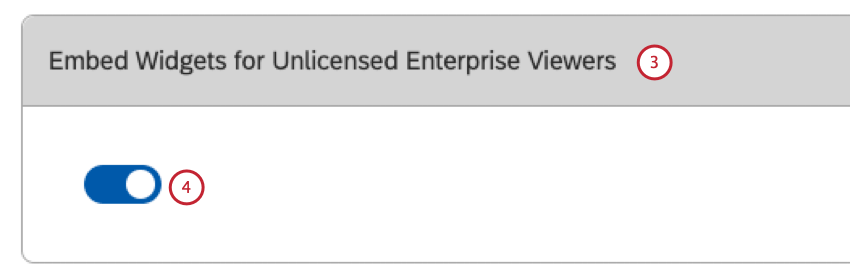
Enabling Embedding Widgets for Unlicensed Enterprise Users
Qtip: This option is only available for accounts that use single sign-on (SSO) authentication as the sign-in method for Studio.
You can allow enterprise users without a Studio license to view embedded widgets outside of Studio provided the users belong to the organization’s SSO authentication scheme and the widget’s embed configuration is set to allow it.
Widget Cache Usage
You can adjust the way widgets use cached data across your account based on your business needs.
Widgets that reference previously cached data, when available, load quicker, though the data in the cache may not be fresh. It is noted in the interface when a user is viewing cached data.
These options let you expand acceptable scenarios where Studio can display slightly older data at the great benefit of perceived performance.
Adjusting Widget Cache Usage
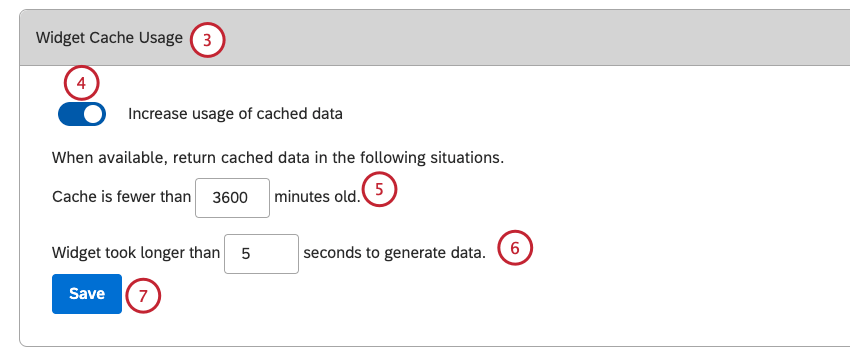
Qtip: Use this option if new data is not loaded frequently, so users will not notice the difference. For example, if you only load data and run classification once a week, the graph you saw 10, 30, or even 60 minutes ago is very likely the same now, so set this option to 1 of these numbers.
Qtip: Use this option if you notice individual widgets take a long time (but most widgets run quickly), and you are willing to wait for the longer running widgets. If the widget took more than that many seconds to run the last time, Studio will use the cached data while you wait for fresh data.
Hierarchy API
You can generate and revoke an authentication token for the Organization Hierarchy inbound connector.
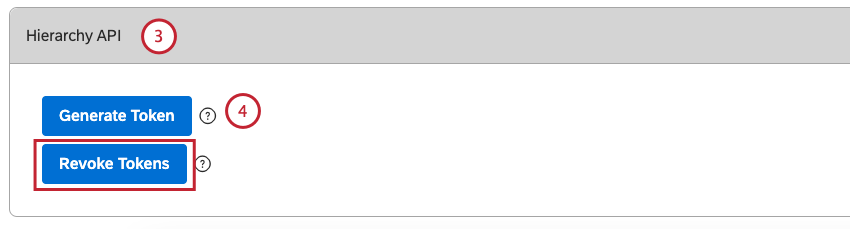
Qtip: Alternatively, click Revoke Tokens to revoke this authentication token.
Qtip: Hierarchy API tokens are valid for 90 days. Account owners are notified 7 days prior to expiration to generate a new one.
That's great! Thank you for your feedback!
Thank you for your feedback!