
Creating Users (Discover)
What's on this page
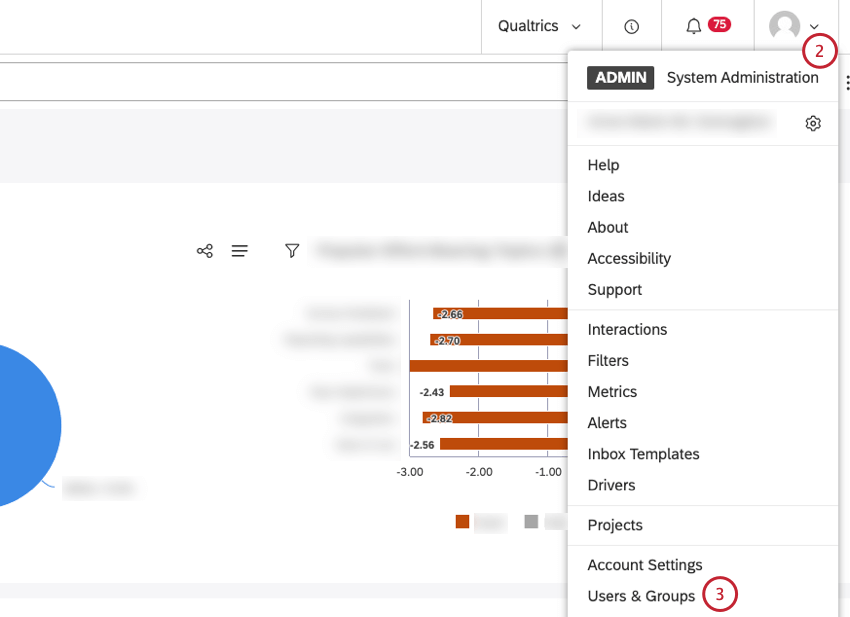
About Creating Users
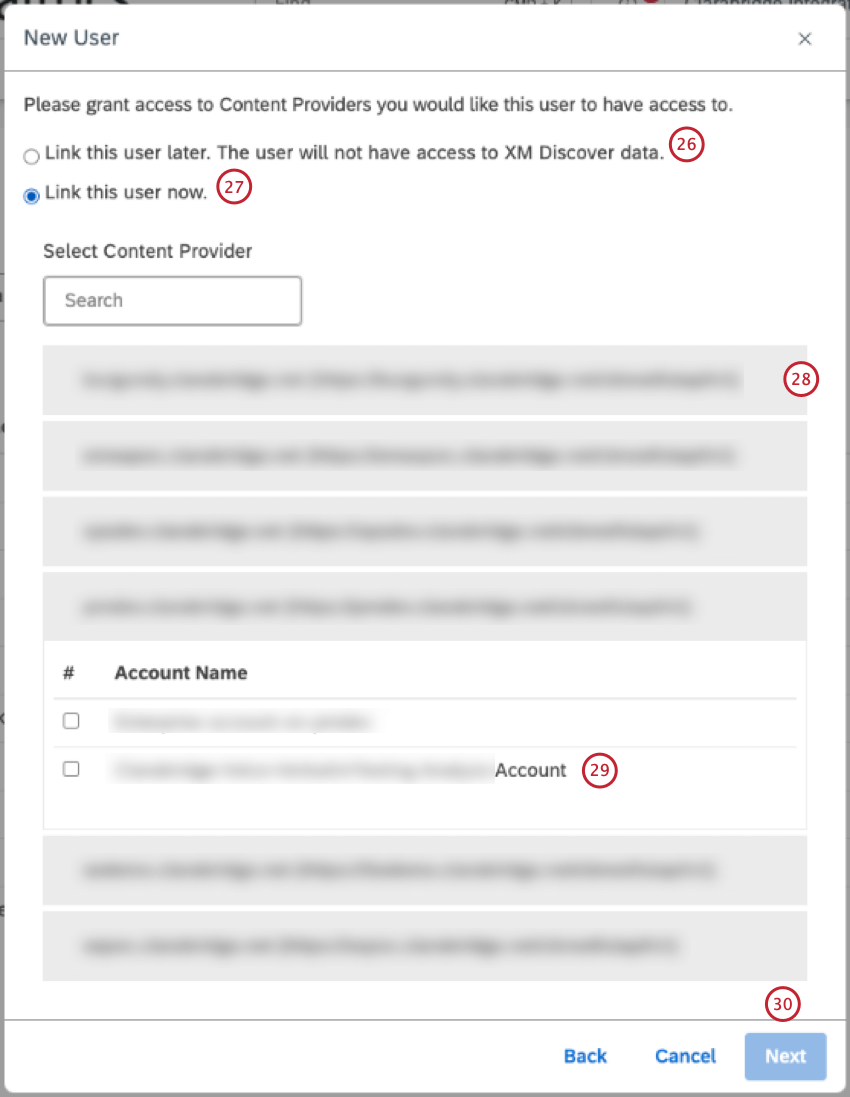
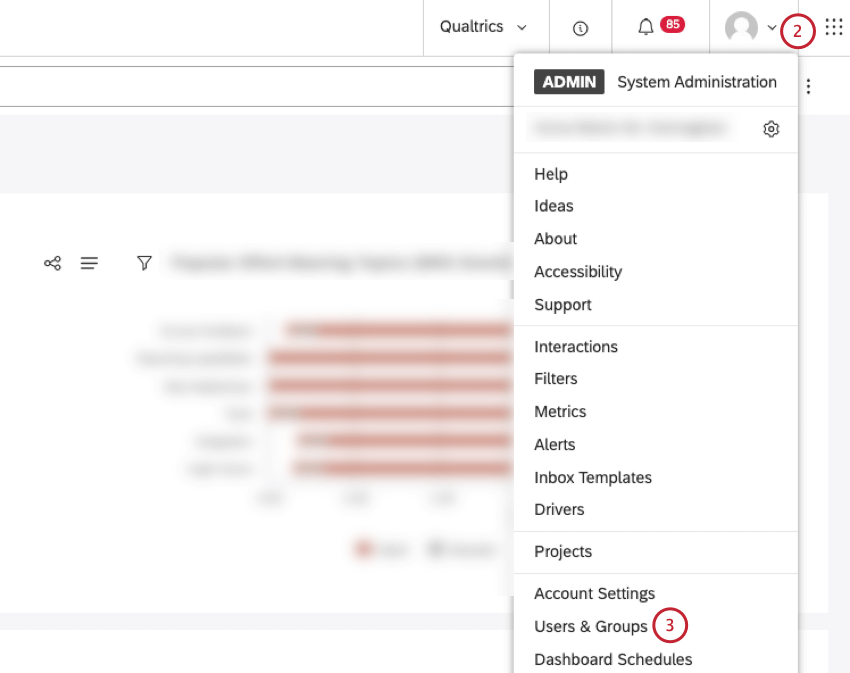
A user account is required to access XM Discover. There are several ways to create users in XM Discover. Account Administrators and Account Owners can do the following:
- Create a user account with appropriate permissions in user management.
- Duplicate user accounts to add new users with similar profile settings.
- Upload multiple new users at a time.
Account Administrators and Account Owners can import multiple users via an Excel spreadsheet and carry out bulk user updates.
Adding a New User
Attention: This action requires a Manage Users permission.
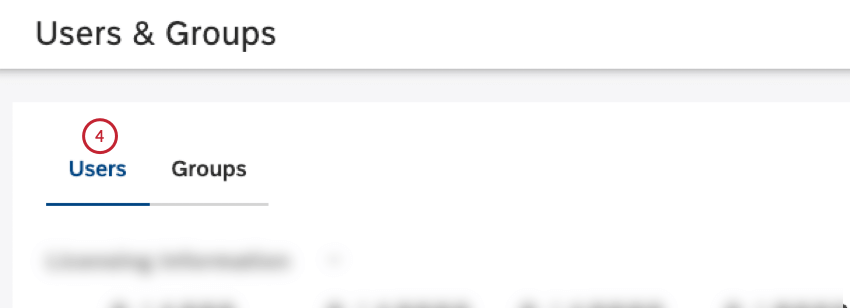
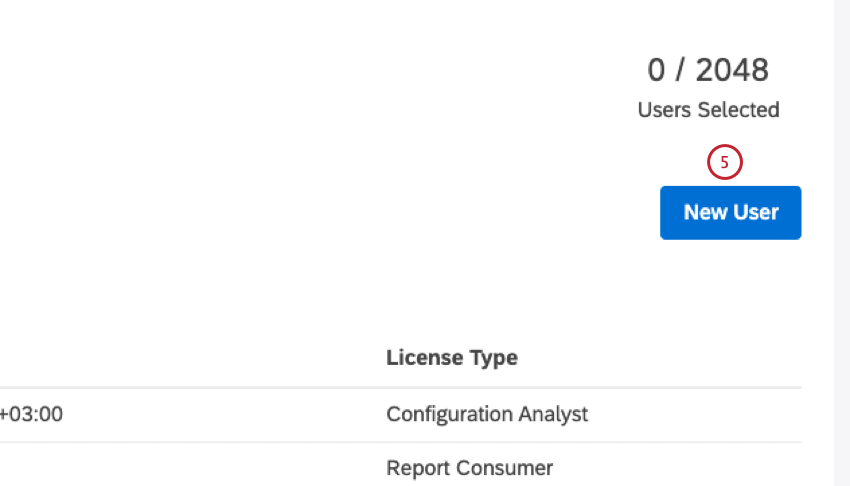
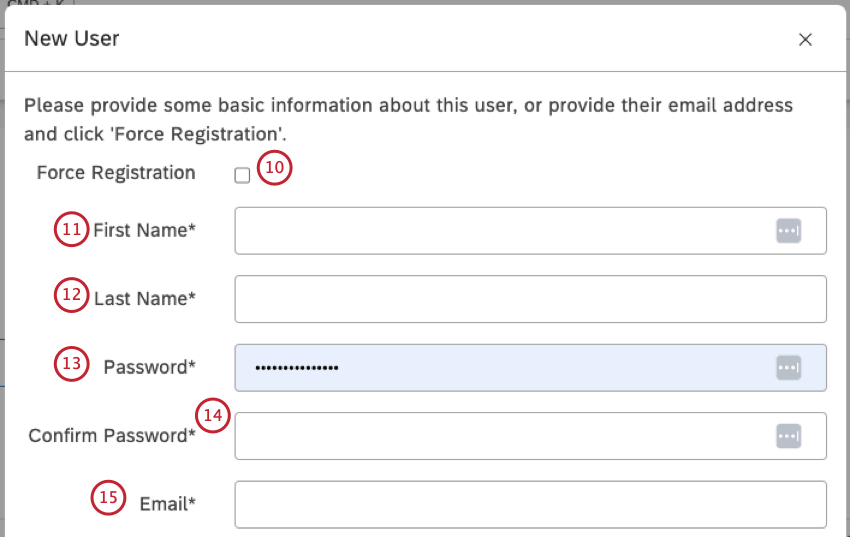
You can create a user account with appropriate permissions in Studio’s user management section.

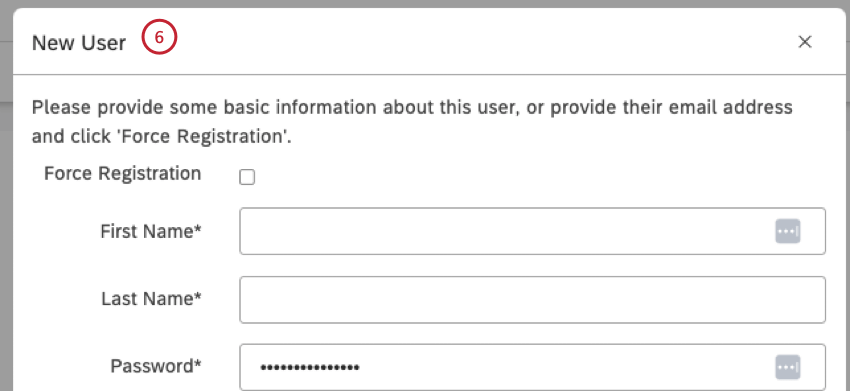
Qtip: After the force registration the user receives an email invitation with a temporary password, which allows the registration to be completed. The user will need to provide their first name, last name and a password.
Qtip: Force registration is recommended if you want to enable users to set their own passwords.
Attention: This is not available for accounts with SAML that enforce exclusive IDP authentication.
Attention: This is not available for accounts with SAML that enforce exclusive IDP authentication.
Attention: This is not available for accounts with SAML that enforce exclusive IDP authentication.
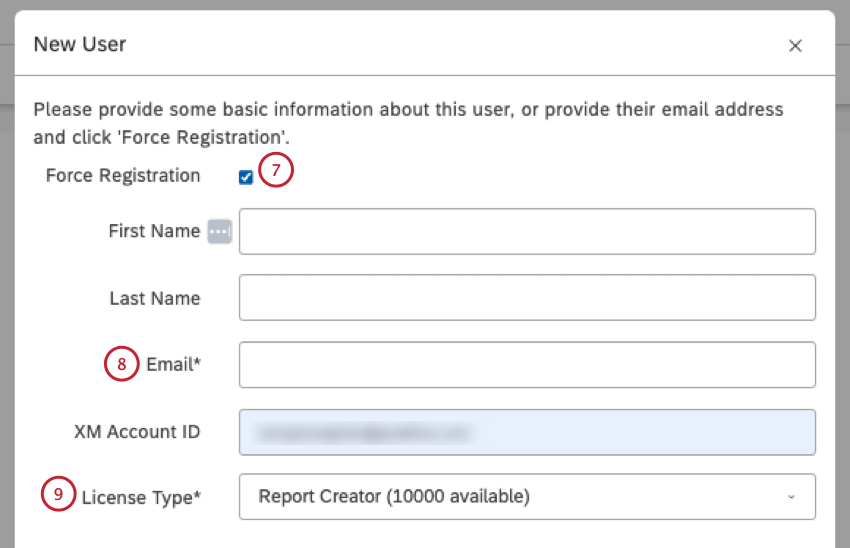
Attention: An email address is used to link user accounts across the XM Discover Suite.
Qtip: A custom property can be added to standard user account properties by an Account Owner. You can use this extra property to group users in the Users section. For more information, please see Custom Property in User Accounts.

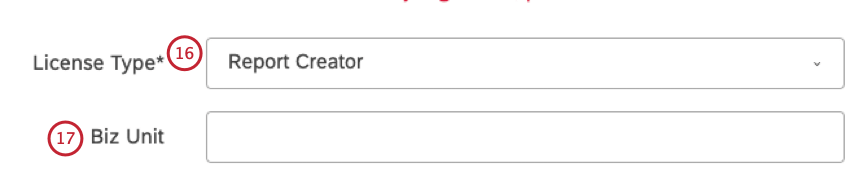
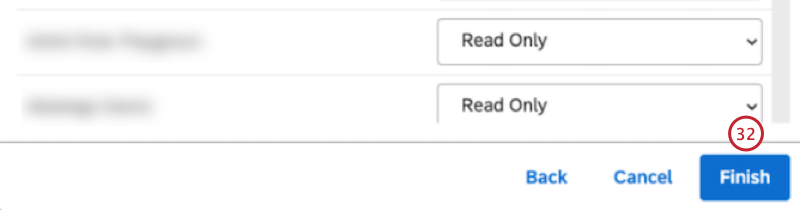
Qtip: By default the project-level permissions are set to “read-only” for all projects for both Report Creator and Configuration Analyst licenses. These licenses support different levels of data access.
Duplicating a User Account
Attention: This action is available only to Account Owners and Account Administrators.
You can duplicate user accounts in Studio to register new users with similar profile settings. The following are copied when you duplicate a use account:
- License type
- Custom field value, if any
- Permissions
- Group membership (except for groups derived from organization hierarchy)
- Access to objects shared with the group
Unique user properties (such as name or email), data access, and access to objects shared with the original user individually are not copied when you duplicate a user account.
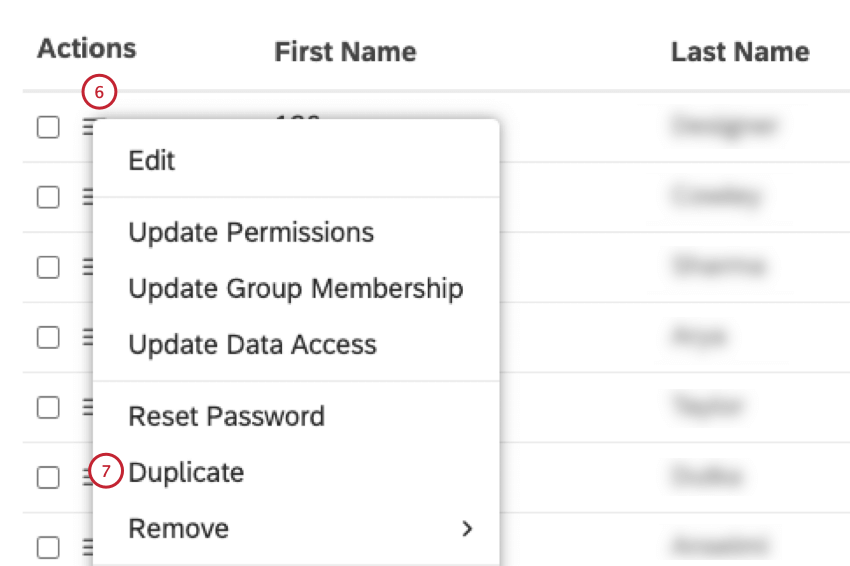
Attention: This option is available only if there is a free license of the type assigned to the original user.
Email Address Requirements
Studio relies on email addresses to uniquely identify users across the XM Discover Suite, which is why we recommend always using a working email address. The username part of an email address may use any of the following ASCII characters:
- Uppercase and lowercase English letters: (a-z, A-Z)
- Digits: 0 through 9
- Characters:
~ ! ^ $ & * + - ' _ = ` ? | - Character: . (period) Qtip: A period can be used in the username part of an email address provided that it is not the first or last character of the username, and provided it does not appear two or more times consecutively in the username.
 Qtip: Email validation in Studio is case-insensitive, meaning that the same email address cannot be registered twice using different capital and lowercase letters.
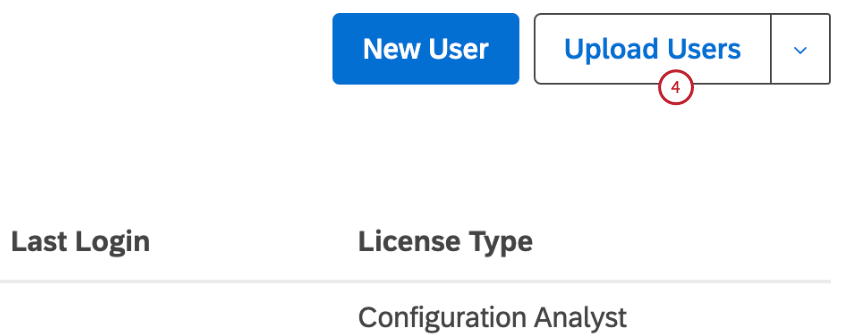
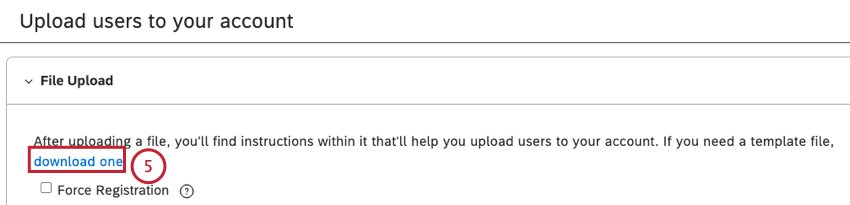
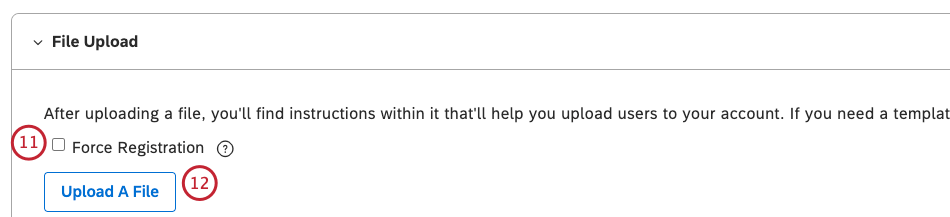
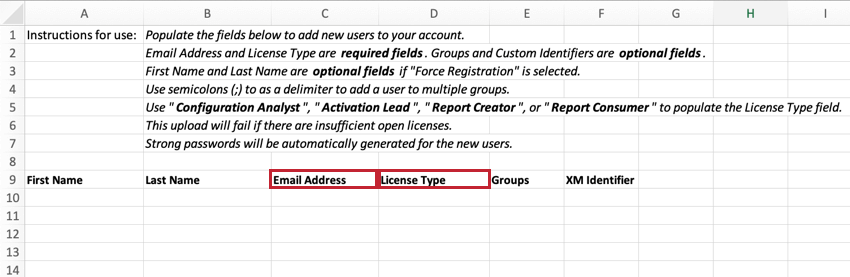
Bulk Uploading Users
Attention: You must be an Account Owner or an Account Administrator to carry out this action.
You can link XM user accounts via bulk user upload. You can upload 500 users at a time. For information on bulk user updates, see Bulk User Updates.
Qtip: If your organization uses automatic user syncing, please navigate to the Qualtrics platform to create users. However, you can still update existing users in bulk via the “Update Users” button.
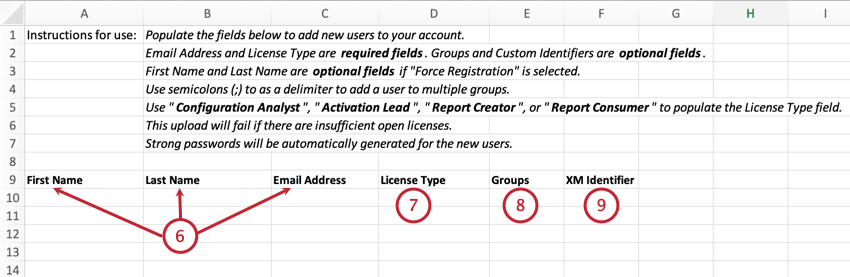
- User’s first name in the First Name (maximum length is 40 characters).
- User’s last name in the Last Name (maximum length is 40 characters). Qtip: First Name and Last Name are optional if Force Registration is selected. For information on force registration, see the Force Registration subsection below.
- User’s Email Address in the Email Address For information on email address requirements, see Email Address Requirements. Attention: Email address is a required field.

Attention: License Type is a required field.
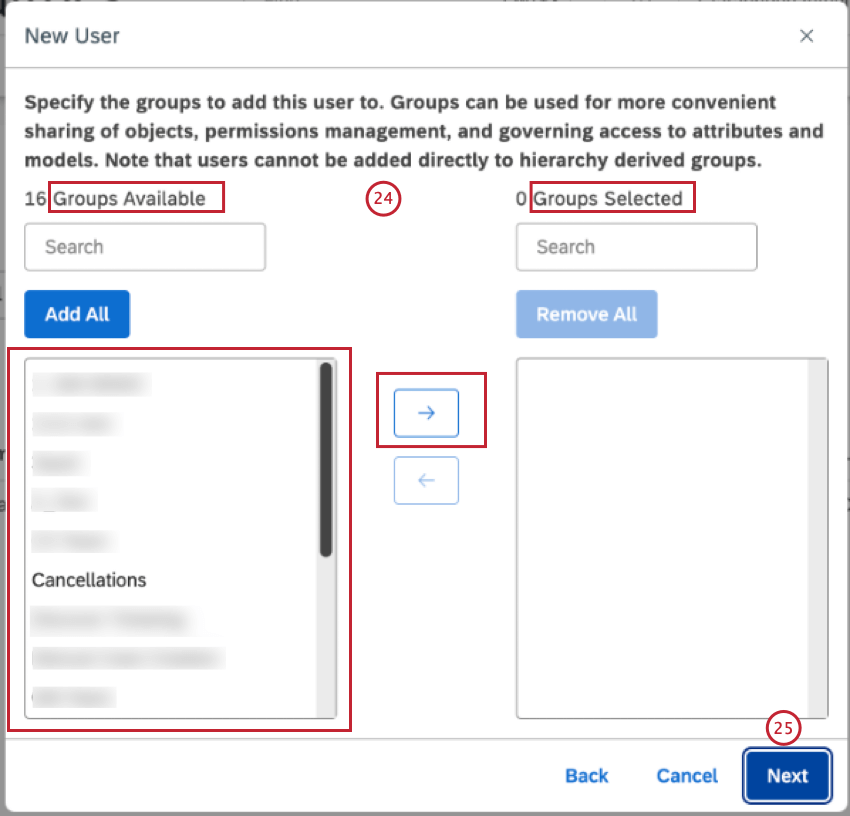
Qtip: Provide 1 or more groups to add a user to. Separate multiple groups with a semicolon (;). Users cannot be added to groups derived from org hierarchies.
Qtip: If you wish, you can add the XM Account ID via bulk user update.
Qtip: If you don’t select the Force Registration checkbox, a strong password will automatically be generated for each uploaded user.
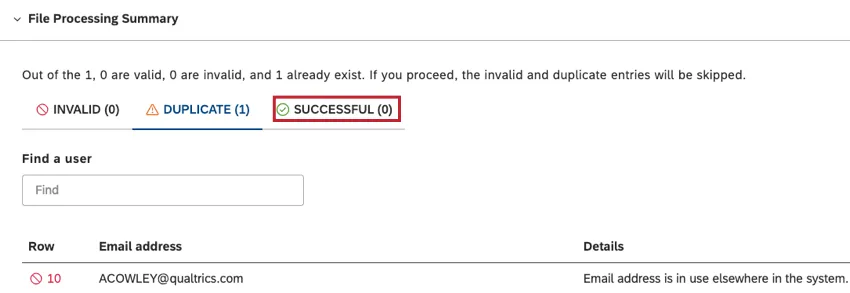
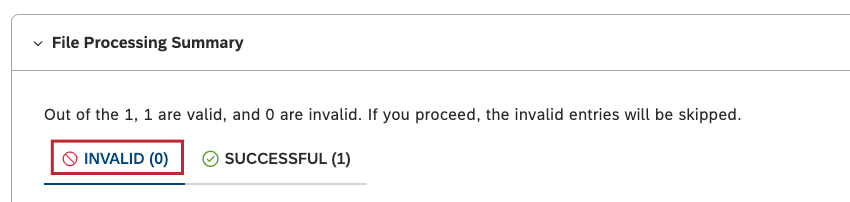
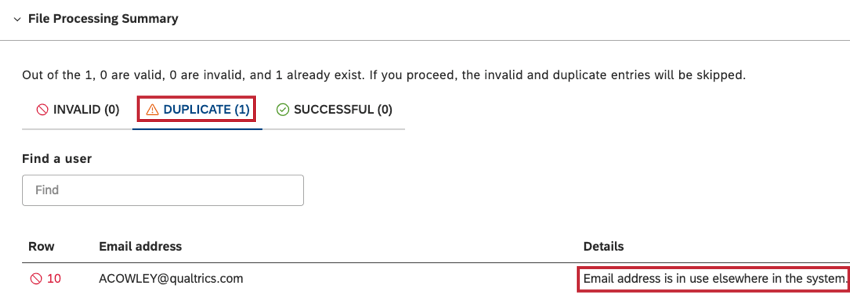
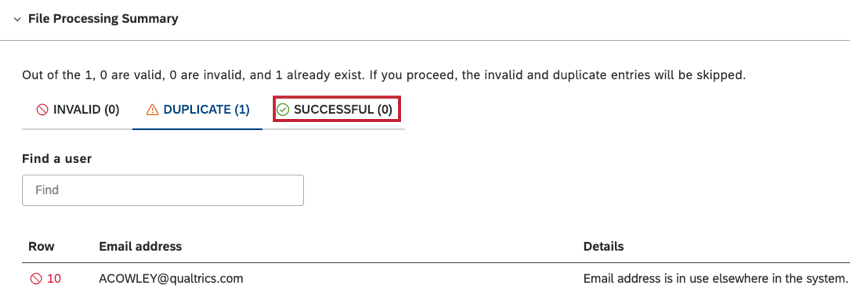
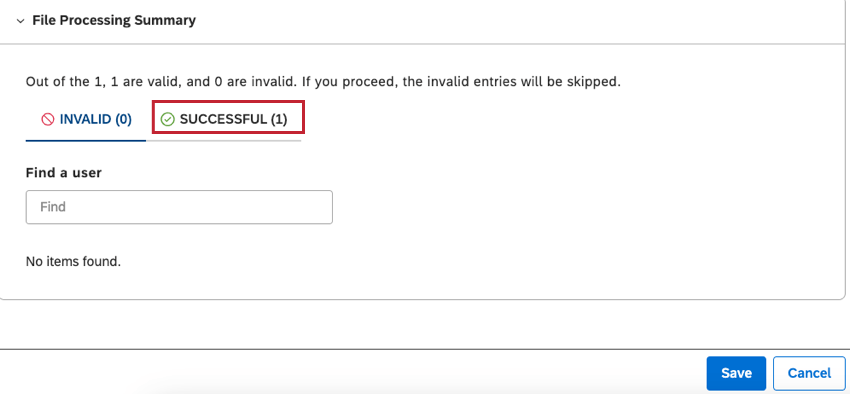
- The number of invalid entries, together with details about the invalid entries, will be shown in the INVALID tab in the File Processing Summary section.
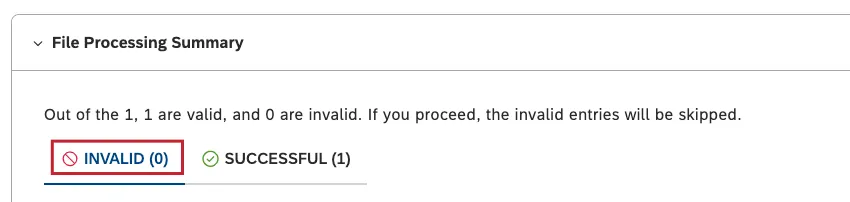
- The number of duplicate entries will be in the DUPLICATE tab, and details about each duplicate entry will be listed in the Details column.
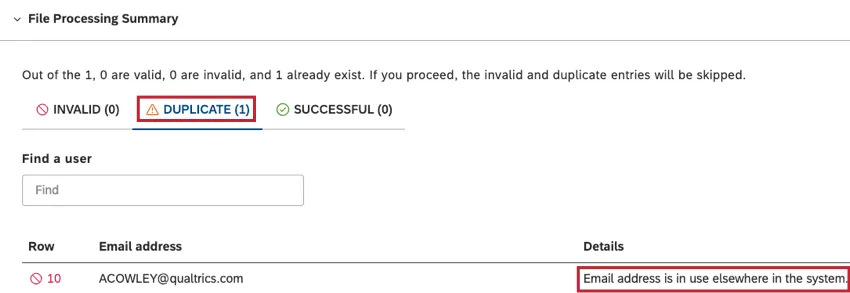
- The number of successful entries will be listed in the SUCCESSFUL tab.
- If there are invalid or duplicate entries, return to the Microsoft Excel file, include the necessary information or remove the duplicate entries, and save the changes to the file. For details of possible errors that may be identified when uploading a Microsoft Excel file, and how to fix these errors, see Error Messages.
Force Registration
When bulk uploading users, you can use force registration to register a user. Enter the following details in the Microsoft Excel template:
- User’s Email Address in the Email Address column.

- Select a license for the user in the License Type column.
The user will receive an email invitation with a temporary password.
That's great! Thank you for your feedback!
Thank you for your feedback!