
Projects Basic Overview
What's on this page
About the Projects Page
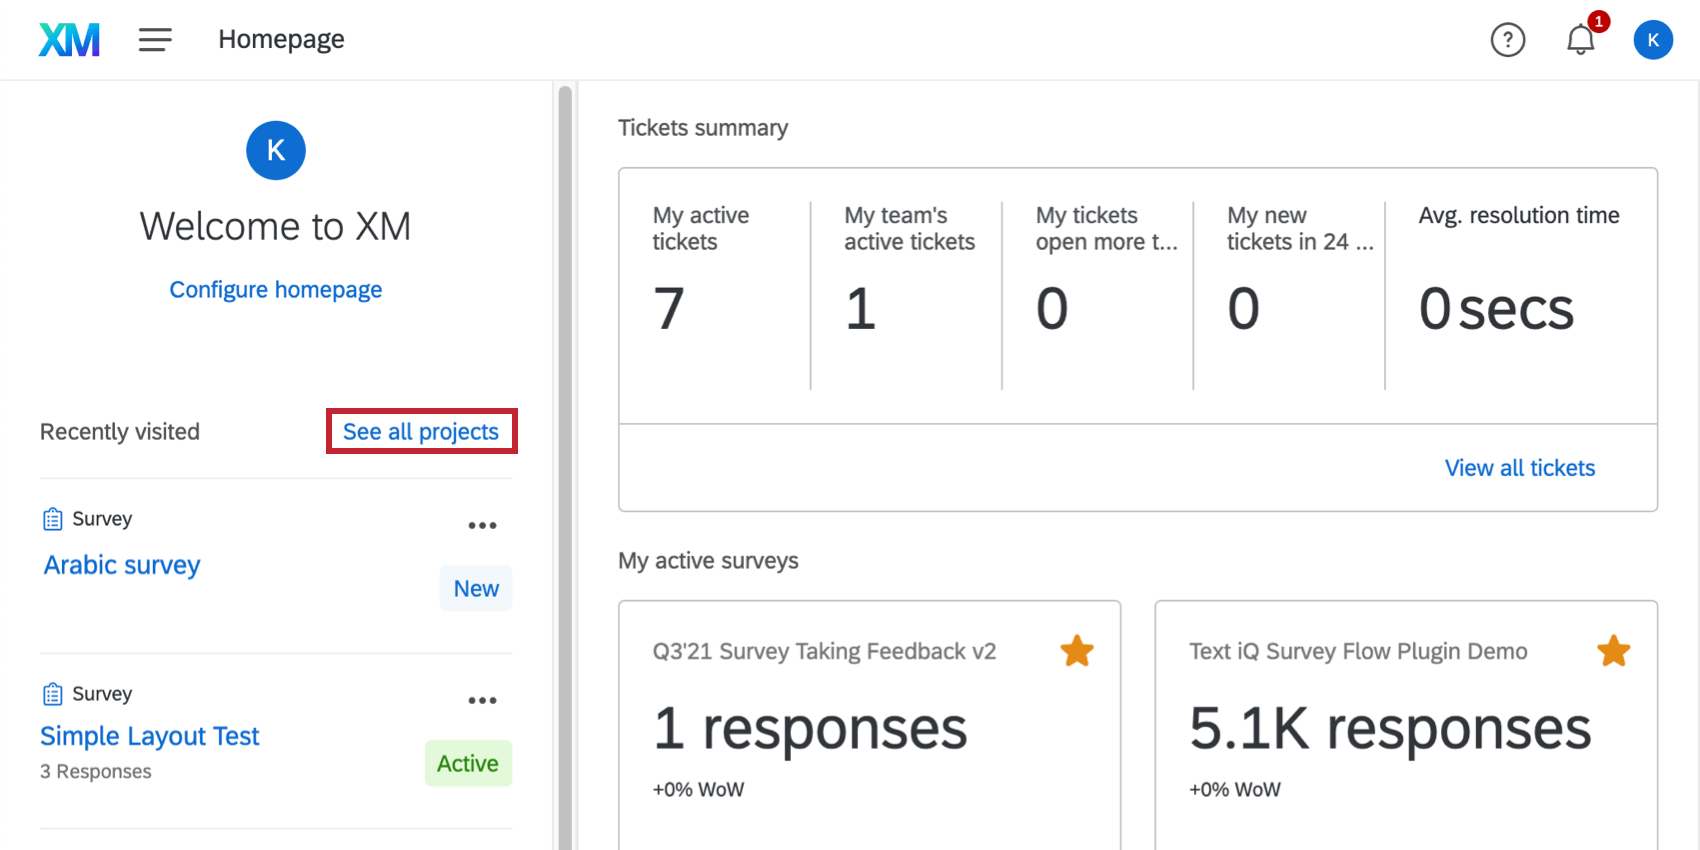
The Projects page is a one-stop shop listing all the XM projects you’ve created and that have been shared with you. The Projects page can be accessed in 2 ways:
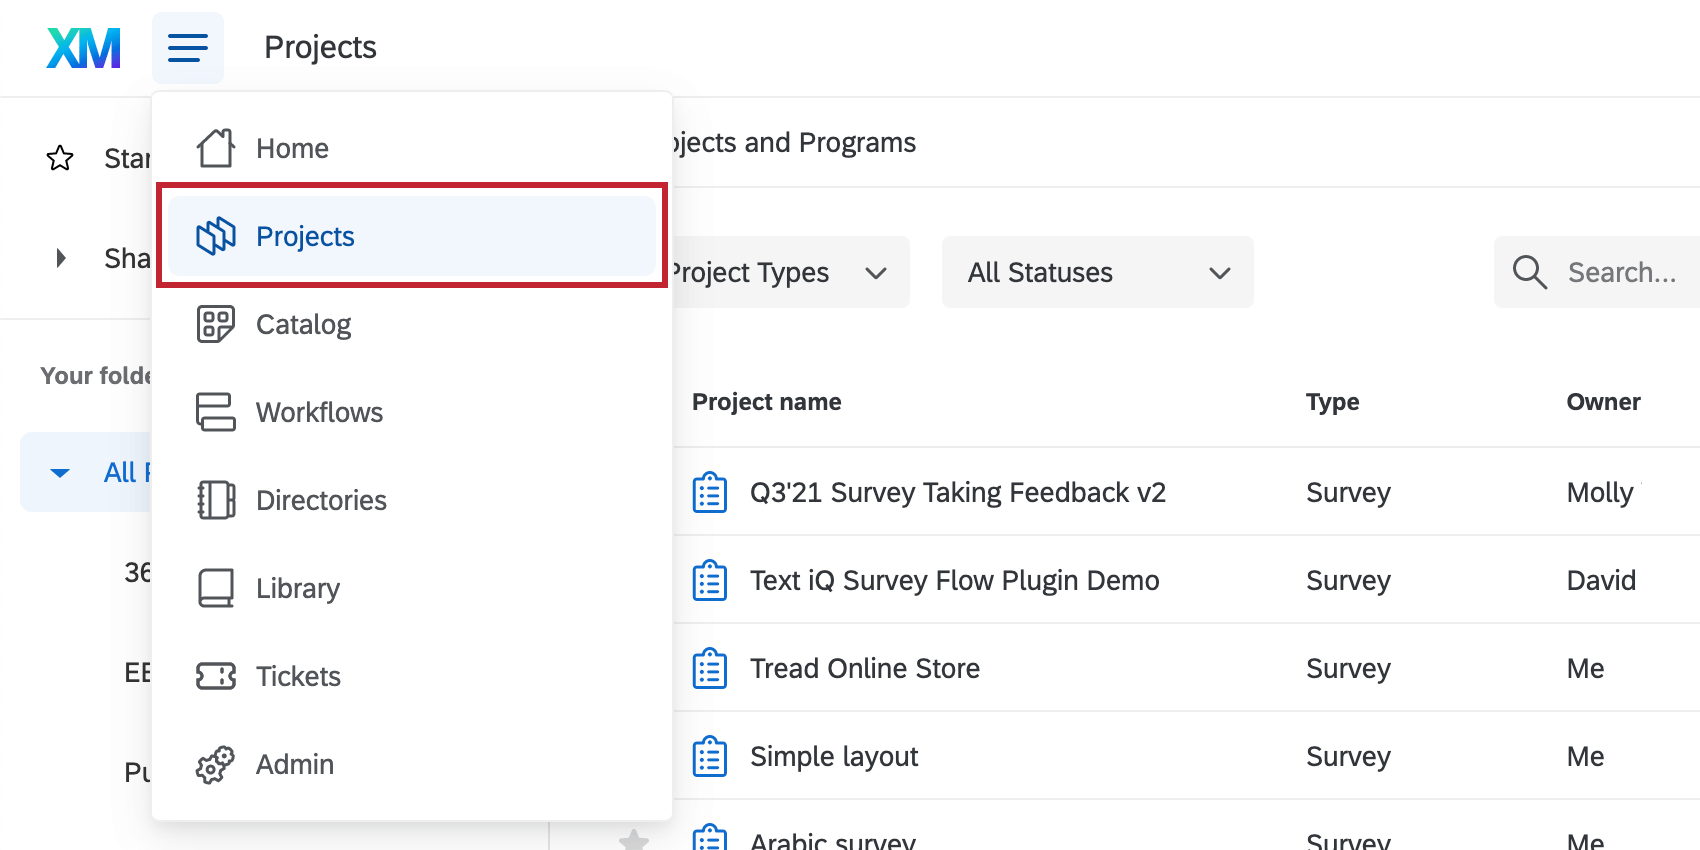
Qtip: Clicking the Qualtrics logo does not take you to the Projects page – it takes you to the Home page.
From the Projects page, you can do the following:
Qtip: The homepage is the default landing page for all users.
Available Project Types
There are many different types of projects available to you. When you create a new project in Qualtrics, you have several options to select for the Project type. Each Qualtrics software solution has its own unique strengths, so the project type helps determine which software you can use.
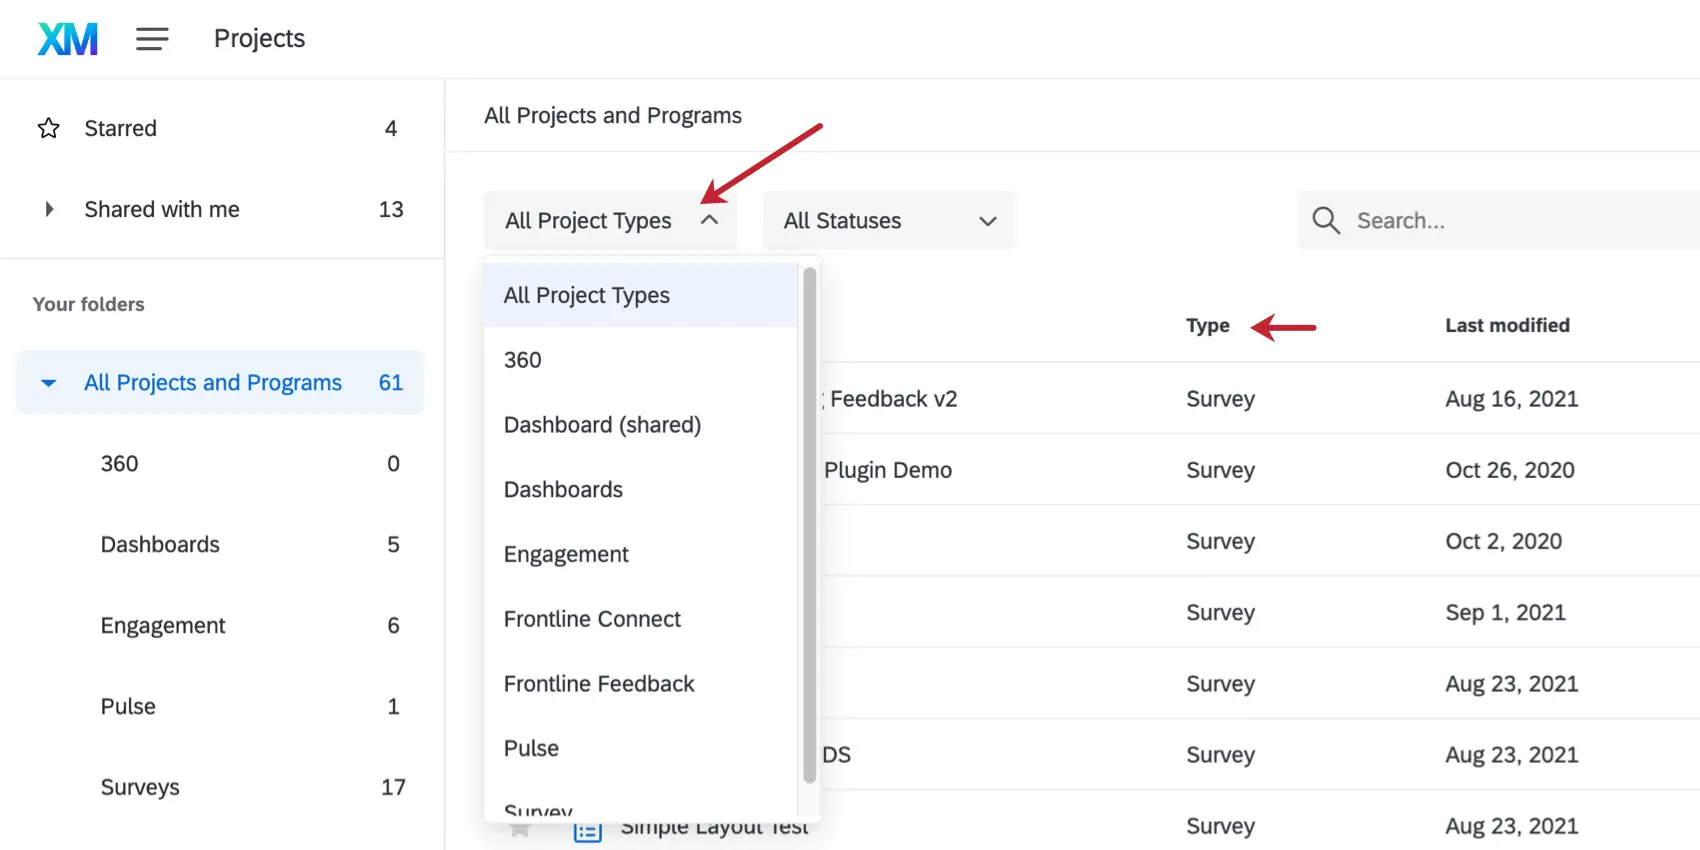
Qtip: Because you can customize what project information is displayed, your project type might not appear exactly as shown below.
- Survey: With survey projects, you can create a survey, distribute it to respondents, analyze the data, and build reports, all inside 1 project.
- Imported Data: If you don’t want to create a survey before importing data to Stats iQ for analysis, you can create a standalone Stats iQ project.
- Website & App Insights: This project type allows you to seamlessly integrate feedback surveys with your website.
- Dashboards Project: Visualize your research by building shareable, dynamic reports. This project type is also called CX Dashboards.
- Conjoint: Conjoint analysis is a market research technique used to identify consumer preferences and evaluate the product trade-offs they would make. Our choice-based model allows your respondents to provide feedback so you can easily narrow down the types of packages and products you should offer.
- MaxDiff: MaxDiff (Maximum Difference) is an advanced survey research technique used to obtain preference and importance scores for multiple items. This is done by presenting respondents with samples of the full list of items you wish to assess, and then having them mark the items they prefer the most and the items they prefer the least in each set.
- Frontline Feedback: Collect, organize, and prioritize suggestions from users in your Qualtrics organization.
- Assorted Guided Solutions: When you create a guided solution, its name will appear as the project type – for example, “Pricing Study (Gabor Granger)” or “Brand Tracker.”
- Reputation Management: Online Reputation management is a means of understanding and managing your brand’s online reputation. Here, you can create dynamic dashboards that report on reviews you receive, and trigger close-the-loop responses when reviews come in that require action.
- Ticket Feedback: Attaches to ticket tasks and lets ticket owners provide additional follow-up details.
- Programs: Organize different related projects in 1 container. Depending on your license, you may be able to access expertly-designed programs, or build your own from scratch.
- Product Test: Product tests are a method to gather feedback on a new product or prototype. You can evaluate the performance and identify strengths and weaknesses of your product before it is widely available.
- Bain Outer Loop: Bain Outer Loop is a means of addressing customer complaints by empowering CX improvements within your organization. In this project you can track elevated issues, common themes, and document proposed solutions. This project also contains a pre-built dashboard to track elevation progress.
- Coaching Recommendations: Configure how coaching recommendations will be displayed within a Customer Care App. After configuration these projects can be selected within an instance of a Customer Care App so you can visualize agent performance and coaching within several informative widgets.
- Chat Data: Create workflows to extract chat data from a contact center provider(s) to Qualtrics. This data can then be analyzed in Text Analysis and Dashboards.
- Email Data: Create workflows to extract email data from a contact center provider(s) to Qualtrics. This data can then be analyzed in Text Analysis and Dashboards.
- Voice: Import call recordings from a voice provider to Qualtrics. These recordings can then be analyzed in Text iQ and Dashboards.
- Unmoderated User Testing: Gather feedback on your website, prototype, or other URL through remote unmoderated sessions with respondents. A study is created and distributed to participants, who can then complete the study on their own time.
You can also find a list of Employee Experience projects, such as Engagement, 360, Lifecycle, and more. See Types of Employee Experience Projects for more details.
Warning: If you don’t have access to one of these project types and would like to make a purchase or request a demo, contact your Account Executive.
In addition to sorting projects by type, you can filter by project type. See more under Organizing, Viewing, Searching, & Sorting Projects.
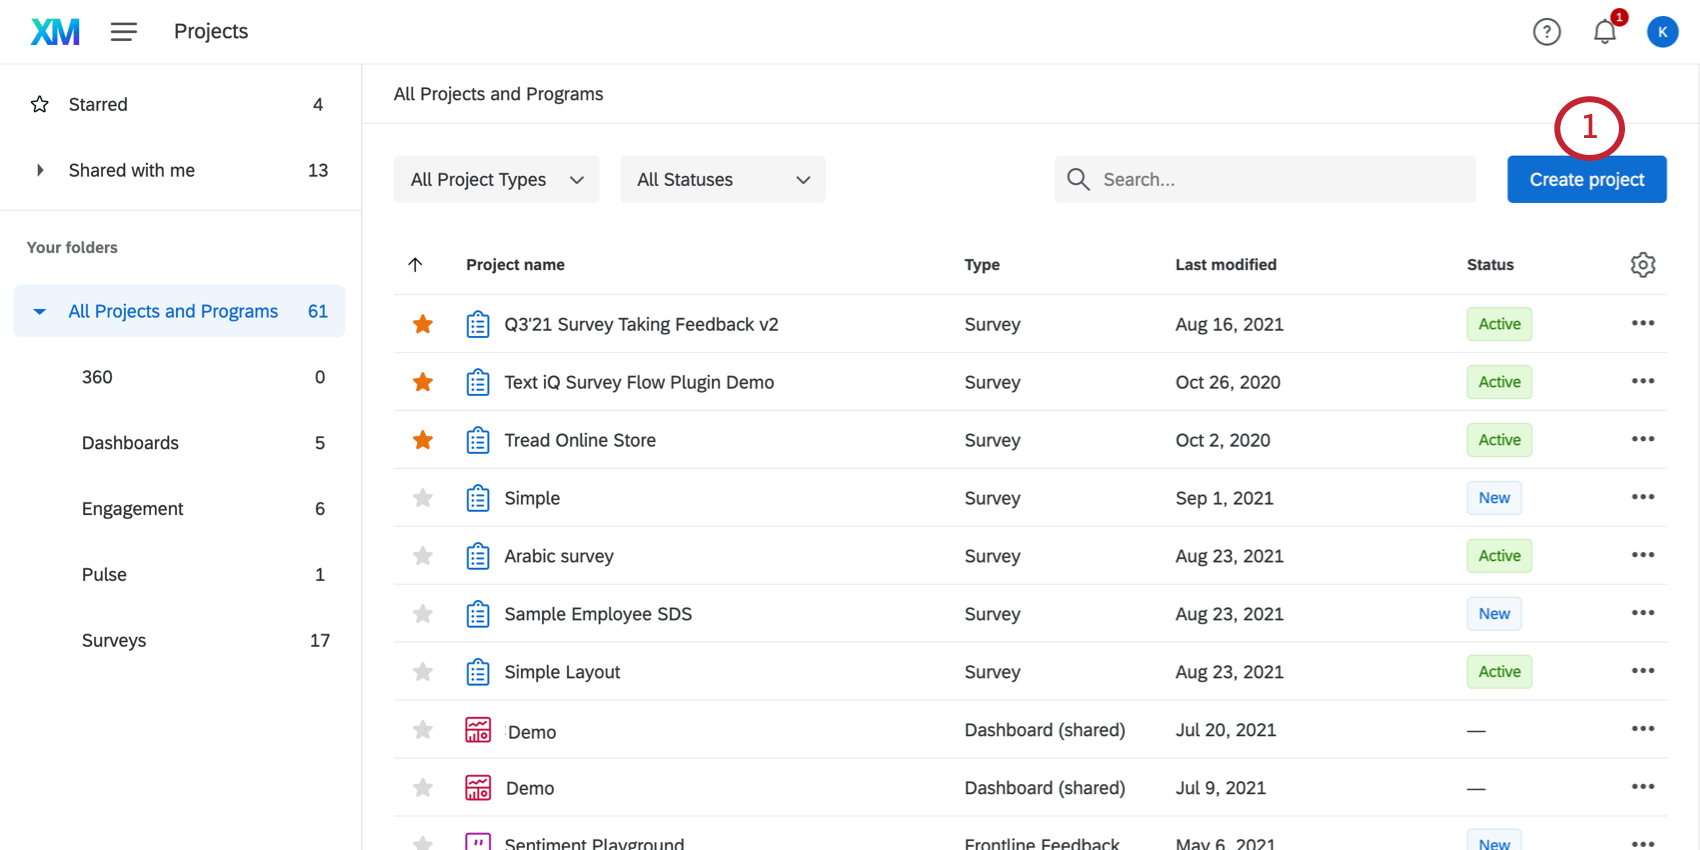
Creating New Projects
A typical project consists of a survey, a distribution record, responses, and reports. You can start with any project type available to you.
New projects are created on the Catalog page. You can also easily start from Home or the Projects page itself. Below, we’ll show you what creating a survey looks like on the Projects page.
Qtip: The folder you start in doesn’t affect where your project will be stored once it’s created.

Go to the Creating a Project page for step-by-step examples of how to create new projects using any of these options.
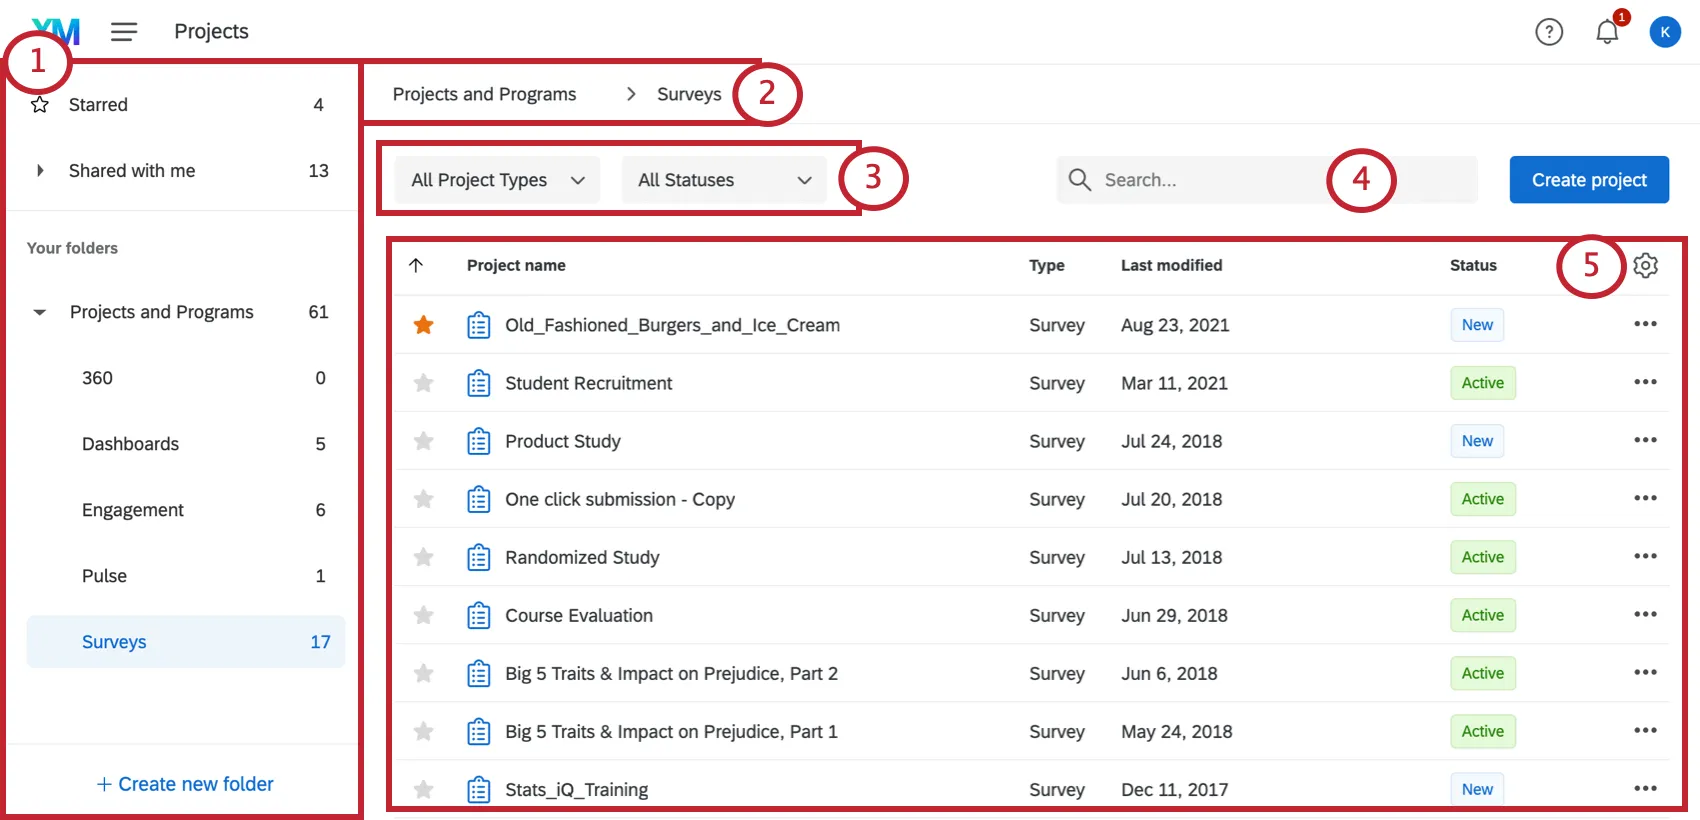
Organizing, Viewing, Searching, & Sorting Projects
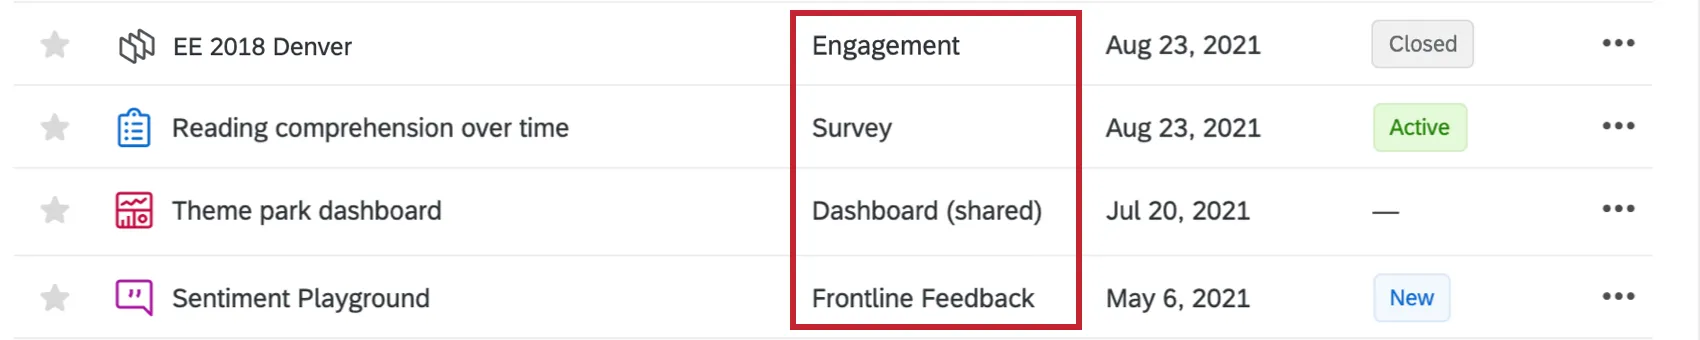
The Projects page displays practical, at-a-glance information to help you organize, view, monitor, track, and sort through your projects. For example:
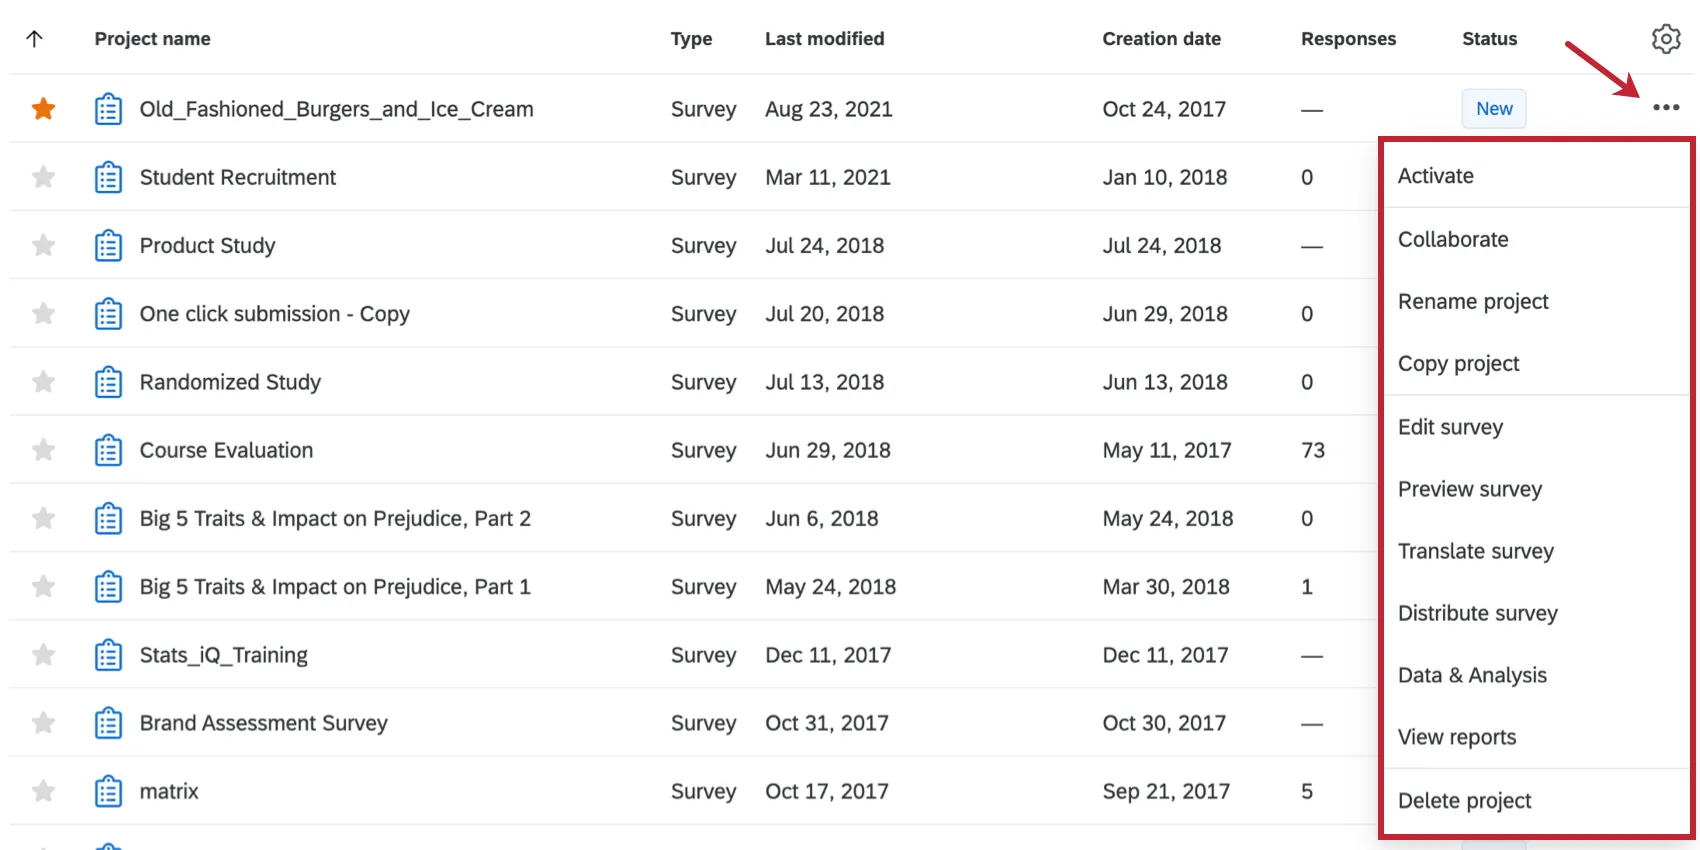
On the far-right of every project name you’ll see 3 dots that open the project actions drop-down menu. From here you can activate, rename, copy, edit, translate, delete your projects, and more.
Go to the Organizing & Viewing Your Projects page for step-by-step examples of how to get the most value and power out of the Projects page. This page goes through:
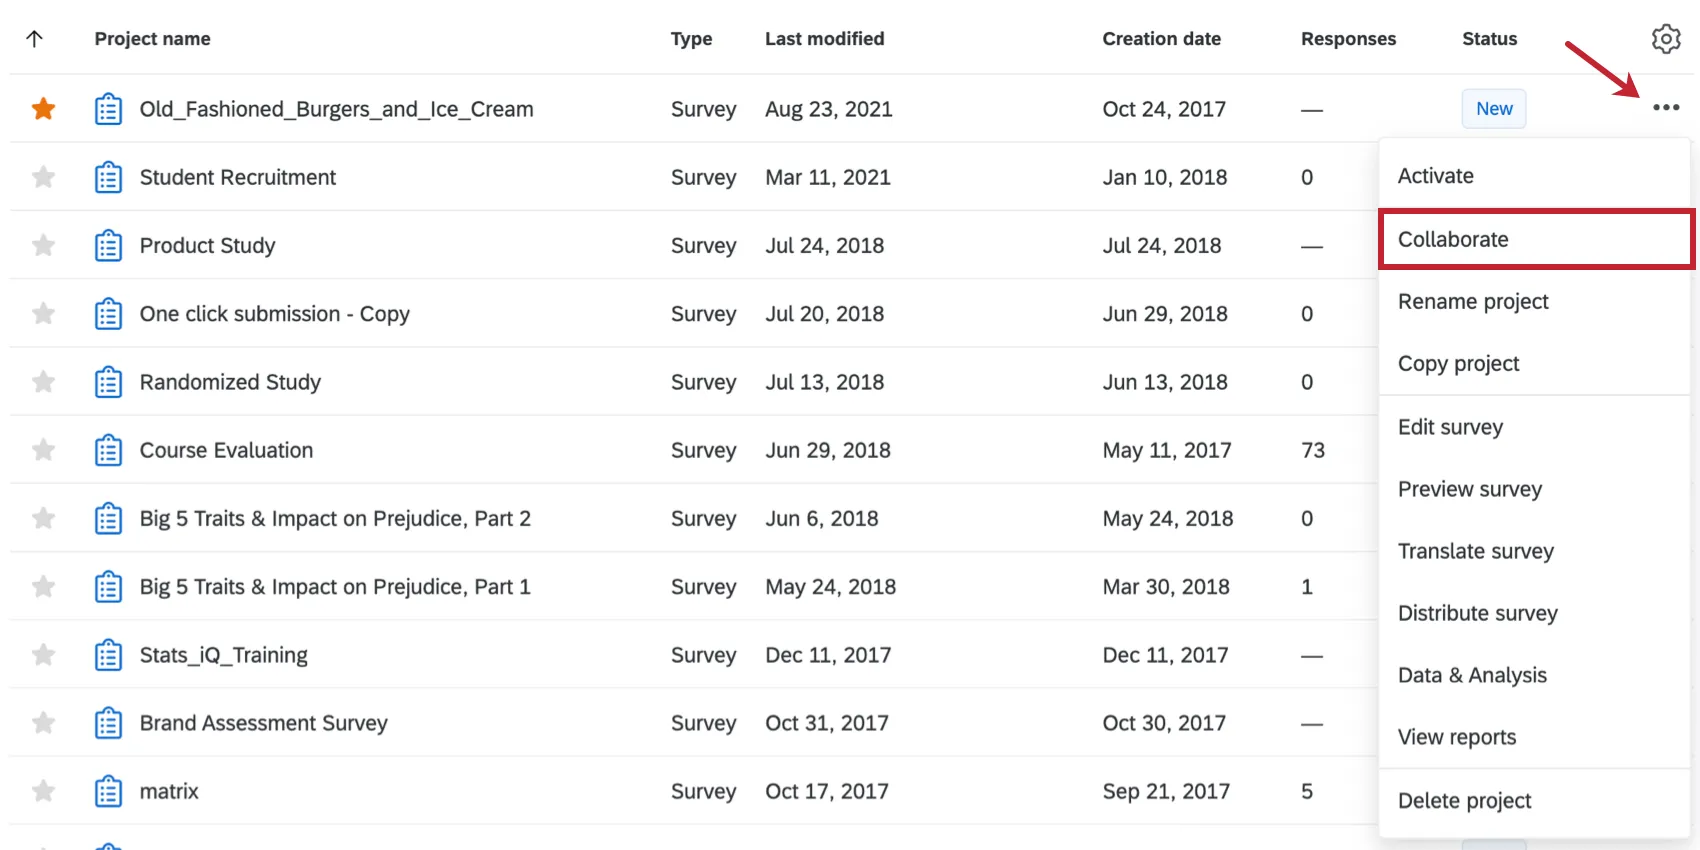
Collaborating On Projects
Collaborating on projects is as easy as clicking Collaborate from the project actions drop-down menu.
If your account has the proper permissions, you can collaborate with:
- Individuals inside your organization.
- Groups within your organization.
- Collaborators outside your organization.
Qtip: If you don’t have the ability to collaborate, reach out to your Brand Administrator.
To begin collaborating, enter a colleague’s email address in the Collaborate popup menu.
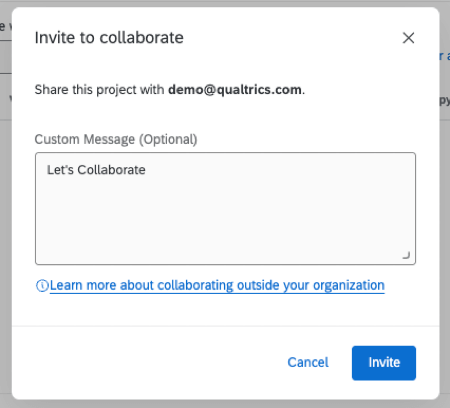
You determine the security level of the projects you share. You can designate full or limited access.
- Full access rights: Allows collaborators unrestricted access (while still protecting your account information).
- Limited access rights: The Collaborate on Project popup menu lets you customize access to specific collaborator needs.
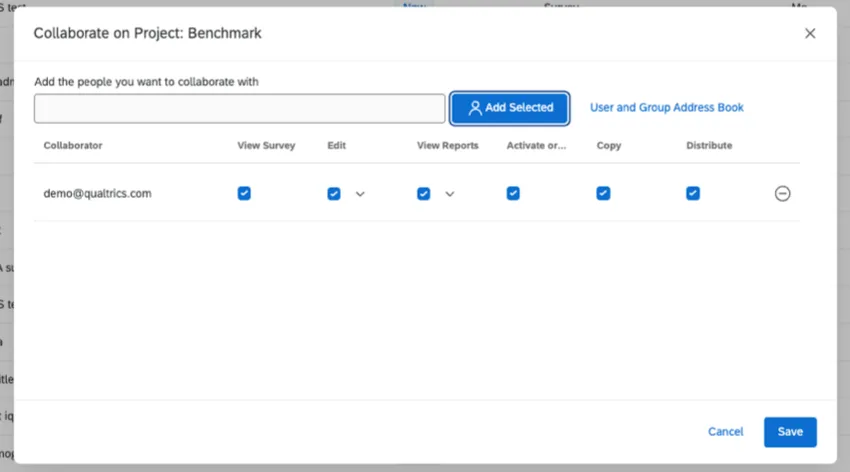
For example, translators may be limited to “Edit” permissions only while their “Activate/Deactivate” and “Distribute” permissions are disabled.
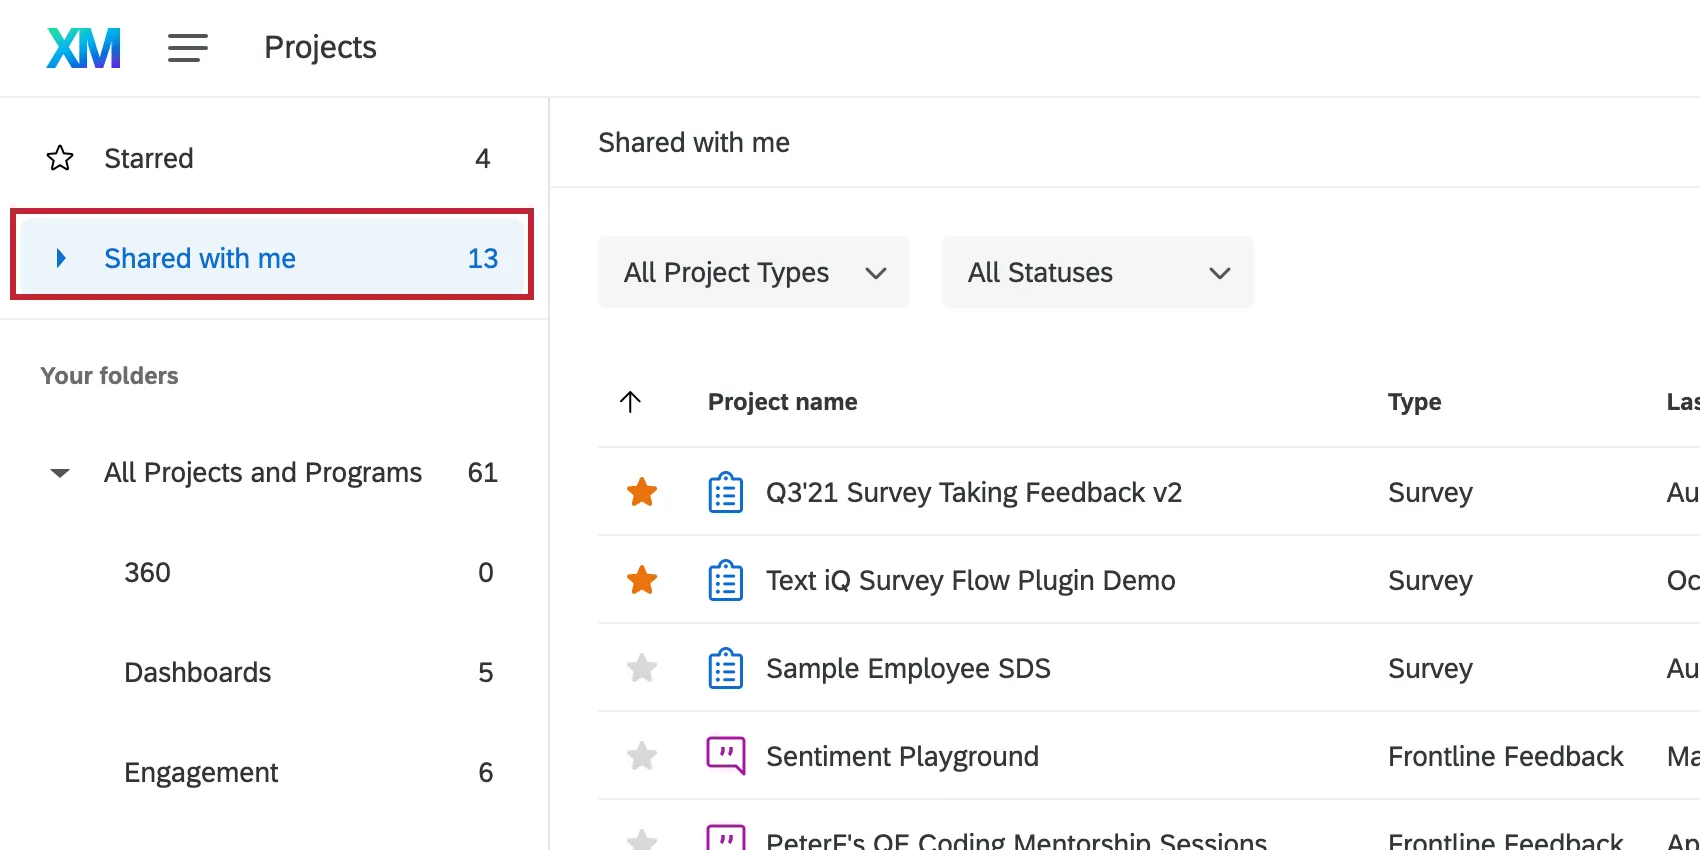
When people invite you to collaborate, their projects will show up in your Projects page. There is even a folder called Shared with me to help you find these projects quickly.
Qtip: If you would like to transfer a copy of a survey to another Qualtrics account, see Import & Export Surveys for more information.
Navigate to the Collaborating on a Project page for step-by-step examples of how to collaborate on projects.
Variations for Different Project Types
The Projects page has a lot of functions that are shared by all types of projects. You can view all of your projects on this page, and you can star them and sort them into folders however you see fit.
However, there are a few key differences to keep in mind, especially regarding:
- Collaboration
- Management (such as copying projects, status changes, and project actions)
Luckily, we have resources to help with these key differences. See the linked pages below for more information about collaboration and management in different project types.
Attention: The types of projects you have access to varies based on what’s included with your license and your user permissions. If you’re interested in a feature you don’t have access to, reach out to your Brand Administrator or your Account Executive for more information.
Collaborating on Different Project Types

- Survey projects: See Collaborating on Survey Projects. Ticket feedback surveys also work this way.
- Employee Experience: See Collaborating on Projects (EX). Includes Engagement, 360, Lifecycle, and Ad Hoc Employee Research.
- Programs: See Sharing a Program. Includes Pulses.
- CX Dashboards projects: See Adding Project Administrators to a Dashboard (CX).
- Website / App Insights: See Adding Users to the Project.
- Conjoint and MaxDiff: See Collaborating on Conjoints & MaxDiffs.
- Reputation Management: See Sharing Reputation Management Projects.
- Imported Data projects: Similar user interface to collaborating on programs. See Sharing a Program.
- Product Test projects: See Collaborating on Product Test Projects.
- Bain Outer Loop projects: Collaborating this project with a user will add them as project admins. To create elevations within the project, they’ll need to be assigned an Outer Loop persona. See User Roles & Personas.
Qtip: Certain projects may have other, similar functionalities, such as sharing dashboards by role or distributing to participants. This list only covers how to invite other users to collaborate with you on editing and managing projects.
Managing Different Project Types
- Employee Experience: See Managing Projects (EX). Includes Engagement, 360, Lifecycle, and Ad Hoc Employee Research.
- Programs: See Programs. Includes Pulses.
- Website / App Insights: See Managing Website & App Insights Projects.
- Conjoint and MaxDiff: See Creating & Managing Conjoint & MaxDiff Projects.
- Reputation Management: See Getting Started with Online Reviews.
- Imported Data projects: See Project Actions.
FAQs
How do I accept a project someone's inviting me to collaborate on?
How do I accept a project someone's inviting me to collaborate on?
- If the email contains a code: Copy the code. Login to your Qualtrics account, go to the Shared With Me folder, and click Accept Collaboration. Paste the code into the field and submit.
- If the email does not contain a code: Login to your Qualtrics account and go to the Shared With Me folder. If you do not see the survey, go to the upper-right of your Qualtrics account, click the profile icon, and select Refresh Account.
How do I rename my project?
How do I rename my project?
Can I restore a deleted project?
Can I restore a deleted project?
How do I see the project owner?
How do I see the project owner?
When sorting by owner, all projects become grouped by their respective owner, regardless of what folder you’re in. We recommend looking in the Shared With Me folder to make locating the owner and project easier.
What is the XM platform?
What is the XM platform?
What does CX/EX/BX stand for? / What does _ Experience mean?
What does CX/EX/BX stand for? / What does _ Experience mean?
- Customer Experience (CX): Learn more about your customers' experience with your company. Build beautiful dashboards to display your data, or target users on your site using creative intercepts.
- Employee Experience (EX): These projects are specially designed to get at the heart of your employees’ experience working for your company, and provide actionable results and dynamic reports. Assign relationships and easily create individual reports with 360, or survey the whole company and create a secure dashboard that only reveals data based on each employee’s position in the company hierarchy.
- Brand Experience (BX): Find out what’s working and what isn’t for your brand’s reputation, and build towards a better experience for your customers.
What are CX Dashboards?
What are CX Dashboards?
Can Dashboards projects only be used for customer experience research?
Can Dashboards projects only be used for customer experience research?
What are EX Dashboards?
What are EX Dashboards?
That's great! Thank you for your feedback!
Thank you for your feedback!