
Creating a Metric Alert (Studio)
What's on this page
About Creating a Metric Alert
You can create an alert that goes out to key stakeholders whenever a certain threshold is met by one of your metrics. You can either create metric alerts right inside your dashboards by clicking data points that interest you, or you can create alerts inside a dedicated page of Studio.
Qtip: You need the Create and Manage Metric Alerts permission to create metric alerts.
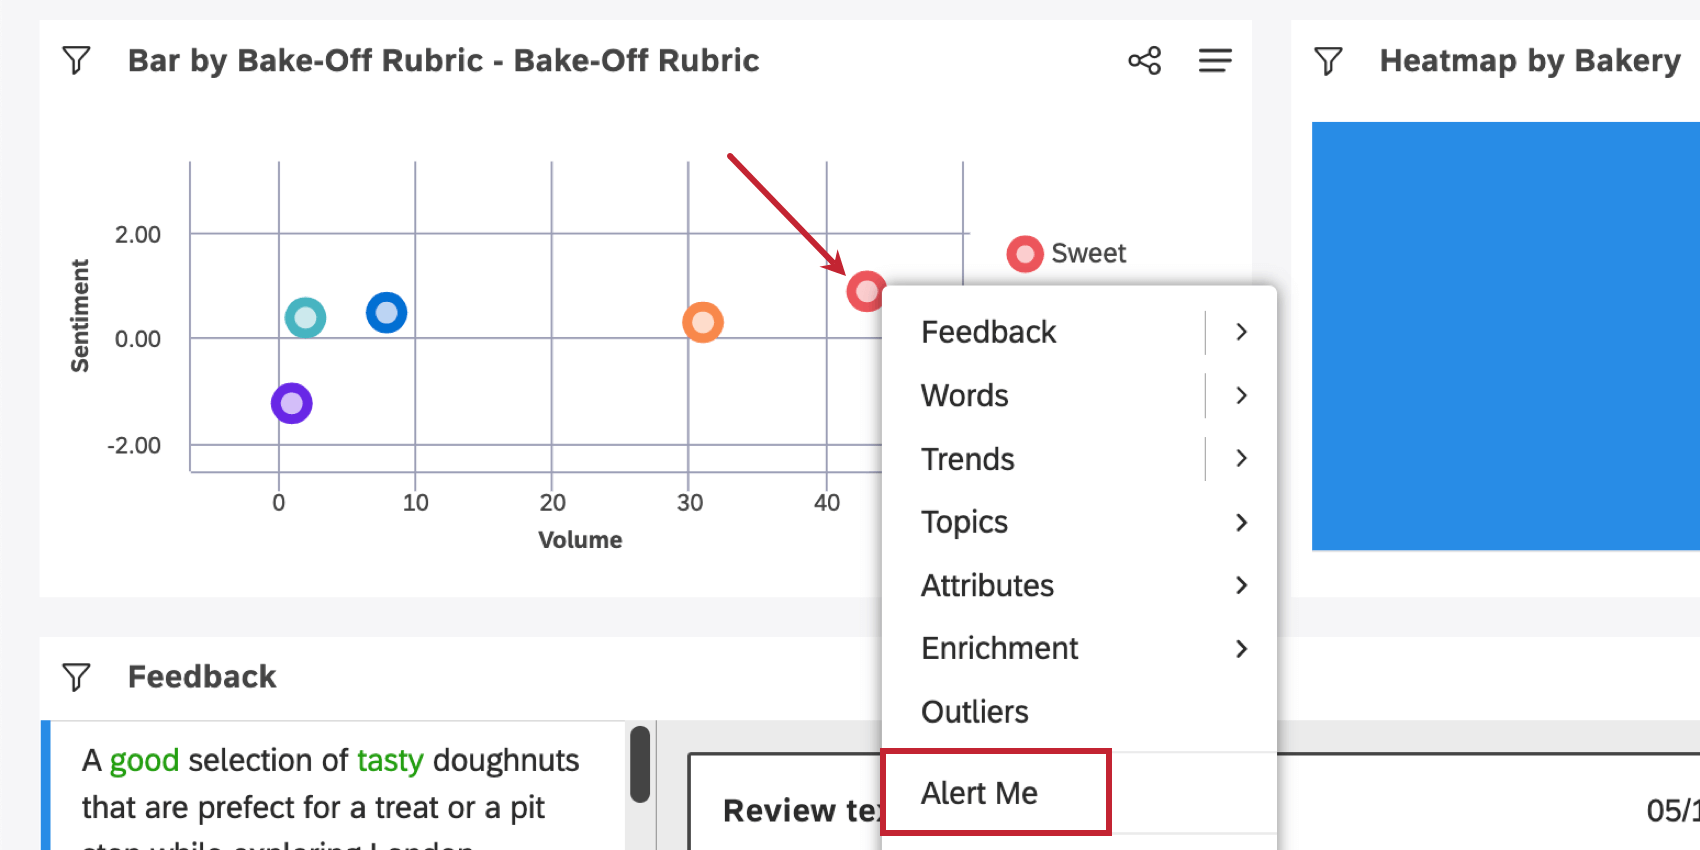
Creating Alerts from Drilled Widgets
You can create a metric by drilling into a widget. Just click a data point and select Alert Me.

From there, you can set up the following:
Creating Alerts from the Alerts Page
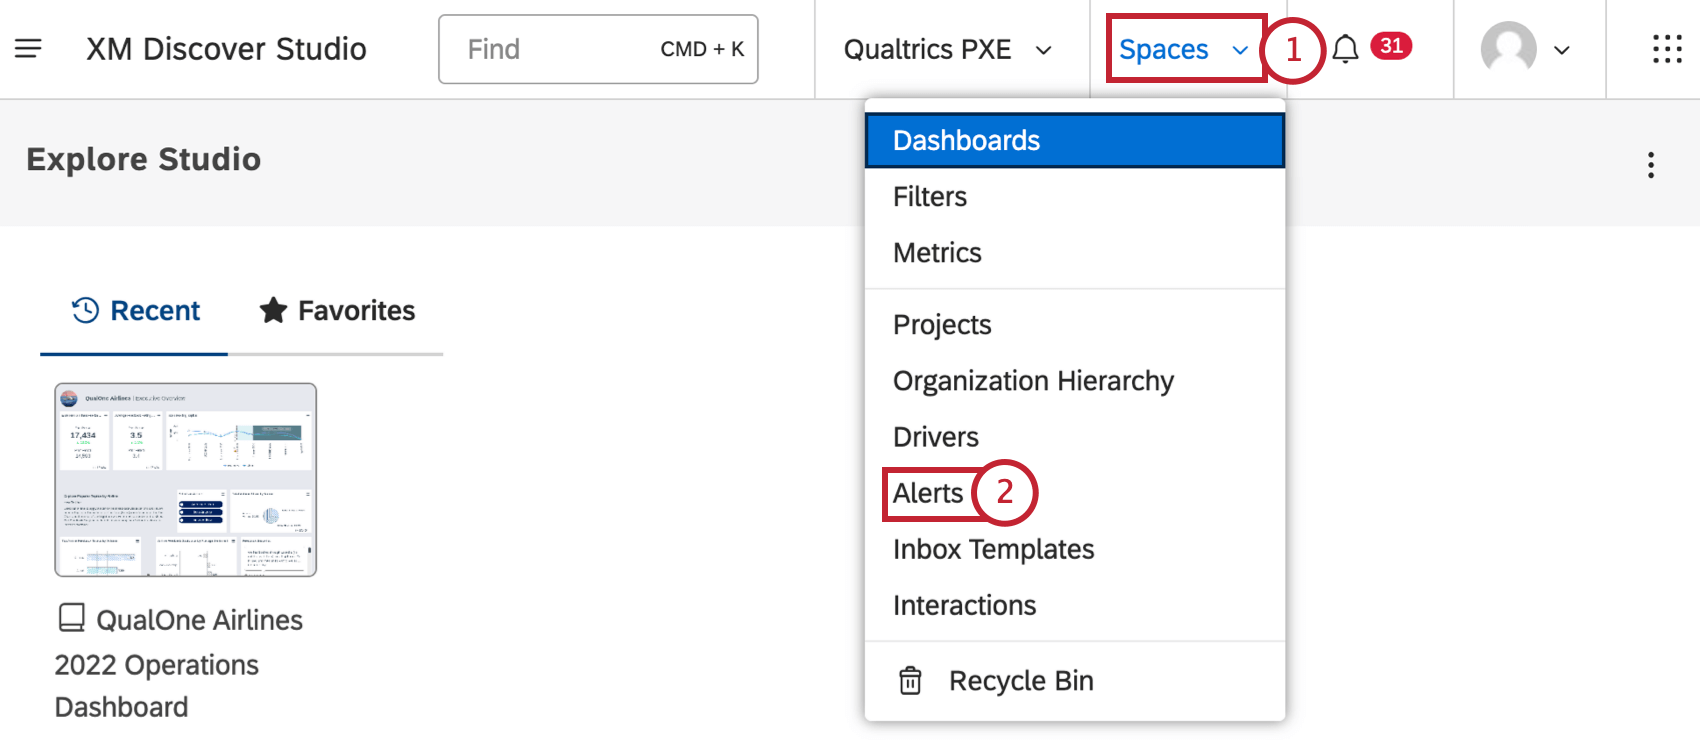
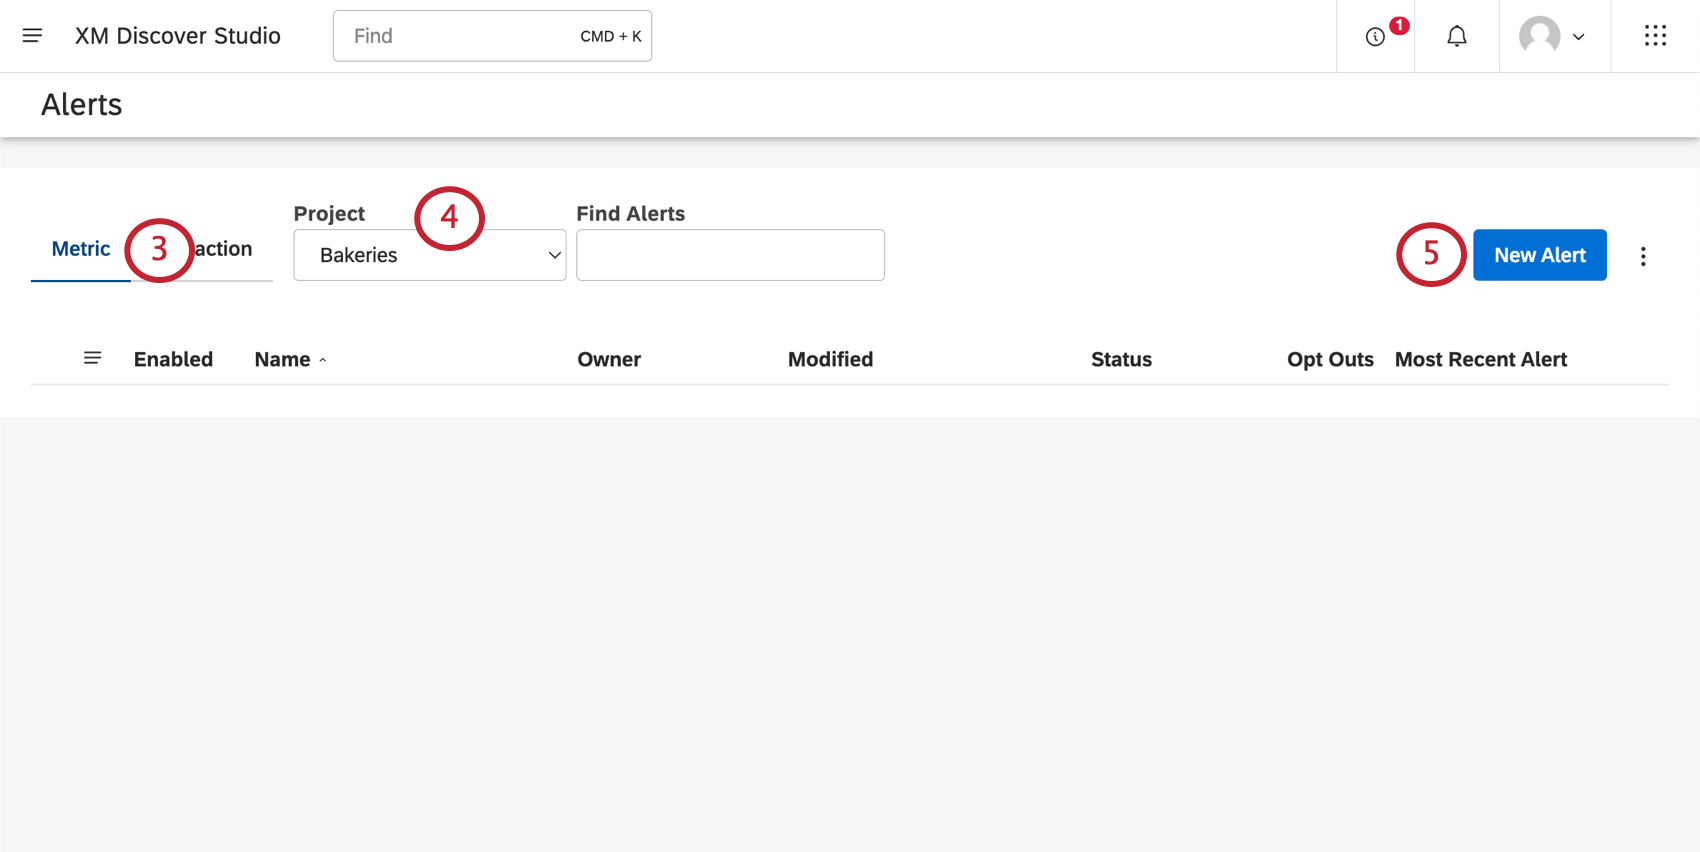
Qtip: You may also need to choose an account and a content provider, depending on what you have access to.
From there, you can set up the following:
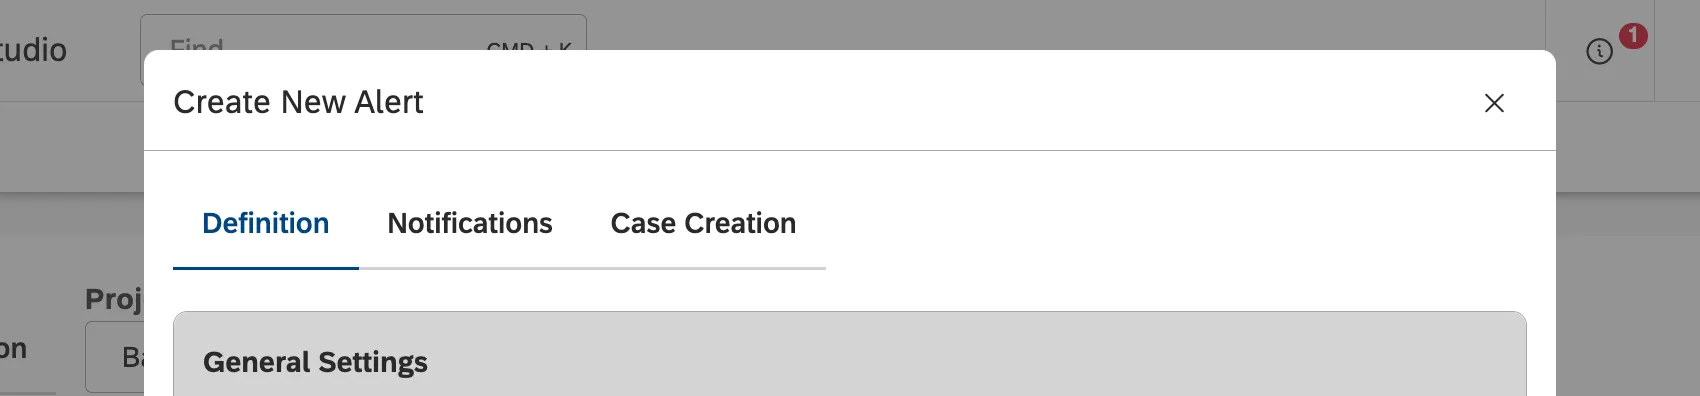
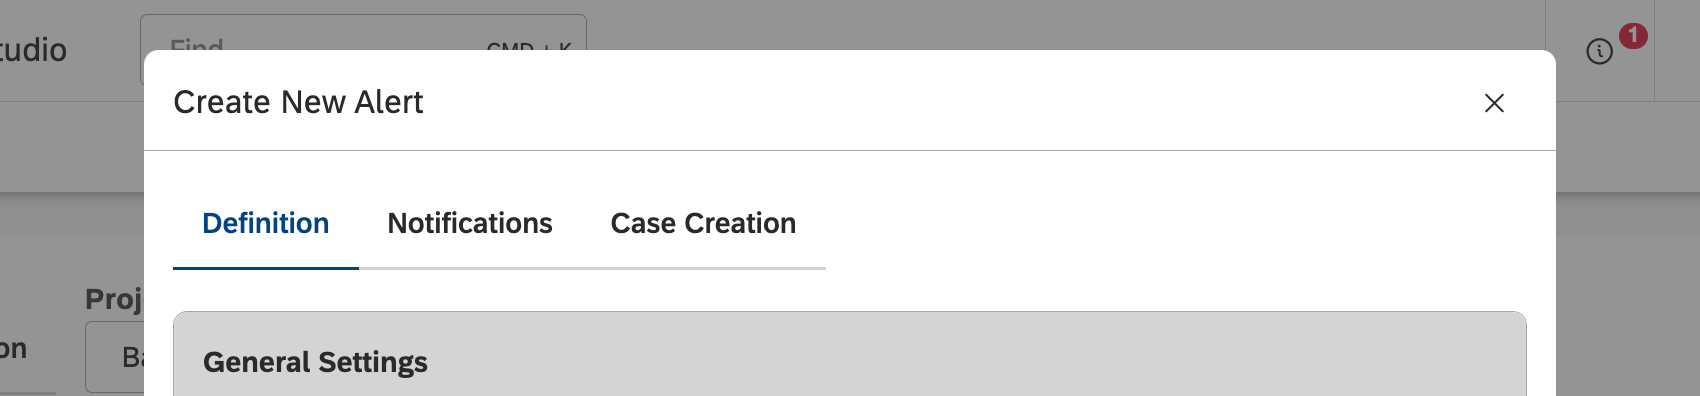
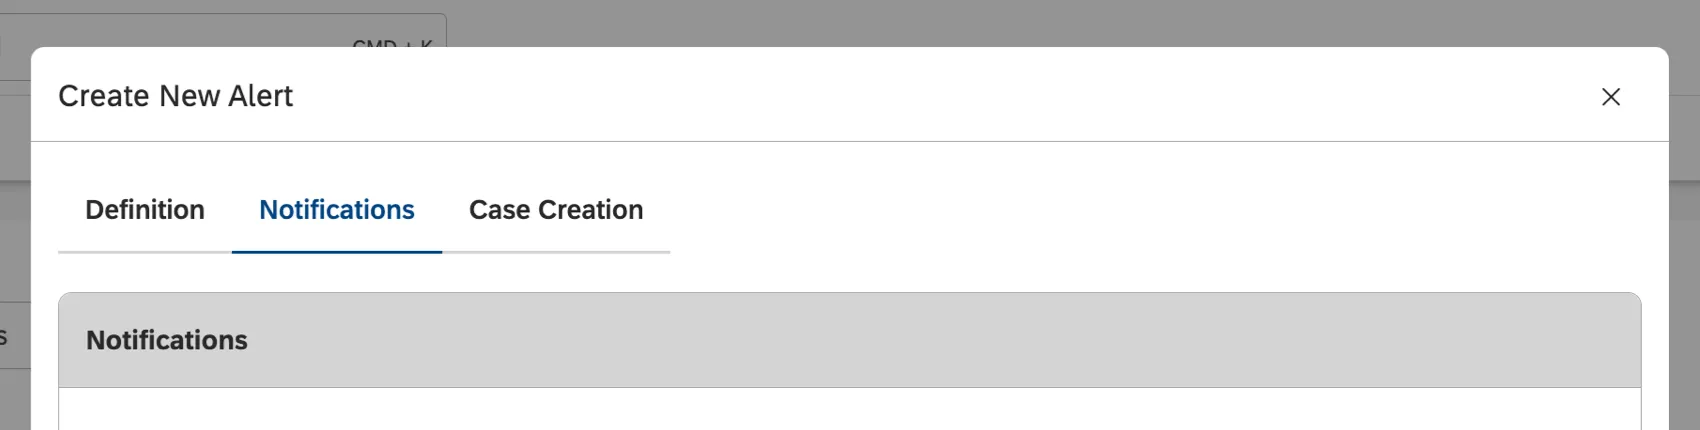
General Settings
General settings can be found in the Definition tab.

In General Settings, name the alert, enable or disable it, and decide the date when it starts.

- Alert Name: Provide a unique name for your alert. No other alerts in your account can have this name.
- Enable: Determine whether the alert should be enabled or disabled when you submit your changes. Qtip: You can create as many metric alerts as you want, but you can only enable up to 10 of them. Once 10 metric alerts are enabled, you will need to disable a metric alert before enabling another. Alerts shared with you by other users do not count towards this limit.

- Starts on: Click the calendar to choose a date the alerts should start. Alerts run between midnight and 6 AM of the selected time zone.
Qtip: Alerts expire after 6 months. When you set a start date, you’ll be shown the date the alerts will stop. You can renew alerts as needed.
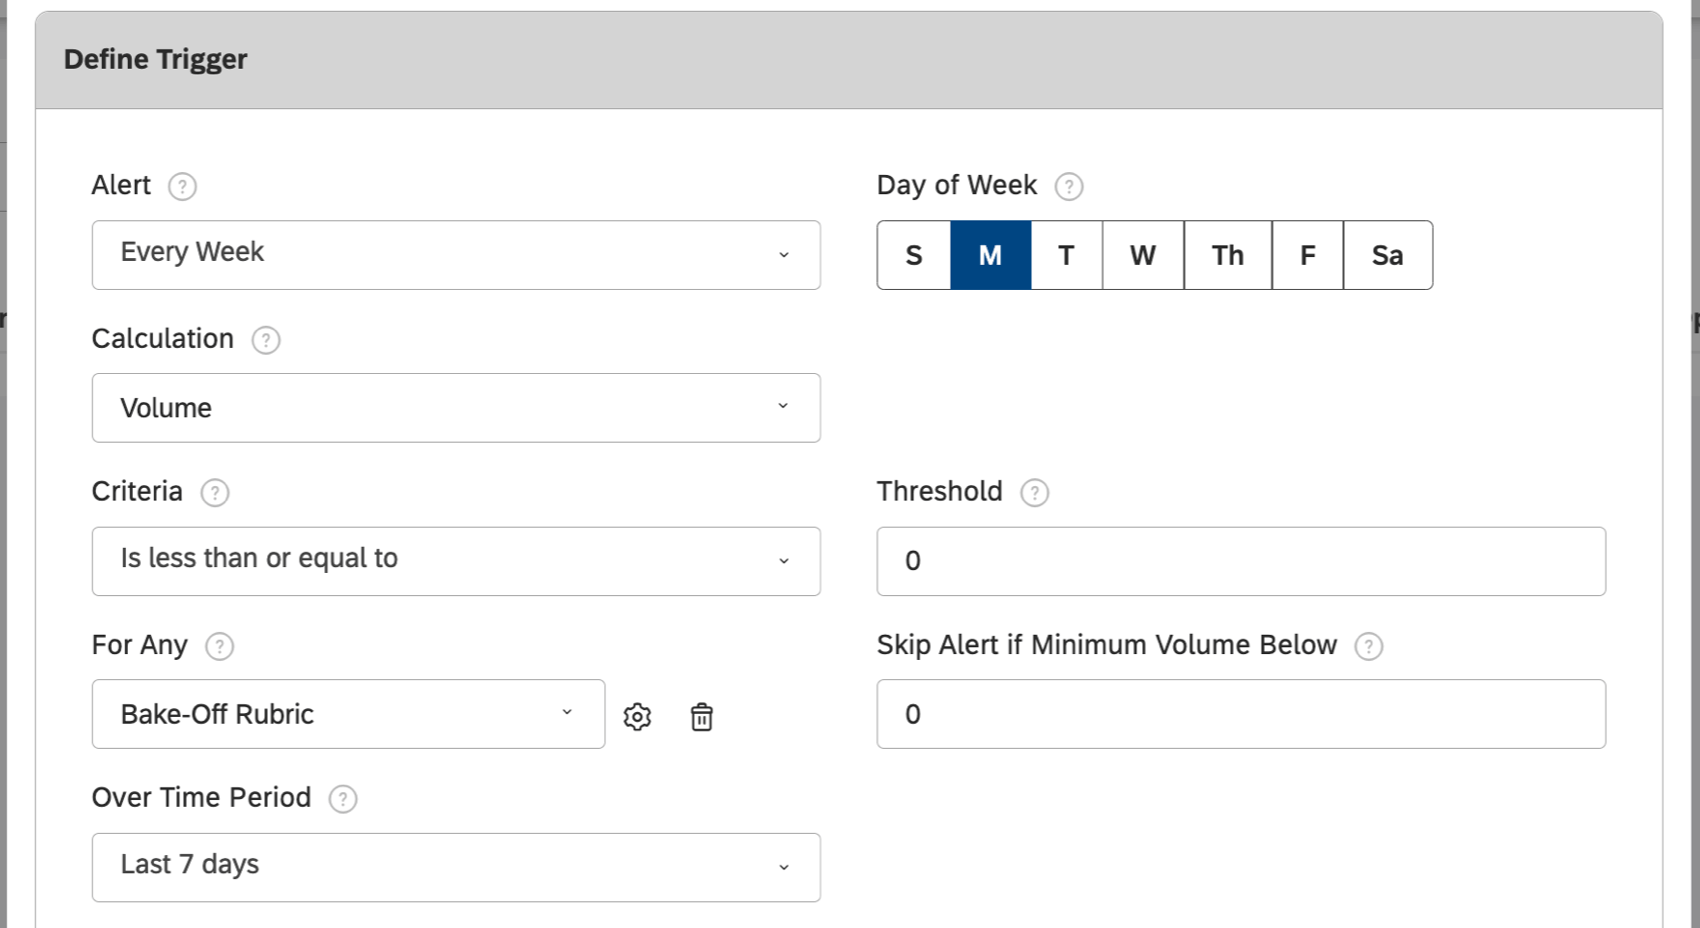
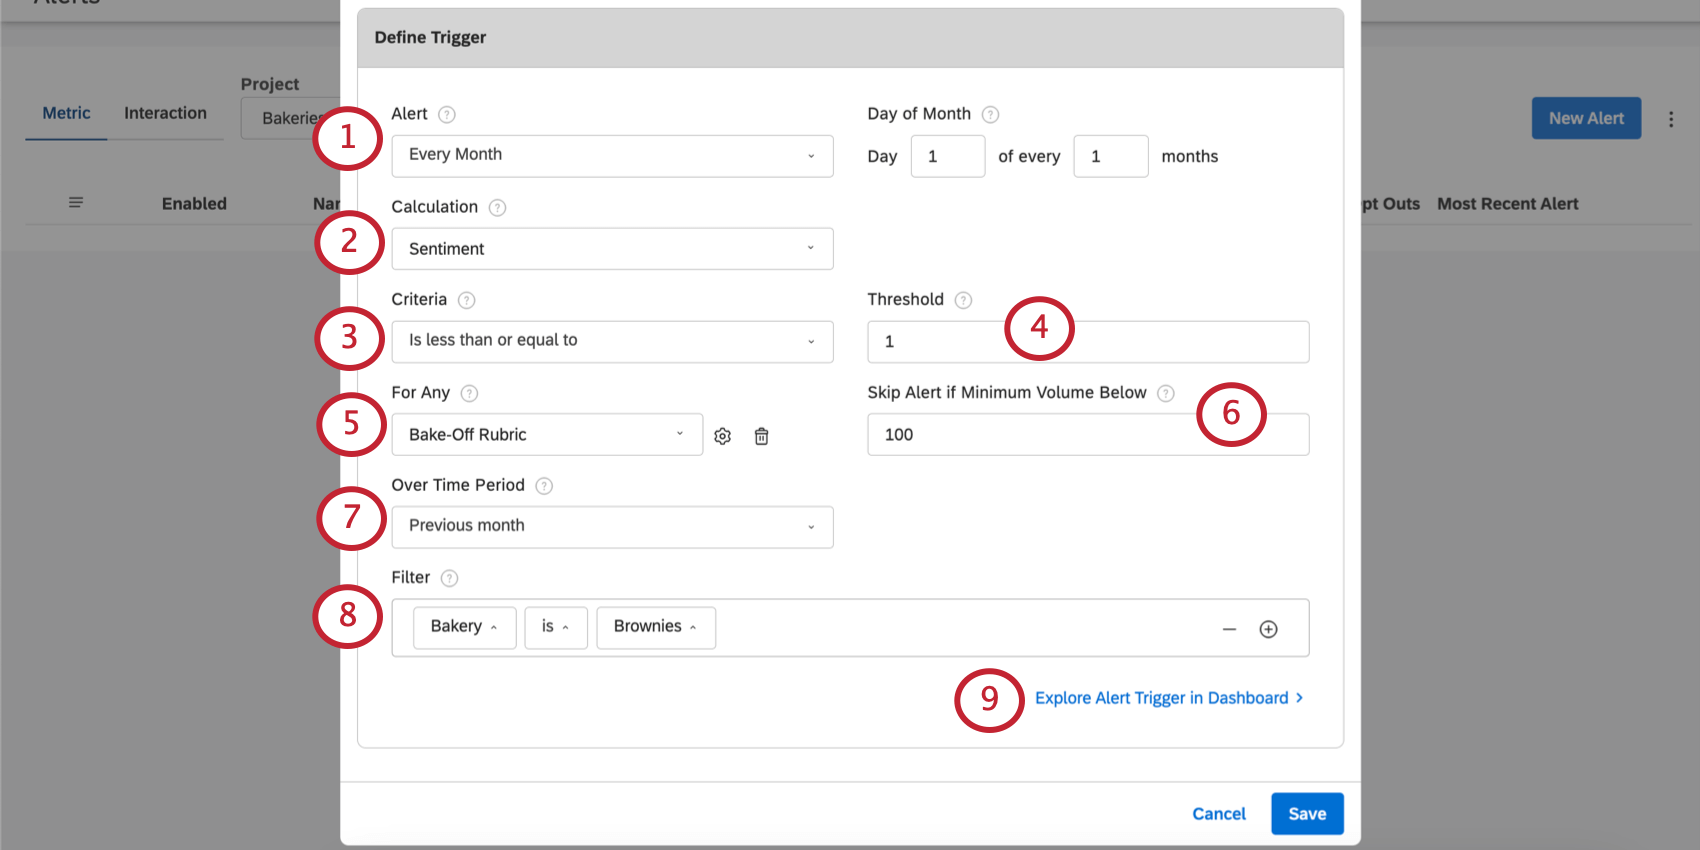
Define Trigger
Define Trigger can be found in the Definition tab.
In the Define Trigger section, decide what data events trigger alerts.
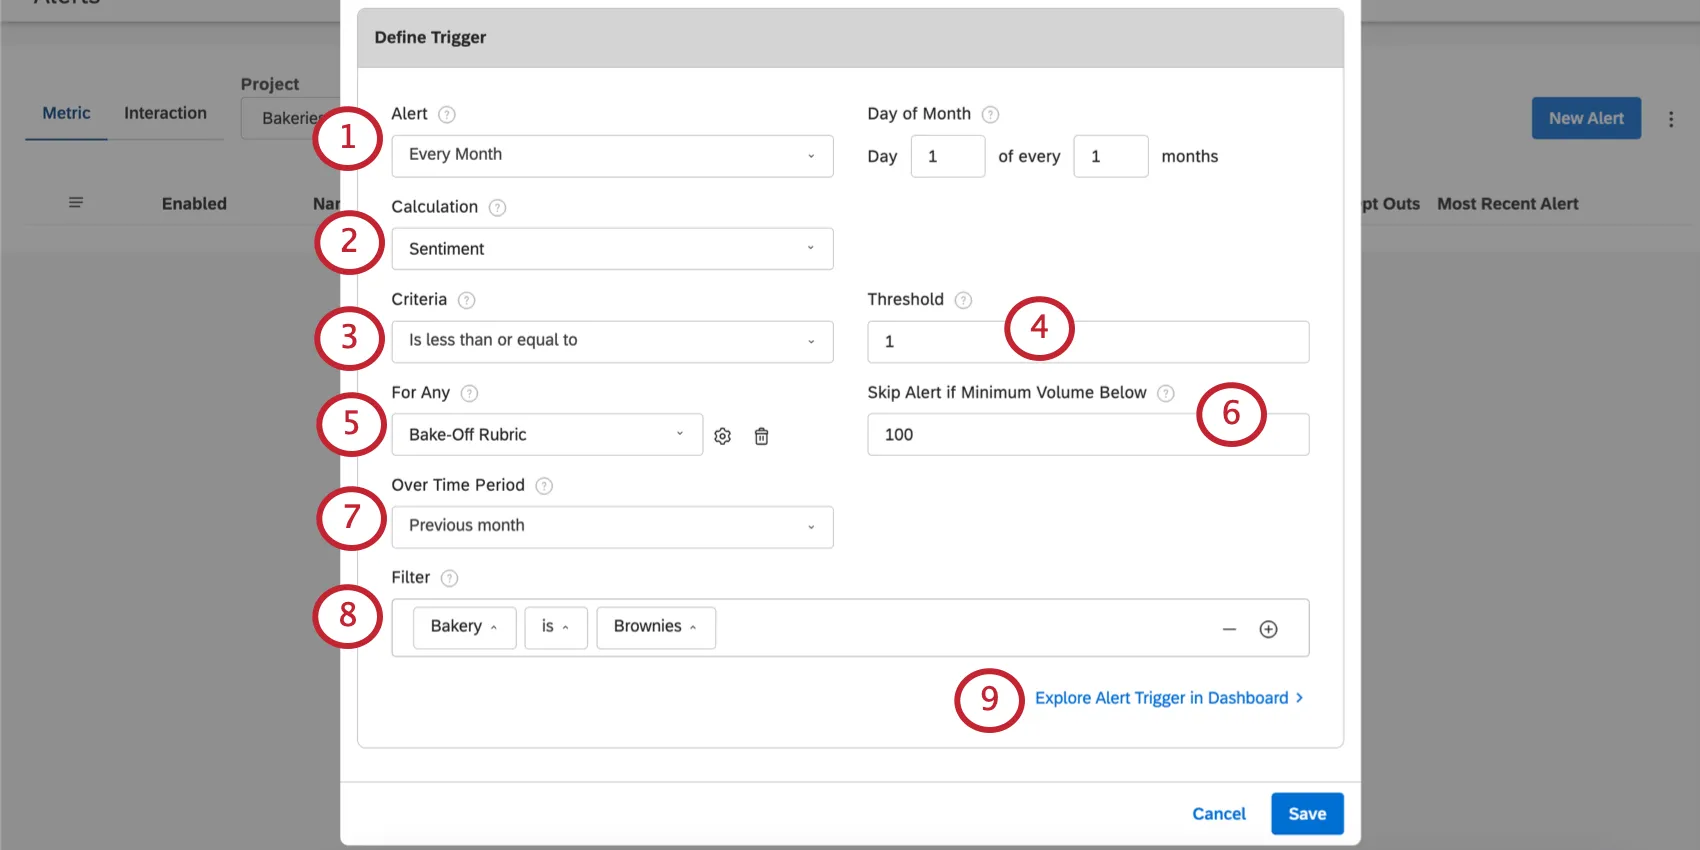
- For Weekly alerts, you can choose a day of the week the alert will send.
- When you choose Monthly, the alert can go out every few months instead. You will be asked what day of the month and how frequently the alert should go out.
Qtip: Documents can take at least 4 hours to process into Discover, so we recommend scheduling the alert to trigger at least 4 hours after the target day is over.
- Is less than or equal to: Send an alert when the calculation is equal to or less than the threshold.
- Is greater than or equal to: Send an alert when the calculation is equal to or greater than the threshold.
- Increases more than or equal to: Send an alert when the calculation’s increase during the monitored time period compared to the previous time period is equal to or greater than the threshold.
- Decreases more than or equal to: Send an alert when the calculation’s decrease during the monitored time period compared to the previous time period is equal to or greater than the threshold.
- Changes more than or equal to: Send an alert when the calculation’s increase or decrease during the monitored time period compared to the previous time period is equal to or greater than the threshold.
- Changes significantly: This option is only for numeric attributes aggregated by average. Send an alert when the calculation’s increase or decrease during the monitored time period compared to the previous time period is statistically significant.
Example: Send an alert when volume becomes greater than or equal to 1000.
Qtip: You can use a zero volume threshold alert to monitor data ingestion into Designer. For example, when volume drops to 0 over the last week for a certain source, an alert will trigger and notify stakeholders. Be sure to set the minimum volume to 0 as well, otherwise the alert will not fire.

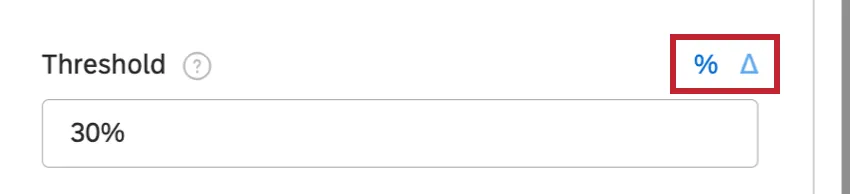
Example: Send an alert when Likelihood to Recommend decreases by more than 30% compared to the previous month.
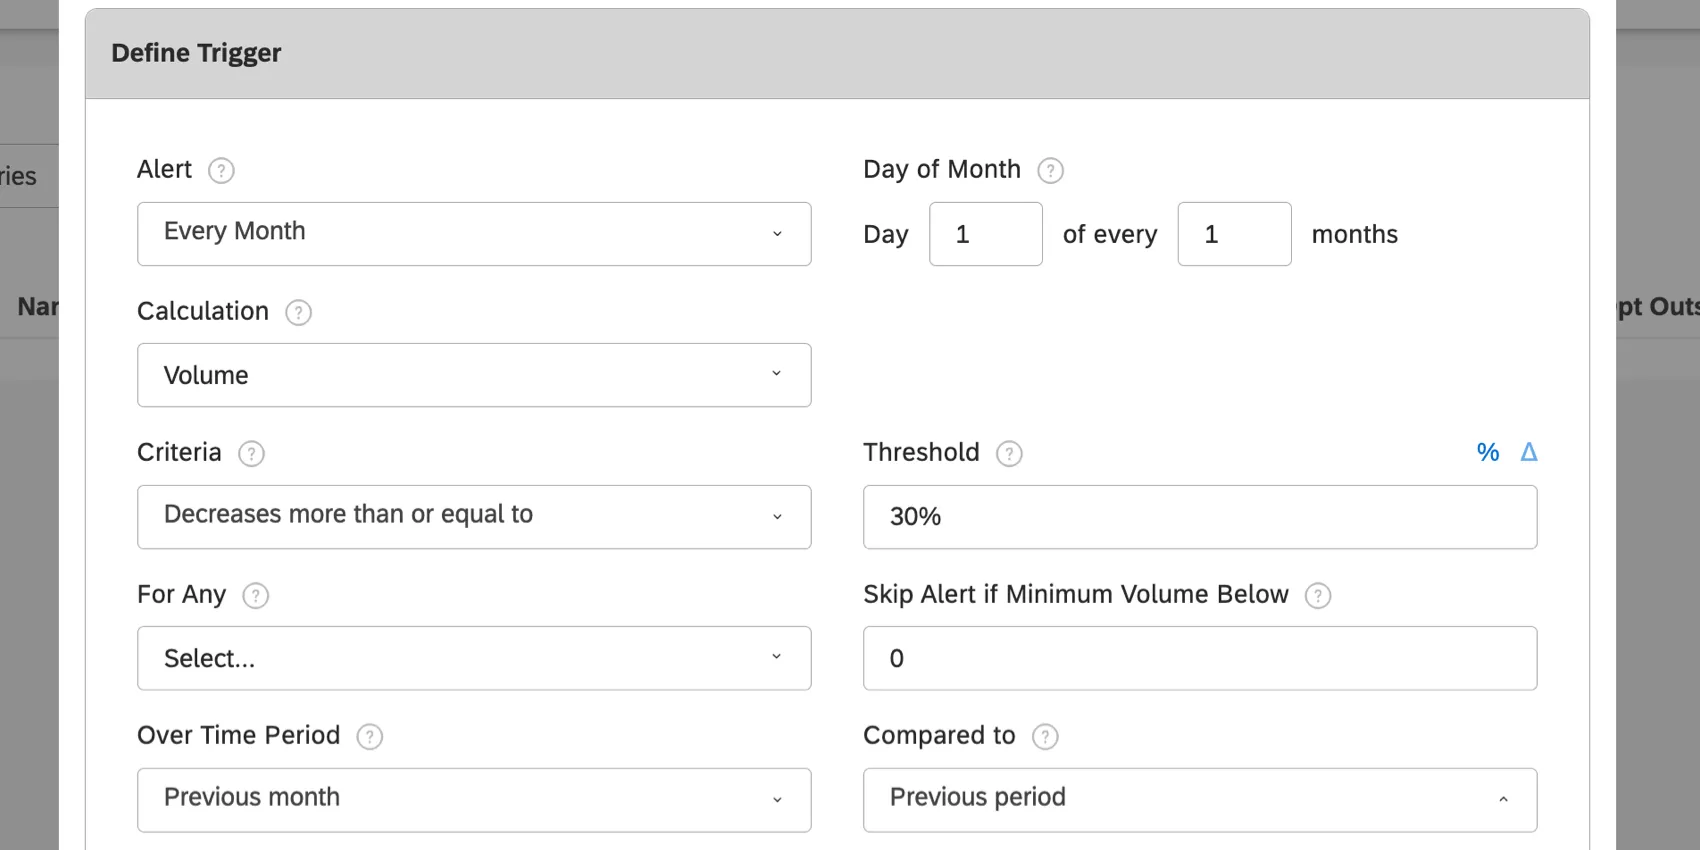
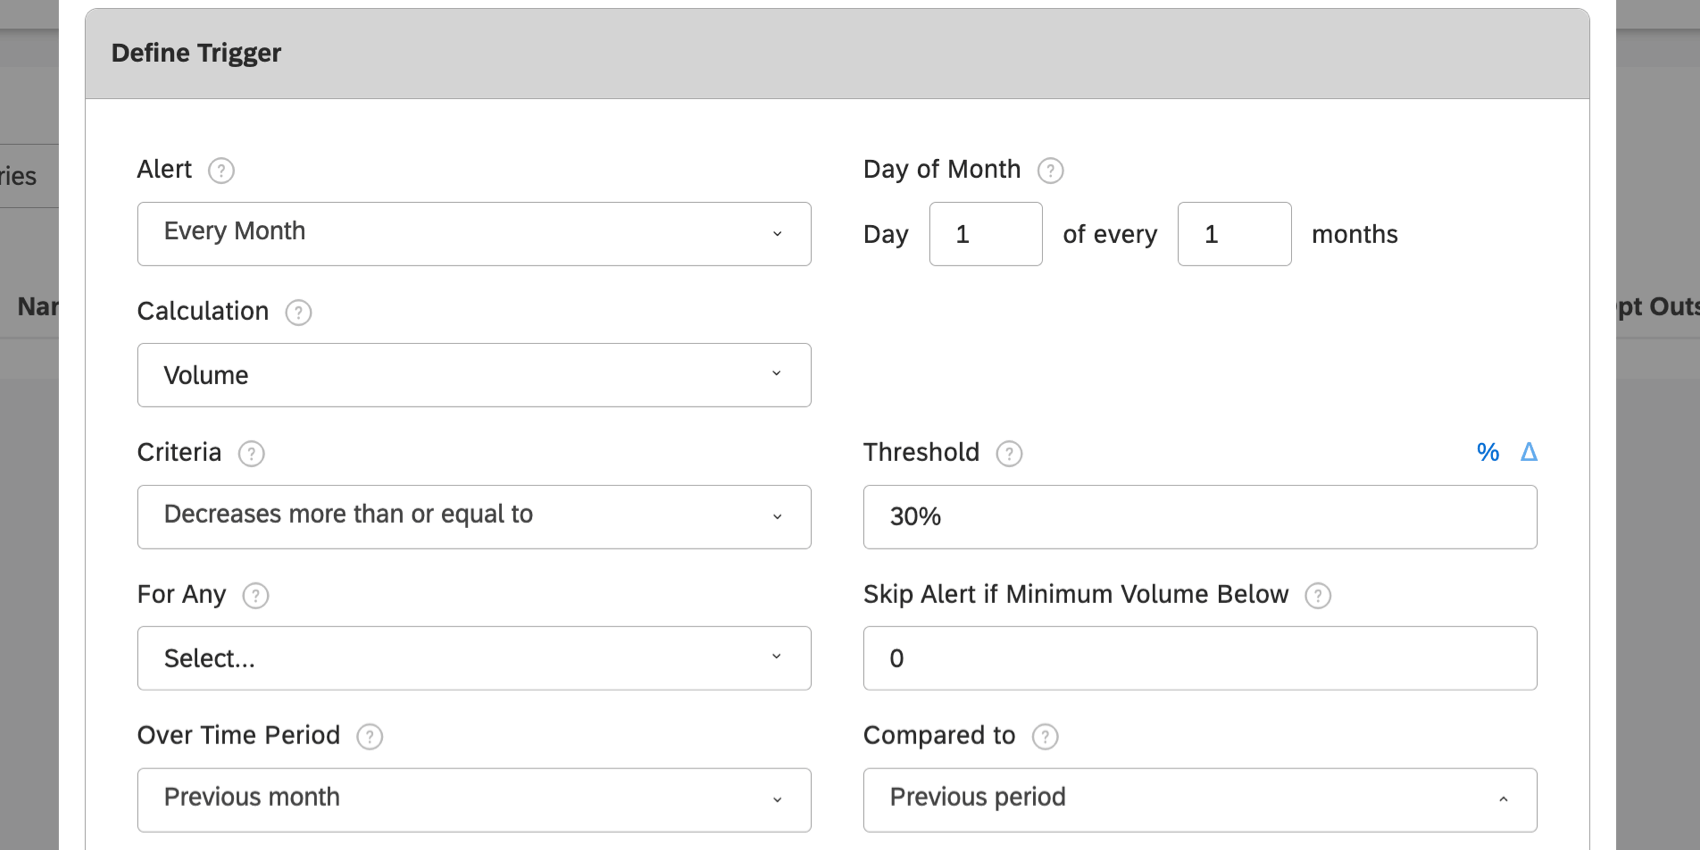
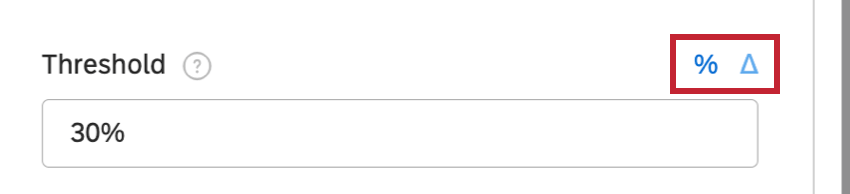
Qtip: For change variance criteria, you can switch between delta change and percentage change calculations by clicking the percent ( % ) and delta ( Δ ) icons.
Qtip: This setting is great for monitoring lots of groups without having to create multiple separate alerts. For example, it can save you a lot of time when you have a set of stores or products that you want to monitor. The alert will send notifications if 1 or more groups meet the threshold criteria.
Notifications
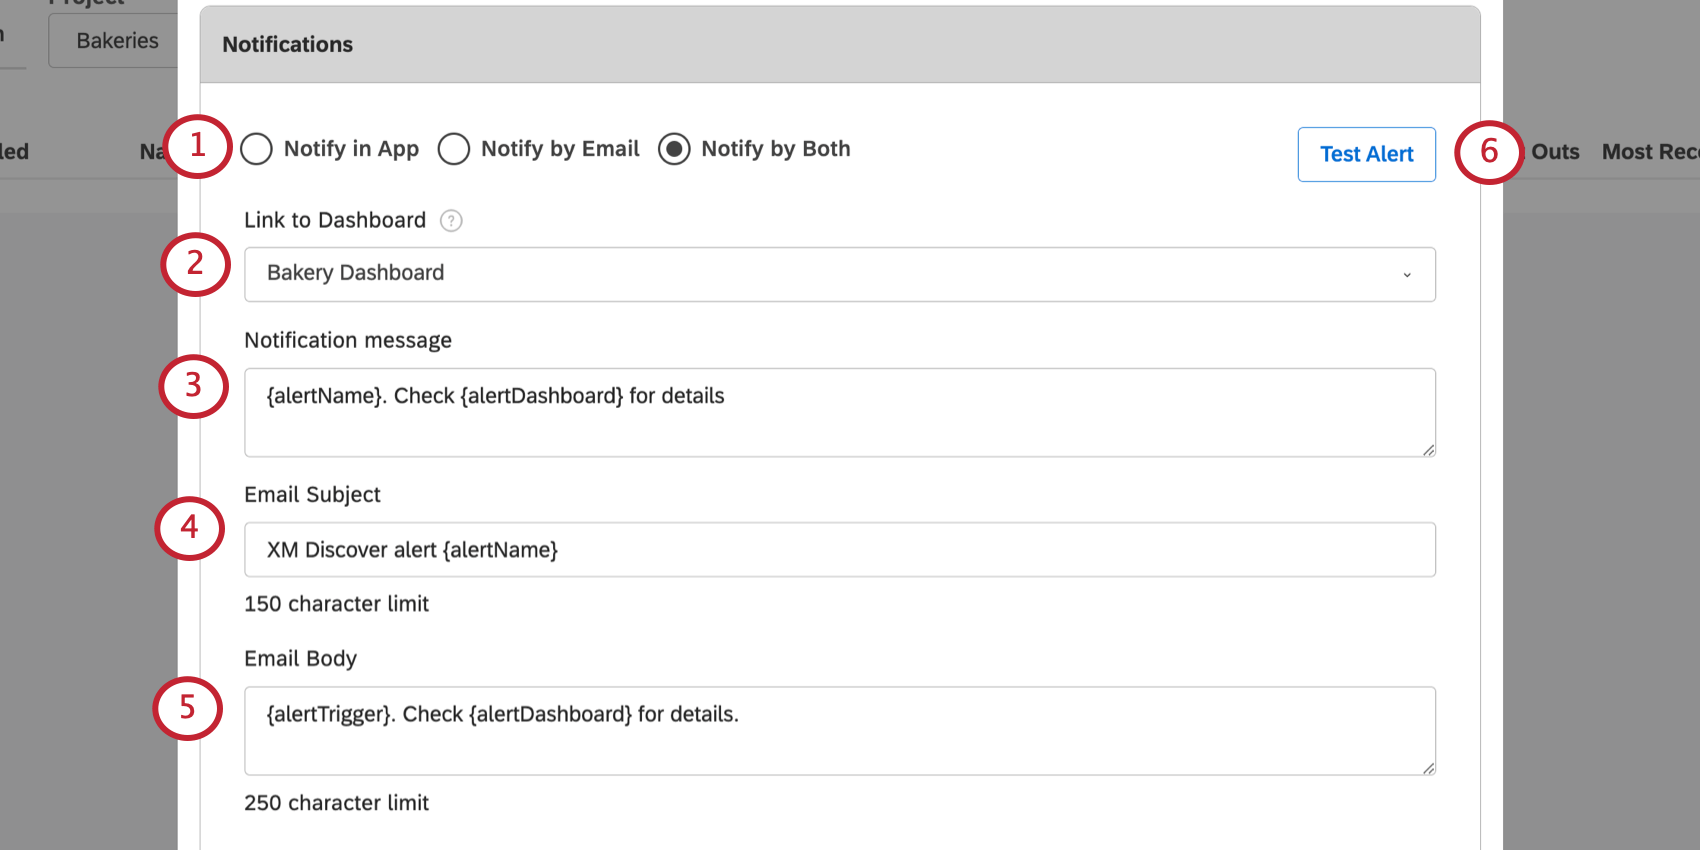
The Notifications section can be found in the Notifications tab.

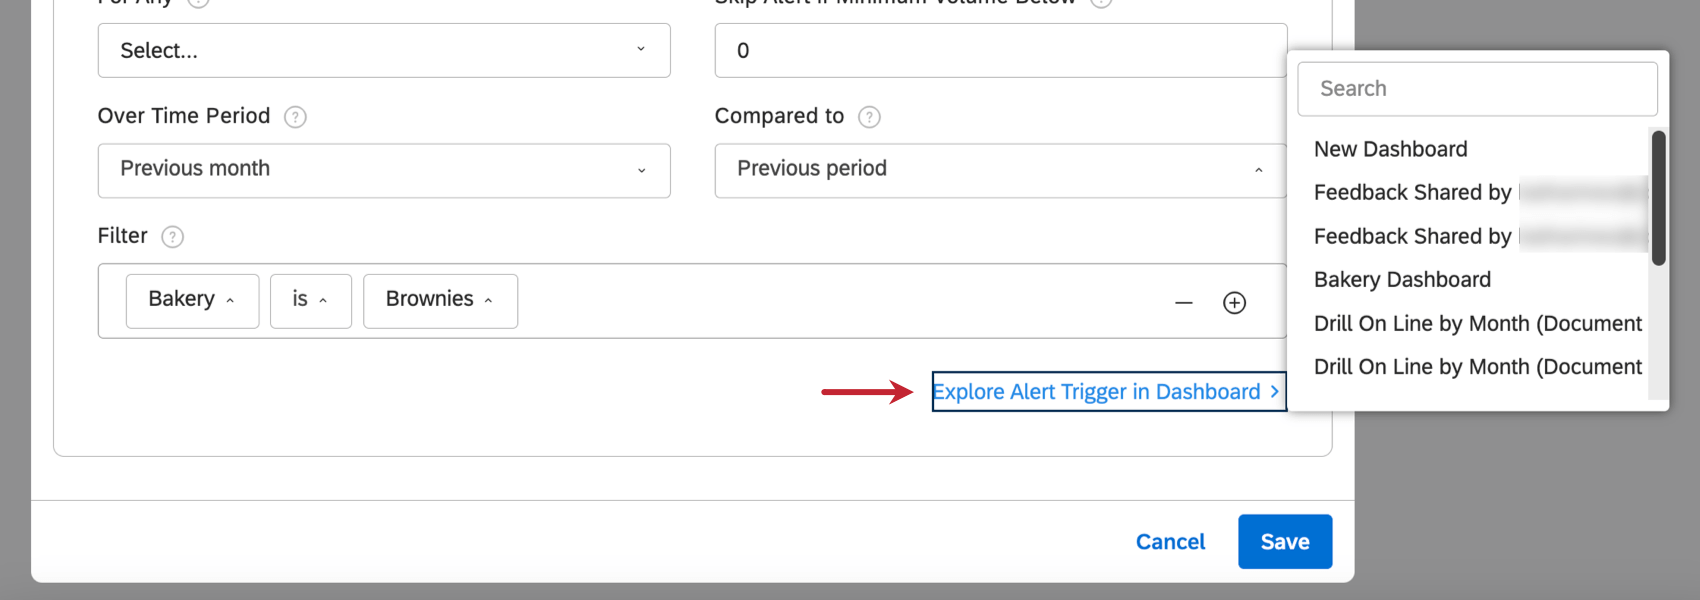
Here, you can set the channel the alert is sent through and write the message included.
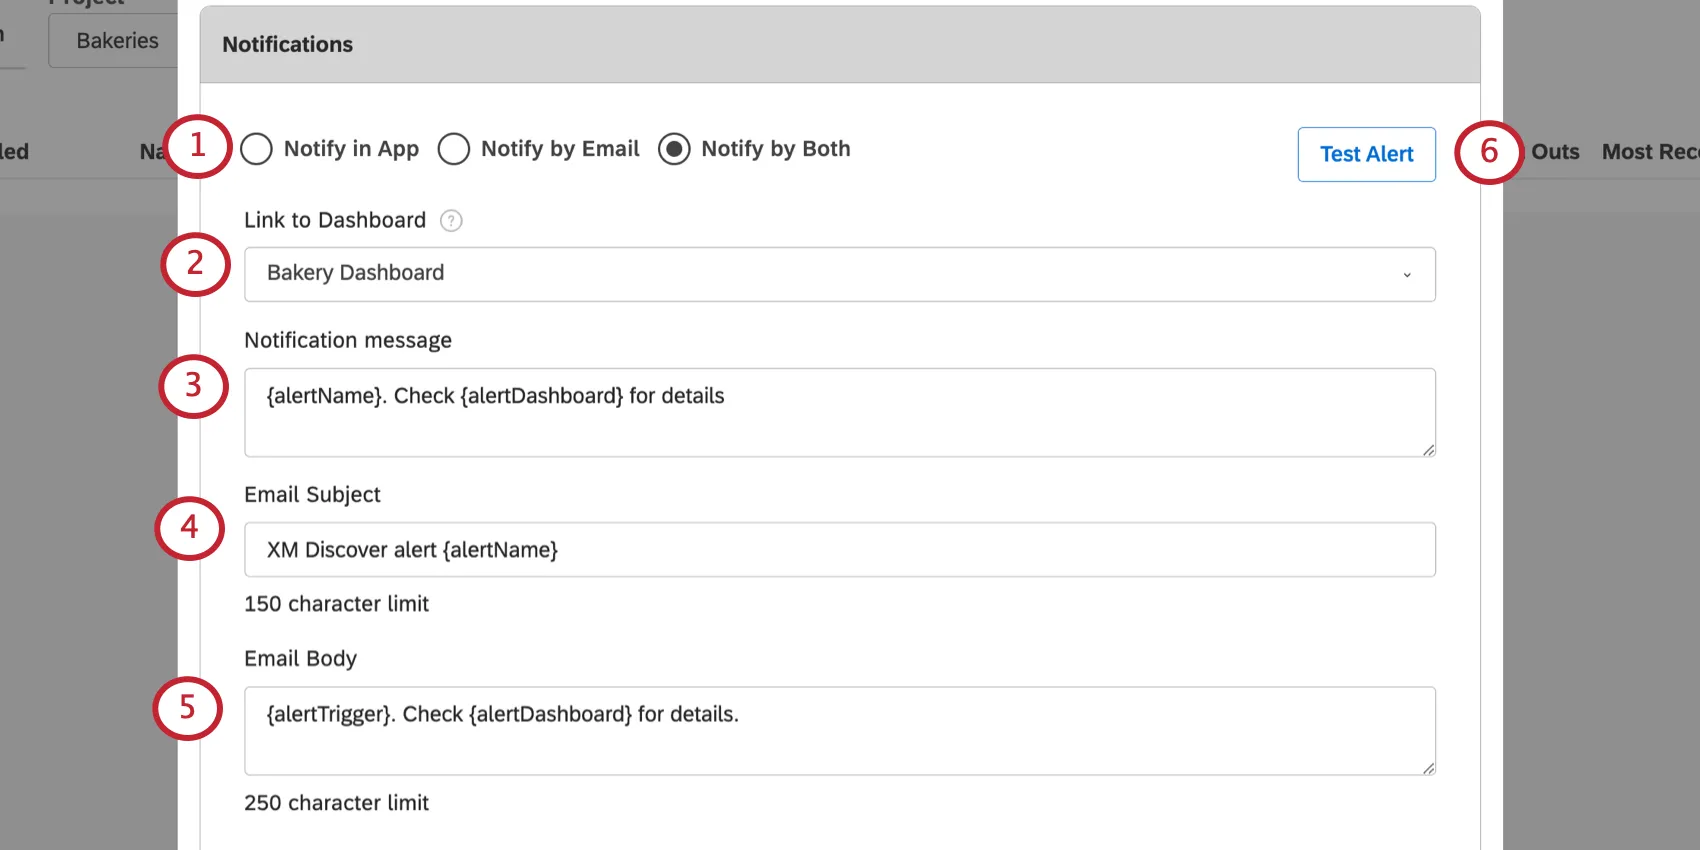
- Notify in App (the Studio desktop site)
- Notify by Email
- Notify by Both
Qtip: If some recipients of this alert do not have access to the linked dashboard, Studio will prompt you when you save the alert. You can then choose to save the alert with or without sharing the dashboard with the alert’s recipients.
Dynamic Text Placeholders
You can use the following placeholders in the in-app message, email subject, and email body of your alert.
| Placeholder | Description |
|---|---|
| {alertCalculation} | The calculation that this alert monitors. |
| {alertCriteria} | The criteria defined for this alert. |
| {alertDashboard} | The name of the dashboard to explore the alert in, if a dashboard is linked. |
| {alertGroupValues} | A list of up to 15 grouping values for which this alert has triggered, if you have For Any groupings applied. |
| {alertName} | The name of your alert. |
| {alertTreshold} | The minimum value or change variance required to trigger this alert. |
| {alertTrigger} | A placeholder that includes 3 values: {alertCalculation} {alertCriteria} {alertTreshold} |
Qtip: Type the curly bracket ( { ) then select one of the placeholders from the list.
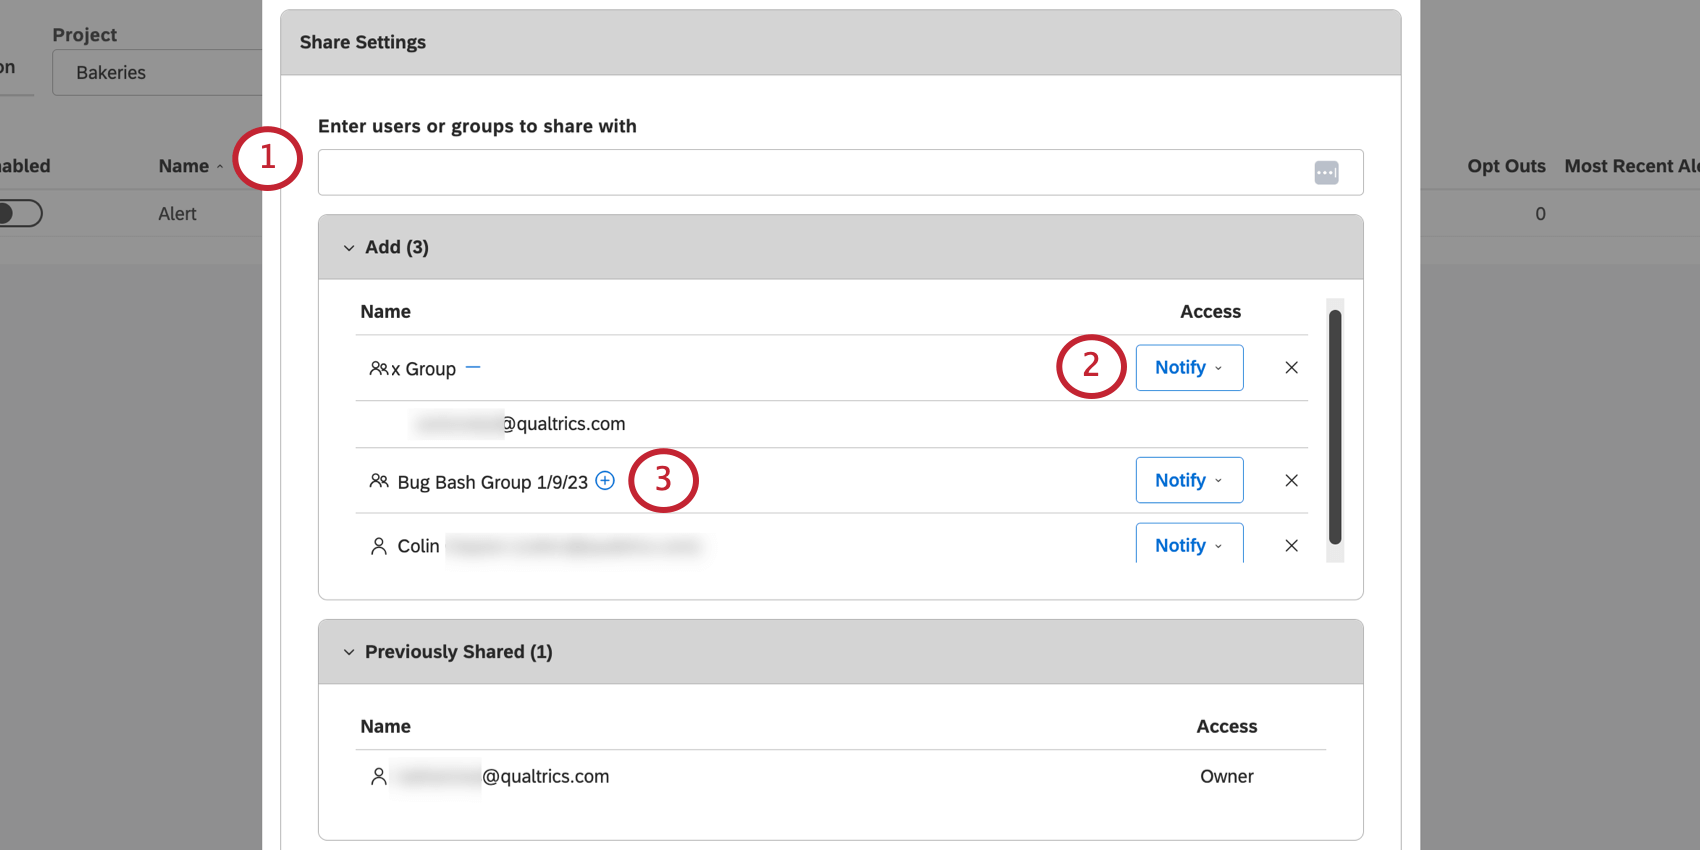
Share Settings
The Share Settings section can be found in the Notifications tab.
Here, you can choose who’ll get notifications when this alert is triggered.
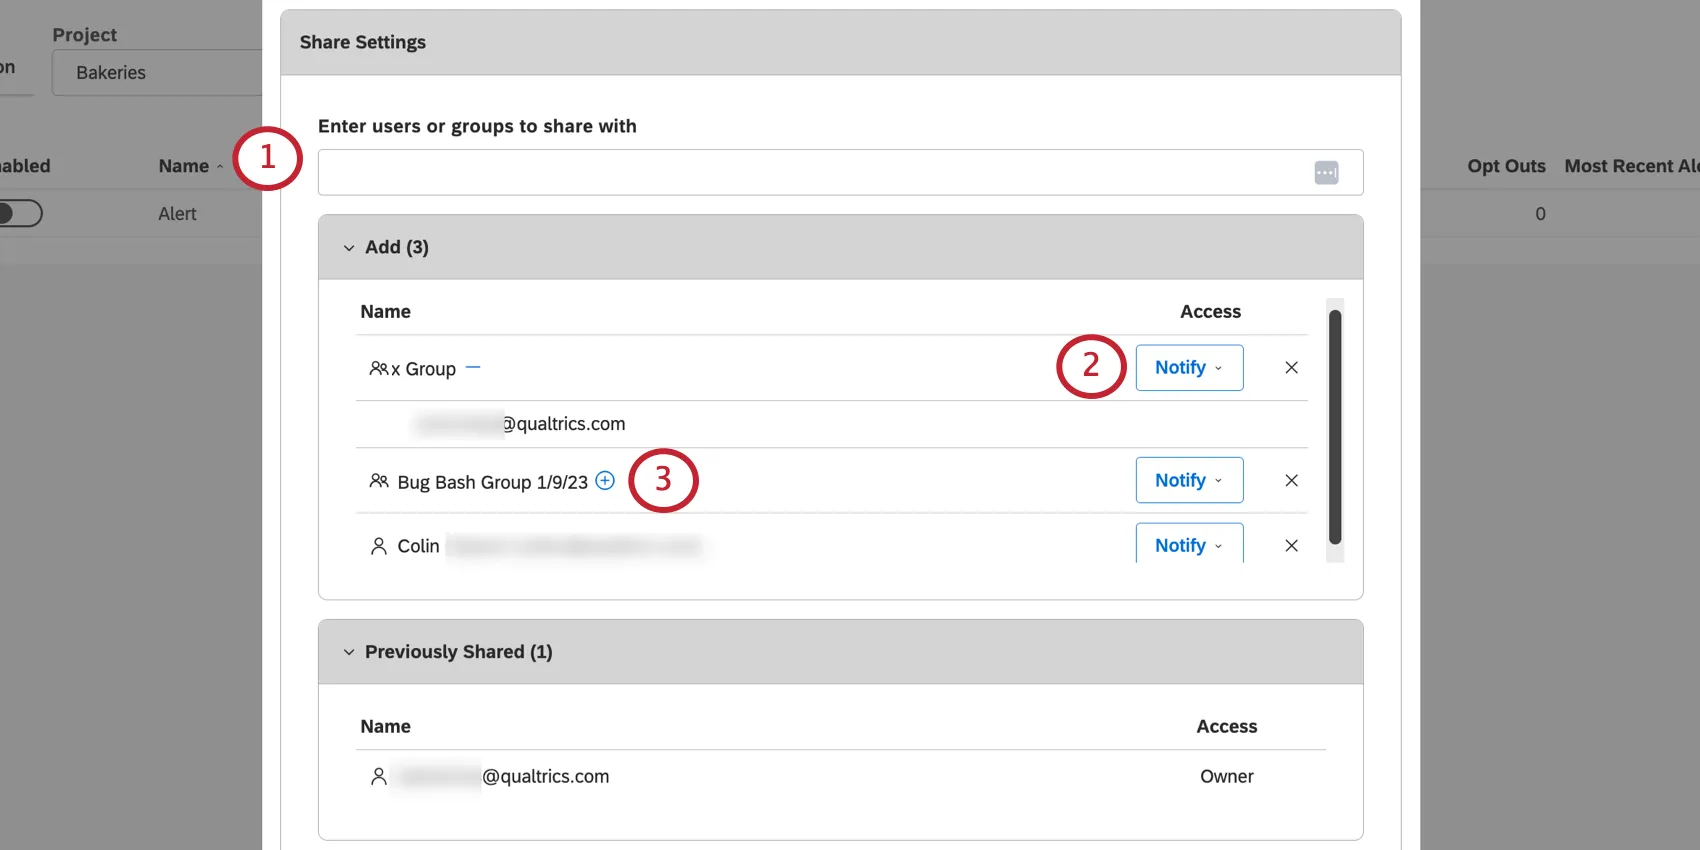
- Individual Studio users: Type the email of the user or part of it, then select it from the dropdown list.
- Studio groups: Type the name of the group or part of it, then select it from the dropdown list.
- Organization hierarchy members: Type the name of the organization hierarchy or part of it, then select it from the dropdown list. Qtip: If you select the same organization hierarchy used for grouping the alert, notifications will only be sent to users who belong to the corresponding level of the hierarchy.
- Notify: Users will get notifications when the threshold and conditions are met.
- Can Edit: Users will get notifications and be able to edit this alert’s settings.
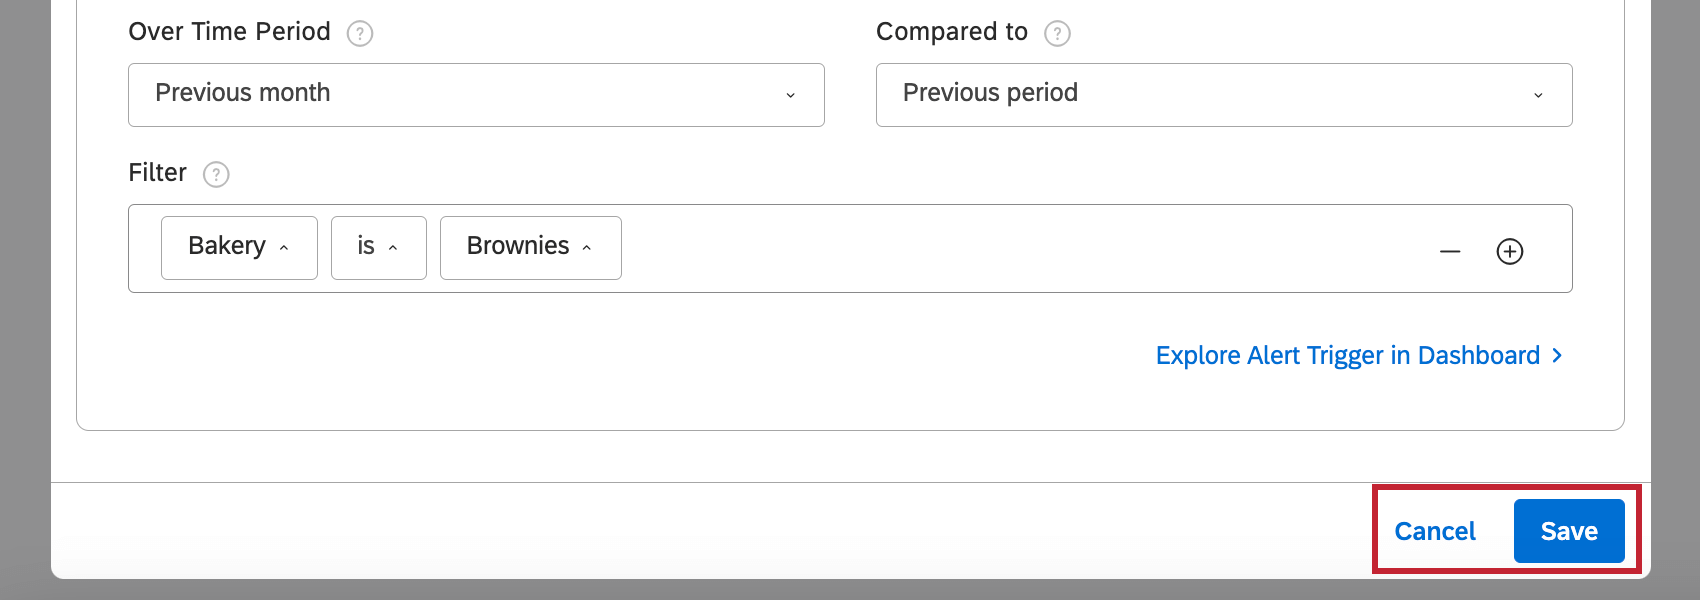
Saving the Alert
When ready, click Save to save the alert or Cancel to close the window without saving.
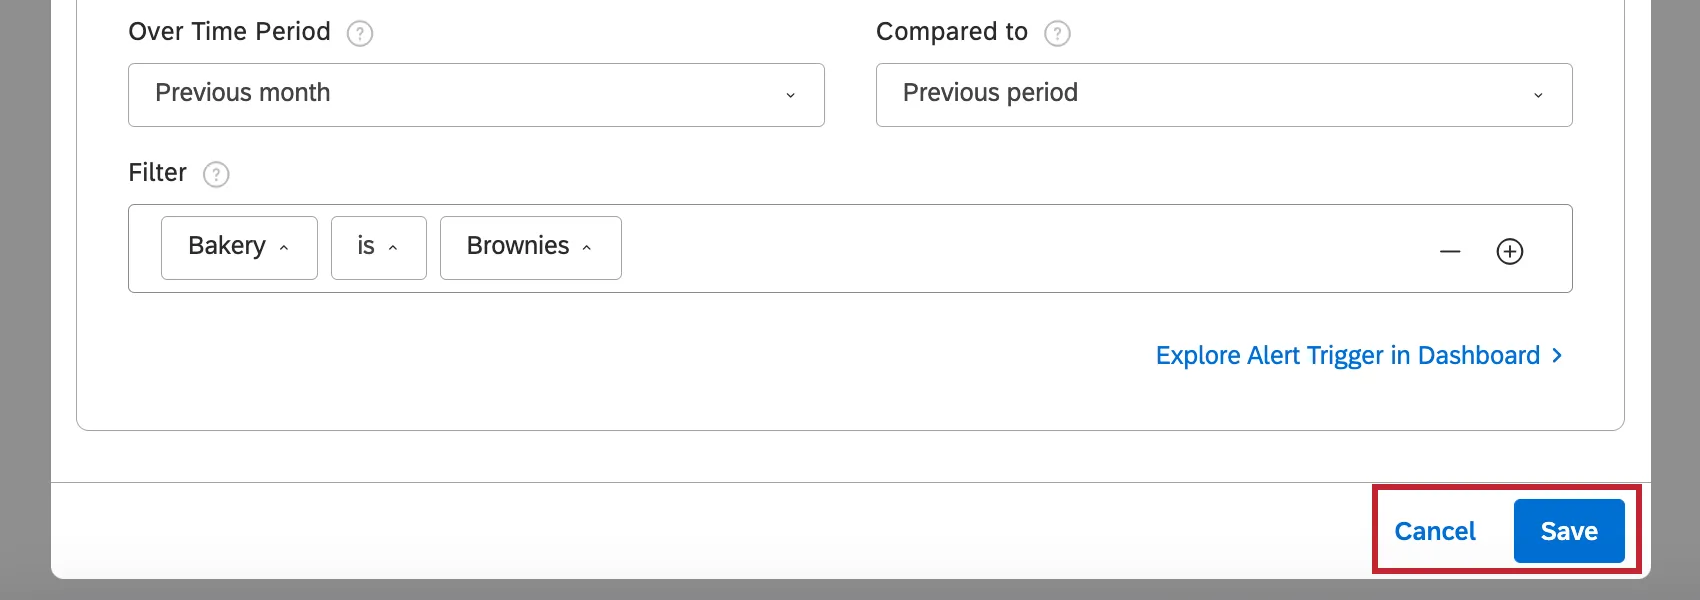
If some recipients of this alert do not have access to the dashboard linked in the notification, Studio will give you the following options:
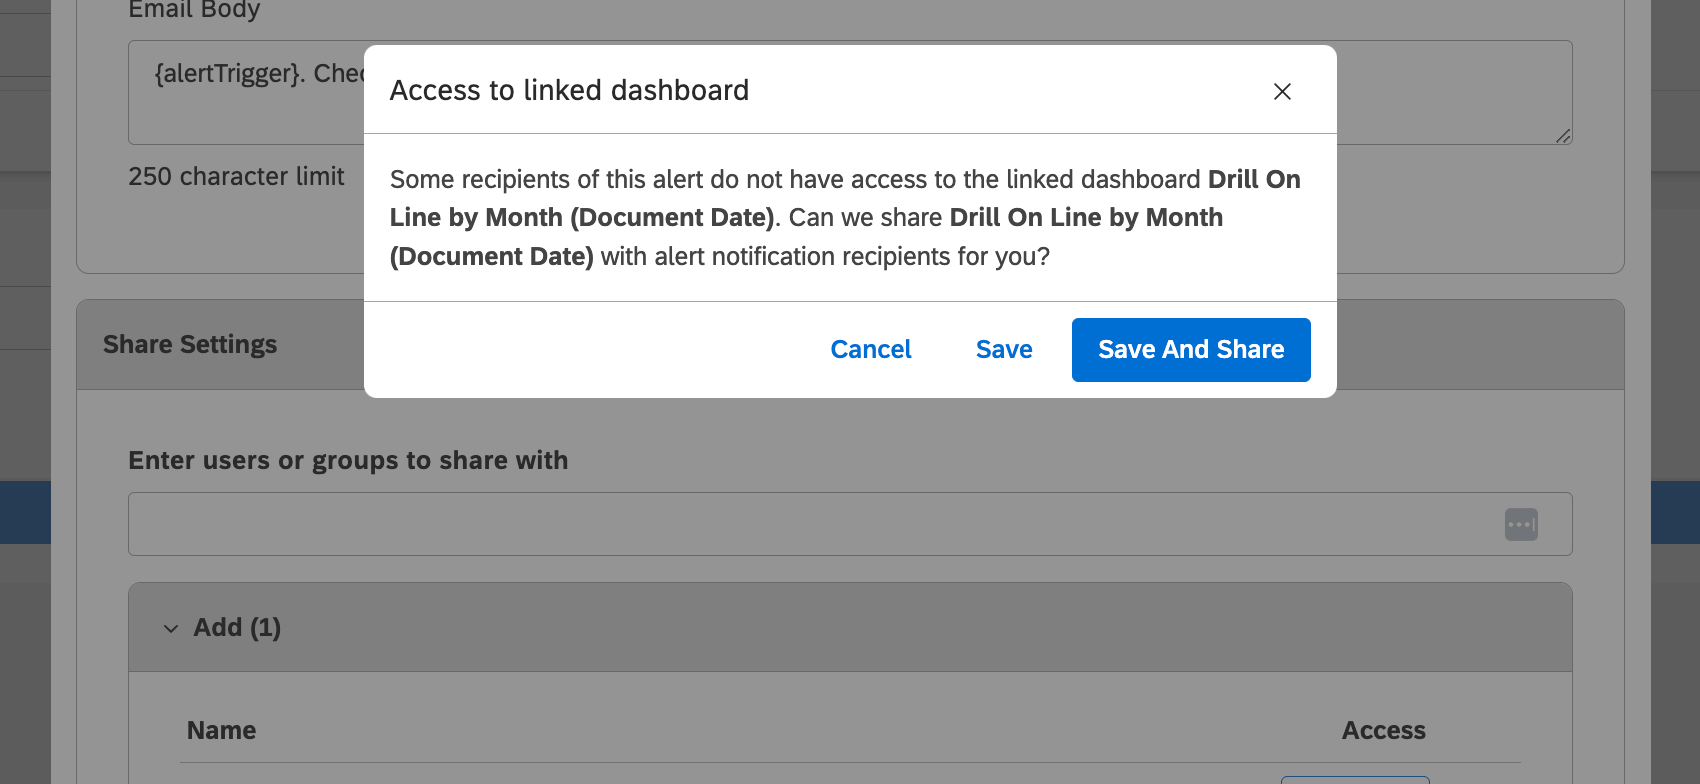
- Save And Share: Save the alert and share the linked dashboard with all its recipients. Qtip: Recipients will be given view-only permission of the dashboard, not editing permission.
- Save: Save the alert without sharing the linked dashboard.
- Cancel: Do not save the alert.
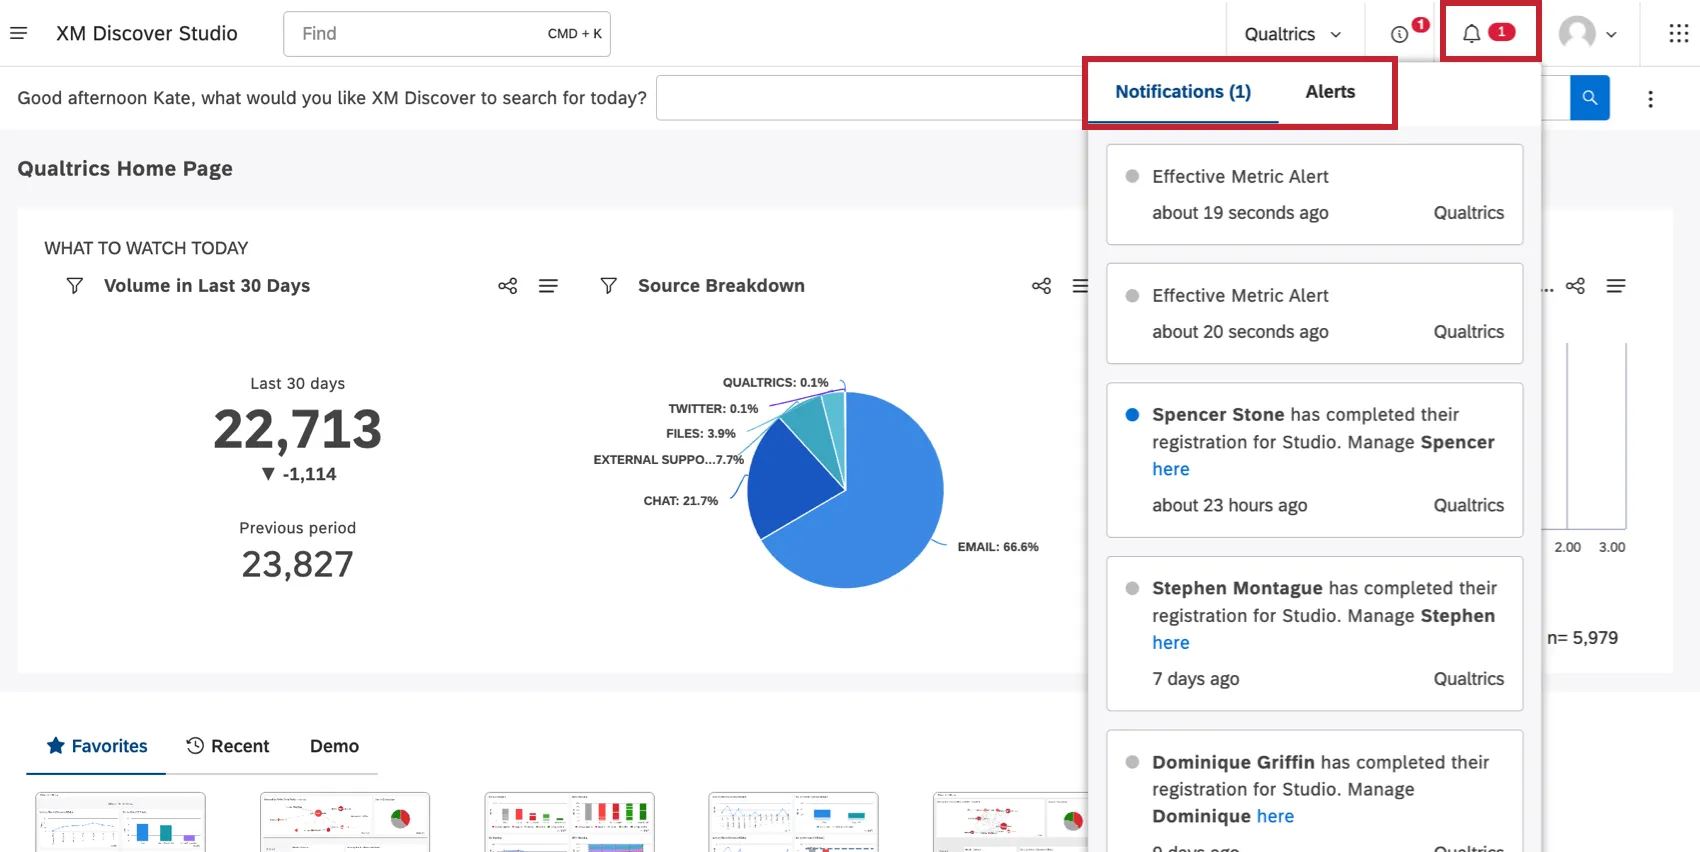
Viewing Metric Alerts
Any in-app alerts you’ve received can be found by clicking the Notifications icon on any page of Studio. Metric alerts appear in the Notifications tab.
That's great! Thank you for your feedback!
Thank you for your feedback!