
Triggering & Emailing Surveys in Salesforce or Updating Contacts in Qualtrics
What's on this page
About Triggering & Emailing Surveys in Salesforce or Updating Contacts in Qualtrics
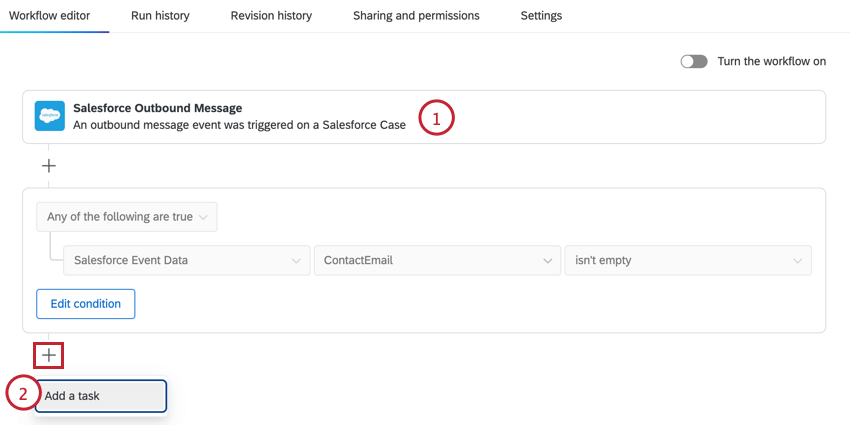
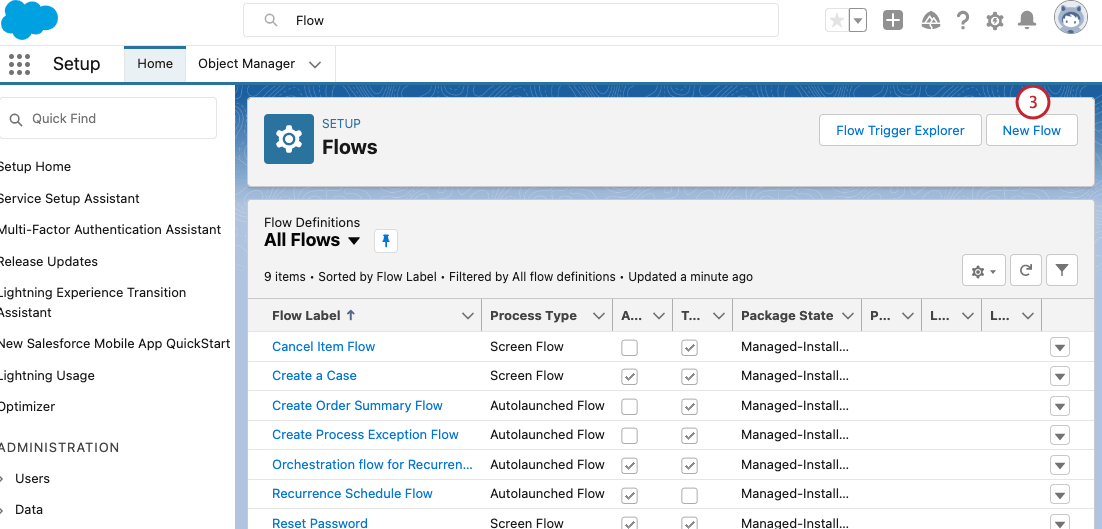
In the Workflows tab, you can set up tasks to trigger workflows within Qualtrics based on Salesforce Flows. The criteria for the Flow in Salesforce might be an event such as a case being closed or an opportunity being won. Once this Flow is met in Salesforce, Qualtrics can take action, such as updating contact information and sending a survey.
In addition, there are other methods of sending surveys as a part of your Salesforce extension. For these additional options, check out our page on Other Salesforce Distribution Methods. Qualtrics can also map survey responses back to Salesforce; for more information, view our Salesforce Response Mapping page.
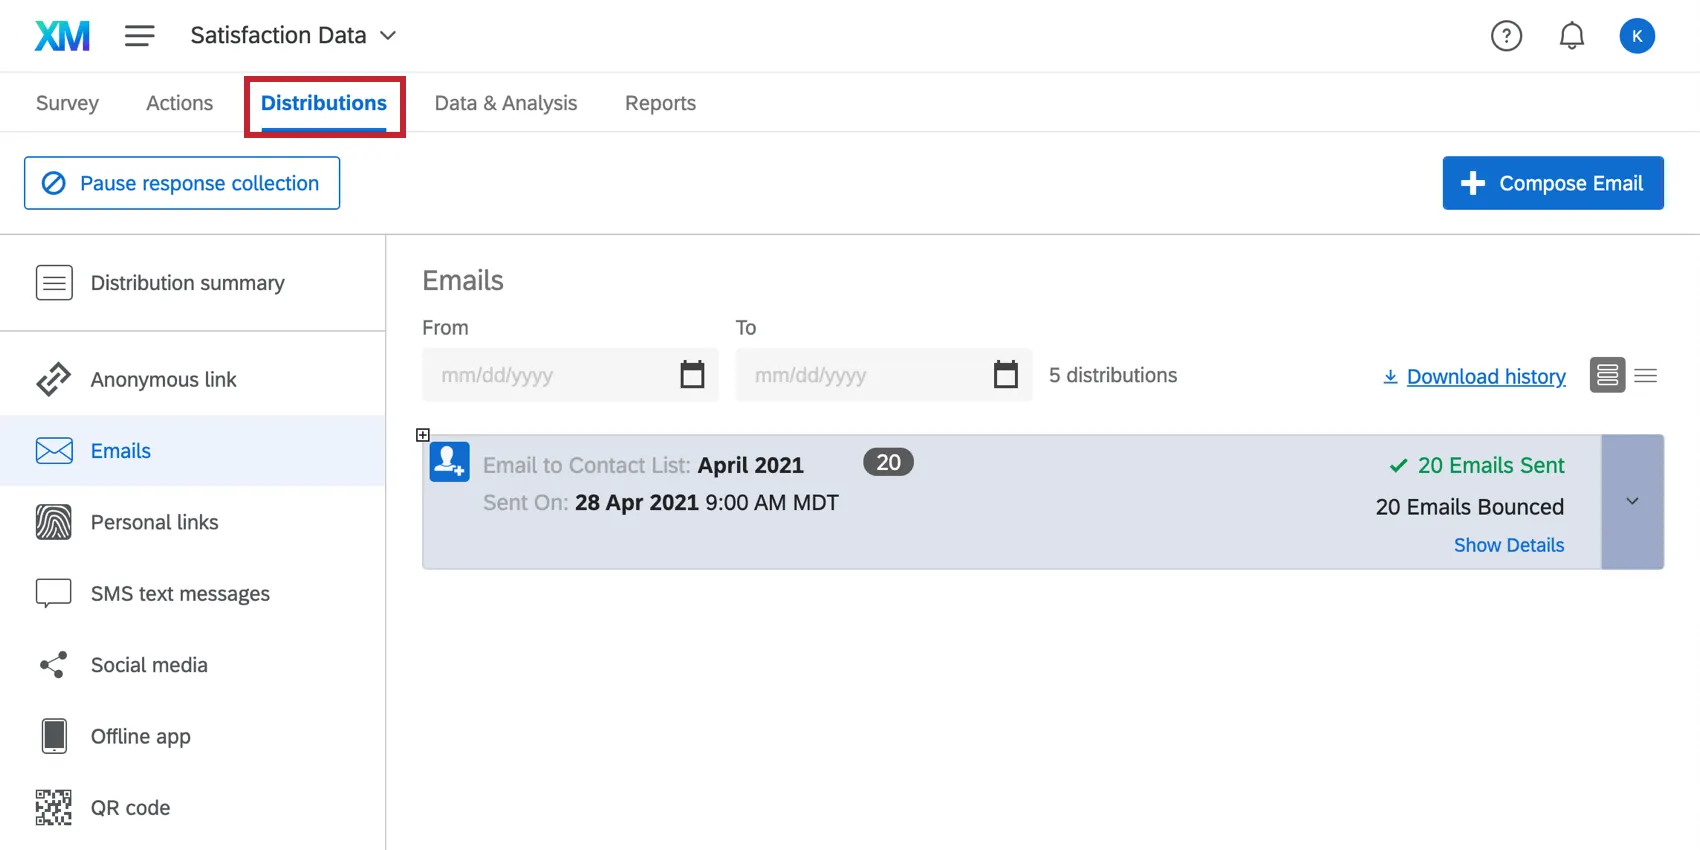
Qtip: You can see distributions triggered from Salesforce in the Distributions tab of your survey.
Setting up a Salesforce Triggered Survey
The Salesforce outbound message event allows you to trigger and email survey invitations to respondents as soon as their corresponding object meets qualifying criteria in Salesforce
Qtip: The following steps require a Salesforce instance with access to Workflows and Approvals. If your instance doesn’t have this access, contact your Salesforce Administrator for help.
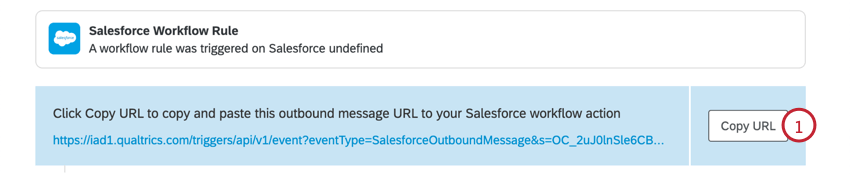
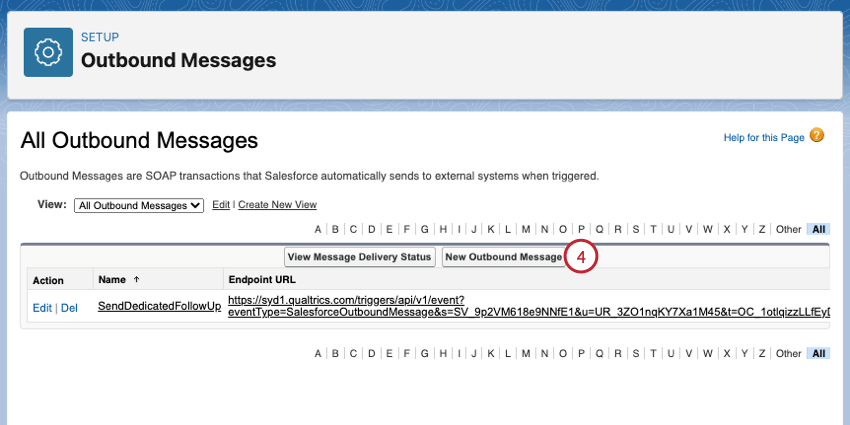
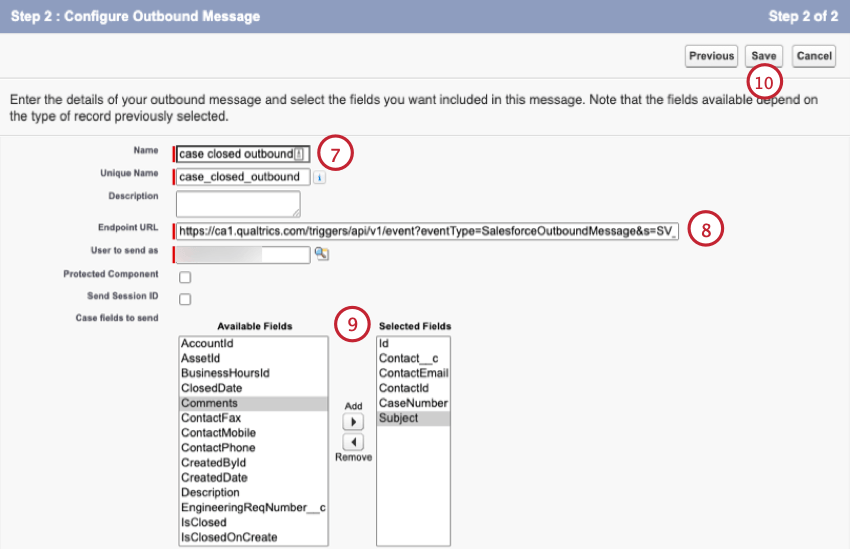
- Make sure you copy the event’s URL as you’ll need it to set up the integration in Salesforce.

Qtip: Don’t want to send a survey? You can save Salesforce data to a mailing list instead. See Saving Record Changes in Salesforce as Contact Information for more information.
Qtip: See the Testing and Troubleshooting section for help troubleshooting your workflow.
Attention: When making edits to your Salesforce workflow, it’s important that the user who initially set up the workflow is the only user who edits the workflow. If a user who did not set up the workflow tries to edit it, the Salesforce integration will stop working. If you are not the Salesforce workflow owner but need to edit the workflow, then copy the workflow and make edits to the copy.
Saving Record Changes in Salesforce as Contact Information
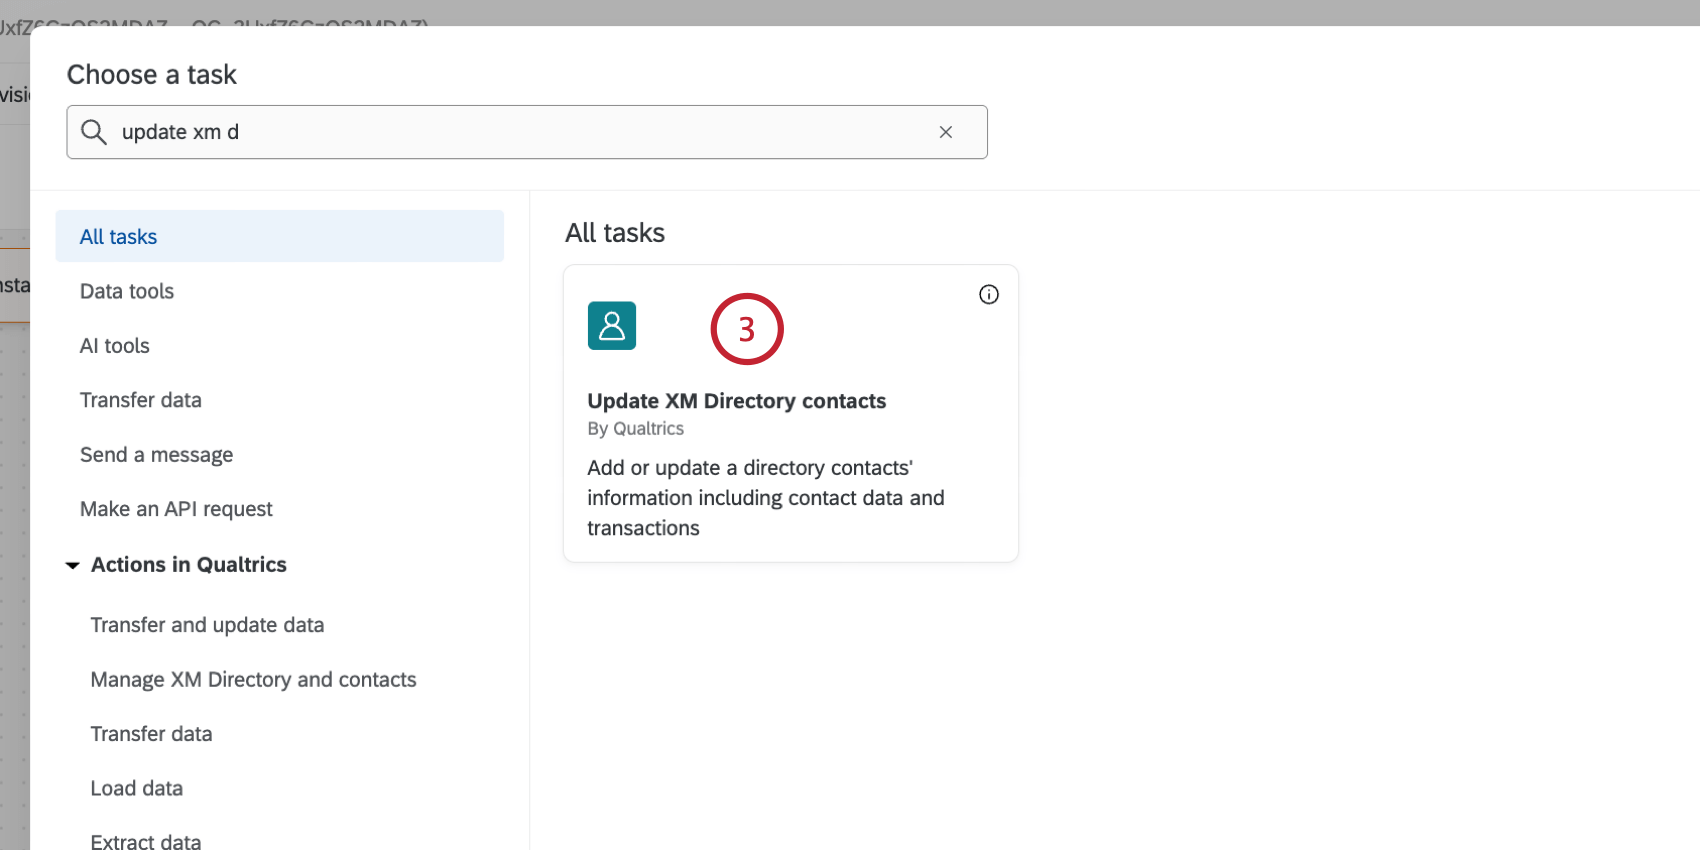
Let’s say you have an opportunity in Salesforce that is won and you’d like to include this information in the opportunity’s contact entry in Qualtrics. You can use the Salesforce Workflow Rule event to push changes from Salesforce to Qualtrics. The updated contact information can be saved as embedded data or transactional data. If this is a new contact, the Salesforce Workflow Rule event can also be used to create new contacts within Qualtrics.
Qtip: Transactional data is only available to users with access to XM Directory.
- Make sure you copy the event’s URL as you’ll need it to set up the integration in Salesforce.
Qtip: See the Testing and Troubleshooting section for help troubleshooting your workflow.
Attention: When making edits to your Salesforce workflow, it’s important that the user who initially set up the workflow is the only user who edits the workflow. If a user who did not set up the workflow tries to edit it, the Salesforce integration will stop working. If you are not the Salesforce workflow owner but need to edit the workflow, then copy the workflow and make edits to the copy.
Saving Salesforce Fields as Embedded Data
Information from Salesforce is saved in your contact list, but is not automatically recorded in survey responses. But it is quick and easy to add them if you follow these simple steps:
Qtip: Make note of the spelling and capitalization you used when setting up your contact embedded data in your XM Directory task. Spelling and capitalization matter!
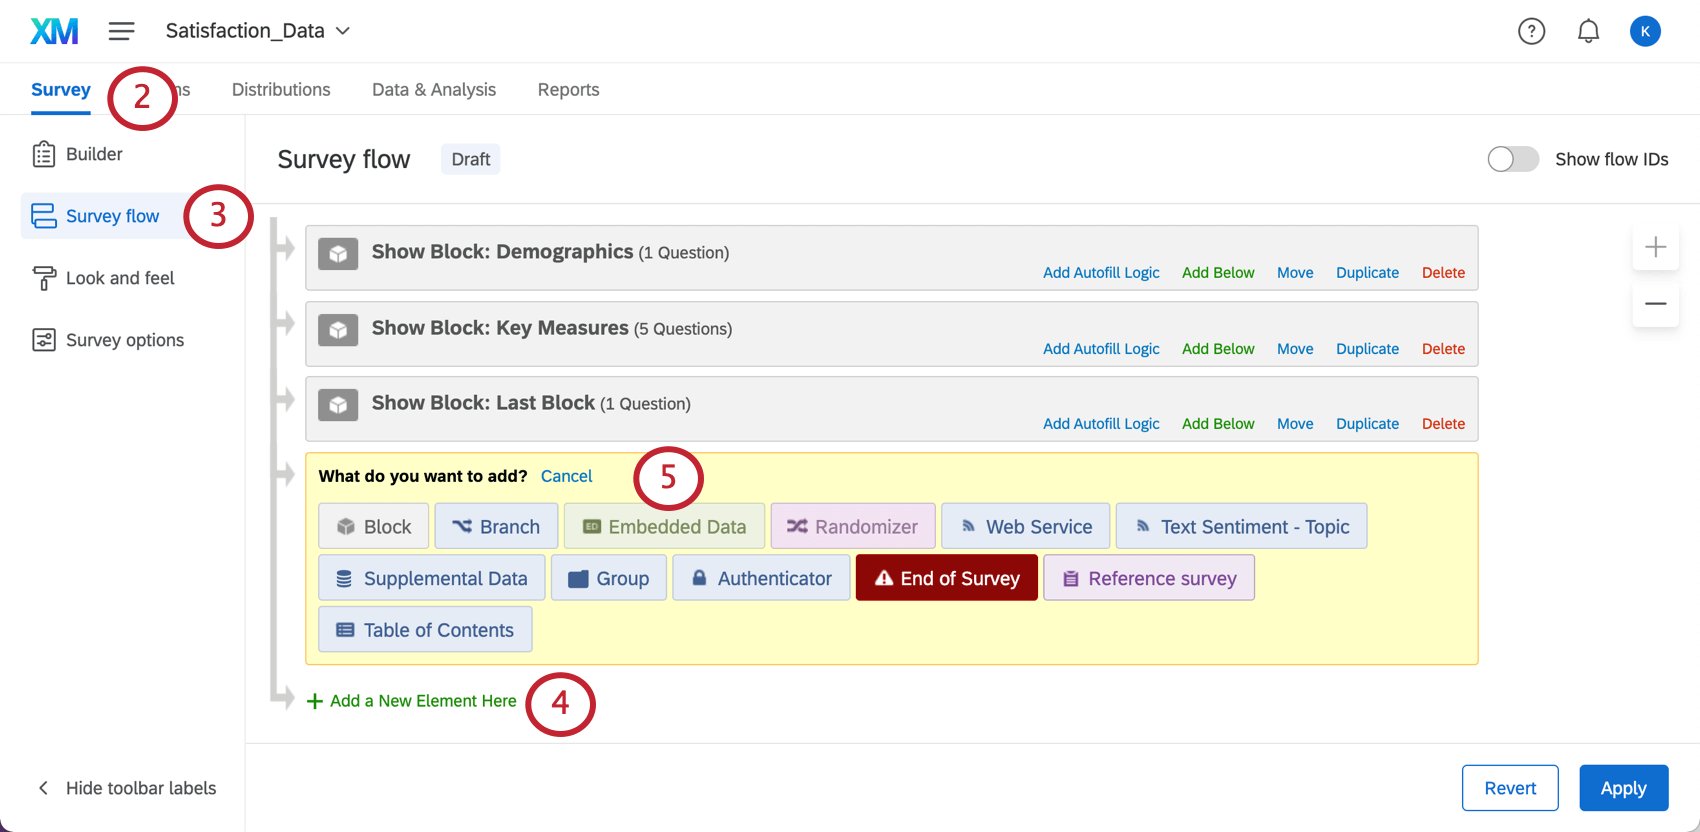
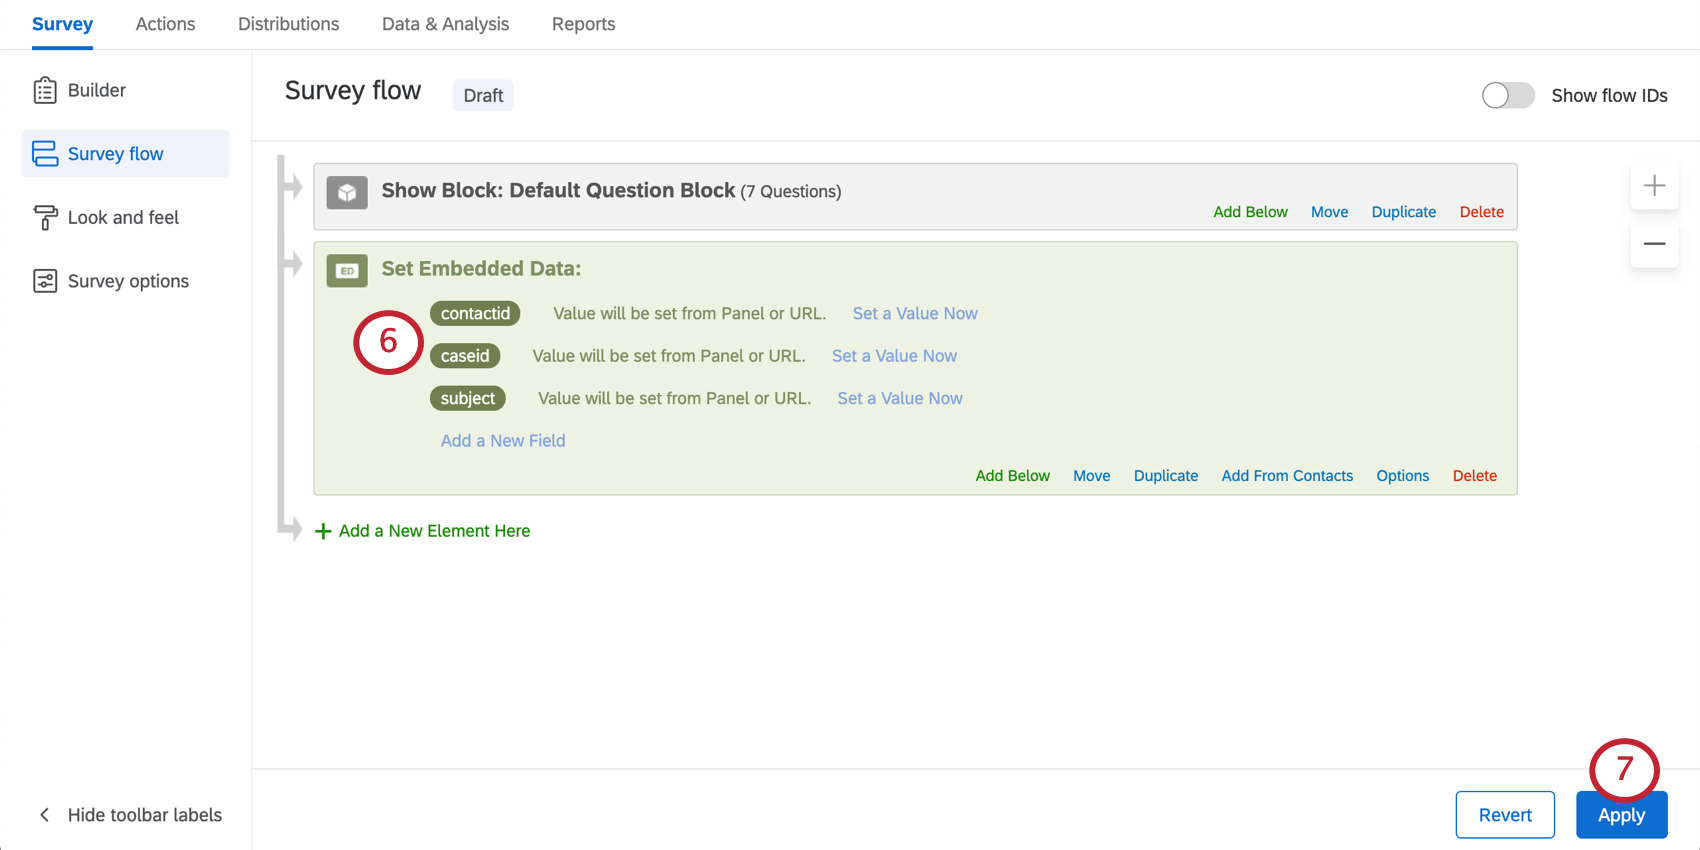
Qtip: This workflow can pull both contact embedded data and transactional data into a survey!
Qtip: Do you want to include Salesforce fields in your email or your survey? Follow the steps above to save these fields as embedded data. Then generate piped text for the embedded data you want to include.
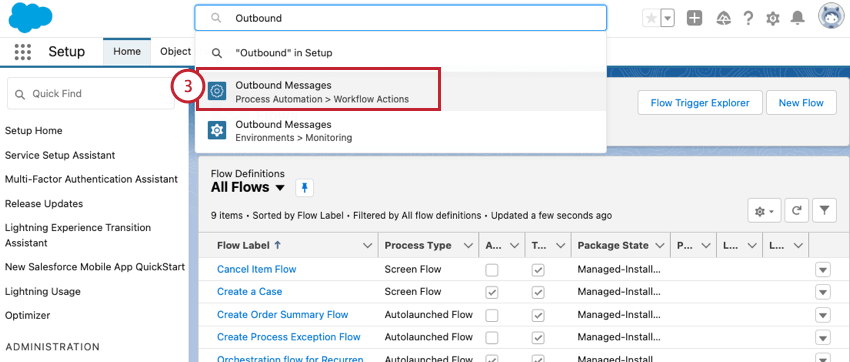
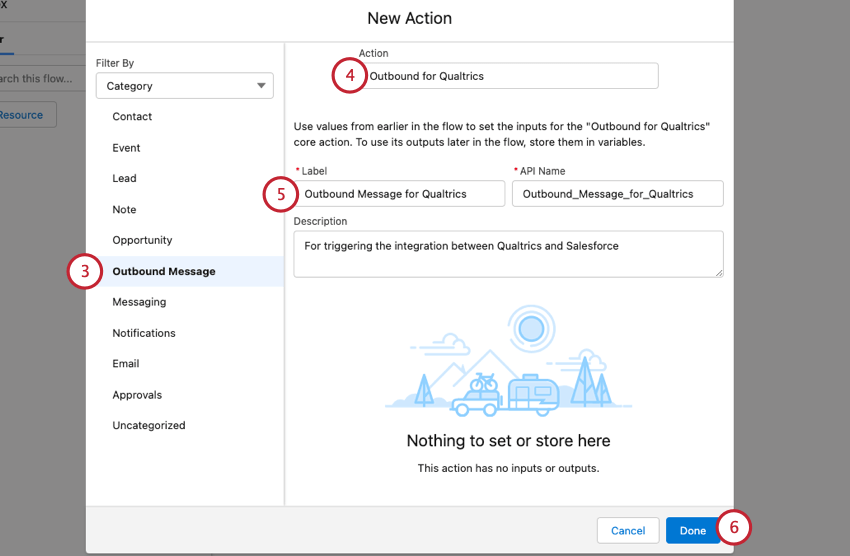
Creating the Outbound Message
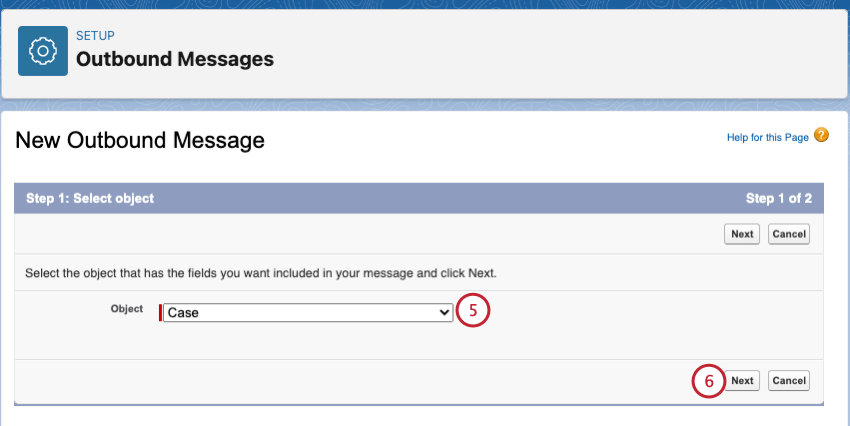
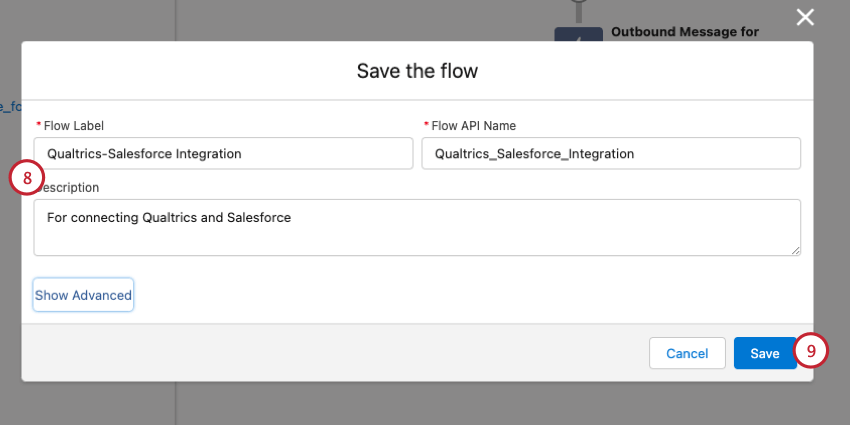
To set up your Flow properly, you’ll need to create an Outbound Message in Salesforce.
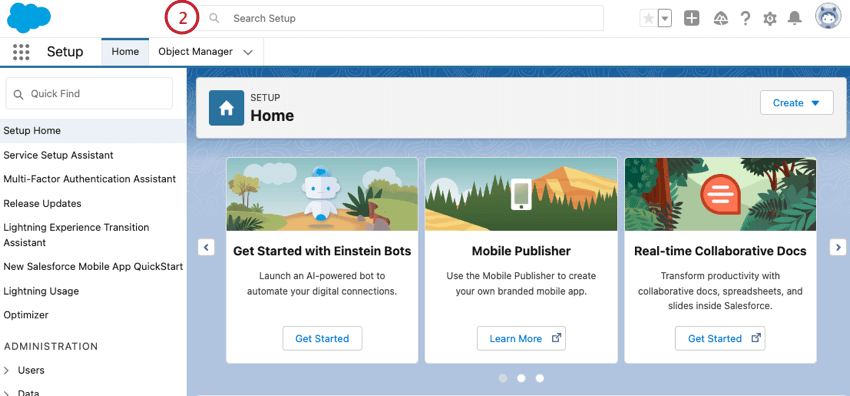
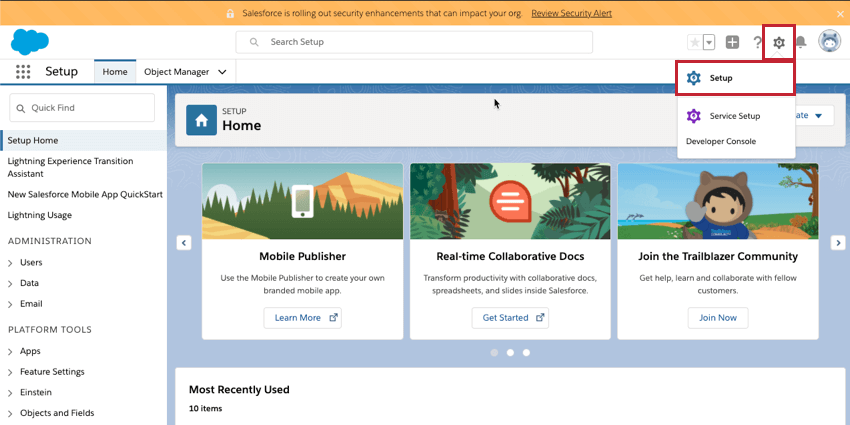
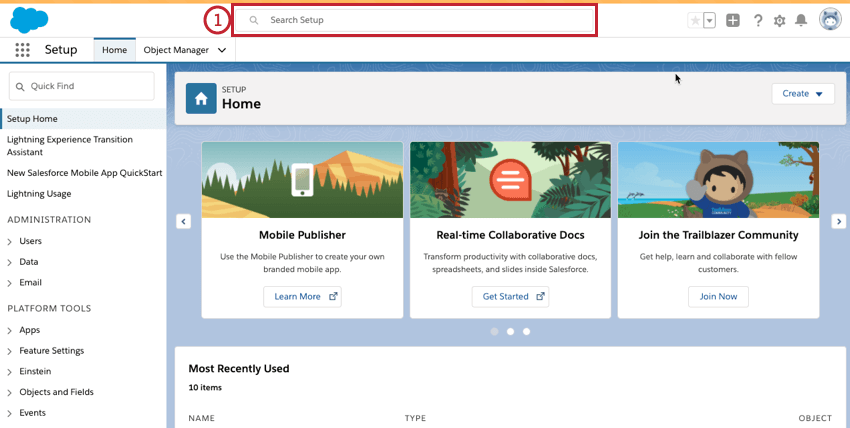
Qtip: If you are not on the Home page, you can navigate there by clicking on the gear icon on the top right corner and choosing Setup.

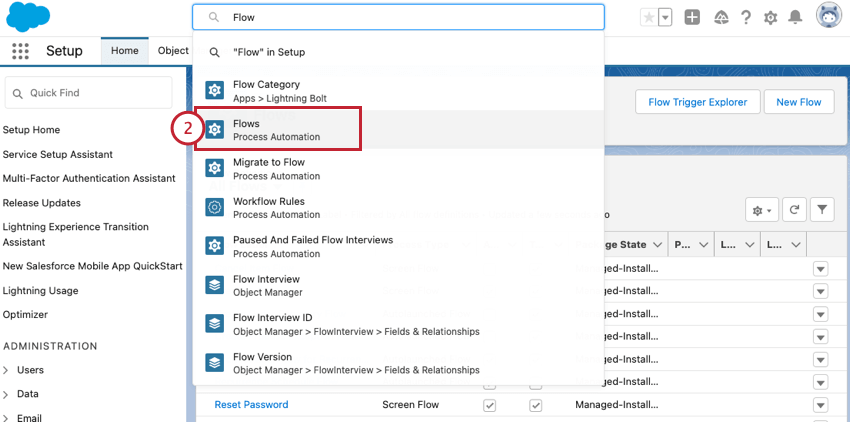
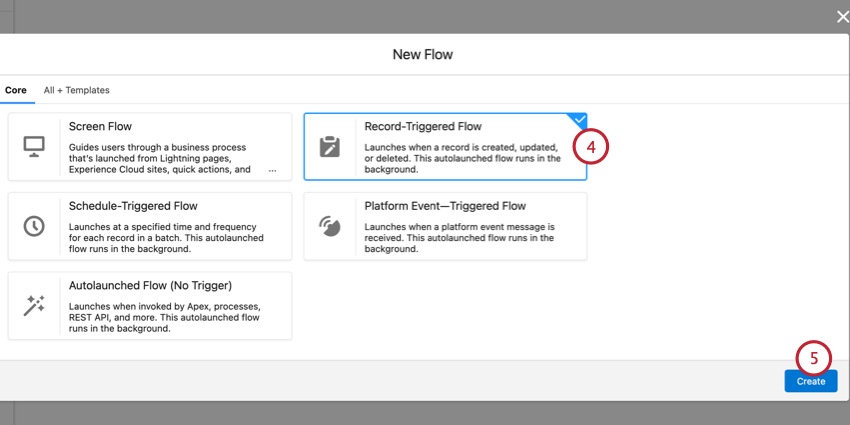
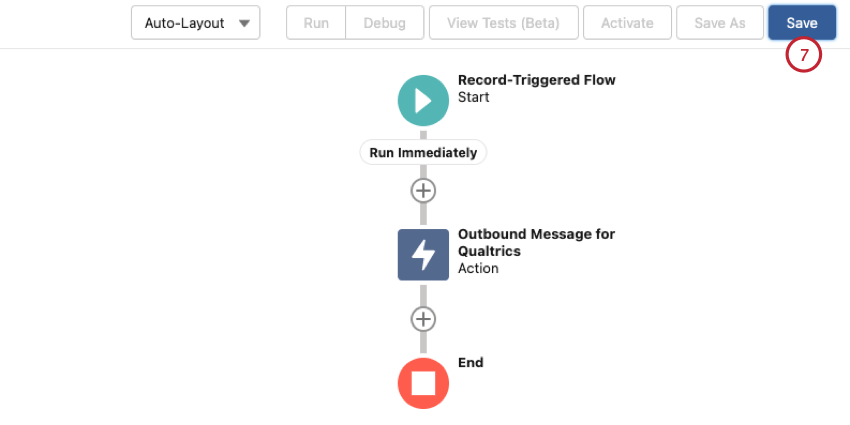
Setting up a Salesforce Flow
A Flow is a set of criteria created in Salesforce. When the criteria have been met, a workflow can be triggered. For example, the criteria might be that a case is marked as closed, and the workflow would be to have Qualtrics send a support feedback survey.
TO SET UP A SALESFORCE FLOW (Salesforce Lightning)
Qtip: If you are not on the Home page, you can navigate there by clicking on the gear icon on the top right corner and choosing Setup.

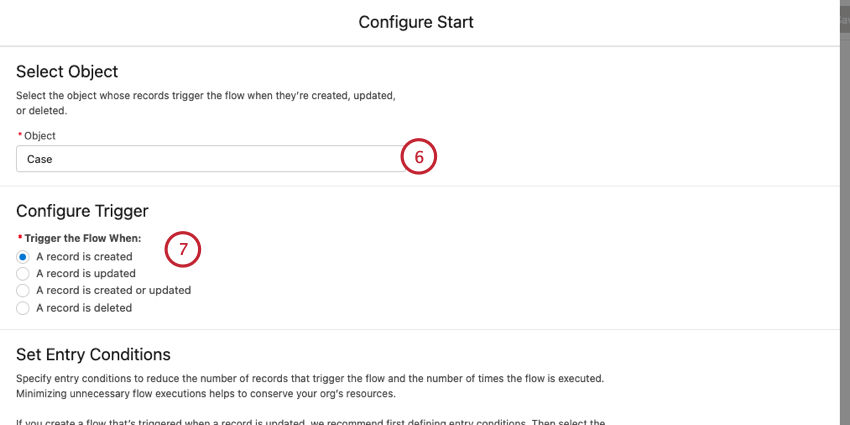
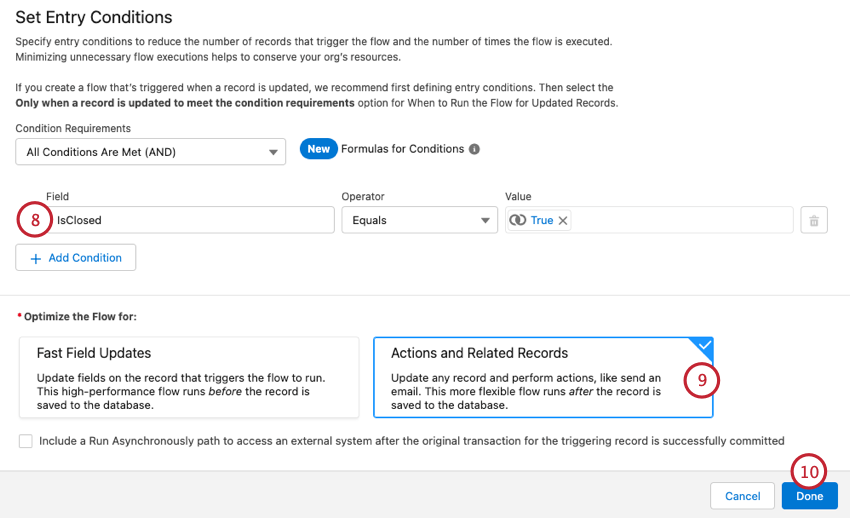
Example: If you want the Flow to be triggered when a Case is closed, you would set the Field to IsClosed and the Value to True. You can add multiple conditions for your Flow here as well.
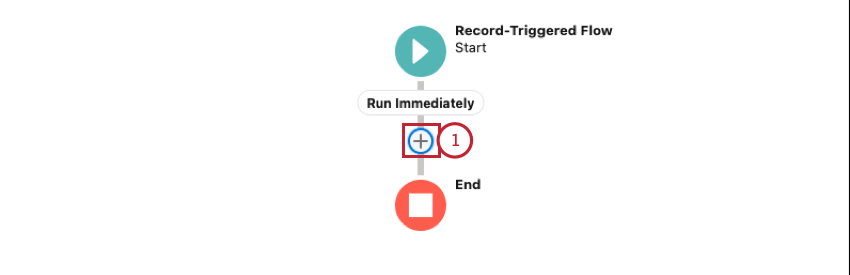
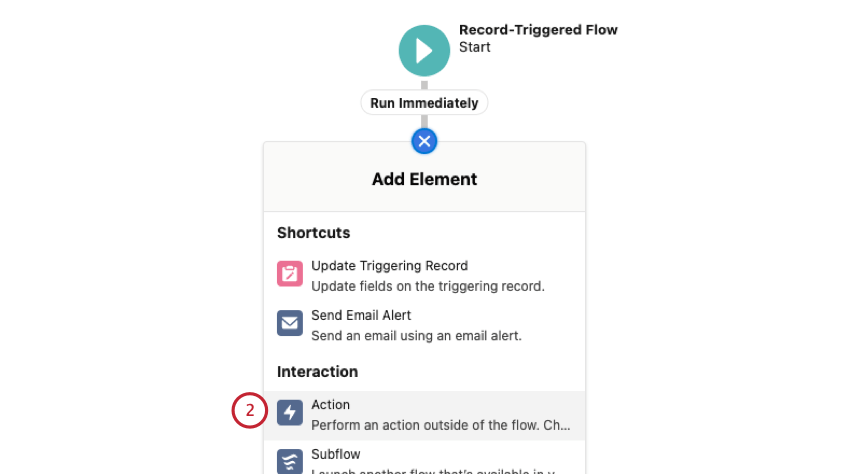
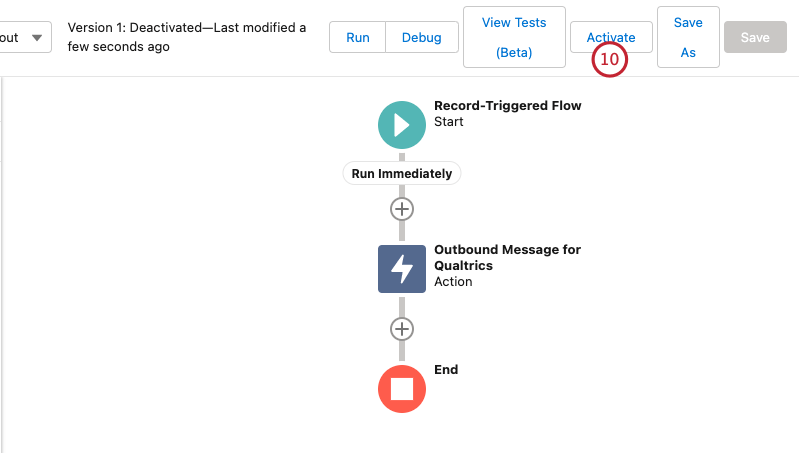
Adding the Flow Action
This action tells Salesforce what to do once the Flow criteria is met. For example, the action might be for Qualtrics to send a survey invitation.
Setting Up A Flow Action (Salesforce Lightning)
Testing and Troubleshooting
Once you have set up the Salesforce Flow, Salesforce Action, and XM Directory task, your survey is ready to go. Each time that the Flow criteria is met in Salesforce, the Salesforce data will be passed over into a new Qualtrics contact.
TROUBLESHOOTING IN QUALTRICS
TROUBLESHOOTING IN SALESFORCE
FAQs
Do I need to have XM Directory in order to to trigger surveys from Salesforce using an XM Directory Task?
Do I need to have XM Directory in order to to trigger surveys from Salesforce using an XM Directory Task?
My action completed and I checked the Distribution History, and the status is “Email Skipped.” What does that mean?
My action completed and I checked the Distribution History, and the status is “Email Skipped.” What does that mean?
I have stored Salesforce fields as contact embedded data. How can I pull this into my survey?
I have stored Salesforce fields as contact embedded data. How can I pull this into my survey?
I triggered multiple survey distributions to the same contact, and contact embedded data being pulled into the survey doesn’t match the case. What happened here?
I triggered multiple survey distributions to the same contact, and contact embedded data being pulled into the survey doesn’t match the case. What happened here?
That's great! Thank you for your feedback!
Thank you for your feedback!