
Data Access Settings (EX)
What's on this page
About Data Access Settings
Attention: This feature requires your brand to be on the updated backend infrastructure. Please fill out this survey to see if your brand is eligible. If your brand needs to be updated, a Brand Administrators can request your brand to be updated via the survey.
Data access settings in the Data Privacy tab allows you to control who has access to employee metadata in Qualtrics. Create Data access tags to flag sensitive fields, then Data access roles to determine who gets to view, edit, and export those fields.
Qtip: Only Brand Administrators with the Manage Data Access Control permission enabled can configure Data Access settings.
Qtip: This feature is only available for Employee Engagement, Employee Lifecycle, Ad Hoc Employee Research, and Pulse projects.
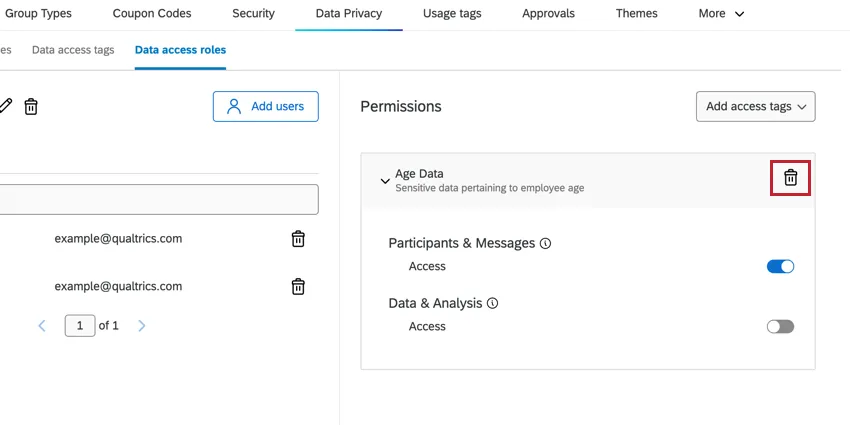
Data access settings prevent fields from being viewed in the Participants, Messages, and Data & Analysis tabs of a project. Users can still use and view aggregate results in Dashboards, so long as the Sensitive Data Policy does not prevent it.
Qtip: We recommend adding a minimum confidentiality threshold in addition to data access tags. This can help ensure that users with dashboard edit access can’t filter down data to view individual participants’ results. You can set confidentiality thresholds by dashboard, and even set an organization-wide threshold. As an administrator, this allows you to determine the smallest aggregate of data that can be viewed in any dashboard across the organization.
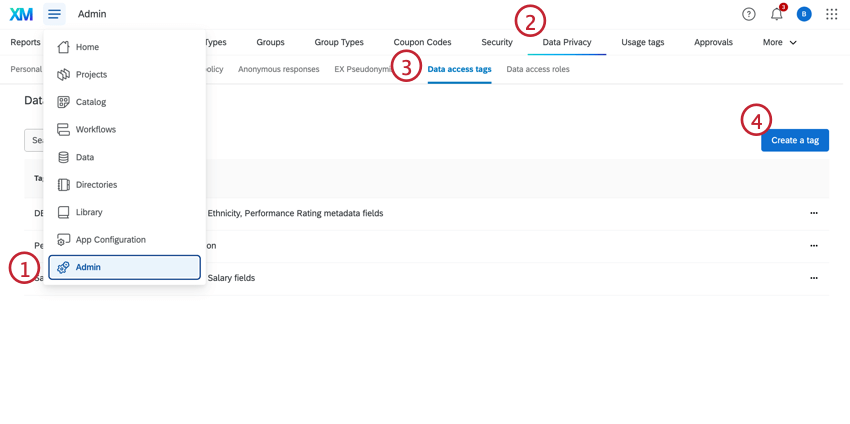
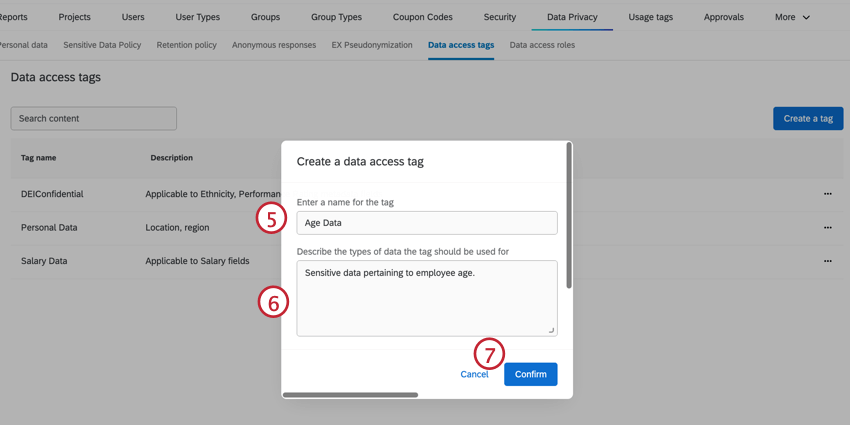
Setting Up Data Access Tags
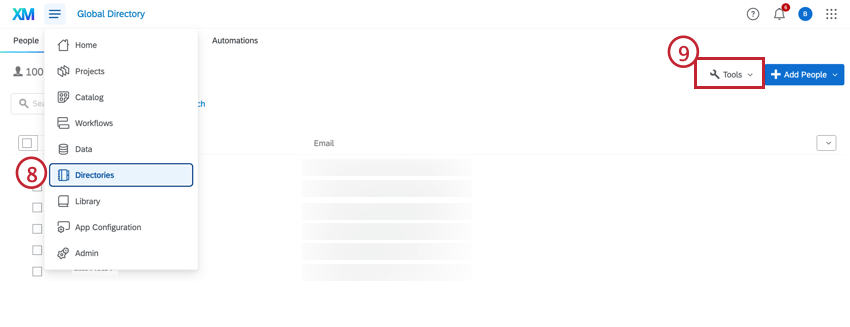
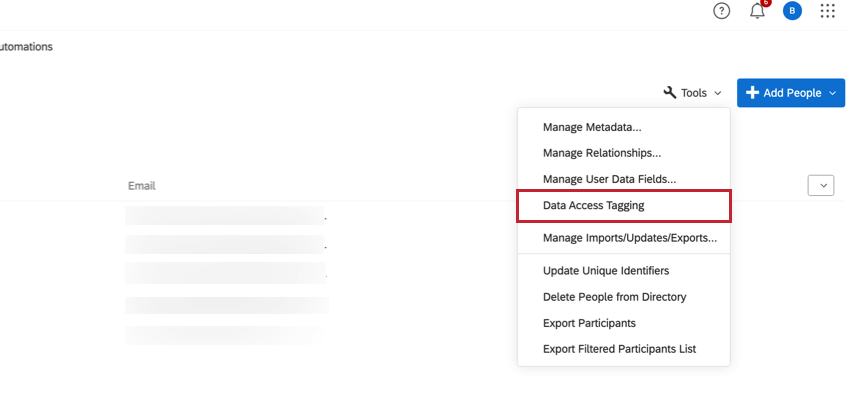
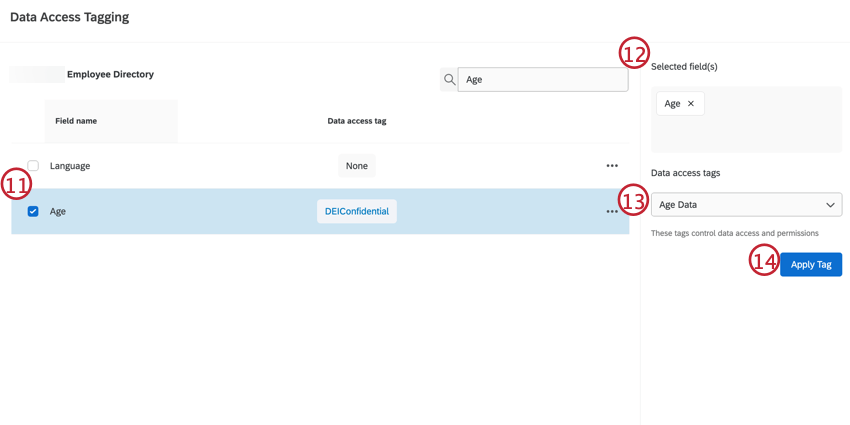
Qtip: Once a metadata field has been tagged in the global employee directory, no user in the brand has access to the field in the global Employee Directory and local EX projects.
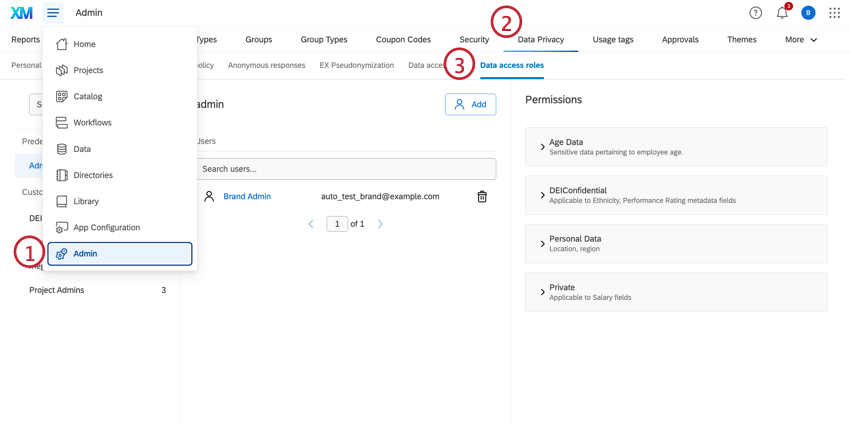
Next, you’ll need to create a data access role to give users access to tagged metadata fields. Follow the steps below for more information on setting up data access roles.
Setting Up Data Access Roles
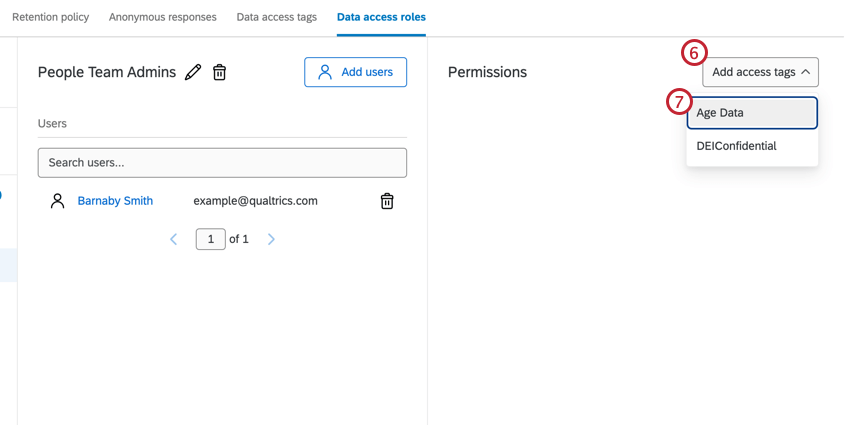
Data access roles determine which users have access to the tagged metadata fields you created in the section above.
The Admin role is the default role for new users, and all data access tags are enabled for this role. To create a custom data access role, see the section below.
Qtip: Regarding restricted data, users cannot edit metadata they do not have access to.
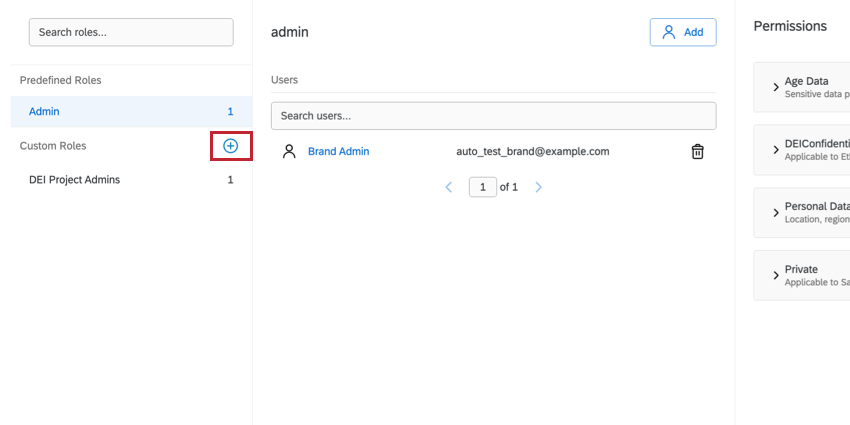
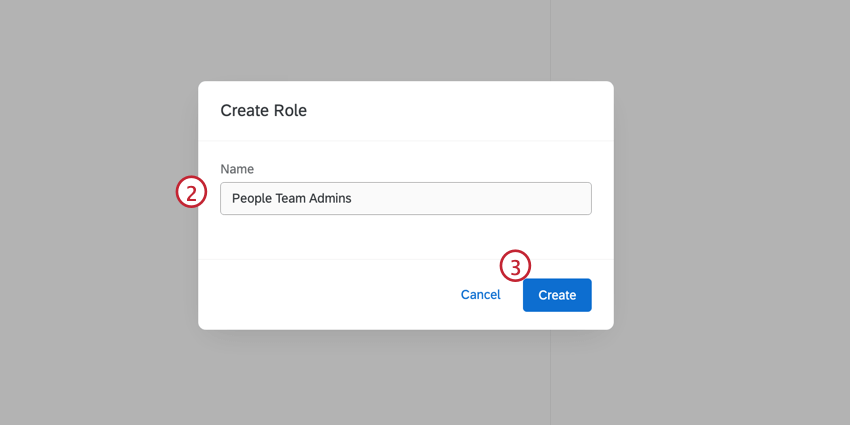
CREATING DATA ACCESS ROLES
Attention: Users can only be added as members to a data access role if they’re listed in the employee directory.
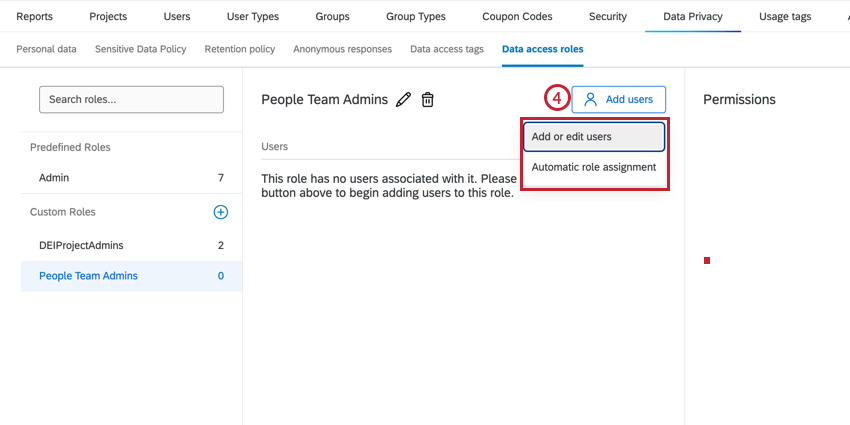
- Add participants: Manually select users to be in this role.
- Automatic role assignment: Create rules to automatically assign users to roles based on their metadata. See Automatic Role Assignment for more information about this option. Qtip: While the linked pages are for adding users to roles in a project, the core functionality is the same.

Qtip: To remove data access tag permissions, click the trash icon in the header.
MANAGING DATA ACCESS ROLES

FAQs
Can Data Access policies be set at the project level?
Can Data Access policies be set at the project level?
How can we disable Data Access Policies?
How can we disable Data Access Policies?
That's great! Thank you for your feedback!
Thank you for your feedback!