
Extract Data from Snowflake Task
Suite
Customer Experience
Employee Experience
Strategy & Research
Product
Qualtrics
What's on this page
About the Extract Data from Snowflake Task
Snowflake is a third-party data cloud software used for storing, maintaining, and sharing data. You can import data from Snowflake to use in a Qualtrics workflow.
Attention: Qualtrics cannot ingest encoded files from Snowflake.
Example: For example, if you have customer data stored in Snowflake, you can import that data into Qualtrics to view in a dashboard or use the data to customer a respondent’s experience when taking a survey.
Qtip: For information on general limits that apply to ETL workflows, see Workflow Limits. For any task-specific limits, refer to the information on this page.
Integrating with Snowflake
To use this task, you must create a new integration in Snowflake and connect it to Qualtrics.
Setup in Snowflake
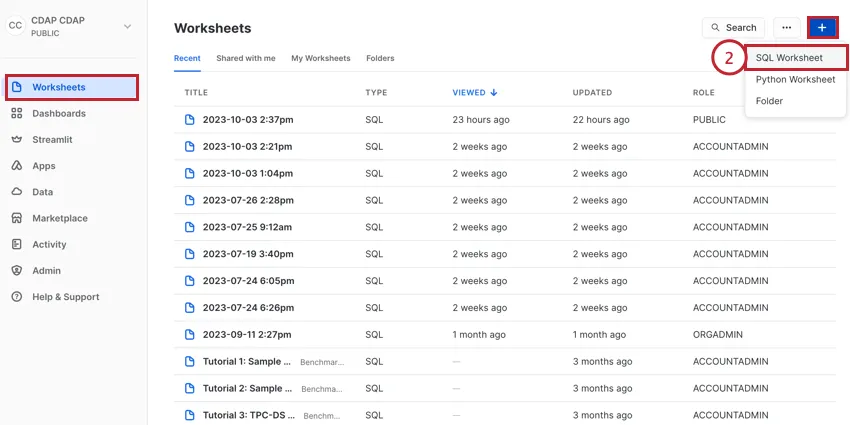
In the Worksheets tab, click the plus sign ( + ) and select SQL Worksheet.

Paste the following code into the worksheet:
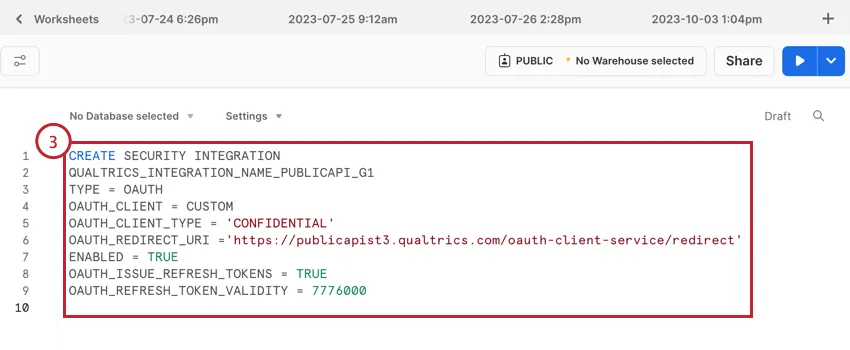

CREATE SECURITY INTEGRATION
QUALTRICS_INTEGRATION_NAME_PUBLICAPI_G1TYPE = OAUTH
OAUTH_CLIENT = CUSTOM
OAUTH_CLIENT_TYPE = 'CONFIDENTIAL'
OAUTH_REDIRECT_URI ='https://publicapist3.qualtrics.com/oauth-client-service/redirect'
ENABLED = TRUE
OAUTH_ISSUE_REFRESH_TOKENS = TRUE
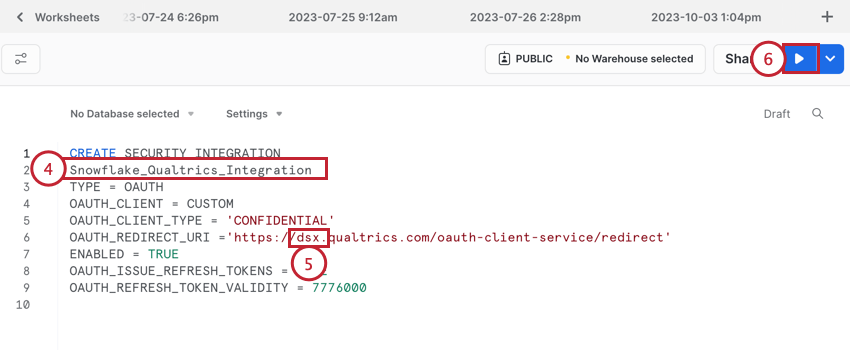
OAUTH_REFRESH_TOKEN_VALIDITY = 7776000Replace the bolded QUALTRICS_INTEGRATION_NAME_PUBLICAPI_G1 line with a name for the integration. Please only use letters, numbers, and underscores for the integration name.

Qtip: Copy down your integration name as you’ll need it later to complete the setup. Snowflake will automatically capitalize every letter in your integration name. For example, if I name my integration “Qualtrics_Integration,” then it will be saved as “QUALTRICS_INTEGRATION” in Snowflake. This is the name I should save for later.
Replace the bolded publicapist3 with information about your brand. This information will be different depending on if you want to set up an individual connection within the workflow itself, or an account-wide connection in the Admin tab.
- If creating an individual connection, replace this with your brandID. Example: If my brandID is “dsx”, then my updated value is https://dsx.qualtrics.com/oauth-client-service/redirect’

- If creating an account-wide connection, replace this with your datacenterID. Example:If my datacenterID is “iad1,” then my updated value is https://iad1.qualtrics.com/oauth-client-service/redirect’
Click Run.
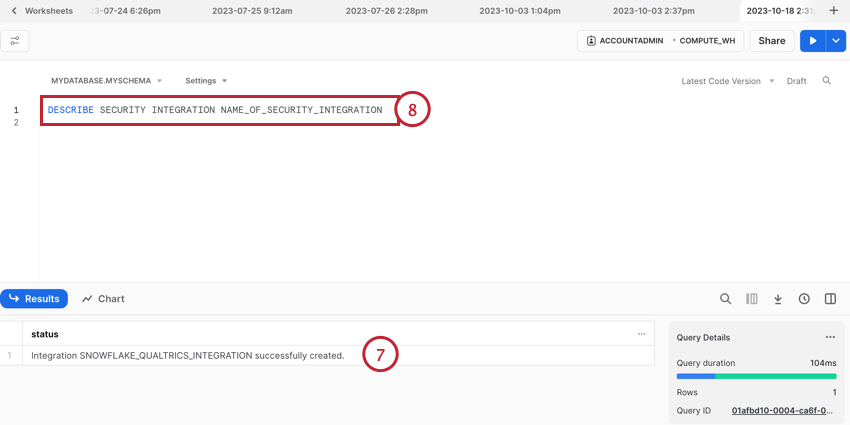
You will receive a message “Integration ‘Name of Integration’ successfully created.”

Qtip: If you receive a “insufficient privileges” error, then your Snowflake permissions must be updated. See this Snowflake support page for more information on which permissions are required.
In the same worksheet, enter the following code:
DESCRIBE SECURITY INTEGRATION NAME_OF_SECURITY_INTEGRATION Replace the bolded INTEGRATION NAME_OF_SECURITY_INTEGRATION with your capitalized integration name from step 4.
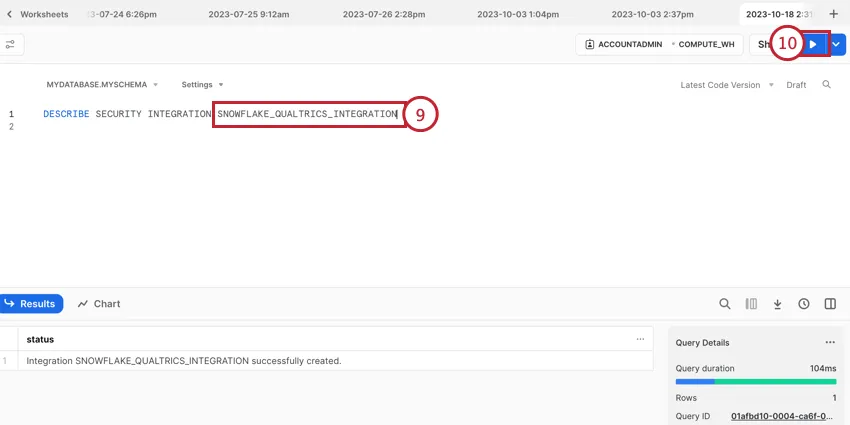
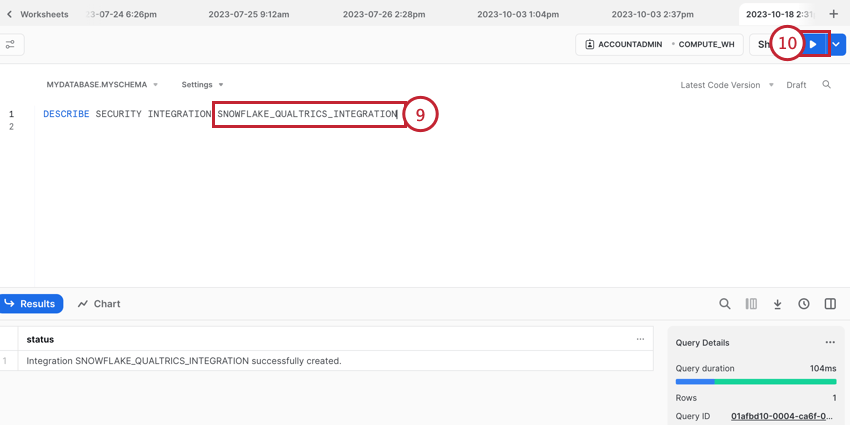
Click Run.
You will be presented with various pieces of information about the integration. Copy down the values for the following fields:


- OAUTH_AUTHORIZATION_ENDPOINT
- OAUTH_TOKEN_ENDPOINT
- OAUTH_CLIENT_ID
In the same worksheet, enter the following code:
SELECT SYSTEM$SHOW_OAUTH_CLIENT_SECRETS(‘NAME_OF_SECURITY_INTEGRATION’) Replace the bolded NAME_OF_SECURITY_INTEGRATION with your capitalized integration name from step 4.
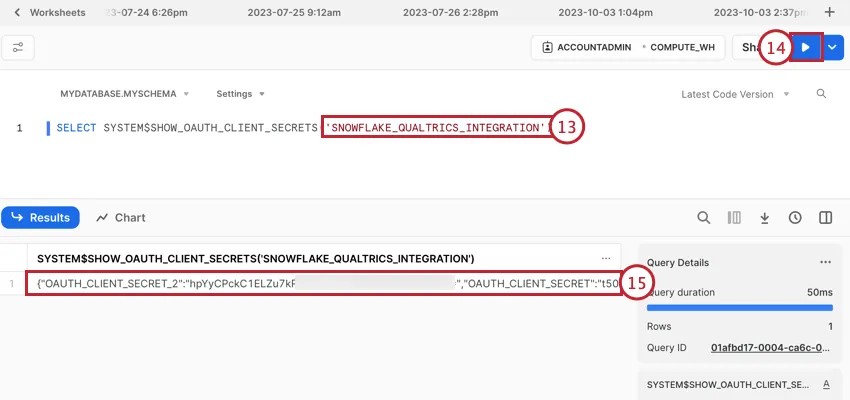
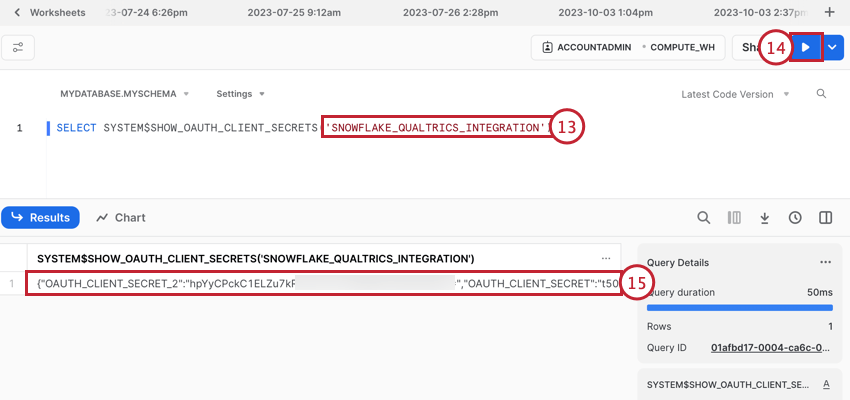
Click Run.
Copy one of the Client Secret values.
Setup in Qualtrics
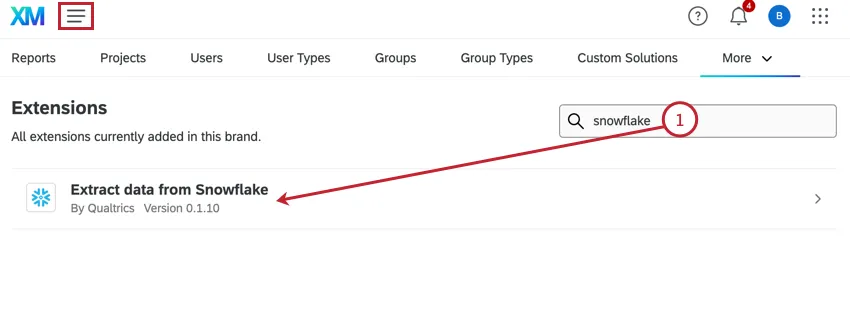
If creating a brand-wide connection (i.e., a Snowflake account available to all users in your Qualtrics license), navigate to the Extensions section of the Admin tab and search for the Extract data from Snowflake integration.

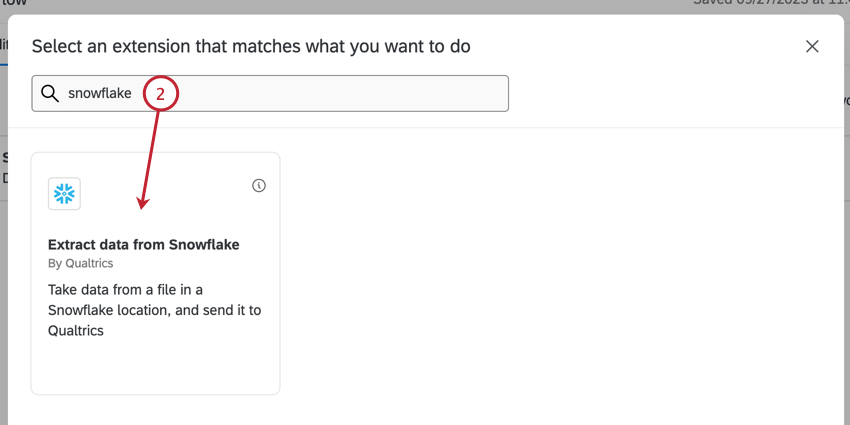
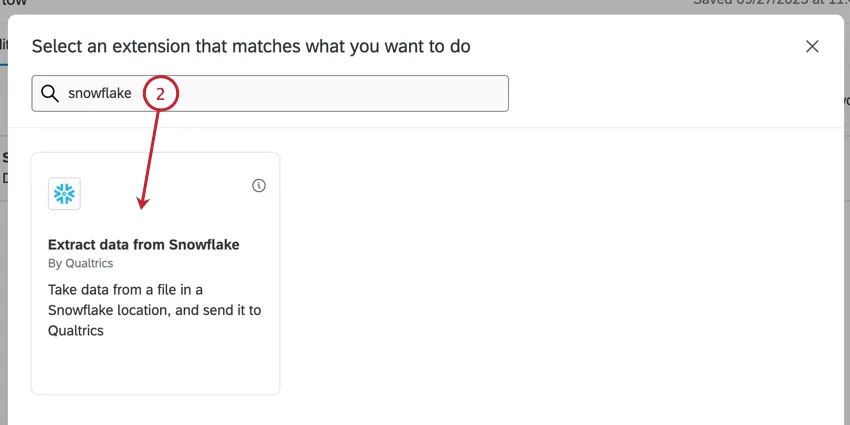
If creating an individual connection (i.e., a Snowflake account only available to you), navigate to Workflows and create a new ETL workflow. When choosing your extractor task, choose the Extract data from Snowflake task.

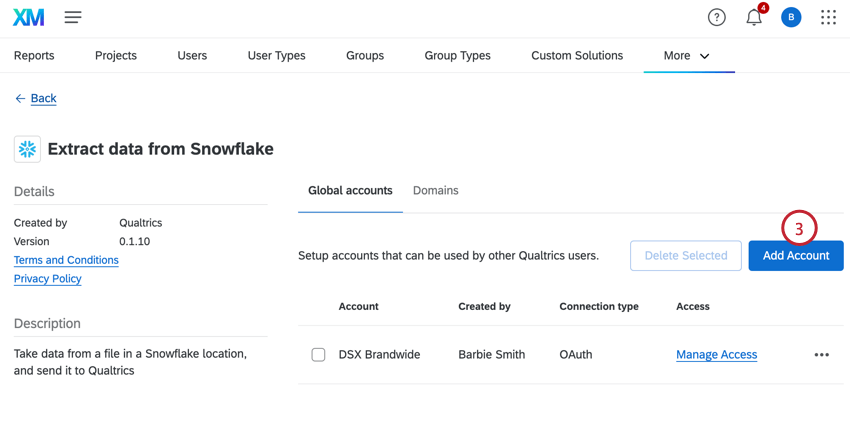
Click Add Account if in the Admin tab, or Add a user account if in the workflow task. The remaining steps are the same regardless of where you’re setting up your account.

Name your account so you can identify it later.
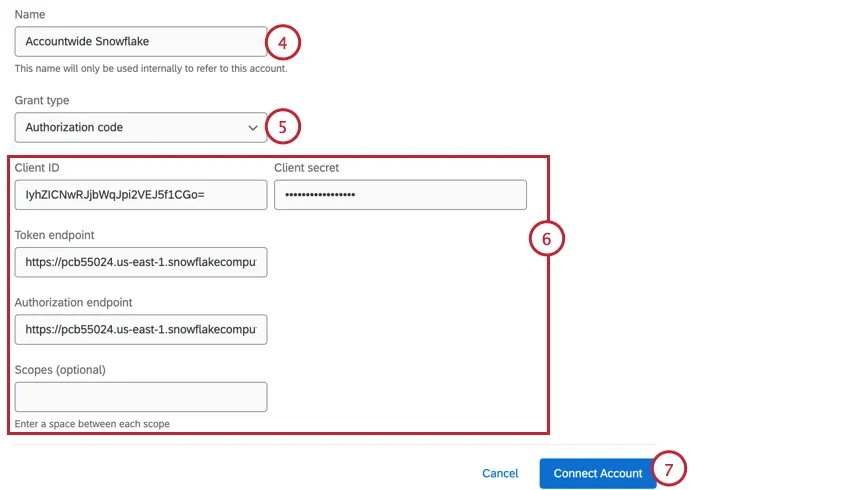
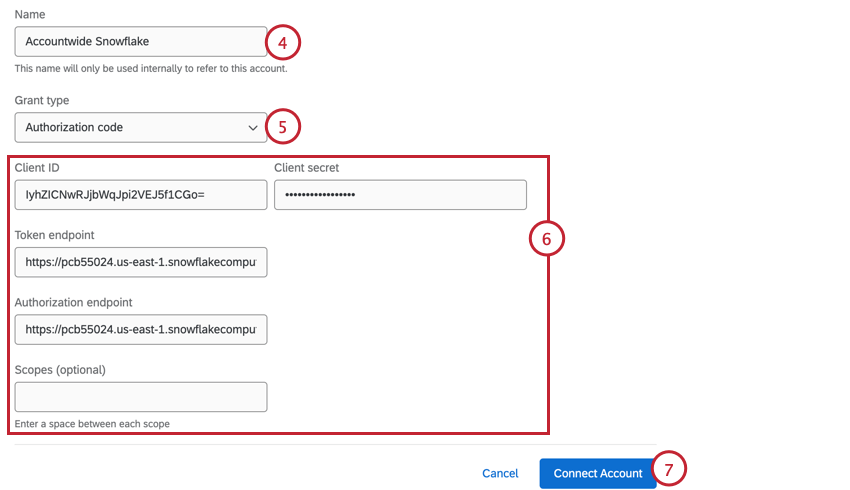
Choose Authorization Code for the Grant Type.
Enter your authorization details:
- Client ID: The OAUTH_CLIENT_ID you copied in step 10 of Setup in Snowflake.
- Client secret: The CLIENT_SECRET you copied in step 14 of Setup in Snowflake.
- Token endpoint: The OAUTH_TOKEN_ENDPOINT you copied in step 10 of Setup in Snowflake. If the URL has any underscores ( _ ), replace them with hyphens ( – ).
- Authorization endpoint: The OAUTH_AUTHORIZATION_ENDPOINT you copied in step 10 of Setup in Snowflake. If the URL has any underscores ( _ ), replace them with hyphens ( – ).
- Scopes (optional): You can use scopes to limit the level of access. For most use cases, you can leave this blank.
Click Connect Account.
A window will open for you to log into Snowflake. Enter your Snowflake Username and Password.
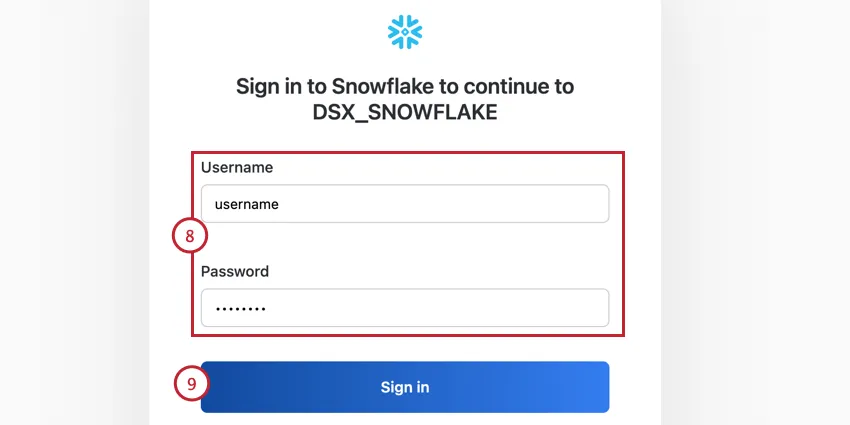
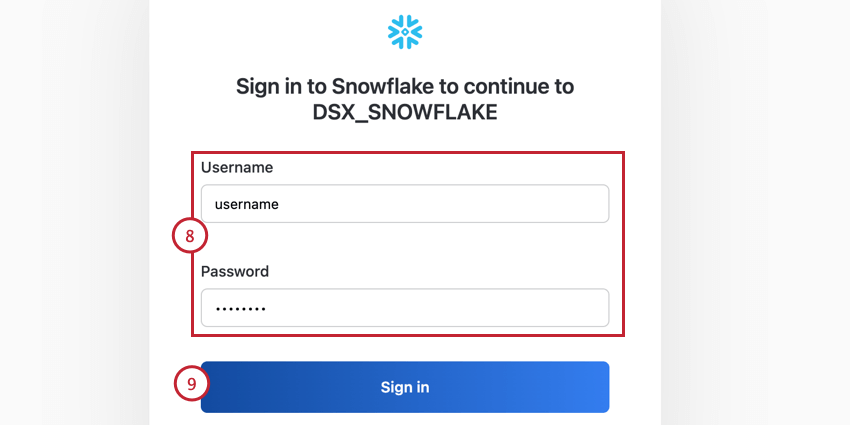
Click Sign in.
Refreshing a Snowflake Connection
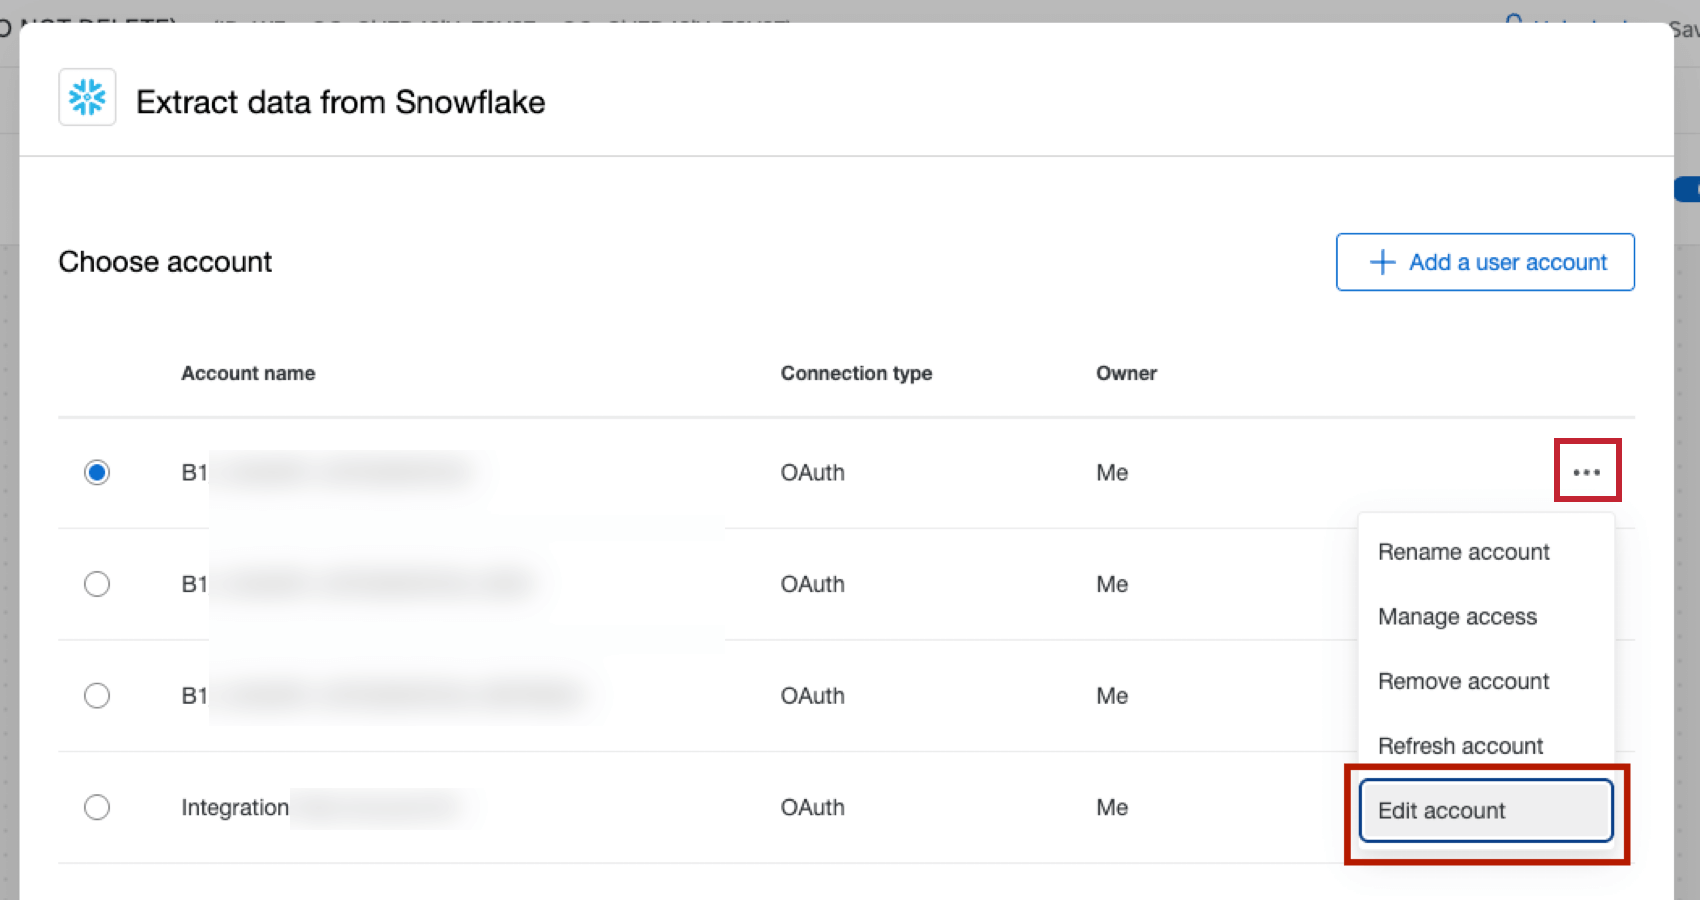
If you receive a workflow error that your Snowflake credentials are expired, then you can refresh them in Qualtrics by following the below steps:
Edit the extension account. If this is a personal Snowflake account, then you’ll do this by clicking the Snowflake task in the workflow editor. It this is a brand-wide account, then you’ll do this in the Admin tab. The remaining steps are the same.

Click Save at the bottom of the credentials window.
A tab will open for you to log into Snowflake. Enter your Snowflake Username and Password. After logging in, your connection will be refreshed.
Qtip: By default, your Snowflake connection will expire after 90 days. You can contact Snowflake Support to request this value to be raised.
Setting up an Extract Data from Snowflake Task
For your workflow task, choose the Extract data from Snowflake task.
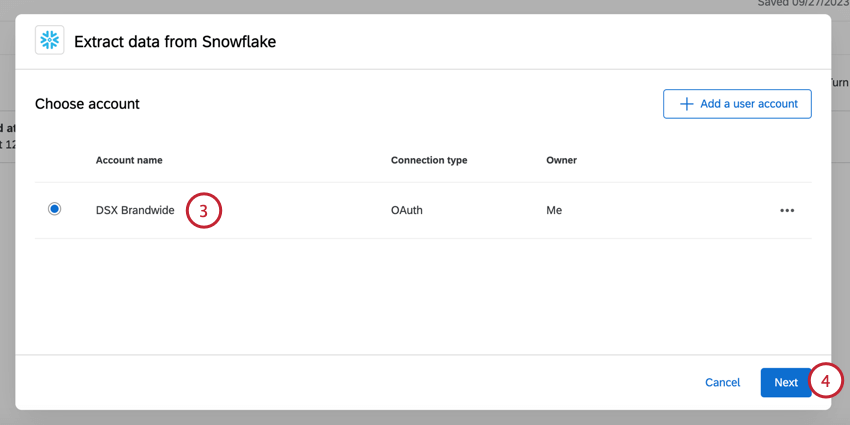
Click Next.
Enter the following pieces of information about the data you want to import from Snowflake:
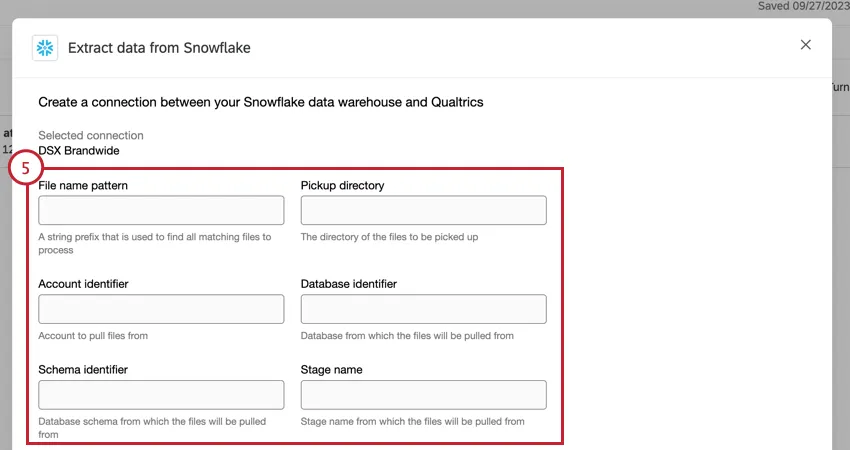

- File name pattern: A text string used to identify the files to import. Qtip: We recommend including “Qualtrics” at the beginning of all files you want to import. You can then enter “Qualtrics” for this field to import all relevant files.

- Pickup directory: The Snowflake directory that contains the files. Qtip: If the file is in the base stage, then you can leave this field blank.
- Account identifier: The Snowflake account identifier of the database that contains the files to import.
- Database identifier: The Snowflake database identifier of the database that contains the files to import.
- Schema identifier: The Snowflake schema identifier of the schema that contains the file to import.
- Stage name: The name of the Snowflake stage that contains the files to import.
If desired, enabled Skip bad files. When enabled, corrupted files and files that don’t match your headers are ignored.
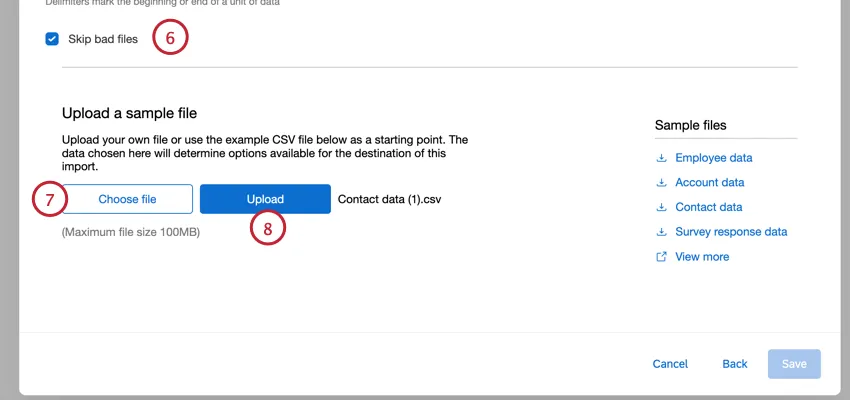

You must upload a sample file that contains the general format of the data you want to import into Qualtrics. Click Choose file and select the file on your computer.
Qtip: If needed, you can download one of the Sample files listed inside in the task window.
Click Upload.
Review your sample file to make sure everything looks correct.
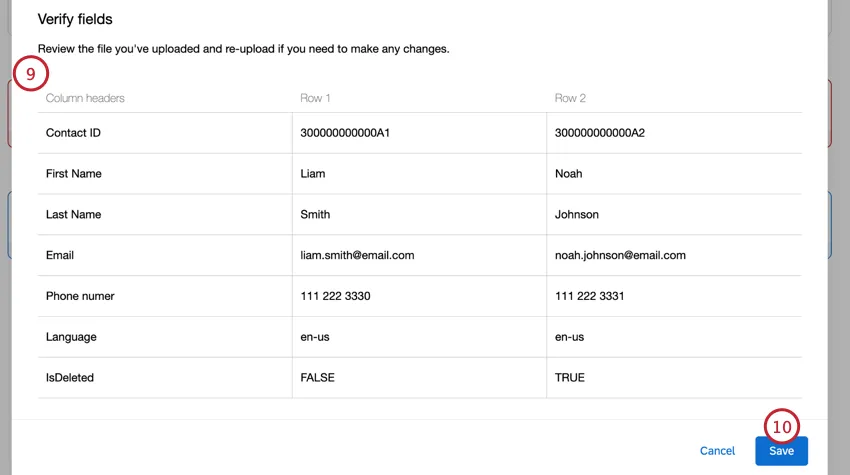

Qtip: If you need to change your file, click Back in the upper left corner.
Click Save.
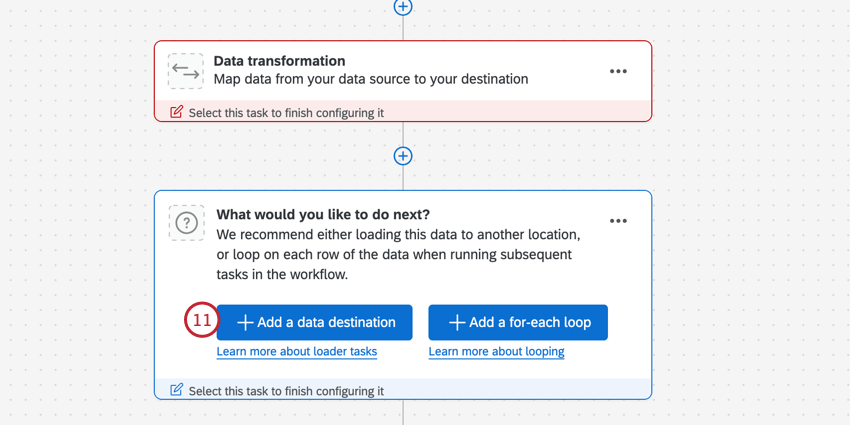
Choose your loader task, which determines where the data is saved. See Available Loader Tasks for more information about the options available to you.

That's great! Thank you for your feedback!
Thank you for your feedback!