
Load Data to Amazon S3 Task
What's on this page
About Loading Data into Amazon S3
Amazon Simple Storage Service (also known as Amazon S3) is a service where you can store data. You can import data from Qualtrics to Amazon S3 buckets. This import can happen on a regular schedule, allowing you to automate the upload of survey data, employees, contacts, or even data extracted from other third party services.
Example: Regularly upload survey data to Amazon S3 in bulk.
Example: Regularly extract employees from Workday and upload them to Amazon S3.
Qtip: For information on general limits that apply to ETL workflows, see Workflow Limits. For any task-specific limits, refer to the information on this page.
Connecting Qualtrics to AWS
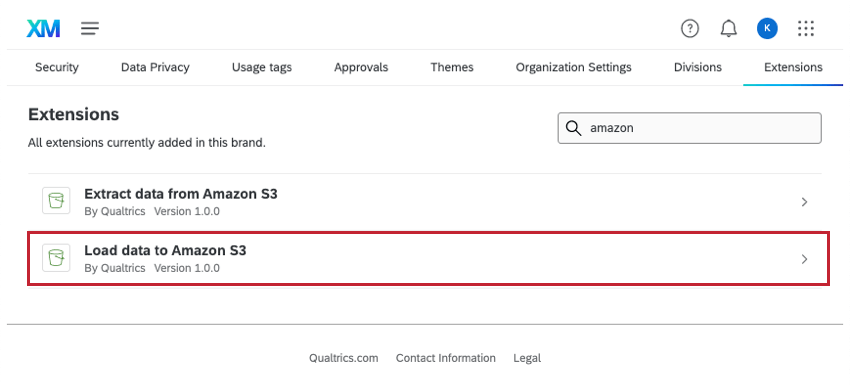
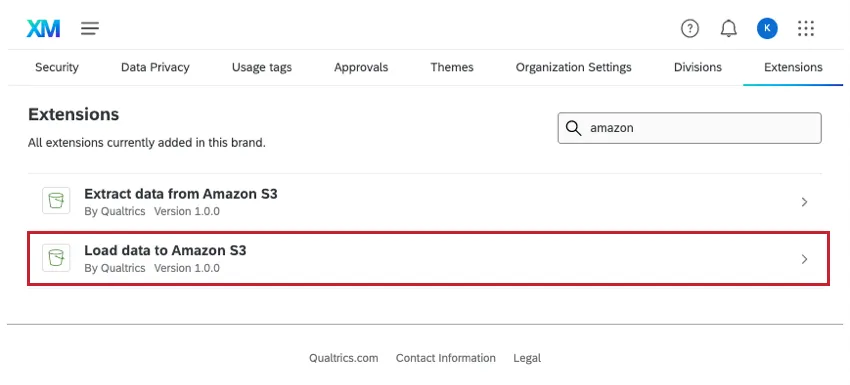
You can connect Qualtrics to AWS by following the steps on the Extract Data from Amazon S3 Task page. The only difference is that when you select an extension, you should choose Load data to Amazon S3.
Extract Data to Upload to Amazon S3
Before you can upload data to your S3 bucket, you need to extract it from someplace. Consider where your data currently lives; is it inside a survey or XM Directory? Or is it not inside Qualtrics at all, but a third party, such as Salesforce or Google Drive?
Create an ETL workflow and add a data extractor task to it. For a guide to creating this kind of workflow, see Building ETL Workflows.
Load Data to Amazon S3
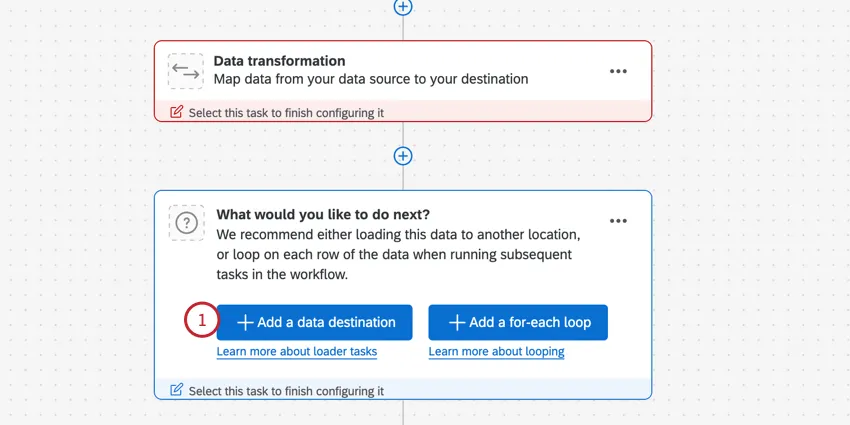
Once you’ve created a workflow and added your data extraction task, it’s time to upload the data into Amazon S3.
Attention: This task can only support CSV file types.
Qtip: This task is best used to move data in bulk rather than one-by-one. If you want to import survey responses to Amazon S3, we recommend pairing a scheduled workflow with the survey response extraction task.
Click Add a data destination.
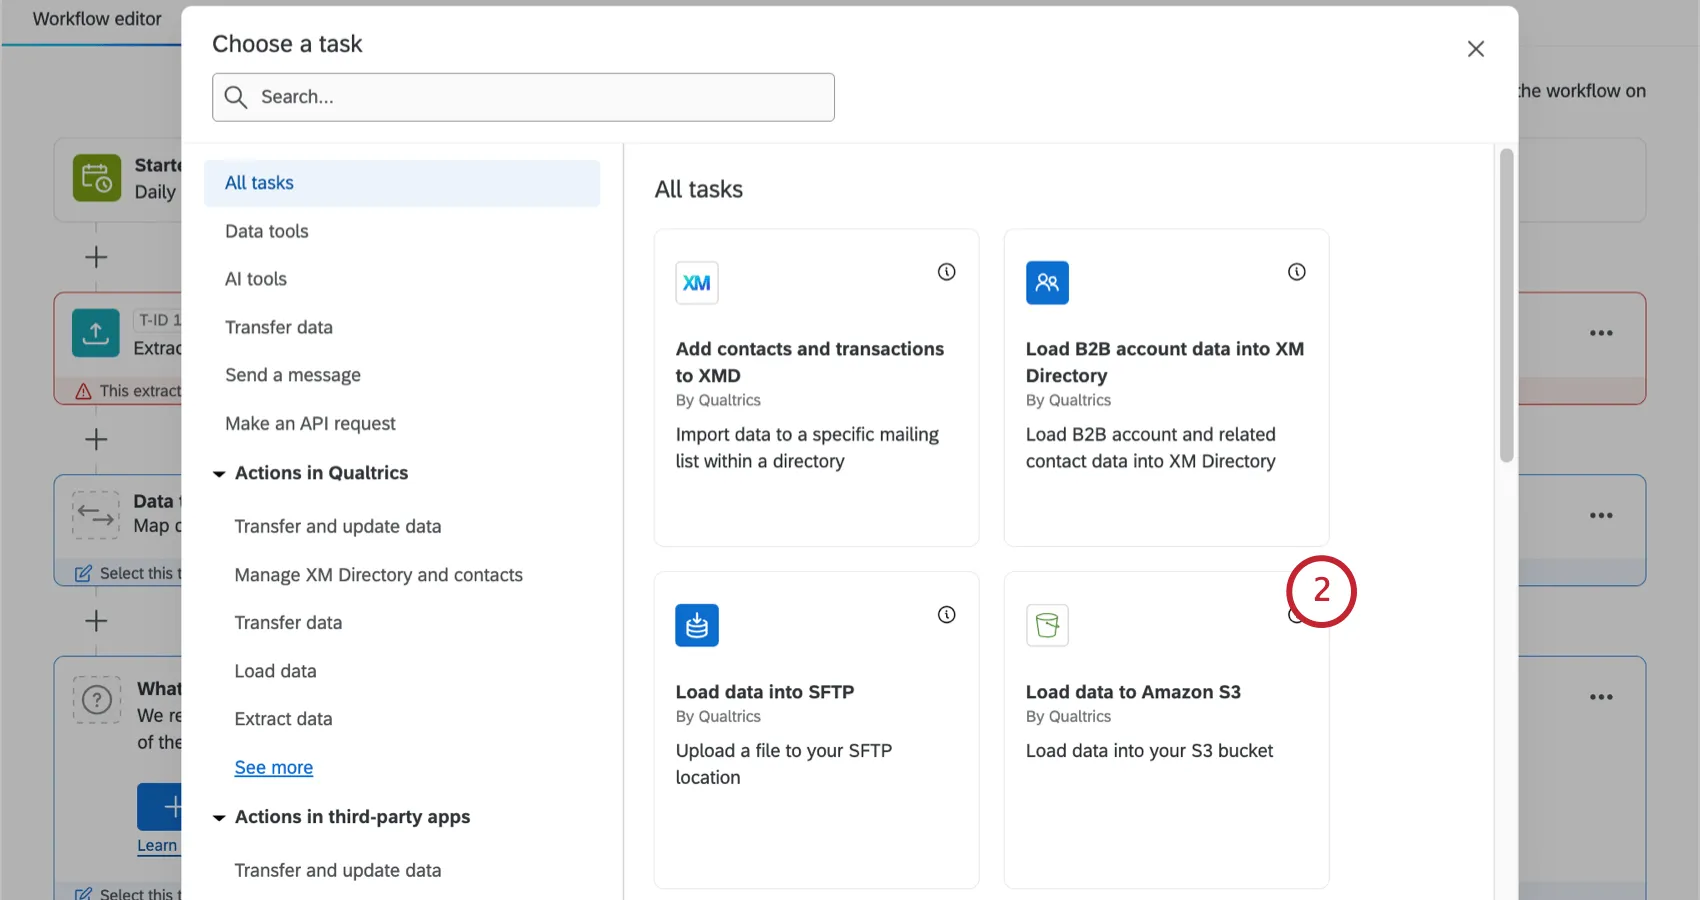
Search and select Load data to Amazon S3.
Choose the Amazon Web Services (AWS) account to extract files from. Any accounts added by Brand Administrators, as well as accounts you’ve added yourself, will be listed here.
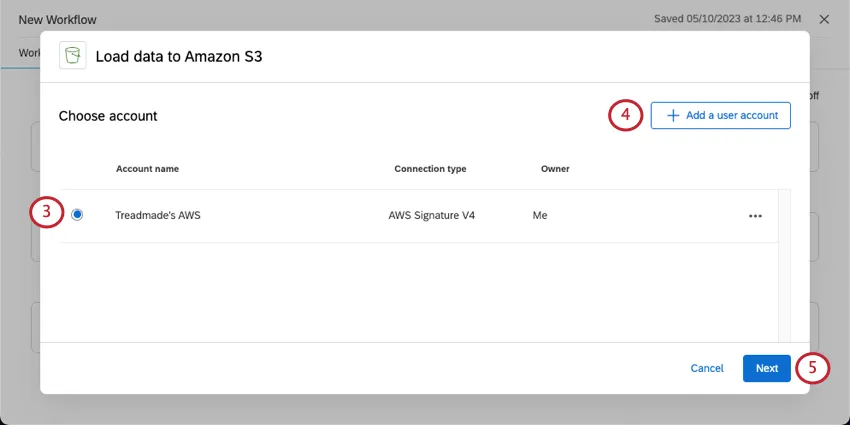
If you want to add new AWS account credentials, click Add a user account and follow the steps in the connecting an AWS account section.
Click Next.
Choose a Data source. This will be the extract data task you set up earlier.
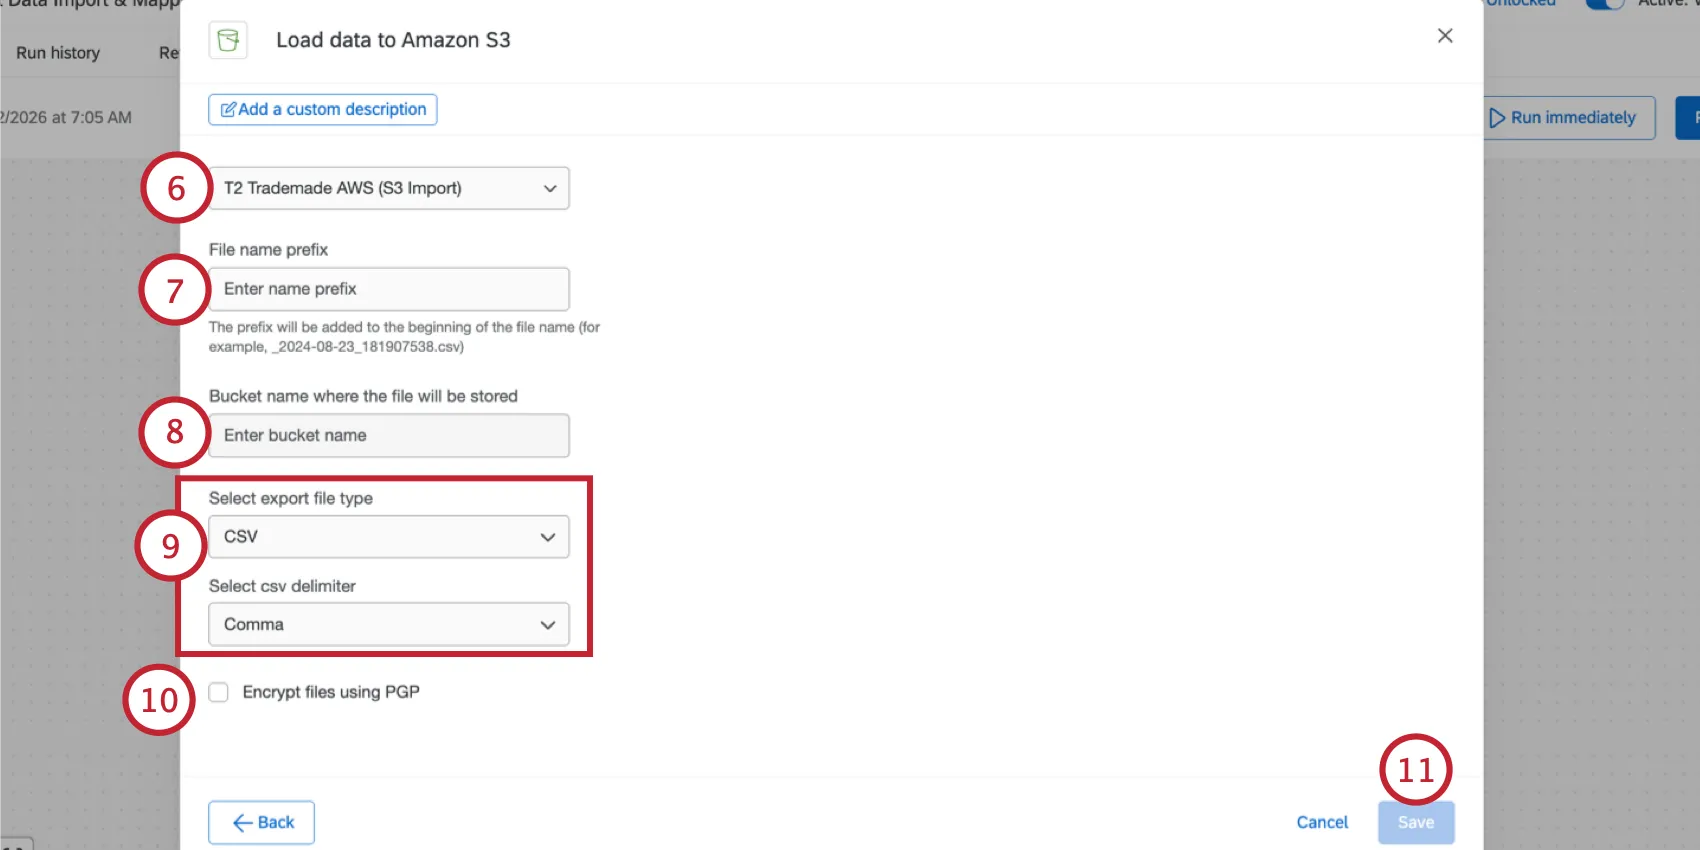
In S3, bucket folders are called prefixes. In the File name prefix box, add the full bucket prefix, as well as a prefix for the file itself.
Warning: Do not start your file name prefix with a slash ( / ). The prefix “example” would be fine, but “/example” would not work. For a guide to supported and unsupported characters, see Amazon S3's documentation on Object key naming.
Example: To put the file in this location: bucketname/QualtricsPrefix/ with the filename prefix “example”, enter QualtricsPrefix/example into the file name prefix box.
Qtip: If your IAM policy specifies that Qualtrics can only write to a specific S3 bucket prefix (for example, “arn:aws:s3:::s3bucketname/QualtricsPrefix/*”), make sure the prefix matches here.
Type the Bucket name where the file will be stored.
Attention: For bucket naming guidelines, see the AWS documentation.
Choose your export file type from CSV, TSV, or JSON.
- For CSV files, you can also choose the delimiter: comma, semicolon, tab, or pipe.
Select this option if you’d like to Encrypt files using PGP. Then, enter an encryption key.
When you’re finished, click Save.
That's great! Thank you for your feedback!
Thank you for your feedback!