
Extract Data from Amazon S3 Task
What's on this page
About Extracting Data from Amazon S3
Amazon Simple Storage Service (also known as Amazon S3) is a service where you can store data. With workflows, you can easily automate the extraction of data from Amazon S3 for use in Qualtrics.
Example: You keep up-to-date spreadsheets of employee contact information stored on Amazon S3. You’d like to periodically upload this employee data to Qualtrics for use in your Employee Experience programs.
Qtip: For information on general limits that apply to ETL workflows, see Workflow Limits. For any task-specific limits, refer to the information on this page.
Attention: The file path must follow S3 object key naming guidelines.
Before You Get Started
Before you get started extracting data from Amazon S3, take the following considerations into account:
- What do you want to do with your data? Take a look at the available loader tasks for a list of options.
- Conversational data: If you plan to use this task to extract chat, email, or call transcript data, see Extracting Conversational Data from Files.
- Do your files fit a consistent format? For example, files you hope to import in the same workflow should have the same headers / columns / fields, even if the values differ.
Example: You set up a workflow to regularly upload contacts from Amazon S3 to XM Directory. Every file has columns for Firstname, Lastname, Email, Phone, UniqueID, and Location.
Example: You set up a workflow to regularly upload chat support transcripts to Qualtrics for analysis. Your chat files need to be formatted exactly the same as the example file provided.
Connecting Qualtrics to AWS
S3 Permission Required for an IAM Role
IAM roles must have the following S3 permissions to connect their AWS account. For more details on S3 access management, see AWS’s documentation.
- s3:DeleteObject
- s3:GetObject
- s3:ListBucket
- s3:PutObject
- s3:AbortMultipartUpload
- s3:ListMultipartUploadParts
Example: Below is a sample role policy. For the action “s3:ListBucket”, the associated resource should point to an entire bucket. There can’t be a trailing slash nor wildcard after the bucket name.
{"Version": "2012-10-17","Statement": [{"Effect": "Allow","Action": ["s3:ListBucket"],"Resource": ["arn:aws:s3:::s3bucketname"]},{"Effect": "Allow","Action": ["s3:DeleteObject","s3:GetObject","s3:PutObject","s3:AbortMultipartUpload","s3:ListMultipartUploadParts"],"Resource": ["arn:aws:s3:::s3bucketname/QualtricsPrefix/*"]}]}
Example: Below is a sample trust policy:
{"Version": "2012-10-17","Statement": [{"Effect": "Allow","Action": "sts:AssumeRole","Principal": {"AWS": "604163242721"},"Condition": {"StringEquals": {"sts:ExternalId": "60ebef7bdexternalidc38d36bc2a6b75cd14f02c73"}}}]}
S3 Resources Required for an IAM User
IAM users must have the following S3 resources to connect their AWS account. For more details on S3 access management, see AWS’s documentation.
- arn:aws:s3:::bucket-name/*
- arn:aws:s3:::bucket-name
Adding an AWS Account
These steps cover how to connect your personal Qualtrics account to an Amazon Web Services (AWS) account.
Qtip: See more on AWS access keys, secret keys, and and IAM policy on AWS’s documentation.
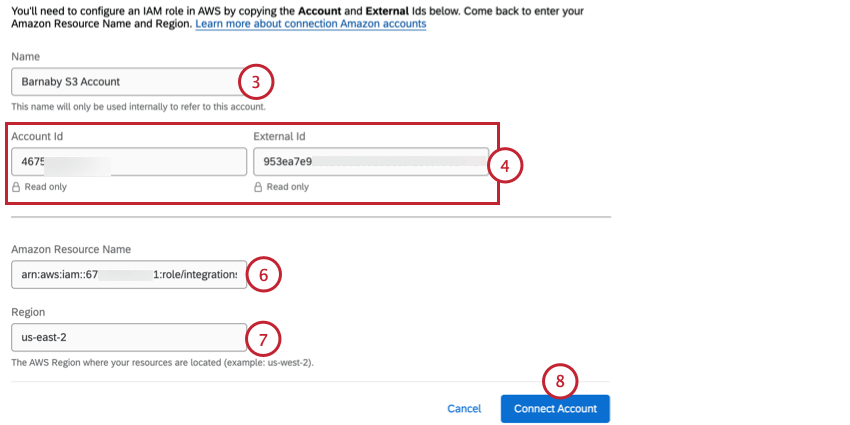
Qtip: Note that if you use Qualtrics’s FedRAMP datacenter, you must also use a FedRAMP AWS region.
Qtip: The ability to authenticate using an access key and secret key has been deprecated. You can still view and use past credentials, but they can no longer be edited. All new credentials must be set up using an AWS IAM Role as described above.
Connecting an Account as a Brand Administrator
As a Brand Administrator, you can add an AWS account to share with multiple users in your license. To add a shared AWS account, go to the Extensions section of the Admin tab and search for the AWS extension you want to add an account for.
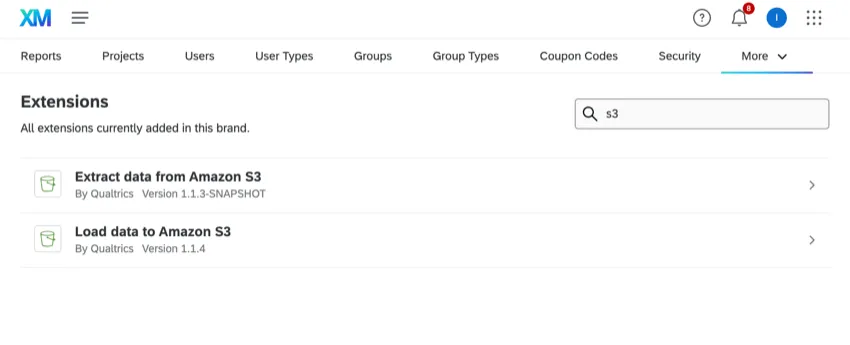
Once you’ve selected your extension, follow the steps above for adding an AWS account. You can also choose which users have access to the account.
Setting Up an Extract Data from Amazon S3 Task
Qtip: There is a 5GB file size limit.
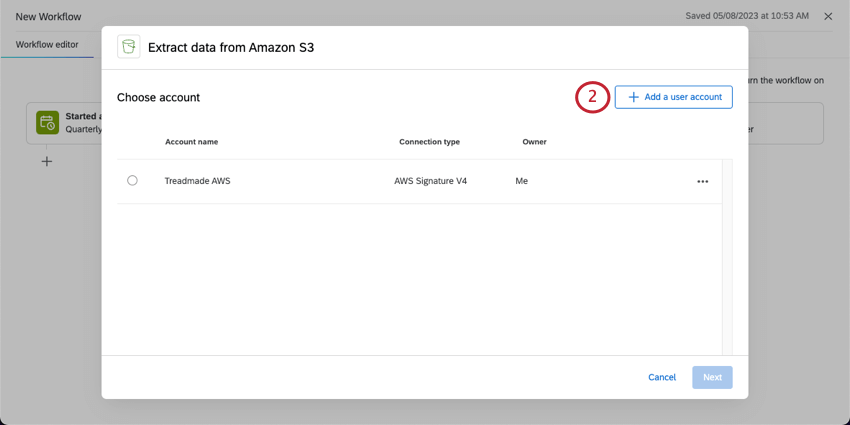
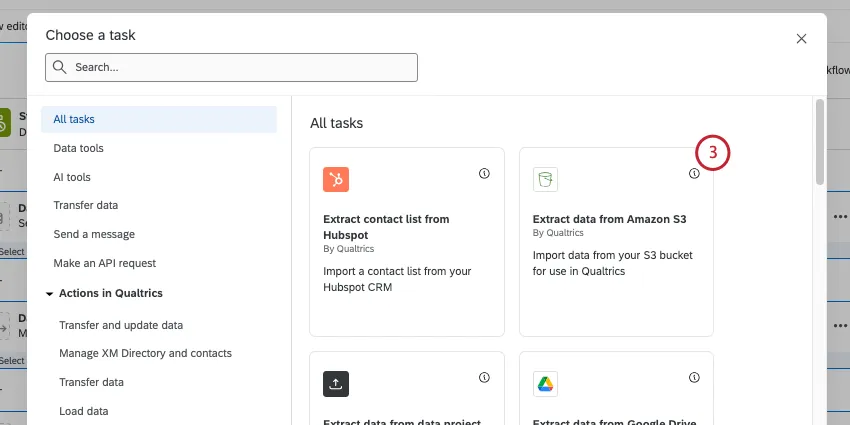
Select Data source (ETL extractor).
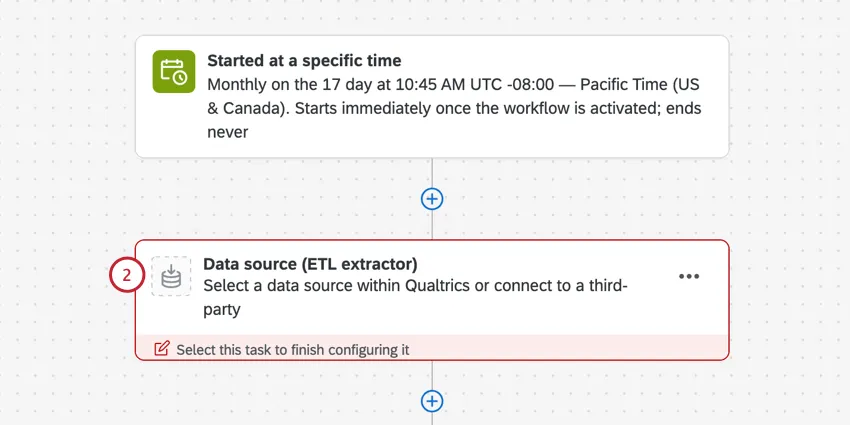
Select Extract data from Amazon S3.
Choose the Amazon Web Services (AWS) account to extract files from. Any accounts added by Brand Administrators, as well as accounts you’ve added yourself, will be listed here.

If you want to add new AWS account credentials, click Add a user account and follow the steps in the connecting an AWS account section.
Click Next.
Enter the S3 bucket name you’d like to pull data from.
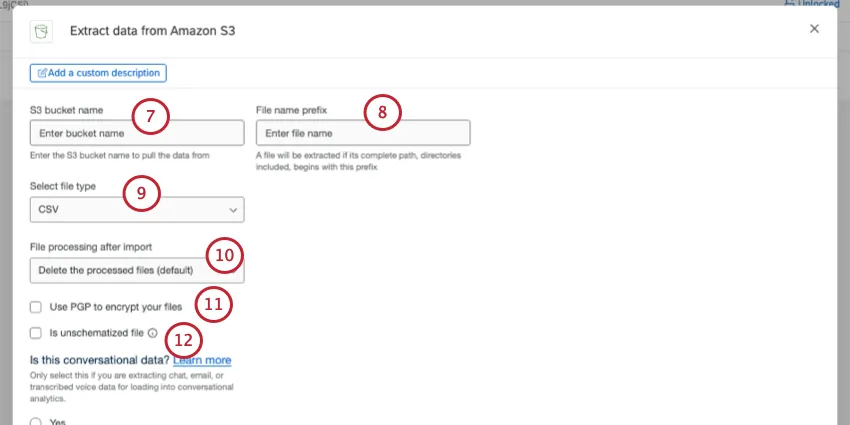
Qtip: For more bucket naming guidelines, see the AWS documentation.
Type a File name prefix. All files with your specified prefix will be processed. If the s3 role only allows access to a specific S3 bucket prefix, you must include the prefix here.
Select a file type to process. You can choose from the following:
- CSV (comma separated values)
- TSV (tab separated values)
- JSON (JavaScript object notation)
Under File processing after import, choose between the following:
- Delete the processed files (default): Delete files from AWS after they are extracted.
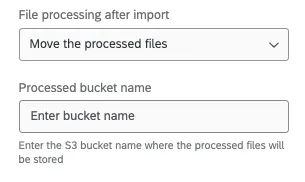
Move the processed files: Move the processed files to another bucket. If you choose this option, you’ll be asked to enter the name of the S3 bucket where you’d like processed files to be stored.
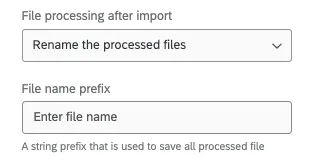
Rename the processed files: Rename files after they’re processed. If you select this option, you’ll be asked to provide a prefix you’d like to be added to file names after they’re processed.
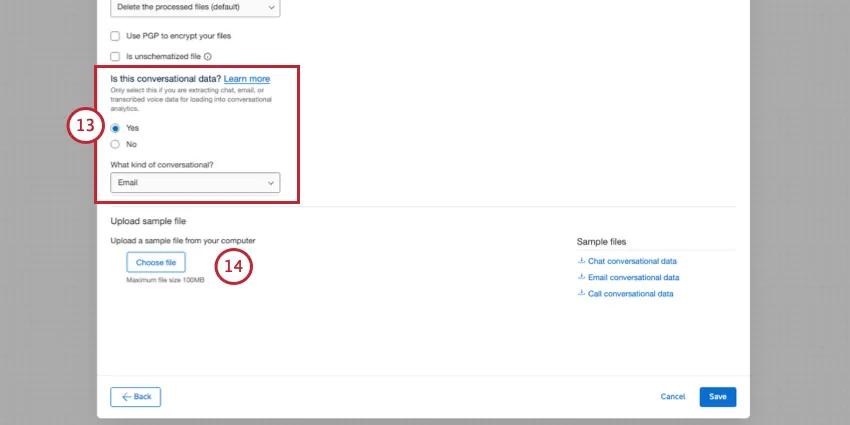
Select this option if you want to Use PGP to encrypt your files.
If desired, select Is unschematized file.
Qtip: A file is considered “unschematized” if it doesn’t follow the standard required formatting. For example:
- The file is an unsupported file type (see step 9 for supported types).
- The file is missing headers.
- The file has other formatting errors.
Qtip: Selecting “Is unschematized file” removes the file type, delimiter, conversational data, and sample file settings.
Set whether your data is conversational or not, and then set it to chat or email. To learn more, see Extracting Conversational Data from S3.
Qtip: Setting the task to conversational data removes the file type and delimiter settings.
Under Upload sample file, add a sample file that has the same headers as the files that will be processed whenever the workflow runs. Click Choose file to upload the file from your computer.
Qtip: If you’d like, you can download the sample files in the task, or download the files in the Example Files section. The only supported file encoding format is UTF-8. Some spreadsheet softwares save files as Unicode UTF-8, which is different from UTF-8, if you are getting unexpected errors. Please ensure that you are exporting in UTF-8 format and not Unicode UTF-8. See CSV & TSV Upload Issues for more troubleshooting steps.
Verify fields in the file. The table will display the column headers (which represent the individual fields) and their values for the first 2 rows of data.
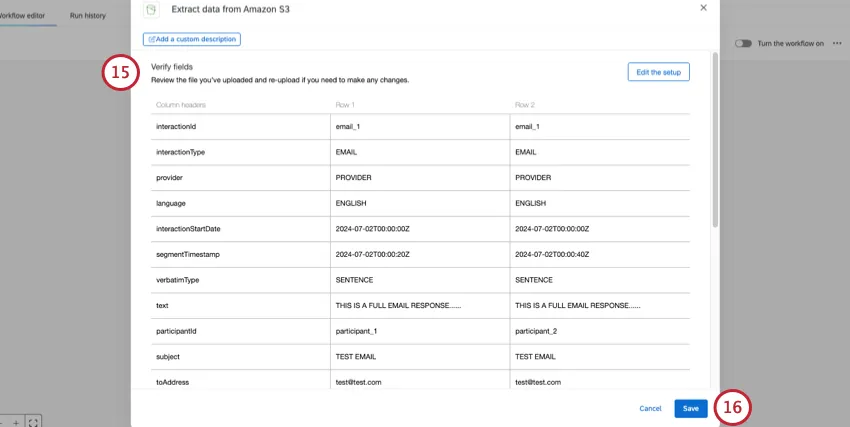
Qtip: If you want to upload a different file or make other changes, click Edit the setup.
When you’re finished, click Save.
Finish building your ETL workflow. When you choose a loader task, you’re deciding the destination of the data you extracted. See available loader tasks for a list of options.

Example Files
Right in the product, we provide sample files you can fill out or use as an example when you format the files you’ll ingest with this task.
Below is the full list of example files. Click on a file name to download it.
That's great! Thank you for your feedback!
Thank you for your feedback!