

Managing Dashboards within a Project (CX)
What's on this page
About Managing Dashboards within a Project
When you create a CX Dashboards project, you will be transported to the Dashboards tab. Here, you can create multiple dashboards that fit within the larger project.
Your Dashboards will be displayed within the Active tab of your project. Dashboards that are deleted will be moved to the Recently Deleted tab. For more information, see Restoring Recently Deleted Dashboards.
Qtip: Only project administrators will be able to perform the actions described on this page. For help identifying project administrators, see the linked page.

Qtip: This page is referring to managing dashboards in CX Dashboard projects and BX Dashboards only.
Creating a Dashboard Inside a Project
To generate your first dashboard:
Click the Dashboards tab.
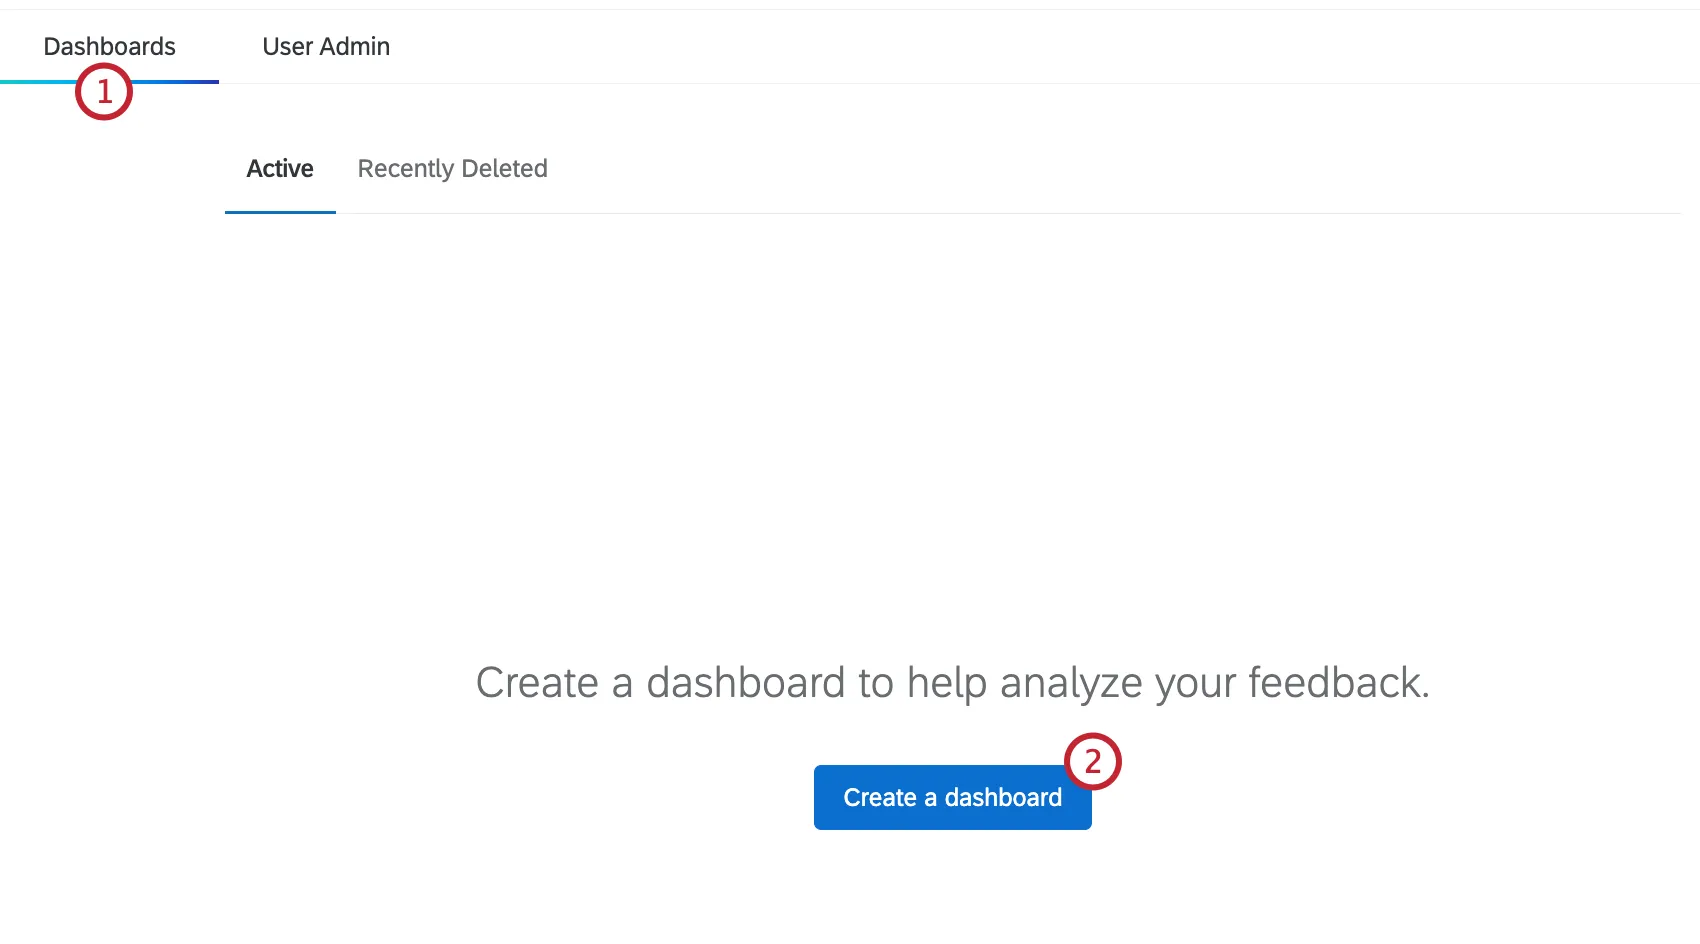
Click the Create Dashboard button.
Qtip: The response count will read “Data Unavailable” if the dashboard hasn’t been accessed in the past 30 days.

Name your dashboard.
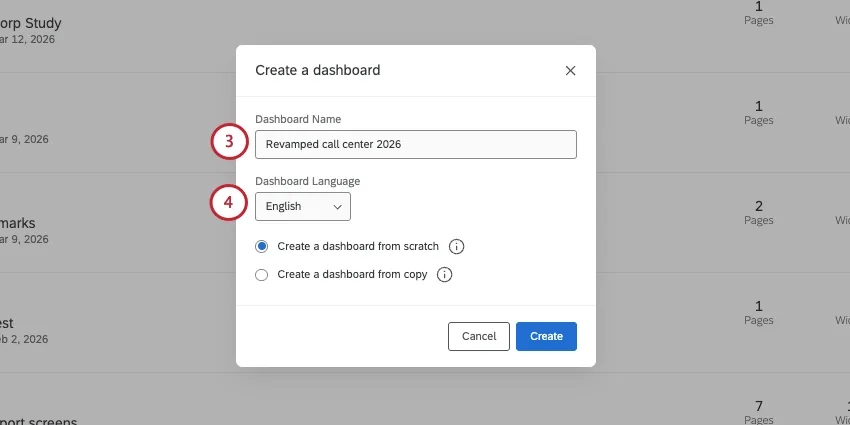
If you're creating a dashboard from scratch, set the Dashboard Language. This is the default language of the dashboard.
Attention: A dashboard's default language cannot be changed. Keep in mind you can always add translations as needed.
Qtip: If you're creating a dashboard from a copy, the new dashboard will use the same default language as the original.
Select from the following:
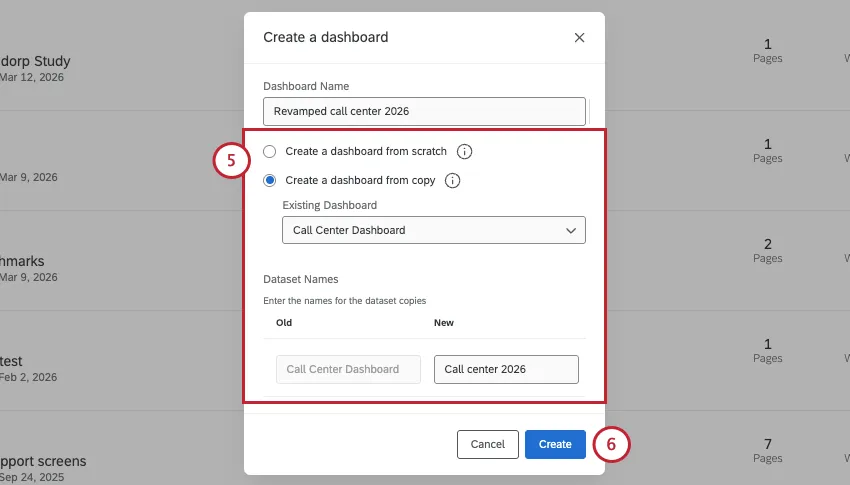
- Create a dashboard from scratch: Start from a blank dashboard with no dataset selected. When you choose this option, the first thing you’ll be asked to do after saving is map a source to the dashboard.
Create a dashboard from a copy: Select a dashboard whose widgets and settings you would like to copy. You’ll also be creating a copy of its dataset. Set a name for the dataset you’re creating.

Attention: You can only copy a dataset 10 times.
Click Create.
Qtip: Once a dataset is created, you can view it on the Data page. Here, you can also see every dashboard your dataset is connected to and make edits.
Navigating Between Dashboards in a Project
To navigate between multiple dashboards in a project:
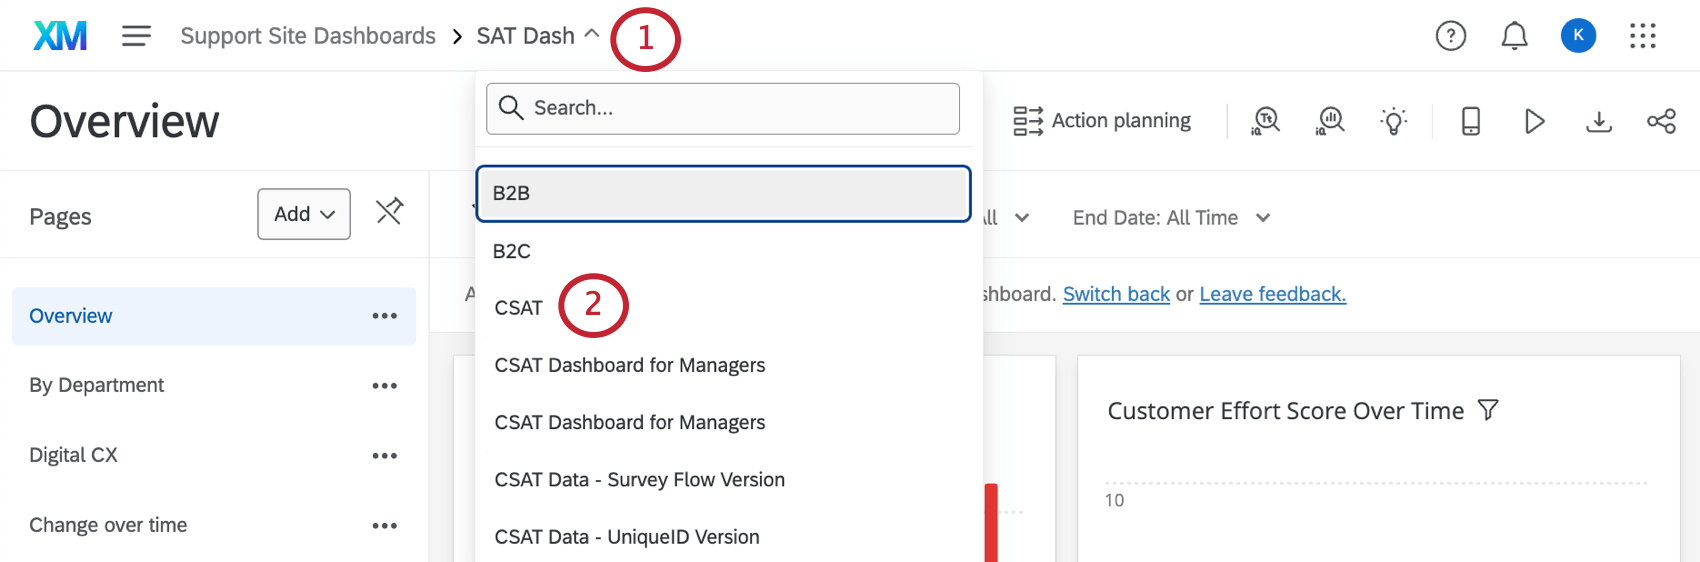
You can also click the name of the project in the breadcrumb bar to navigate back to the Dashboards tab of the project.

From this tab, you will see a list of dashboards in the project, sorted by when they were last modified. Click anywhere on a dashboard to go inside and start adding and editing widgets.
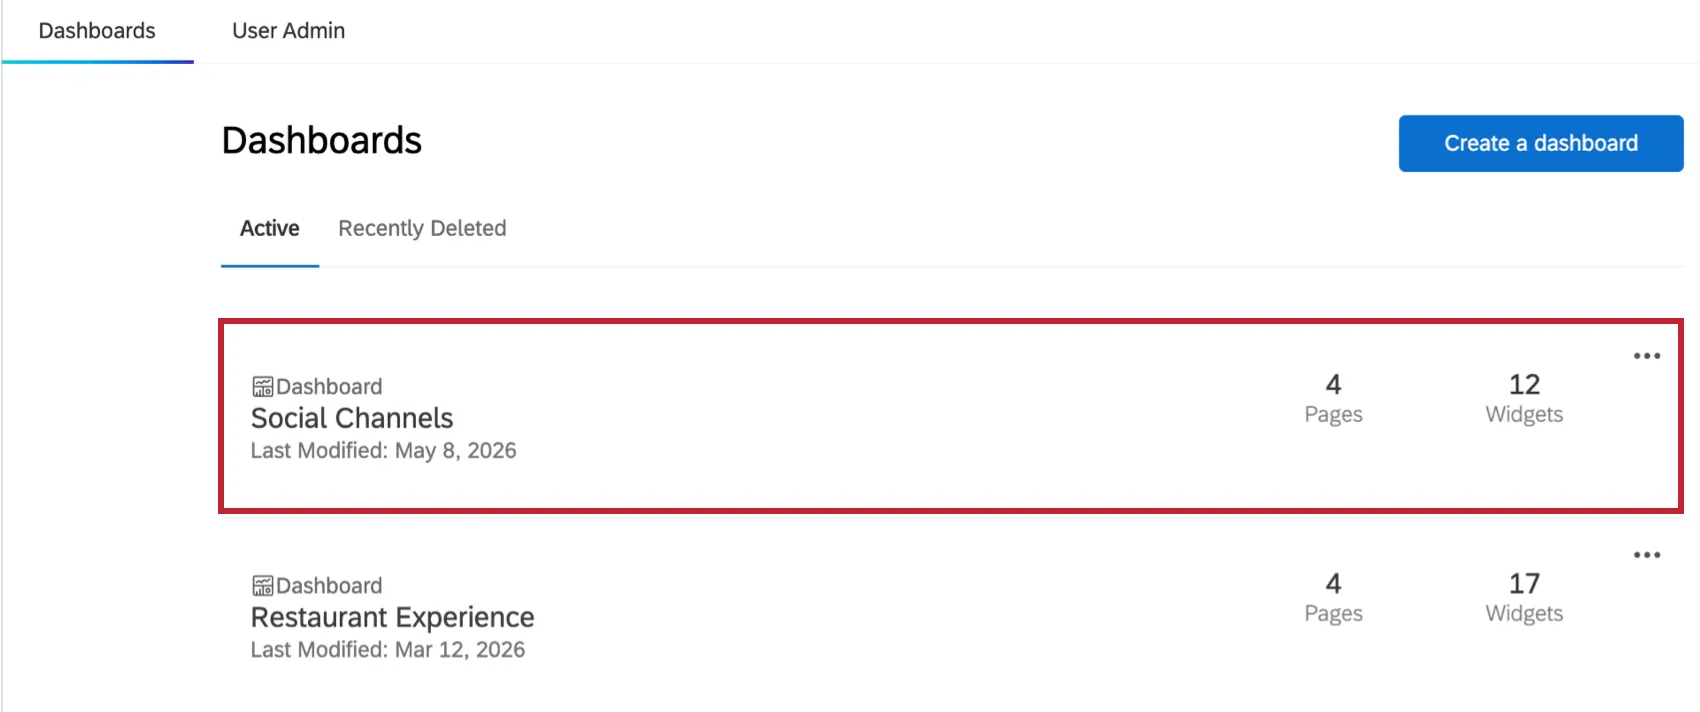
Renaming Dashboards in a Project
To change the name of a dashboard:
Click on the dropdown to the right of the dashboard that you wish to rename.
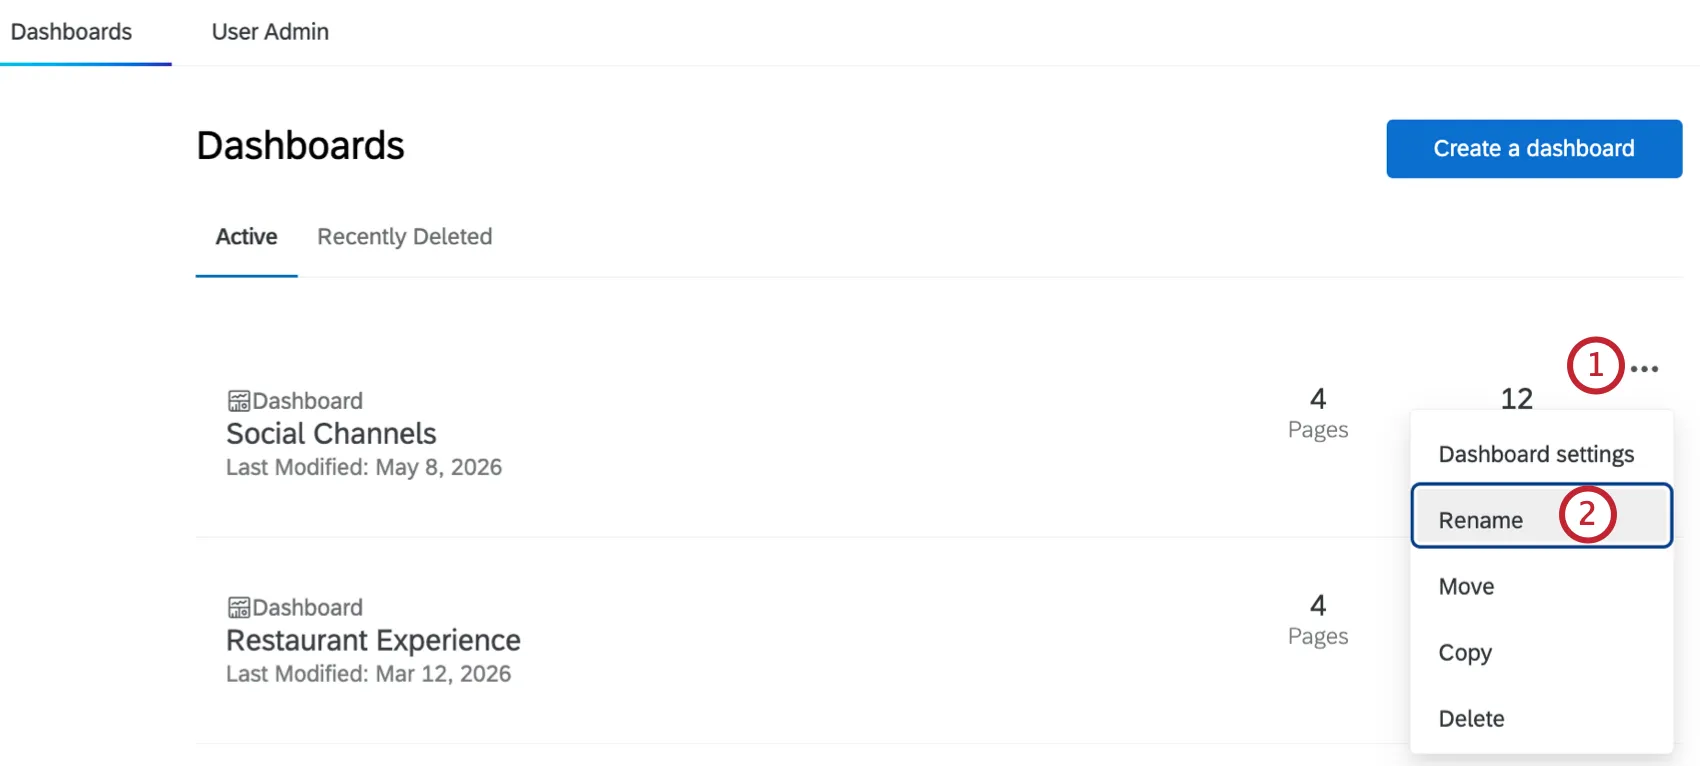
Select Rename.
Enter a new name for the dashboard.
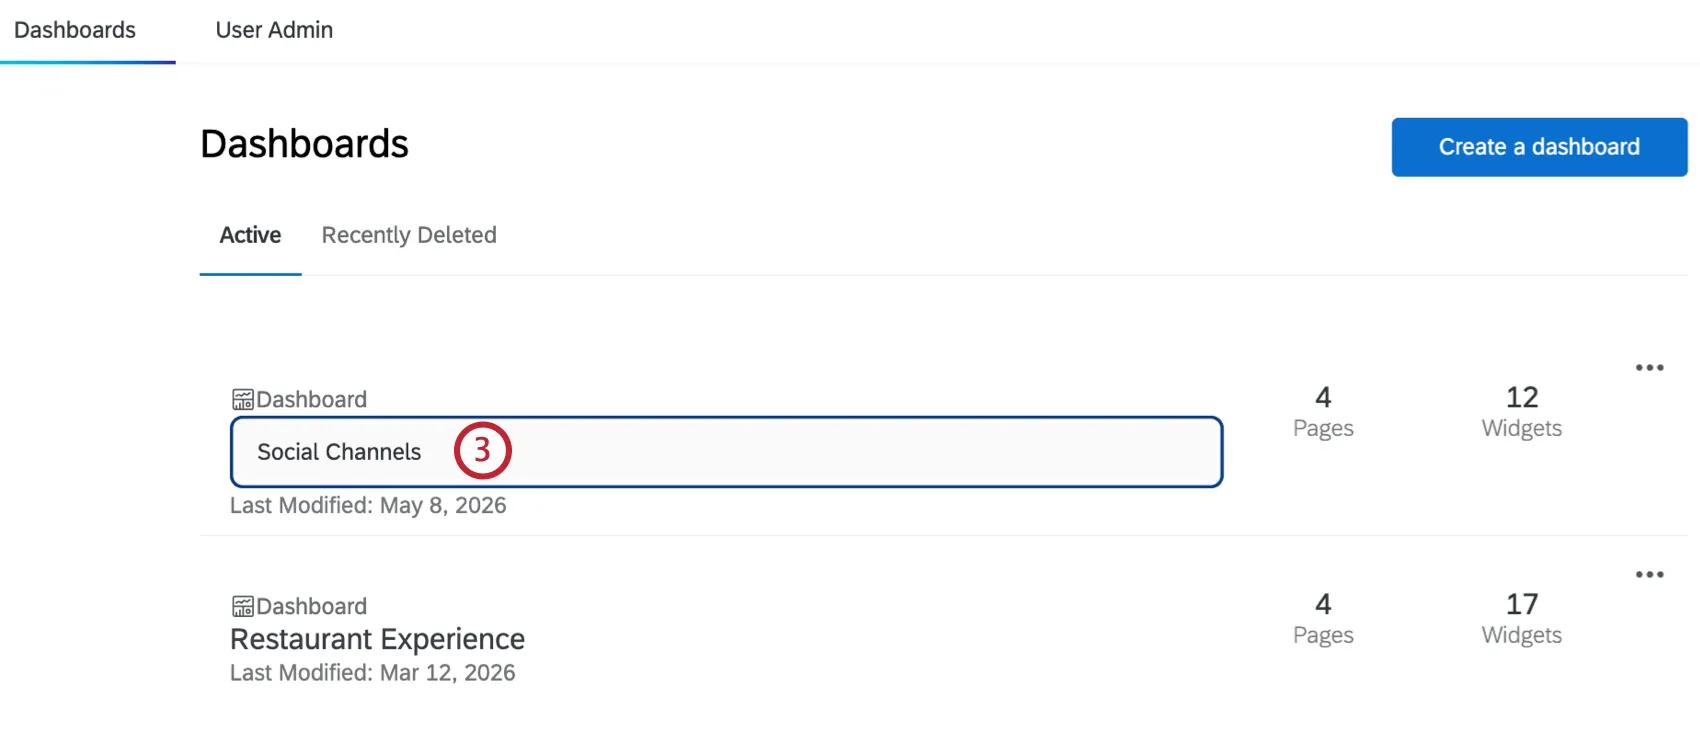
Press Enter on your keyboard, or click out of the field, to save your changes.
Moving Dashboards to Different Projects
You can move a dashboard from 1 project to another. This can be helpful in cases where you’ve created different dashboards to be accessed by different project administrators, or simply for organizational purposes.
Click the dropdown arrow to the right of the dashboard you wish to move.
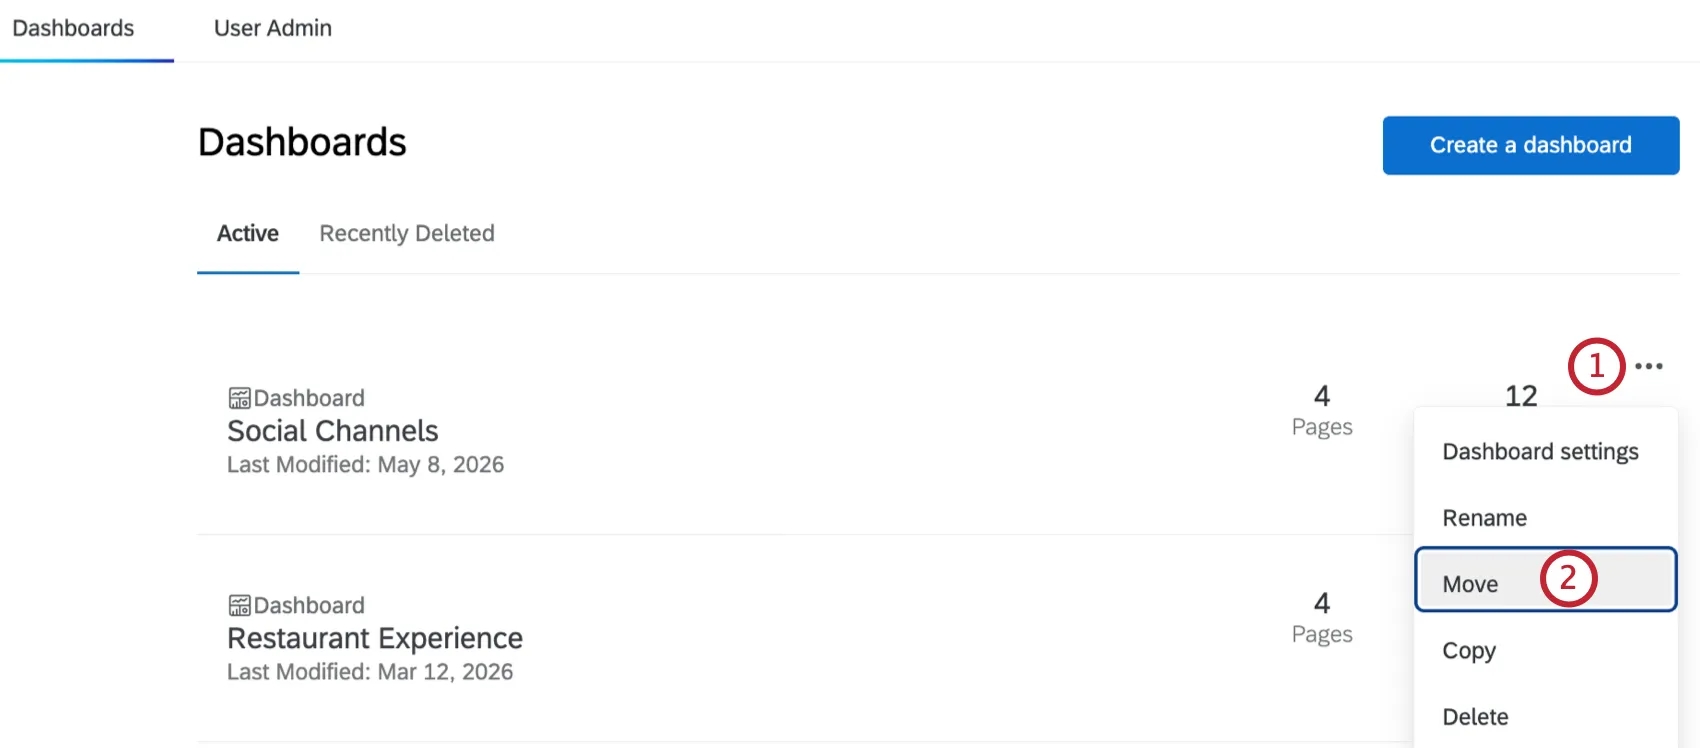
Select Move.
Click the project you’d like to move the dashboard to. You will only see projects you are a project administrator over.
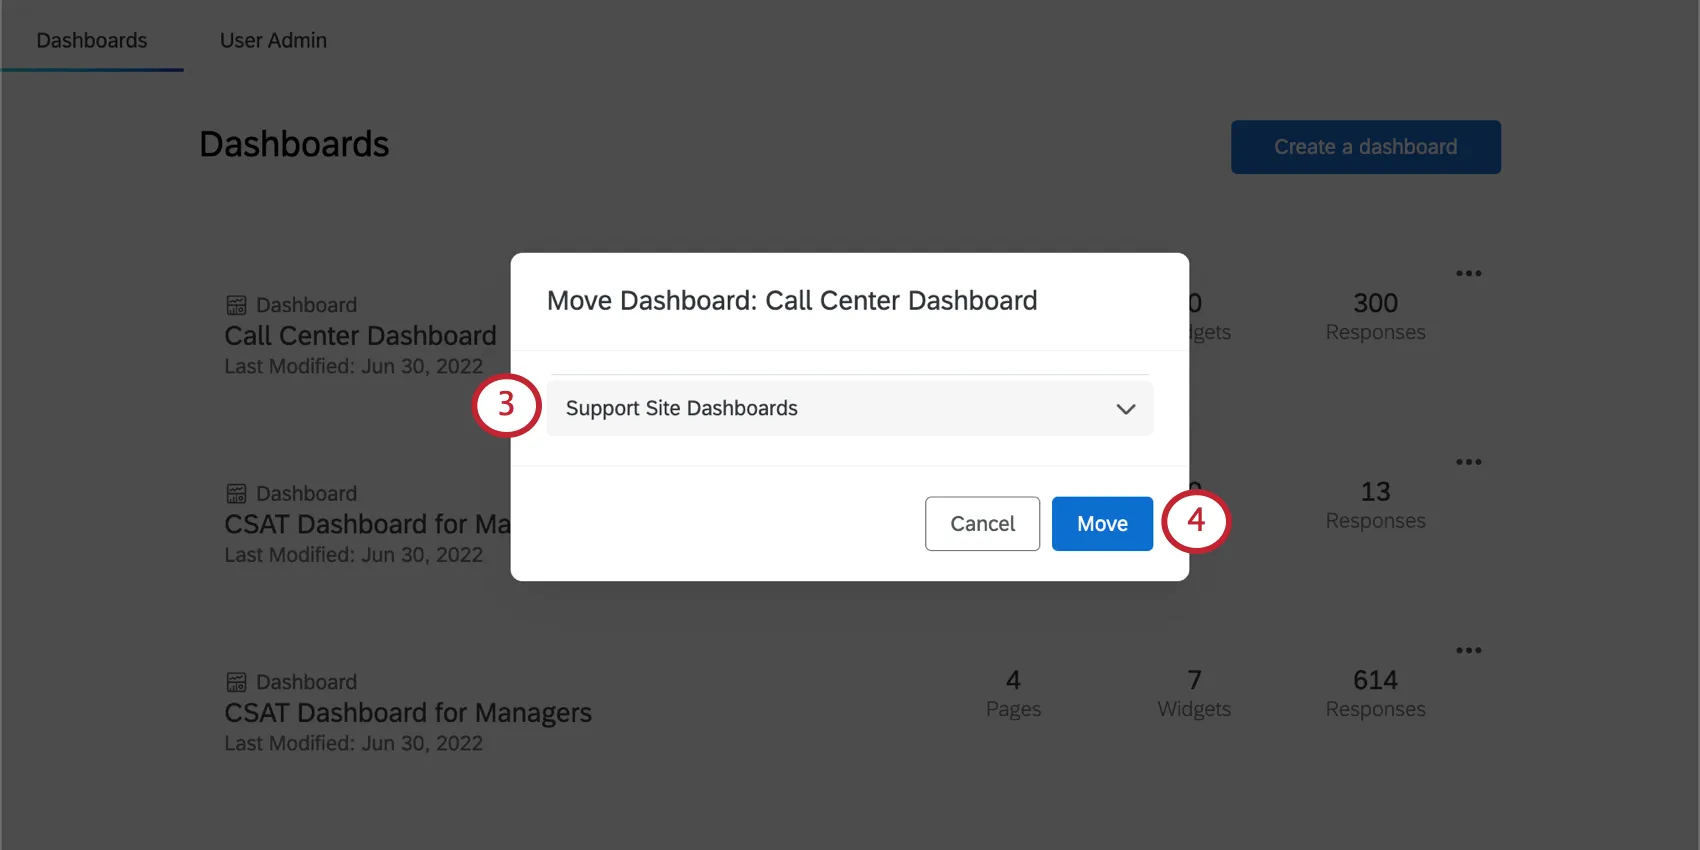
Click Move to confirm your selection.
Copying Dashboards within a Project
You can copy an entire dashboard – settings, widgets, and all. This can be useful if you want to test edits without changing a live dashboard, if you need to troubleshoot with support, or if you want to use an older dashboard as a template for a new one you are building.
Note that this duplicate dashboard you create will be located in the same project as the dashboard you copied, unless you move it afterwards.
You won’t be able to copy a dashboard if it has an org hierarchy and you’ve reached your limit of allowed hierarchies. Learn more about CX hieraarchies.
Attention: Benchmarks are not copied and will not appear in your duplicate dashboard.
Attention: Text iQ topics are not copied and will not appear in your duplicate dashboard. To copy topics over, export a JSON from your original dashboard, then upload it into the copied dashboard’s Text iQ page. Additionally, any Text iQ widgets will need to be deleted and rebuilt.
Click the dropdown arrow to the right of the dashboard you want to copy.
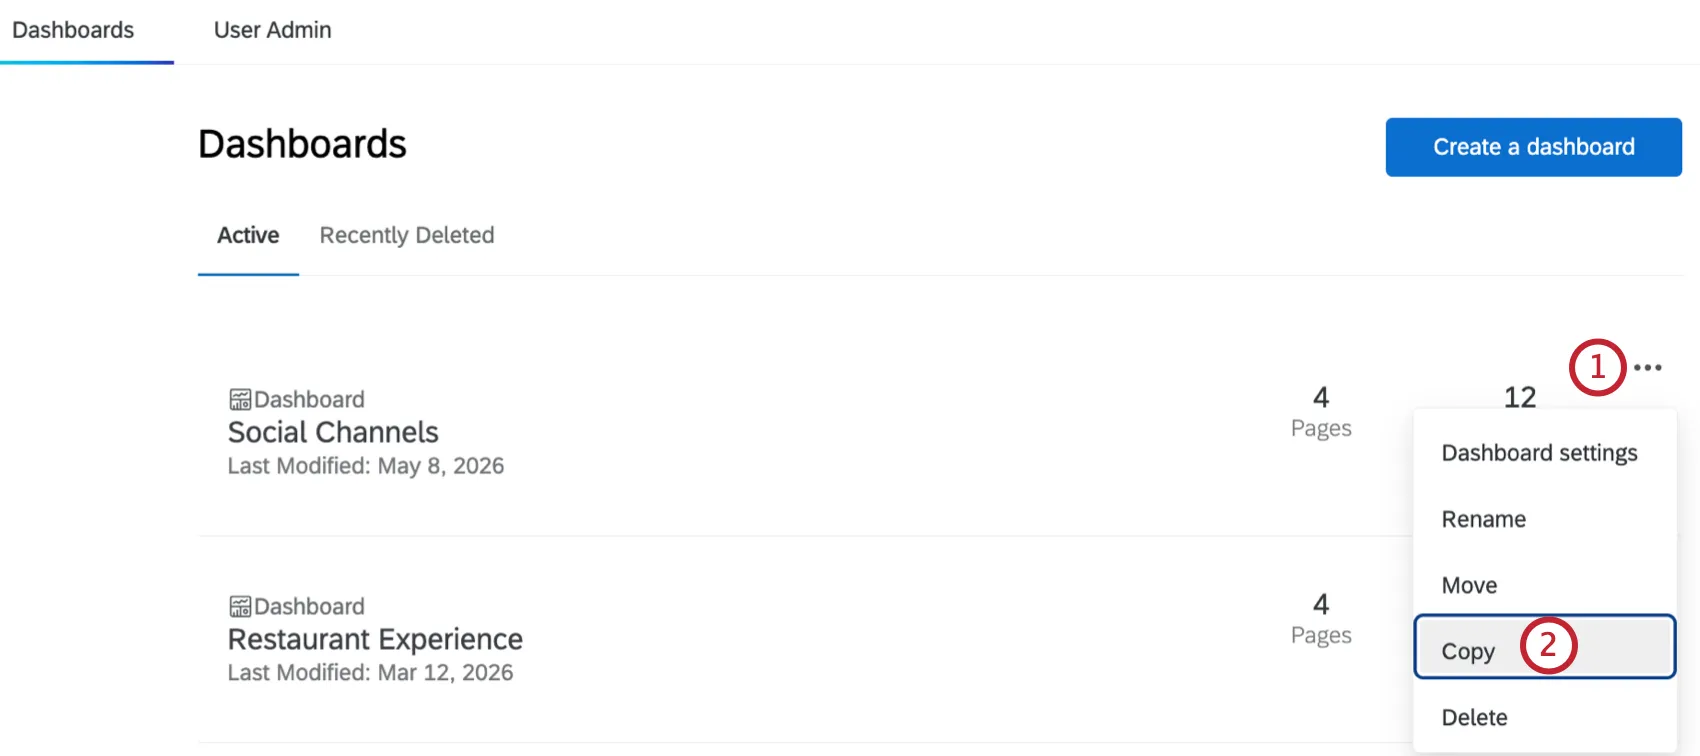
Select Copy.
Name your duplicate dashboard.
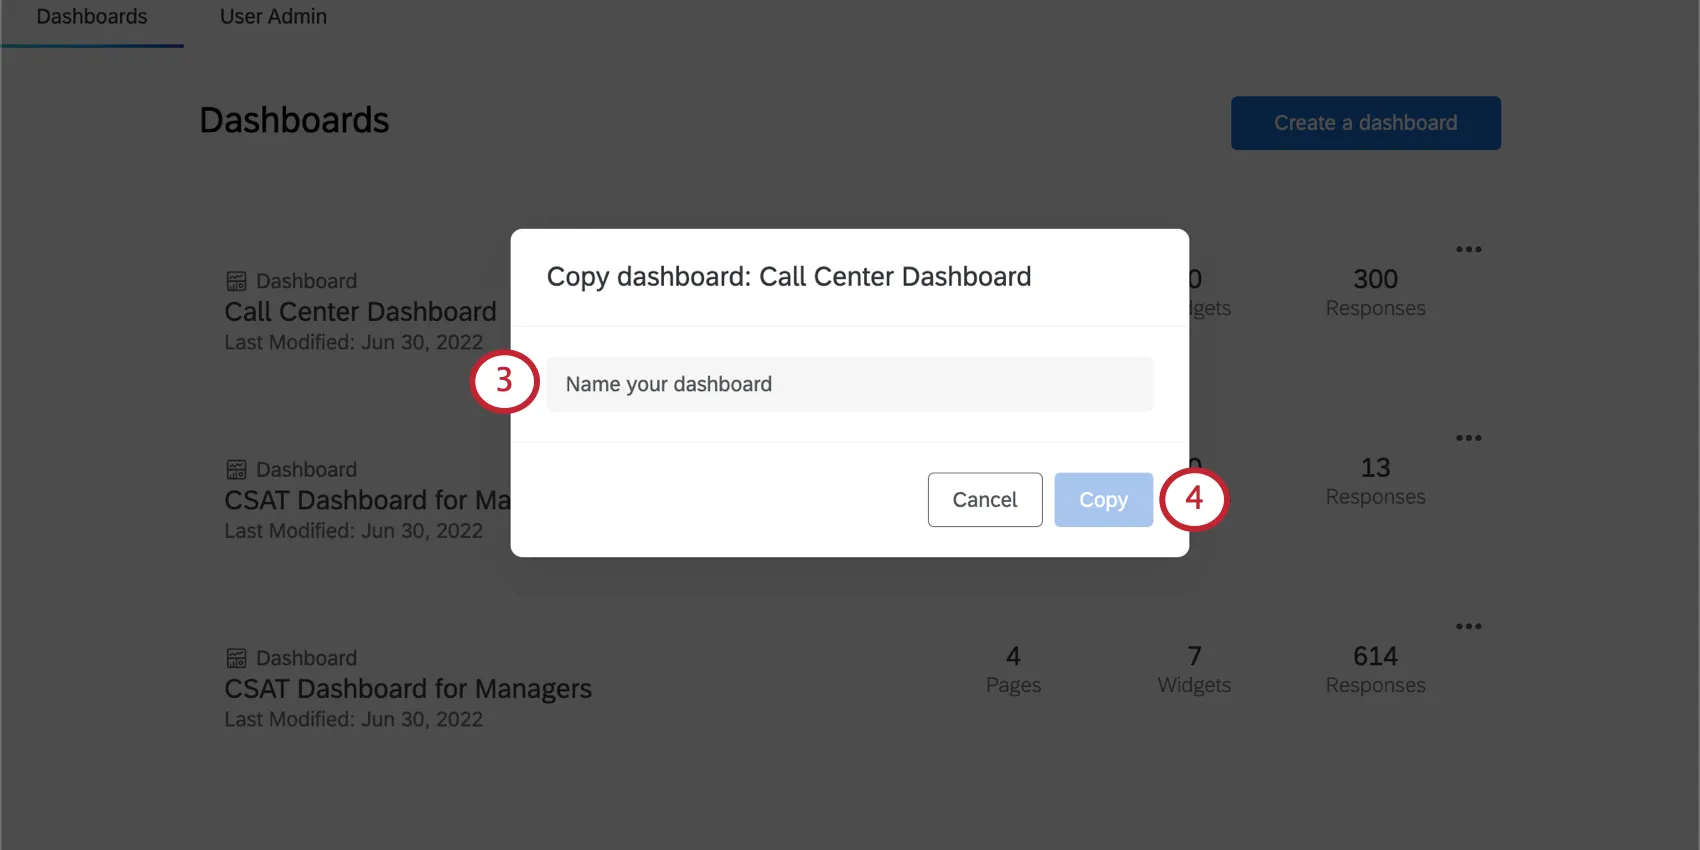
Click Copy.
Dataset Utilization Limits
Our data platform imposes a limit on the number of times a single data source can be used in active datasets. Currently, a single data source can only be in 50 active datasets to guarantee timely data processing. For external data, the limit is 5 active datasets. These limits are subject to change over time as our platform and features grow. If your data source reaches this utilization limit, an error dialog is displayed while adding the source in the data mapper or copying the dashboard.
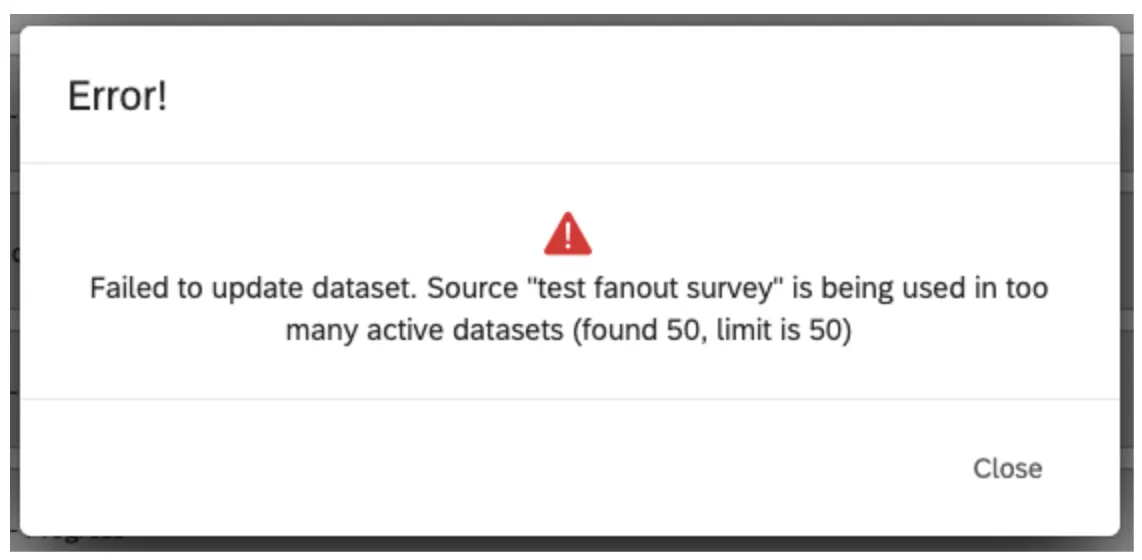
Qtip: For example, a survey used in 2 dashboards creates 3 active datasets (1 for Data & Analysis in a survey, 2 for the dashboards). An active dataset is a dataset that has been accessed within 30 days.
Deleting Dashboards from a Project
Attention: Deleted dashboards can be restored for 30 days after they are deleted. After 30 days, the dashboard and all of its resources are permanently deleted and cannot be recovered. See Restoring Recently Deleted Dashboards for more information on restoring deleted dashboards.
To remove unwanted dashboards:
Click the dropdown arrow to the right of the dashboard you wish to delete.
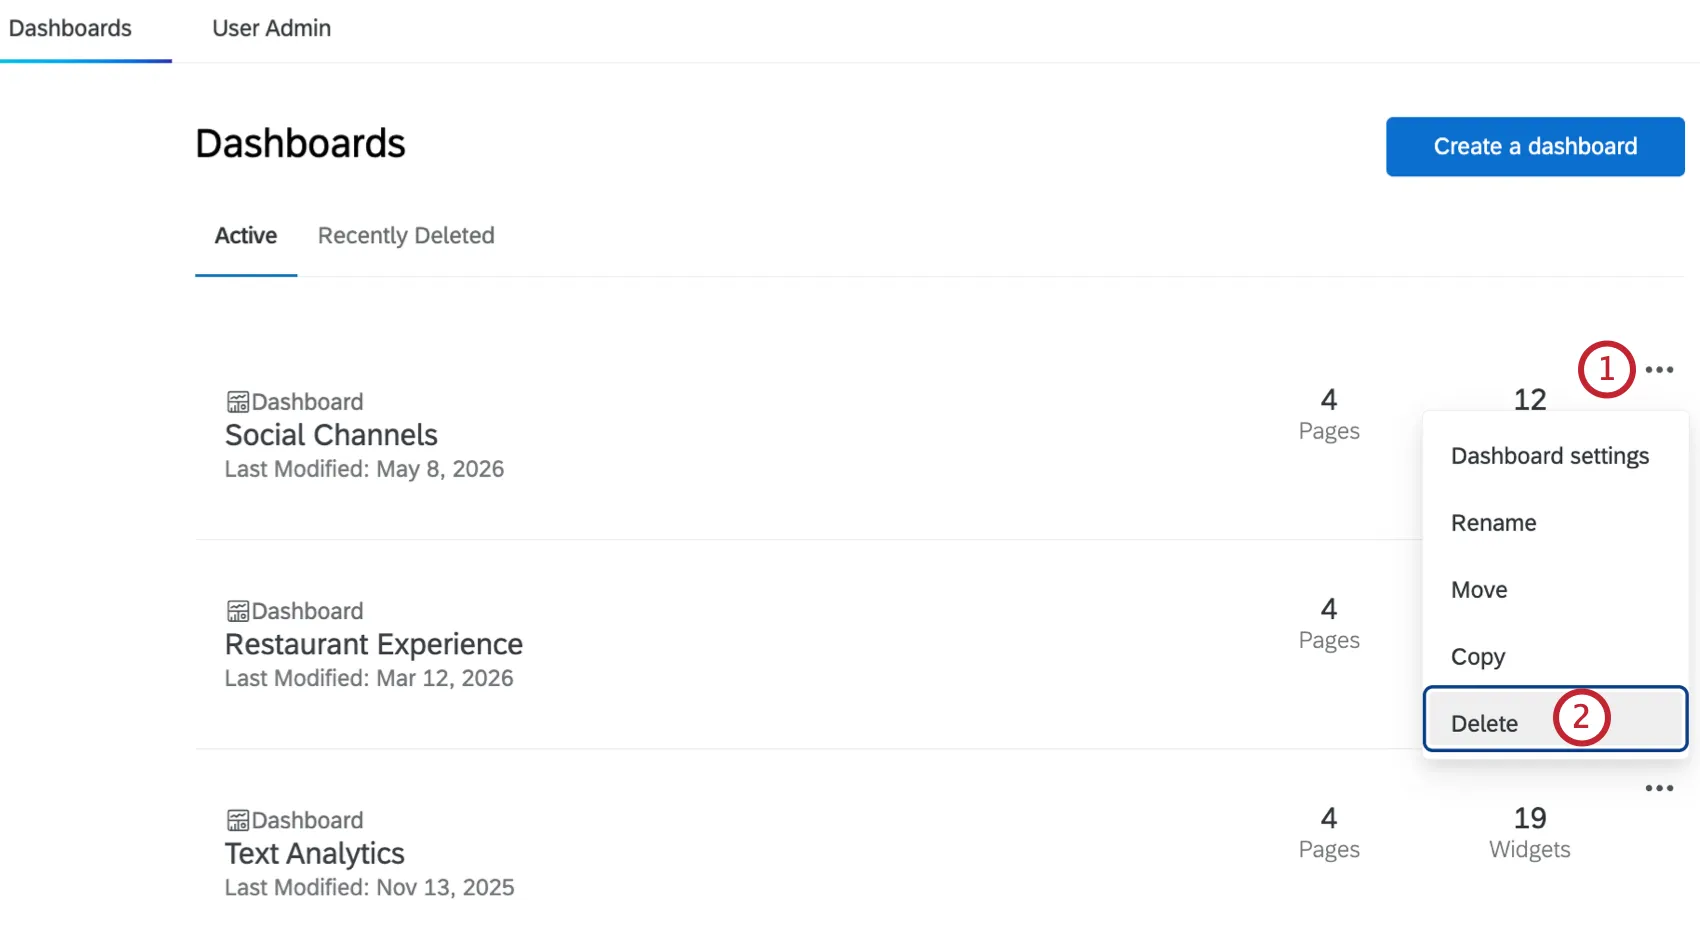
Select Delete Dashboard.
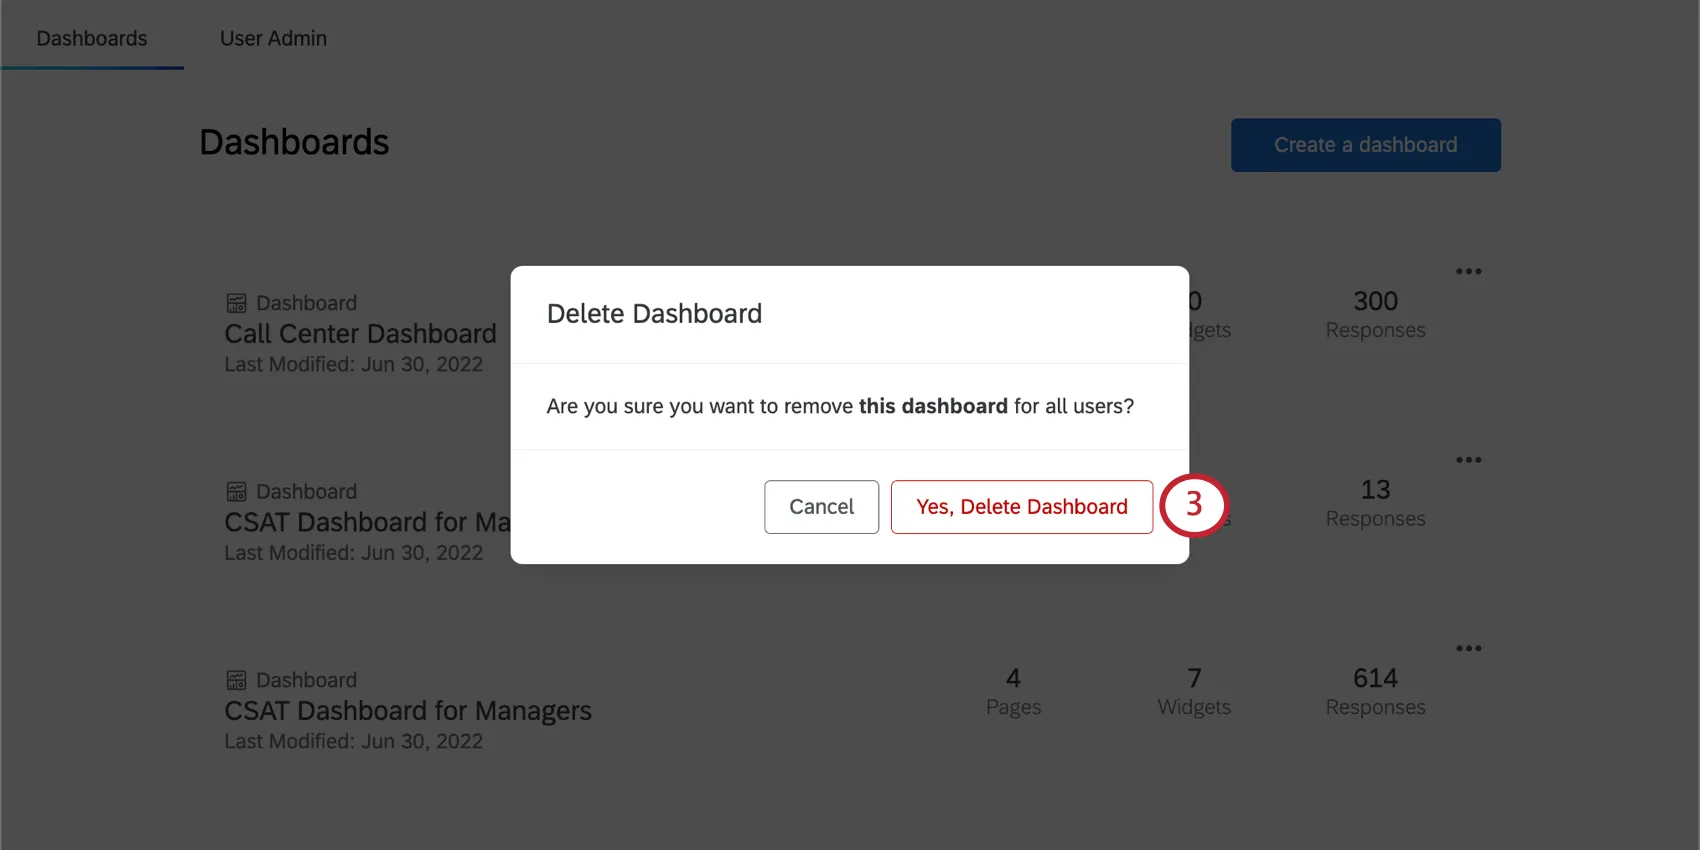
Confirm that you want to delete the Dashboard by clicking the Yes, Delete Dashboard verification button.
Restoring Recently Deleted Dashboards
Dashboards that have been deleted can be restored for 30 days after deletion from within the Recently Deleted tab. After 30 days, the dashboard and all of its resources are permanently deleted and cannot be recovered. After a dashboard is deleted it cannot be viewed, and scheduled exports will be suspended.
Qtip: Only project administrators can view and restore dashboards in the Recently Deleted tab.
Attention: Dashboards cannot be restored if the project they belong to has been permanently deleted.
To restore a recently deleted dashboard, follow the steps below:
Click the Recently Deleted tab.
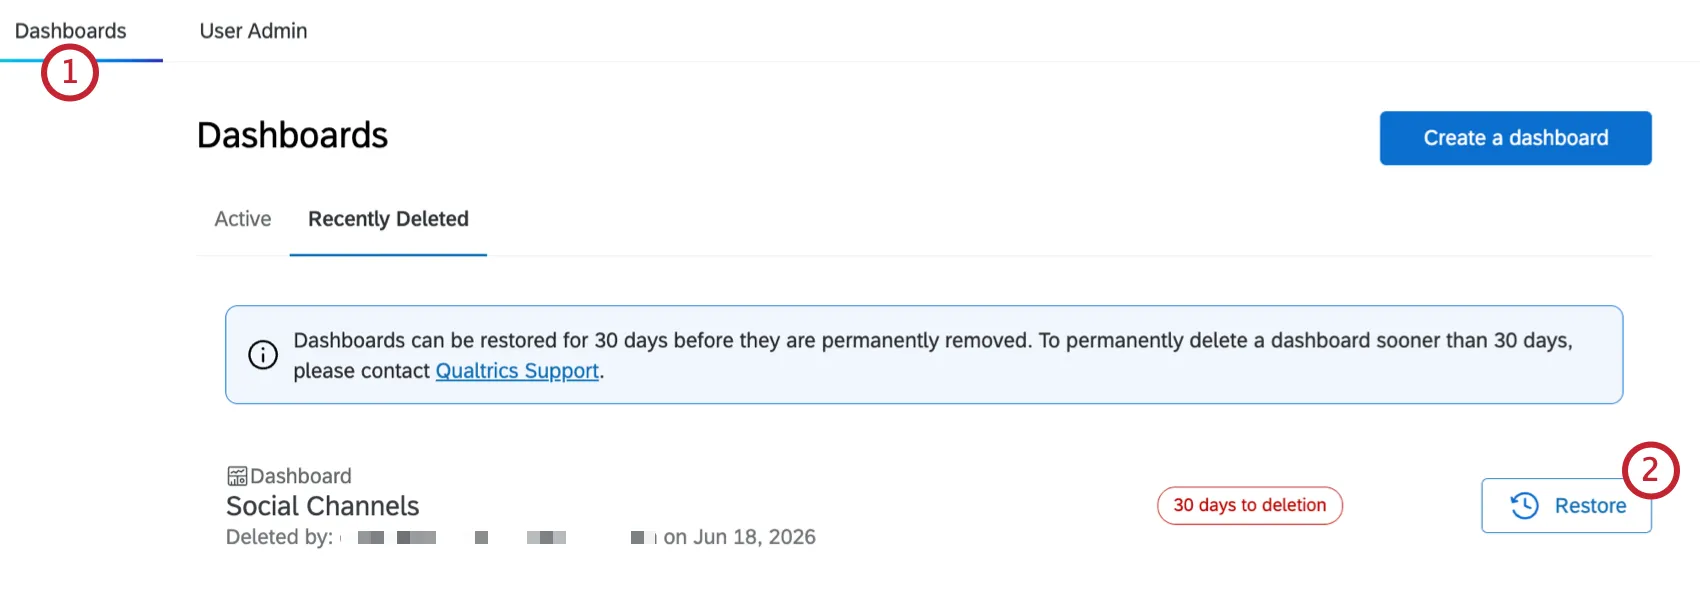
Locate the dashboard you want to restore and click Restore Dashboard. Each dashboard displays how many days remain before it is permanently deleted, as well as the user within your brand that deleted it.
Review the confirmation message that appears, then click Restore Dashboard to confirm.
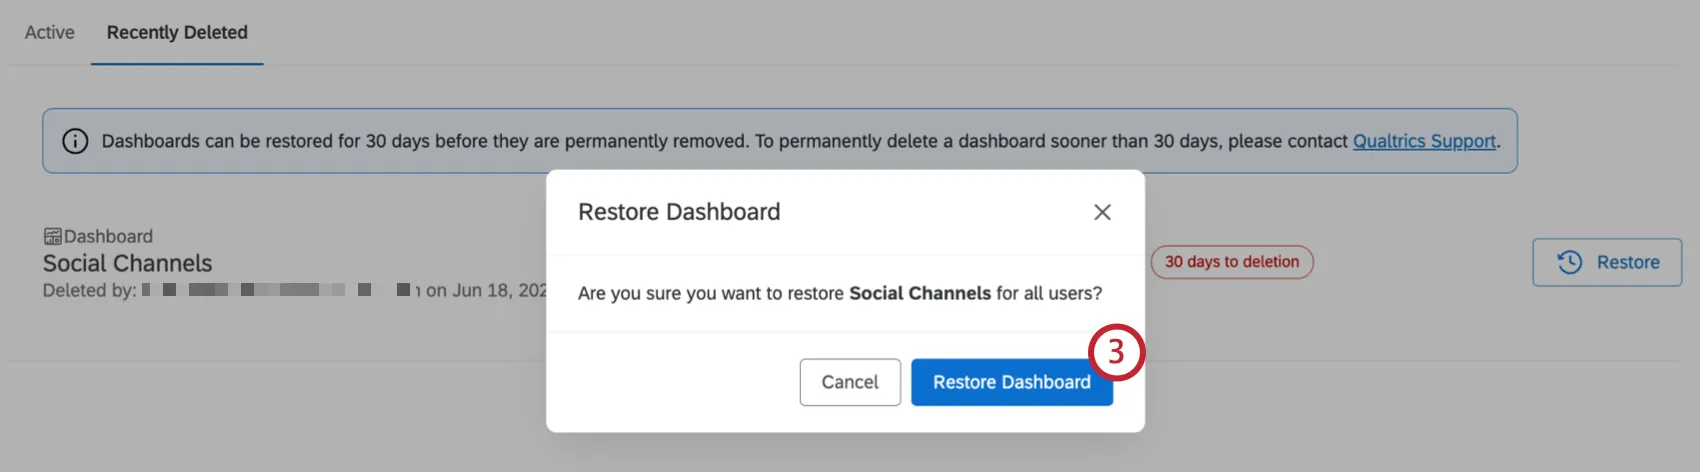
The dashboard will be returned to its original location in the project with its prior configuration intact. All data will still be connected, including any new data that came in while the dashboard was deleted, and all access permissions will be restored.
Attention: Datasets associated with a deleted dashboard cannot be reused until the dashboard is permanently deleted after 30 days. If you need to reuse a dataset sooner, restore the dashboard, then either modify it, or make a copy and delete the original. Alternatively, you can contact Qualtrics Support for help permanently deleting the dashboard.
Dashboard Settings Shortcut
When you click the dropdown next to a dashboard, you’ll see there’s an option called Dashboard Settings.
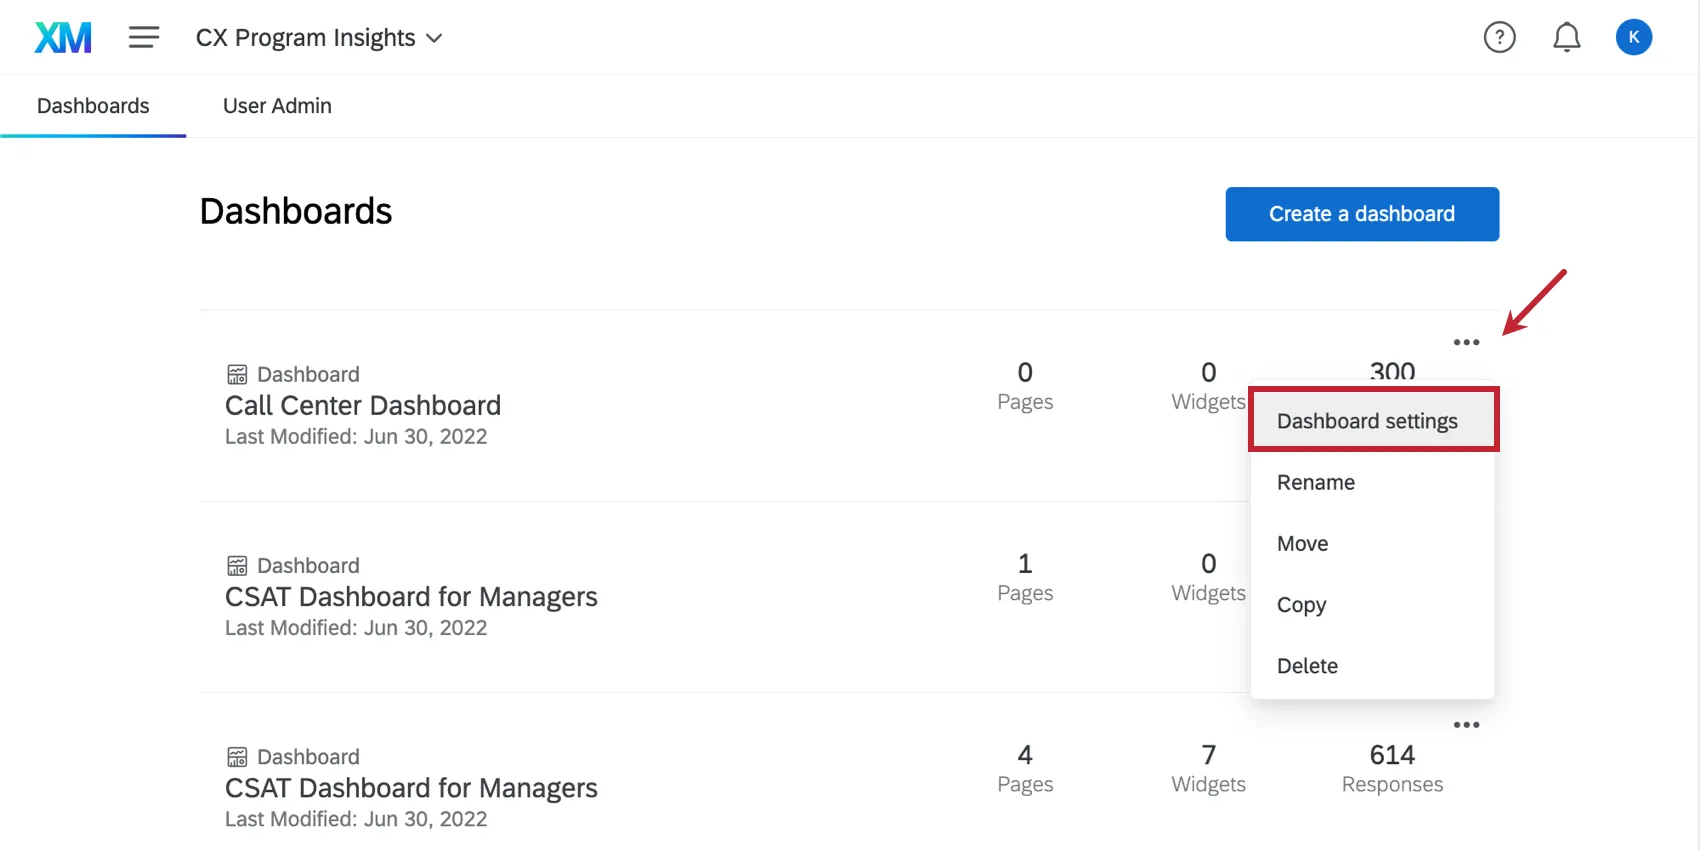
If you click this, it will take you to the Dashboard Data, where this dashboard’s source is mapped. From there, you can map the fields available to widgets in your dashboard. Please see the linked support page to learn more.
FAQs
Can Dashboards projects only be used for customer experience research?
Can Dashboards projects only be used for customer experience research?
That's great! Thank you for your feedback!
Thank you for your feedback!