
Schedule & Content (Pulse)
What's on this page
About Pulse Schedule and Content
In the Schedule and content tab, you can determine the schedule of your pulse surveys, the survey questions that should be asked every time, the messages you’d like to include with each pulse, and the shareable link for the pulse program.
Program Schedule
Attention: Whenever you need to make an update to the program schedule or sampling settings, you will have to temporarily stop the pulse program. When you stop the program, this will delete any future scheduled surveys that do not yet have responses collected. This is why it’s important to edit program survey templates rather than individual surveys, so edits to future surveys are preserved in the event you need to stop a program.
Select how often you want to send pulses to your participants.
Qtip: Pulses surveys can be sent to everyone, or you can invite participants over a number of pulse surveys to get survey data from a sample of your population each survey. When using participant sampling, each pulse survey is sent to participants in roughly equal batches, until everyone who is eligible to receive the pulse has been invited.
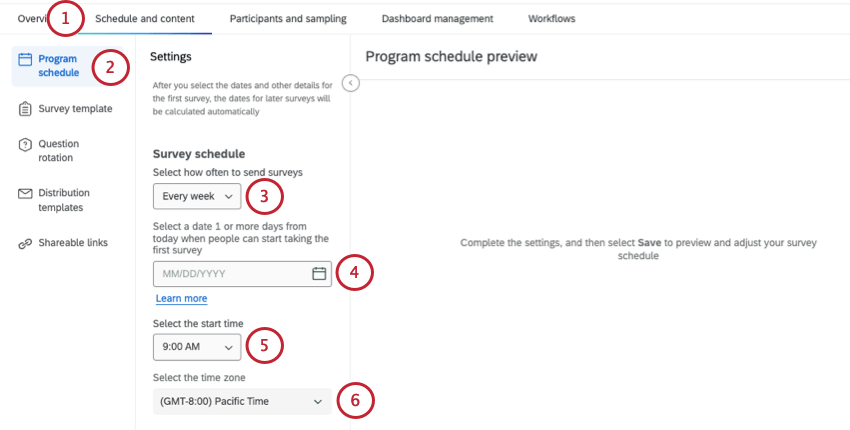
Qtip: You must choose a date at least 5 days from today. This gives time for participants to be added to the pulse survey before it is distributed.
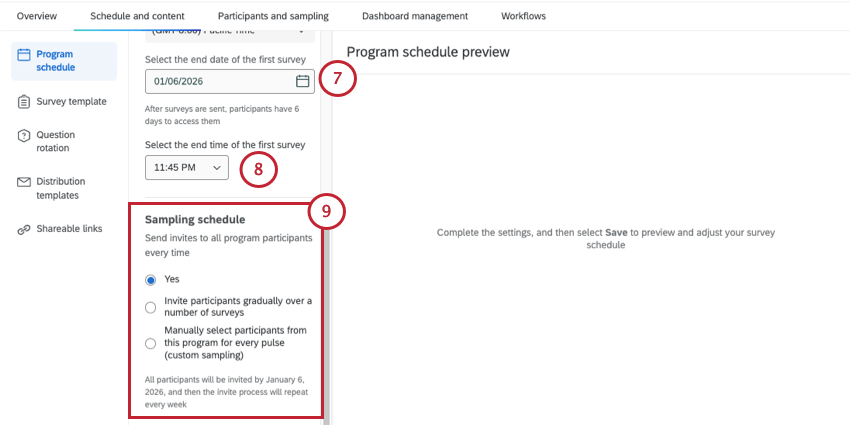
Qtip: After surveys are sent, participants have until the survey end date to access them.
- Yes: Invite all program participants to every pulse. You will not need to set any additional sampling settings.
- Invite participants gradually over a number of surveys: Sample a selection of your participants every time the survey goes out. See more on Sampling Settings.
- Manually select participants from this program for every pulse (custom sampling): Create custom samples of your program participants for each survey. To learn more, see Manually Adding Participants to Pulse Surveys.
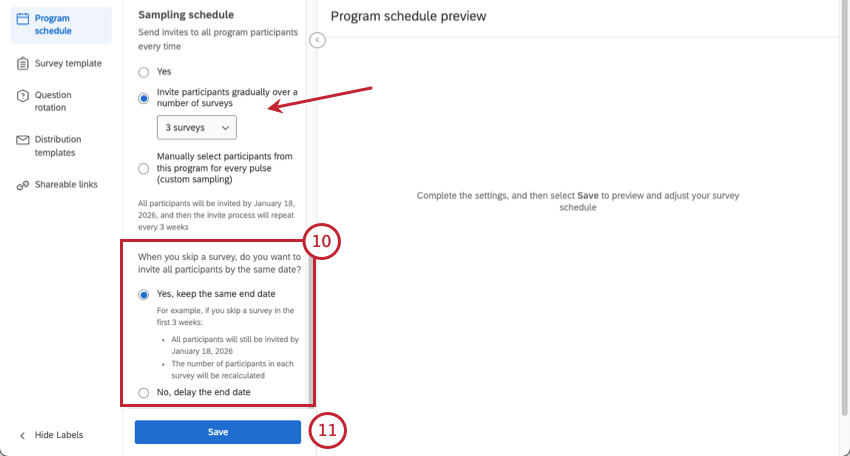
- Choose the number of surveys to be sent. Qtip: You’ll see an estimate of when all participants will have been invited to the survey. The invite process will repeat on the cadence you chose in step 3.

- Choose what happens when you skip a survey.
- If you want to keep the same end date, all participants will still be surveyed by your chosen end date. The participants per survey will be recalculated to reflect this.
- If you want to delay the end date, the participants per survey will be kept the same. Instead, the end date will be moved further into the future to accommodate how long it’ll take to survey every participant.
Qtip: If you chose to invite participants gradually over a number of surveys, you need to set sampling criteria. If you chose to manually add participants, you’ll be able to do that after program setup; see custom sampling.
Changing Schedules and Skipping Surveys
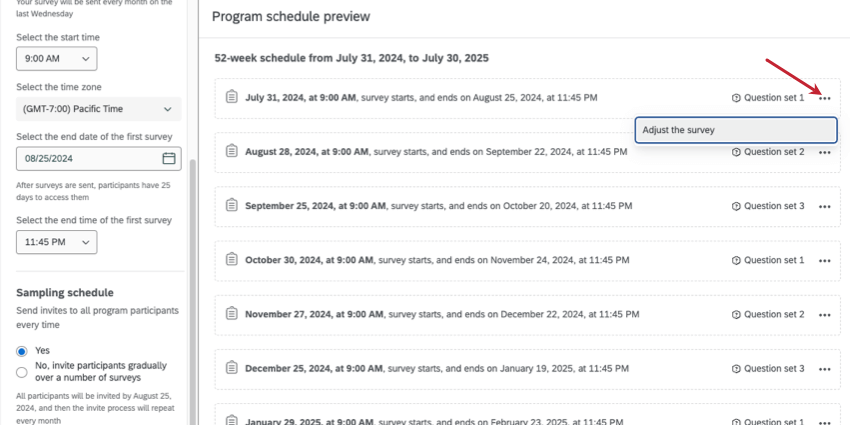
Once you generate your program schedule, you’ll see the surveys and their schedule for the next 52 weeks (one year). This is a running schedule; the program will continue to add more pulse surveys automatically as time goes on.
This is also where you can change the schedule for individual surveys, or skip them. This can be useful to avoid company holidays or other dates that could be inconvenient for your employees.
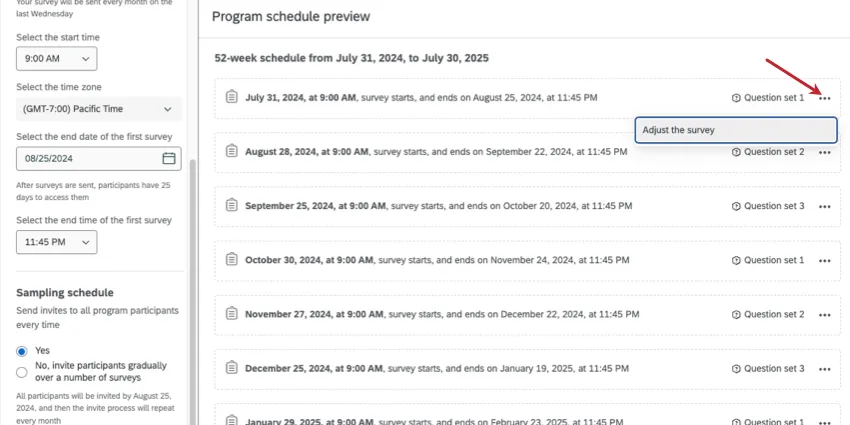
To do this, click Adjust Schedule.
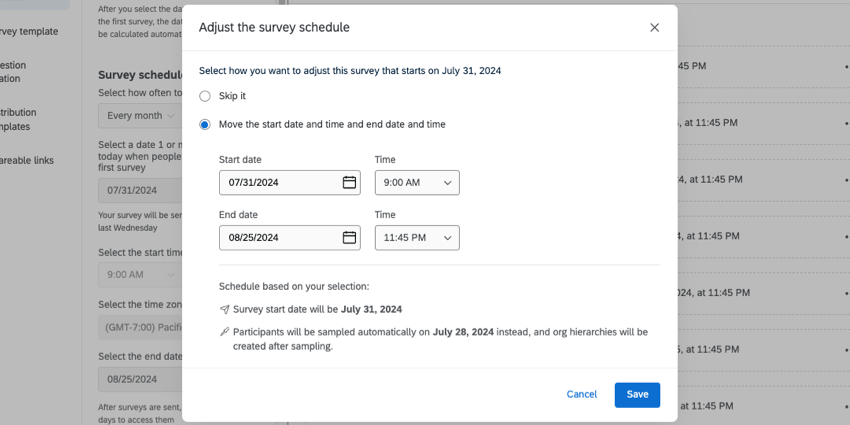
- Skip it: Skip the survey. Whether this adjusts your sampling settings or ultimate end date is dependent on how you configured your program schedule.
- Move the start date and time and end date and time: Adjust dates and times as needed. Your time zone matches what you selected during program schedule configuration.
You’ll see a preview of your start date and sample dates based on your selections.
Qtip: After starting your program, surveys that are skipped within 1 month of today can’t be un-skipped. Skipped surveys within 1 month of launch will be permanently deleted.
Survey Template
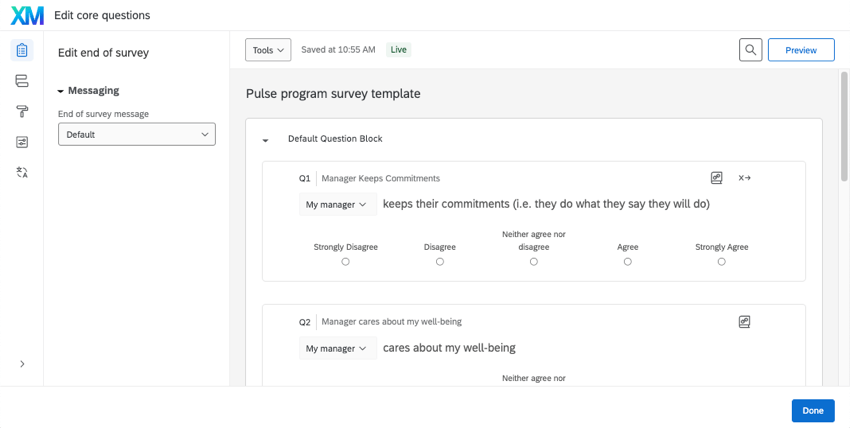
Here, you can edit your pulse’s core questions. These are the questions that will be asked in each of your pulses.
Qtip: It’s safe to edit the survey template at any time. Changes to core questions will only affect pulses that are created after edits, and will not invalidate previous pulses’ data or changes that were made in existing pulse projects.
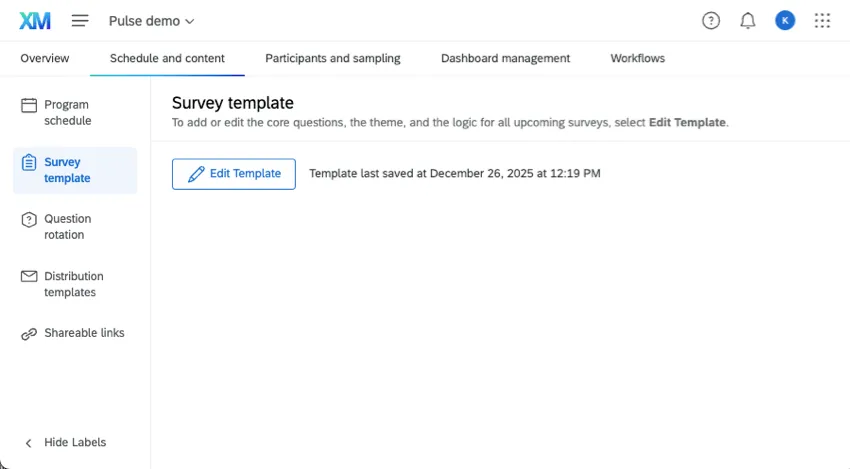
To edit core questions, click Edit Template.

Qtip: Not sure where to start? We have questions designed for pulses in our question library.
Qtip: Do you need to add unique questions to a survey, perhaps for a one-off event? You can edit individual surveys on the Overview tab.
Question Rotation
You can create rotating sets of questions for your pulse program. Switching out different questions can be helpful if your program needs feedback on a lot of topics, but you want to keep pulses short and prevent survey fatigue.
For more details, see Question Rotation.
Features Available in Pulse Surveys
A pulse’s survey builder works just like it does in any other project.
Available Questions
Pulses are not compatible with any other types of questions.
Available Survey Options
For the most part, the survey options in the pulse are the same as other Employee Experience projects’ survey options. These are the only differences:
- There is no “Use anonymous link” option in the survey template, but that’s because anonymous links can be generated using the shareable links program setting.
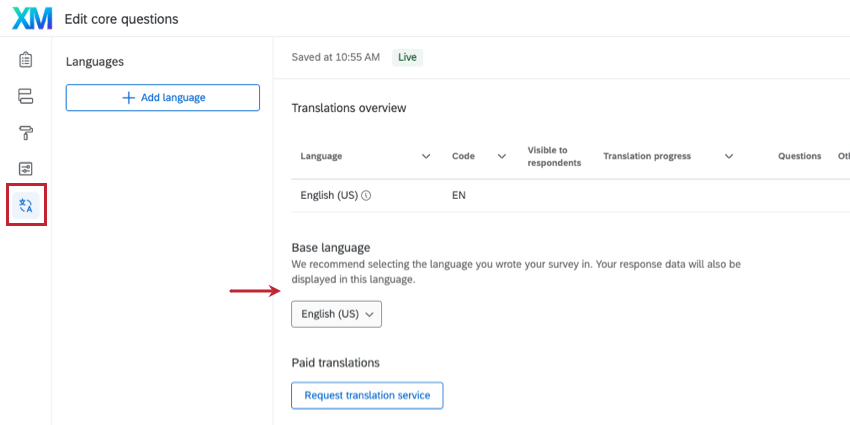
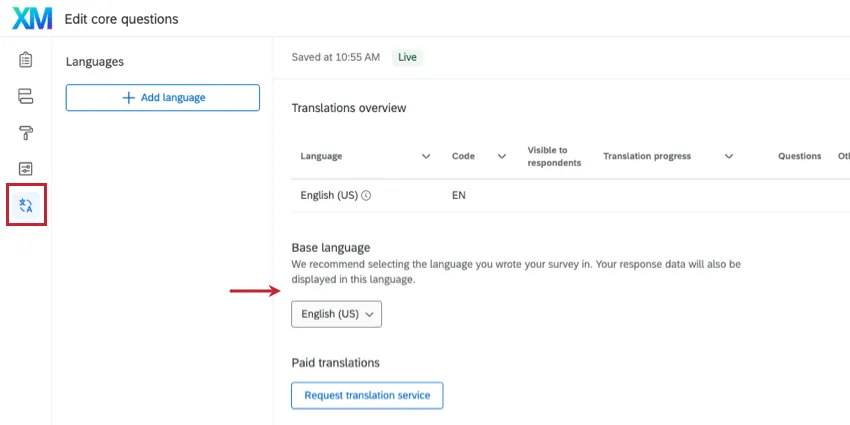
- The Base Language is configured in the Translations tab instead of the survey options.
Question Behavior
Pulses are only compatible with the following question behavior:
- Display logic
- Skip logic
- Choice randomization / Randomization
- Recode values
- Default choices
- JavaScript
- Add Note
- Add Choice Group
Pulses are not compatible with carry forward choices or scoring.
Survey Tools and Survey Flow
Pulses have the same survey tools as other Employee Experience projects. If your brand has enabled usage tags, you’ll see a “survey tagging” option.
Pulses have the same survey flow functionality as other Employee Experience projects.
Warning: The following are reserved field names. You should not use these names for embedded data.
- projectStartDate
- ProjectStartDate
- Project Start Date
Distribution Templates
You can set a distribution message template for your pulse’s invitation and the reminder. You can also create messages in your library that can be used as distribution templates for your pulse program. Pulse supports both email and SMS (text message) distributions.
Shareable Links
You can distribute your pulse program to participants using 1 shareable link. The survey connected to the link will change depending on the program schedule you set.
See Shareable Links.
That's great! Thank you for your feedback!
Thank you for your feedback!