
Usage Tags
What's on this page
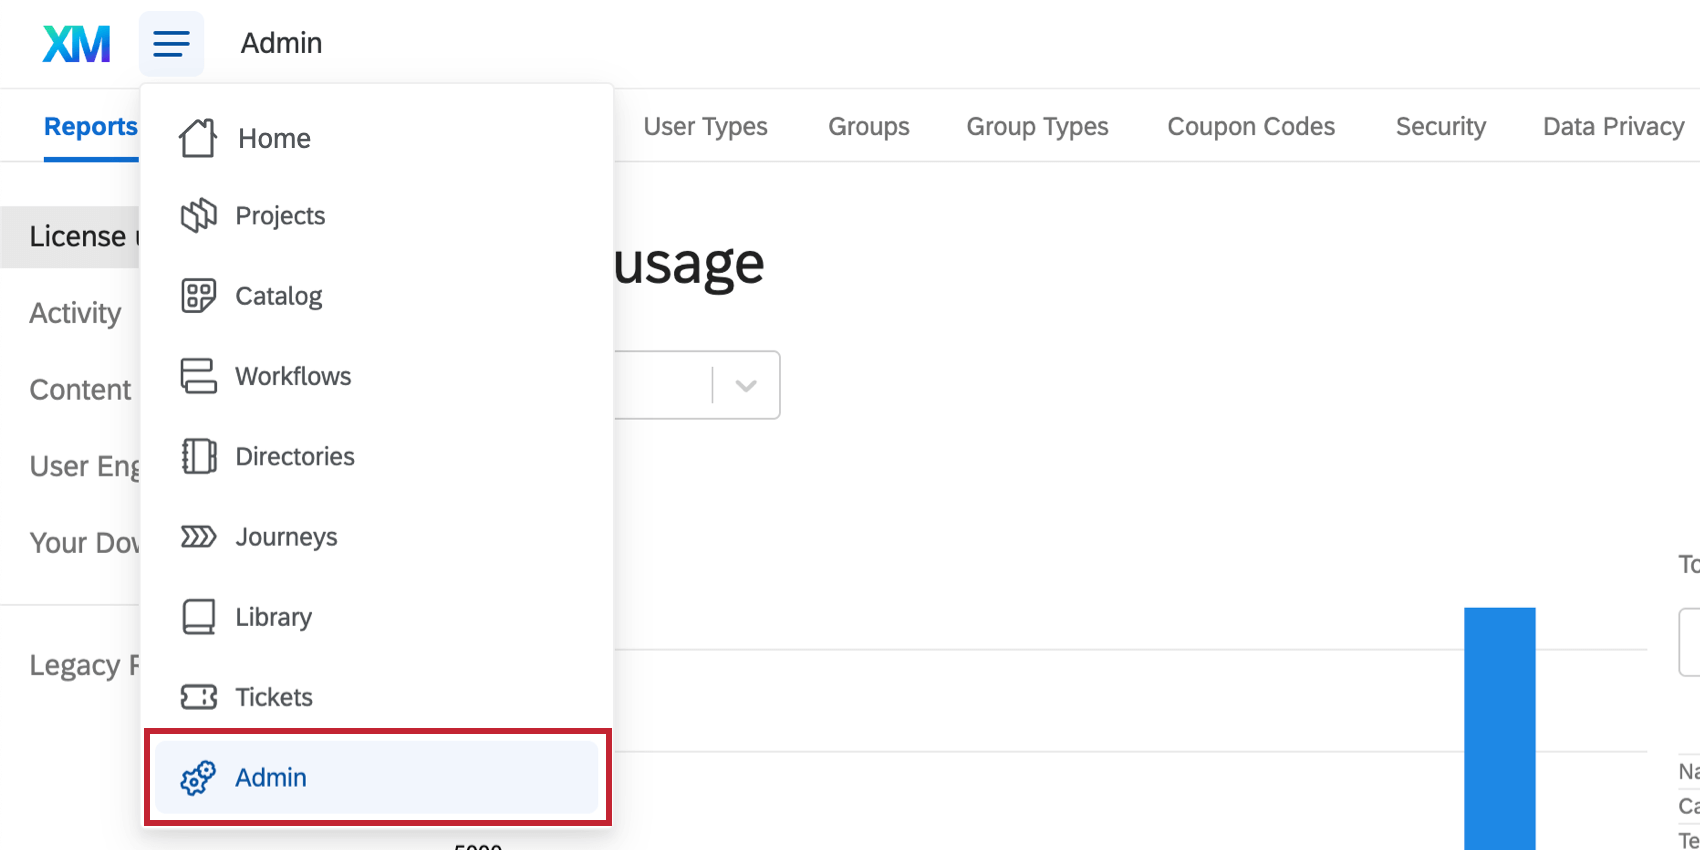
About Usage Tags
Have you ever wanted to monitor which departments at your company use Qualtrics the most? Usage Tags allow Brand Administrators to create tags that correspond to their company’s cost structure. This allows you to create a Cost Management system within Qualtrics. When new user accounts are created or when new surveys are published, the relevant tags will be applied to the users or projects. Administrators can run periodic reports to see how many survey responses or user seats were consumed for each tag within a given period of time.
Creating Usage Tags
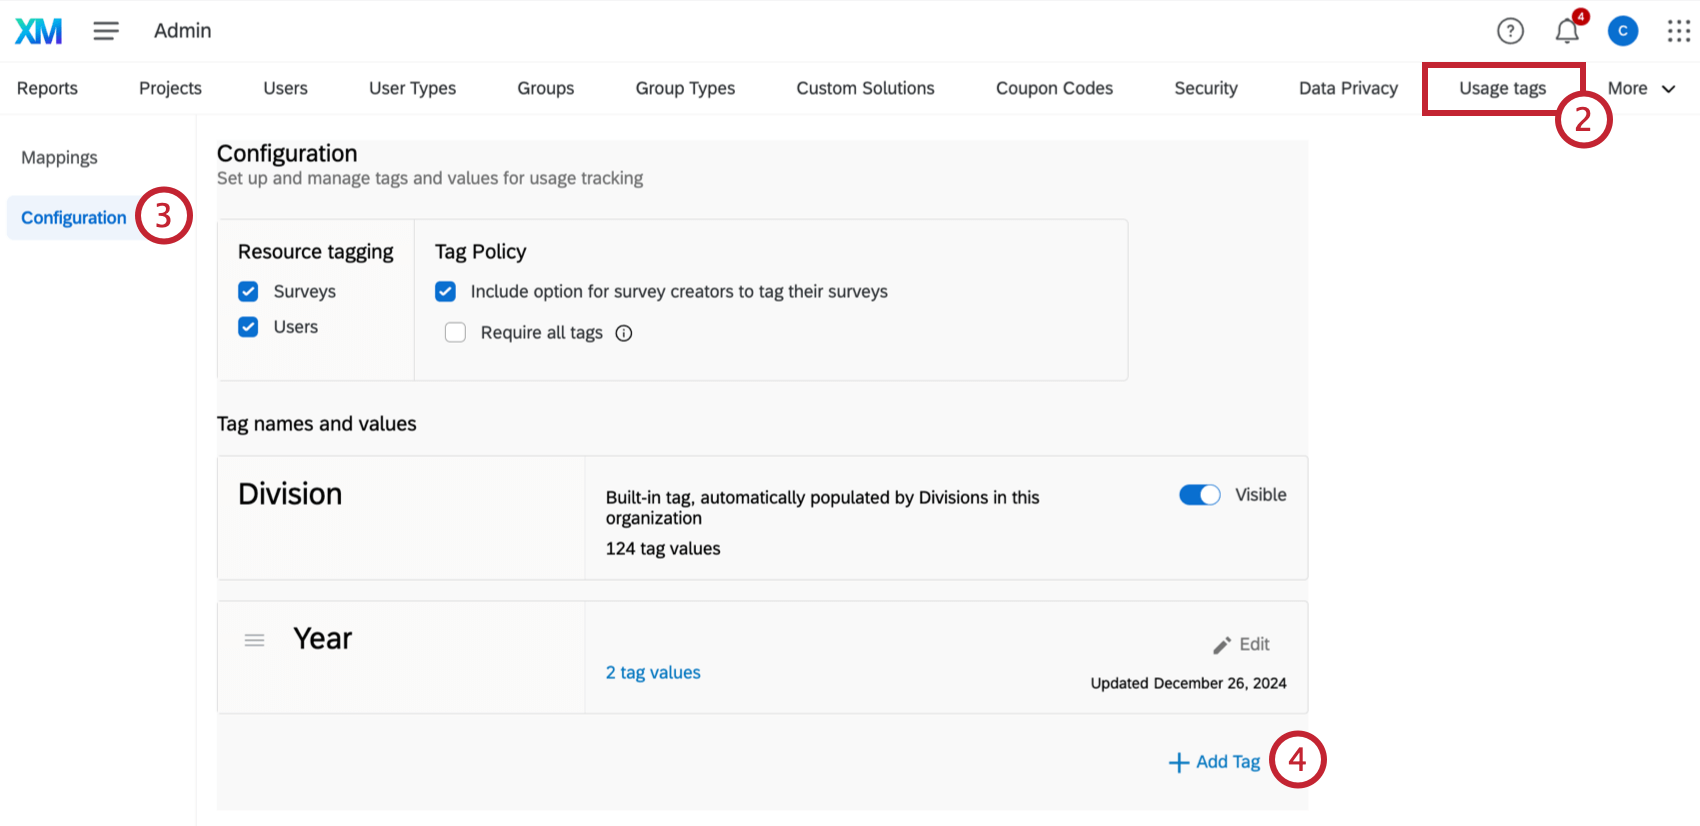
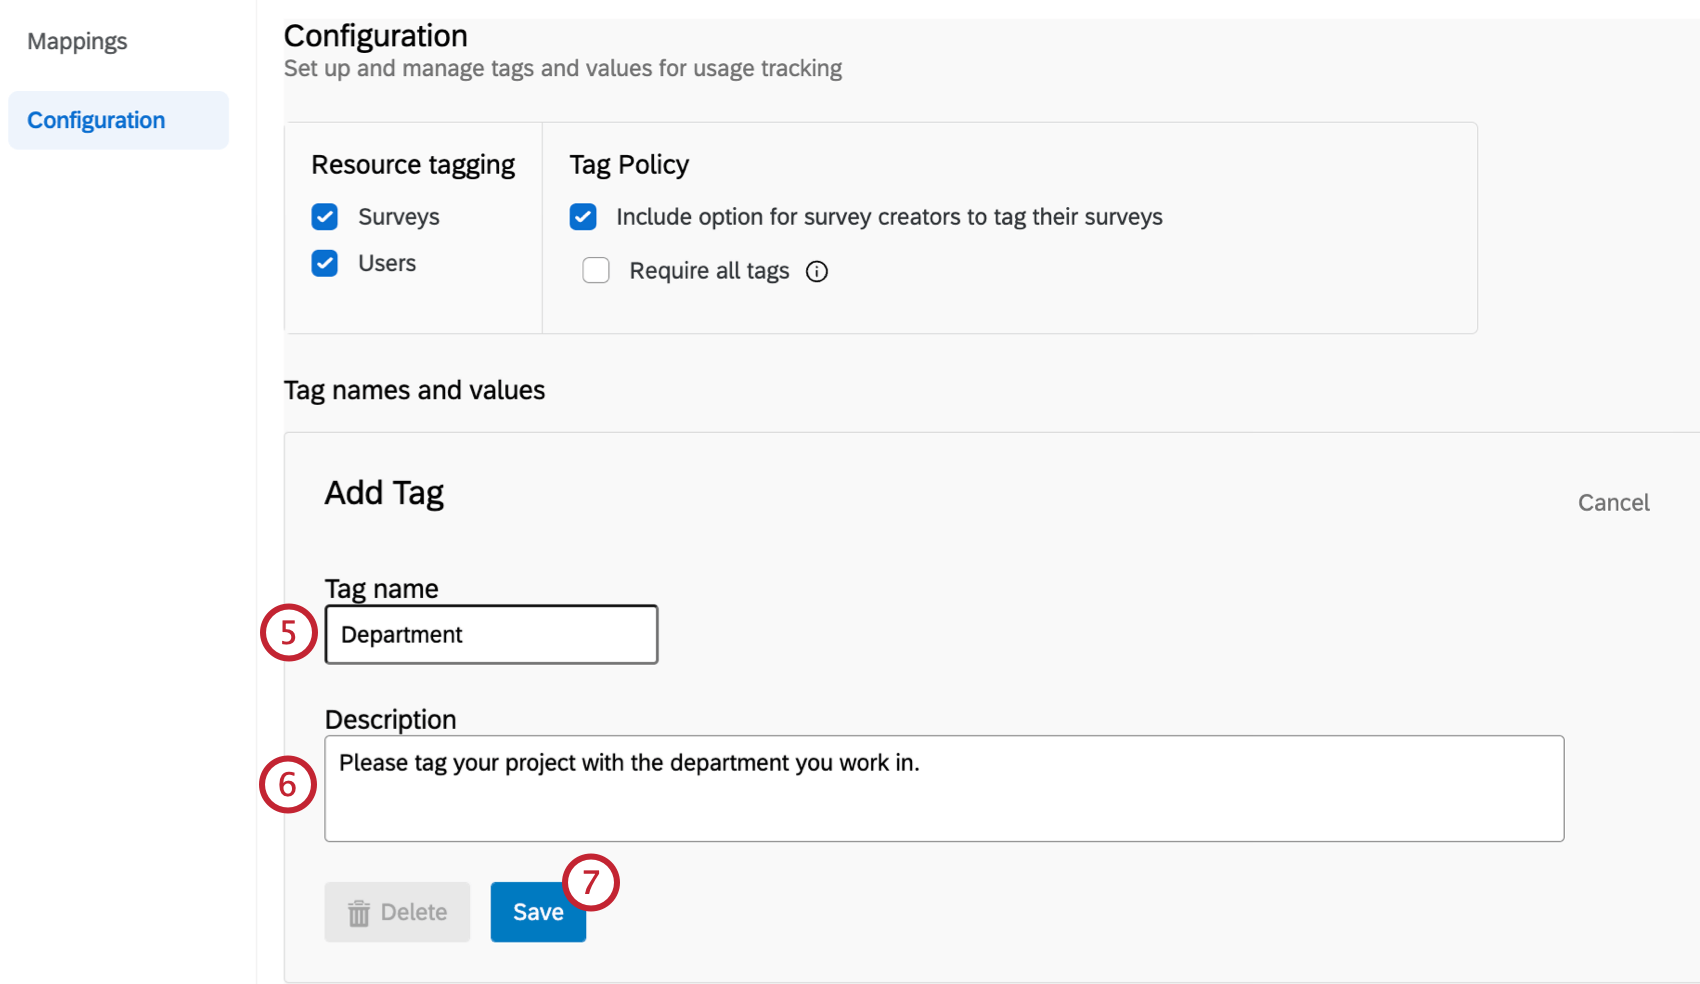
Example: We’re creating a tag for “Department” so users in our organization can tag which department they work in.

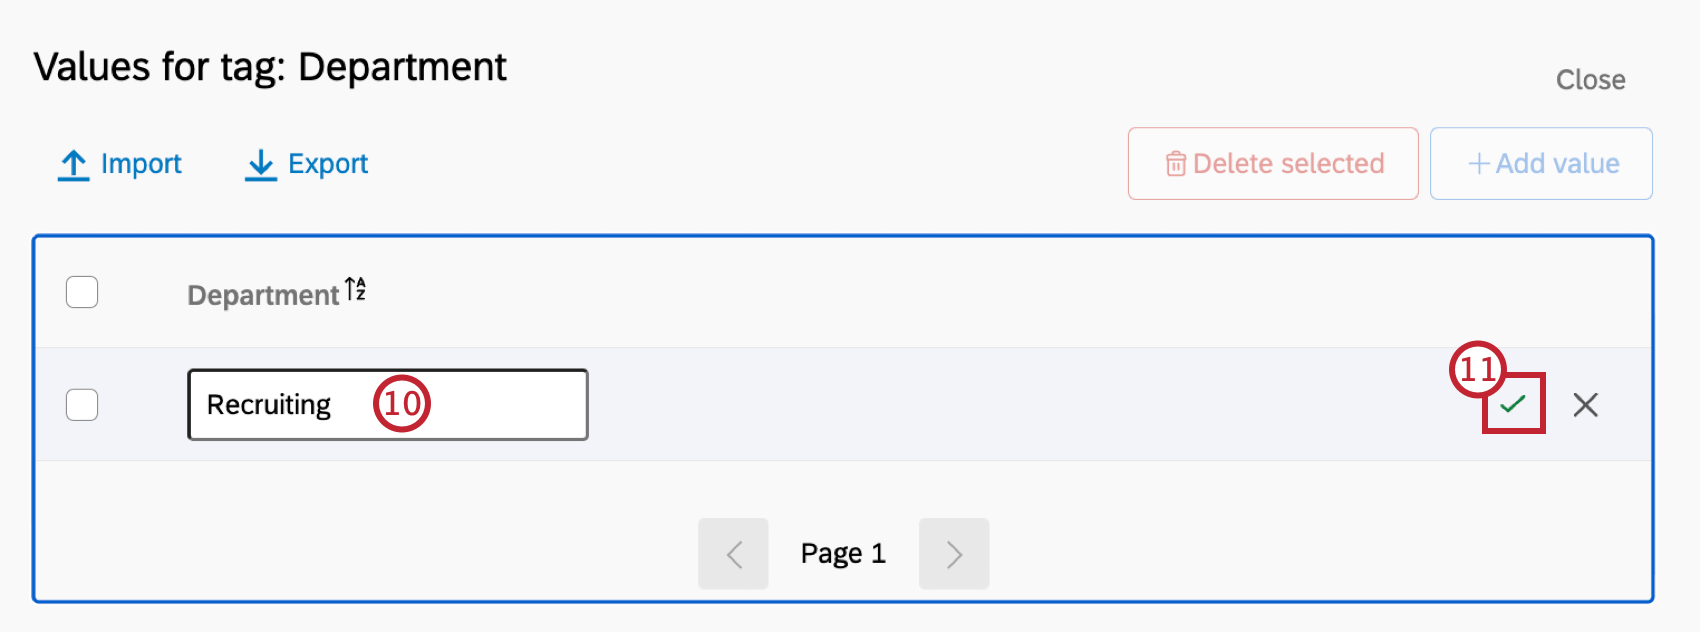
Qtip: Click the X to delete the value.
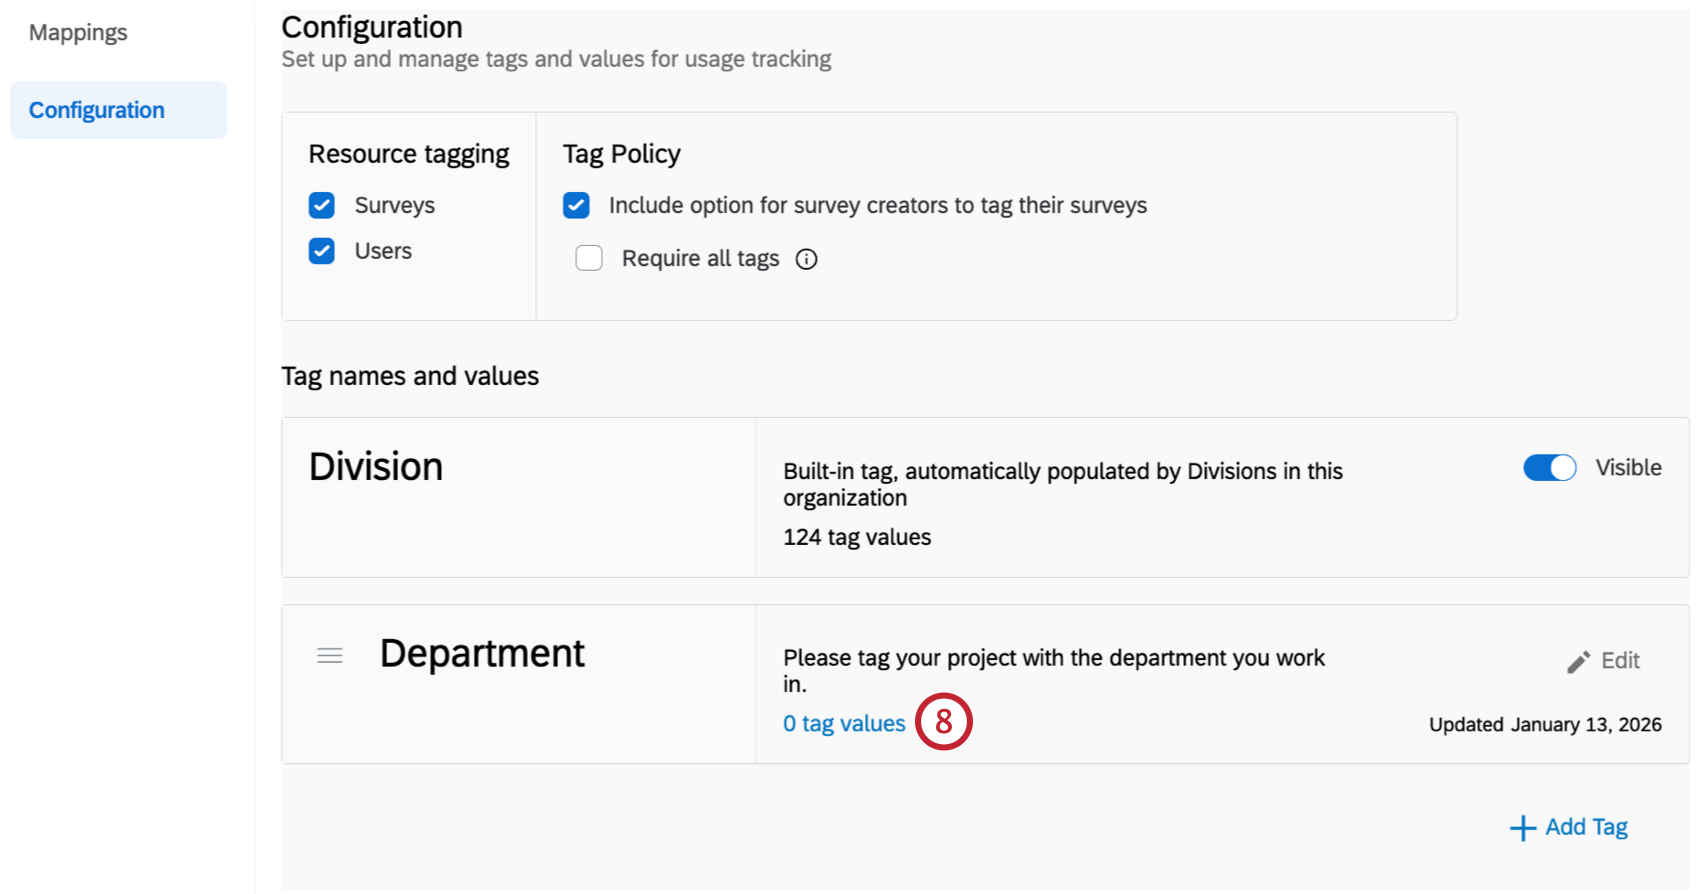
You may repeat this process to create as many tags and values as your organization requires. There is a limit of 10 tags with 10,000 values.
Importing & Exporting Values
If you have a lot of tag values to create, Qualtrics lets you import a CSV or TSV file to easily create your tag values. You can also export your values for your own purposes, or to use in other tags.
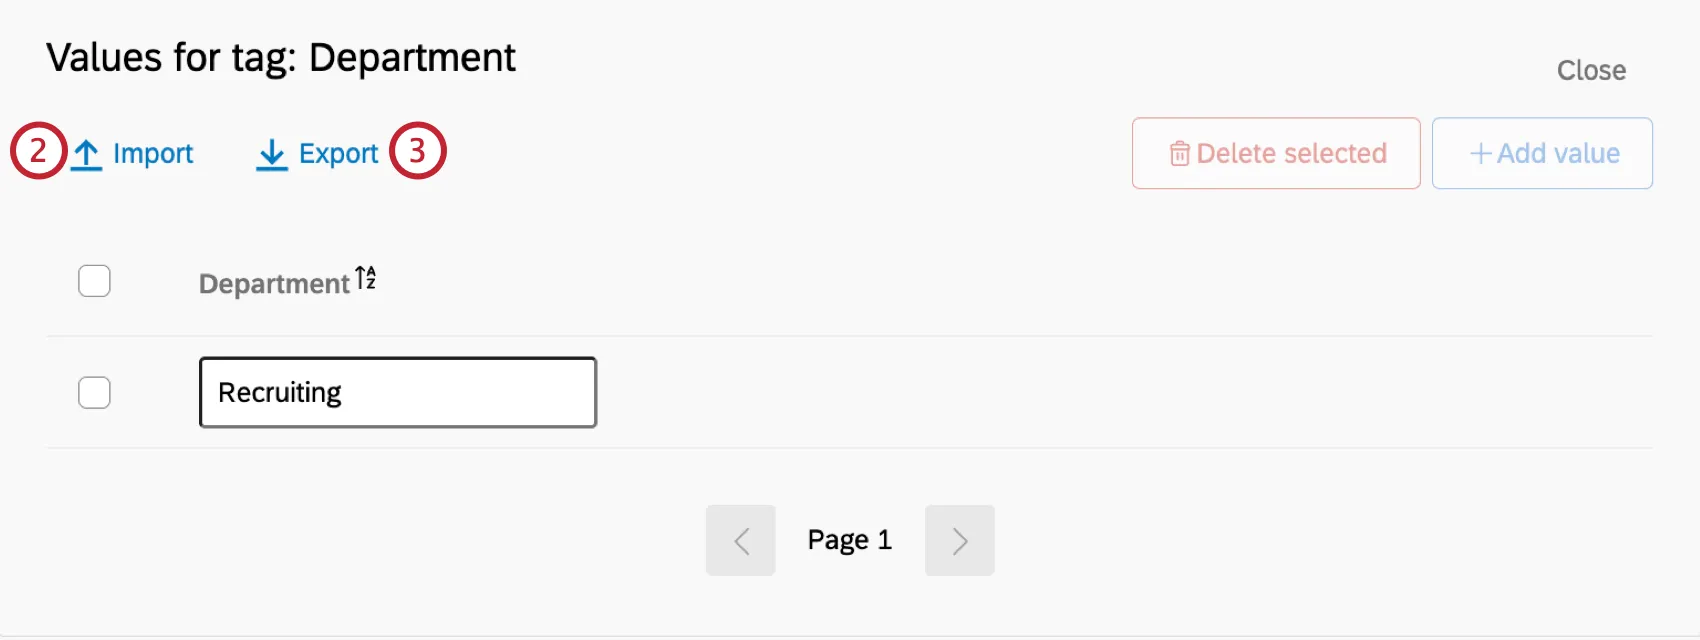
To import or export your tags:
Click tag values on a tag you’ve already created.

Click the Import button to upload a CSV file of tag values.
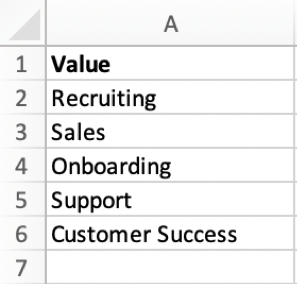
Qtip: The file you import should have one column labeled Value. This column should include a list of the values you’d like to import.
Click the Export button to download a file of your tag values.
Choosing Which Resources Are Tagged
In addition to creating your tags, you also need to choose which resources get tagged as well as if these tags are required. These settings are configured in the Resource Tagging box.

Surveys: When enabled, surveys are eligible to be tagged. Tagging surveys allows you to track how responses are consumed.

Qtip: Although we say survey, survey projects aren’t the only ones you can tag. You can tag any project type, including XM Solutions, conjoints, MaxDiff, and all Employee Experience projects.

Attention: Only responses recorded after a survey was tagged will be assigned a usage tag, not all responses in the survey.
- Users: When enabled, users are eligible to be tagged. Tagging users allows you to track how user seats are allocated across your organization.
Include option for survey creators to tag their surveys: When enabled, survey owners will have the option to add tags to their surveys. See the Tagging Surveys for Survey Creators section for more information.
Qtip: This option will not appear unless Surveys is also enabled.
Require all tags: When enabled, survey owners are required to apply one value to all tags on their survey when they publish. See the Tagging Surveys for Survey Creators section for more information.
Qtip: If you enable this option, we recommend you include an “Other” or “I don’t know” value for all of your tags for users to select if they aren’t sure what tag value to use or if a tag isn’t applicable to them. You can then filter for these values in your Mappings or License Usage Report and then adjust the tag value accordingly.
Qtip: This option will not appear unless Include option for survey creators to tag their surveys is also enabled.
Tagging Surveys and Users for Admins
After creating your tags, you can assign them to both users and surveys. You can tag items individually, or in bulk.
Tagging Items Individually
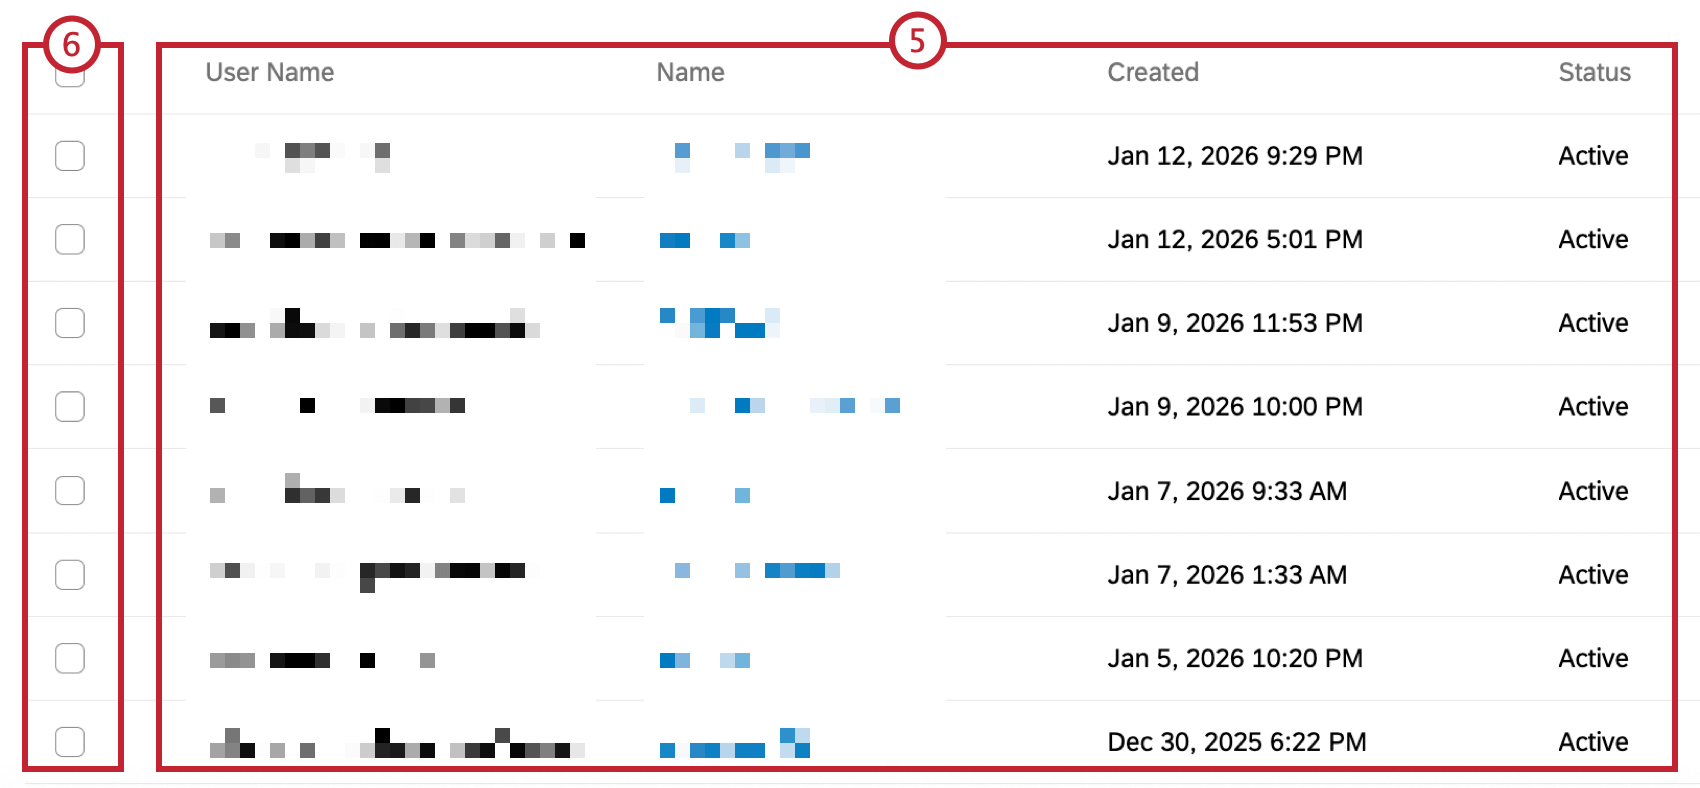
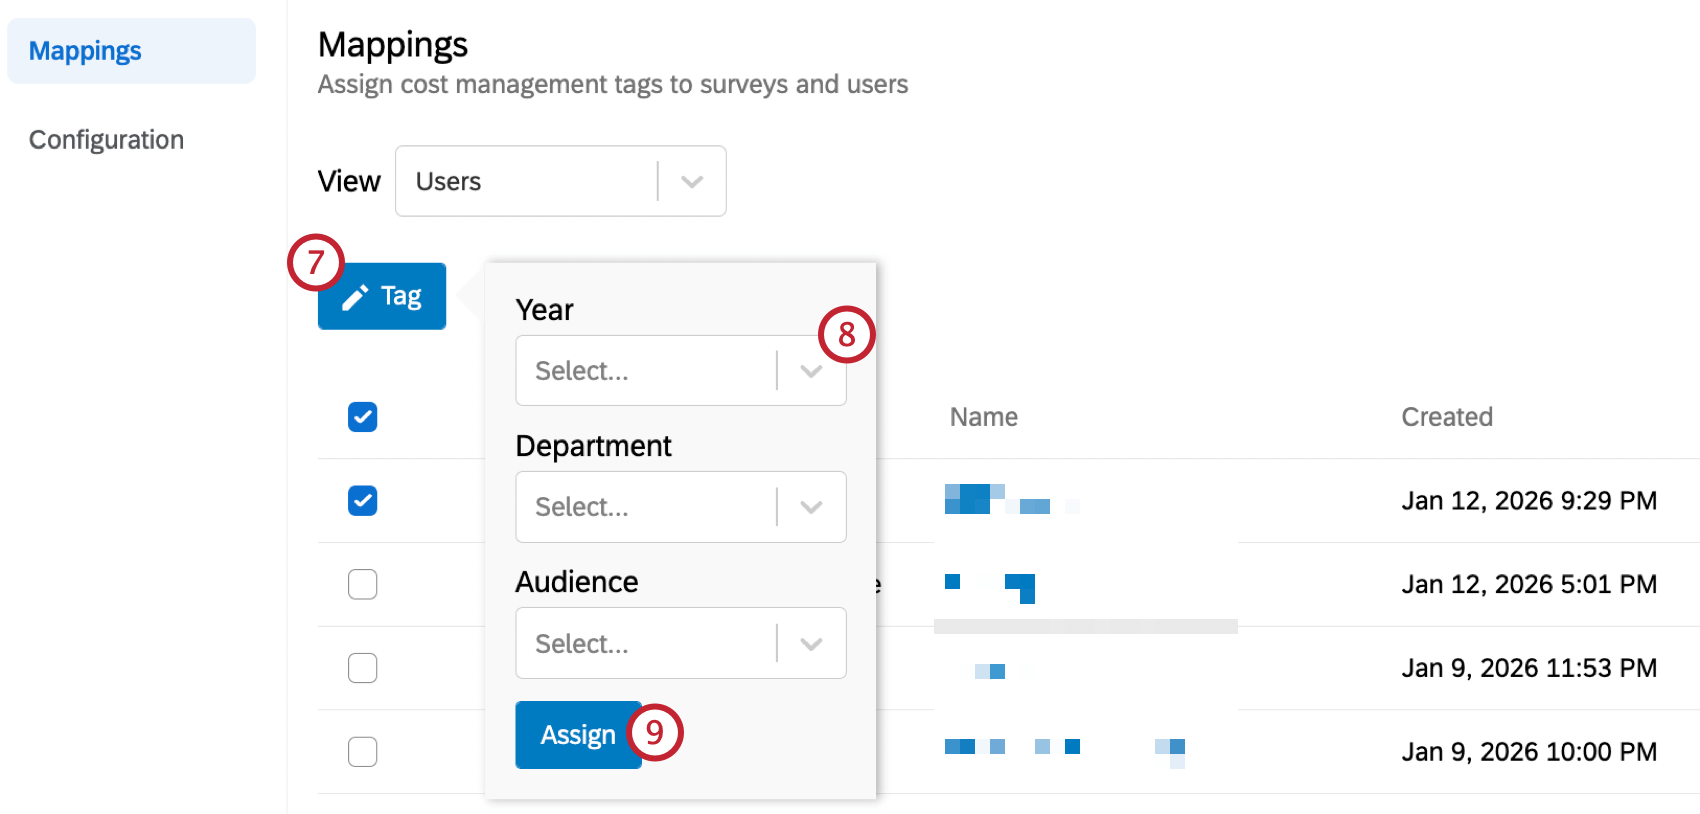
You can tag items individually via the Admin UI:
Tagging Items in Bulk
You can tag items in bulk via a file upload:
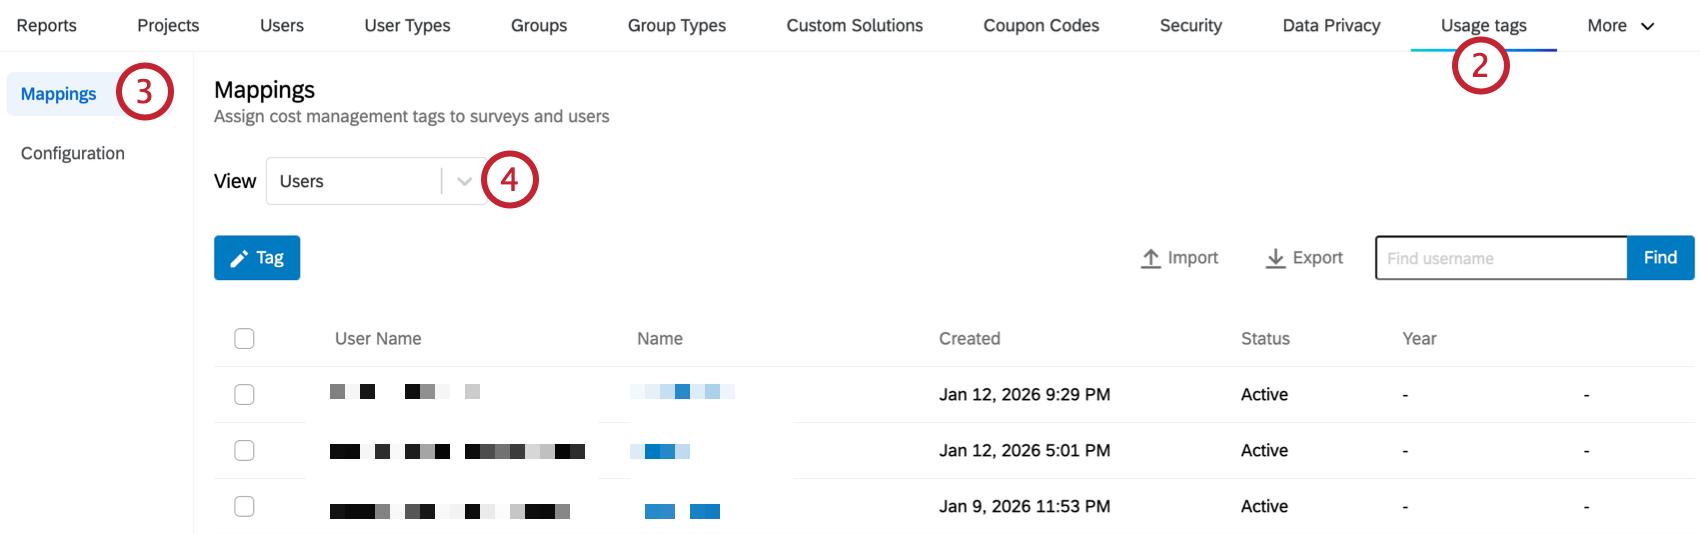
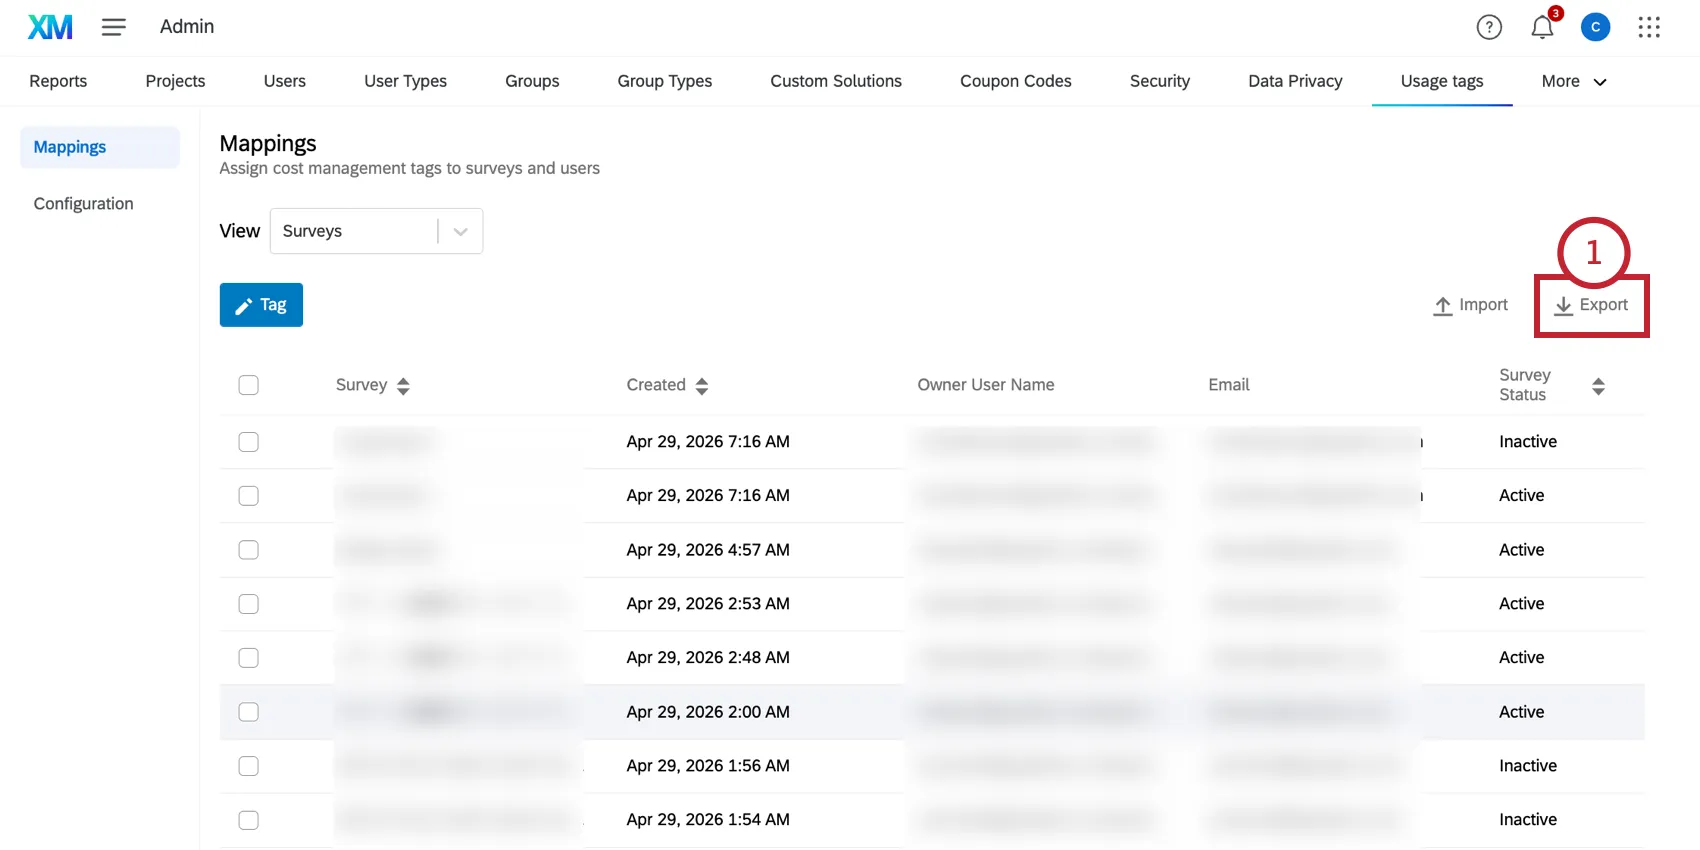
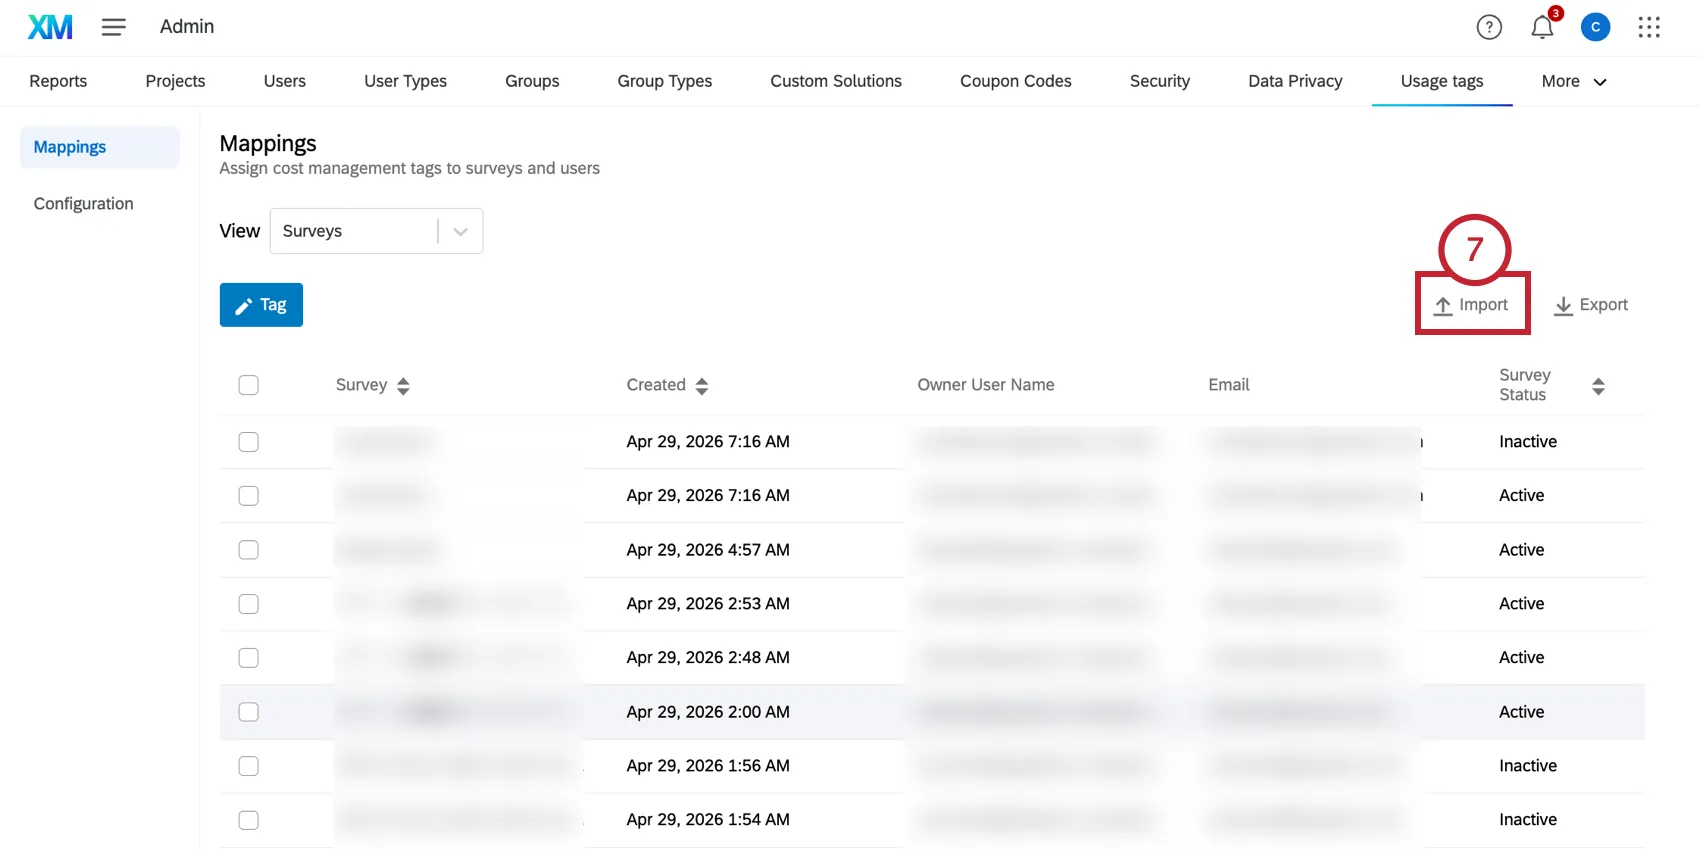
In the Mappings section, click Export to export a list of surveys or users. Use the "View" menu at the top of the page to switch between surveys and users.
Choose your desired export format, either CSV or TSV.
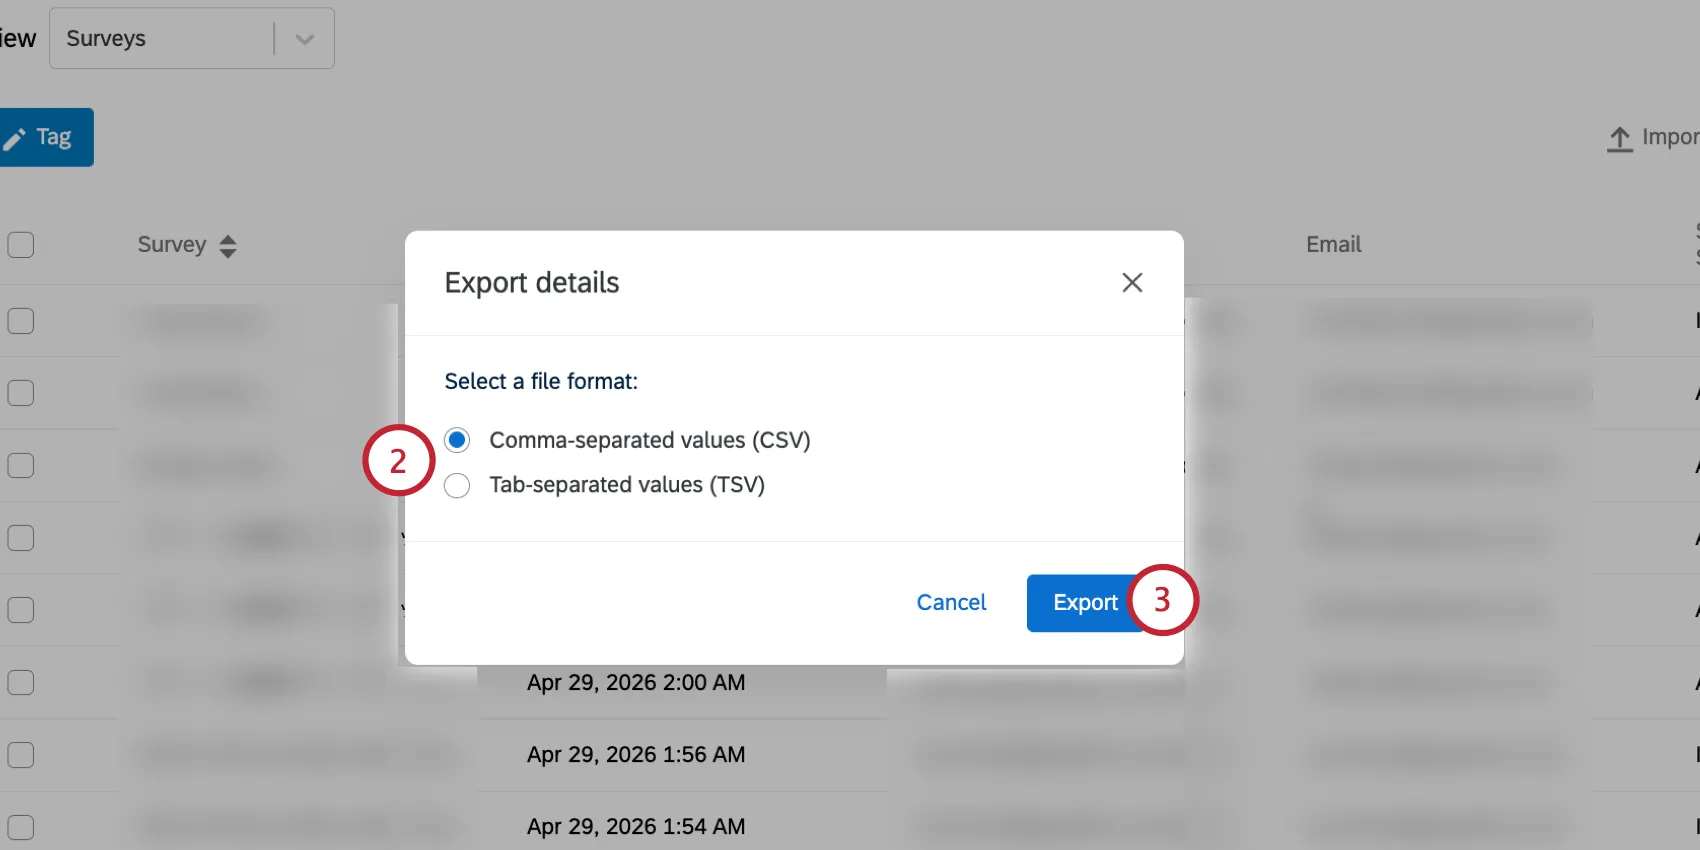
- Click Export.
- Open the file in a spreadsheet editor on your computer (such as Microsoft Excel).
Each item will be its own row in the spreadsheet and each tag will have its own column. Add your desired tag values in the corresponding tag columns. If a tag's value does not already exist in your configuration settings, then the value will not be tagged to the item.
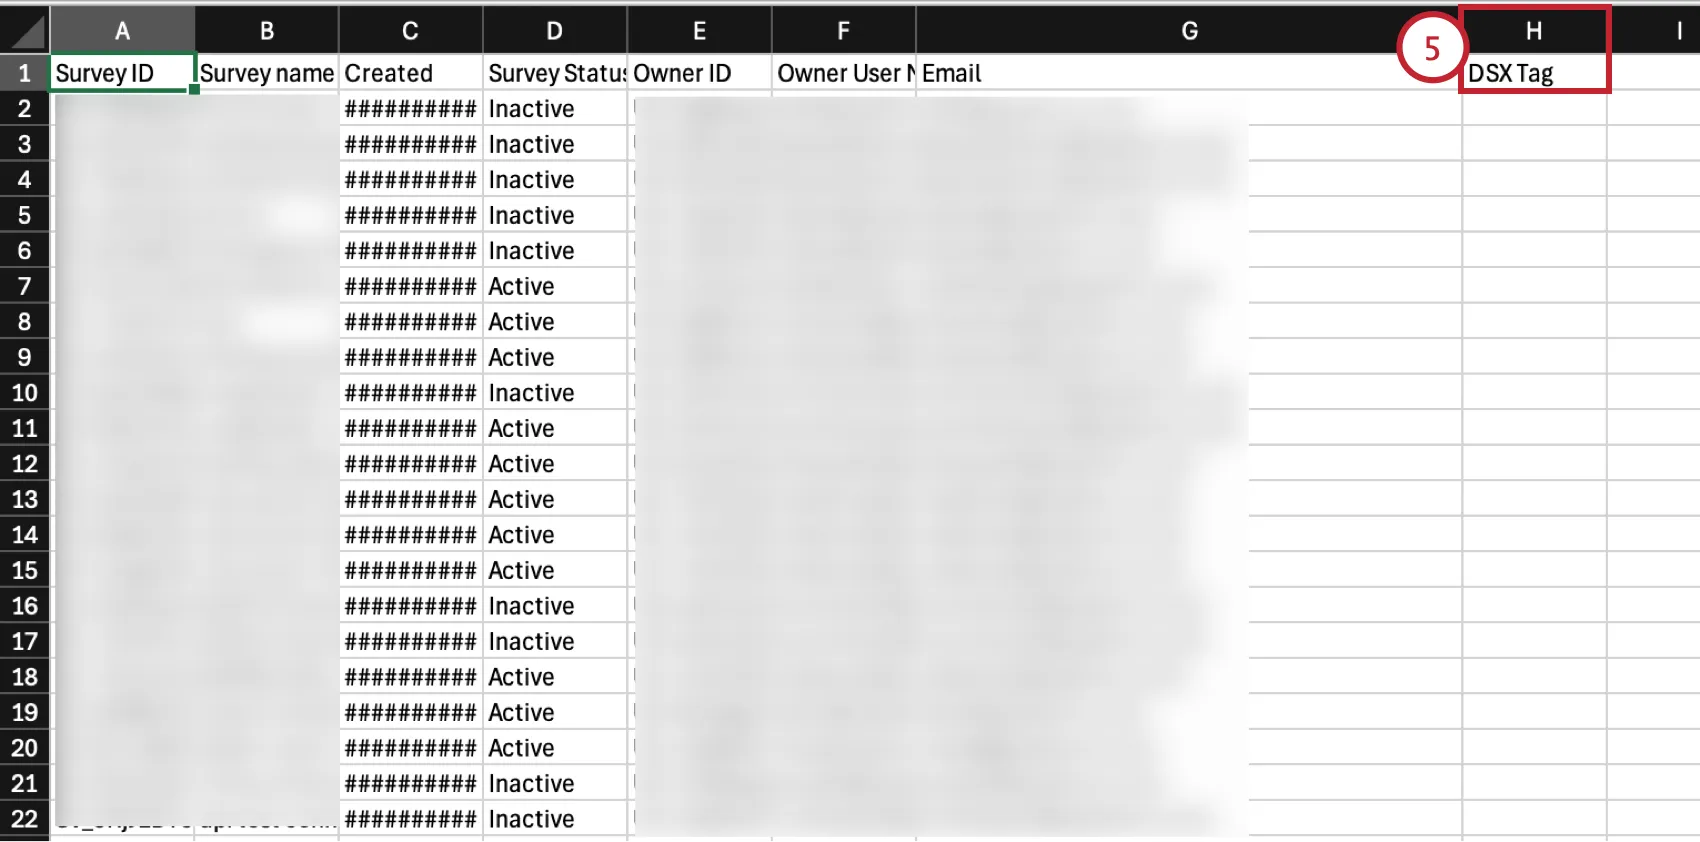
- Save your file as a CSV.
In the Mappings section, click Import and choose the file saved to your computer. Your surveys or users will be updated after the file is finished processing.
Adding Required Tags to a Survey
Sometimes, as a survey editor, you may be required to add tags to surveys. These will be labeled “Org usage tracking.” If your Brand Administrator has enabled Require all tags, you must tag your survey before it can be published for the first time.
Attention: You will only be required to tag your survey the first time you activate it. While you can update tags when you publish additional changes (or by using tools), you will not be required to add tags every time you publish. If your survey was activated for the first time before tagging requirements were created, you will not be required to add tags when you publish changes.
Editing a Survey’s Tags
As a survey editor, you can edit existing tags on a survey in 2 ways: through the tools menu, or when you publish your survey.
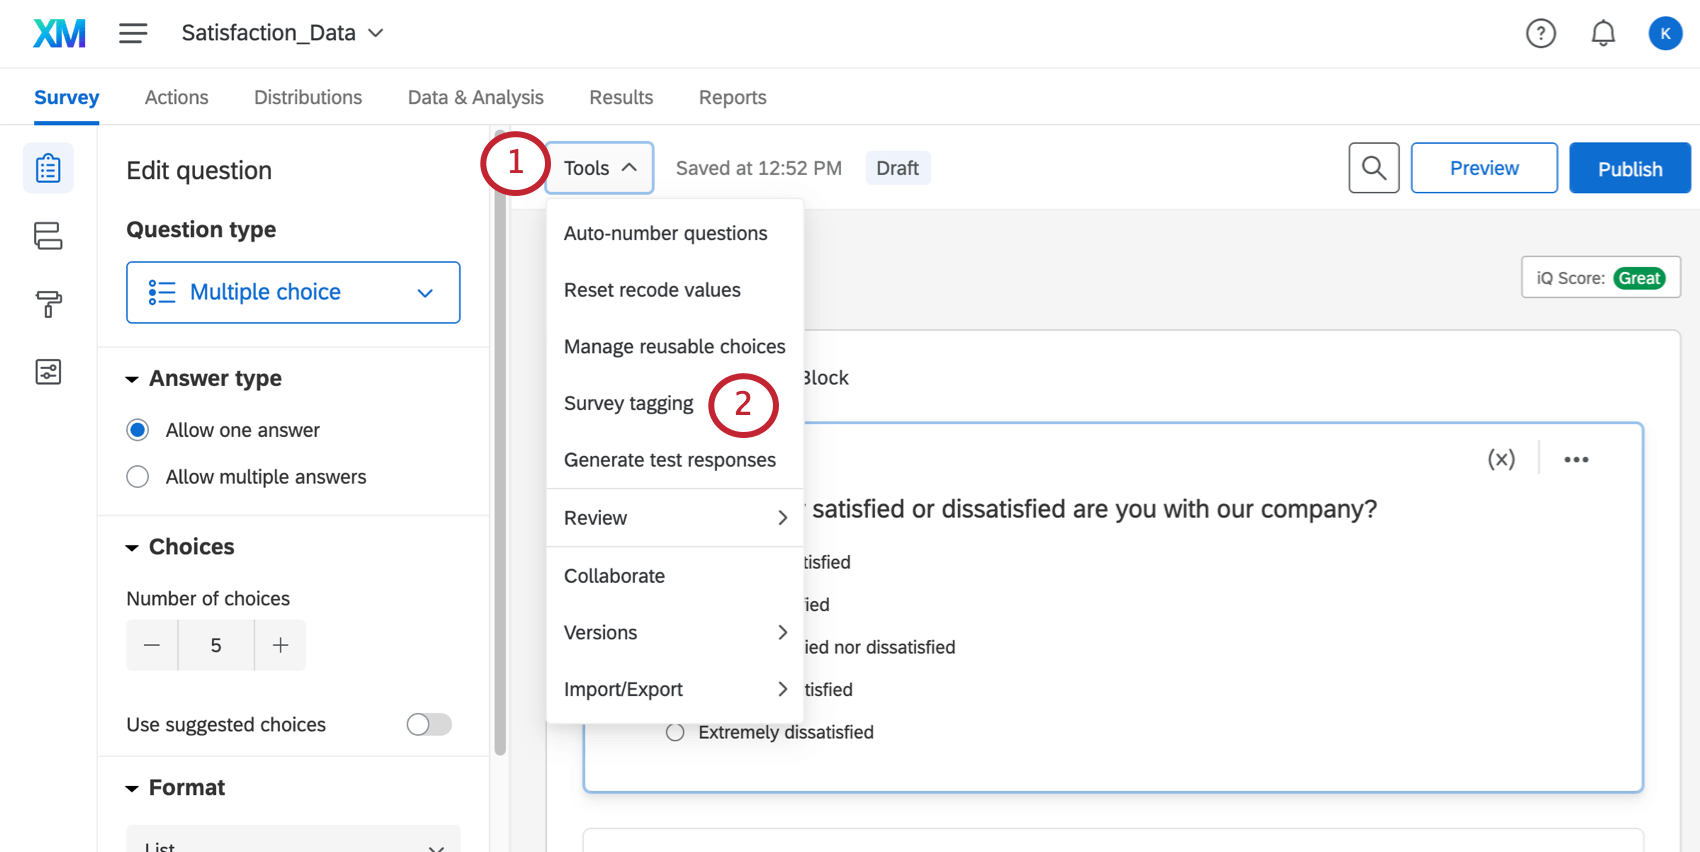
To edit a survey’s tags through tools:
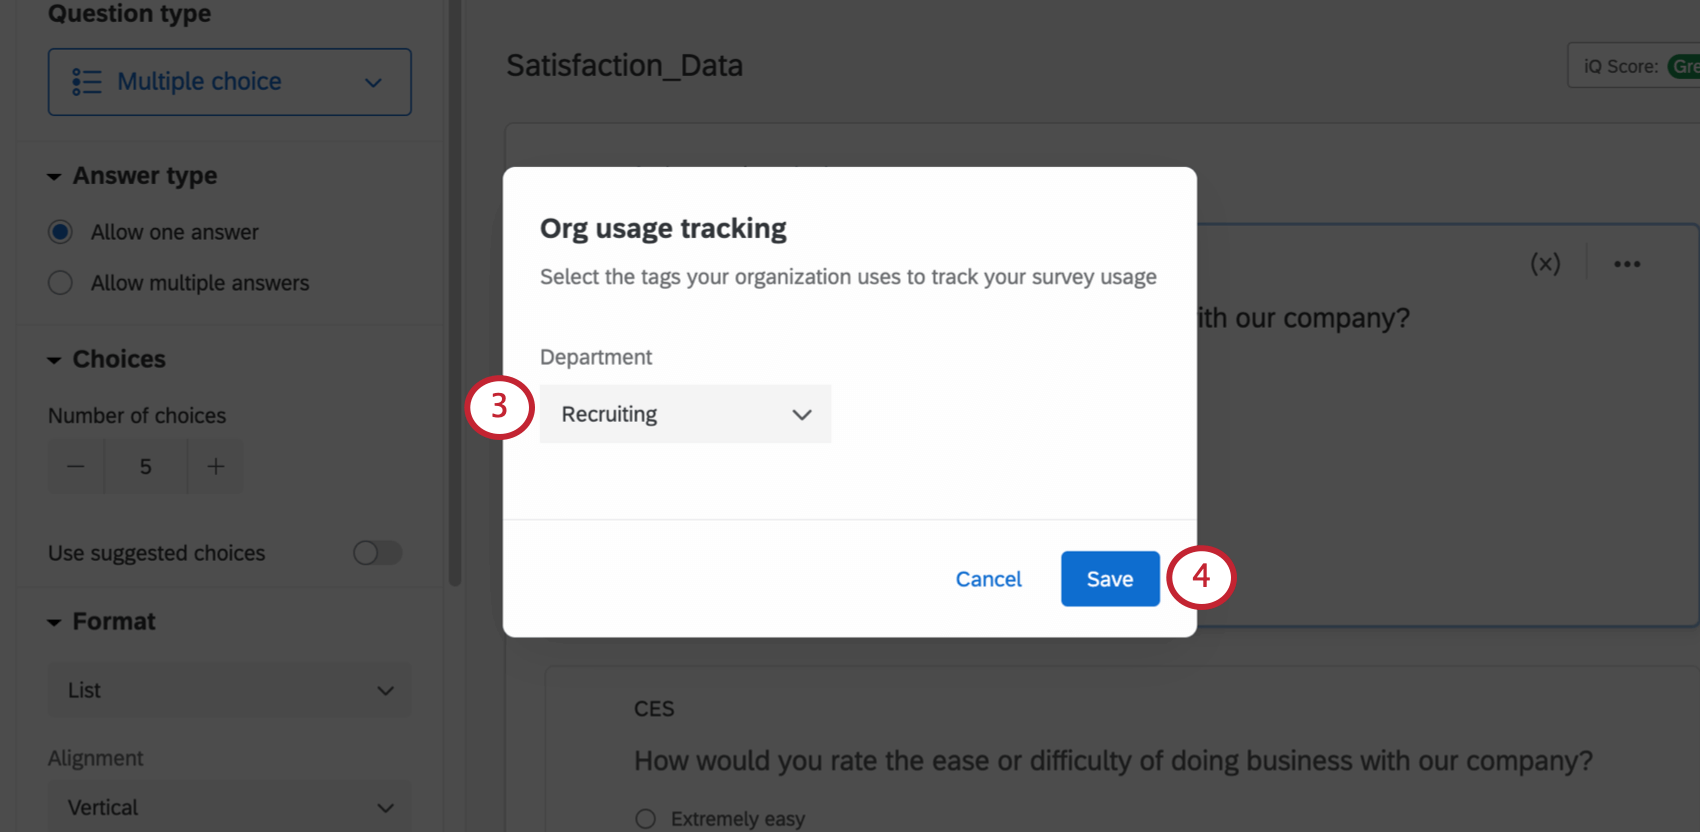
Qtip: You can choose one value for each tag.
Qtip: Up to 500 tag values can be displayed in this dropdown menu. If there are more than 500 possible tag values, then you need to narrow down the possible number of tag values by typing in the tag box to search the tags.
Viewing License Usage
Once you’ve created your cost management system with tags, Brand Admins can report out on license usage based on these tags in the License Usage report.
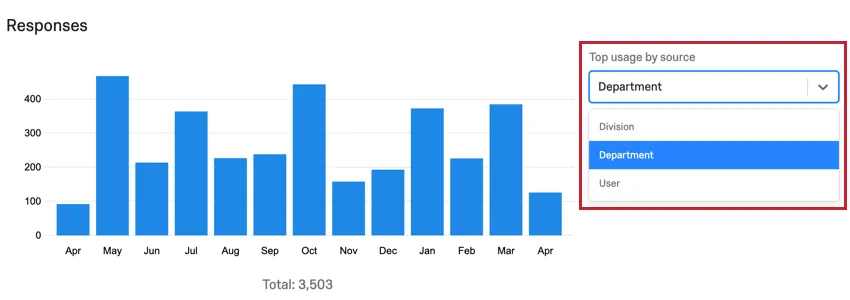
To access the license usage report and get a full explanation of the charts available in this report, see the Admin Reports.
That's great! Thank you for your feedback!
Thank you for your feedback!