
Editing Category Models (Designer)
What's on this page
About Editing Category Models (Designer)
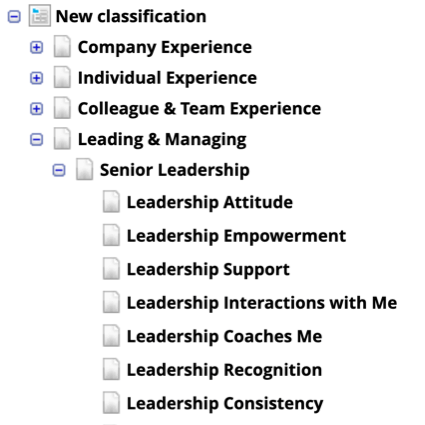
Categories, also known as Nodes, are topics that define the structure of a category model. You can build a hierarchy of these topics to sort and organize the data in your analysis.

Best Practices
- Define top-level categories by using category groups. Category groups allow you to include common words and general descriptions without focusing too much on accuracy.
- Break each category group into categories. We recommend 5-9 categories for each group. This set of categories should cover most of the group’s topics.
- Each category inherits rules from its category group.
- While there is no limit to categories you can add to a tree, we recommend keeping them to 2 levels (category groups and categories).
Adding Categories
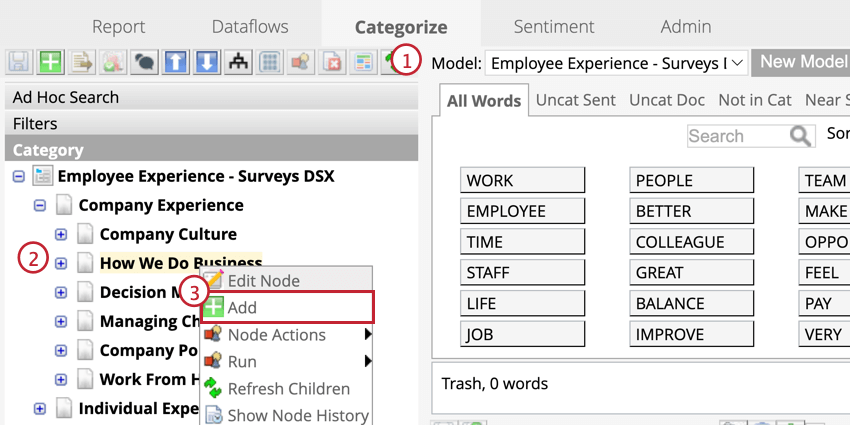
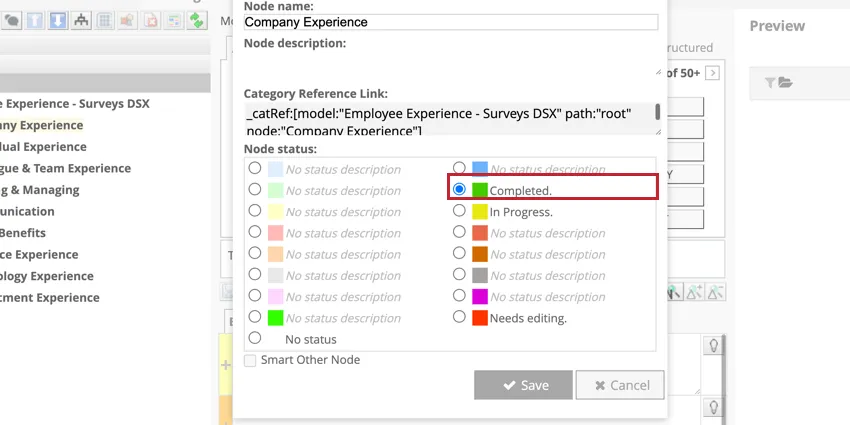
- Node name: Provide a name for the category. Qtip: Category names must be unique for categories that are located at the same level and share a category group. If your category model uses derived attributes, category names must be unique even if they are in different groups.

- Node description: Provide a brief description of the category.
- Category Reference Link: This field provides an automatically generated catRef link for this category. This is used to reference categories in rules.
- Node status: Select a custom status for this category. If no status is available, select No status. Setting statuses can be helpful to keep track of work.
Adding Category Rules
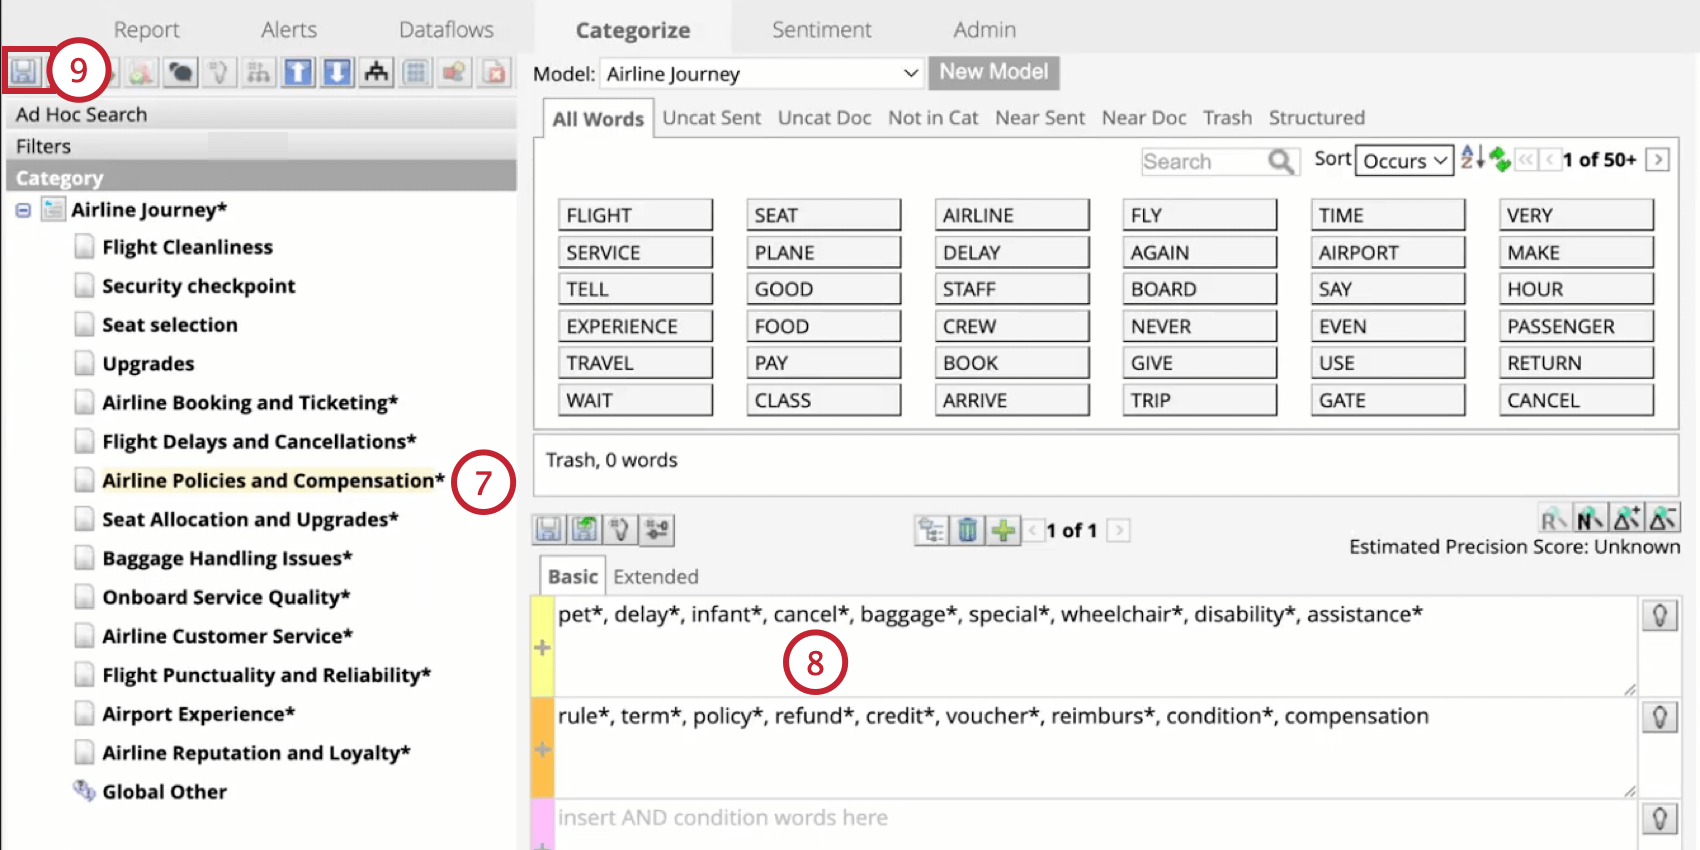
Category rules define which sentences will be assigned to each category. Once you have created a category, add rules to classify sentences into it. For information on how to add category rules, see Category Rules.
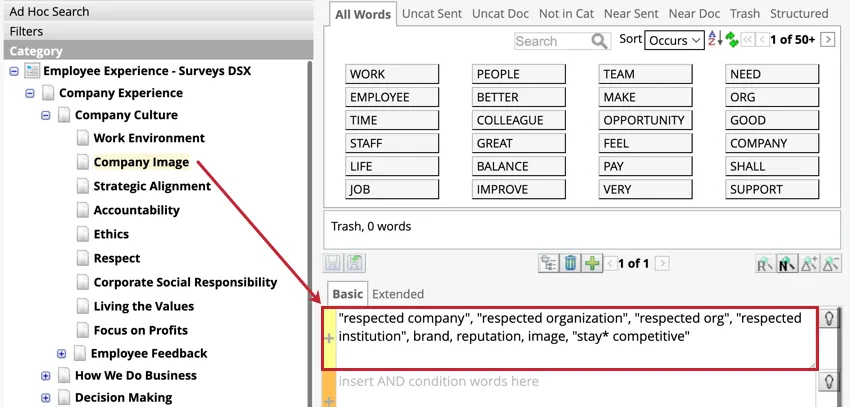
Example: The category for “Company Image” contains a rule that looks for sentences that discuss image-related topics (like “brand”, “reputation”, “image”). This category might also need a rule that excludes sentences with words that are not related to company image (like “brand new” or “her reputation”). Rules establish which sentences are relevant to the category and exclude any data that is not applicable.

Topics Recommendation
Topics recommendation uses artificial intelligence (AI) to analyze unclassified documents and existing topics, revealing hidden themes and topics that may have been overlooked by manual modeling.
Qtip: Topics recommendation can be enabled or disabled by an account administrator.
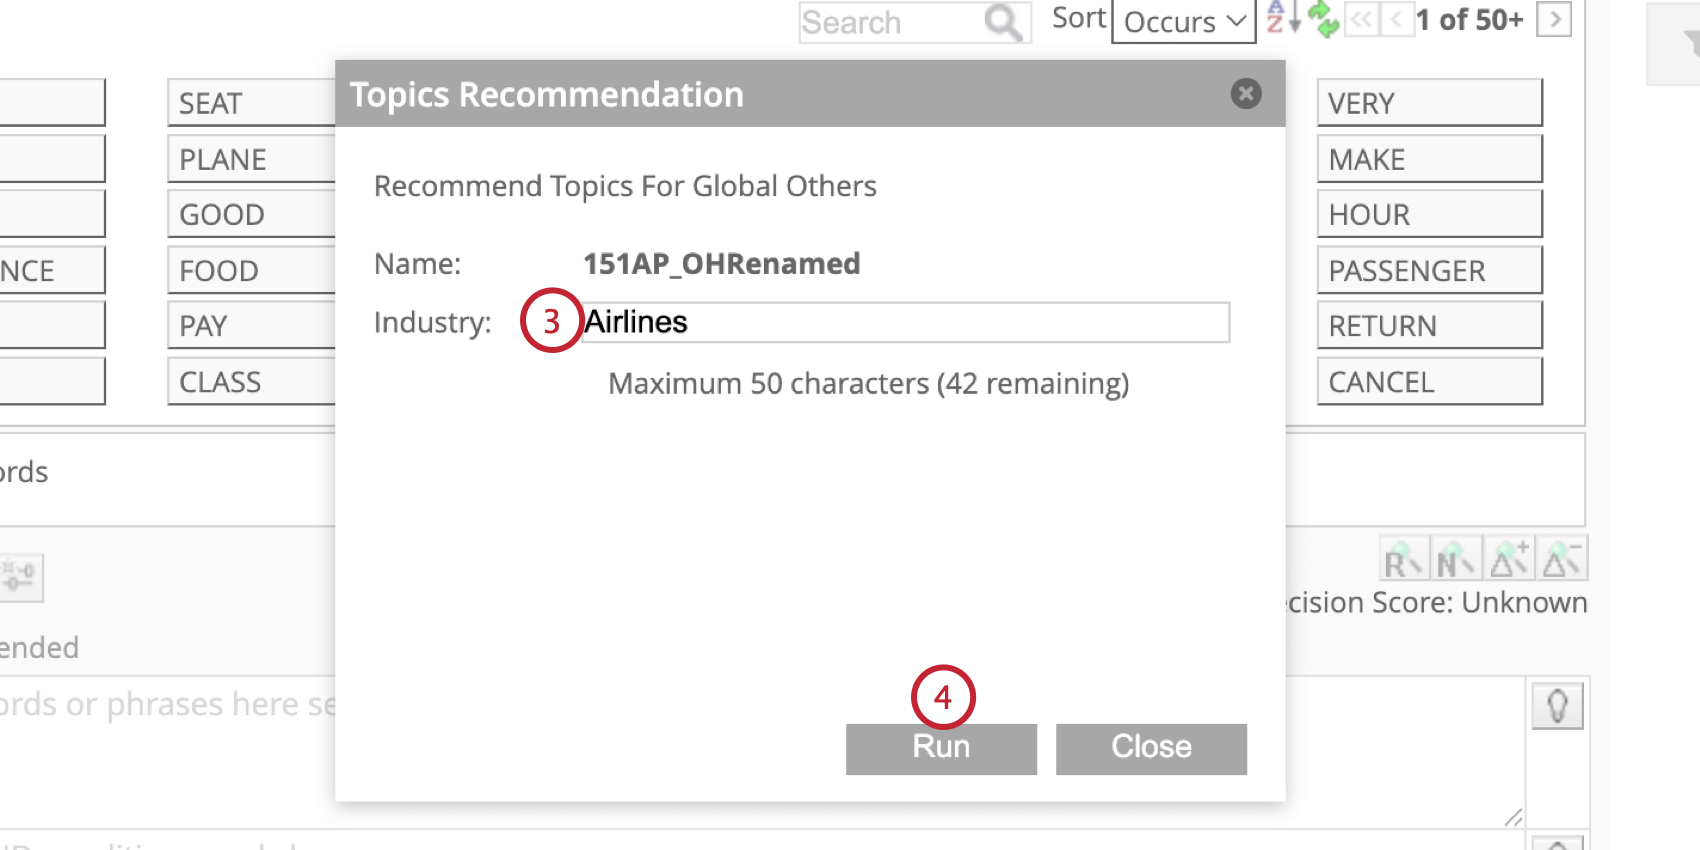
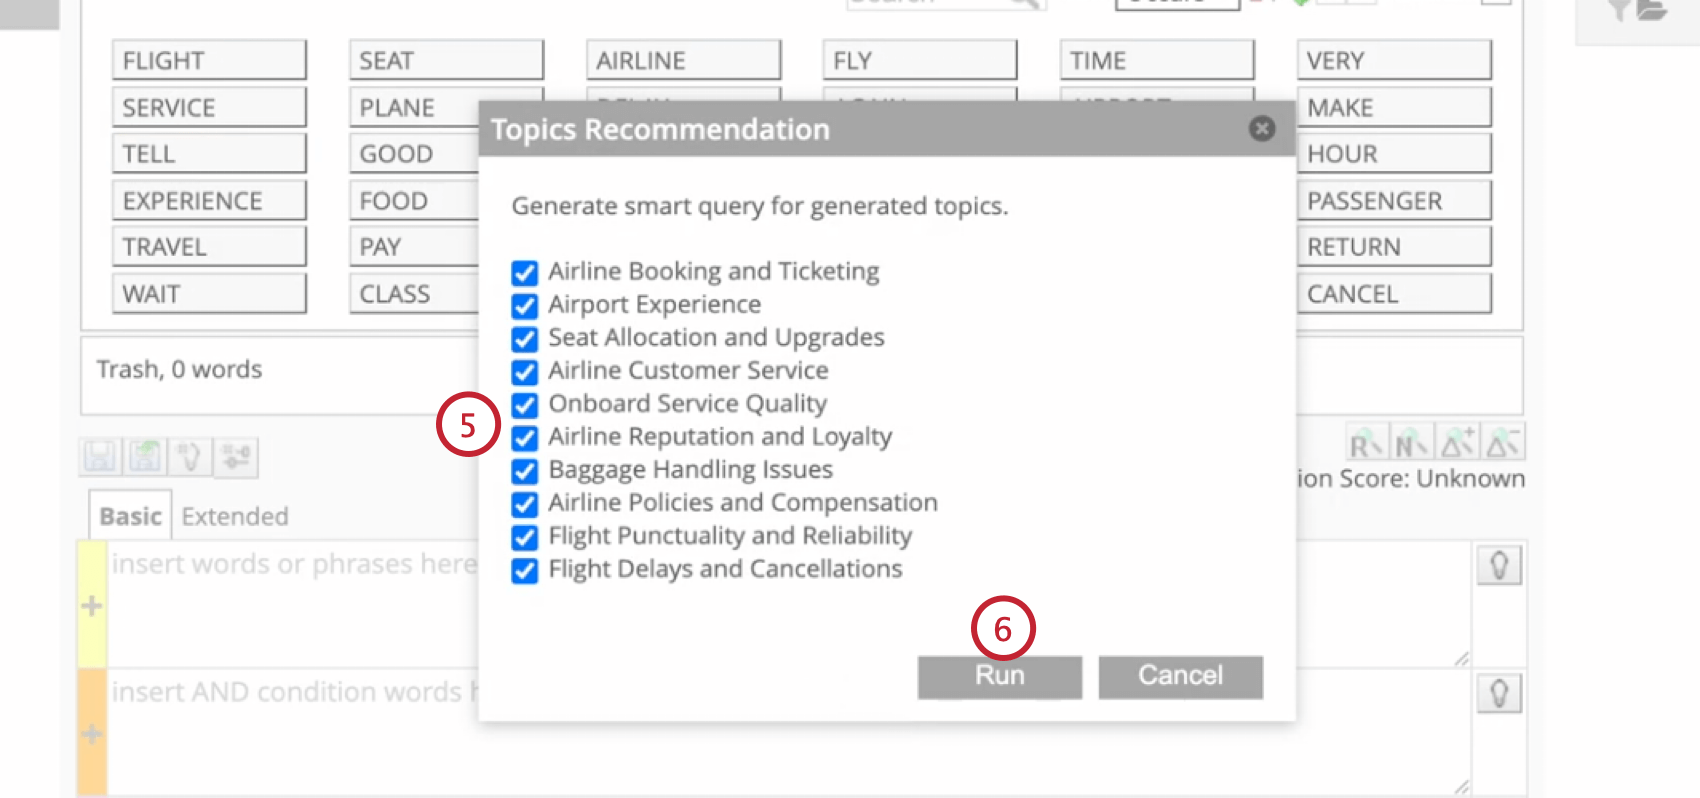
Qtip: If you see “No Recommendations” then you can try again by closing and rerunning recommended topics. Recommended topics use a sample of your data; different samples may produce different results when run again.
Qtip: If you receive the error message “Validation failed. Limit Exceeded.”, wait one minute then generate Topic Recommendations again.
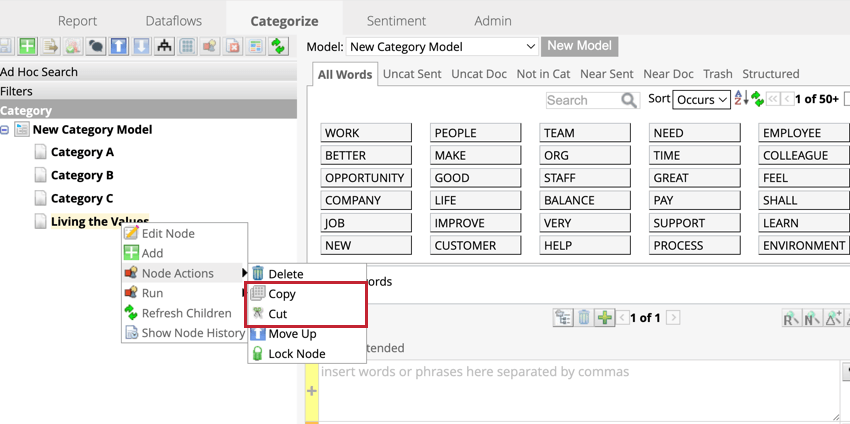
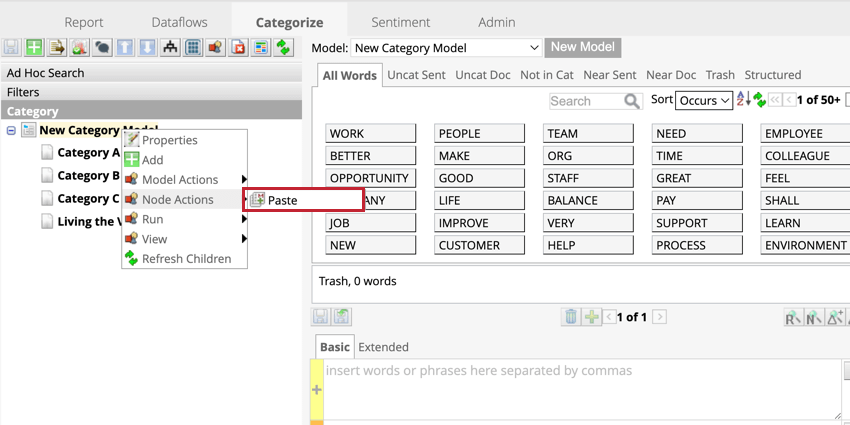
Copying and Pasting Categories
To copy or cut a category, right-click that category, then hover over Node Actions and click Copy or Cut.

To paste a category, right-click the category group that you would like to paste the category in. Hover over Node Actions then click Paste.
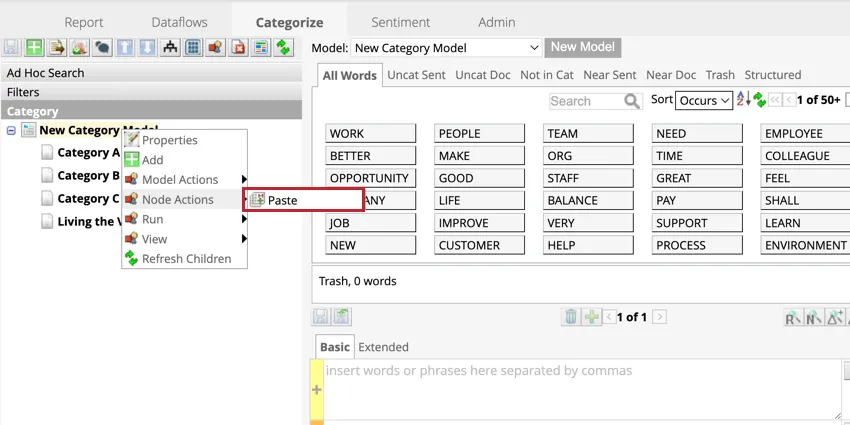
Attention: When you cut or copy a category, its status and classification rules are copied as well.
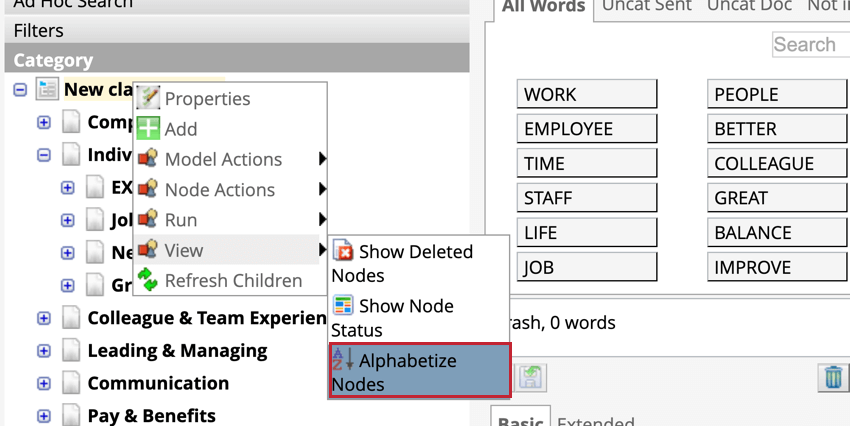
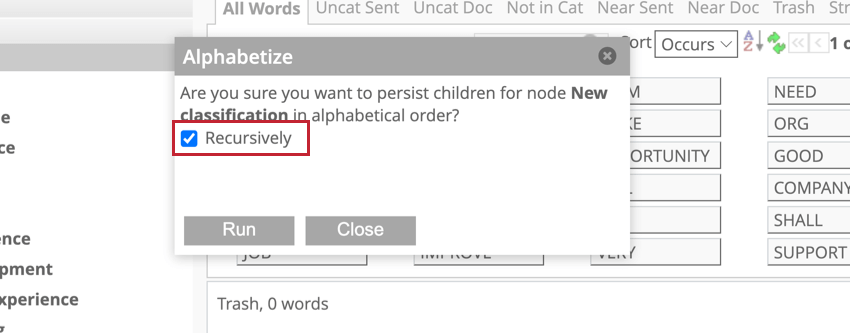
Alphabetizing Categories
You can automatically arrange all categories by alphabet from A to Z. Right-click the root node then hover over View and click Alphabetize Nodes.
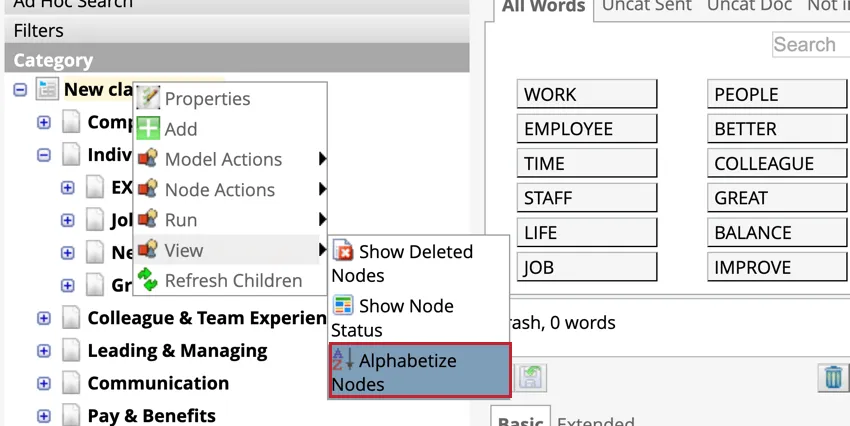
Alphabetizing will sort all category groups by alphabet. If you select Recursively, all nodes inside category groups will be alphabetized in addition to category groups.

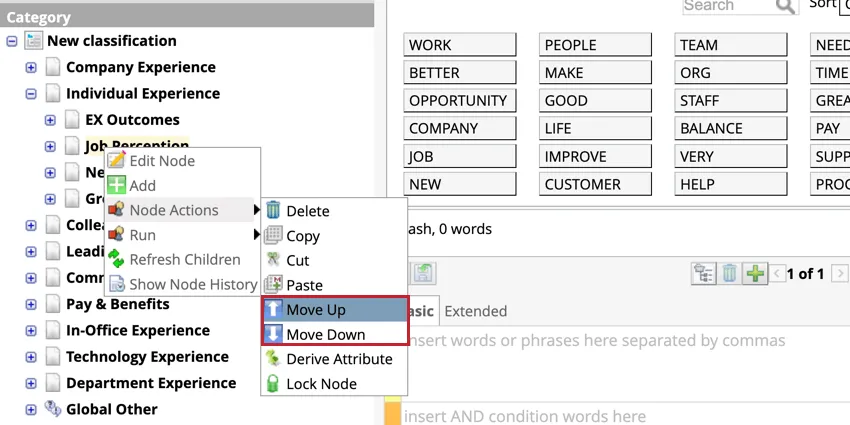
Moving Categories
To move categories up and down, right-click the category, hover over Node actions and click Move Up or Move Down.
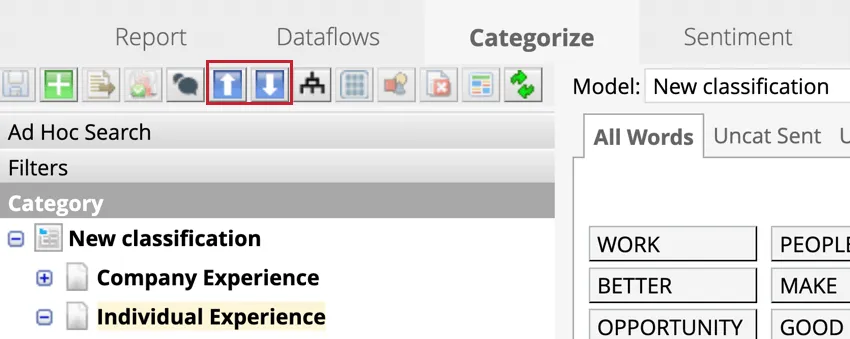
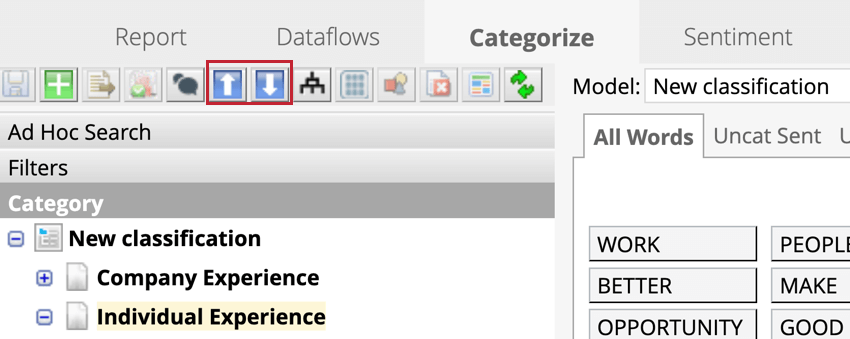
Qtip: Alternatively, you can select a category then click the up and down arrows in the menu above the category tree.
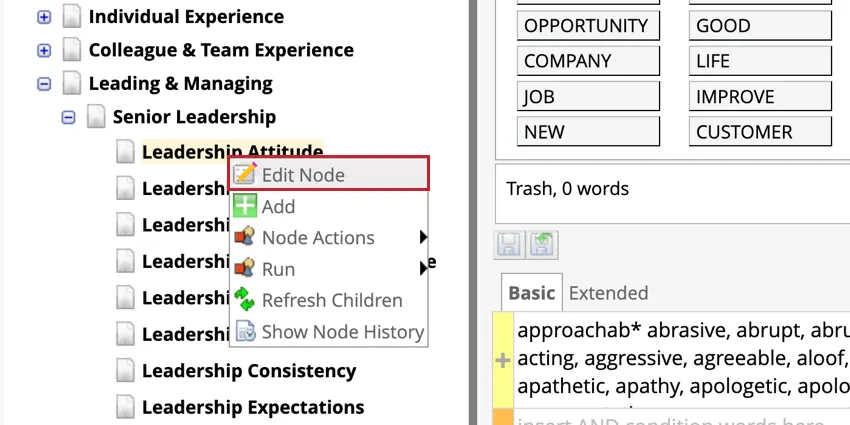
Editing Categories
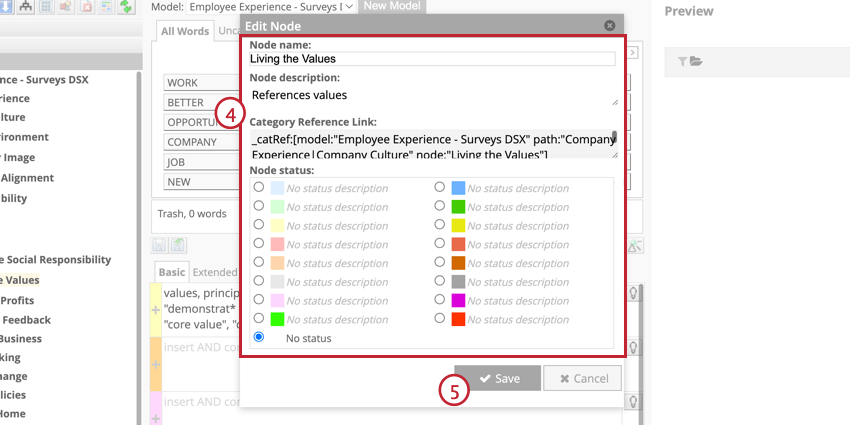
To edit a category, right-click the category and then click Edit Node.
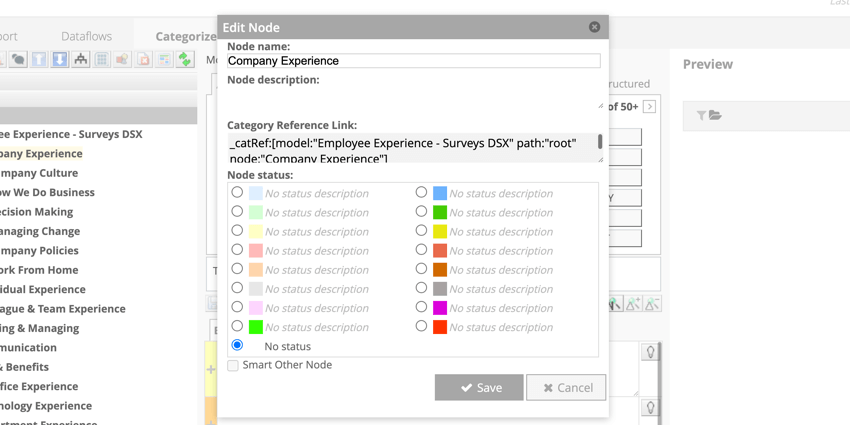
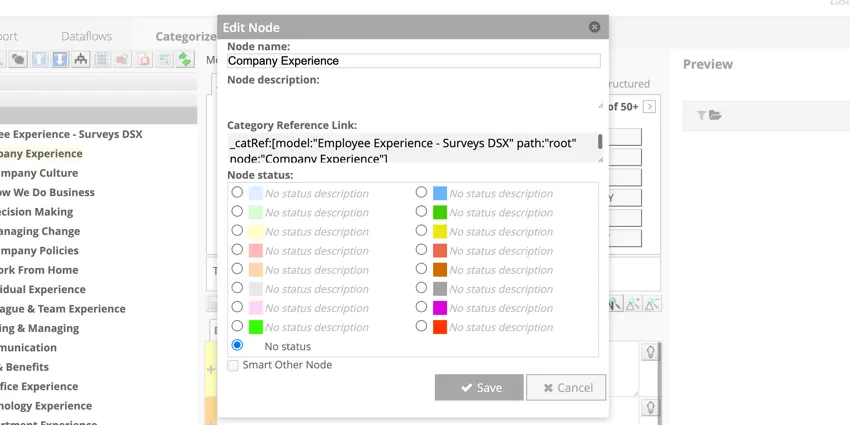
You can change the node name, node description, and node status. When you’re finished editing, click Save.
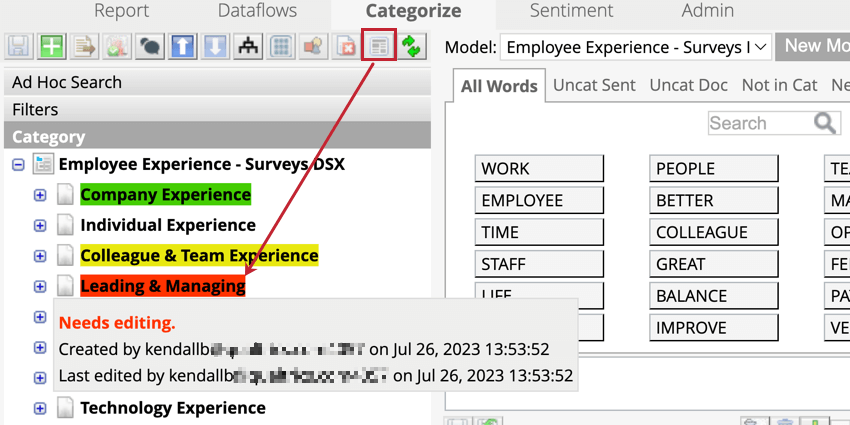
NODE STATUSES
Statuses can be assigned to nodes to provide useful information for other editors. To assign a status, edit the node and select a status, then click Save.
To make colored statuses visible in the category model, click Show Node Status at the top pane. With this setting enabled, nodes are highlighted to the color of the status and users can hover over the node to view the status title.

Qtip: Statuses cannot be assigned to the root node.
Qtip: Statuses are not exported while exporting a classification.
Qtip: Statuses are set up in the Classification tab of the project’s Admin settings.
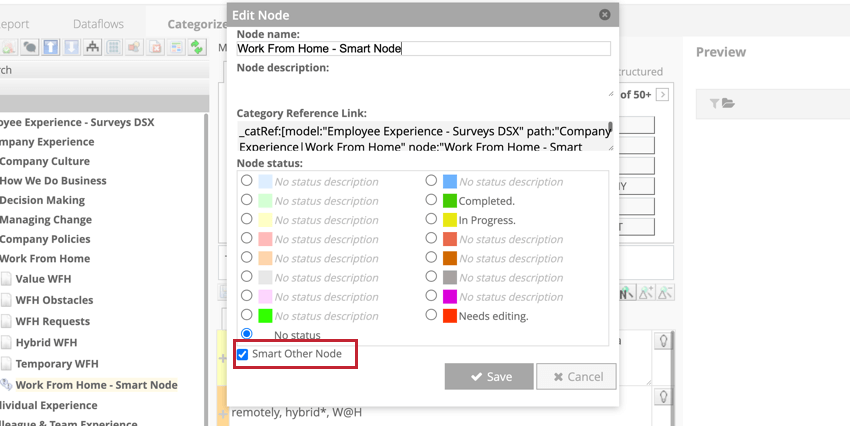
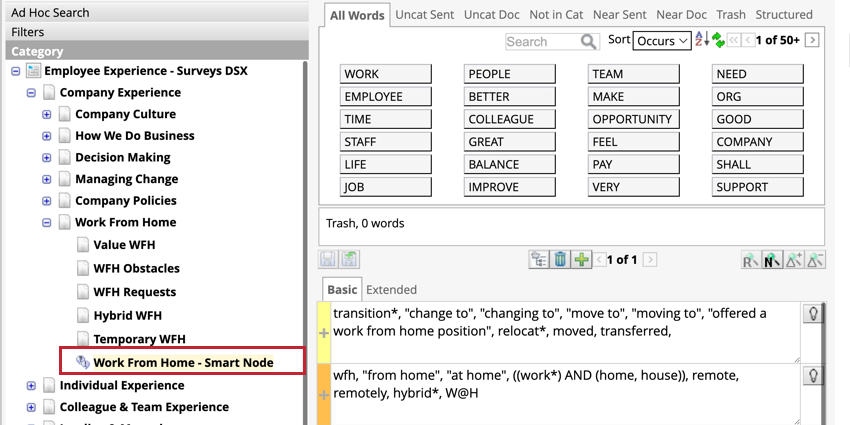
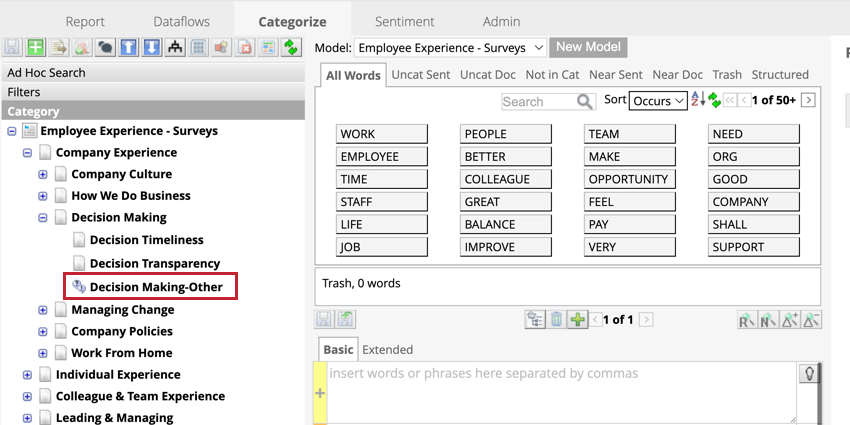
SMART OTHER NODES
Smart Other Node is a special category type that automatically excludes data captured by other categories. Smart Other categories look at how words are categorized into sentences, and are available for reporting in studio. This category type provides a more flexible alternative to “Other” buckets, and sentences categorized into a Smart Other node are excluded from the Local Other bucket.

Sentences will be categorized into the “Smart Other Node” if they match the rules of the parent category but none of the categories within the group.

Qtip: Smart Other Nodes can have their own rules to narrow down the data that is captured. When this is the case, sentences that match the Smart Other Node rules will be included in that category so long as they do not match any of the rules in the other categories of that group.
Attention: Node-level classification and category references cannot be used in Smart Other Node rules.
Attention: Preview for Smart Other Nodes only works on the category model that has been classified, so may not reflect the current state of the category model. For information on running a classification on a category model, see Classifications (Designer).
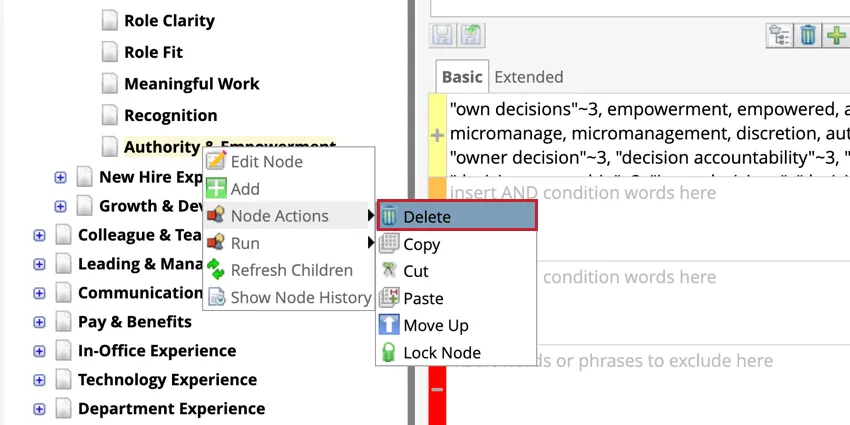
Deleting Categories
Categories that are no longer needed can be deleted from the category model. This action is permanent and cannot be undone. Right-click the category, then hover over Node Actions and click Delete.
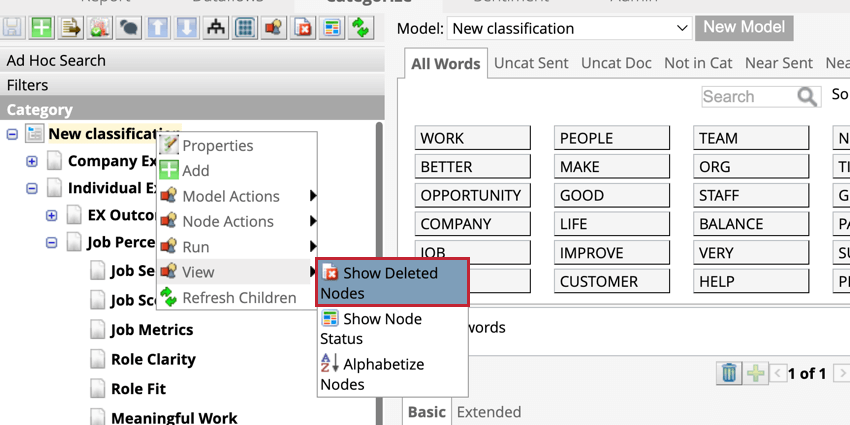
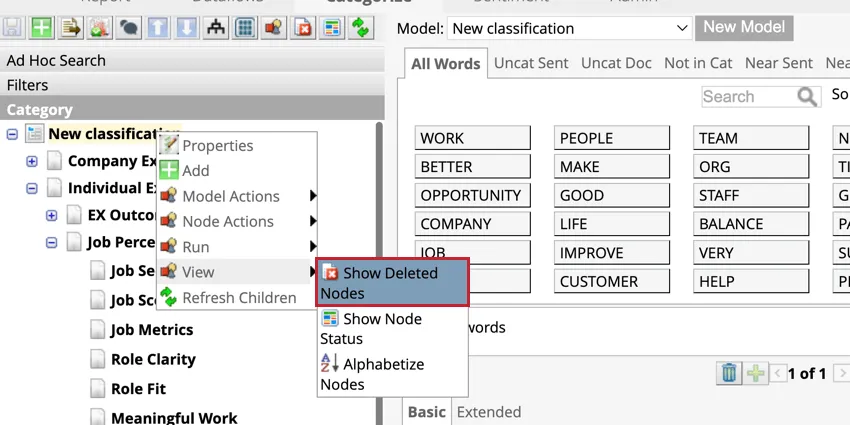
SHOWING DELETED NODES
Deleted categories cannot be restored, but you can show deleted category groups to view their status and rules. Right-click the root node then hover over View and click Show Deleted Nodes from the context menu.
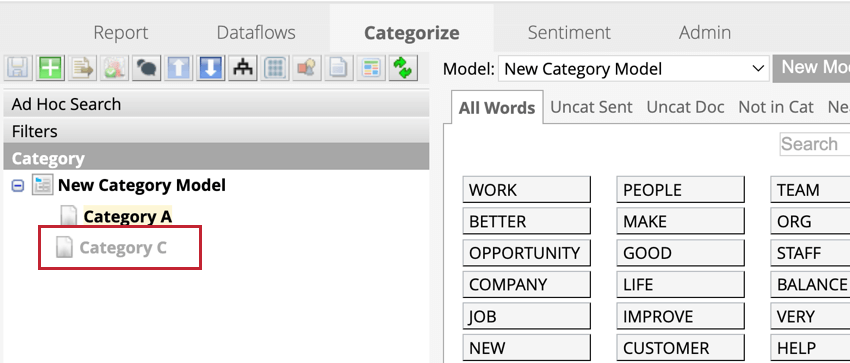
Deleted nodes are shown in gray and no actions can be performed on them. Only parent nodes can be shown.

Qtip: To hide deleted nodes, right-click the root node then hover over View and click Hide Deleted Nodes.
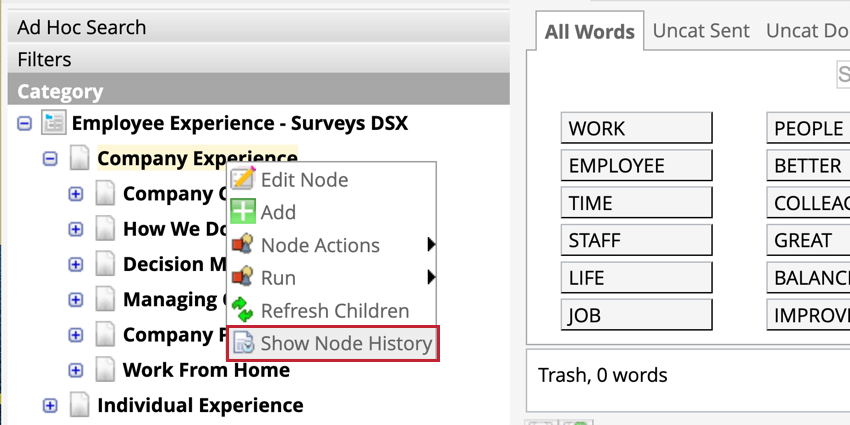
Viewing Category History
All actions performed on a node are stored in the Node History. To view the history of a particular node, right-click the node and select Show Node History.

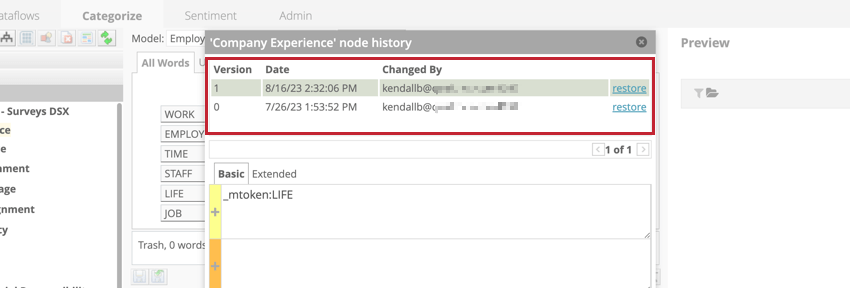
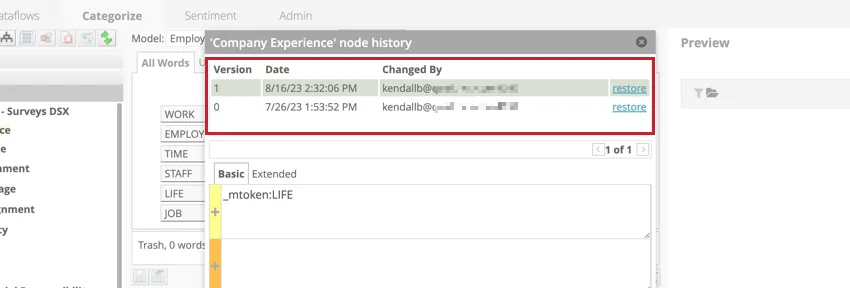
Click on a version of the node to see the corresponding node rules in the rule lanes beneath the version history. To revert to an old version, click Restore next to the selected version.
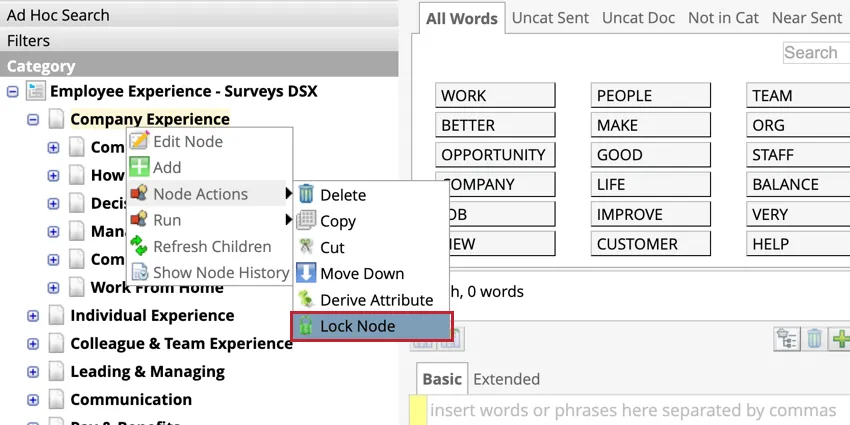
Locking Nodes
Locking nodes can help prevent other editors from modifying the node at the same time. To lock a node, right-click the node you would like to edit and hover over Node Actions then select Lock Node.
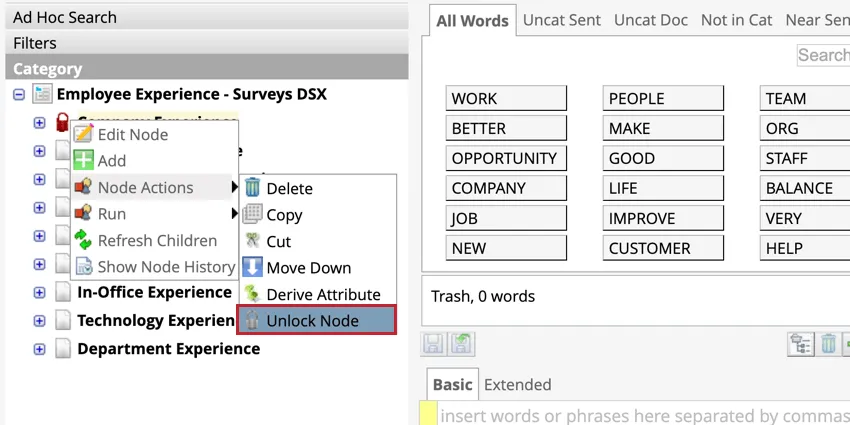
To unlock a node, right-click the node you would like to unlock and hover over Node Actions then select Unlock Node.
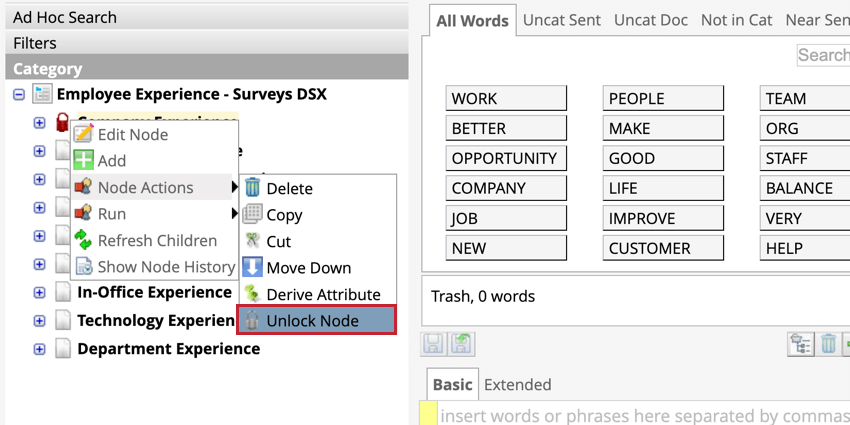
Qtip: Administrators can select Strict Lock to lock nodes for all users, even if they have been locked previously.
Qtip: To prevent users from editing an entire model, Administrators can set their model-level role to None.
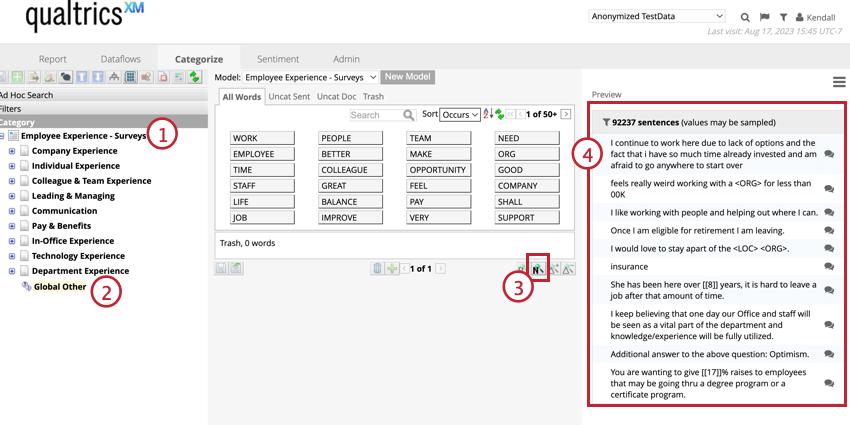
Uncategorized Data
All uncategorized data from documents will be in the “Global Other” bucket. Use preview to look at all uncategorized sentences in this bucket.
LOCAL OTHER BUCKETS
“Local Other” buckets are available in category groups that have rules and child nodes available. These buckets contain sentences that were classified into the parent node but not a child node.

Local Other buckets are not available for the root node. Instead, see the Global Other bucket.
Qtip: Choose how sentences classified into “Local Other” buckets should be treated in the category model properties.
Attention: The “Other” buckets in the Reports tab works differently than the Categorize tab and therefore could have less sentences. In reporting, only sentences that are not classified in any verbatim / documents are included in the global and local “Other”. If at least one sentence is classified into a node, no other sentences from that verbatim / document will be included in the bucket.
FAQs
What is a node?
What is a node?
For example, your category tree may be Airline Journey, and includes topics like Booking Functionality, Payment, Upgrades, and more, which all might have topics underneath them, as well. Each branching topic is a node. “Airline Journey” would be the root node.
What’s the difference between a category and a node?
What’s the difference between a category and a node?
What is the difference between Global Other and Local Other?
What is the difference between Global Other and Local Other?
The Local Other bucket is a collection of all sentences that pass the criteria for a node in a model (other than the root node), but not the criteria for any of its subcategories. The Local Other bucket is a special node for sentences that match the parent topic, but none of its child topics.
That's great! Thank you for your feedback!
Thank you for your feedback!