
Create an XM Directory Sample Task
What's on this page
About the Create an XM Directory Sample Task
The Create an XM Directory sample task allows you to create samples of contacts to use within a workflow. This sample can then be referenced in subsequent workflow tasks.
For example, let’s say you have a mailing list in your XM Directory that contains every customer who is signed up for your customer loyalty program. Every month, you want a random 10% of that mailing list to receive a feedback survey on how to improve the program. You also do not want the same customer to receive the feedback survey within a 6 month period. You can set up a workflow to create this sample, and then that same workflow can distribute a feedback survey to that sample.
Qtip: This task is compatible with both XM Directory and XM Directory Lite. However, this task is not available in all licenses, and may not include certain features when used with XM Directory Lite. If you’d like to upgrade to XM Directory, reach out to your Account Executive.
Qtip: While the output created in this task can be used in the workflow, it will not be saved as a mailing list sample unless an existing mailing list is selected as the sample source.
Setting up a Create XM Directory Sample Task
Follow the linked instructions to create a new workflow. Your workflow can be triggered by an event or run on a set schedule.
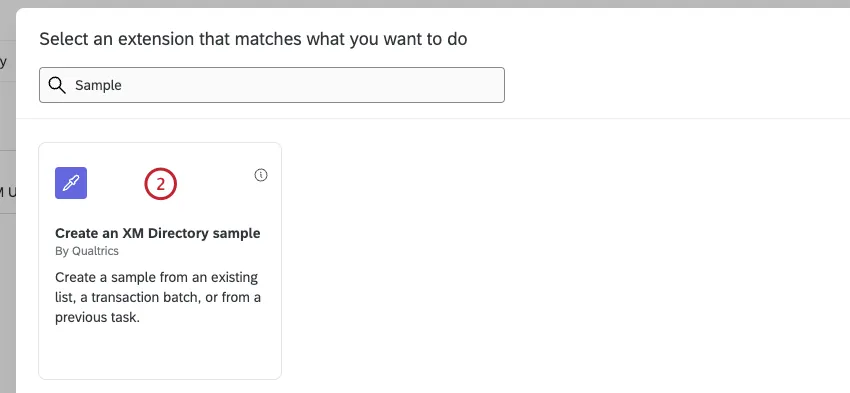
When you get to the step about adding a task, select the Create XM Directory Sample task.
Select a sample source, which determines what contact lists are available for you to choose to generate your sample.
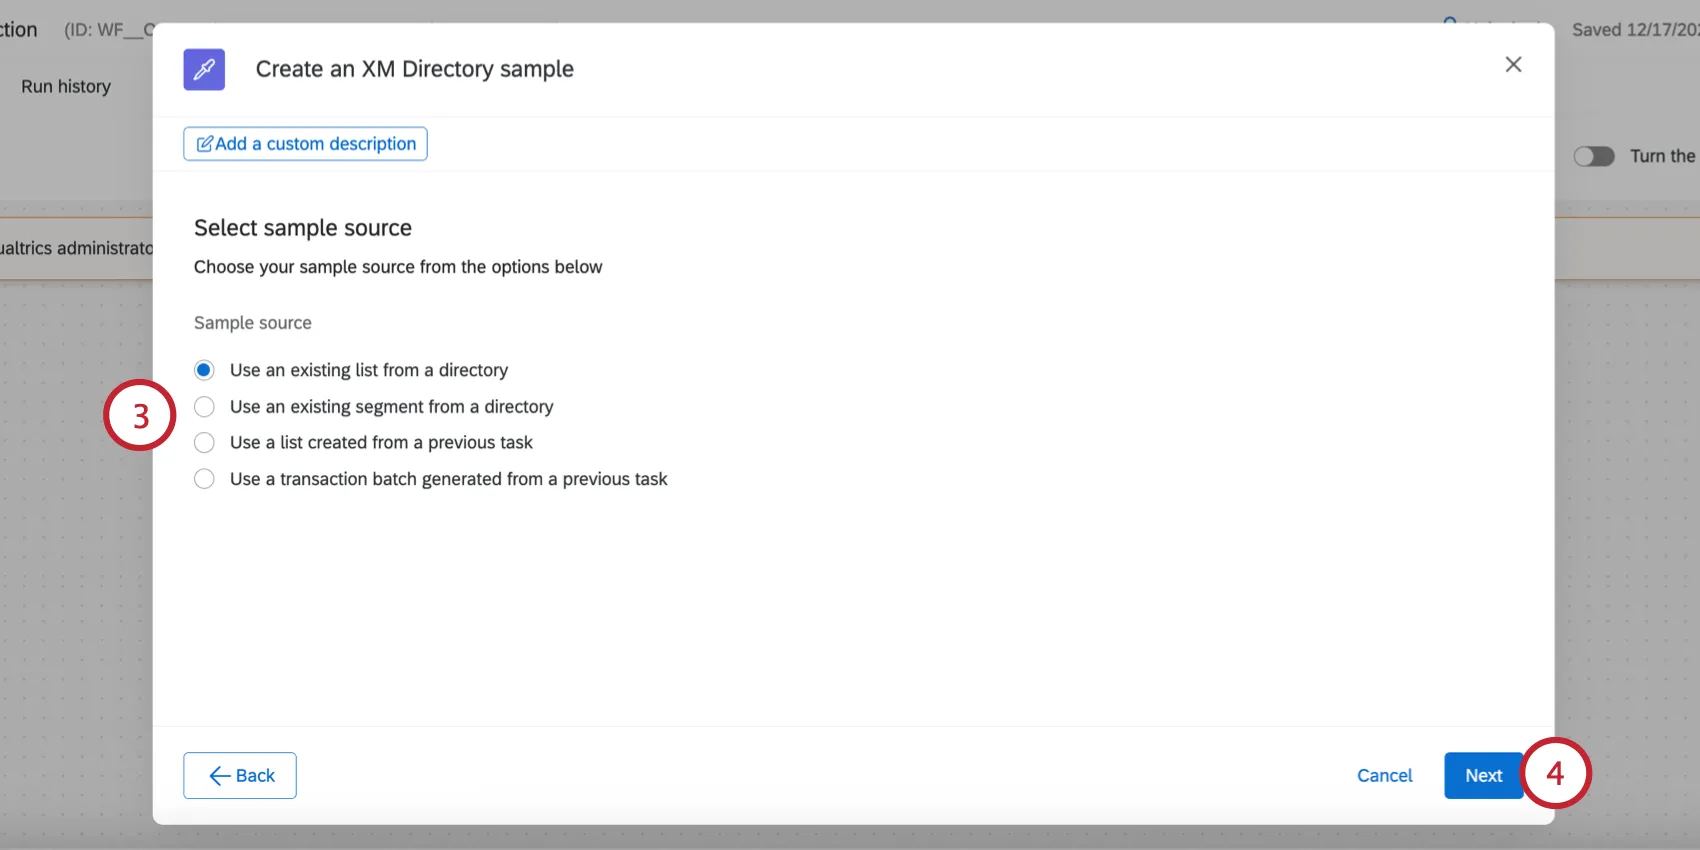
Your options include:
- Use an existing list from a directory: Generate your sample from a mailing list that already exists in your XM Directory.
- Use an existing segment from a directory: Generate your sample from a segment that already exists in your XM Directory.
Use a list created from a previous task: Generate your sample from a mailing list from a previous task in your workflow. See Piped Text for Sampling Workflows for more information on making sure you choose the right mailing list ID.

Example: For example, let’s say you’re uploading customer contacts from your company’s SFTP server using the extract data from SFTP files task. You can then save these contacts to a new list in your directory using an add contacts and transactions to XMD task. Then, use the create an XM Directory sample task to create a sample from this list.
- Use a transaction batch generated from a previous task: Generate your sample from a transaction batch from a previous task in your workflow.
Click Next.
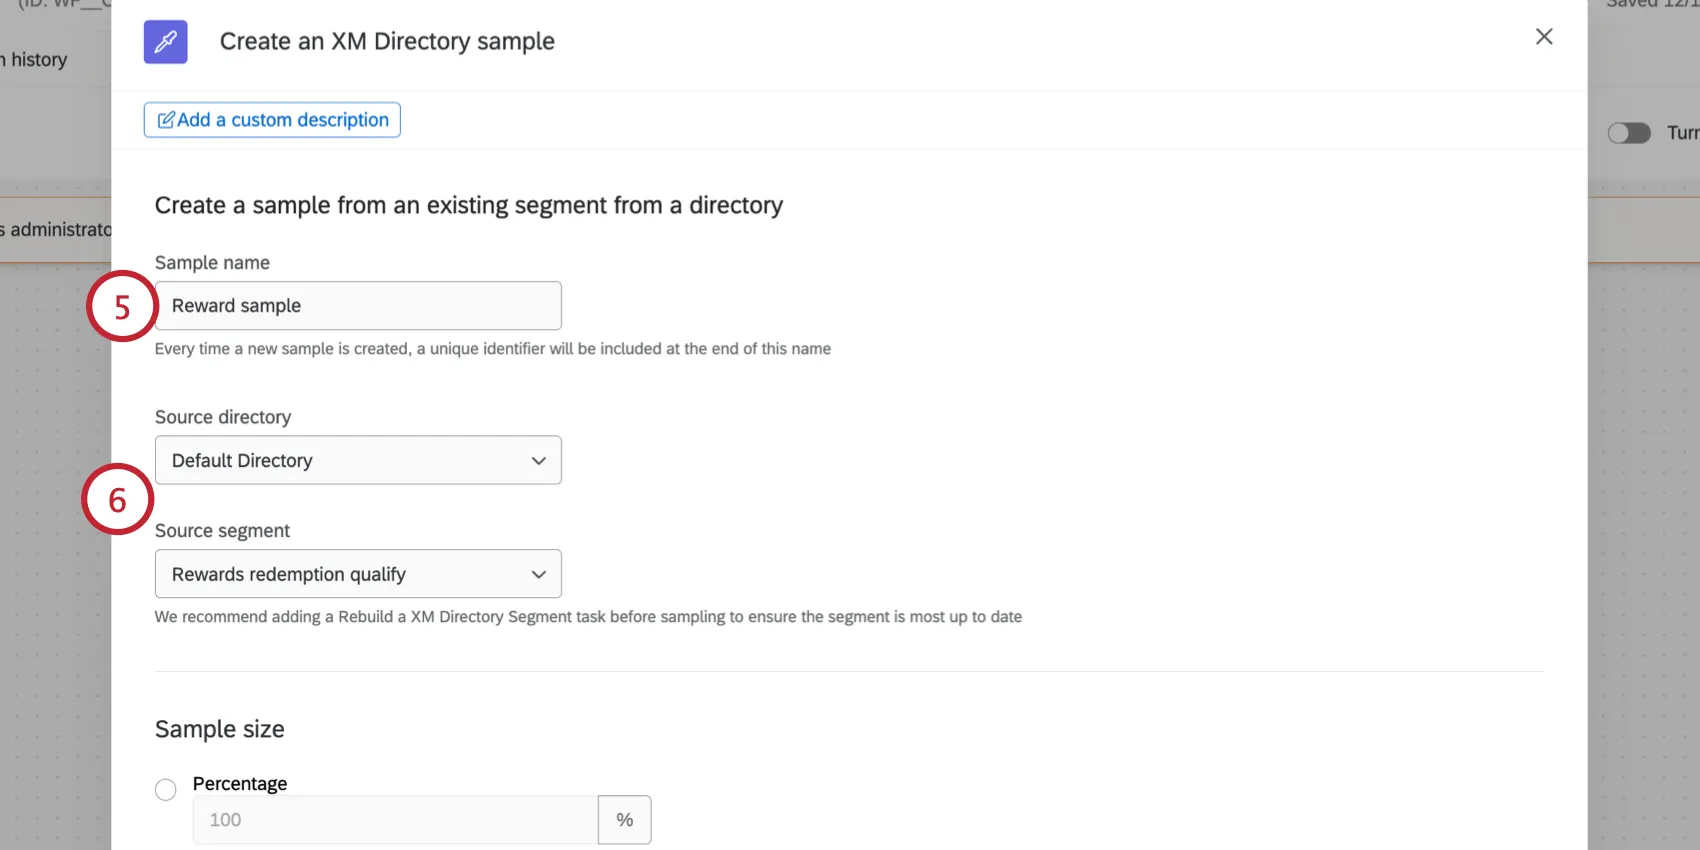
Give your sample a name so you can identify it later. A unique ID will be generated and added to the sample name each time a new sample is created.
Next, choose the input data for the sample:
For Source directory, choose which directory contains the mailing list you want to reference. If you chose “select from previous task” as your source, then choose the same directory that contains the mailing list or transaction batch you plan to reference. Your newly created sample will be saved in this directory.

Qtip: Not all organizations have multiple directories. If your organization only has 1 directory, then your only option is “Default Directory.”
- For the second Source, choose the list that contains the contacts you’d like to sample. The options that appear here depend on the option you selected in step 3. For example, if you are building a sample based on an existing segment, then you’ll chose the segment here.
Choose your Sample size.
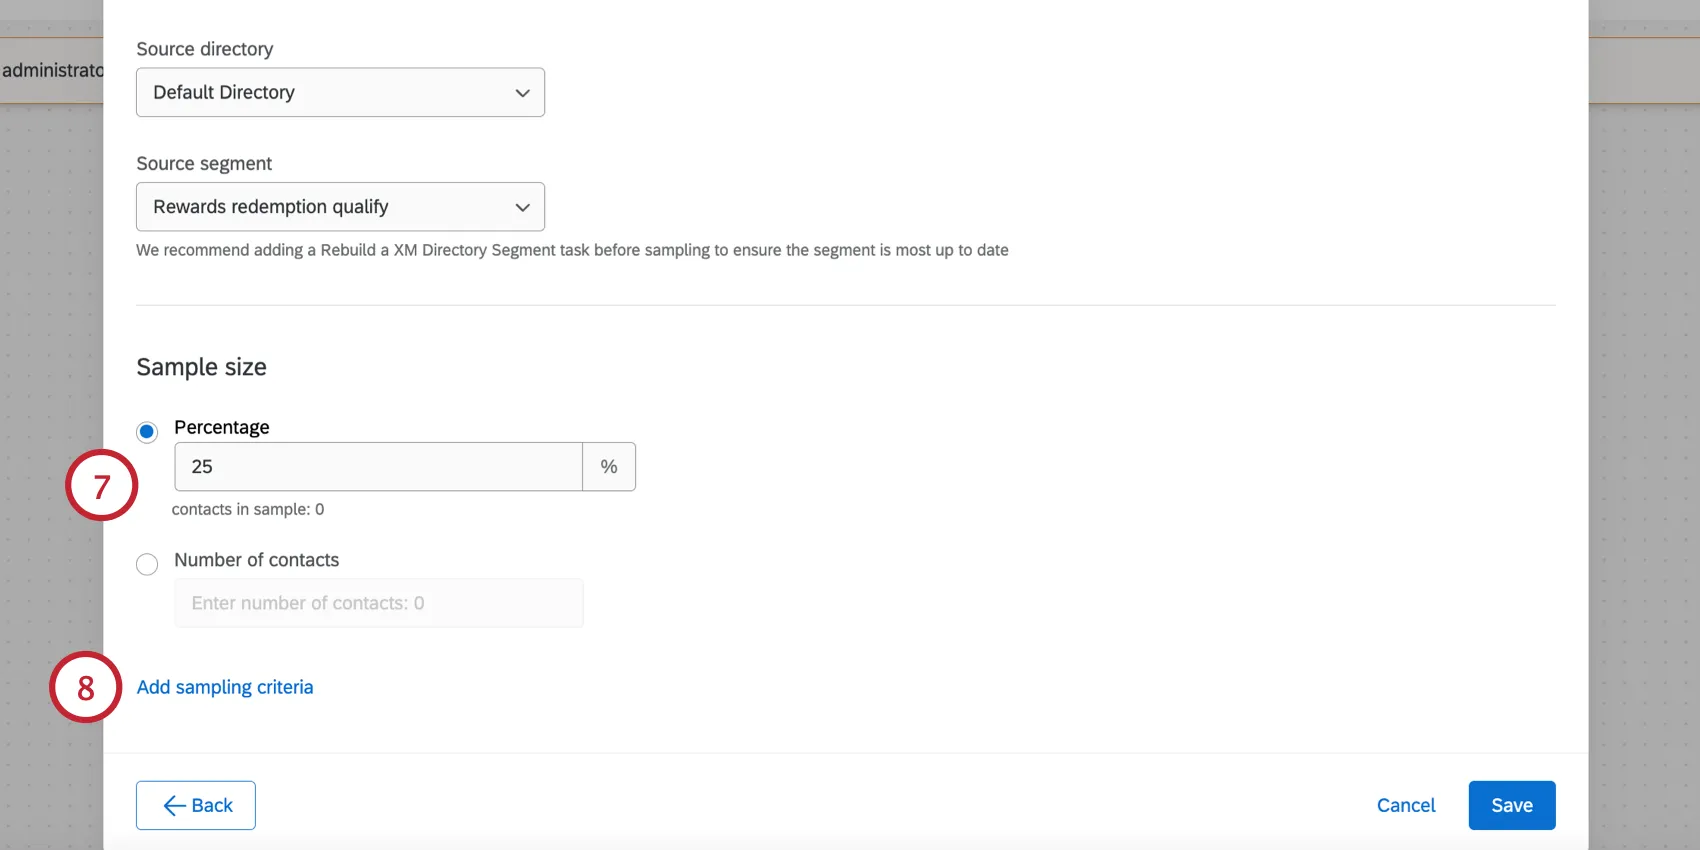
You can set the sample size using 2 different methods:
- Percentage: Enter a percentage between 1-100 to sample a portion of the source list.
Number of contacts: Enter the number of contacts you want to include in the sample.
Qtip: If the number of contacts meeting the sampling criteria is less than the number specified here, only the contacts that meet the sampling criteria will be returned.
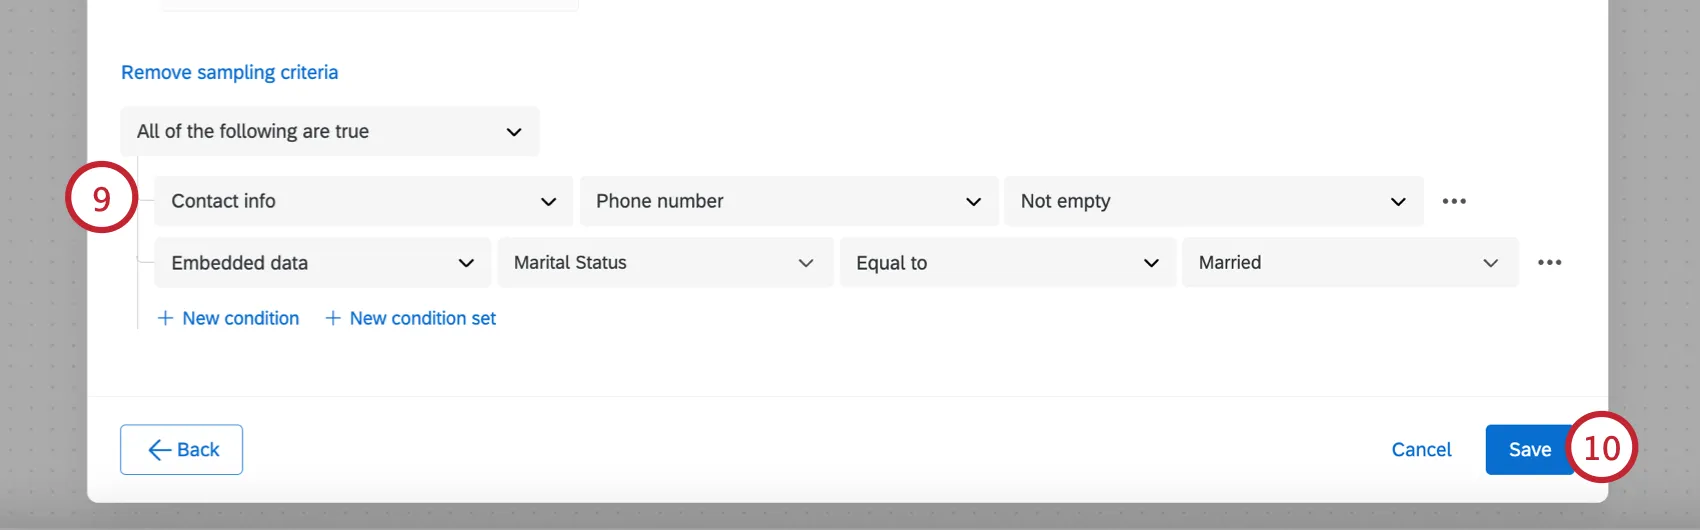
You can further narrow down who’s included in your sample by clicking Add sampling criteria.
The way you create sampling criteria in this task is the same way you build samples and filters in XM Directory. See Creating Mailing List Samples and Fields You Can Filter By for more information on building sampling criteria. You can have 10 top-level conditions and 10 conditions per block (so 100 conditions total), but when sampling from a transaction, you can only have 10 conditions total.
Attention: When sampling by transaction fields, only transactions with a Transaction Date from the past year will be returned. For example, if you added a transaction today, but gave it a Transaction Date set 2 years in the past, then that contact will not meet the sampling criteria.
Attention: Trailing spaces will not be trimmed.
Click Save.
Click the plus sign ( + ) and then Add a task to add a task to your workflow.
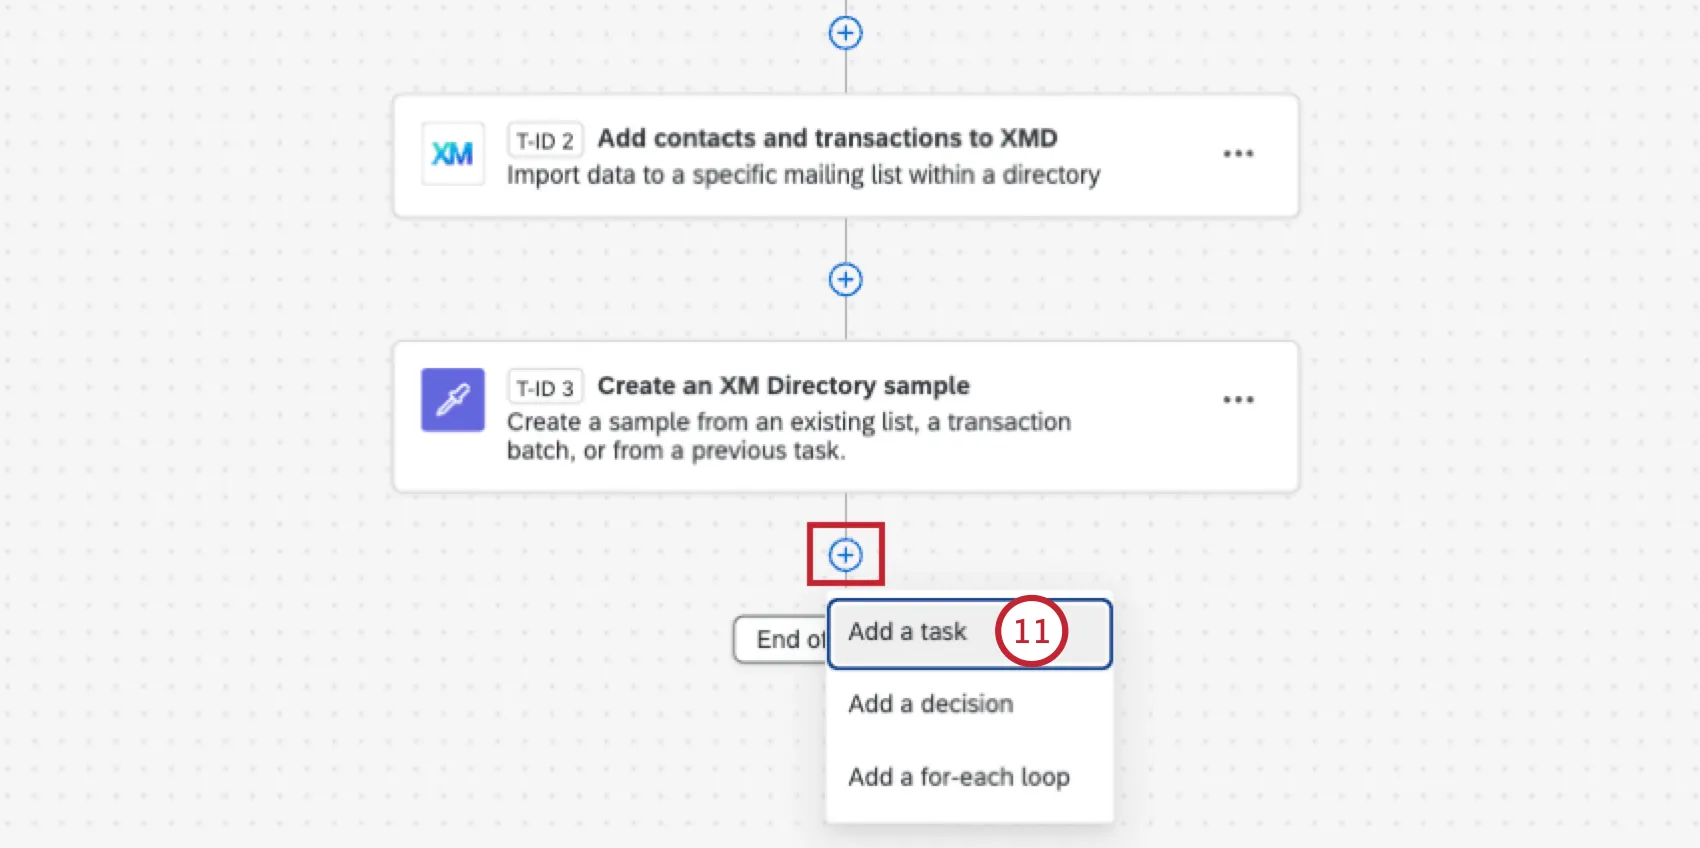
The most commonly used tasks are:
- Send Survey via Email Task: Distribute a survey to your sample via email.
- Send Survey via Text Message (SMS) Task: Distribute a survey to your sample via text message (SMS).
When setting up your subsequent task, you can reference your created sample using the piped text menu, {a}. See Piped Text for Sampling Workflows for more information.
Piped Text for Sampling Workflows
This section covers how to use piped text for different sampling workflows.
Basing samples off lists created in the same workflow
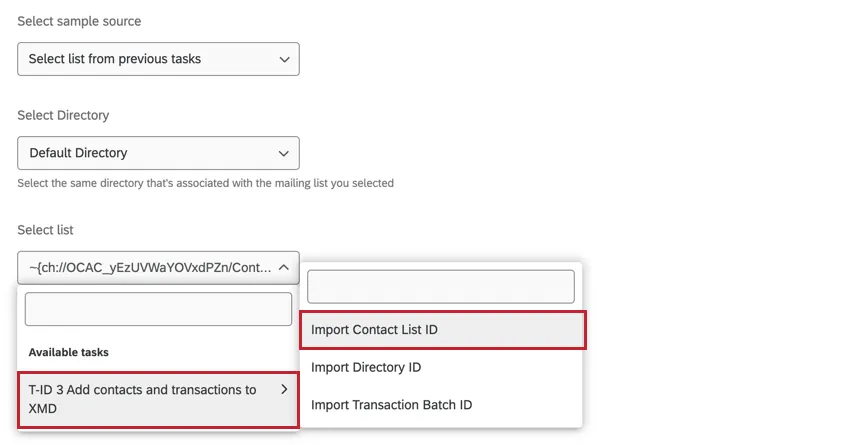
You can use the sampling task to make a sample based off a mailing list that’s created in the same workflow (example task). To do this, you need the ID of the list created earlier in the workflow. This can be generated dynamically using the steps below.
In the Select list dropdown, hover over the task that creates the mailing list, then select Import Contact List ID.
Distributing to samples created with this task
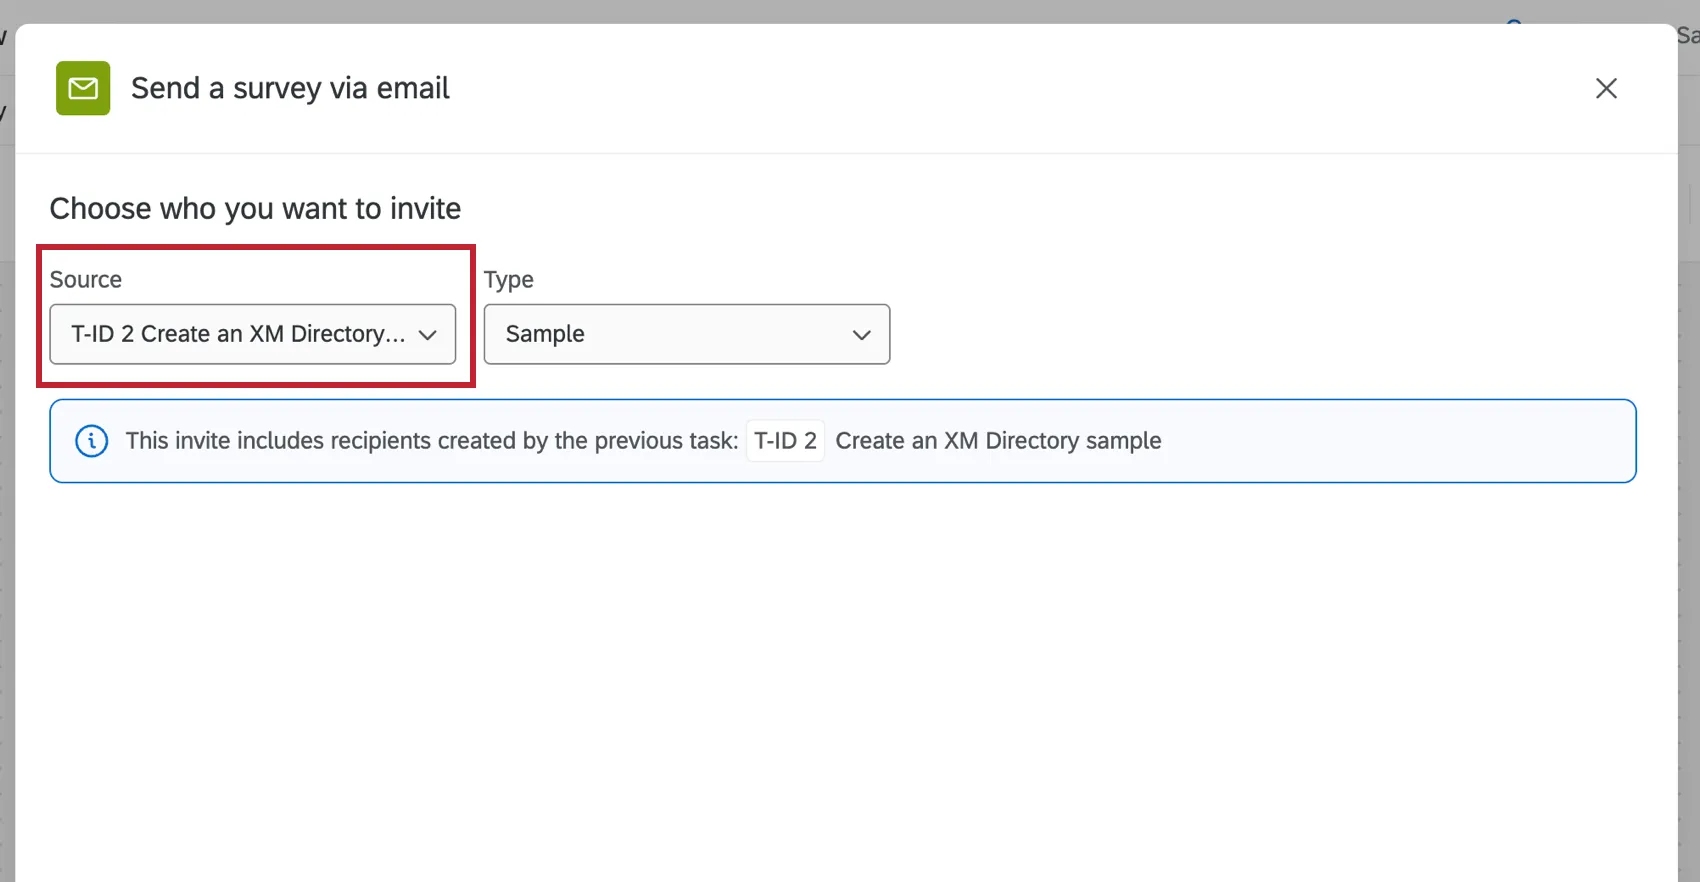
Once you've generated a sample with this task, you can send a survey to it within the same workflow.
First, add a send survey task (email, SMS).
When you choose who to invite, select the “Create an XM Directory Sample Task” as your Source. Then select Sample as the type.
Troubleshooting task failures
If your workflow with the sample task fails, you may see the following message in the run history:
MOD_15 - 'sample source' was empty, expected non-empty value. Please ensure that the task responsible for generating the piped text value completed successfully and was not skipped or a no-operation.
This message appears because there was no mailing list the sample could be created from. This is most common if you added your sample task to an ETL workflow that extracts data from one source and uses it to create a mailing list. Learn more about contact import workflows.
Example: Every Wednesday, you use an Extract from SFTP Files task to look for contacts on your server and upload them back to your directory. This week, there were no new files to process, so the task failed.
To help reduce the number of failed workflows, you could always add a condition (also called a decision) above your sample task. This condition can specify that the sample task should only run if the mailing list ID generated isn't empty.
Example: This condition says that the next tasks should only execute if Tasks Add contacts and transactions to directory List ID isn't empty.

That's great! Thank you for your feedback!
Thank you for your feedback!