
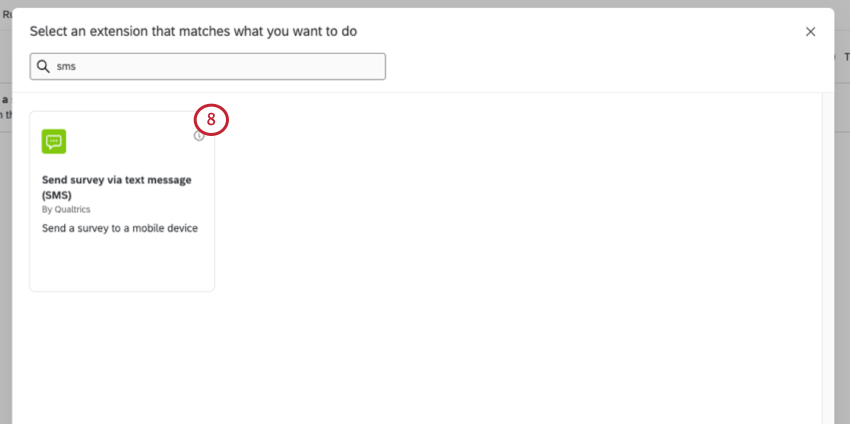
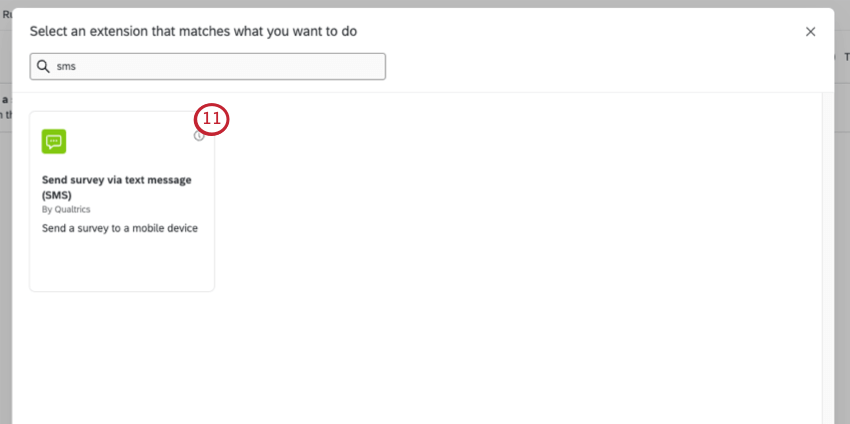
Send Survey via Text Message (SMS) Task
What's on this page
About Sending a Survey via Text Message (SMS)
SMS tasks allow you to send a survey via text message when a workflow is initiated. This task lets you set a survey link expiration, use messages saved to your library, easily set reminders, and perform more advanced scheduling.
Example: Automatically text a satisfaction survey to a customer after they interact with a customer service representative.
Qtip: The number of SMS credits you have left will be displayed while you set this task up.
Attention: Make sure your survey follows all opt-in compliance guidelines.
Qtip: This task is compatible with both XM Directory and XM Directory Lite. However, this task is not available in all licenses, and may not include certain features when used with XM Directory Lite. If you’d like to upgrade to XM Directory, reach out to your Account Executive.
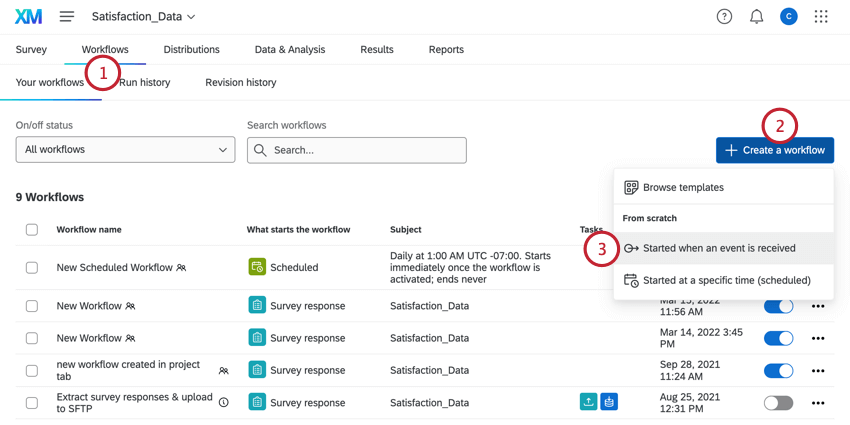
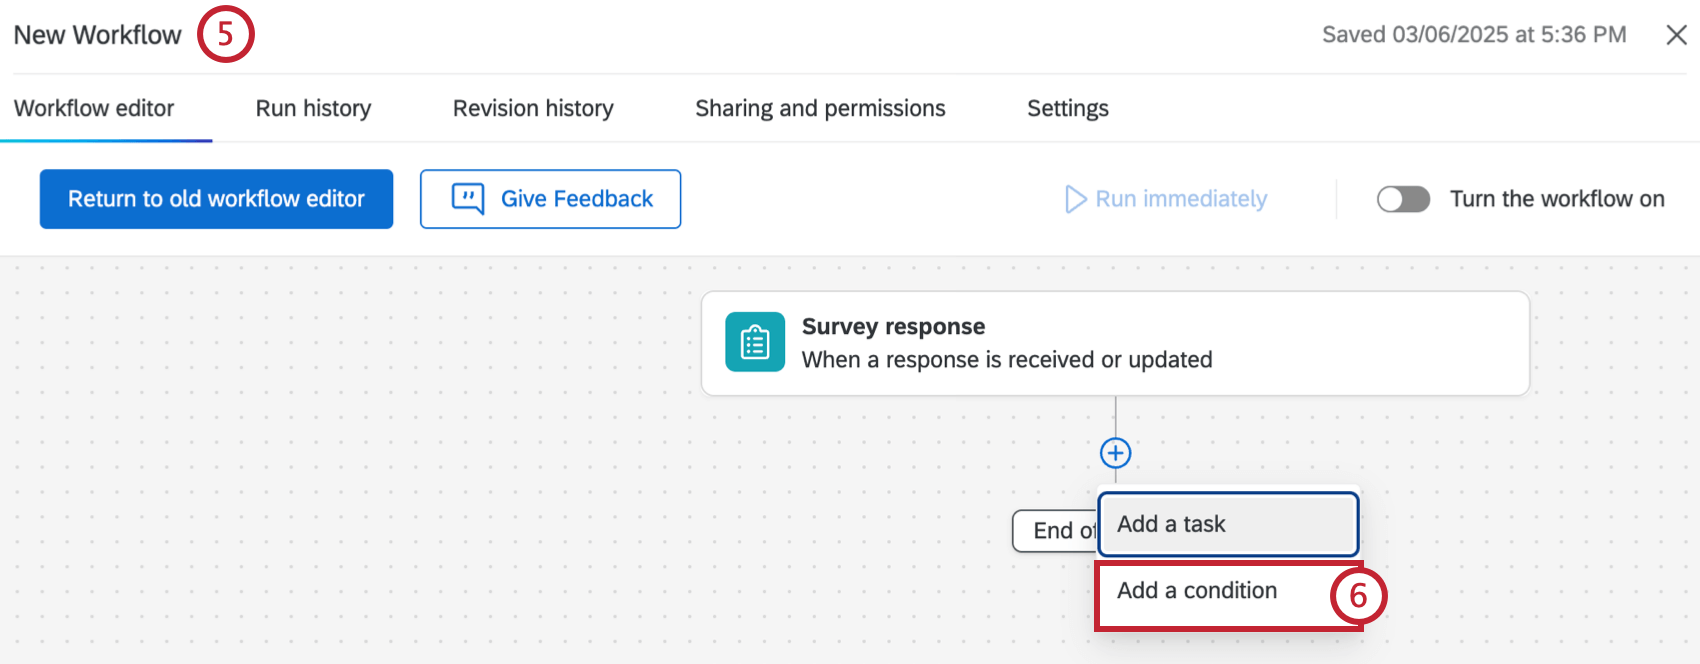
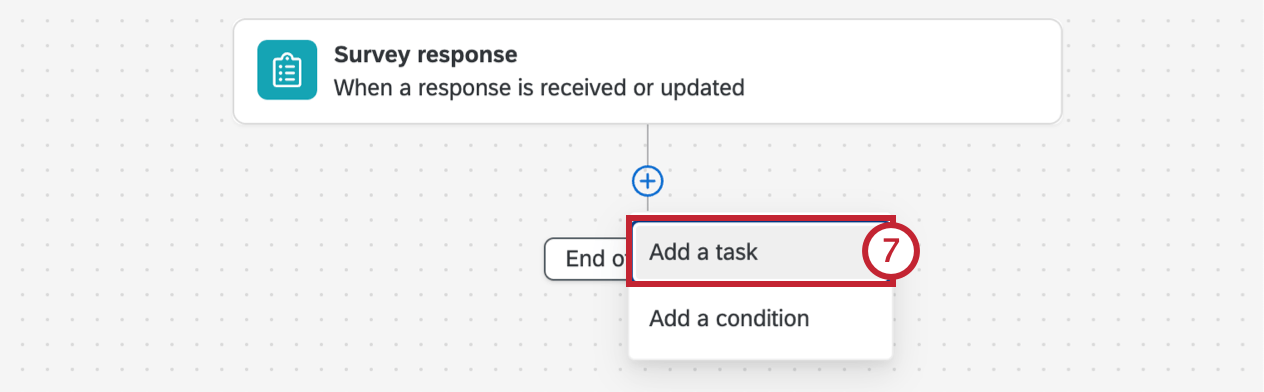
Creating an SMS Task
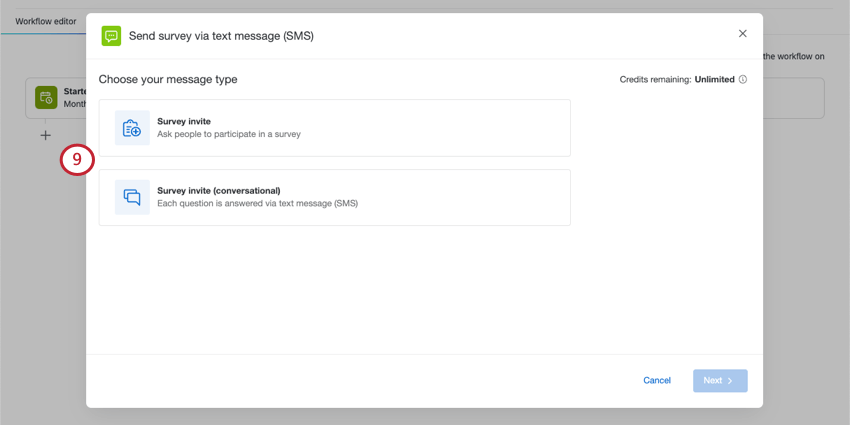
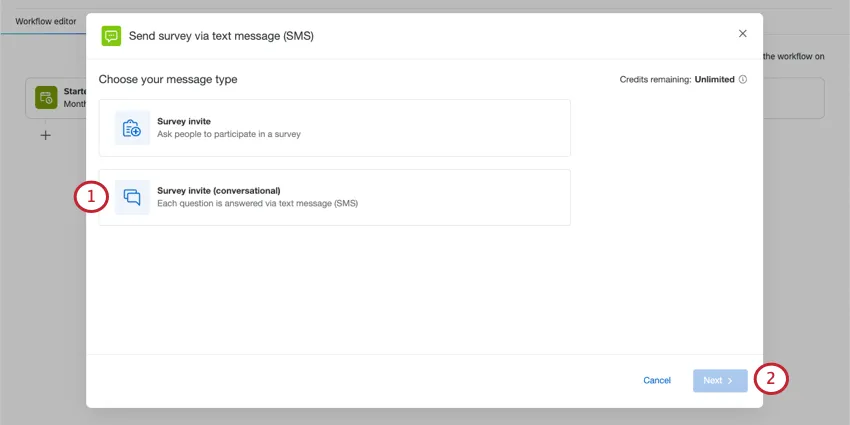
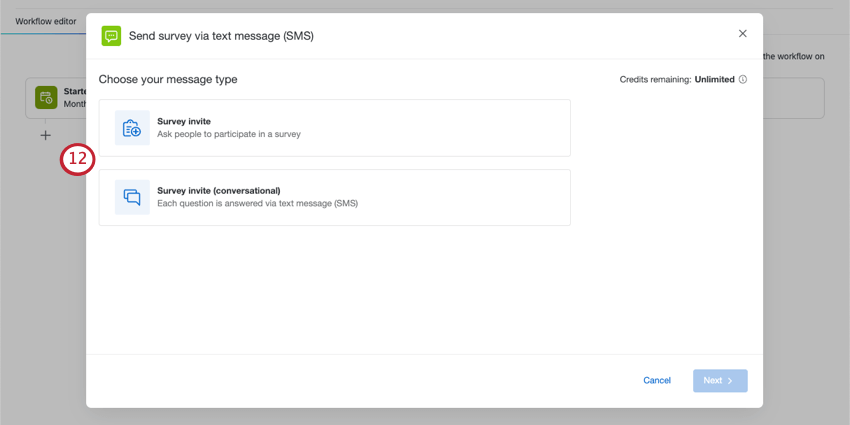
- Survey invite: Invite people to participate in a survey by sending them a link that they can open in a mobile browser. This is sometimes called “1-way” SMS.
- Survey invite (conversational): Each question is answered via text message.
This is sometimes called “2-way” SMS.
Sending a Survey Invite with a Link
Invite people to participate in a survey by sending them a link that they can open in a mobile browser. This is also sometimes called “1-way” SMS.
Select Survey invite.
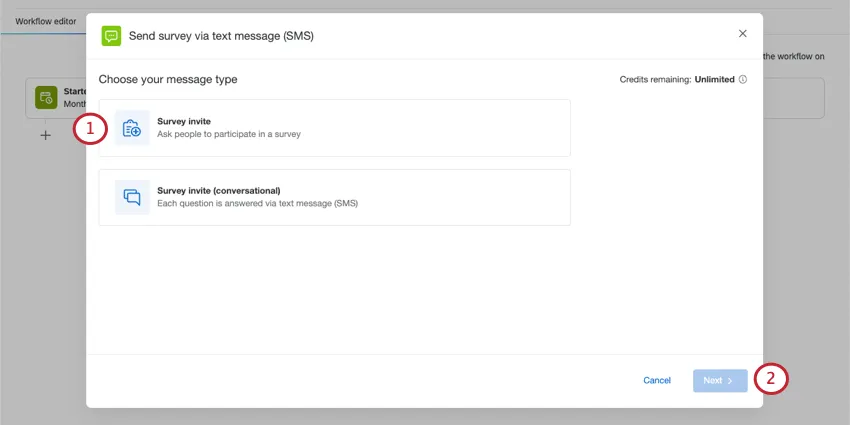
Click Next.
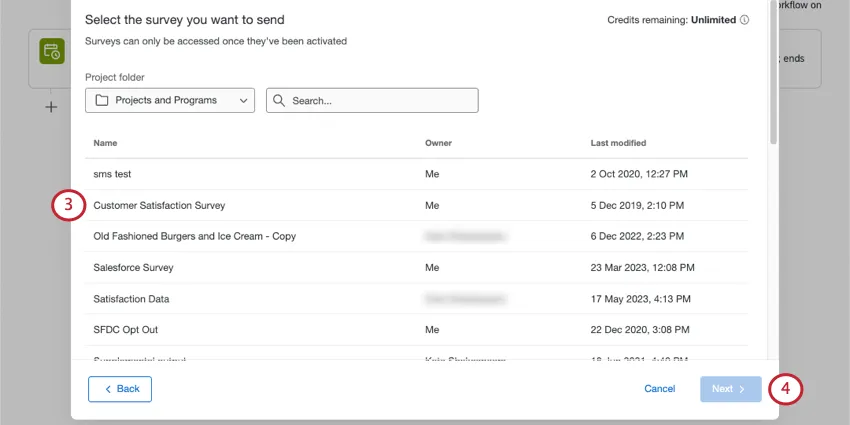
Click Next.
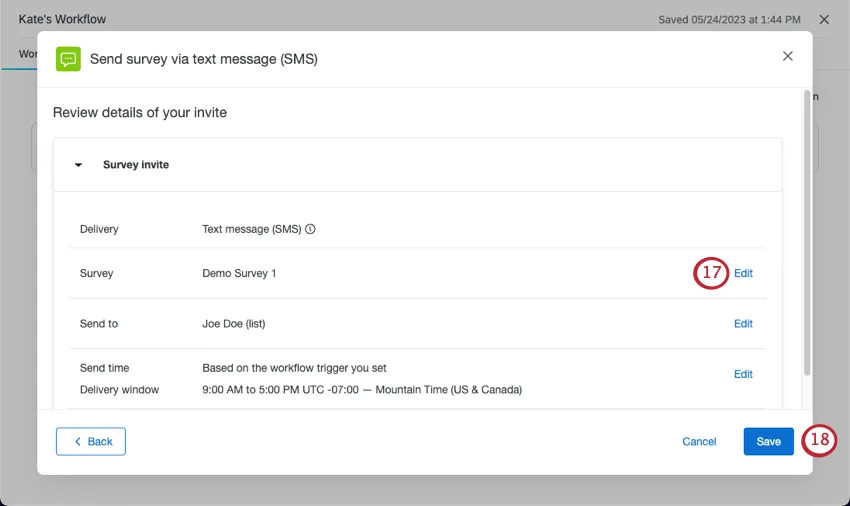
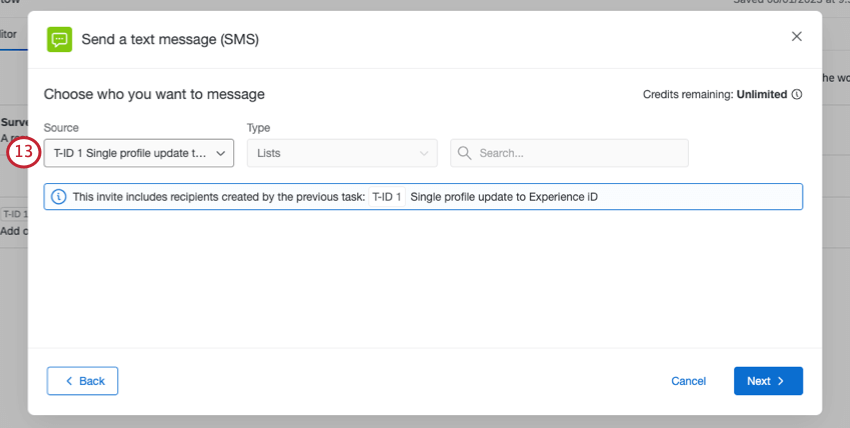
Choose who to send the survey to.

- Source: Choose the contacts that you’d like to survey.
- Directory: Choose from one of the directories you have access to.
- Workflow Event: Send the invite to recipients from the event which starts the workflow. This option is available when the workflow starts with an Experience ID segments event or Experience ID change event.
- Available Tasks: Send the invite to recipient lists or groups that were created by a previous task, such as the Add Contacts and Transactions to XMD task.
Piped Text: Use piped text to enter the directory ID and other relevant IDs (mailing list ID, sample ID, etc.). Choose this option if you want to distribute to contacts from other components in your workflow.

Qtip: When using piped text to enter a single contact ID, make sure to select the Lookup ID option.
- Type: Choose between mailing lists, samples, segments, single contacts, and transaction groups.
Click Next.
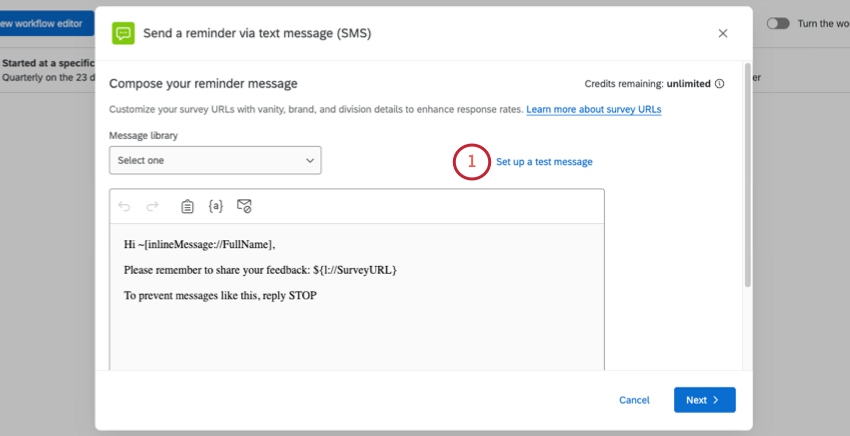
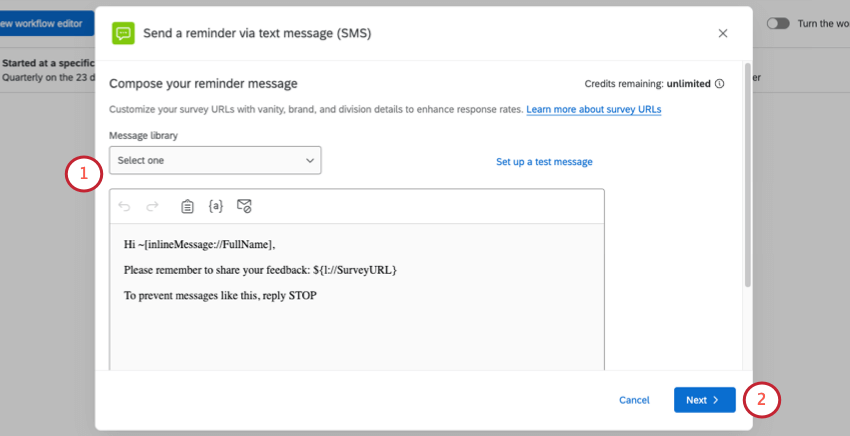
Write a text message, or use one from your library.
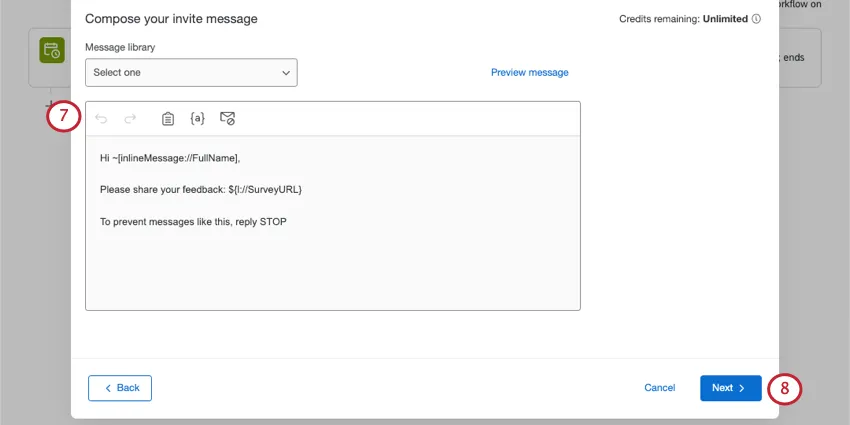
Qtip: When you write your message, keep credit consumption and opt-in requirements in mind.
Qtip: Click Preview message to see what it will look like before you send it.
Click Next.
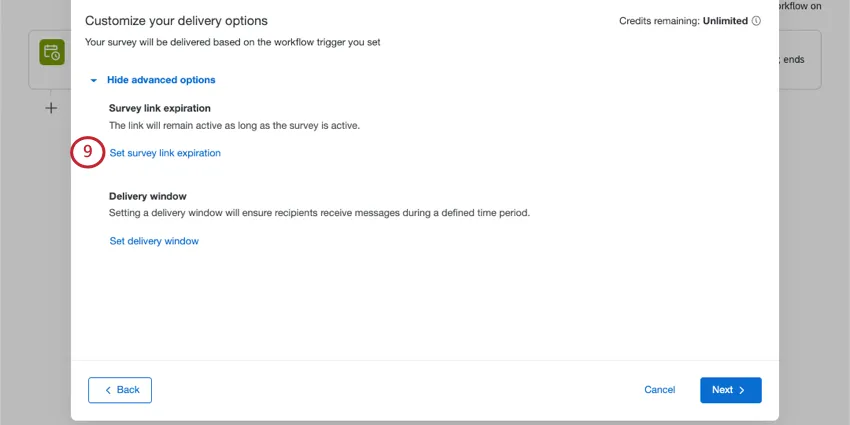
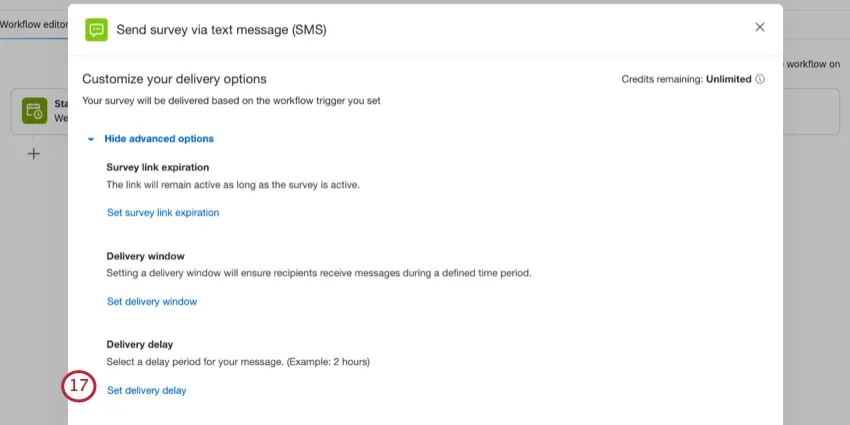
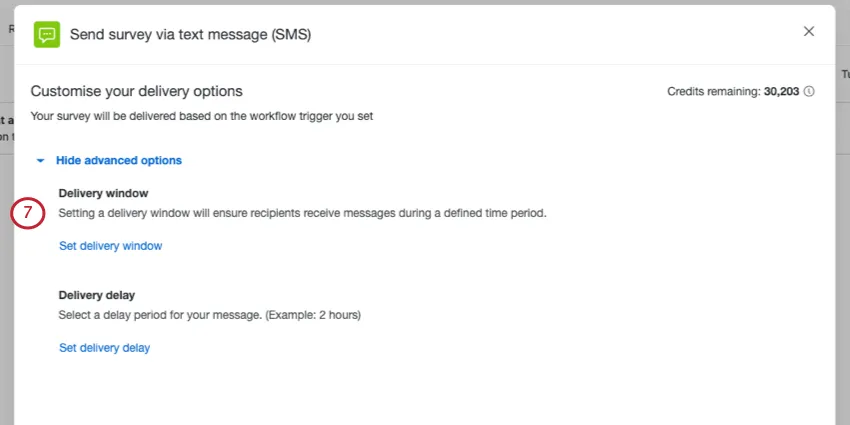
If you want the link to expire after a certain amount of time, click Set survey link expiration. (Optional.)
Choose between the following link expirations:
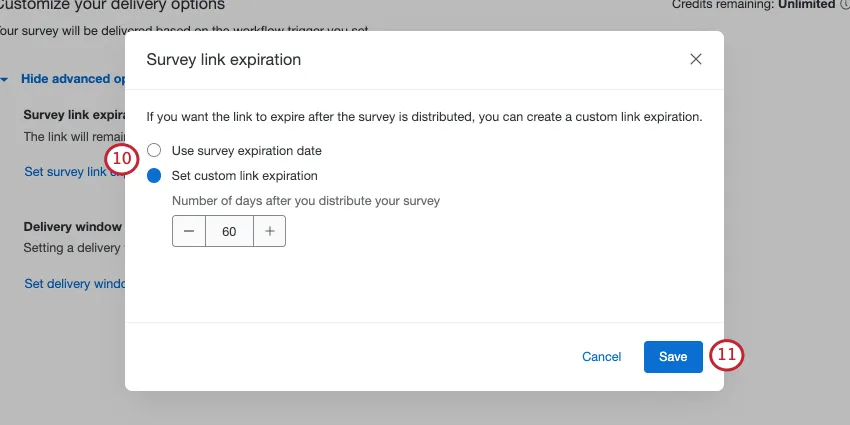
- Use survey expiration date: The SMS links will expire when the survey availability
- Set custom link expiration: Specify how many days after the text is sent that respondents can still access and complete the survey.
Click Save.
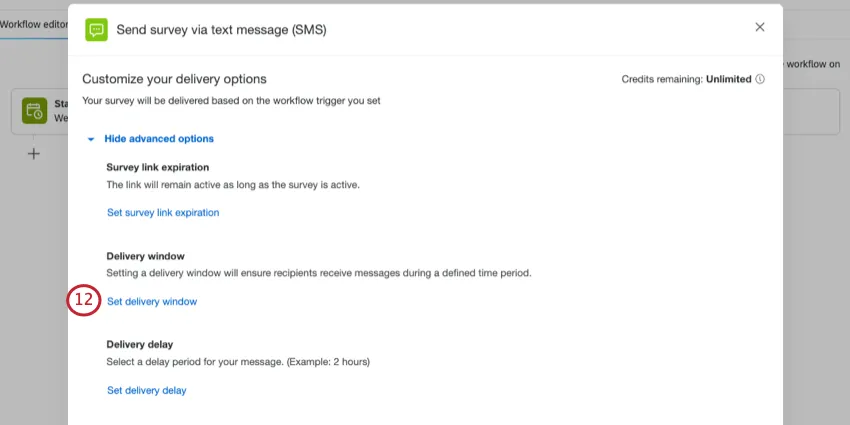
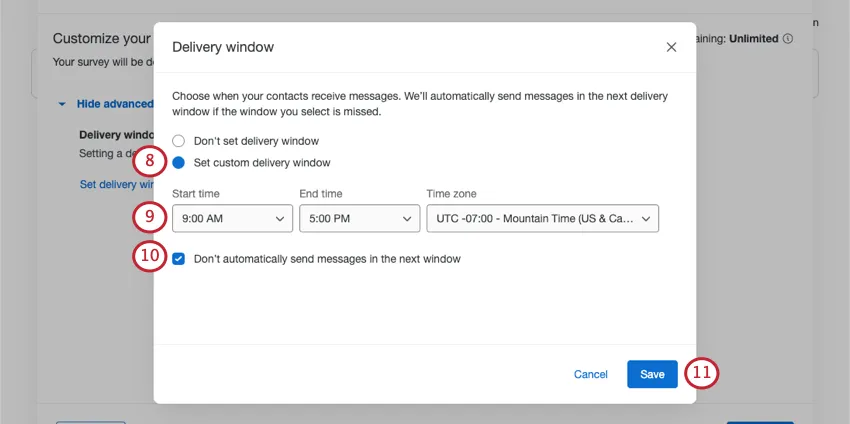
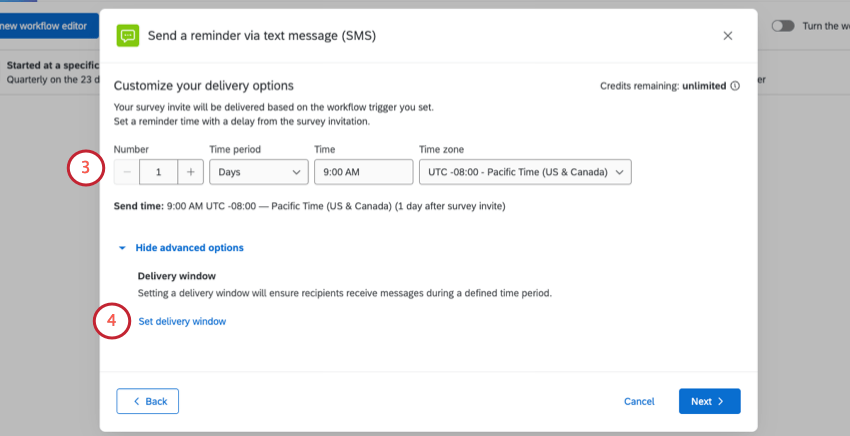
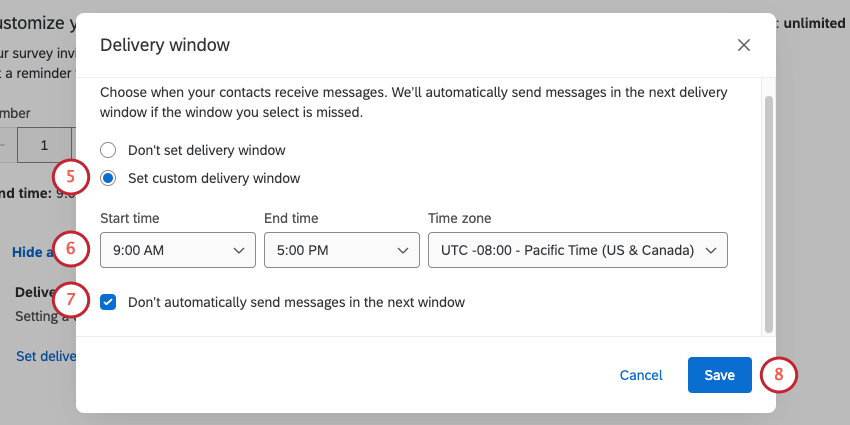
If you want to make sure recipients only get messages during a certain time period, click Set delivery window.
Select Set custom delivery window.
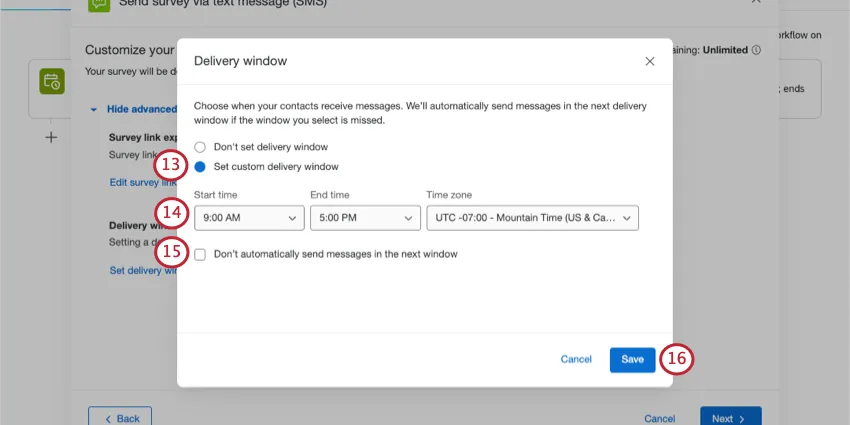
Set a start time, end time, and time zone for the delivery window.
Example: You don’t want respondents to get bothered with texts late at night. You make sure texts only arrive between 9 AM and 5 PM.
Qtip: Delivery windows also apply to reminders.
By default, if a distribution is triggered outside a delivery window, the distribution will be sent in the next eligible delivery window. However, if you’d like the distribution to be cancelled instead, select Don’t automatically send messages in the next window.
Click Save.
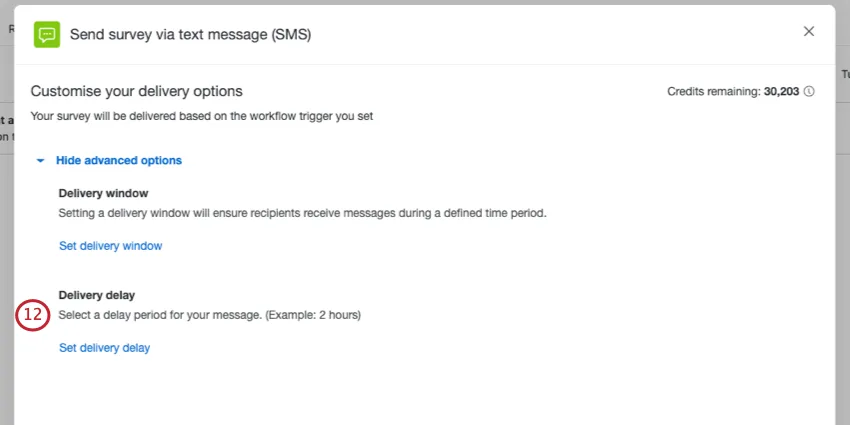
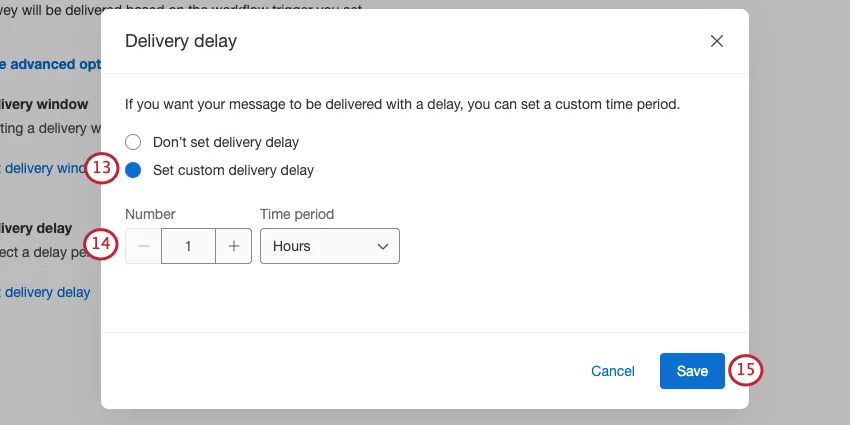
If you want to set a delay period for your message, click Set delivery delay.
Select Set custom delivery delay.

Qtip: Delivery delays apply to reminders, too.
Enter the number of hours, days, or weeks the invitation should be delayed.
Example: You want to send an SMS invite to a follow-up survey every time someone completes a satisfaction survey, but you don’t want to send your customers too many surveys at a time. You add a 1 week delay.
Click Save.
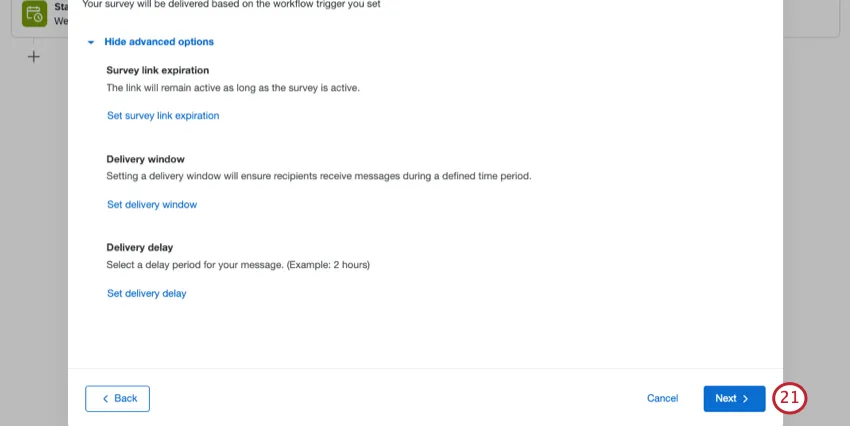
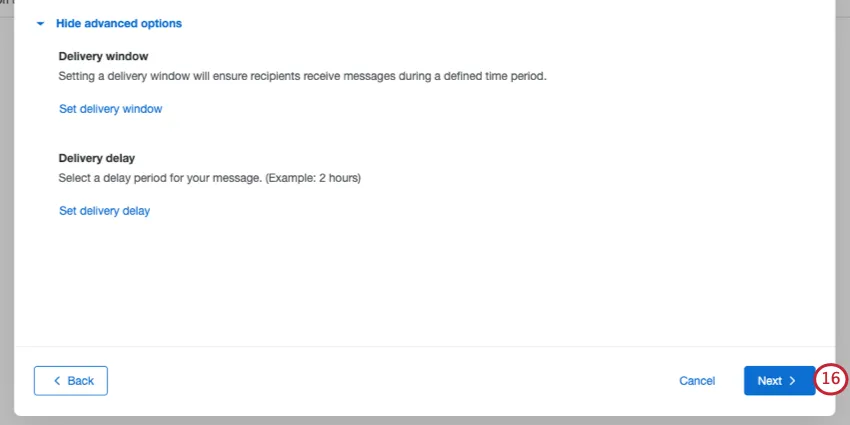
Click Next.
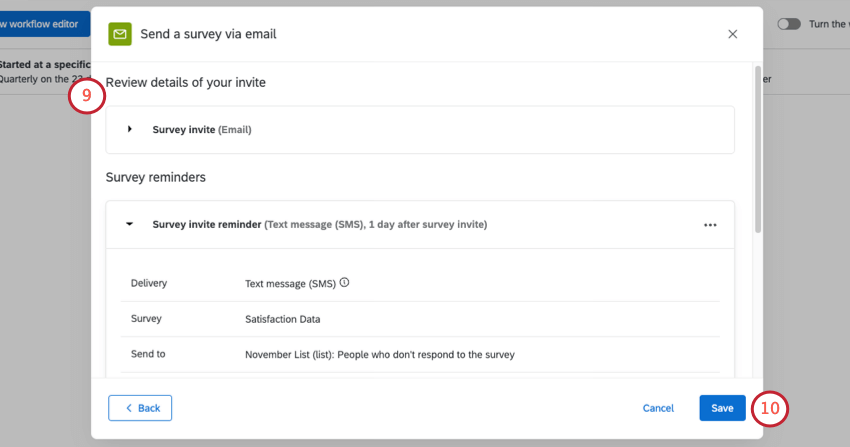
Read the summary of changes and click Edit next to anything you want to change.
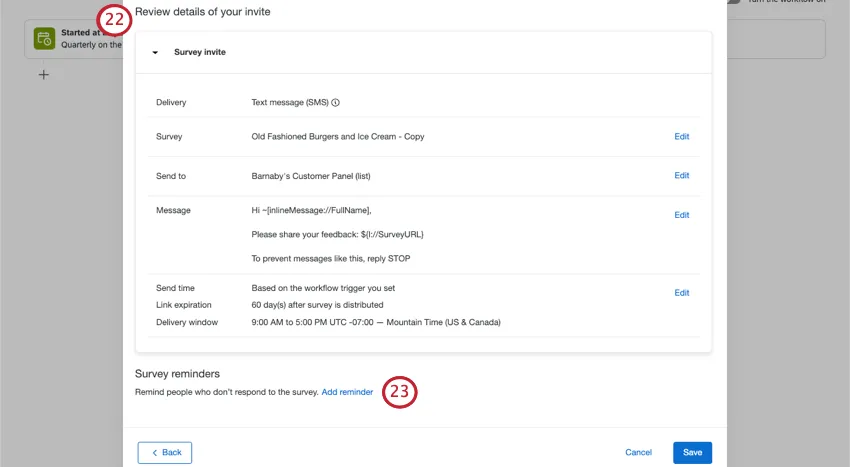
If you want to schedule a reminder for unfinished respondents, click Add reminder, then follow these steps.
Once you get to the summary of your messages, you can go back and make edits as needed.
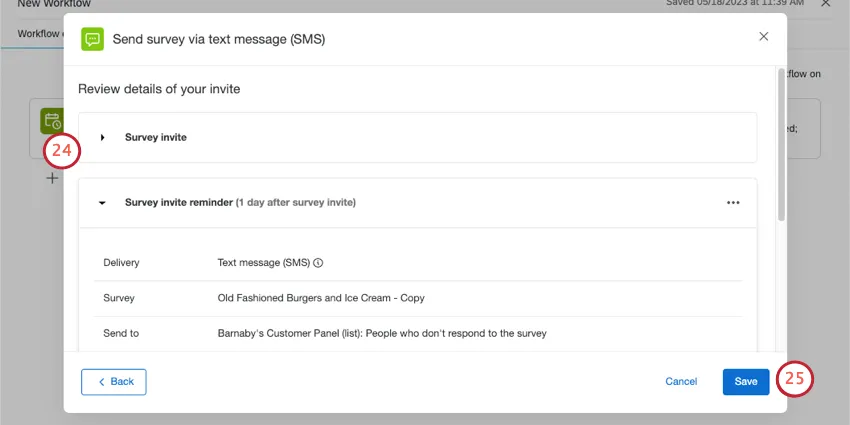
Save your changes.
Sending a Conversational Survey
Send the survey directly over text, so that respondents text their responses. This is sometimes called “2-way” SMS.
Qtip: Before you send a conversational survey, make sure your survey meets 2-way SMS requirements.
Select Survey invite (conversational).
Click Next.
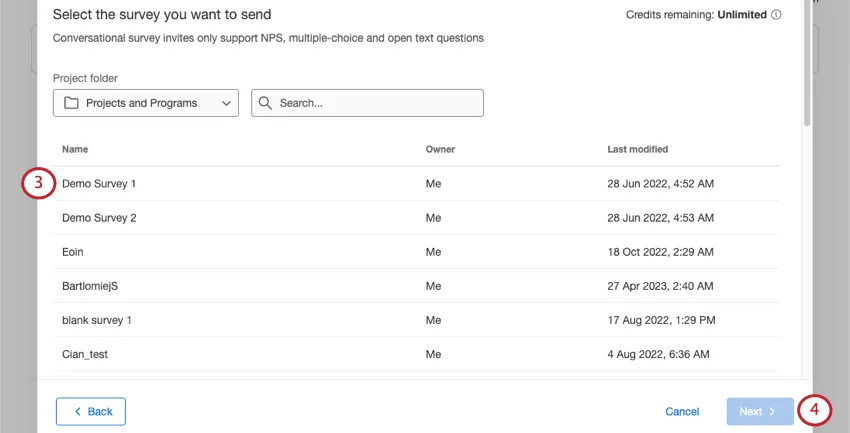
Click Next.
Choose who to send the survey to.
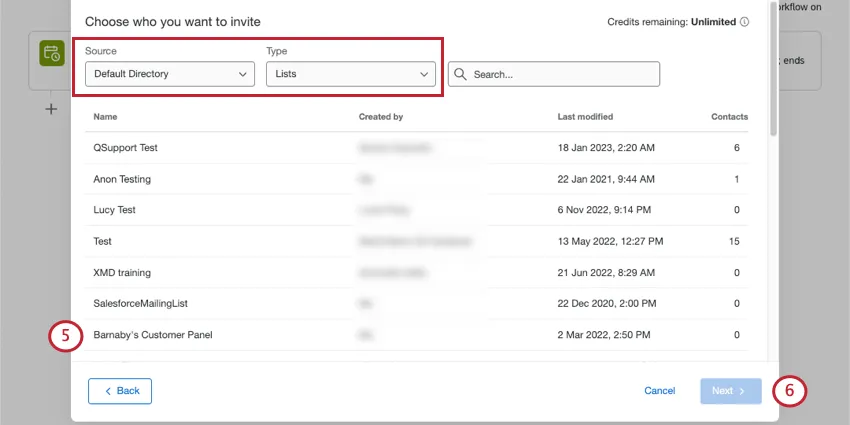
- Source: If you have multiple directories, choose the directory you want to choose contacts from. If you want to send to a single contact, select Workflow Event.
- Type: Choose between mailing lists, samples, segments, single contacts, and transaction groups.
Click Next.
If you want to make sure recipients only get messages during a certain time period, click Set delivery window.
Select Set custom delivery window.
Set a start time, end time, and time zone for the delivery window.
Example: You don’t want respondents to get bothered with texts late at night. You make sure texts only arrive between 9 AM and 5 PM.
By default, if a distribution is triggered outside a delivery window, the distribution will be sent in the next eligible delivery window. However, if you’d like the distribution to be cancelled instead, select Don’t automatically send messages in next window.
Click Save.
If you want to set a delay period for your message, click Set delivery delay.
Select Set custom delivery delay.
Enter the number of hours, days, or weeks the invitation should be delayed.
Example: You want to send an SMS follow-up survey every time someone completes a satisfaction survey, but you don’t want to send your customers too many surveys at a time. You add a 1 week delay.
Click Save.
Click Next.
Read the summary of changes and click Edit next to anything you want to change.
If you’re finished, click Save.
Previewing an Invite Message
For SMS survey invites, you can test what your text message will look like before you officially send it out. One of the benefits of this preview is that you can test different languages and piped text, too!
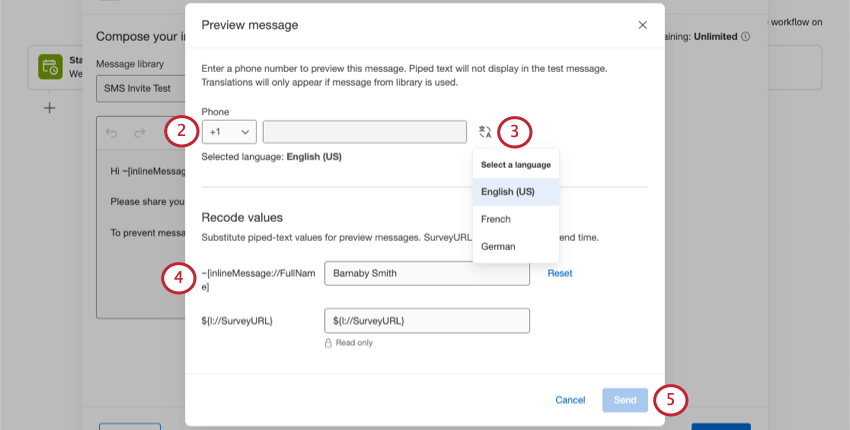
Qtip: To see this option, you must be using a message saved to your library that has been translated.
Example: Here, instead of the piped text for full name, we want it to say an actual name, Barnaby Smith.
Qtip: The survey link will be a preview link. You cannot edit this field.
Adding SMS Reminders
You can remind respondents who haven’t completed the survey by automatically texting them a link to the survey.
Qtip: SMS reminders are only compatible with survey invites (1-way SMS) and the Send Survey via Email Task. You cannot add reminders to a conversational SMS (2-way SMS) distribution.
Qtip: Delivery delays set for the original survey invite will also apply to the reminders.
Qtip: When you write your message, keep credit consumption and opt-in requirements in mind.
Qtip: Click Set up a test message to see what it will look like before you send it.
Qtip: If you already set a delivery window for your main invite, you won’t be able to select a time zone. The reminder’s delivery window will automatically match the invitation’s time zone.
Qtip: If you have a link expiration or invite delivery delay set, they will be displayed on this page.
Example: You don’t want respondents to get bothered with texts late at night. You make sure texts only arrive between 9 AM and 5 PM.
Managing Workflow Distributions
You can always manage workflows right from the workflows page. However, one of the great things about workflow survey invites is that they appear in the same places as other survey distributions, giving you a chance to track and troubleshoot all of your distributions in one place.
For more information, see Managing Workflow Distributions.
Sending Surveys to a Single Contact
You can create a workflow to distribute surveys to individual contacts in your directory. For step-by-step instructions, see Distributing to a Single Contact.
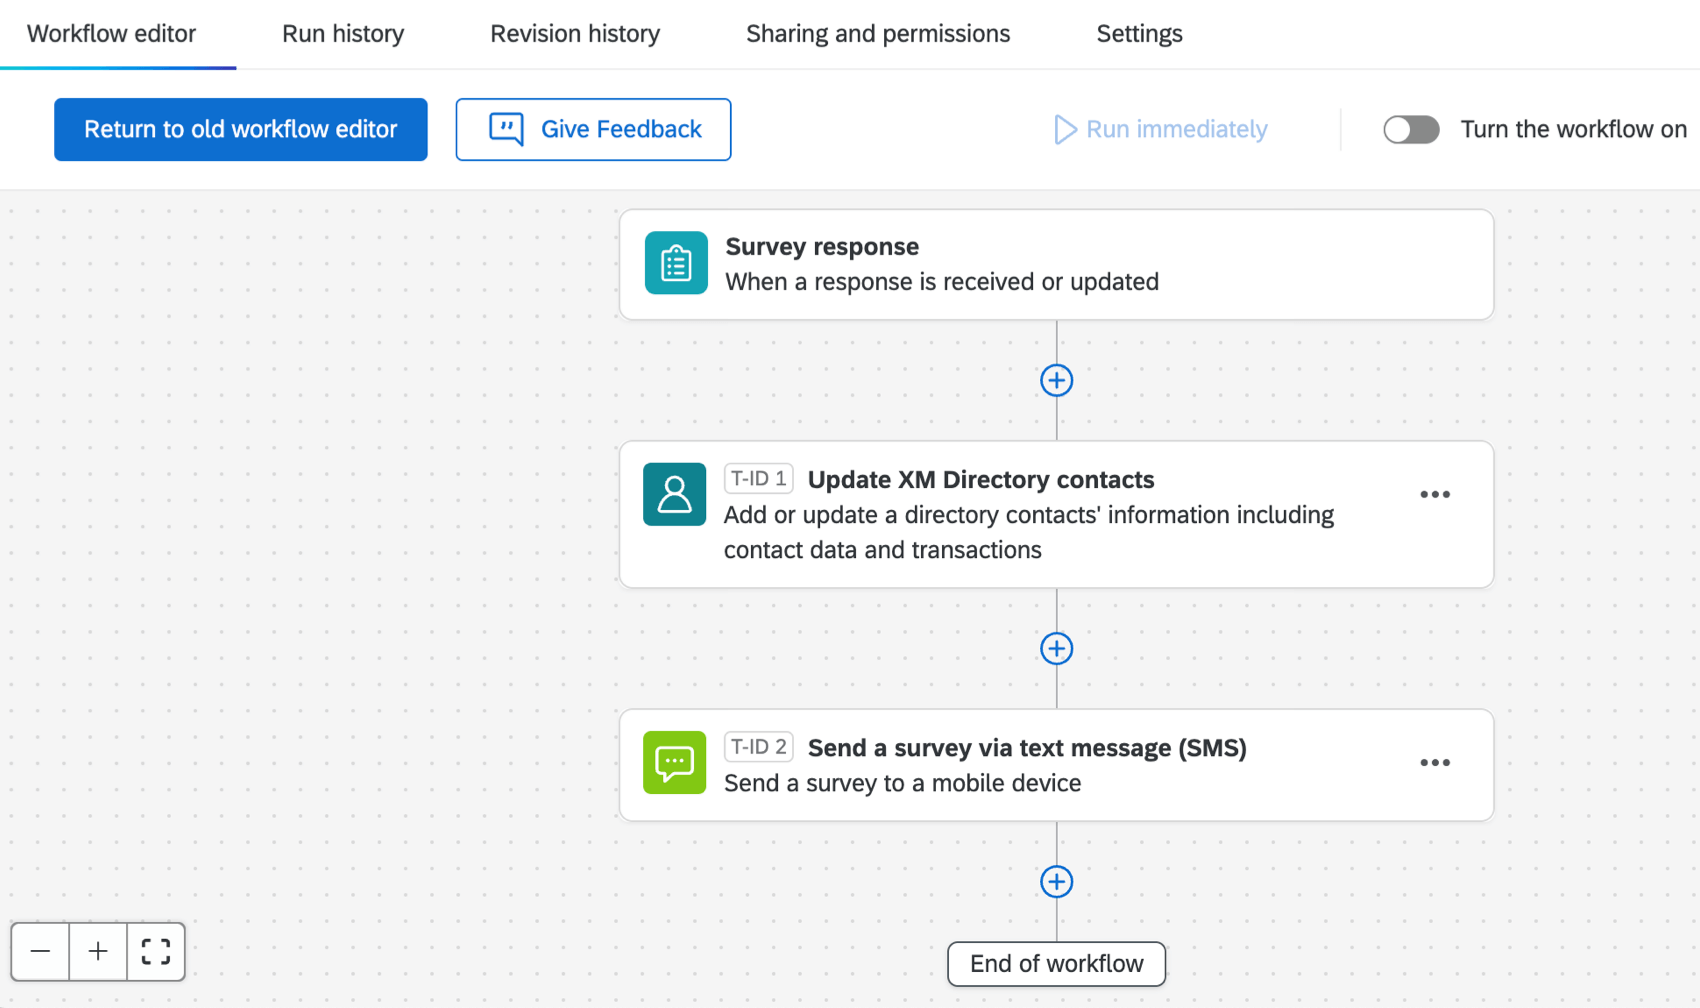
Creating Contacts and Distributing SMS in a Single Workflow
You can add contacts to your directory and send them an SMS invite, all in 1 workflow.
- Update XM Directory Contacts Task: Add 1 contact at a time. This would send a text each time a contact was created.
- Create an XM Directory Sample Task: Create a sample of a list of contacts. Then distribute your SMS to the sample.
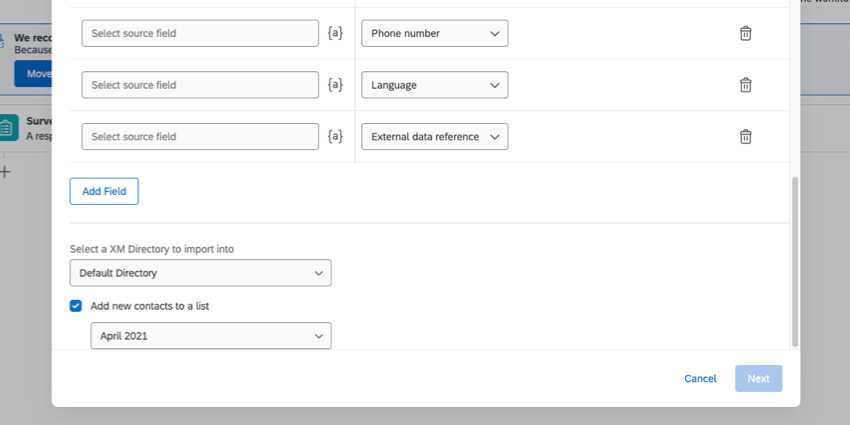
Attention: If you chose Update XM Directory Contacts, you must select Add new contacts to a list.
Other SMS Resources
Details on SMS distributions sent right inside the Distributions tab of a survey can be found on the SMS Distributions support page.
Here is a list of resources that are relevant regardless of whether you’re distributing from the survey or workflows:
- SMS Credits Pricing
- SMS Providers
- Survey Design (For conversational, 2-Way SMS)
- Importing Phone Numbers
- Opting Out of an SMS Distribution

Attention: Make sure your survey follows all opt-in compliance guidelines.
- Legal Requirements
- Using Your Own SMS Provider
That's great! Thank you for your feedback!
Thank you for your feedback!