
Generating a Level-Based Hierarchy (CX)
What's on this page
Qtip: CX Hierarchies are only available to CX licenses with tickets included. If you’re interested in this feature, reach out to your Account Executive.
Qtip: CX Hierarchies and EX Hierarchies are very similar, but have some key differences. If you are an EX client, please see Generating a Level-Based Hierarchy (EE) instead.
About Level-Based Hierarchies
Level-Based hierarchies are a good option if your HR data includes each level the employee reports to, from the top of the hierarchy all the way down to where the employee sits. With Level-Based hierarchies, you don’t necessarily have to know who the employee’s manager is; you just need to know the chain of command for each employee you’re including in the project. This data format is often more common with companies that organize employee data by distinct levels, location, or functional breakout.
Qtip: Not sure what type of hierarchy fits your HR data best? Check out a basic comparison of your options on the Hierarchies Basic Overview page.
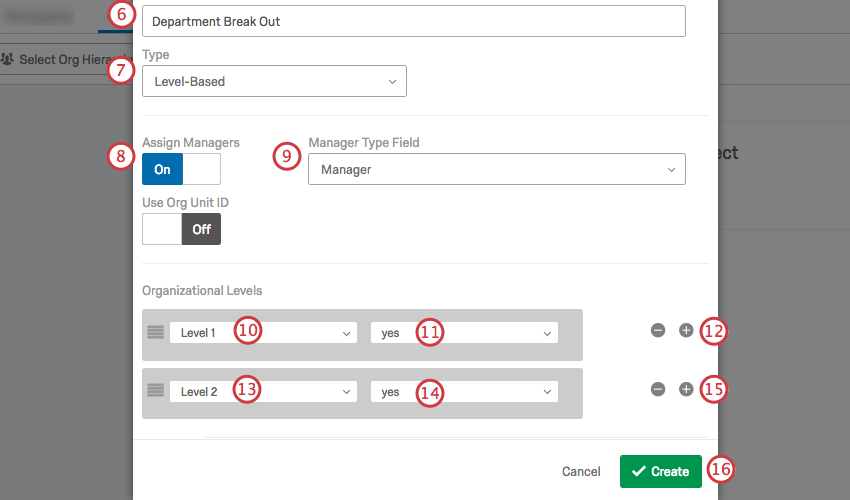
Generating a Level-Based Hierarchy
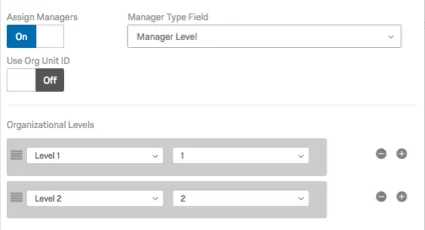
Qtip: If you chose a Manager Level style metadata instead, your levels may look more like the example image below, where managers at Level 1 have the value “1,” and managers at Level 2 have the value “2.”

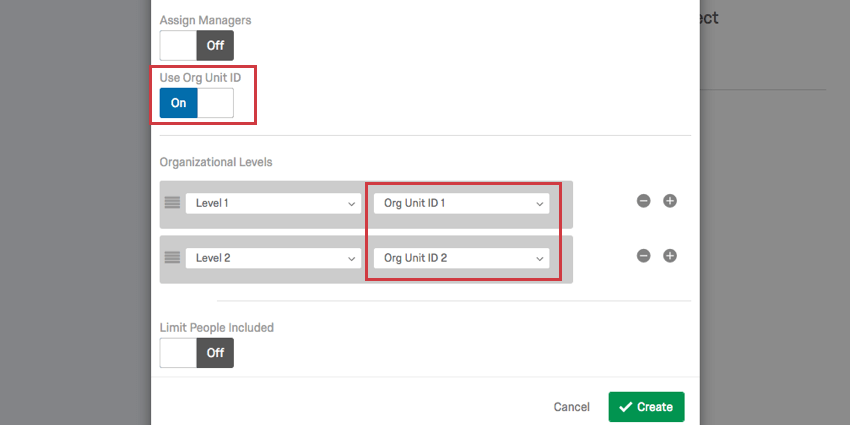
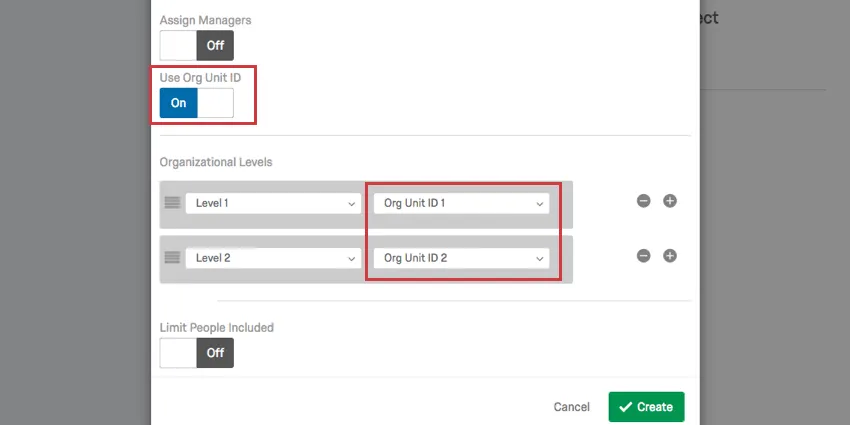
Use Org Unit ID
If you have an Org Unit ID uploaded with your users, you can incorporate this into your Level-Based hierarchy.
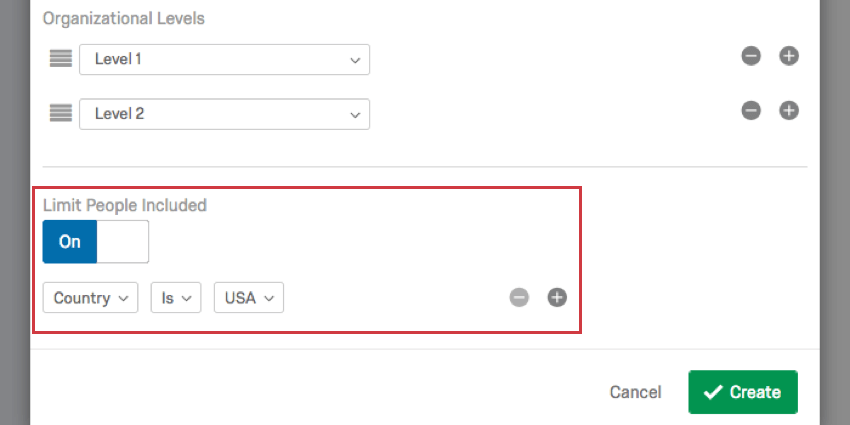
Limit People Included
Turn the Limit People Included setting On to restrict what users are included in the hierarchy based on additional user attributes you uploaded with your users. In the example below, only users from a certain country are included in the hierarchy.
Attention: At this time, you should only use one condition with the “limit people included” setting. Including multiple conditions can cause your hierarchy generation to fail.

FAQs
How do I make sure that leading zeroes are included in my CSV/TSV file?
How do I make sure that leading zeroes are included in my CSV/TSV file?
Thankfully, there are solutions to ensure your leading zeroes are not removed. If you add this formatting to your file, be careful not to re-open the CSV before importing it to Qualtrics, or you may lose your formatting.
Is this feature compatible with data models?
Is this feature compatible with data models?
Can I automate changes to my CX org hierarchy?
Can I automate changes to my CX org hierarchy?
That's great! Thank you for your feedback!
Thank you for your feedback!