Loading...
Skip to article
  • Qualtrics Platform
    Qualtrics Platform
  • Customer Journey Optimizer
    Customer Journey Optimizer
  • XM Discover
    XM Discover
  • Qualtrics Social Connect
    Qualtrics Social Connect

Integrating with Genesys


Was this helpful?


This site is protected by reCAPTCHA and the Google Privacy Policy and Terms of Service apply.

The feedback you submit here is used only to help improve this page.

That’s great! Thank you for your feedback!

Thank you for your feedback!


About Integrating with Genesys

Integrating with Genesys enables you to collect post-interaction feedback on interactions that occur using Genesys. You can then analyze your contact center data using any Qualtrics analysis method.

Attention: Custom coding features are provided as-is and require programming knowledge to implement. Qualtrics Support does not offer assistance or consultation on custom coding. You can always try asking our community of dedicated users instead. If you’d like to know more about our custom coding services, please contact your Qualtrics Account Executive.

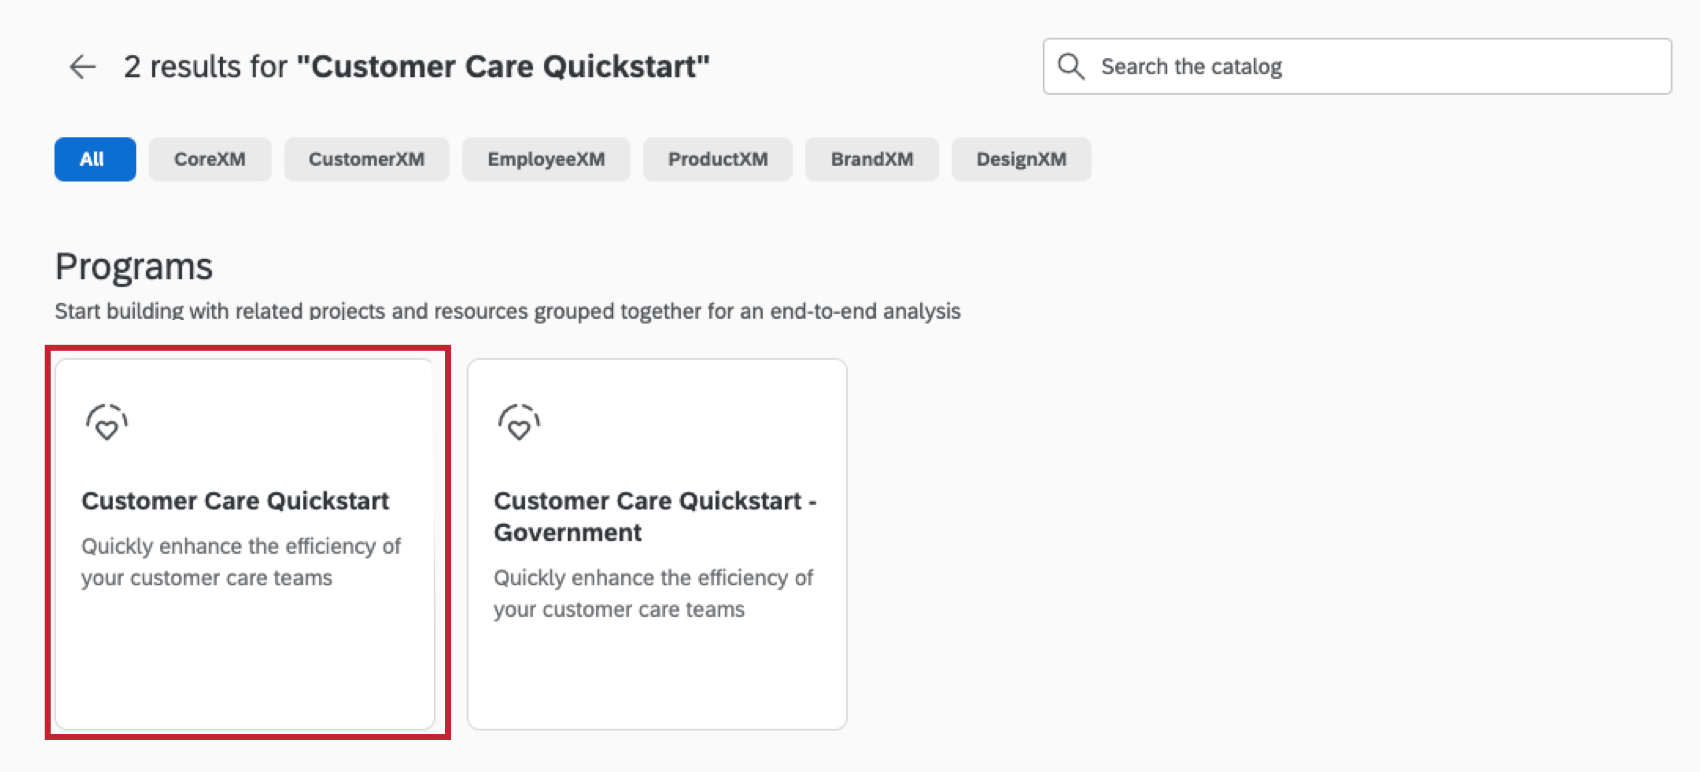
Step 1: Building the Post-Interaction Survey

This section covers how to set up a Customer Care Quickstart project. You’ll need this for setting up the integration with Genesys.

  1. Create a new project from the Catalog or Projects Page.
  2. Select Customer Care Quickstart.
    selecting "customer care quickstart" from the projects page
  3. Set up your survey by following the instructions included in the setup guide.
    Qtip: For help with set up, launch, and usage of the solution see the Methodology and Implementation Playbook.
  4. Add a new multiple choice question after the first question in the Main KPI survey block. The question text should read: Did you connect with us on chat or voice?
    multiple choice question that only allows one answer

    Attention: Make sure the answer type is set to Allow one answer.
  5. Add a new multiple choice question directly after the question you just created. The question text should read: If you didn’t connect, what was the reason for that?
  6. Add display logic so the question only displays if I didn’t connect is selected in the previous question.
  7. Add the same display logic to Q10 in the Resolution survey block.
  8. Navigate to your survey flow.
  9. Add a new embedded data field called ConversationID in the Group: Transactional Data element and leave the value blank.
  10. Create a branch.
  11. Move the Agent Drivers block, OPTIONAL block, and Agent Performance Score group to your new branch.
    nesting blocks within a branch in the survey flow
  12. Click Apply.

Step 2: Triggering ​​the Survey Distribution

This section covers how to trigger a survey distribution based on Genesys interactions. To begin the setup, you’ll first need to set up a Qualtrics workflow.

  1. Navigate to the Workflows tab.
  2. Create an event-based workflow and select JSON event.
  3. Click Copy URL in the pop-up window to copy the endpoint.
    "copy url" button in the workflow

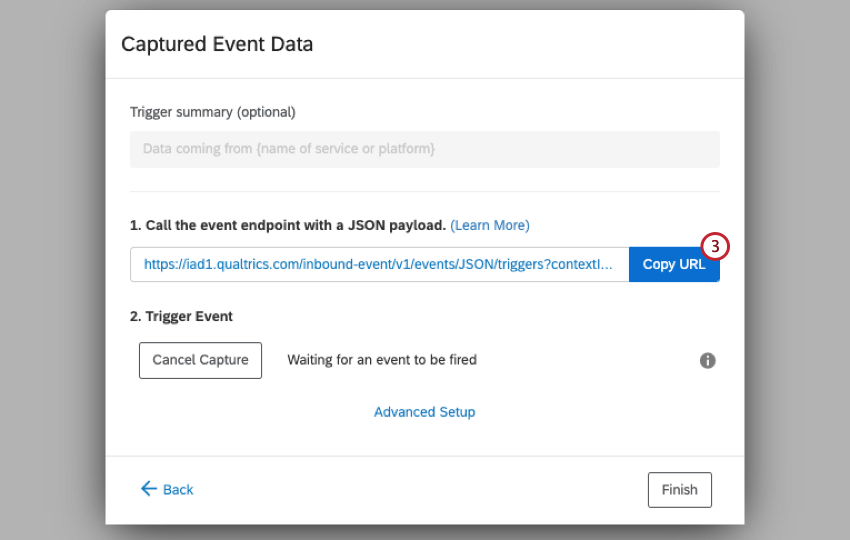
    Attention: Do not close this window while you complete the remaining steps in Genesys
  4. Open Genesys.
  5. Go to the Admin tab.
    "admin" and "actions" options in pure cloud admin tab
  6. Click Actions.
  7. Select Add Action.
    "add action" button
  8. Select Web Services Data Actions as the integration name.
    selecting and naming an integration

    Qtip: You may have to install and enable this integration in the Integrations tab if you haven’t already.
  9. Add an Action Name.
  10. Click Add.
  11. Navigate to the Setup tab.
    configuring JSON input in the "setup" tab
  12. Change the Input Contract to JSON and follow this guide to configure the properties sent to Qualtrics.
  13. Copy the contents of the JSON file.
  14. Navigate to the Configuration tab.
    configuration tab
  15. Change the Request to POST.
  16. Paste the JSON Event URL from step 3 in the Request URL Template.
  17. Click Add Header.
    configuration window in genesys
  18. Enter X-API-TOKEN in the key textbox.
  19. Paste your Qualtrics API Token in the value textbox.
  20. Select the Test subtab and fill in test values.
  21. Click the Run Action button. Genesys will indicate if the call to JSON Event was successful. If not, the error response will be displayed.
    "run action" button and output in genesys
  22. Navigate back to the workflow you configured in Qualtrics, where you can also see the data passed by the test.
  23. If the data was captured successfully in Qualtrics, click Finish.
  24. In Genesys, click Save & Publish at the bottom. This will make the Action usable across the platform.
  25. Click Yes to confirm you want to publish. Once published, the Action data model cannot be edited.
  26. Add a new XM Directory task to the Qualtrics workflow you created in step 2.
  27. Configure your task to send email distributions.
  28. Select the contact list you created during the Customer Care Quickstart setup in step 1.
    configuration window for "distribute survey" task in Qualtrics
  29. Set your fields equal to the corresponding event data from your survey, and add all other event data as embedded data fields.

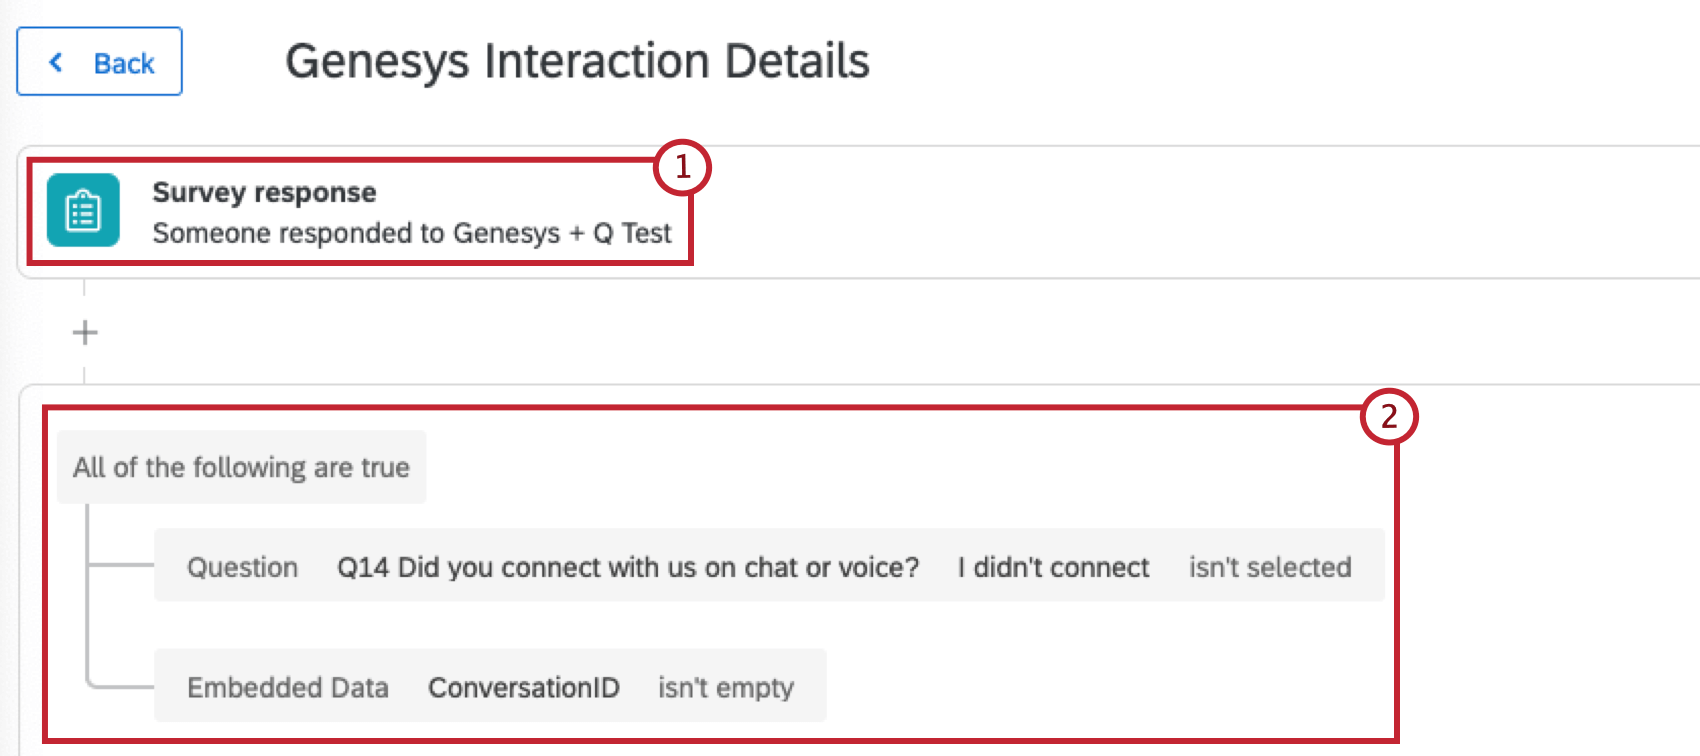
Step 3: Creating a Survey Response Workflow

Now that you’ve built the post-interaction dataset and set up a survey response workflow, it’s time to map data from Genesys to your dataset.

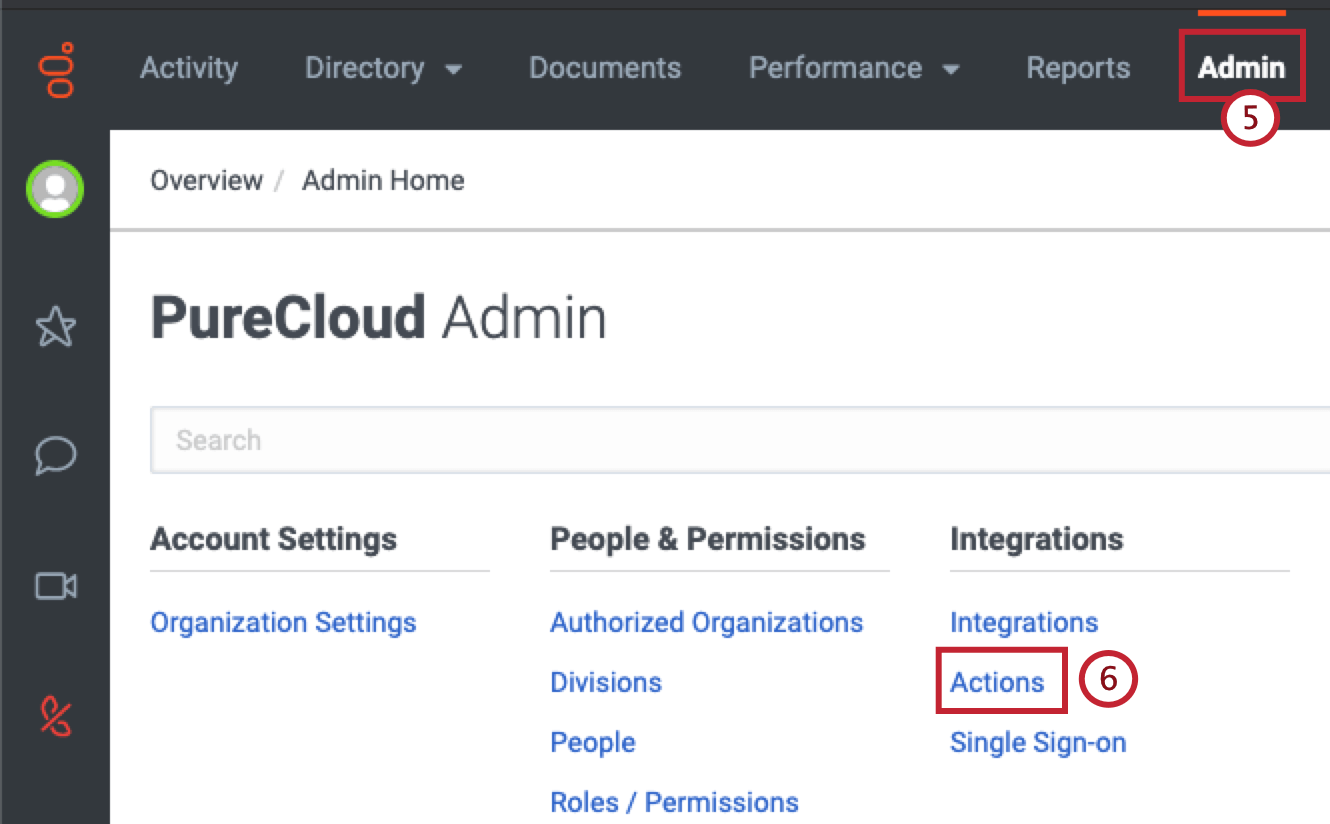
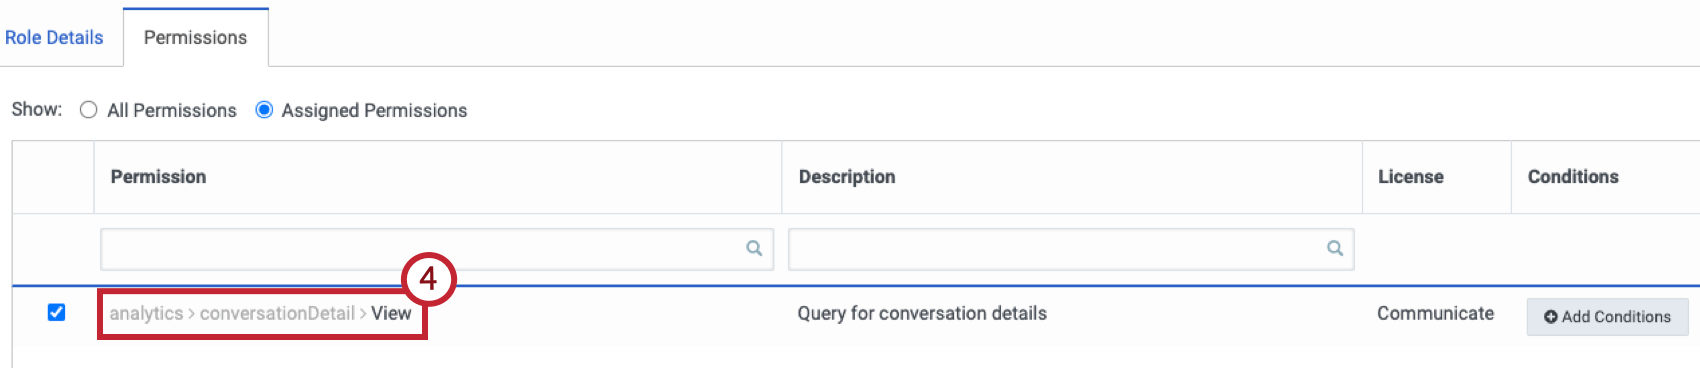
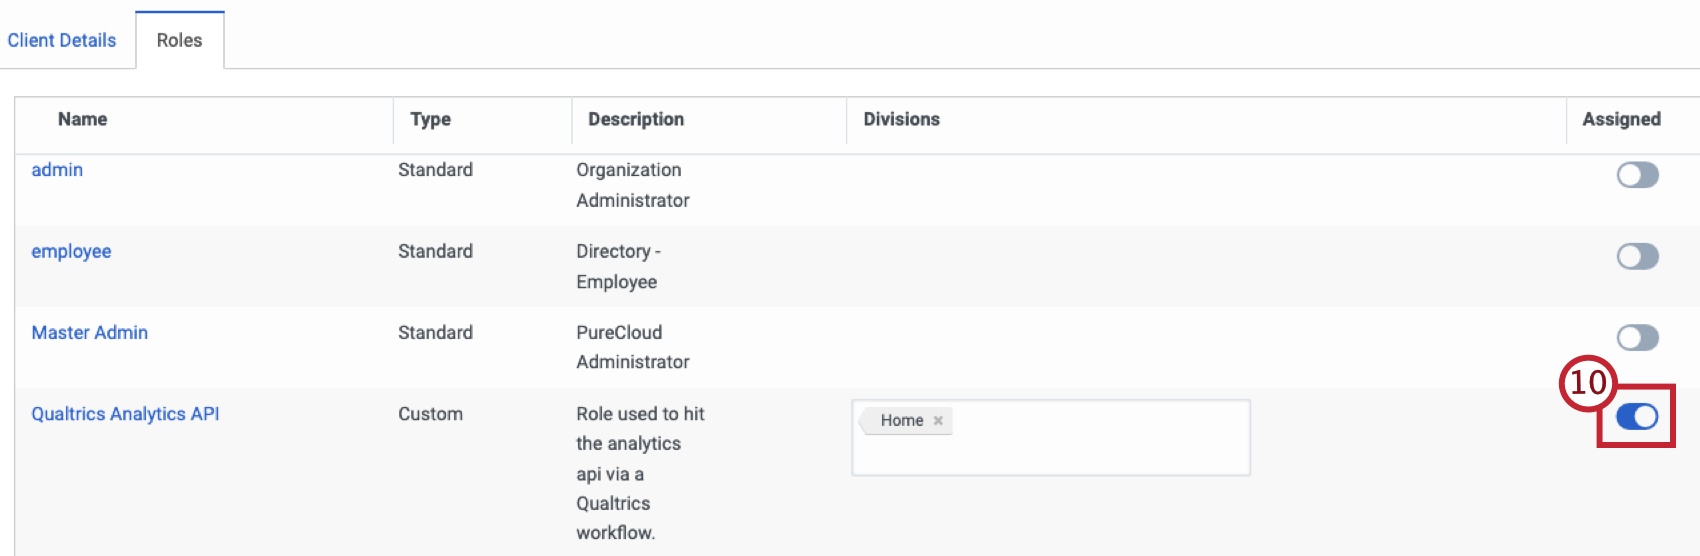
Creating a Role in Genesys

  1. In Genesys, go to the Admin tab.
  2. Select Roles/Permissions.
  3. Click Add Role to create a new role.
  4. Give your new role the permission to use the analytics > conversationDetail > View permission.
    adding "analytics > conversationDetail > View" permission within Genesys permissions tab
  5. Navigate to the Integrations tab.
  6. Select OAuth.
  7. Click Add Client.
  8. Add a name in the App Name field.
    configuring a role in Genesys
  9. Select Client Credentials as the Grant Type.
  10. Under Roles, select the Role that you created.
    selecting the newly configured role from the "Roles" tab

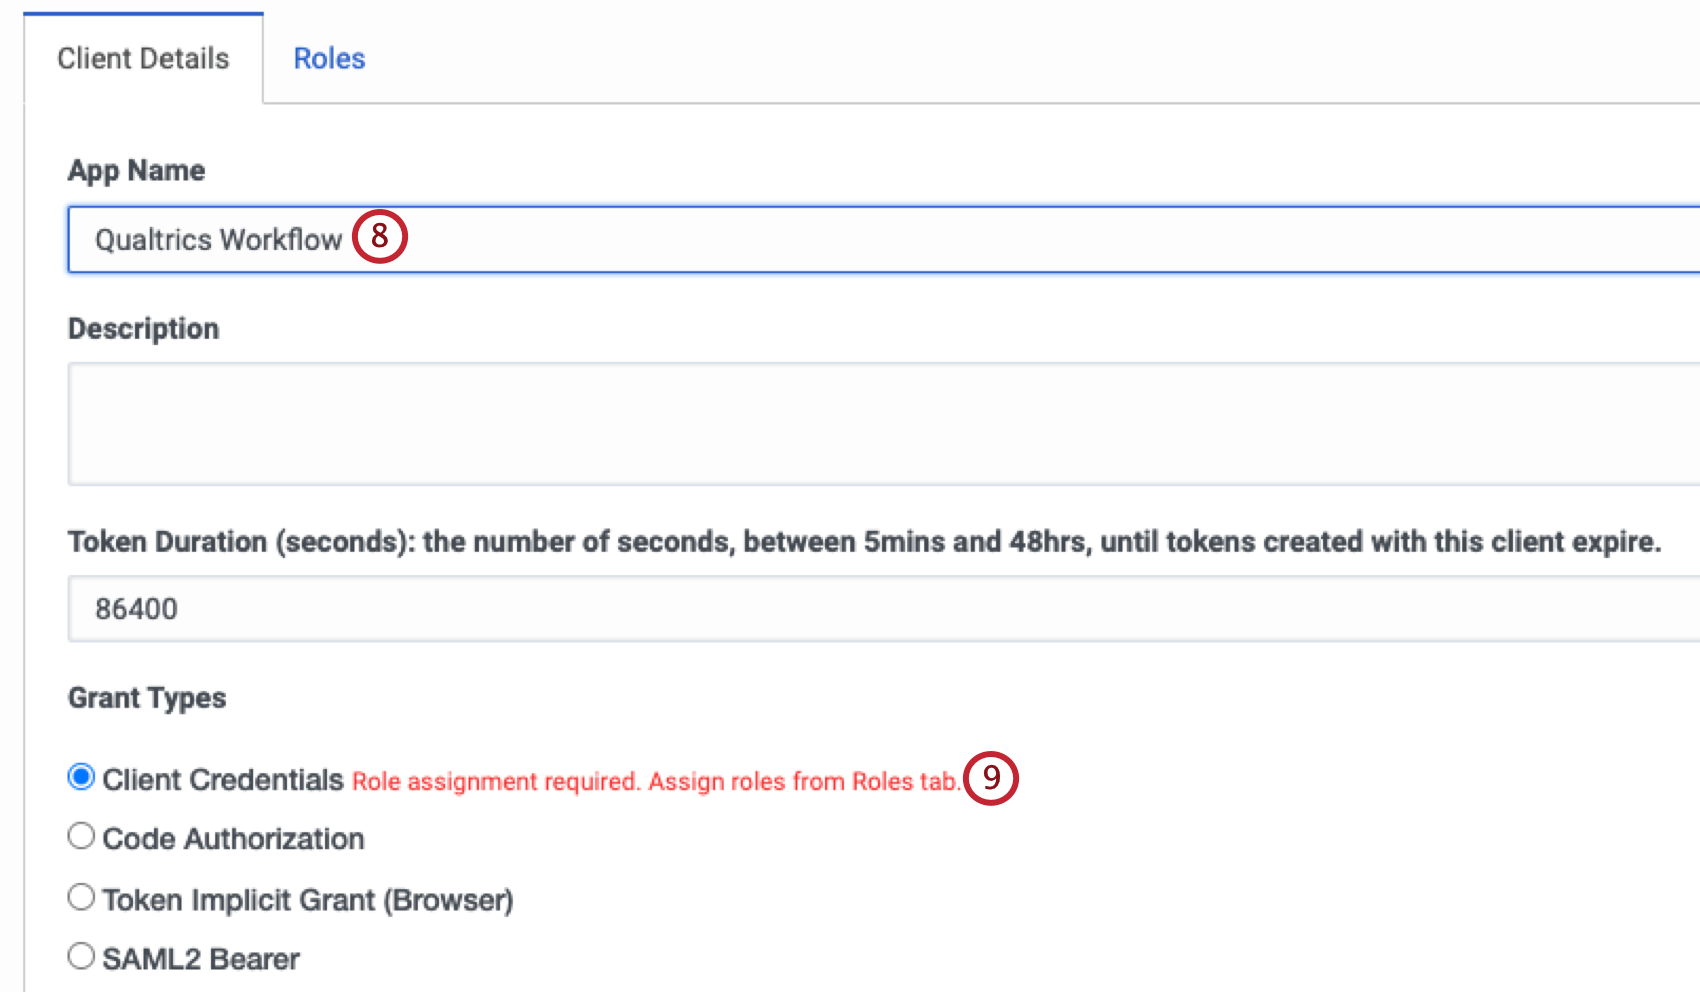
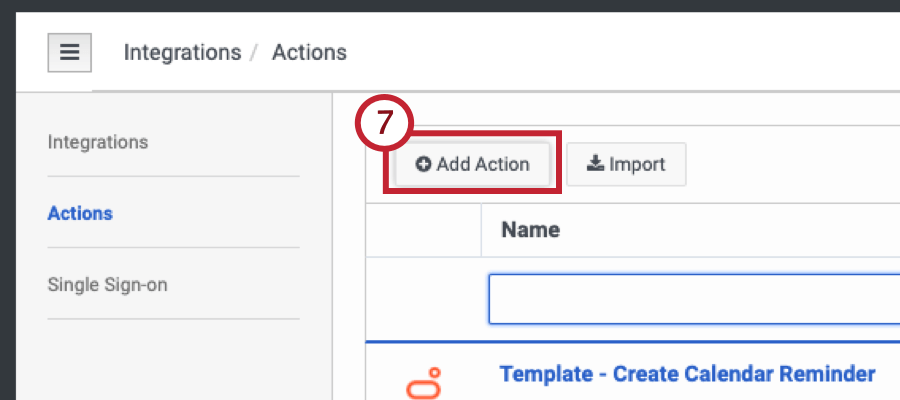
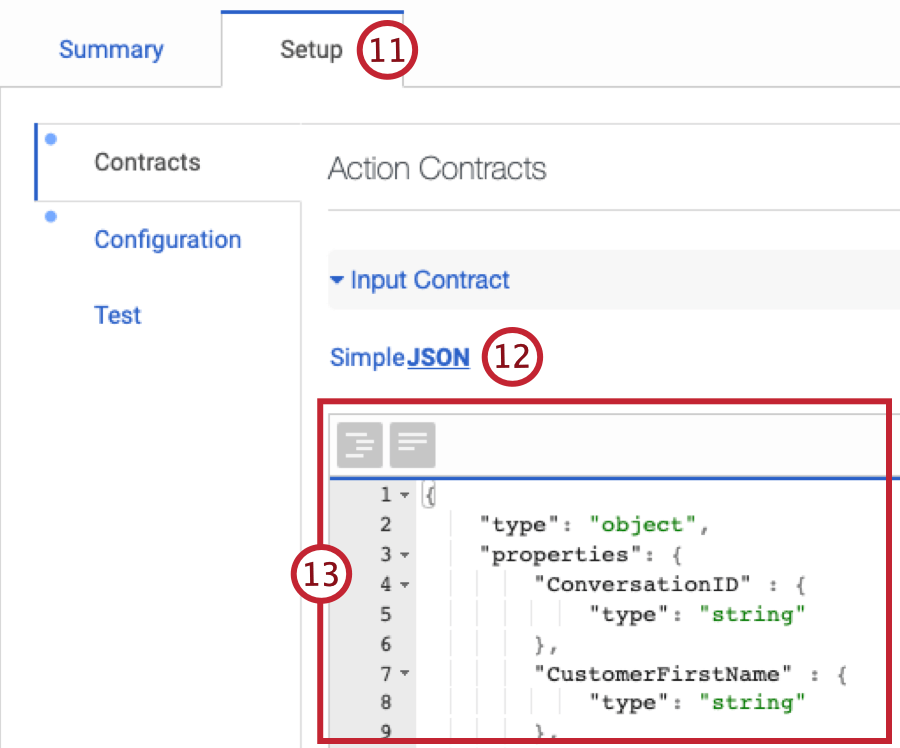
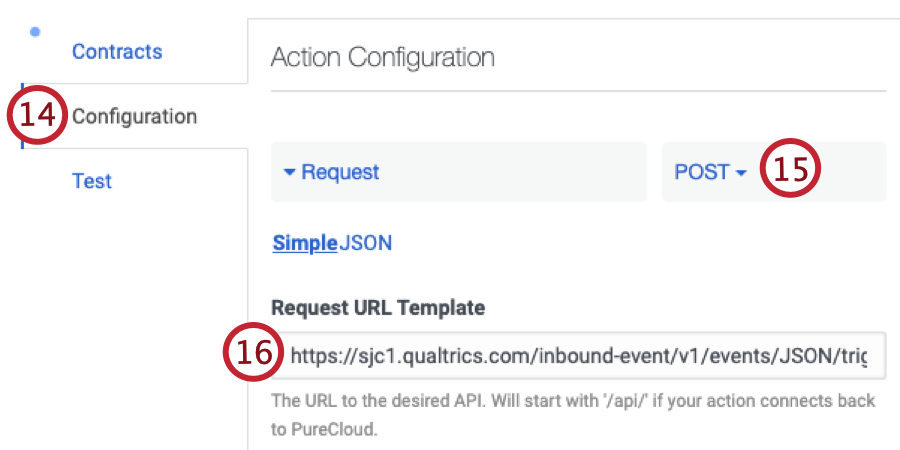
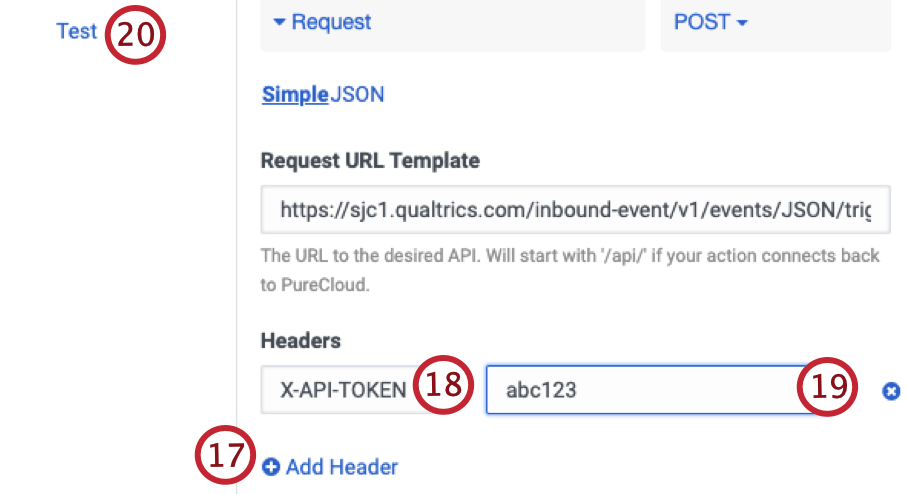
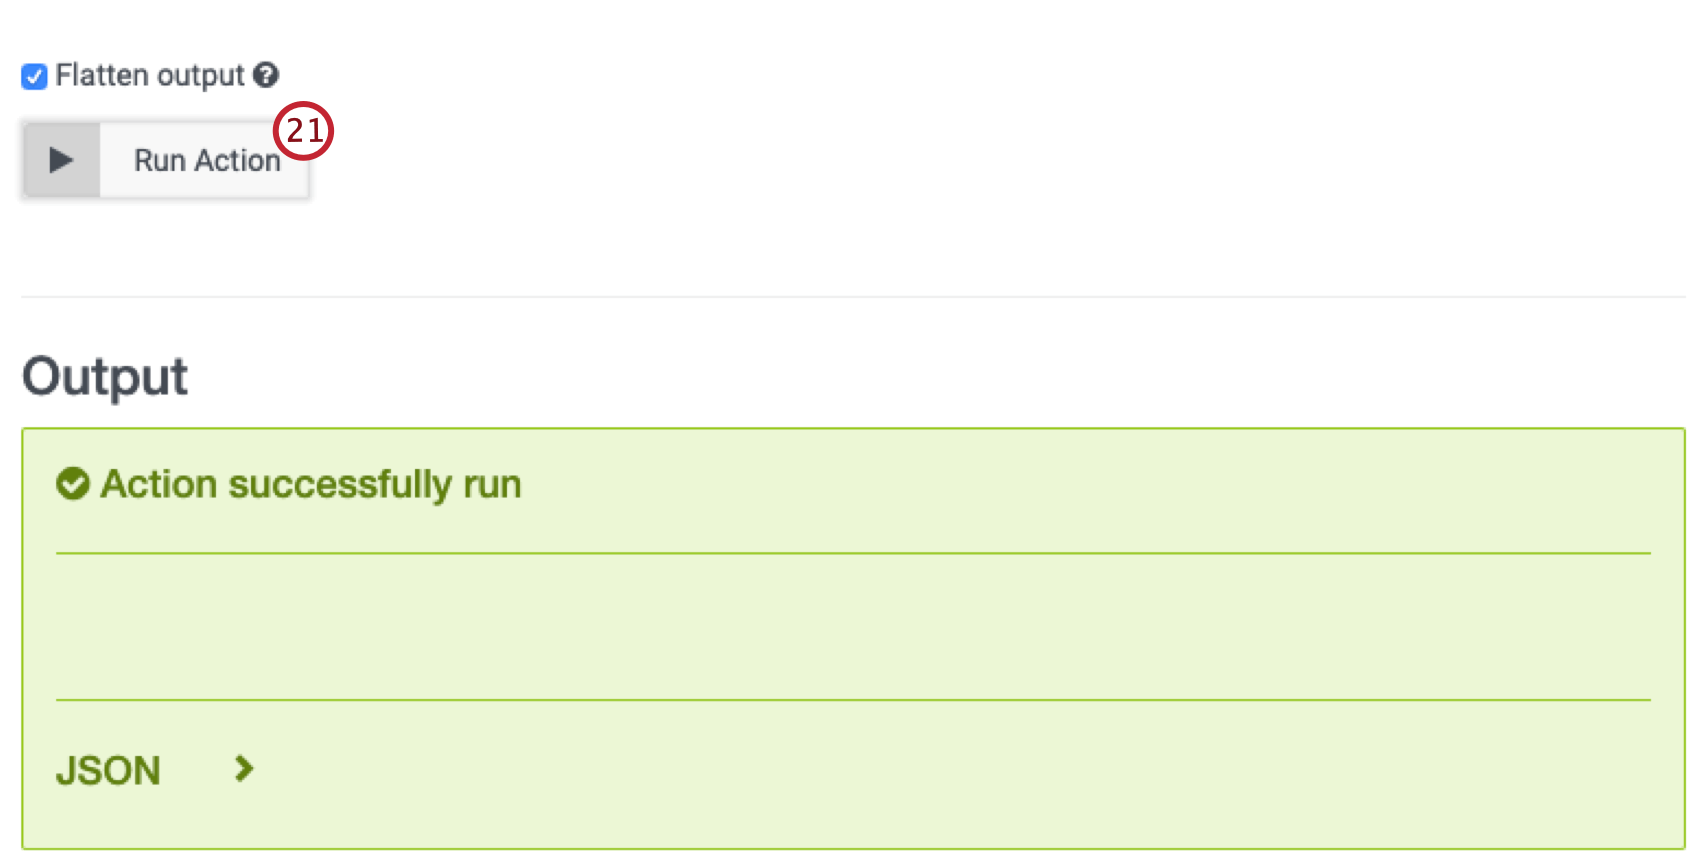
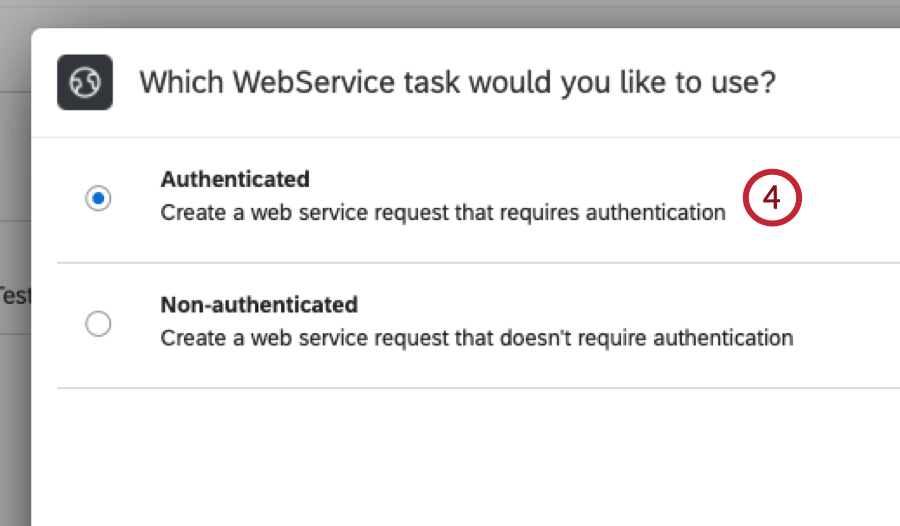
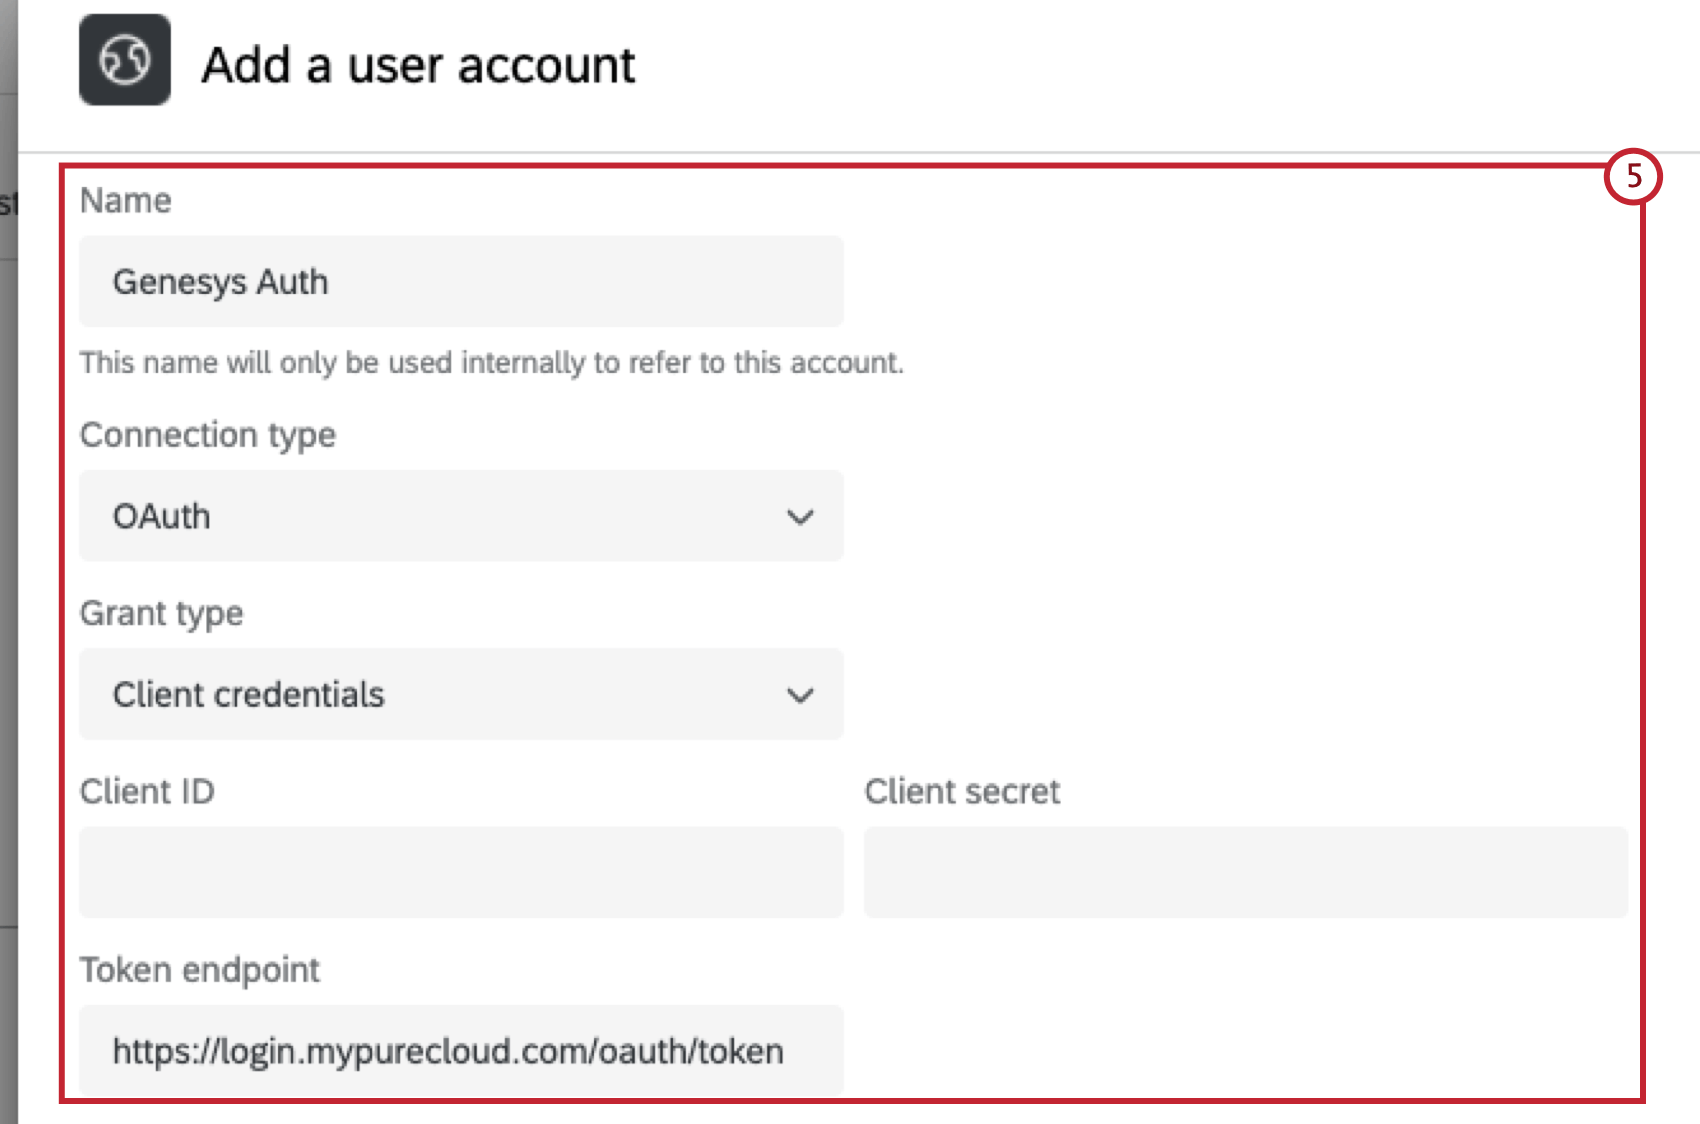
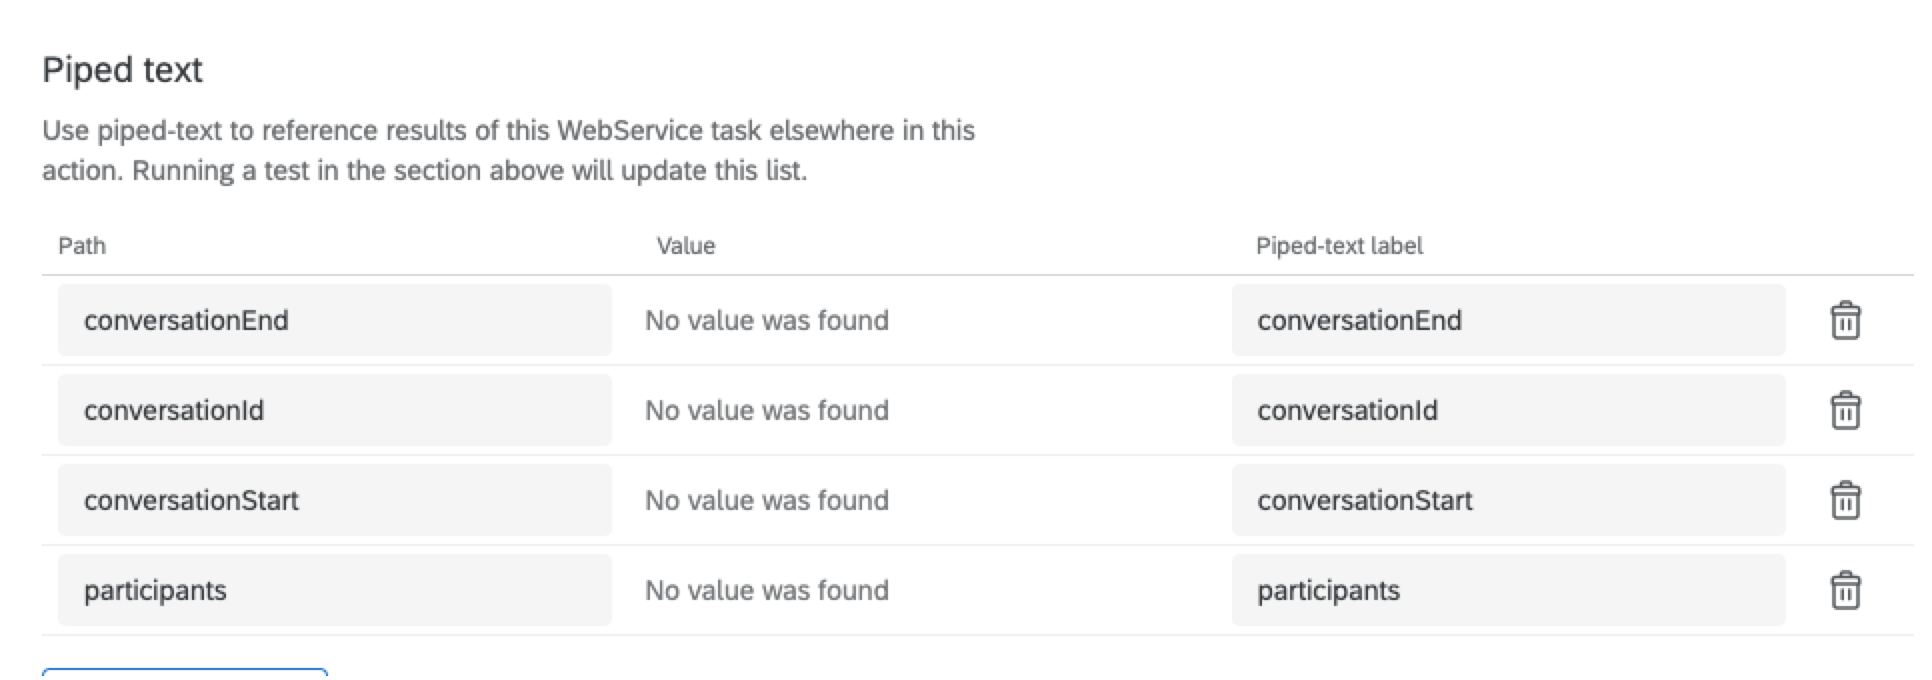
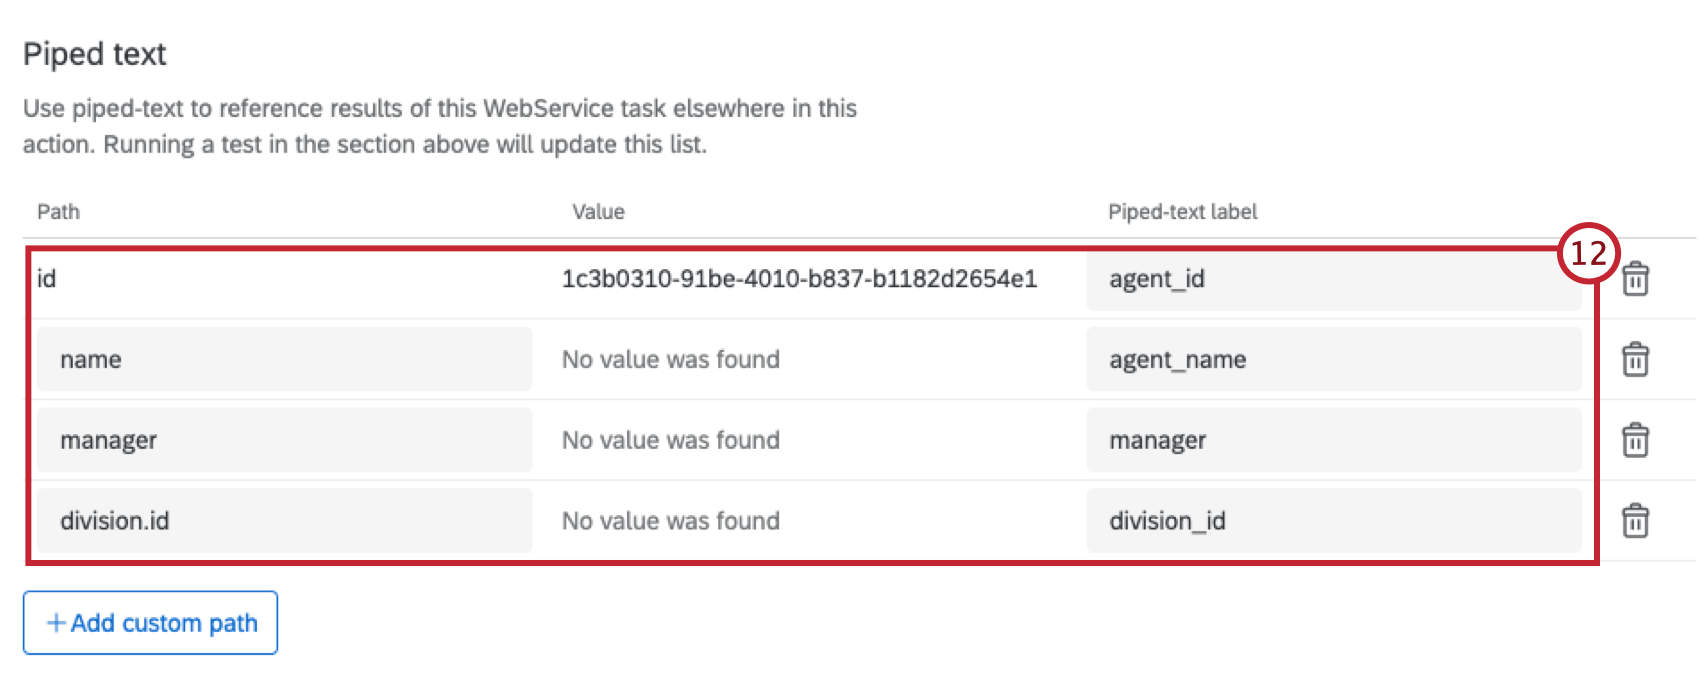
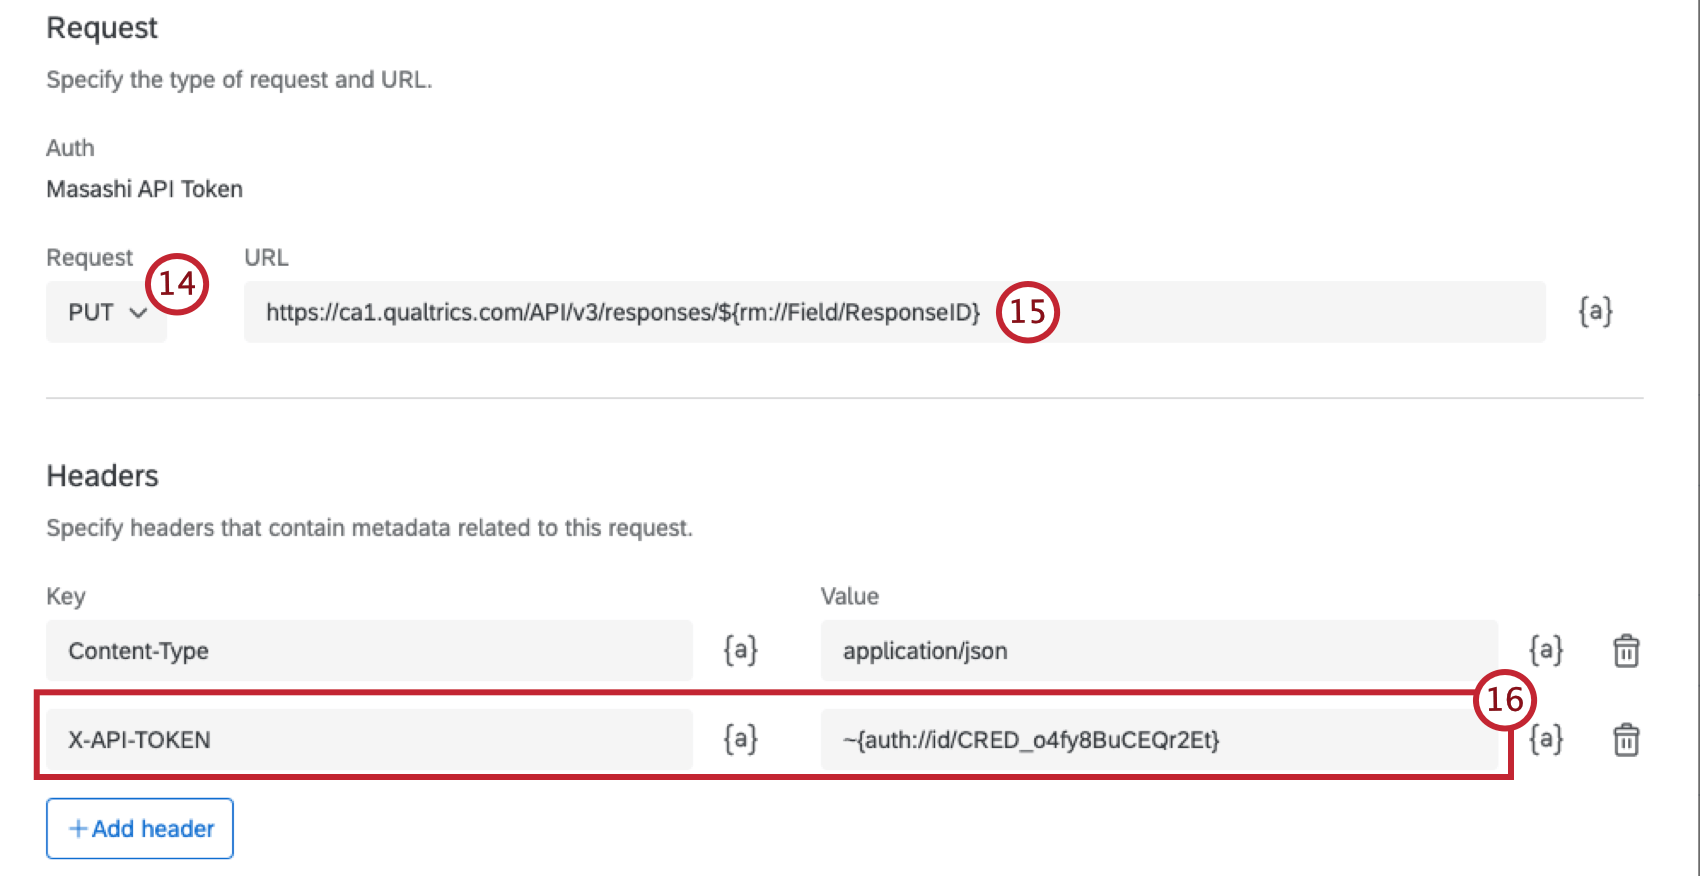
Creating Web Service Workflows

  1. Create a new event-based workflow started by a survey response.
  2. Add conditions so the workflow only runs when a user selects I didn’t connect and the ConversationID embedded data field is not empty.
    adding workflow conditions
  3. Add a Web Service Task to the workflow.
  4. Select Authenticated web service.
    authenticated webservice option
  5. Add a new OAuth user account and fill in the relevant credentials from Genesys. The token endpoint should be https://login.mypurecloud.com/oauth/token.
    adding a genesys user account to qualtrics
  6. Select GET for the request type.
    configuring request type and headers
  7. Enter the following URL to use as an endpoint:
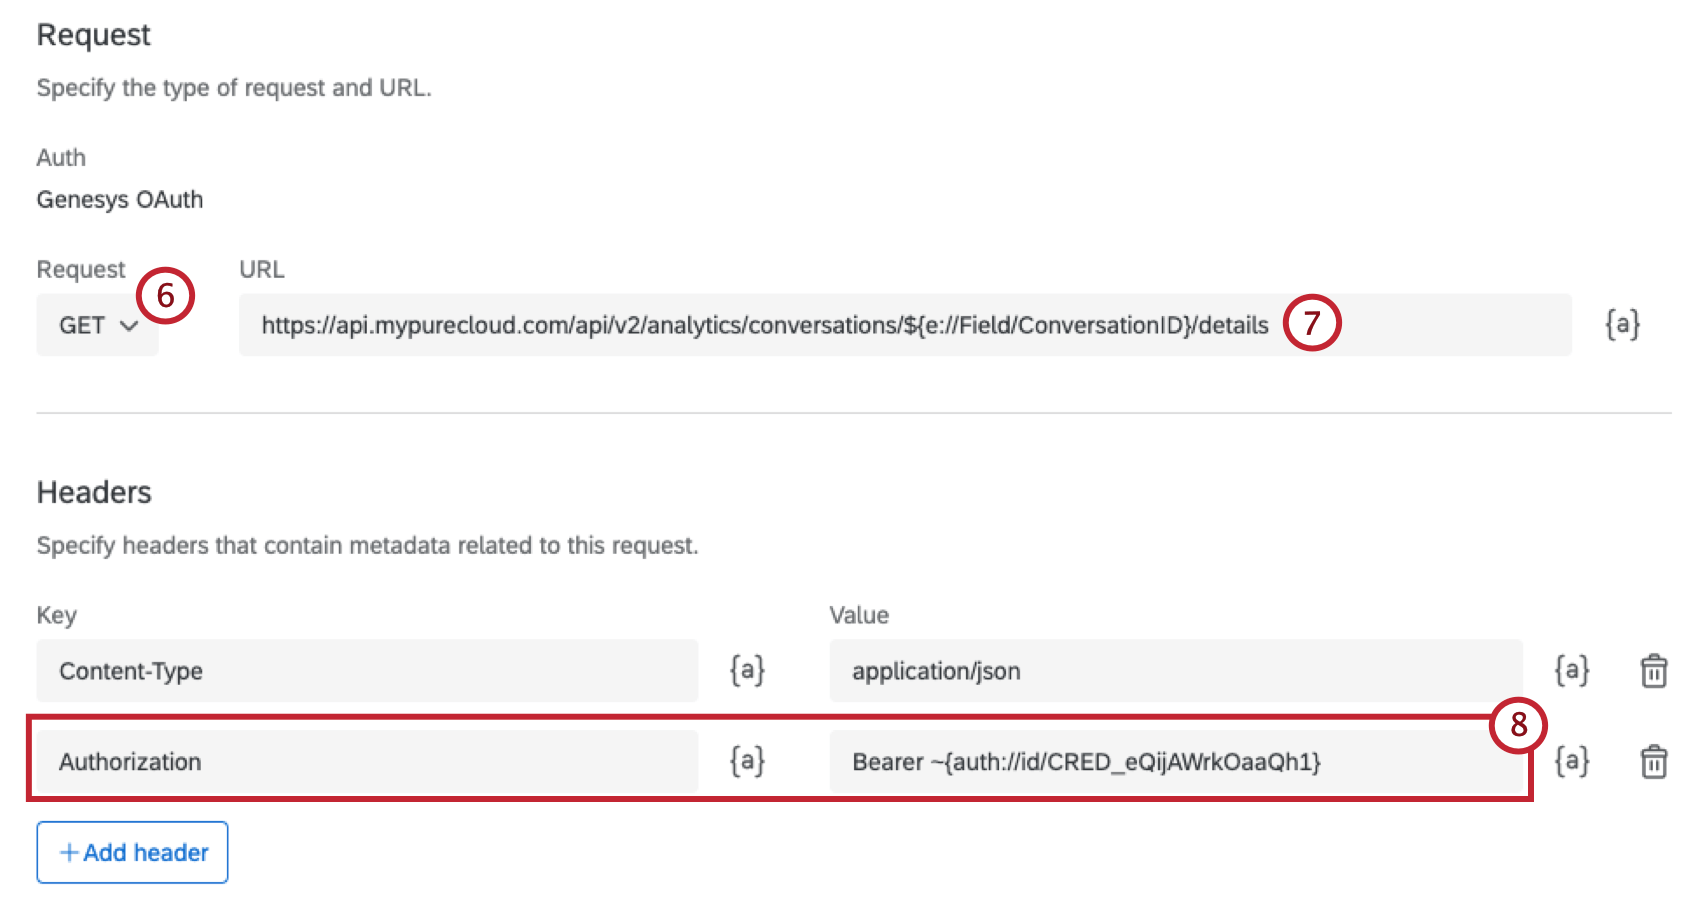
    https://api.mypurecloud.com/api/v2/analytics/conversations/${e://Field/ConversationID}/details.
  8. In the Headers section, add Authorization as a Key, and enter Bearer [credentials] as the Value, where the credentials are inserted as piped text.
  9. Begin mapping your fields in the Piped text section. Enter each field name in both the Path and Piped Text Label columns. Make sure to add the following fields: conversationEnd, conversationId, conversationStart, participants.
    mapped fields in the piped text section

    Qtip: Some of the fields that are returned from Genesys may need to be cleaned up using a code task. You can add the code task to your workflow to transform the data into a more readable format.
  10. Create another Web Service task by repeating steps 3-6.
  11. Enter the following URL to use as an endpoint, inserting the Agent ID field using piped text: https://api.mypurecloud.com/api/v2/users/[CC_Agent_ID].
  12. Map your fields in the Piped text section.
    mapped fields in the piped text section

    Qtip: Some of the fields that are returned from Genesys may need to be cleaned up using a code task. You can add the code task to your workflow to transform the data into a more readable format.
  13. Create a third Web Service task by repeating steps 3-5.
  14. Select PUT for the request type.
    request type and headers when configuring task
  15. Enter the URL in the following format: https://datacenterID.qualtrics.com/API/v3/responses/${rm://Field/ResponseID} where datacenterID is replaced with the ID of your datacenter.
  16. In the Headers section, add X-API-TOKEN as a Key, and enter the authentication you configured in step 8 as the Value.
  17. Add any additional key-value pairs you want to use in the request.

Step 4: Connecting to Your CRM

After you’ve created your survey response workflows, you must connect Qualtrics to your Customer Relationship Management (CRM) System. This step will look different depending on the way your CRM is set up. Follow the documentation for your CRM to look up other contact data by phone number.

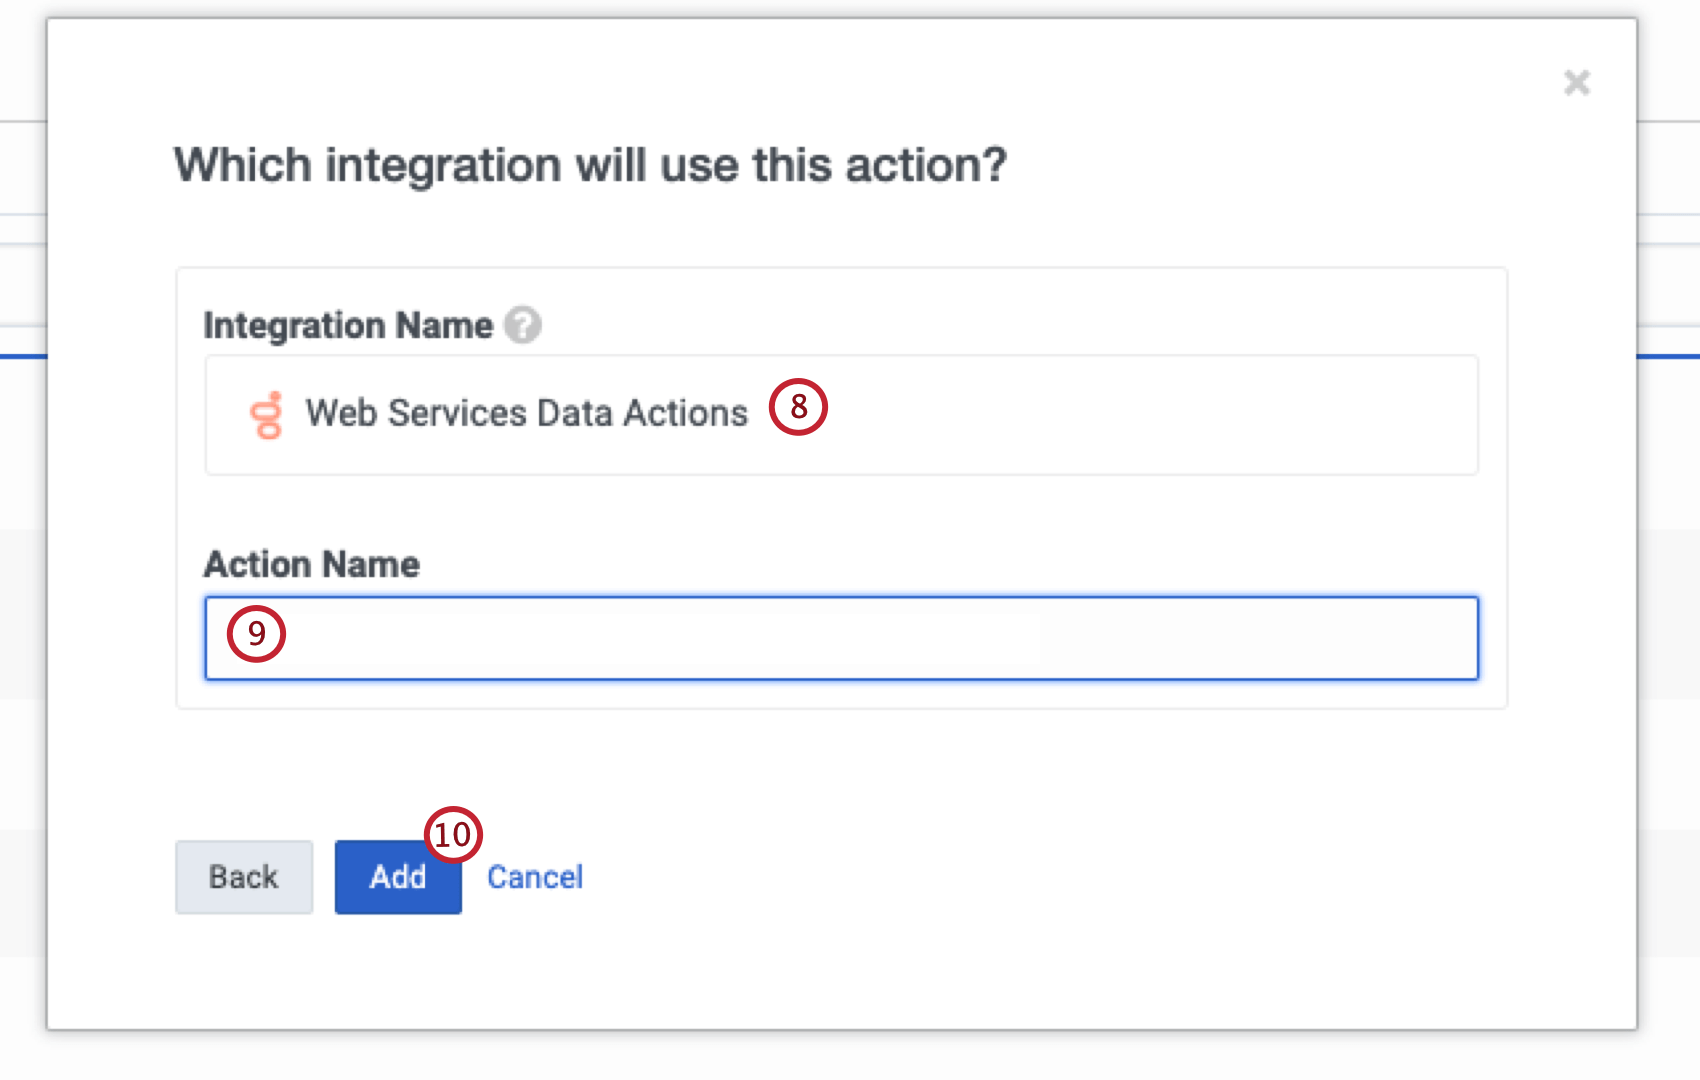
Example: Set up a Genesys Cloud Data Action to call Genesys conversation API. Alternatively, if you are using Salesforce, configure a Salesforce Data Action Integration.

Step 5: Closing the Loop with Ticketing

To close the loop, use the Dissatisfied Customer Ticket workflow that was automatically created when you set up your post-interaction survey. For more information, see Closing the Loop.

Step 6: Analyzing Genesys Data in CX Dashboards

An example dashboard is included for the post-interaction survey you created. This dashboard can be modified based on what data you want to visualize from the the survey and interaction data.