-

Qualtrics Platform -

Customer Journey Optimizer -

XM Discover -

Qualtrics Social Connect
Integrating with Five9
About Integrating with Five9
Integrating with Five9 enables you to consolidate and analyze all of your contact center data in one place. You can then analyze your data using any Qualtrics analysis method, including Text iQ in a CX dashboard.
Step 1: Creating the Qualtrics Workflow
This section covers how to create a Qualtrics workflow started by a JSON event. This workflow will be used to send data to Five9.
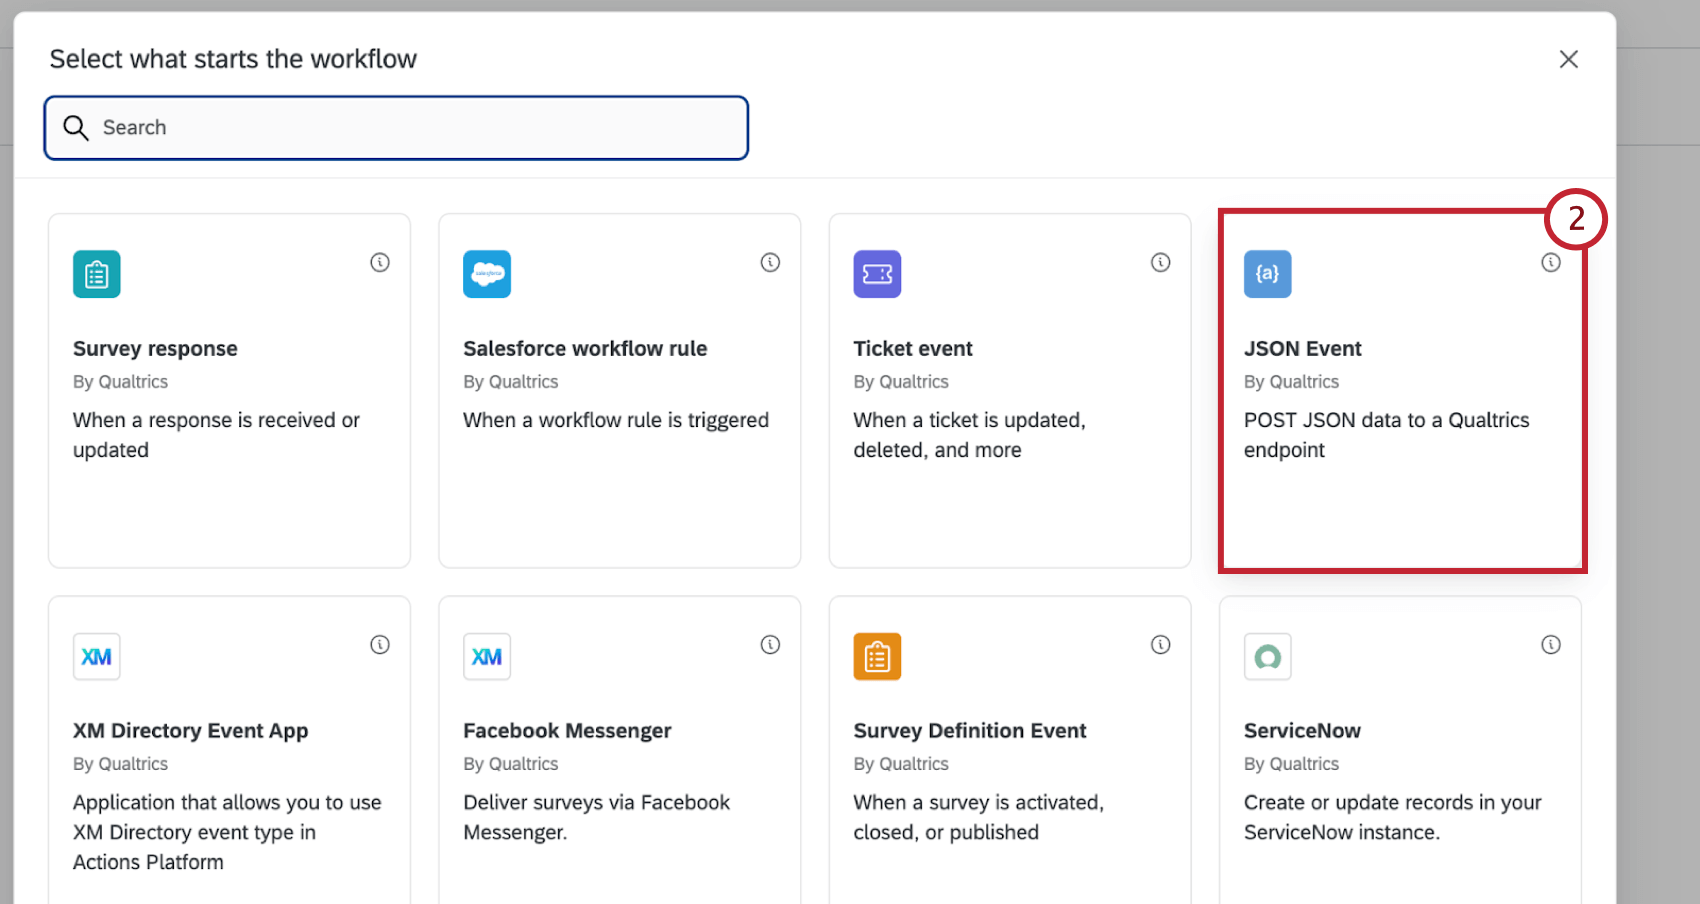
- Navigate to the Workflows tab.
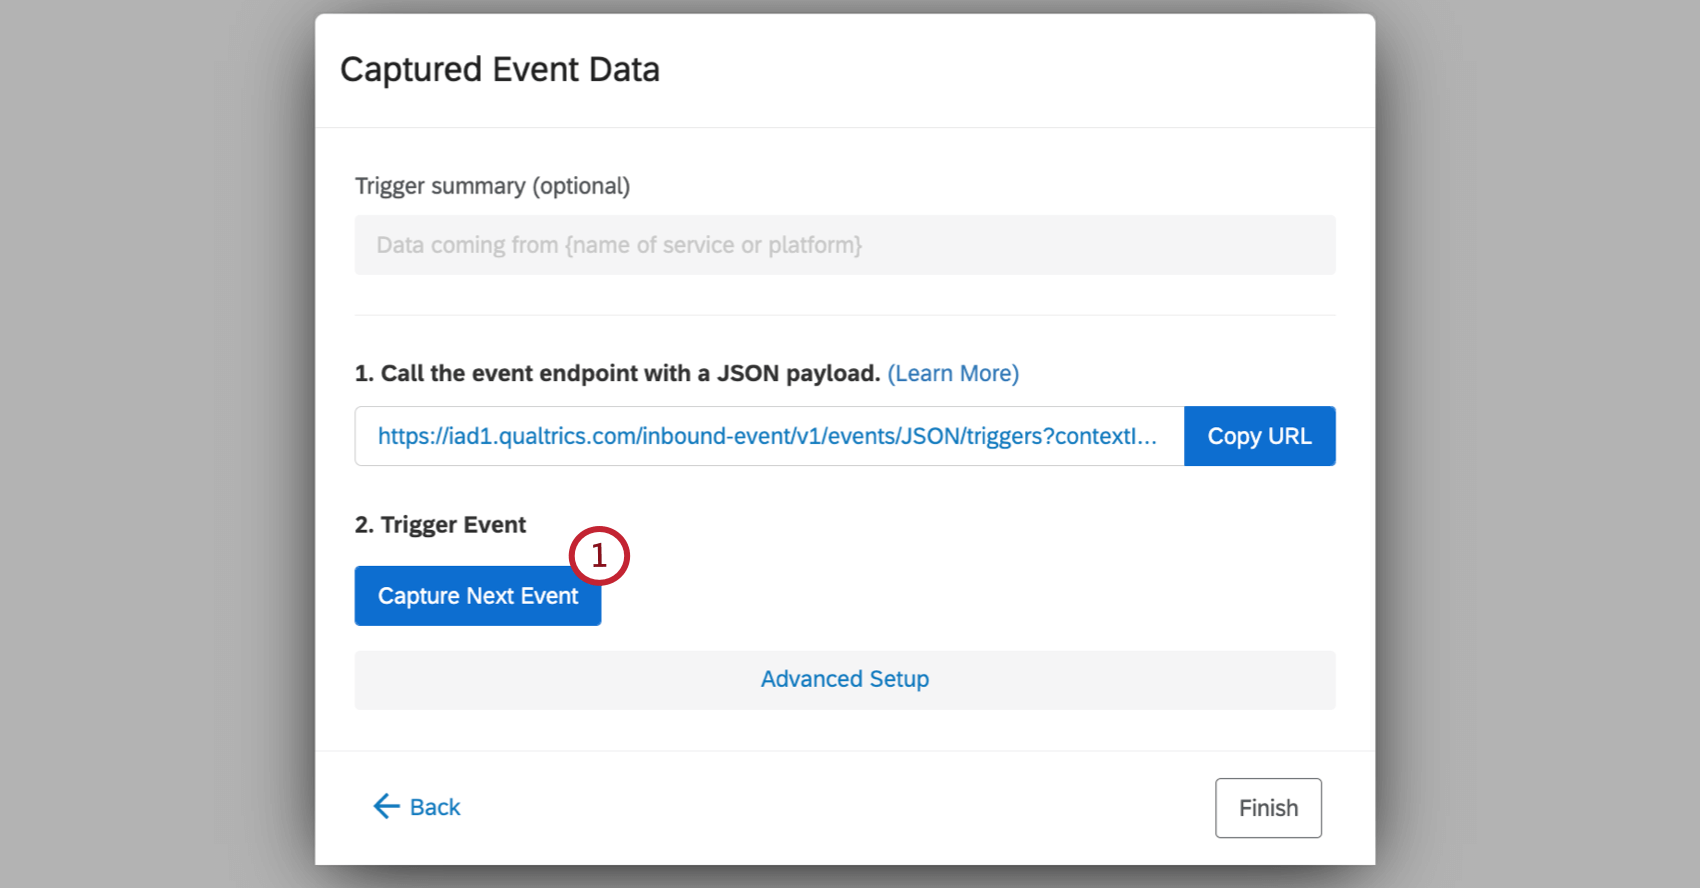
- Create an event-based workflow started by a JSON event.
- Click Copy URL in the pop-up window to copy the endpoint.
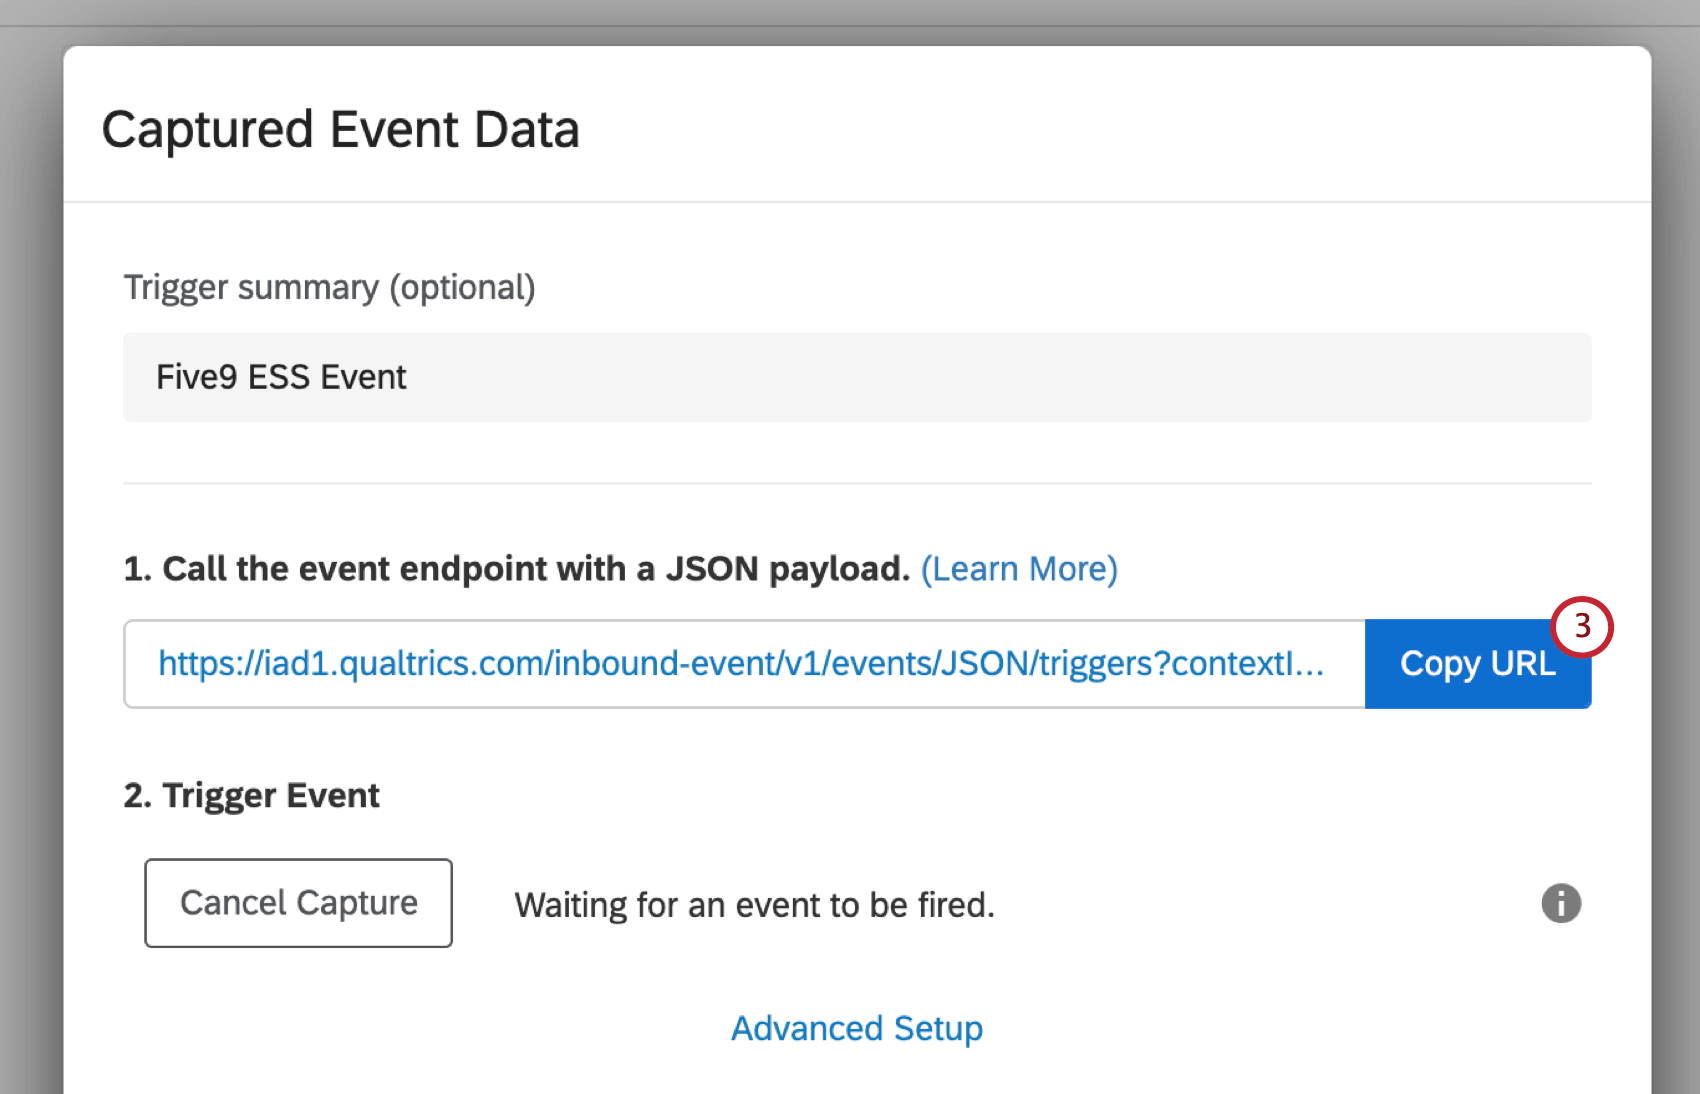 Attention: Do not close this window while you complete the remaining steps in Five9.
Step 2: Generating an API Token
To successfully integrate your Qualtrics data with Five9 you’ll need to generate an API token. See Generating an API Token for instructions on creating your API Token for use in Five9.
Step 3: Creating the New Five9 Event Subscription
This section covers the initial setup you’ll need to complete in Five9 to set up the integration. To begin the setup, you’ll first need to create an event subscription in Five9.
- Within Five9, click on ES – Configuration.

- If desired, add a name for your event subscriptions.
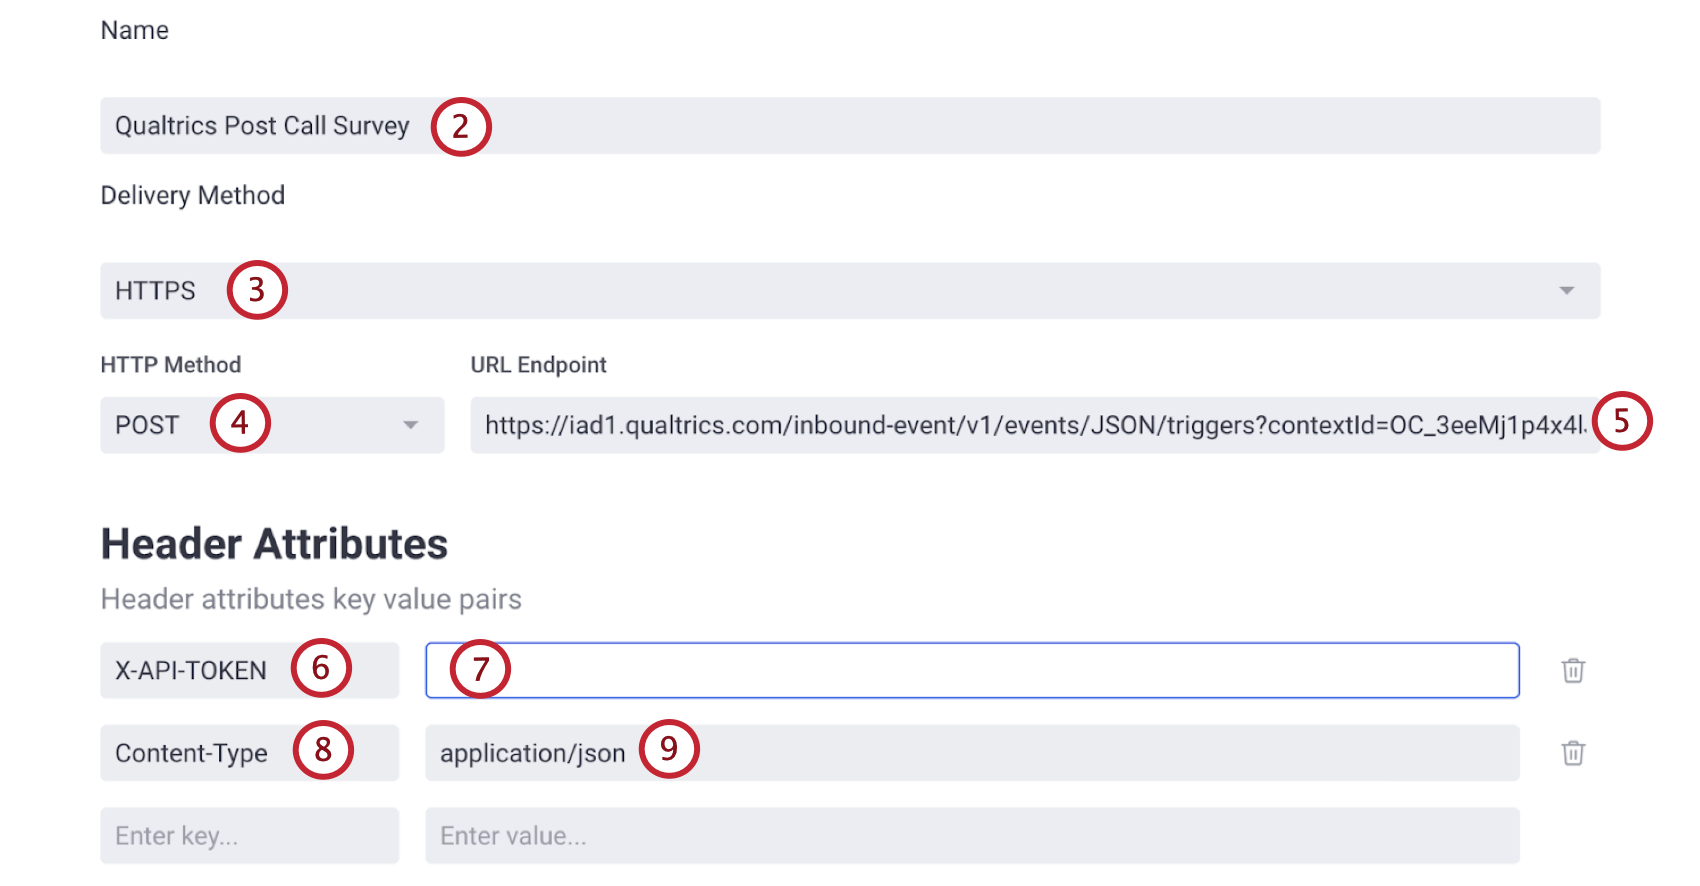
- Set the Delivery Method to HTTPS.
- Set the HTTP Method to POST.
- Paste the URL you copied in Step 1 into the URL Endpoint field.
- Add the header X-API-TOKEN in the first header field.
- Paste your API key obtained in Step 2 into the value field.
- Add the header Content-Type in the second header field.
- Set the value as application/json.
- Select Filtered to open the configuration menu.

- Select attached_variables within the Fields menu. This ensures all contact information will be in the event.
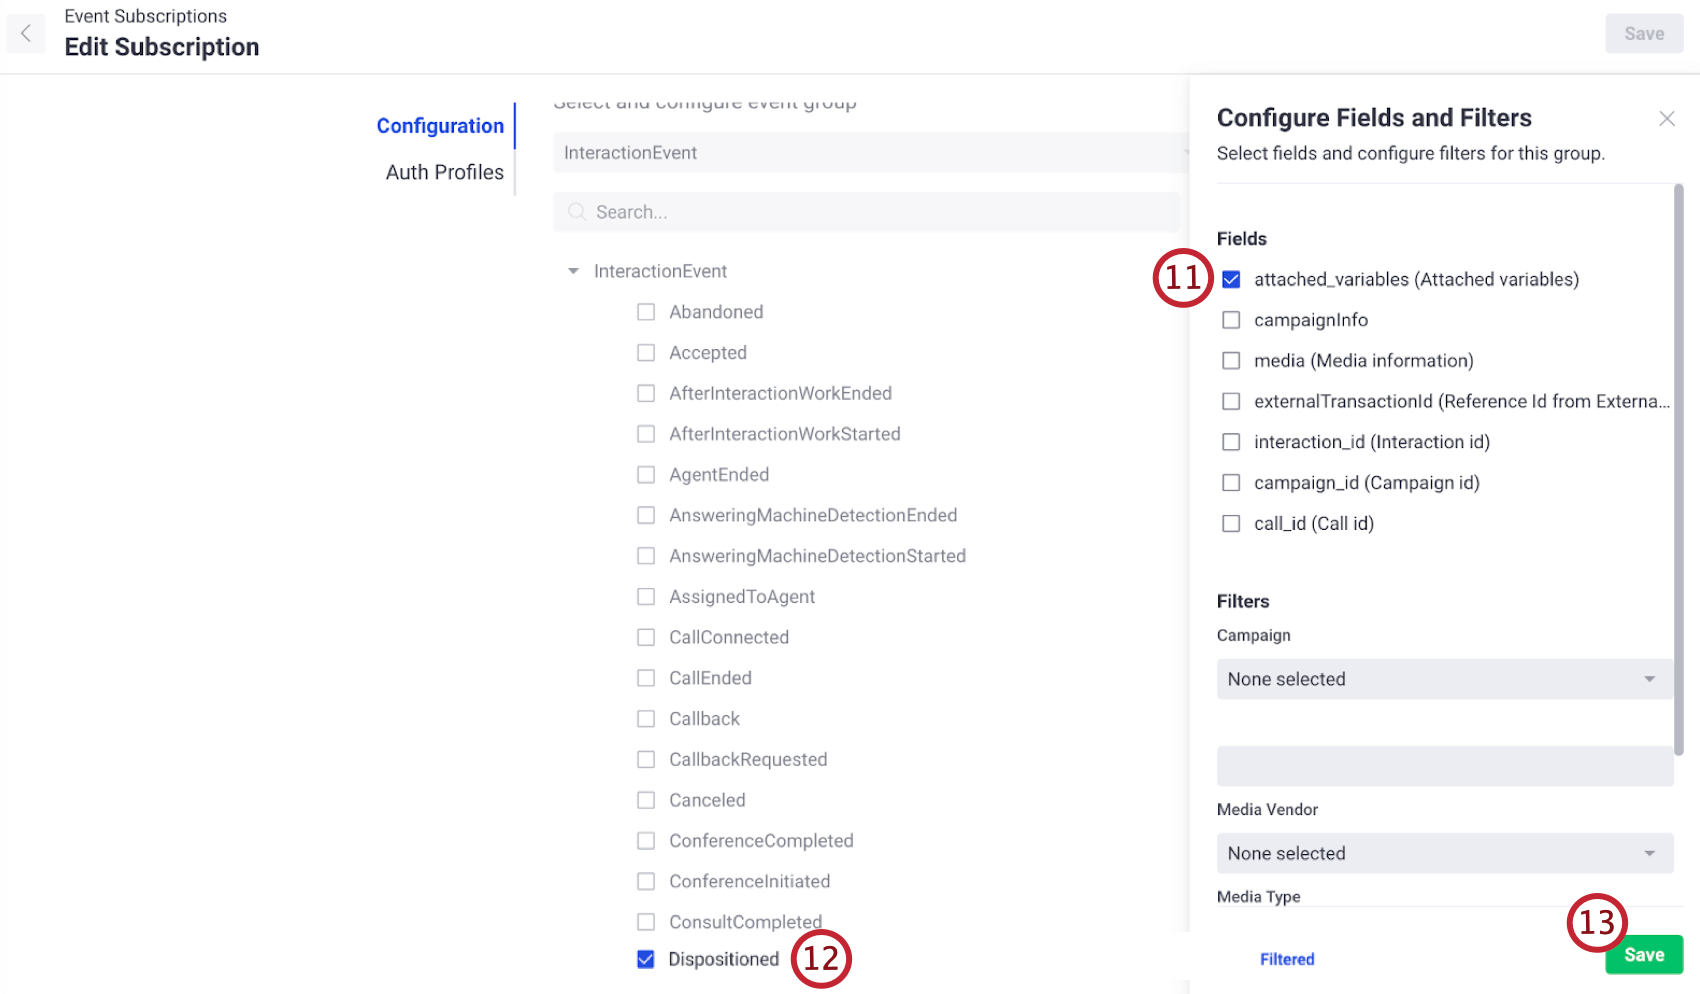
- Select Dispositioned within the InteractionEvent menu.
- Click Save.
- Click Create.
Step 4: Testing the Integration
After you’ve created your Qualtrics workflow and set up an event subscription in Five9, you need to send a test event to make sure the integration is configured correctly.
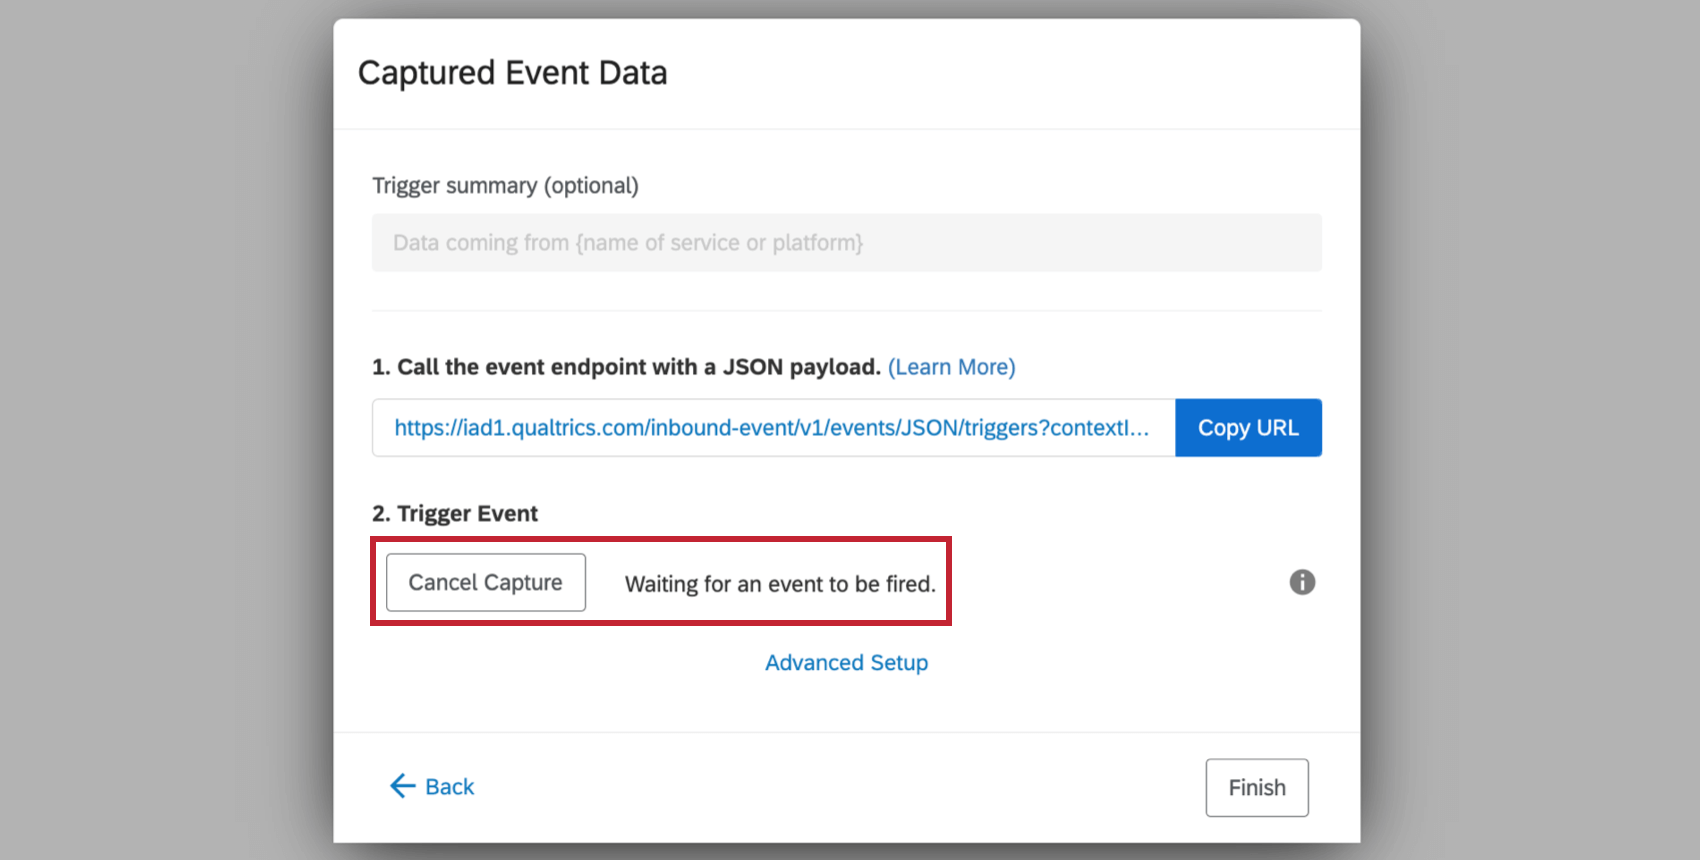
- Within the JSON Event you created in Step 1, click Capture Next Event.
- Your JSON event will now show that it is waiting for an event to be fired.
- Return to Five9 and select your event subscription.

- Click Start so your event subscription can begin to send messages.
- Use Five9 to place a test call.
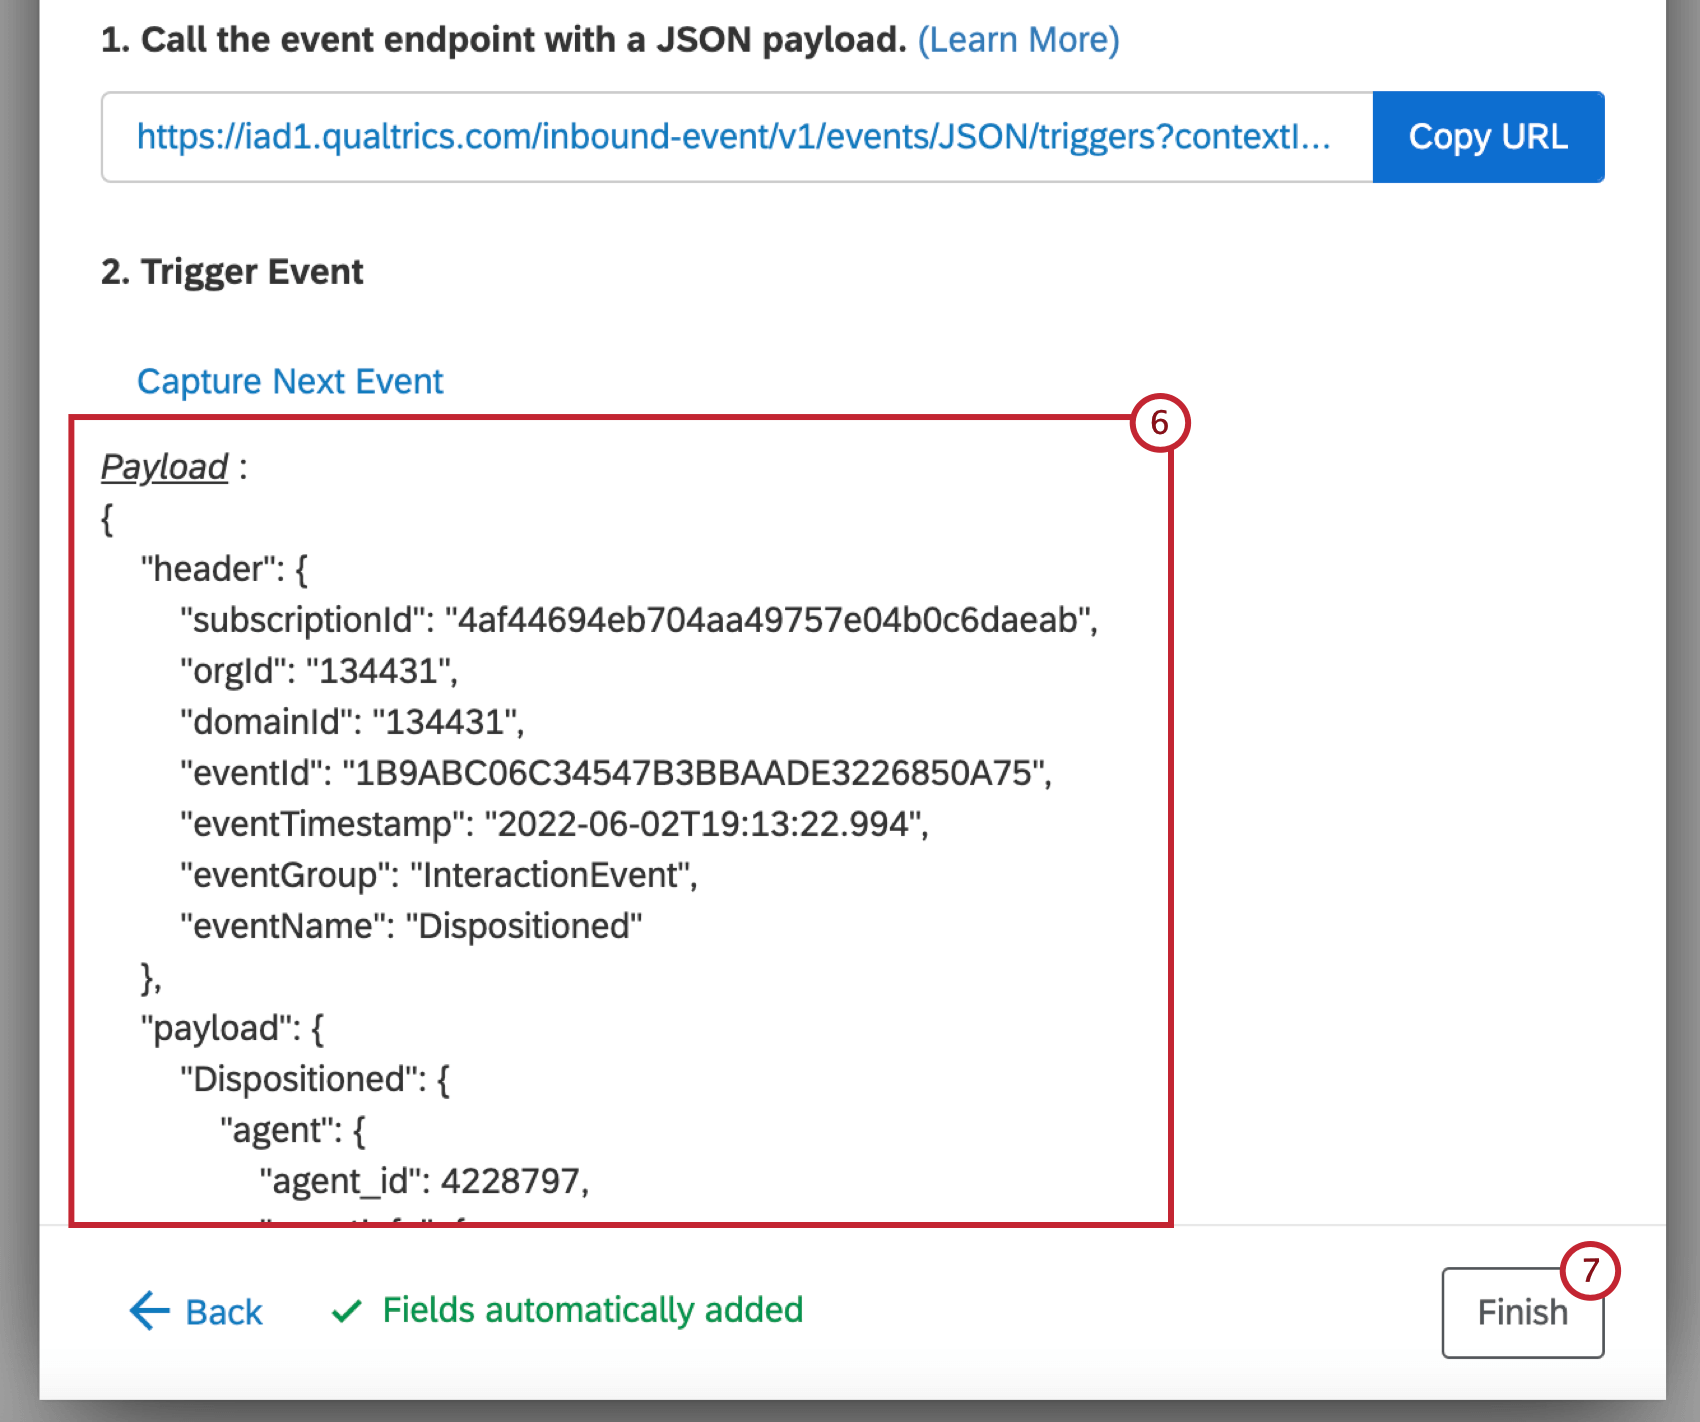
- Return to your JSON event in Qualtrics to verify the test call was received. The last event received should now be within the Trigger Event section.
- Click Finish.
Qtip: If you want to pause your event subscription while you finish setting up the integration, return to Five9, select your event subscription, and click Stop.
Step 5: Creating the Update XM Directory Contacts Task
Now that you’ve established a connection with Five9, it’s time to map data from Five9 to Qualtrics. To do this you’ll need to add a task to the workflow you created in Qualtrics.
- Within your Qualtrics workflow, click the plus sign (+) underneath the JSON event.
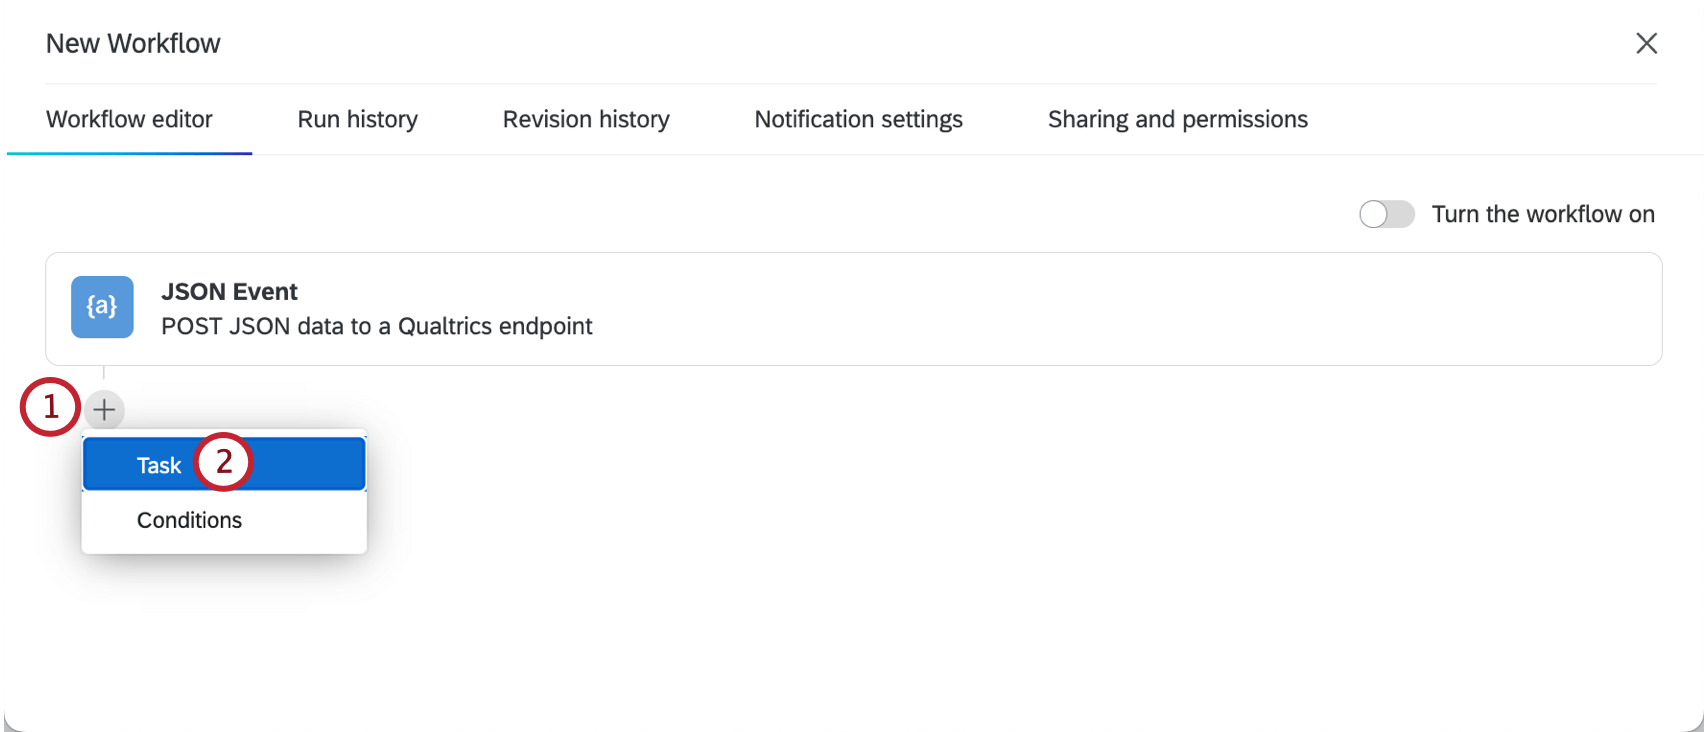
- Select Task.
- Select the Update XM Directory Contacts task.

- Select an XM Directory to save your Five9 contact information in.

- Select a contact list to save your Five9 contact information in.
- Set the contact details to pull in the relevant fields from Five9. Use the following syntax to make sure the fields are pulled in correctly:
- First name: ~{aed://payload.attached_variables.[‘Customer.email’]}
- Last name: ~{aed://payload.attached_variables.[‘Customer.first_name’]}
- Email address: ~{aed://payload.attached_variables.[‘Customer.last_name’]}
Qtip: If you are saving phone numbers, use the syntax ~{aed://payload.attached_variables.[‘Customer.number1’]} or ~{aed://payload.attached_variables.[‘Call.DNIS’]} for the Phone number field

- Finish configuring your task.
- Click Save to save your task.
Step 6: Validating Your Workflow
Now that your data is mapped, you can run a test to verify the integration is working. This step is optional.
- Make sure your workflow is turned on in Five9 so you will successfully send follow up surveys whenever a call is dispositioned.
- Use Five9 to place a test call.
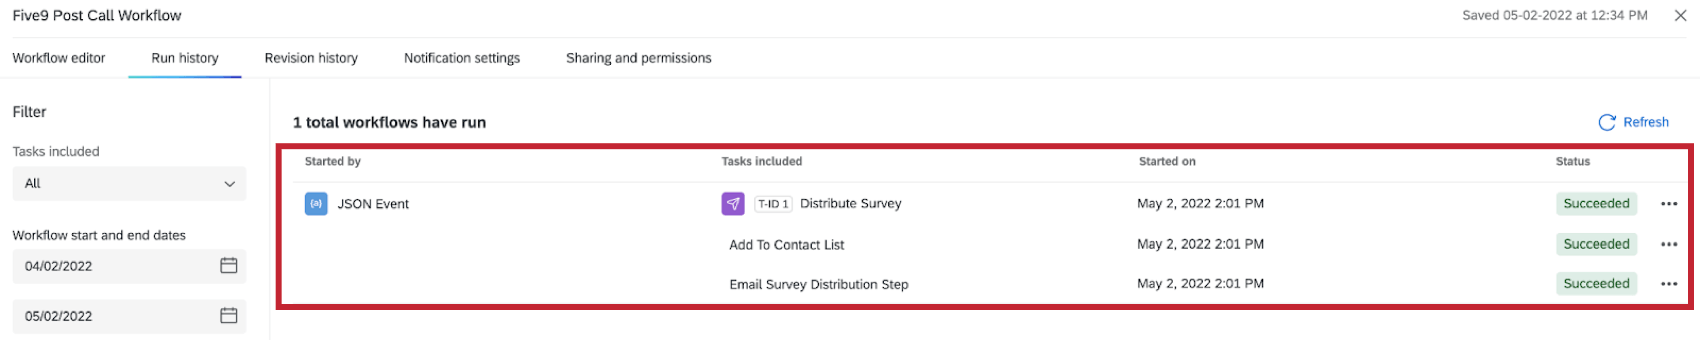
- Navigate to your Qualtrics workflow and select Run History.
- If your workflow ran successfully, all tasks should have a status of Succeeded.
- Verify that the email or phone number associated with the contact in Five9 successfully received a survey invitation.
- If your workflow is not running successfully, go through the above steps to make sure everything is set up correctly.